Chronological order – Start from the bottom; the most recent posts are on top.
Click on Images to enlarge.
5/3/2018
On the water pictures are here.
3/30/2018
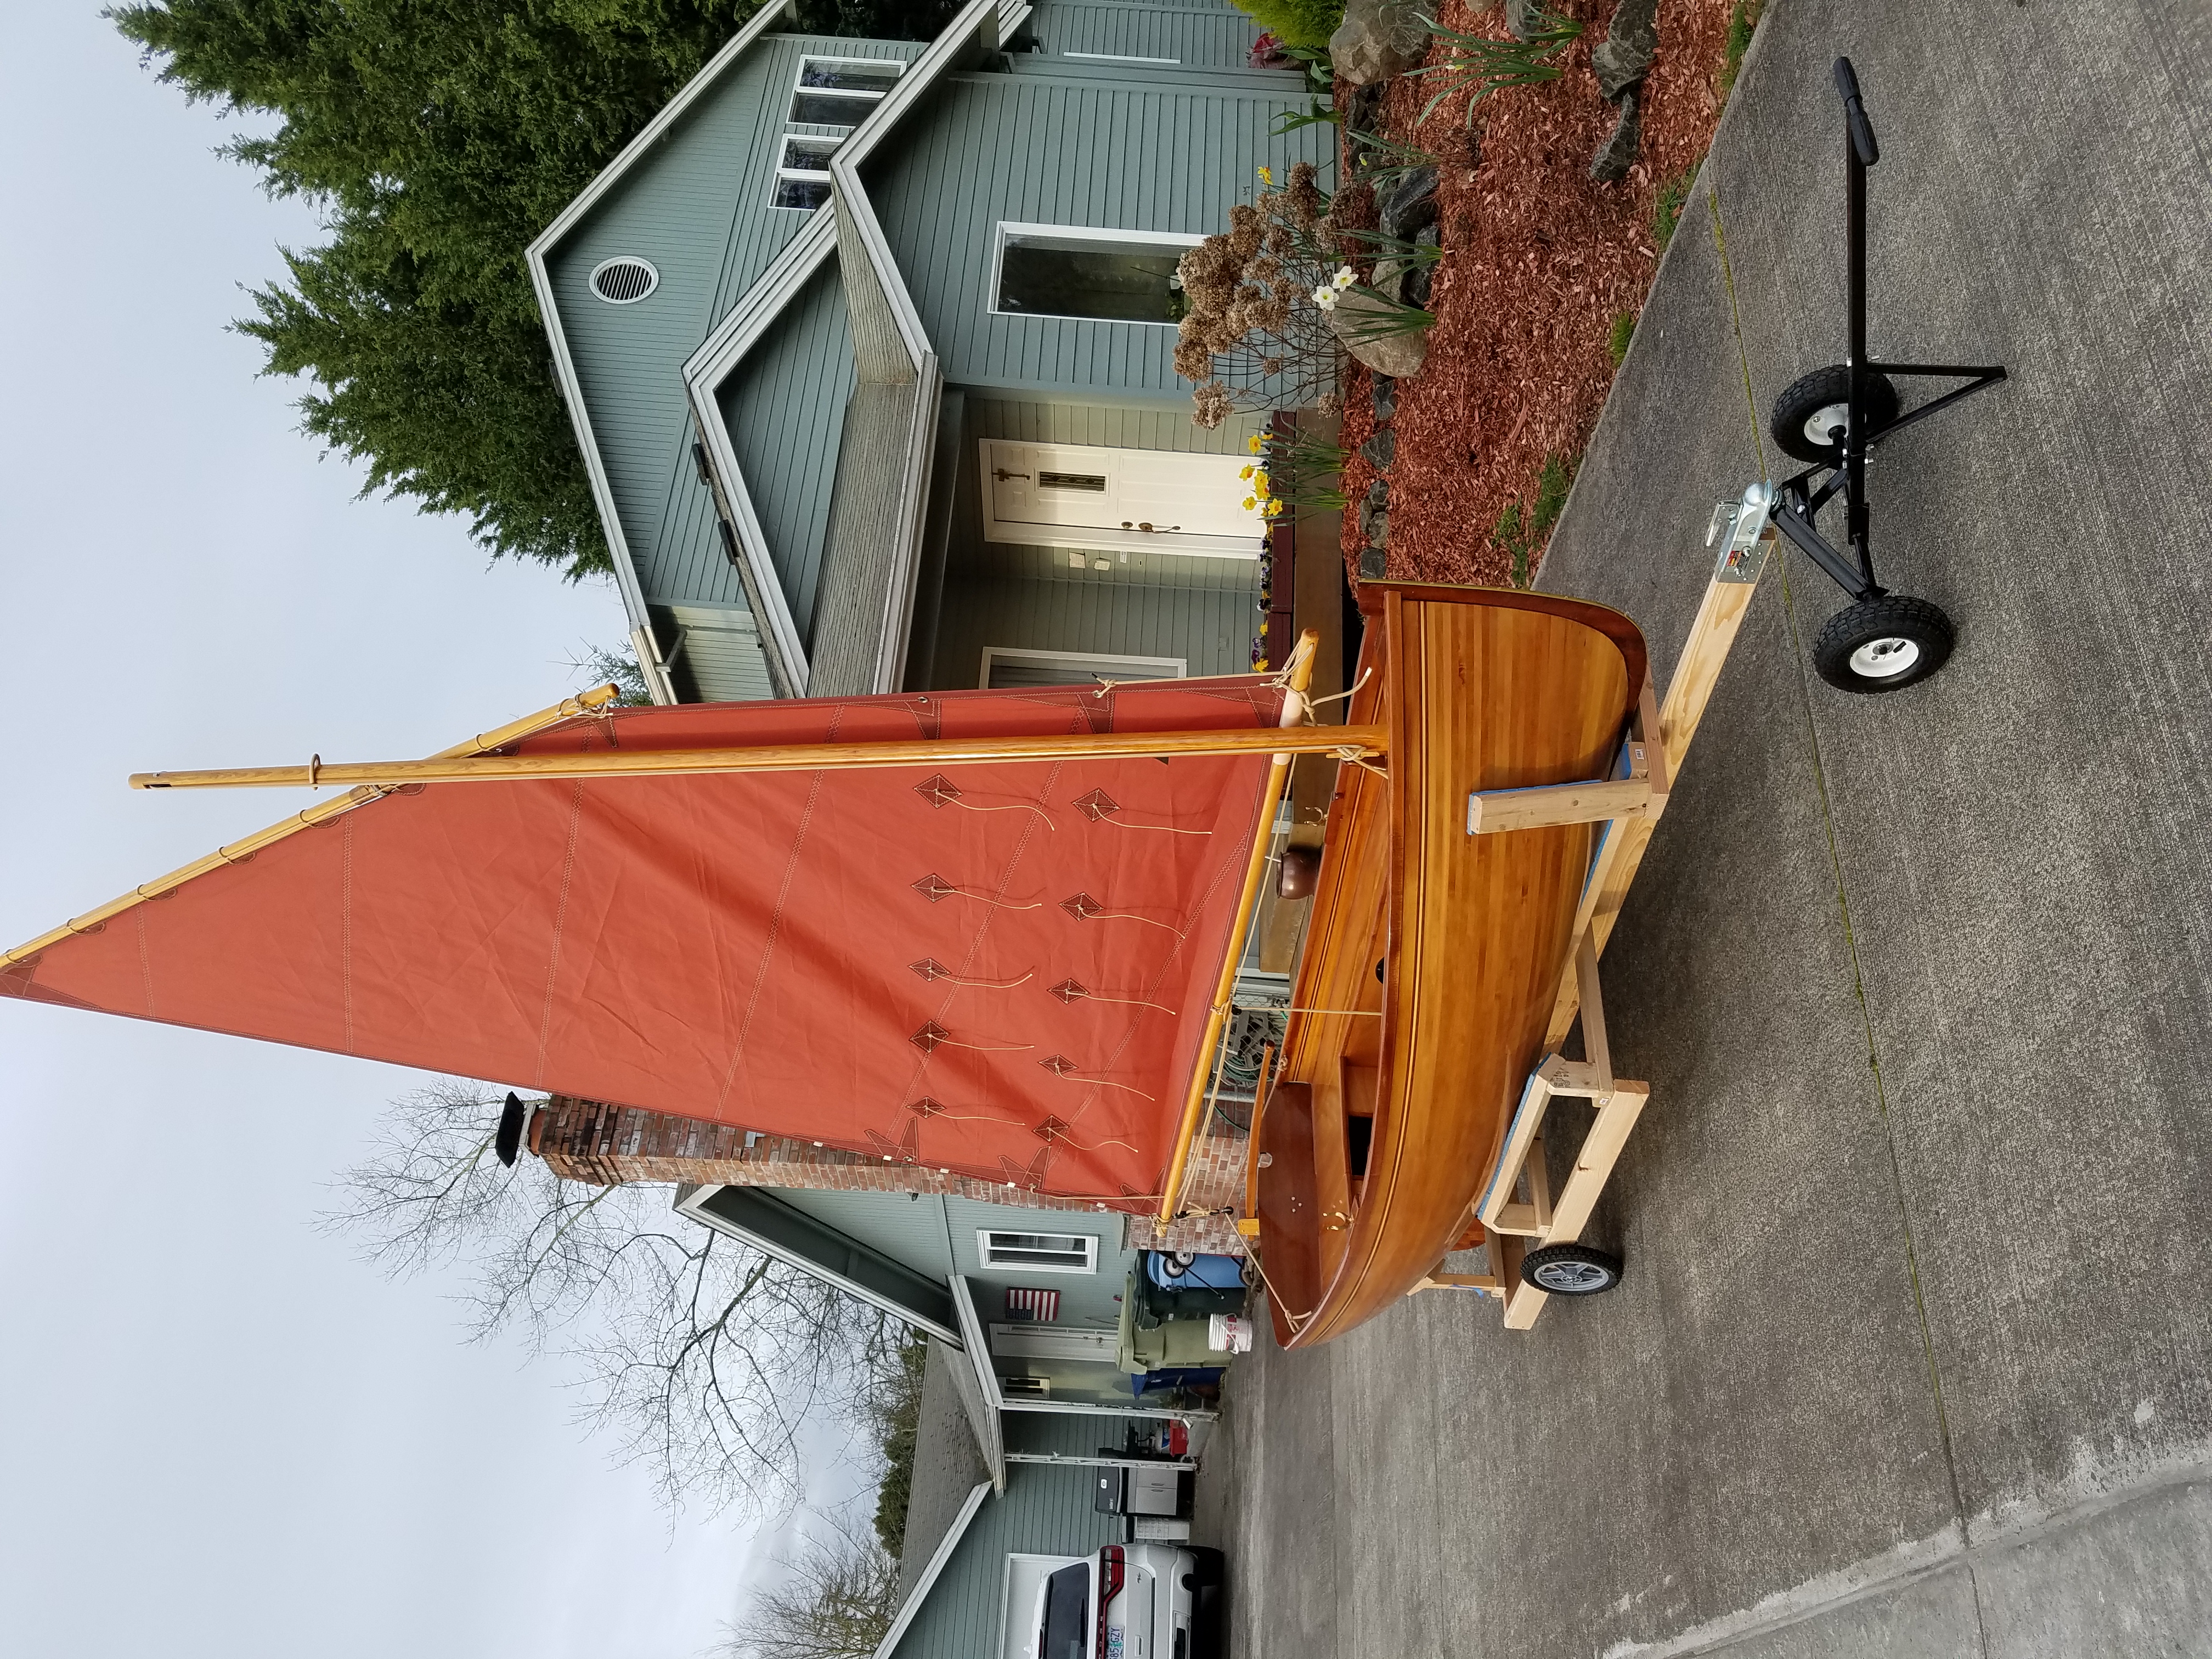
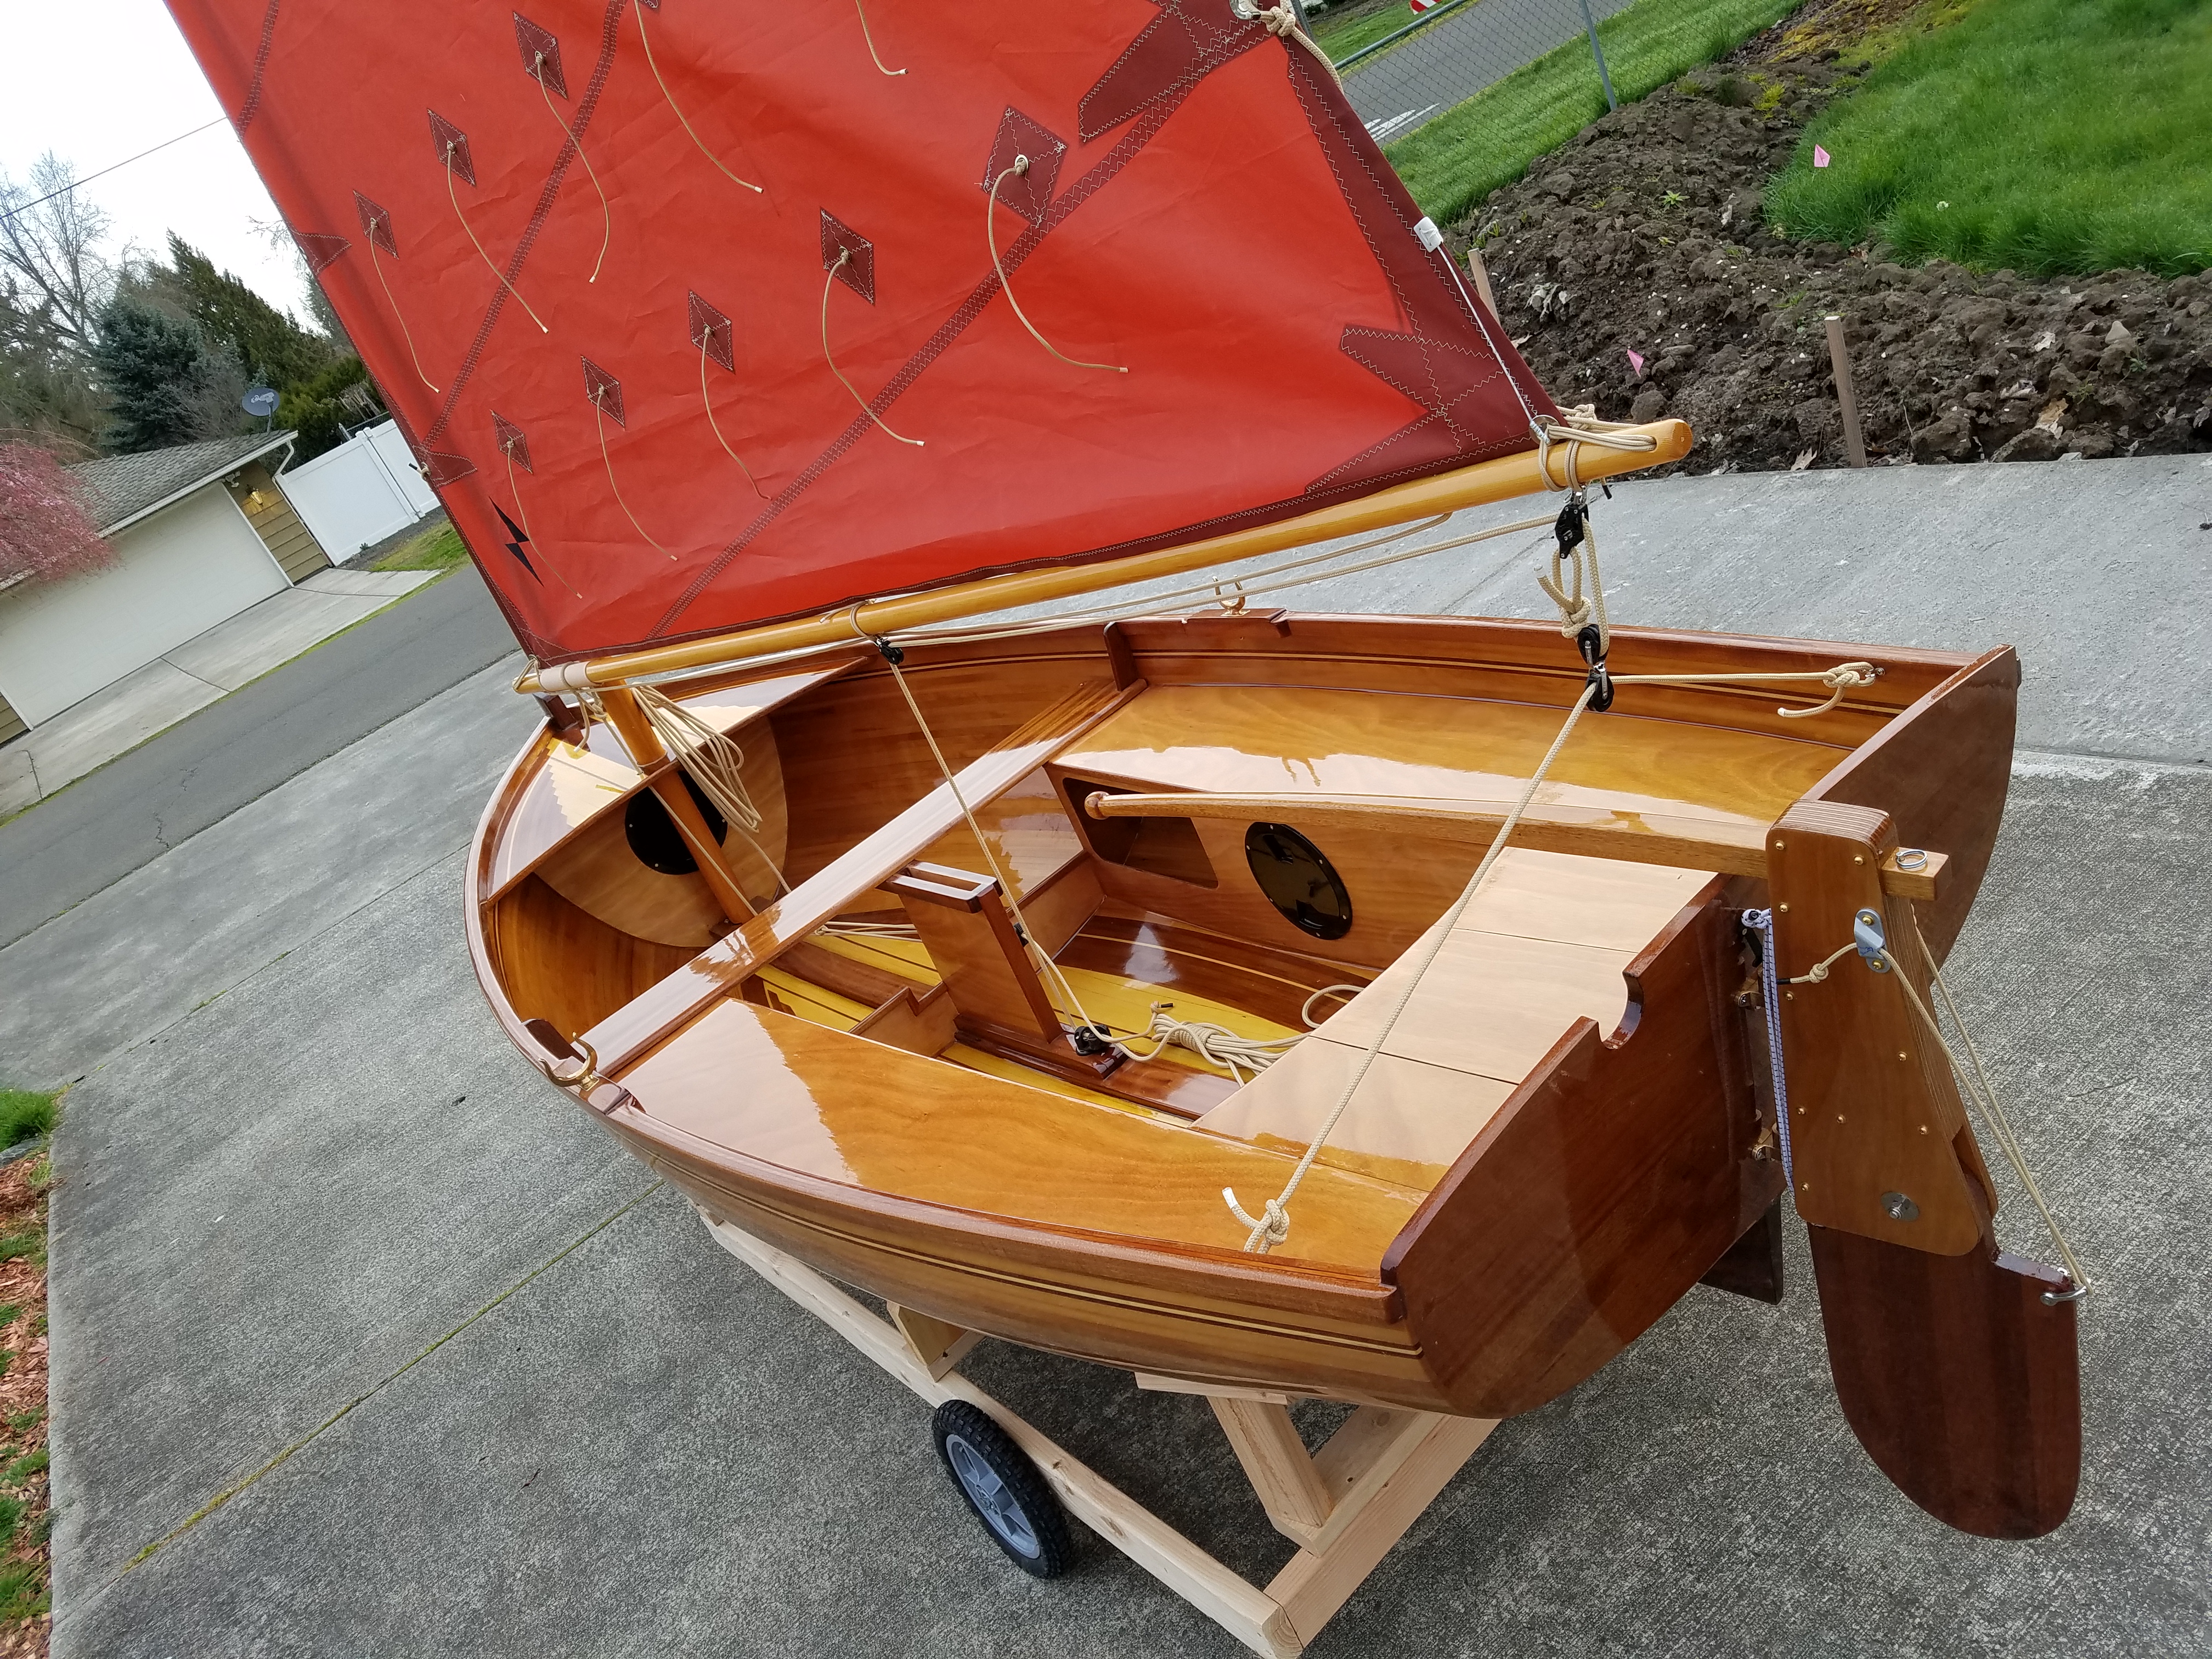
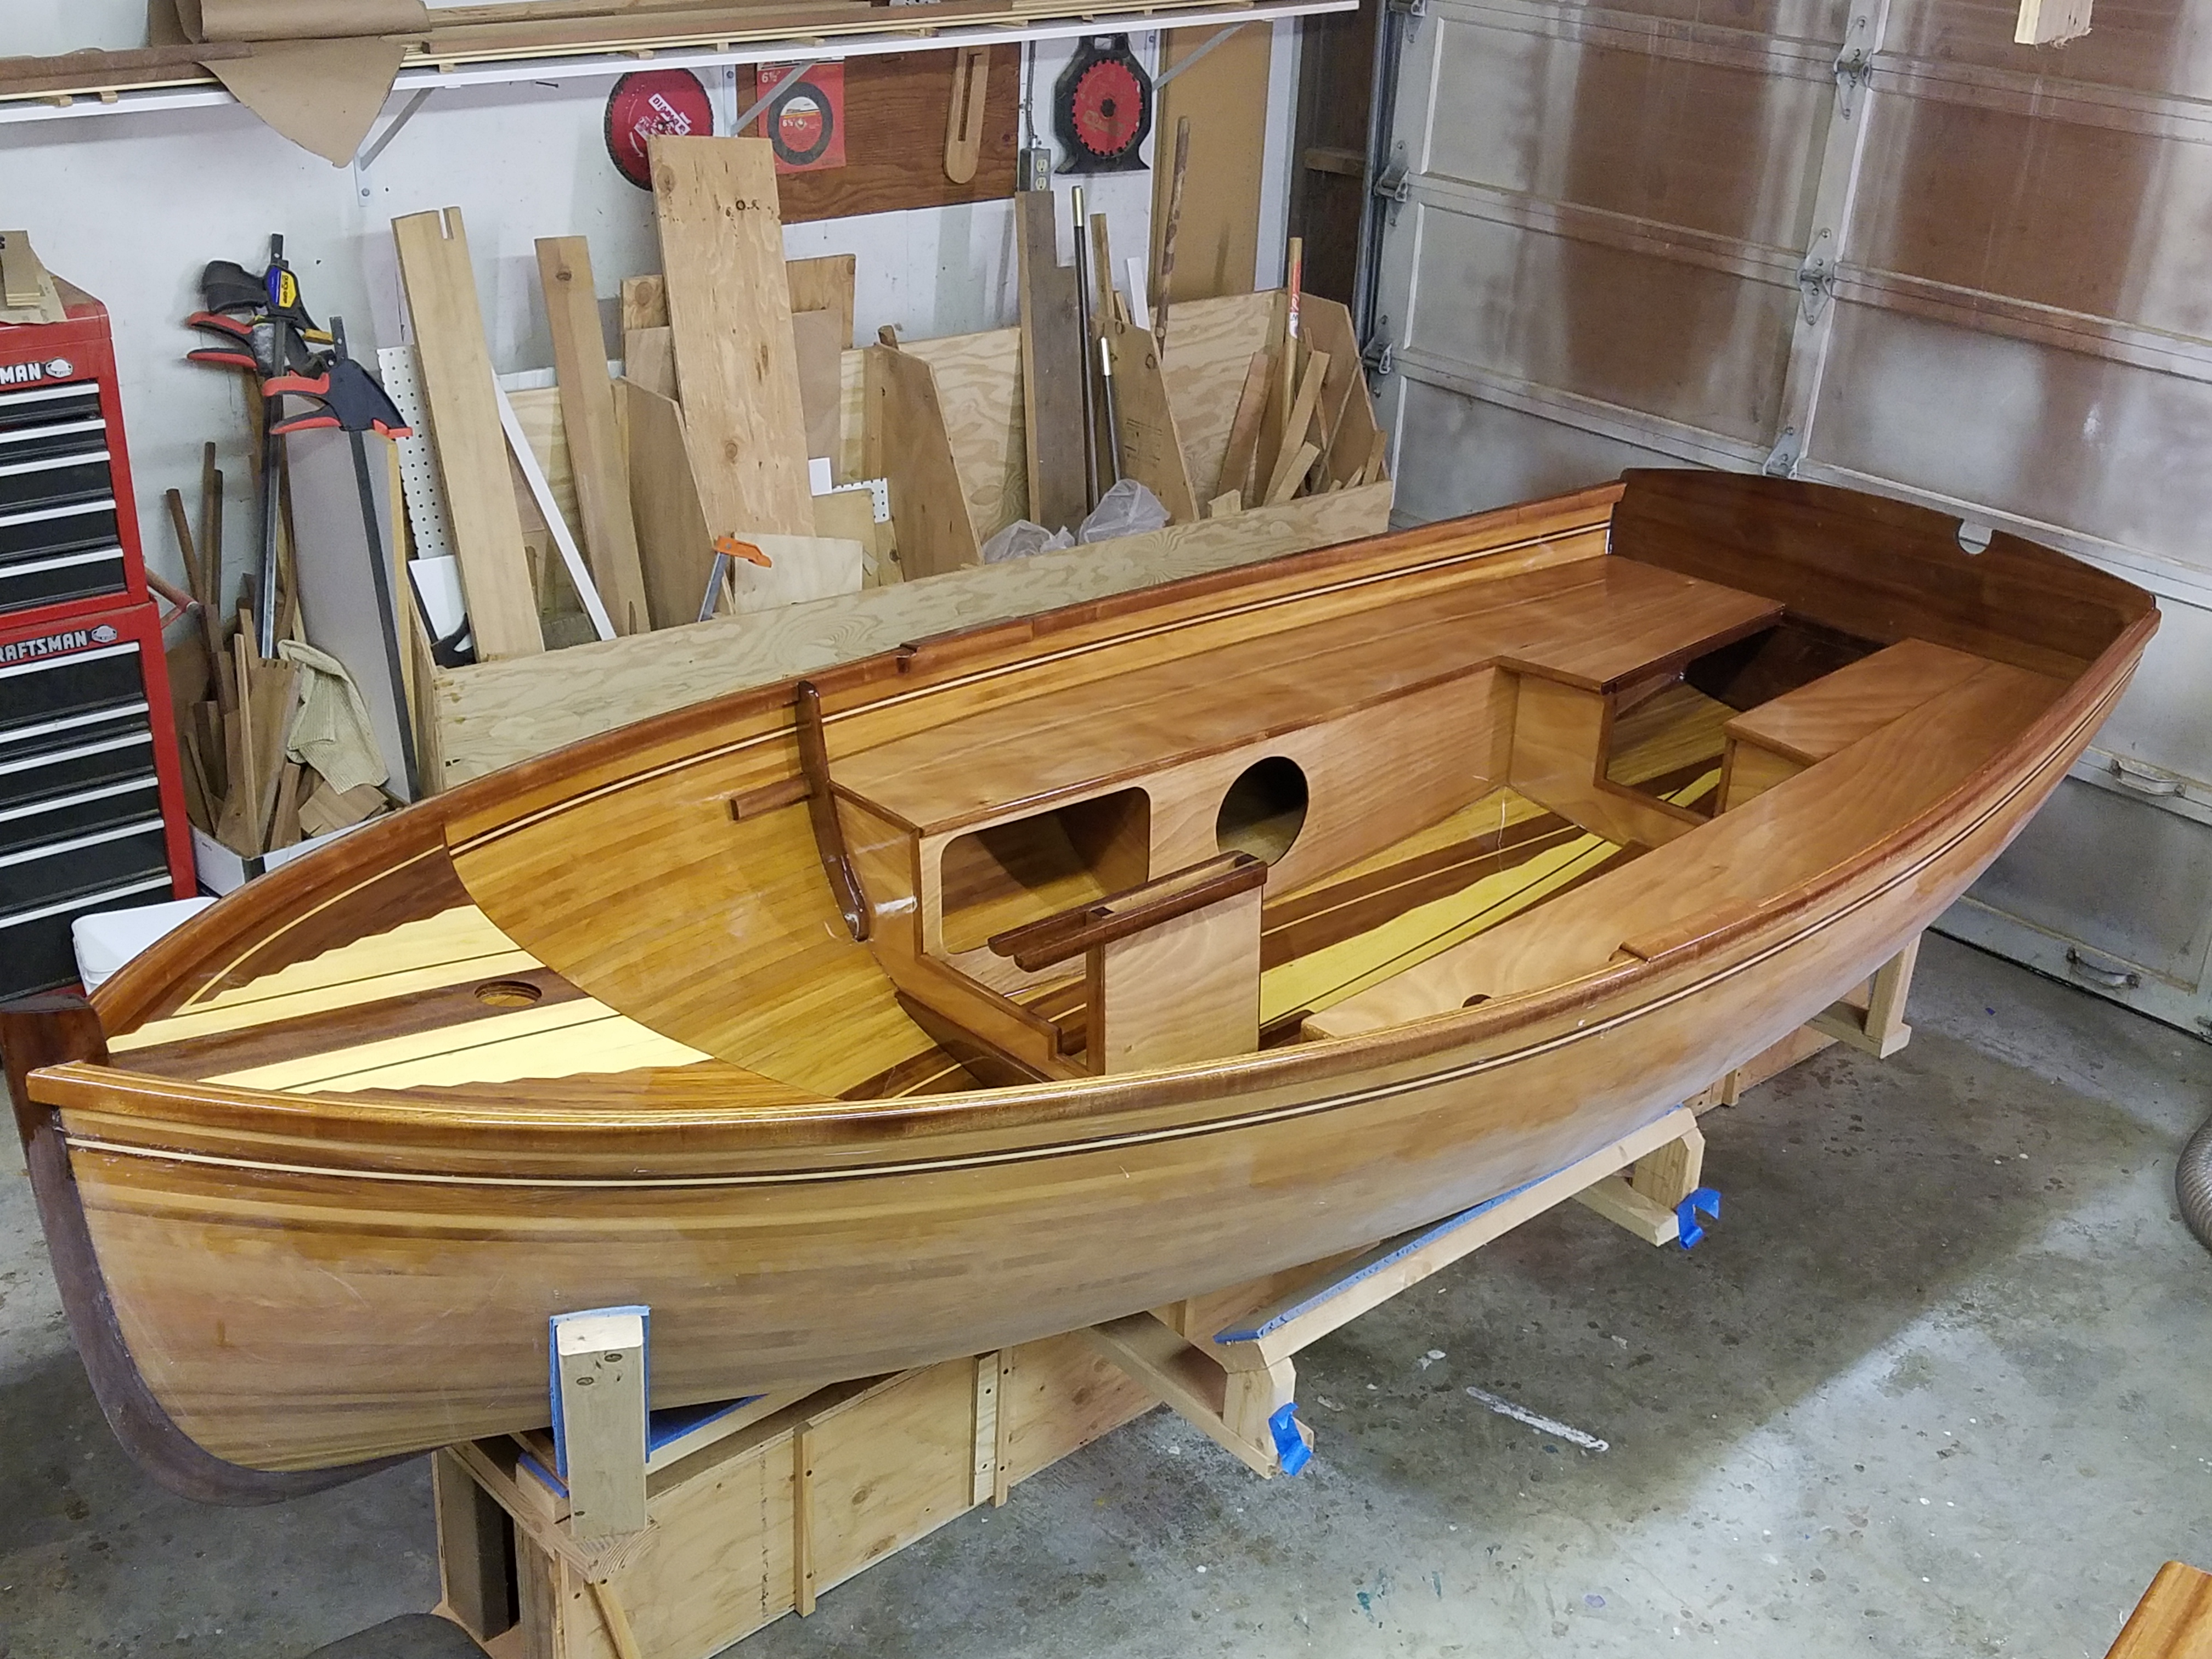
I’m finished! Rigging done, including setup for reefing. Just need to get it on the water. Fun project – was a lot of work, but am pleased with the outcome.

3/17/2018
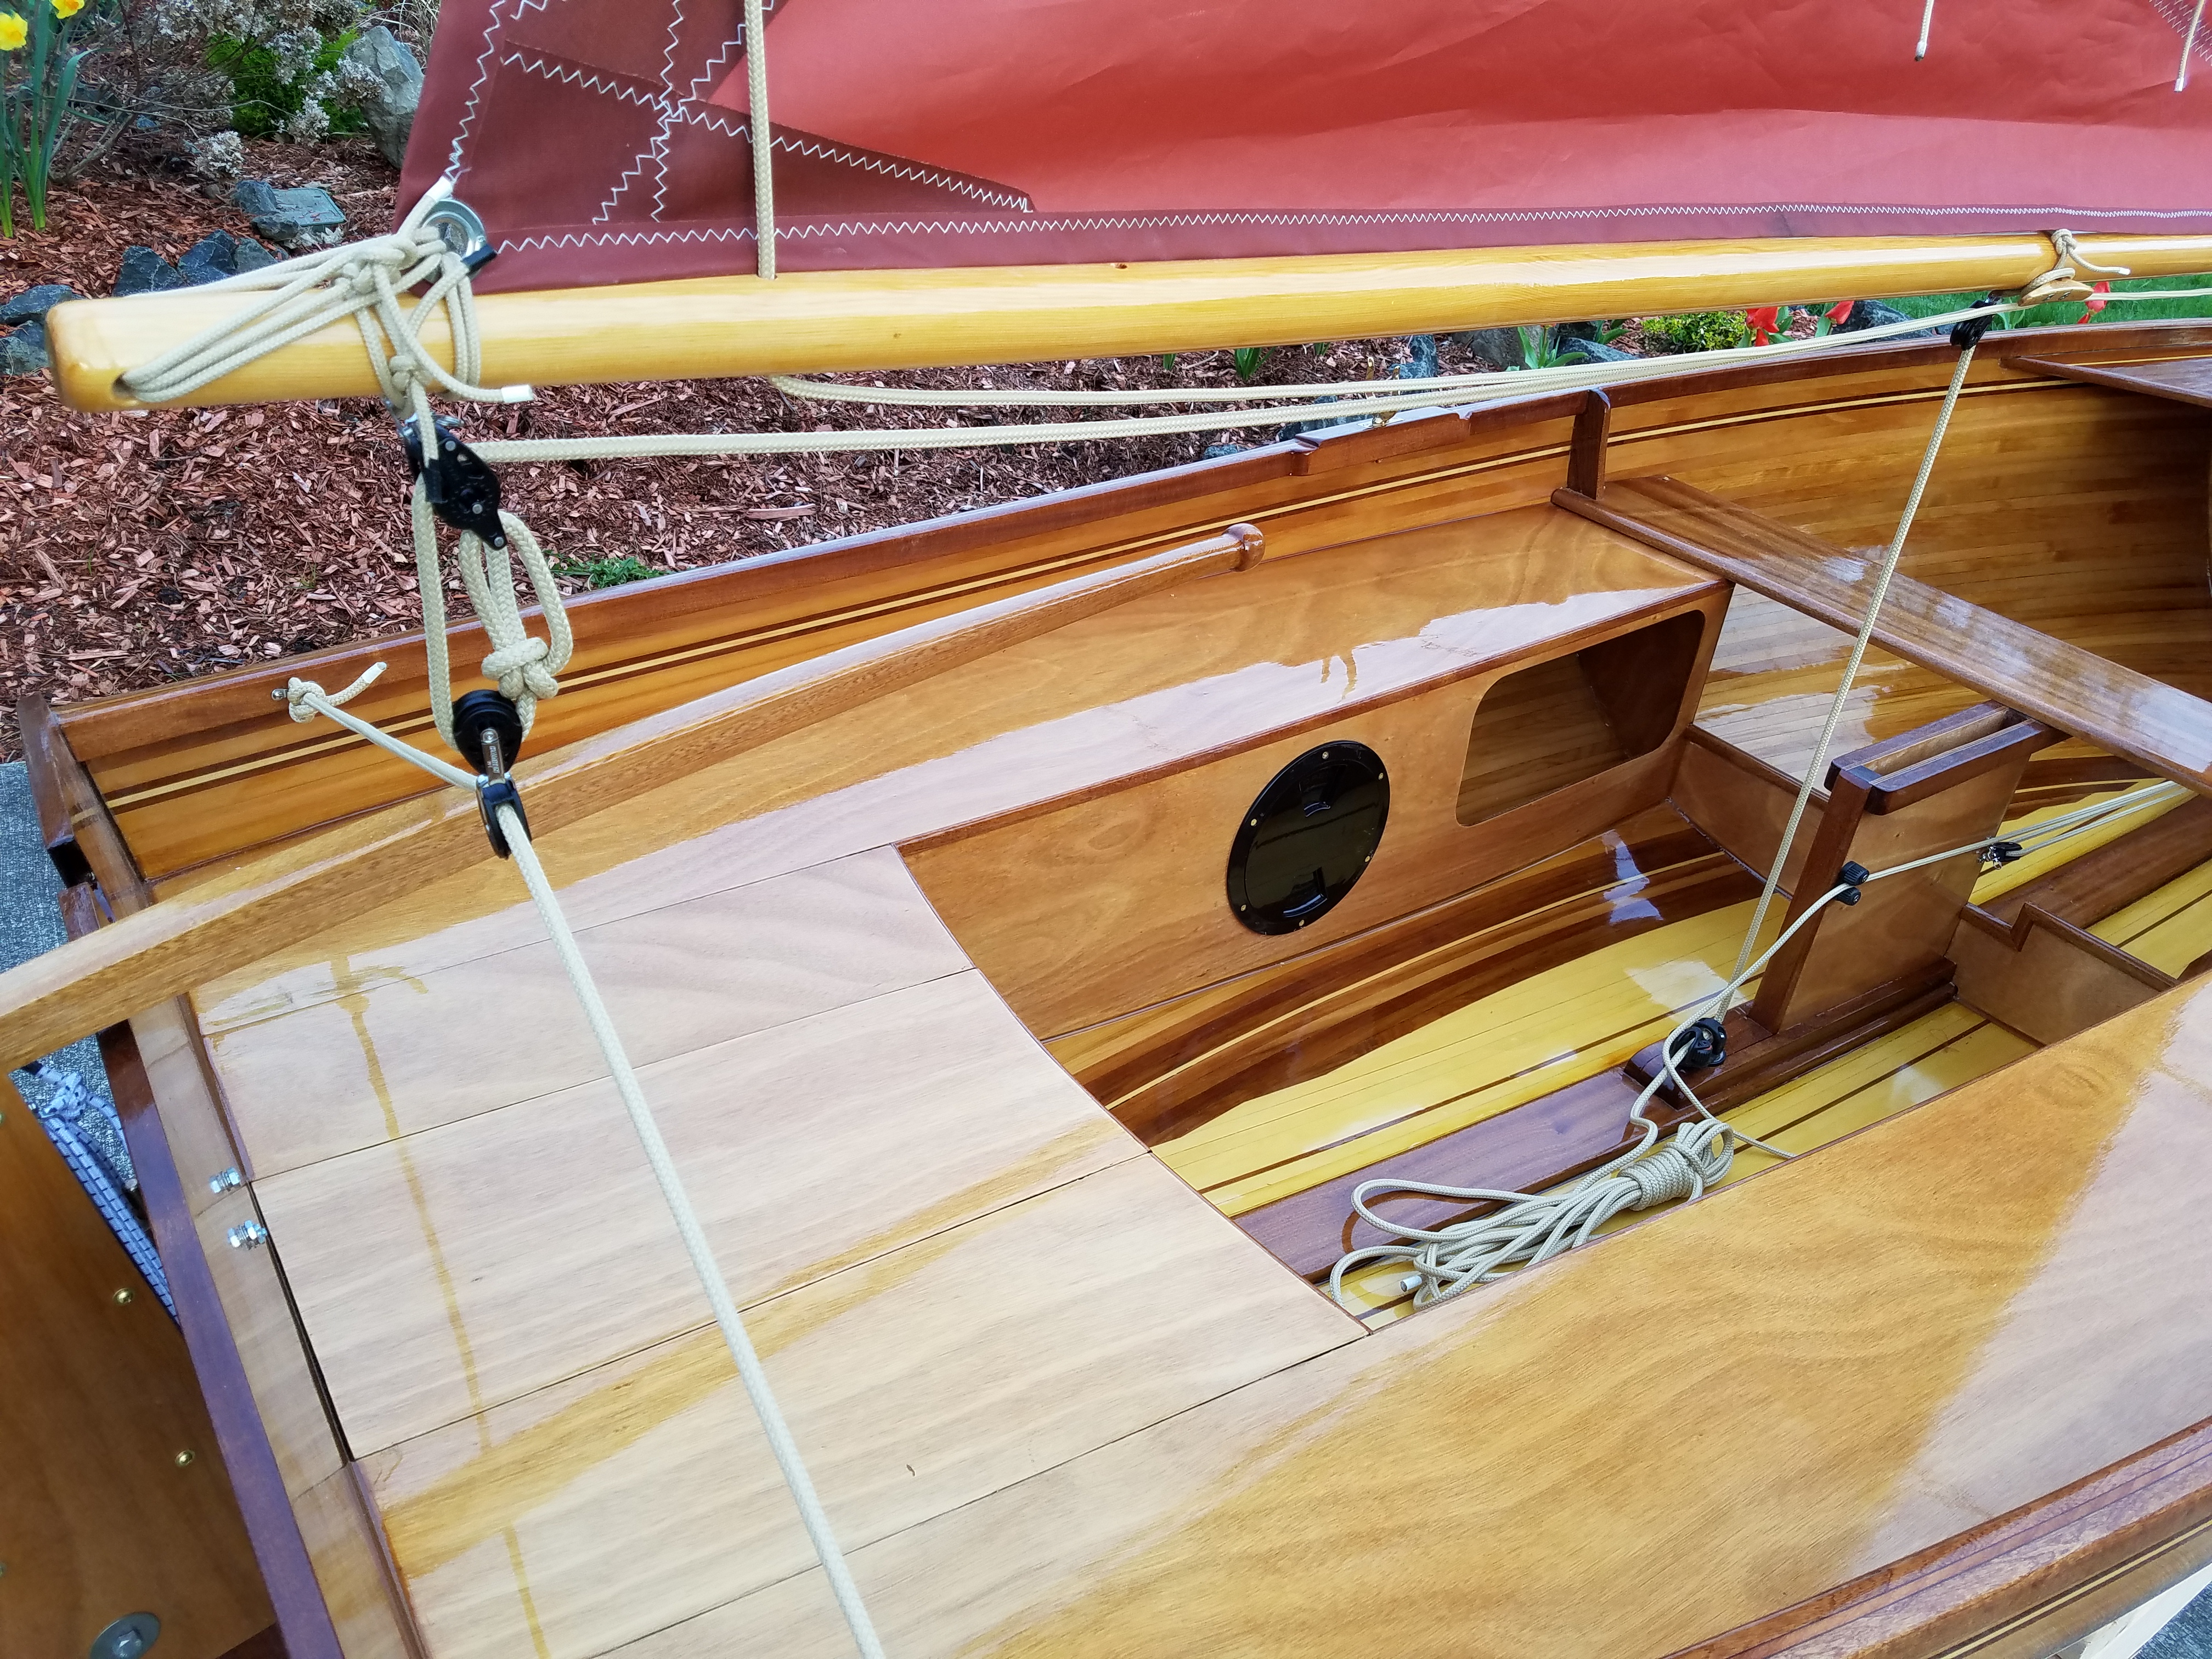
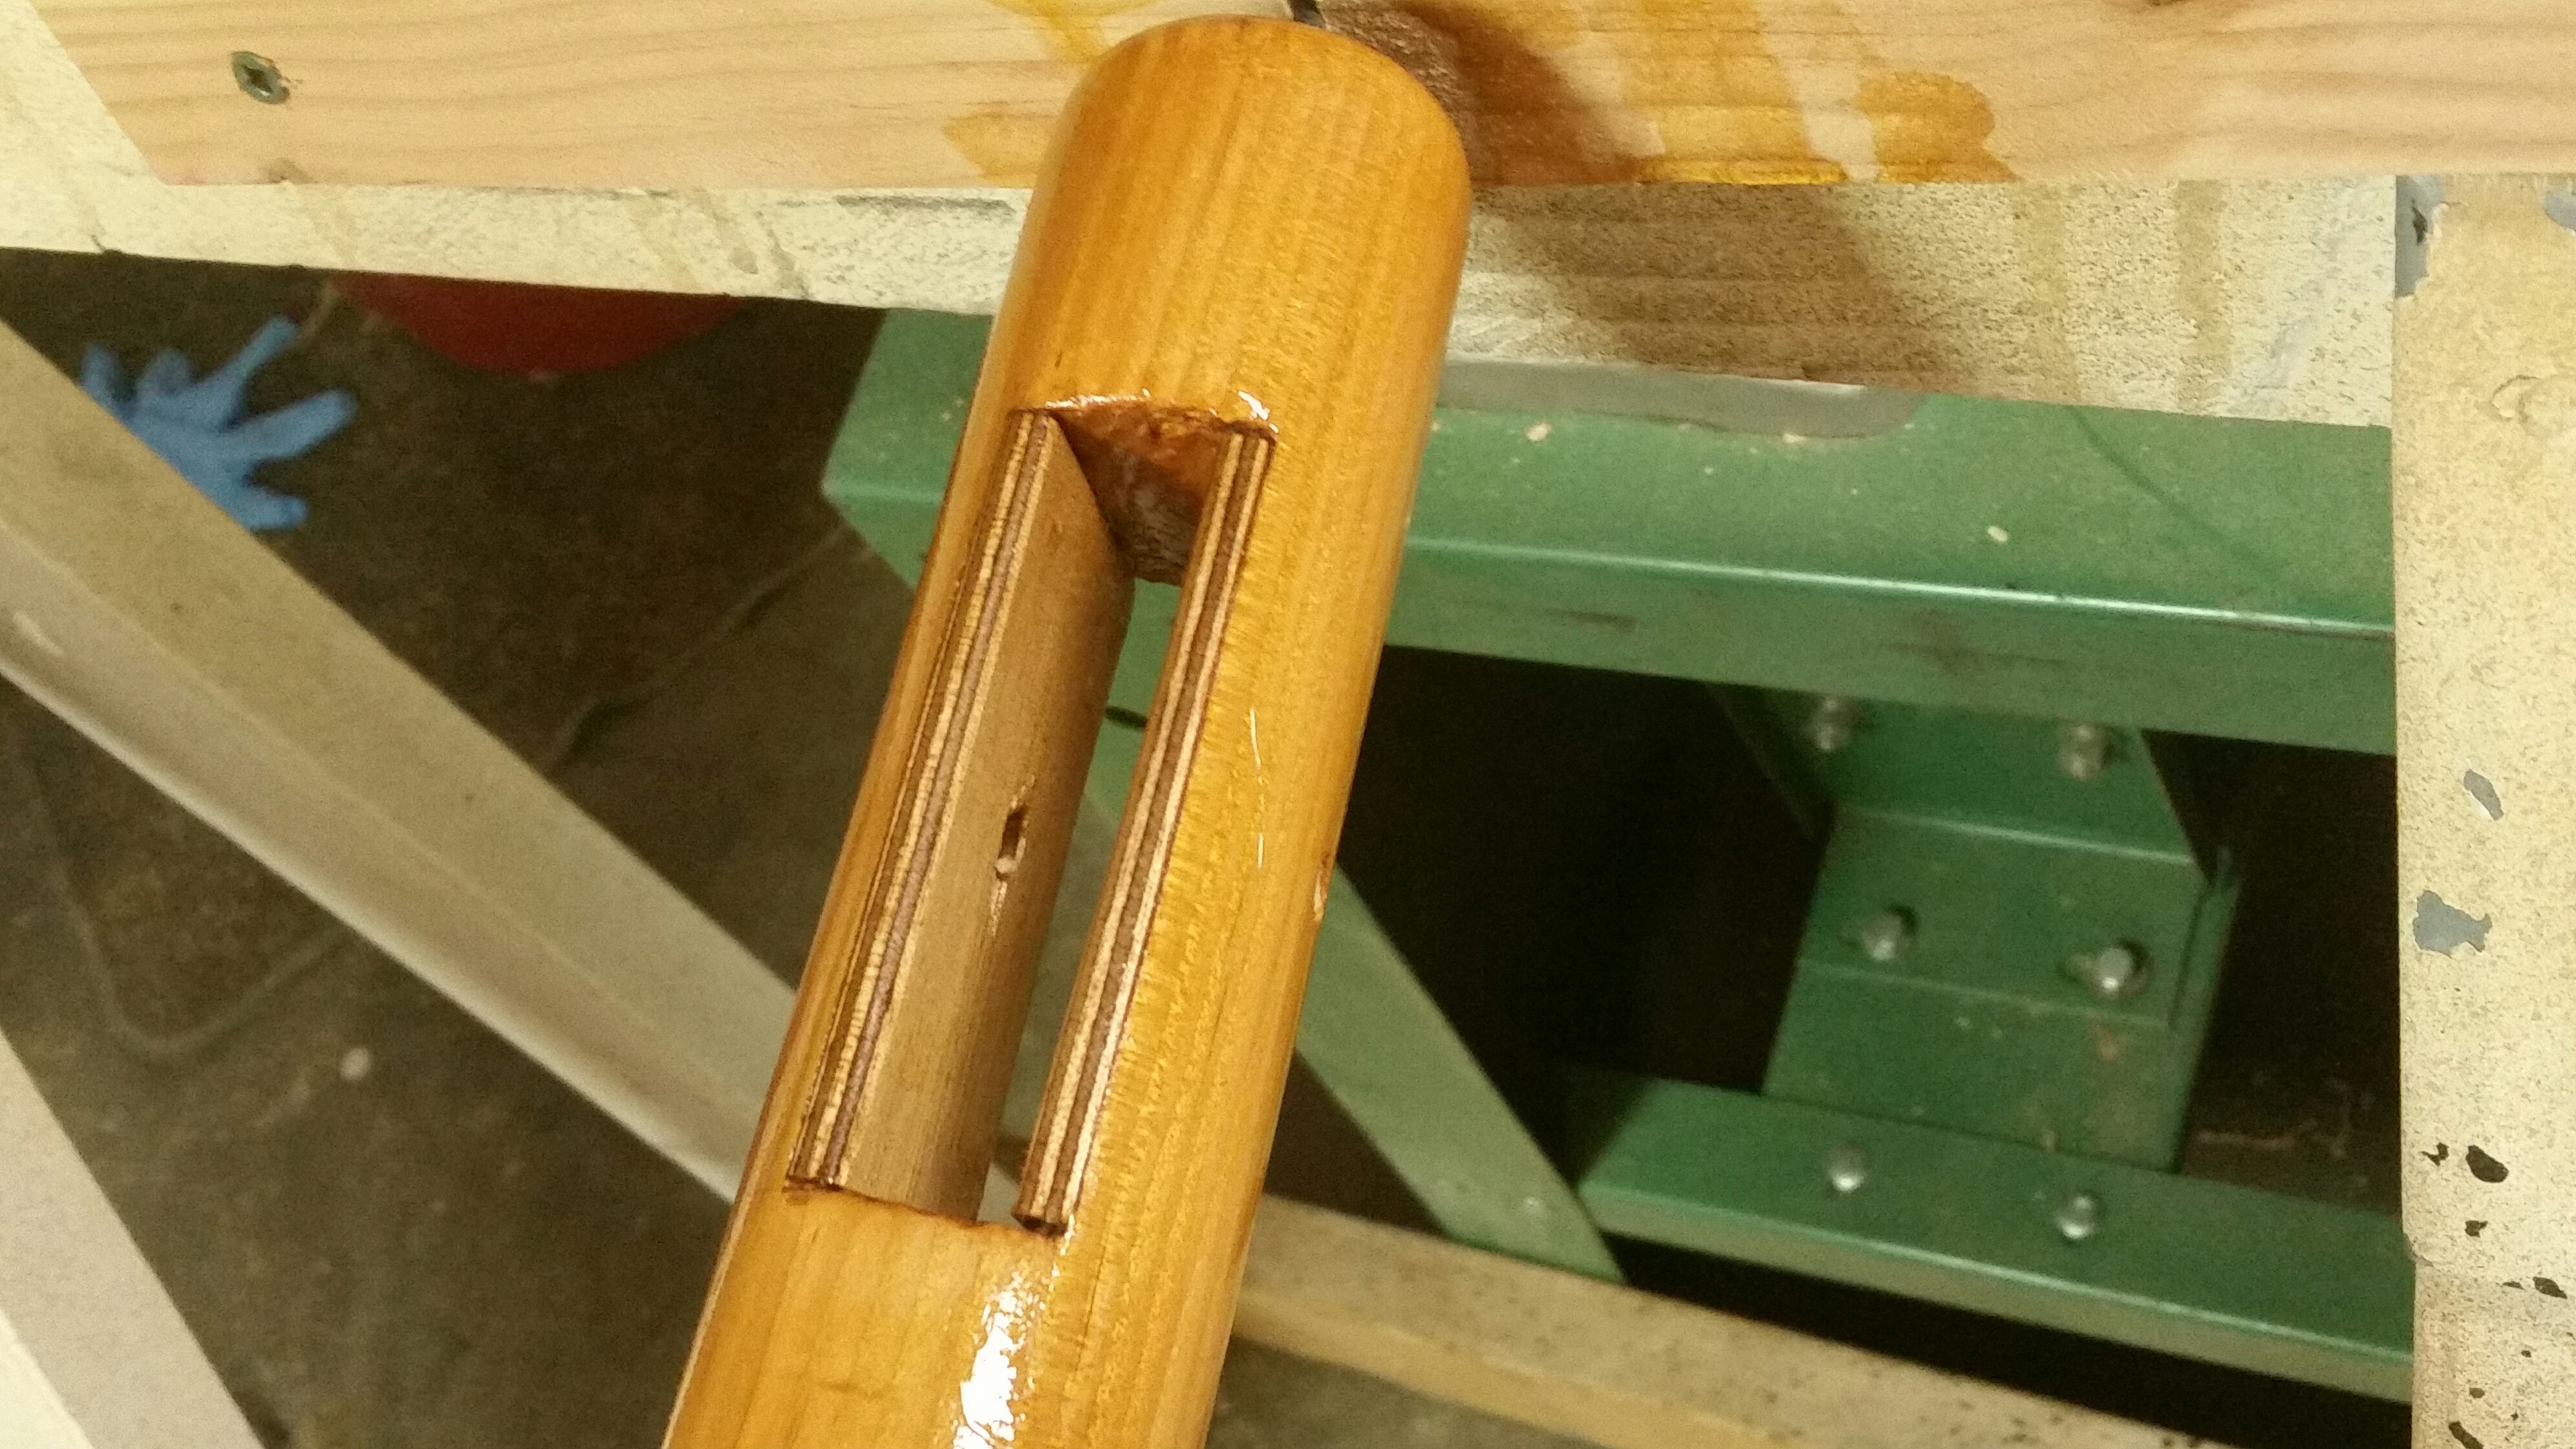
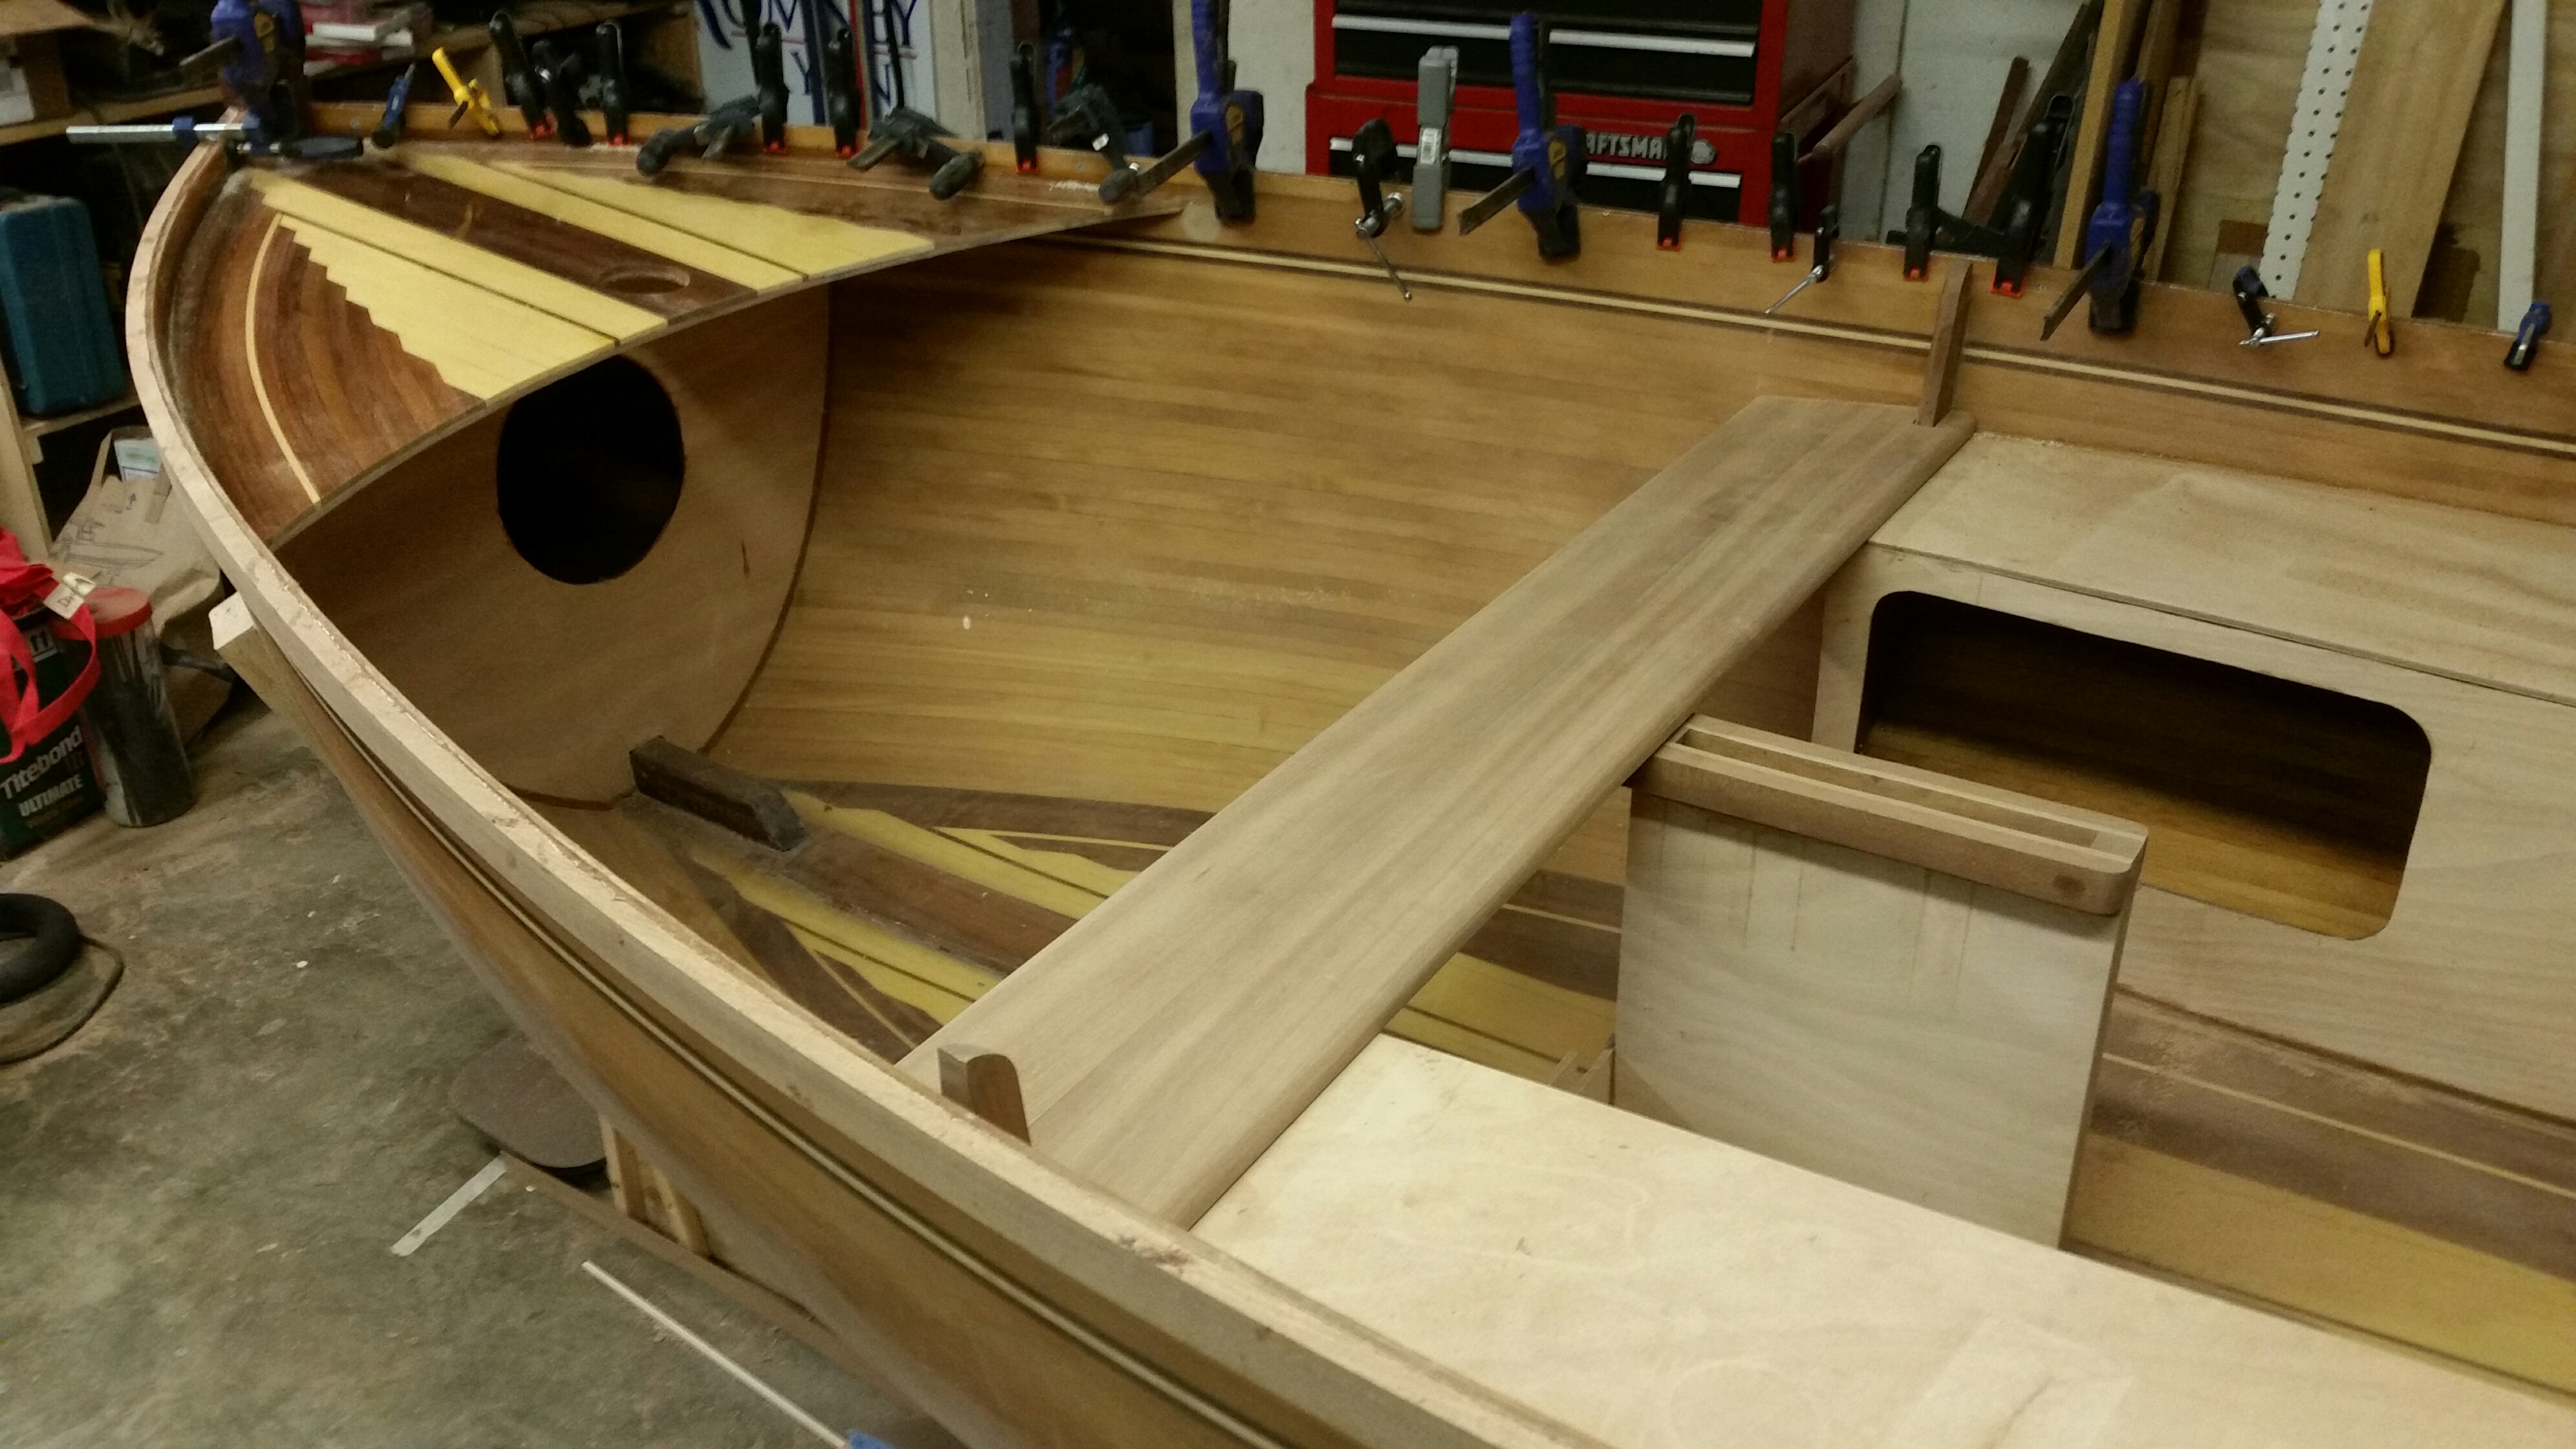
Picking away at the final To-Do list this week. Assembled the rudder/case and installed with gudgeons and pintles carefully aligned. Attached the thwart with screws, so that it is removable. Made template and routed out the spots for oar-lock mounts and mounted those. Drilled, mortised and chiseled the rectangular hole in mast head for sheave, and lined with ply for strength. All is centered and aligned well – scary cuts, many of them this week.. fortunately didn’t muff.


3/10/2018
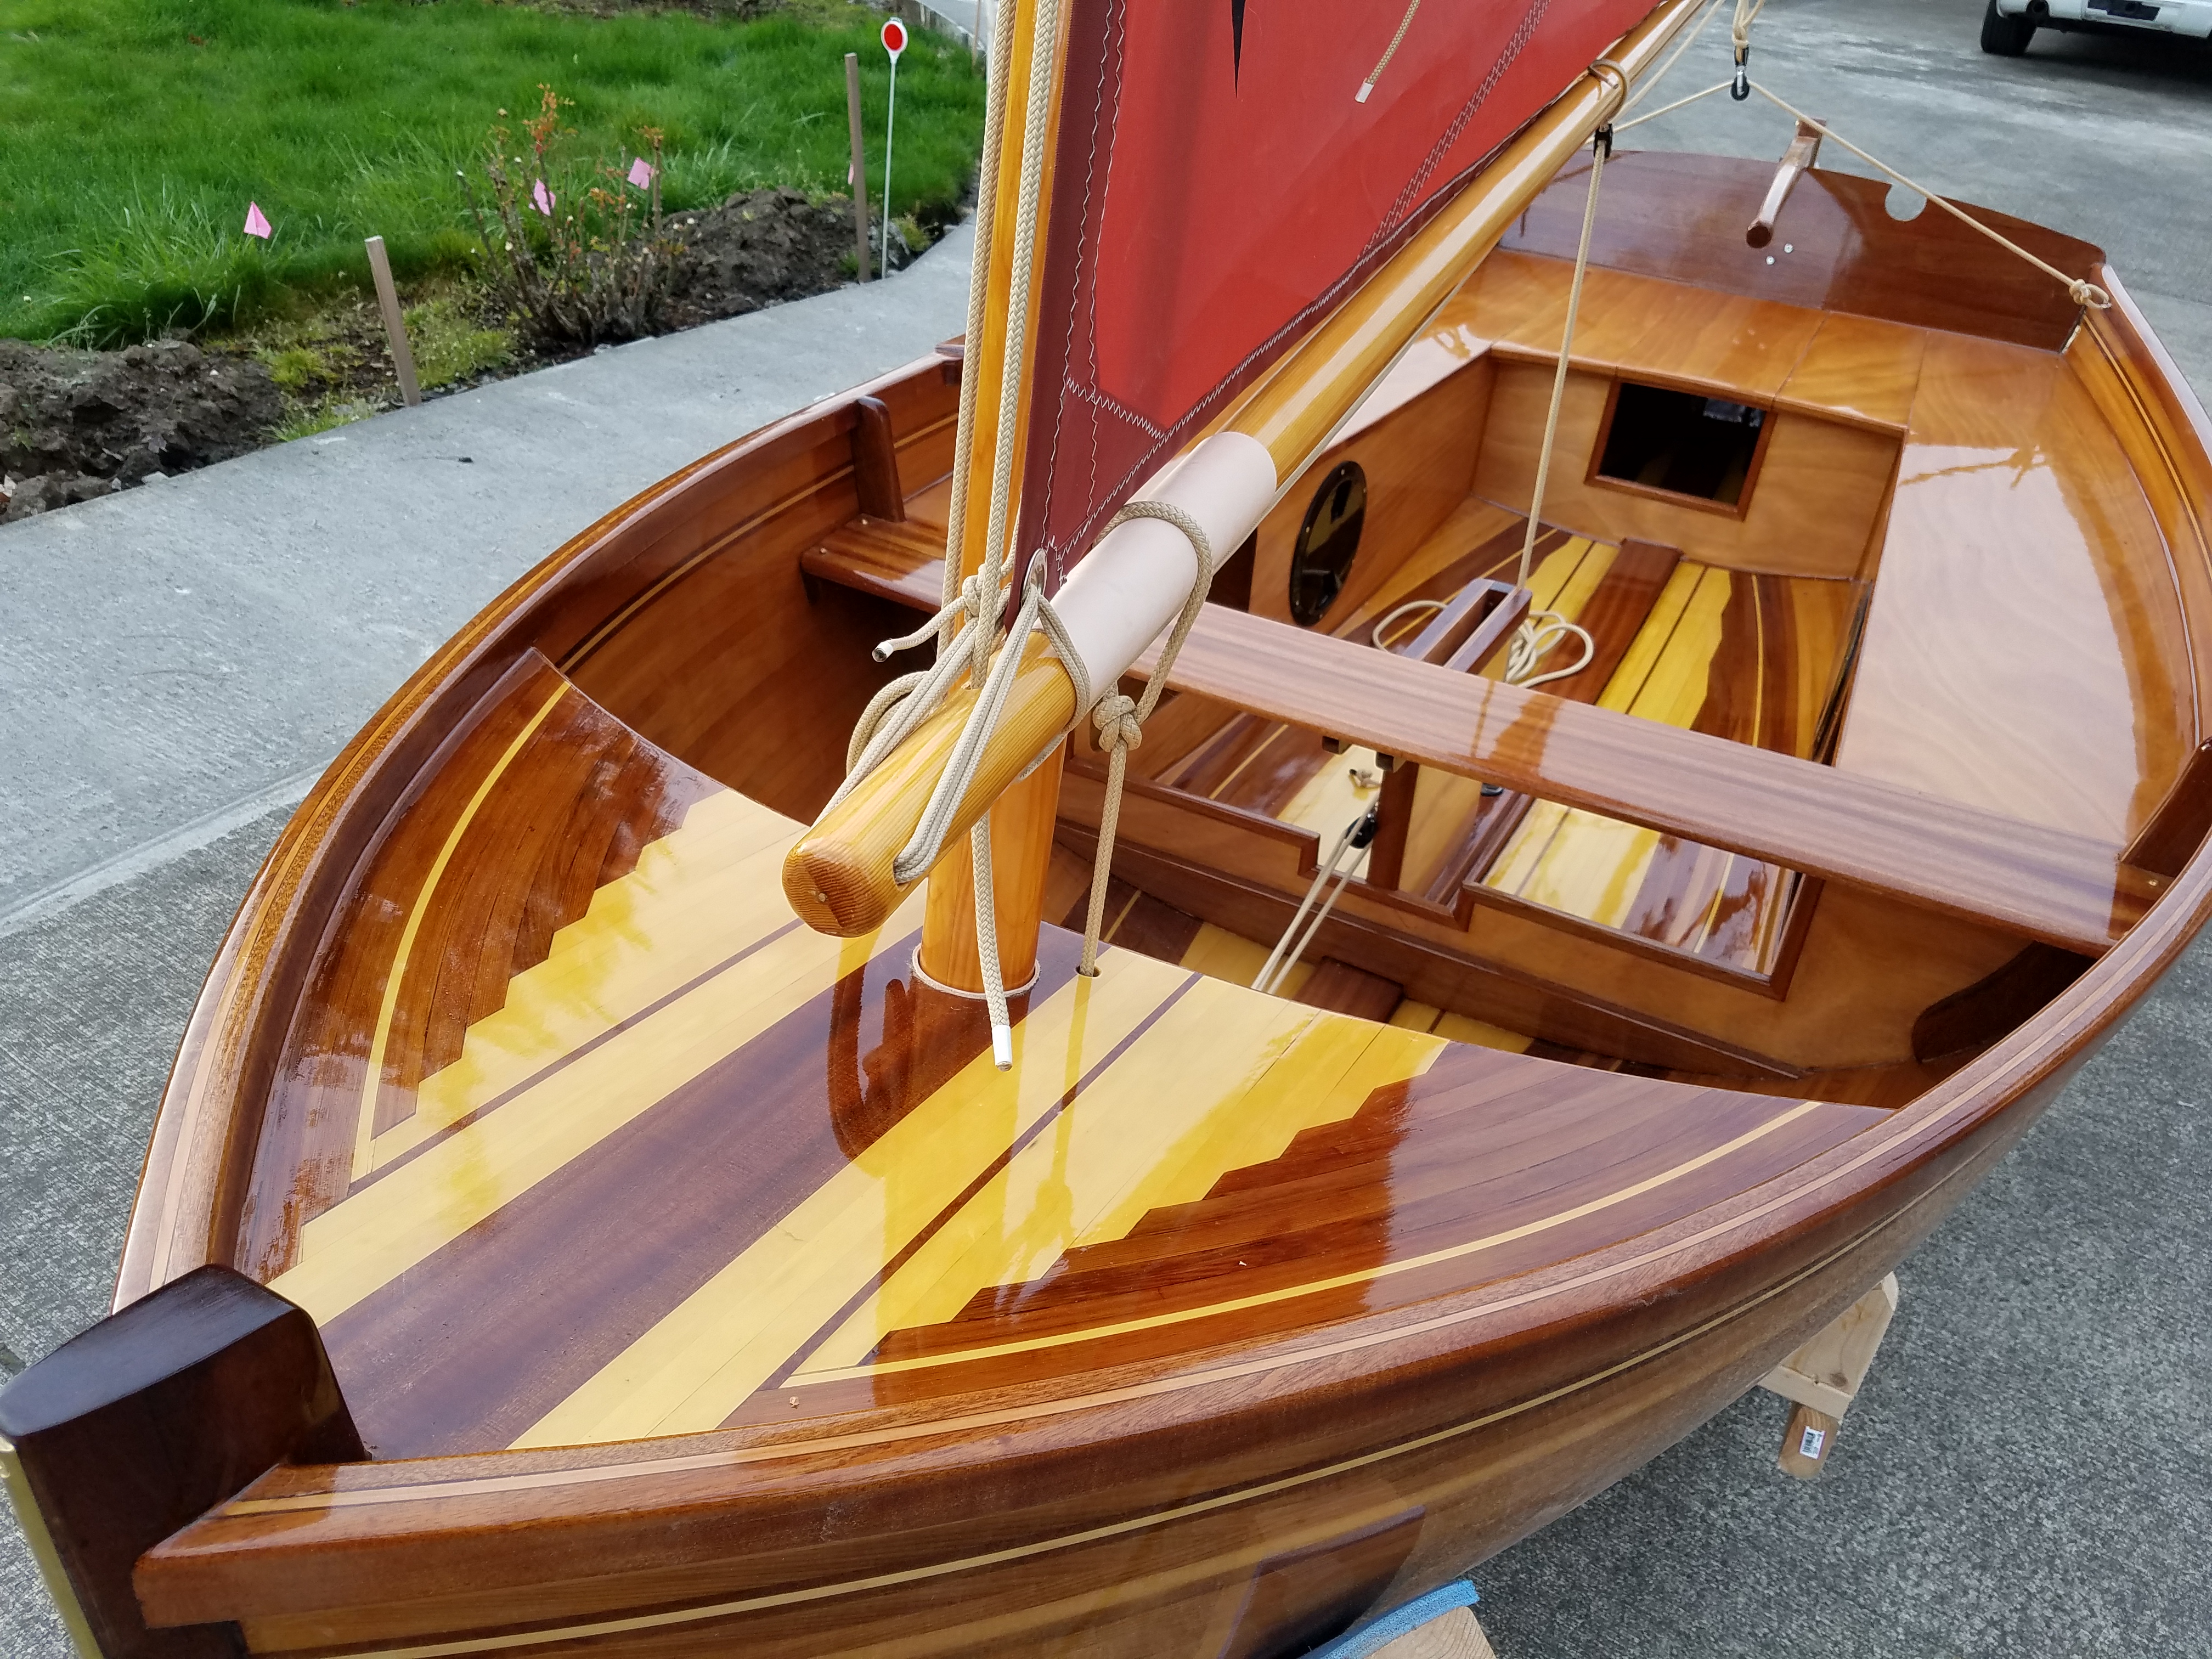
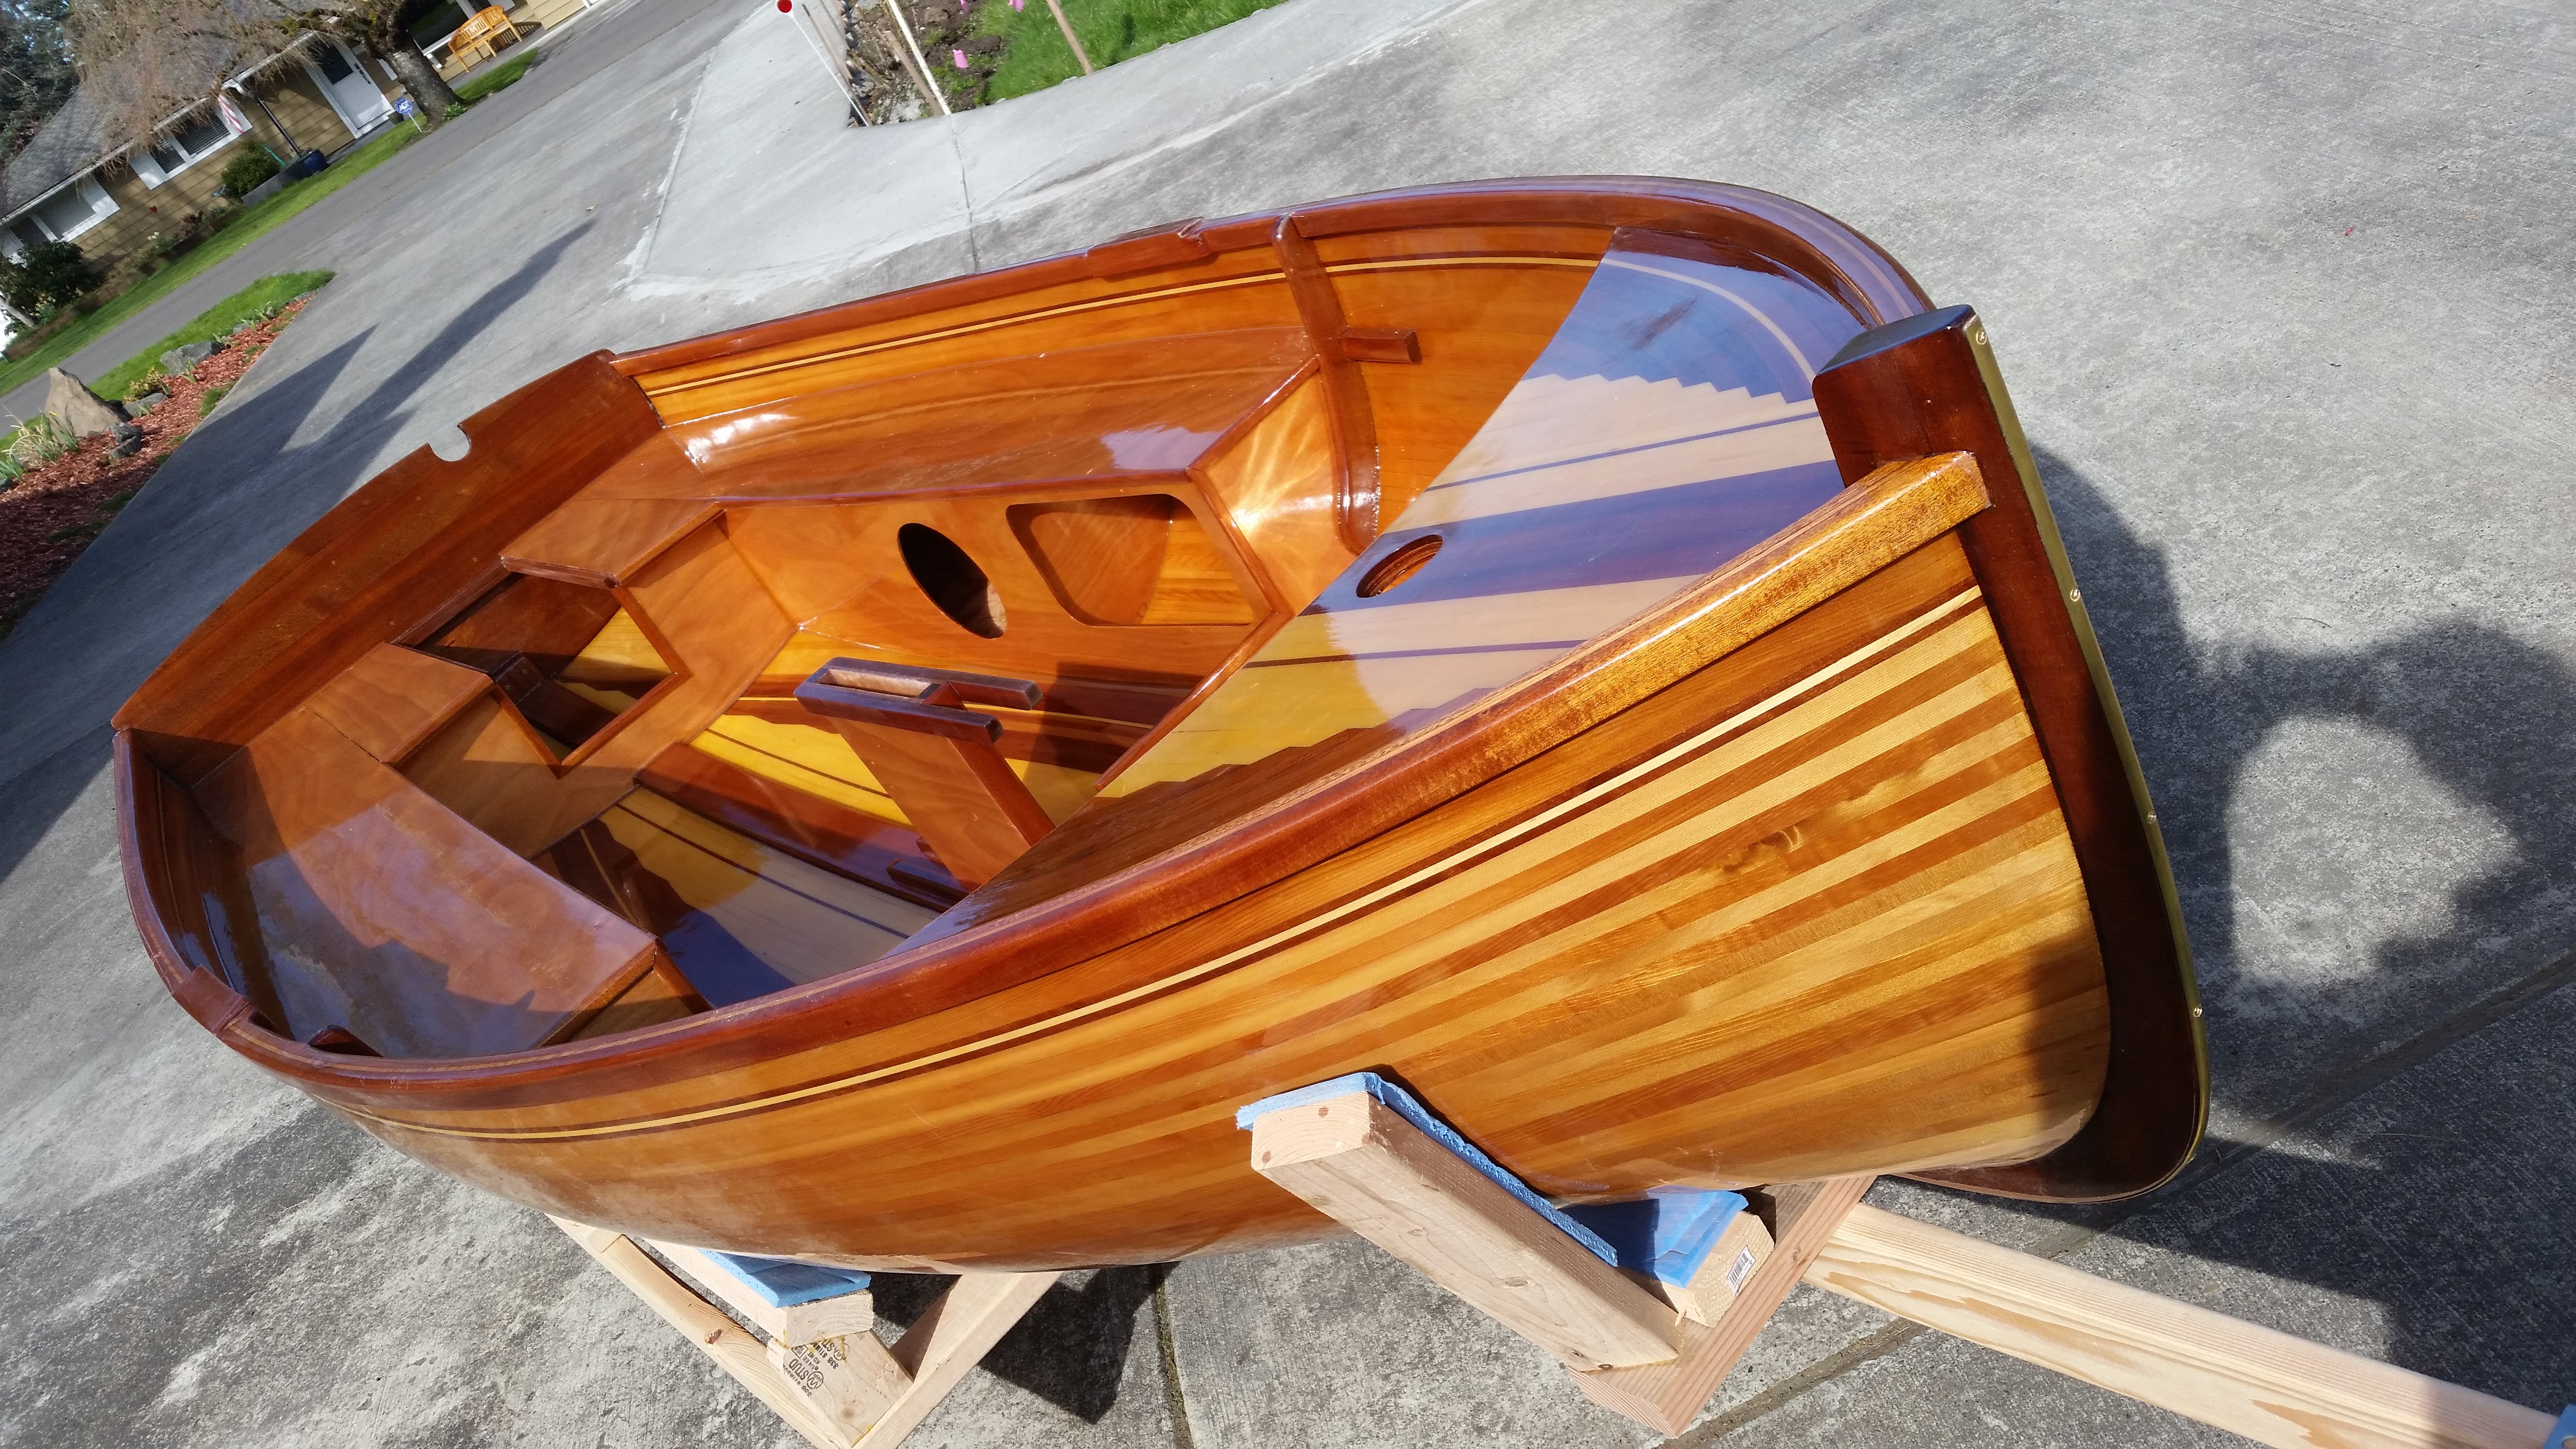
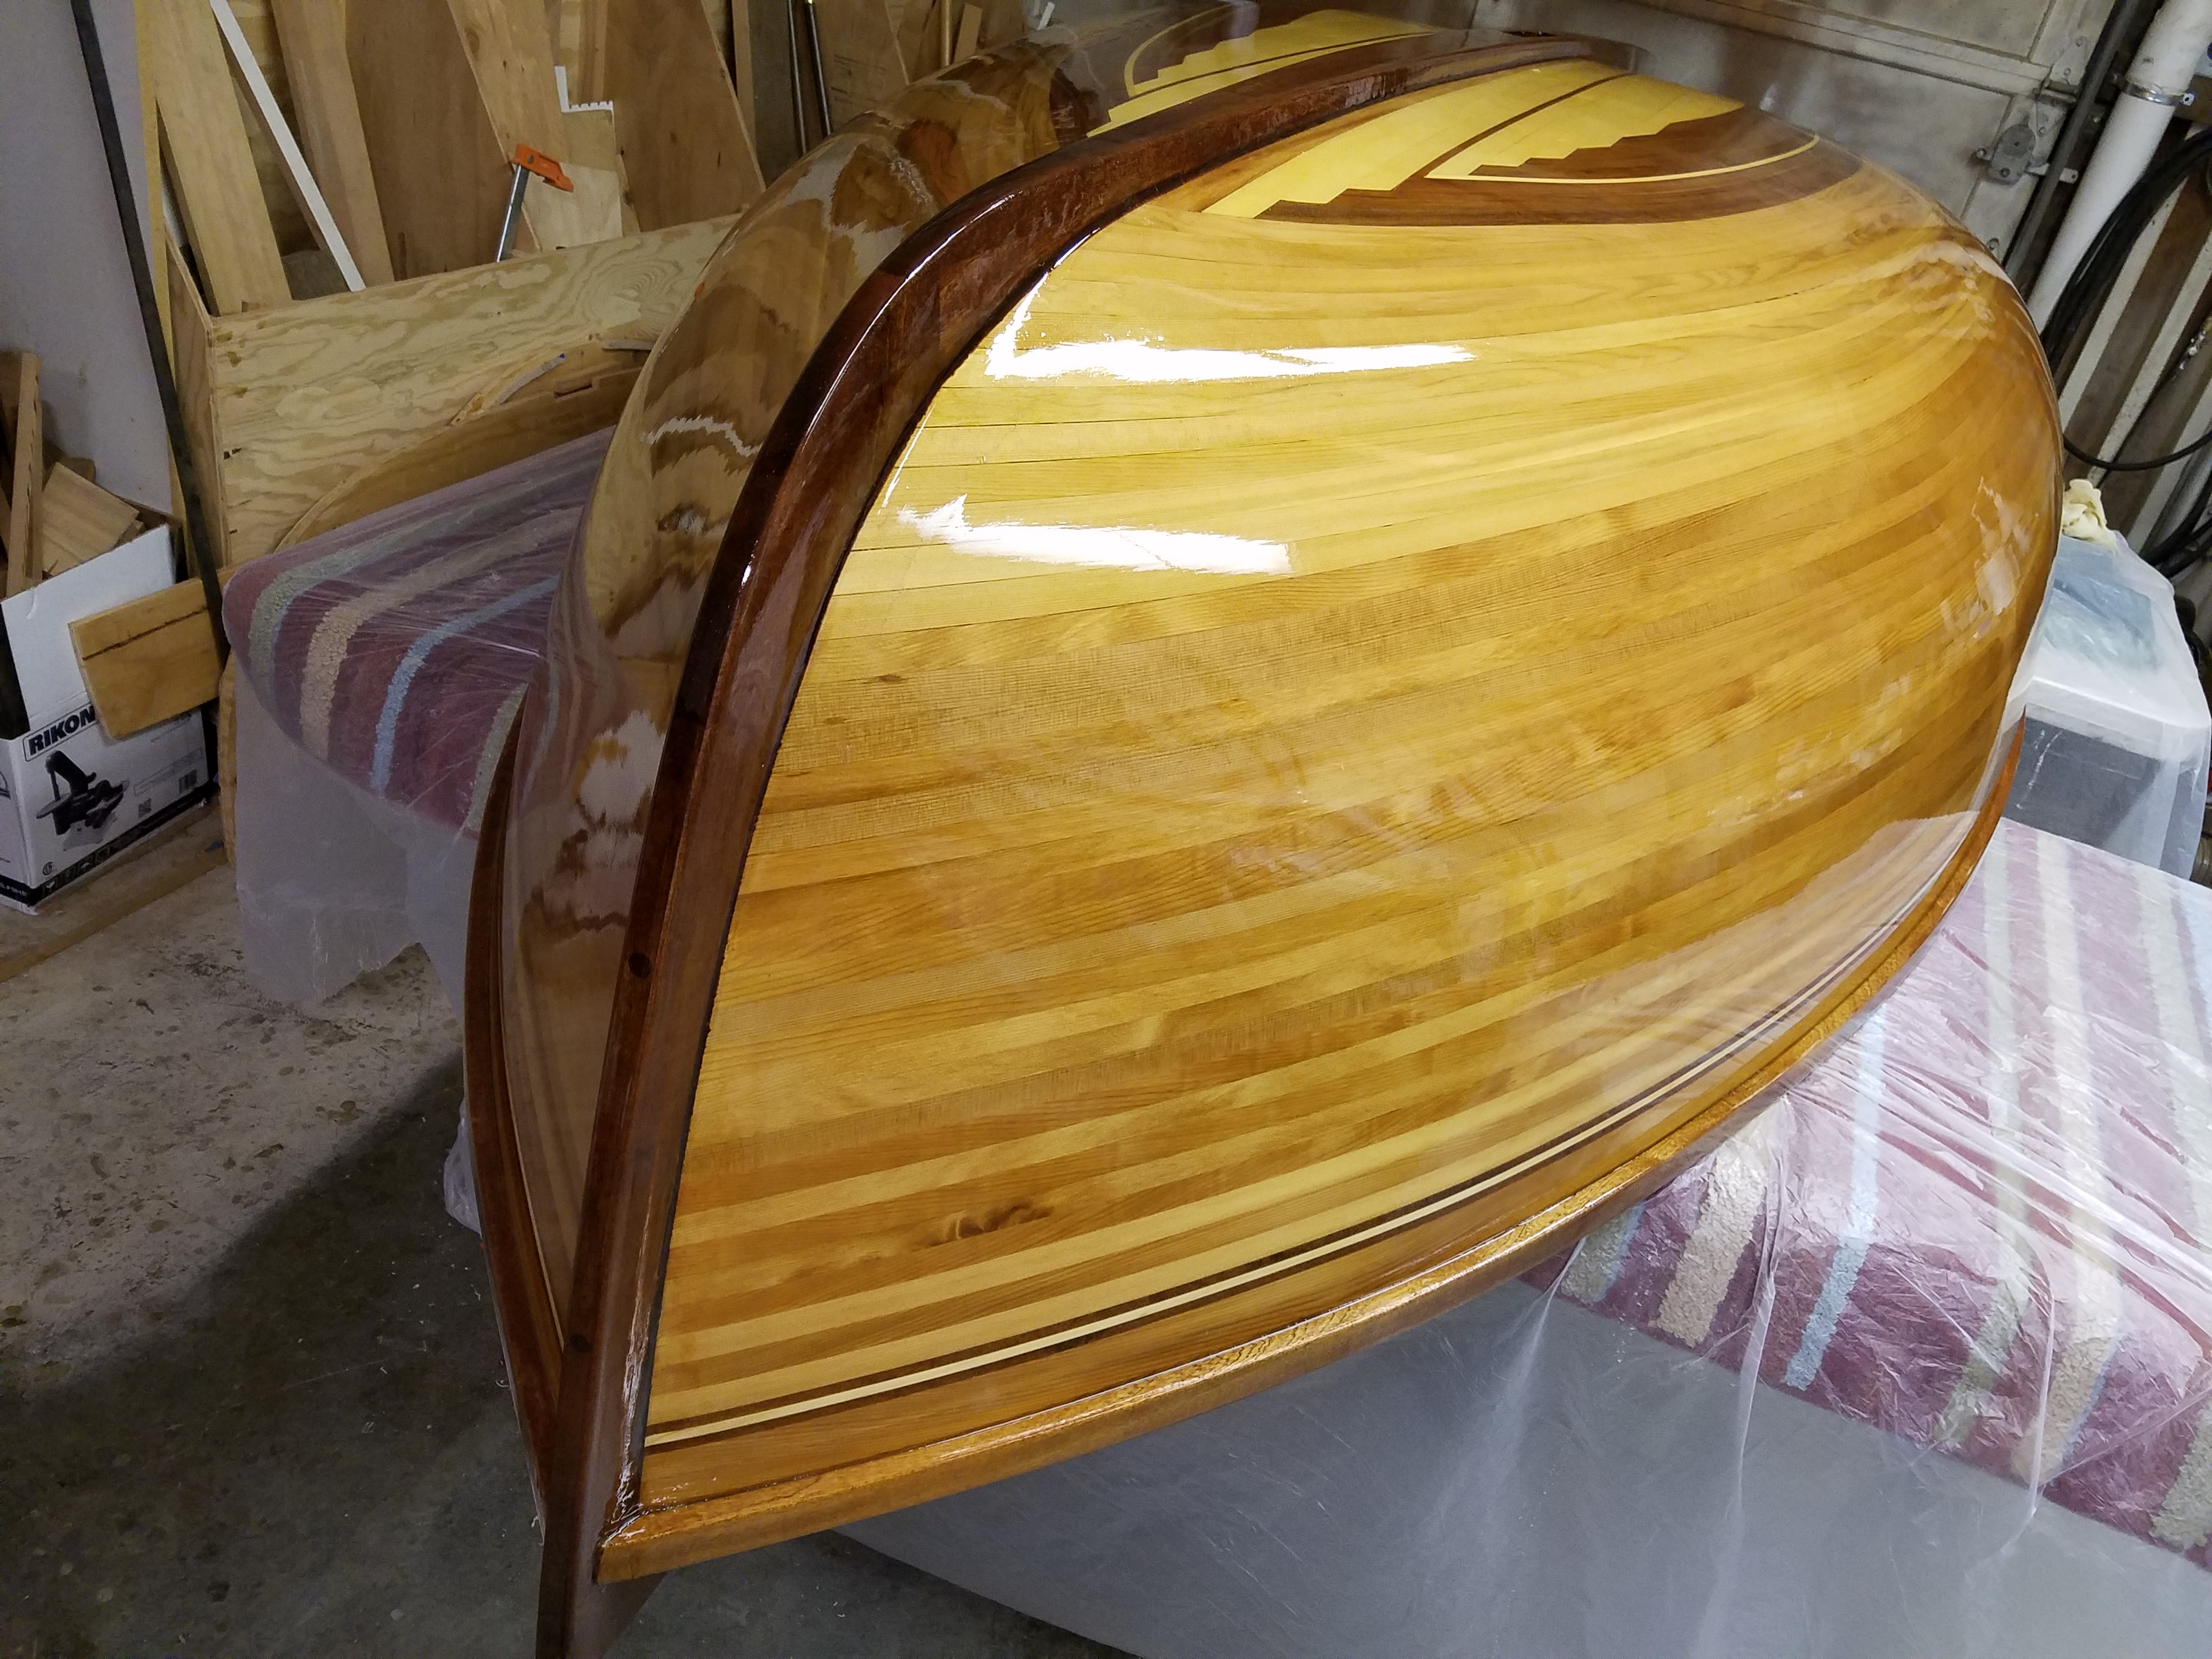
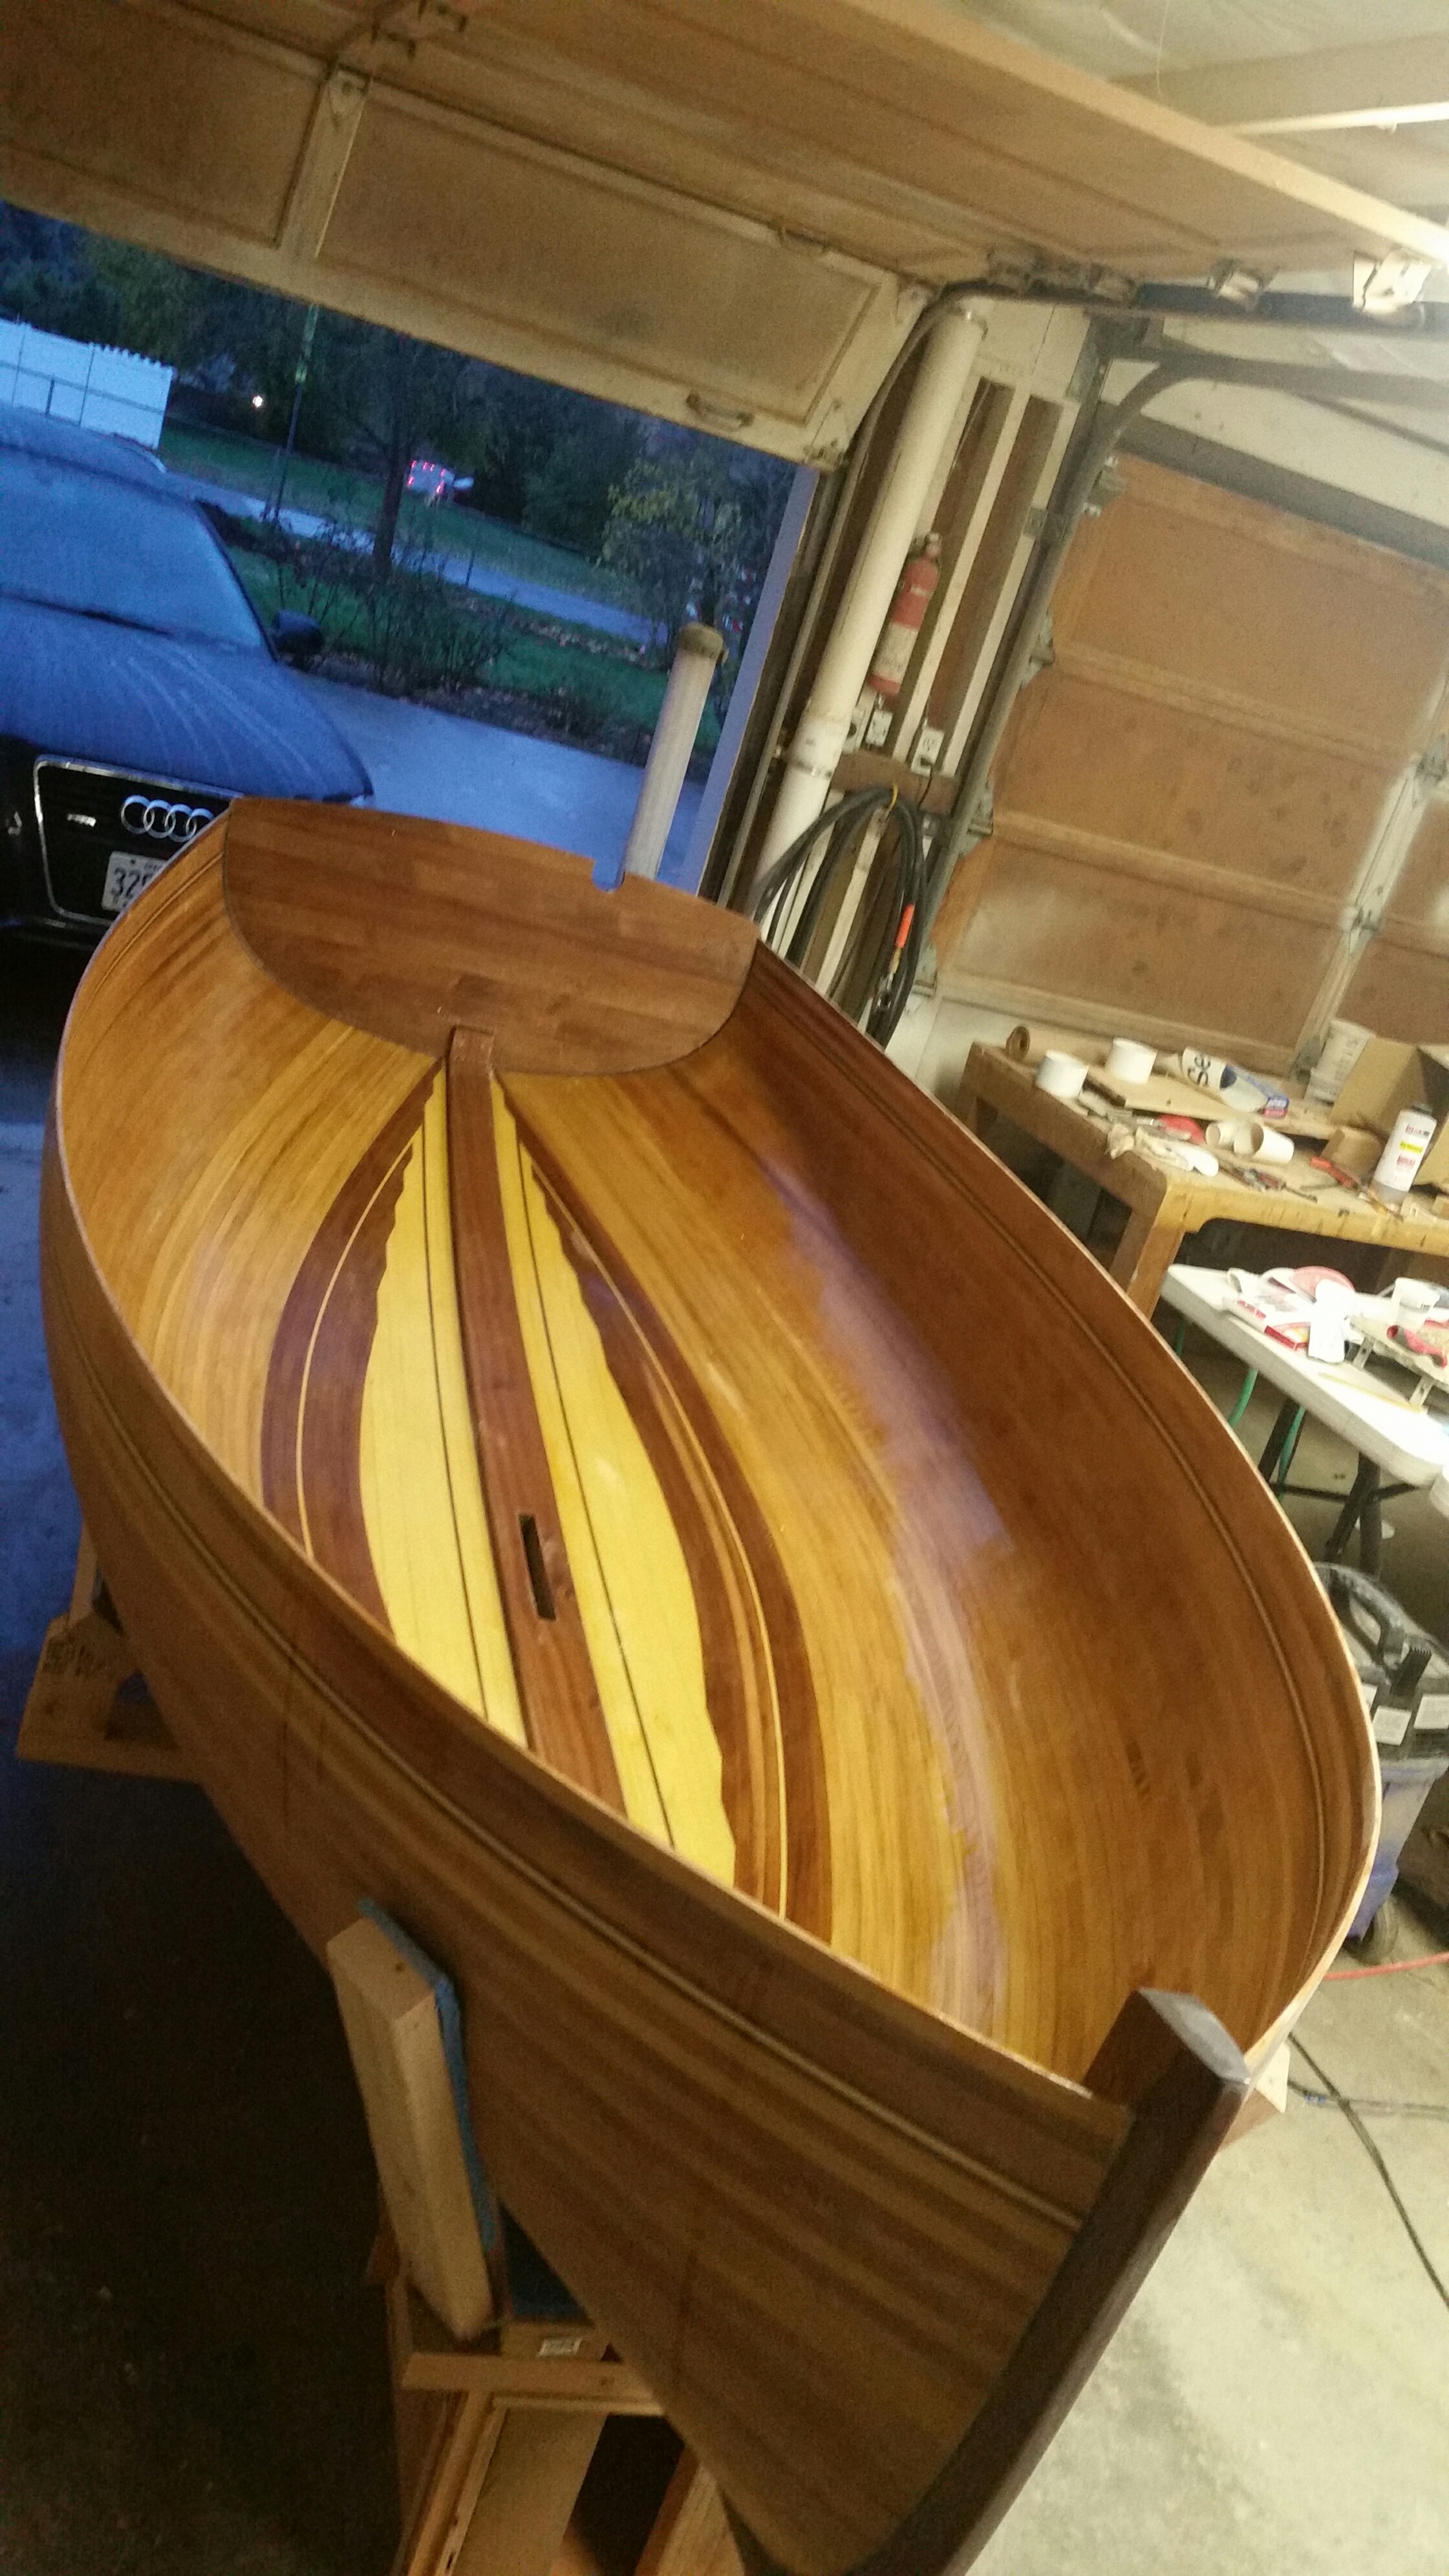
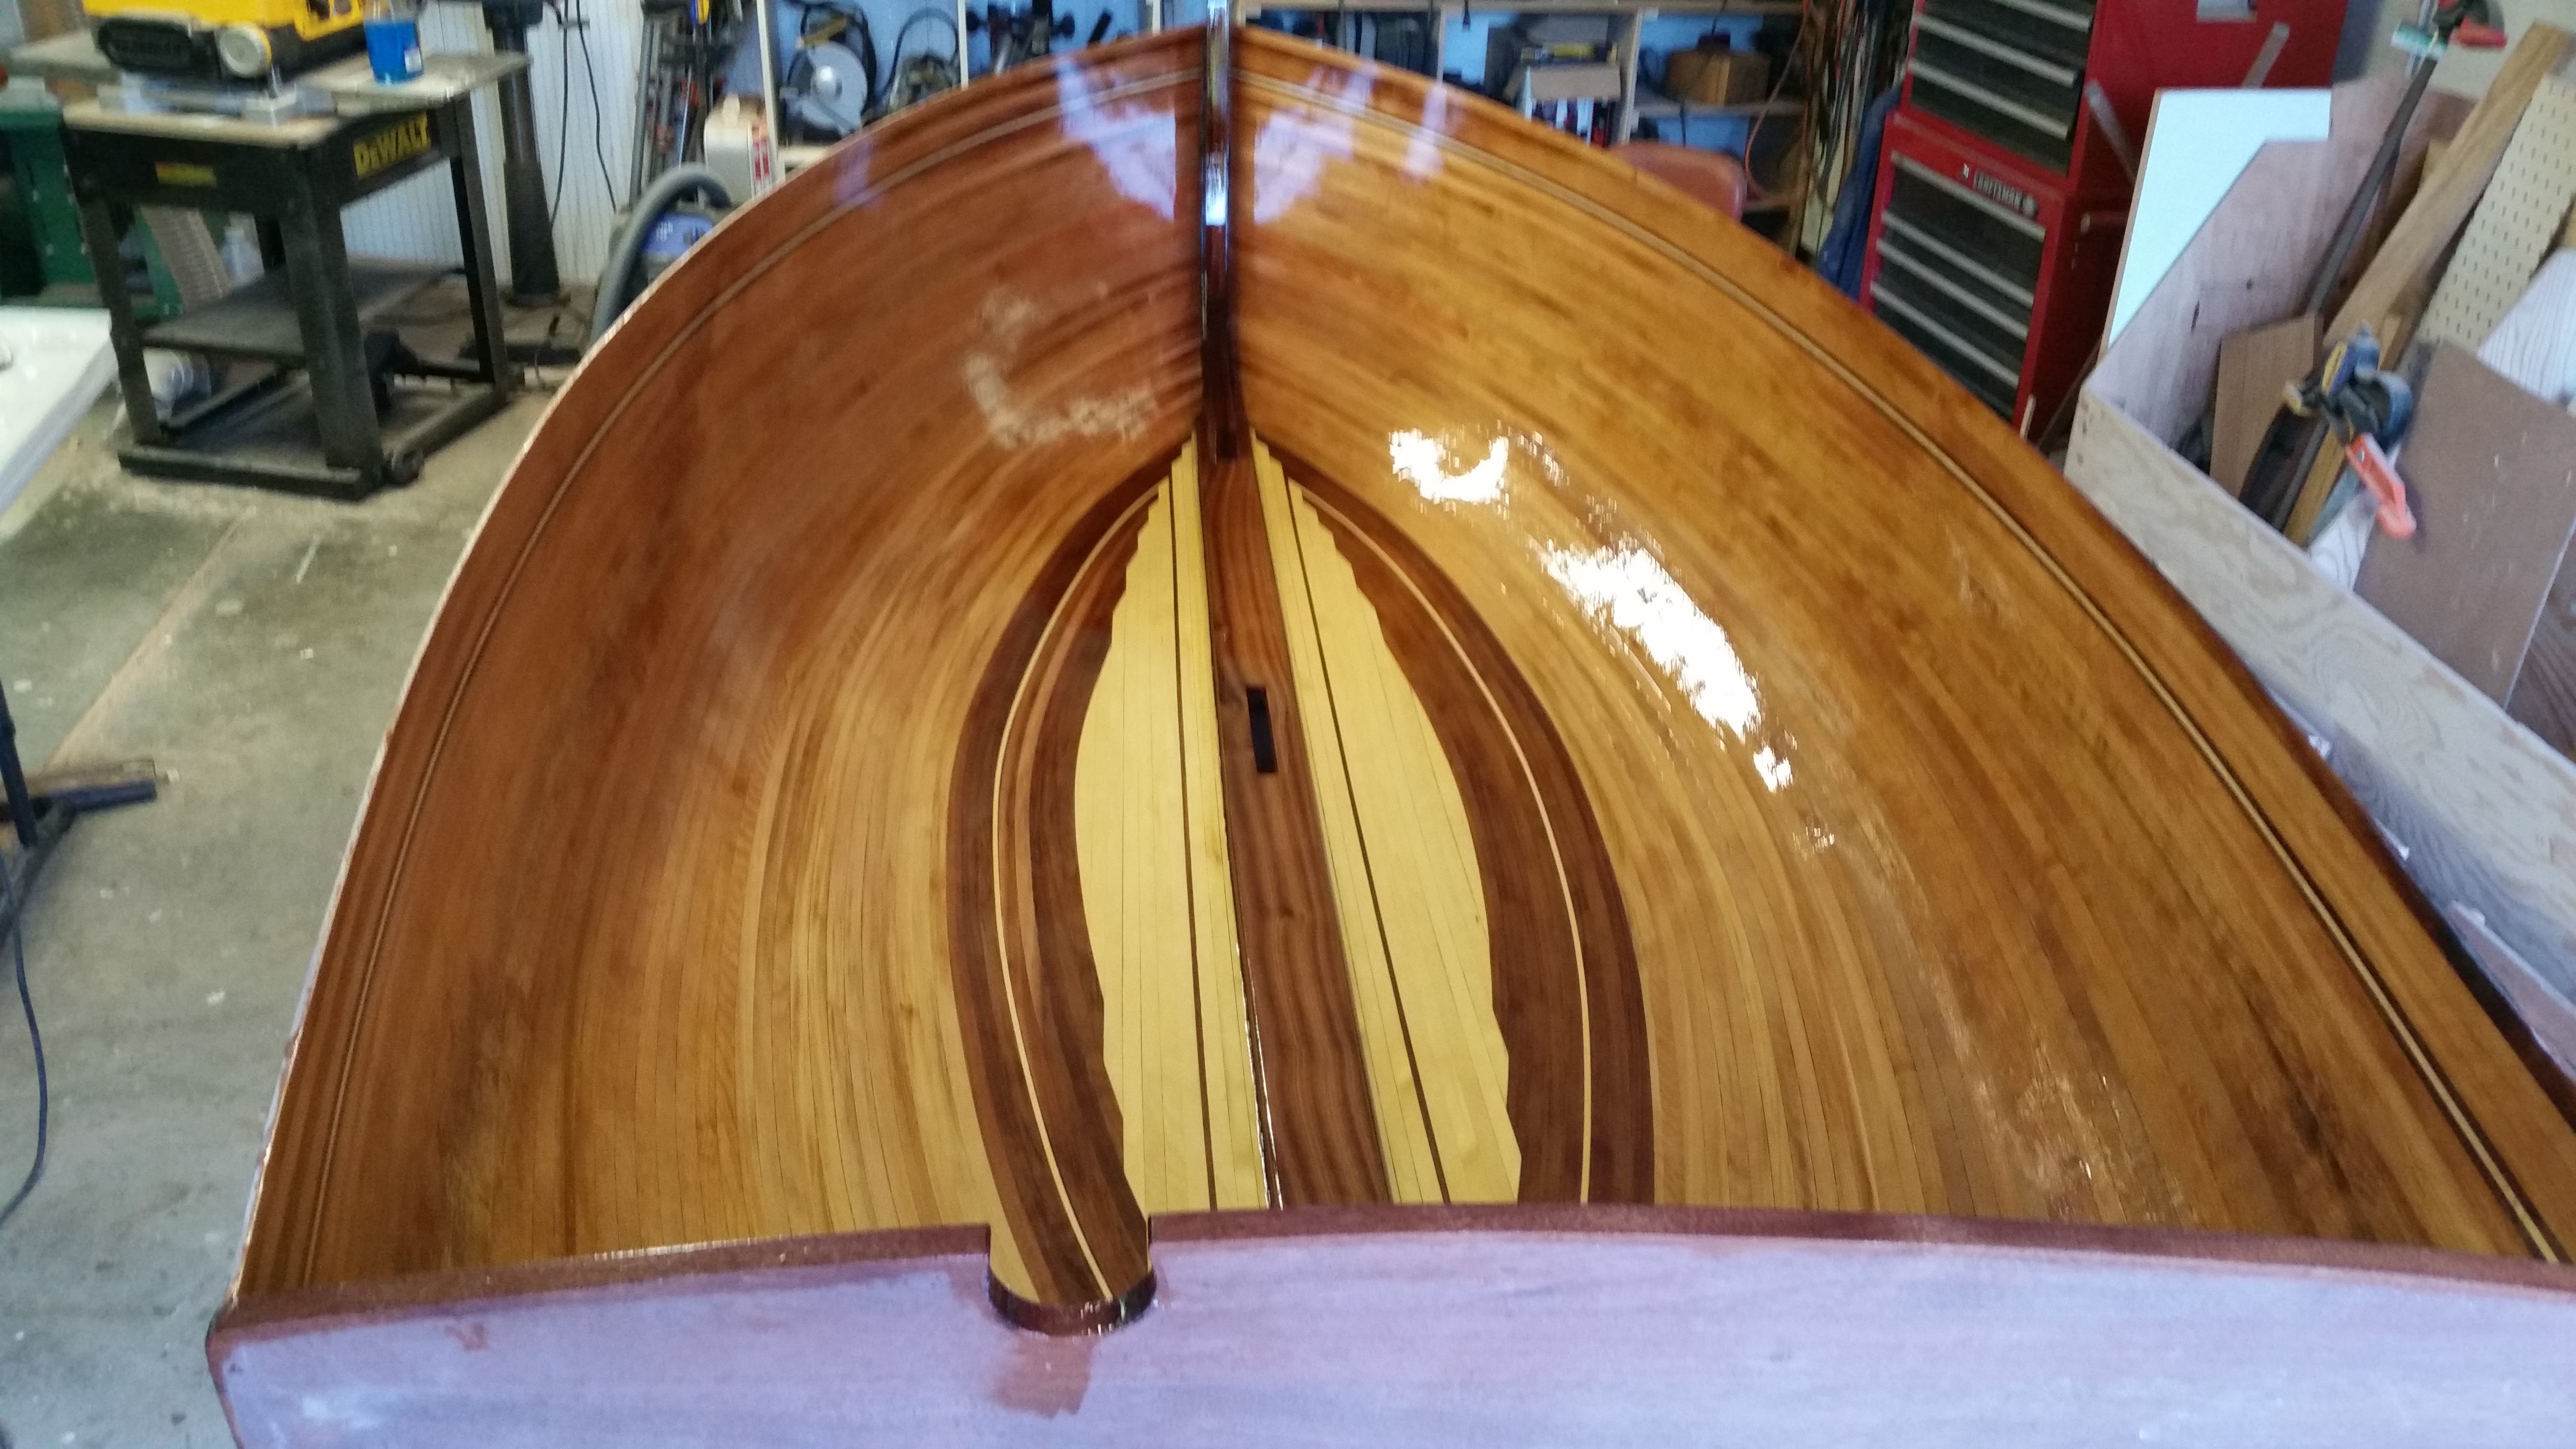
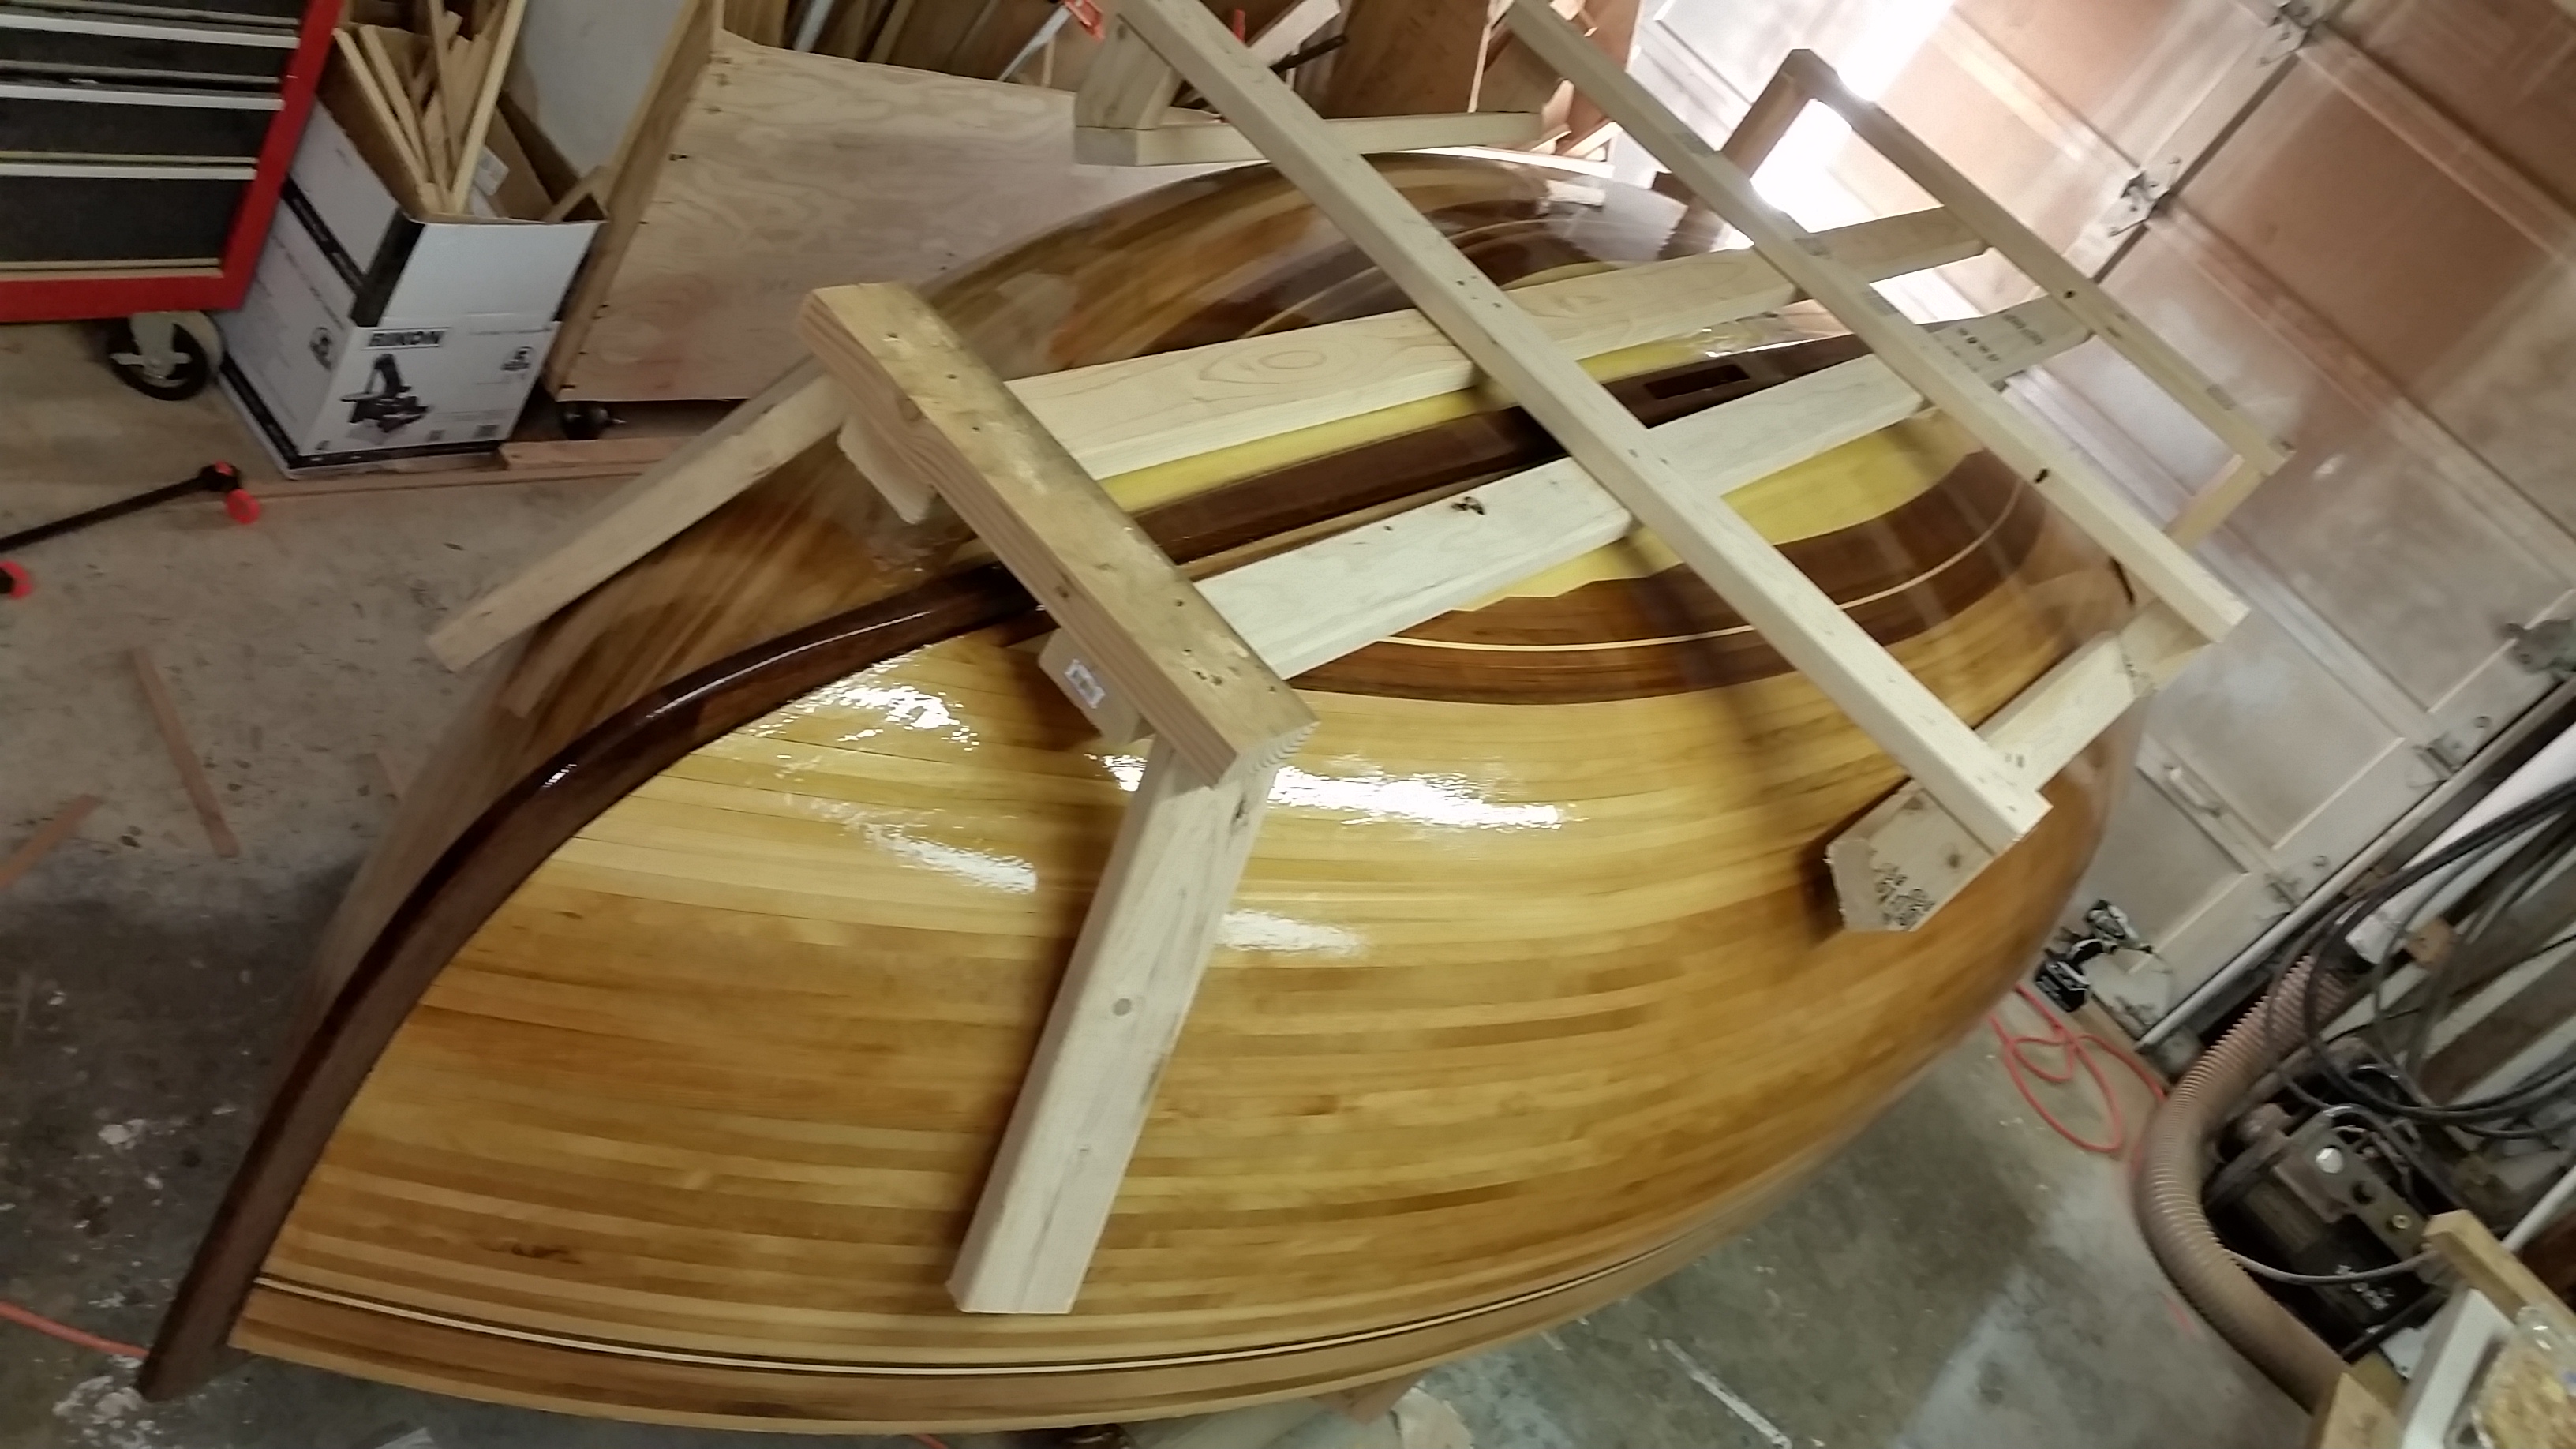
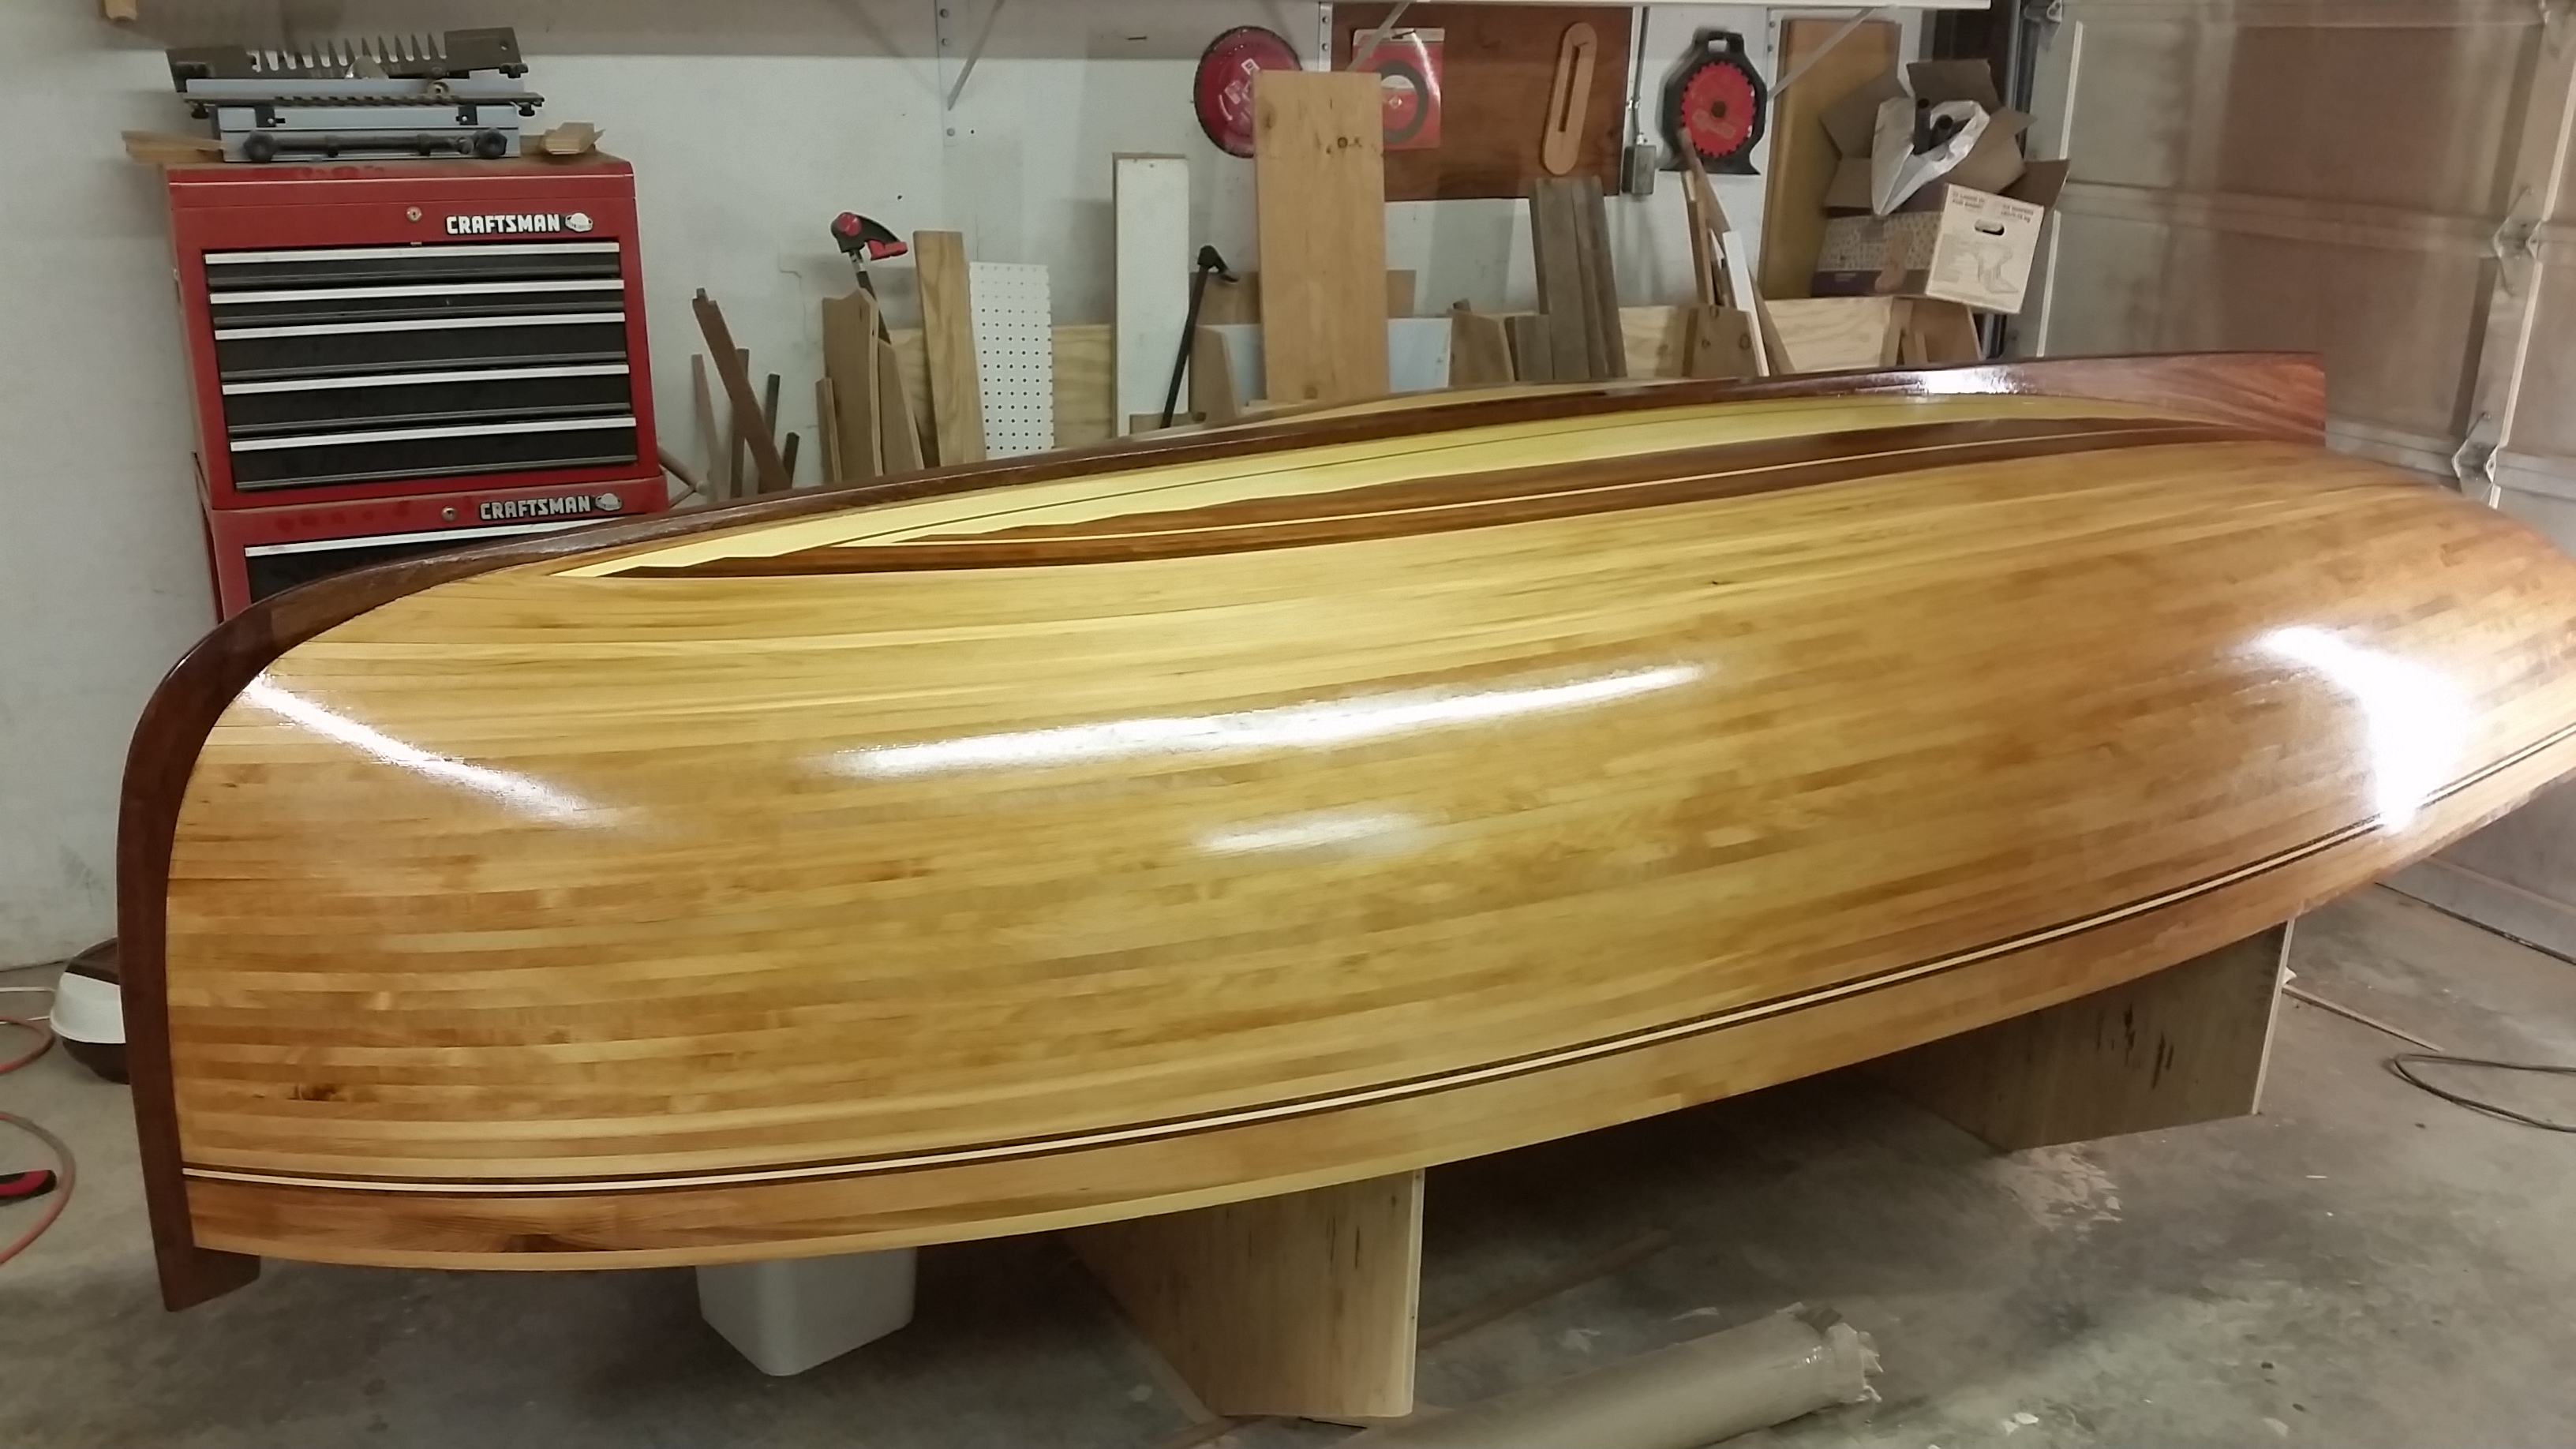
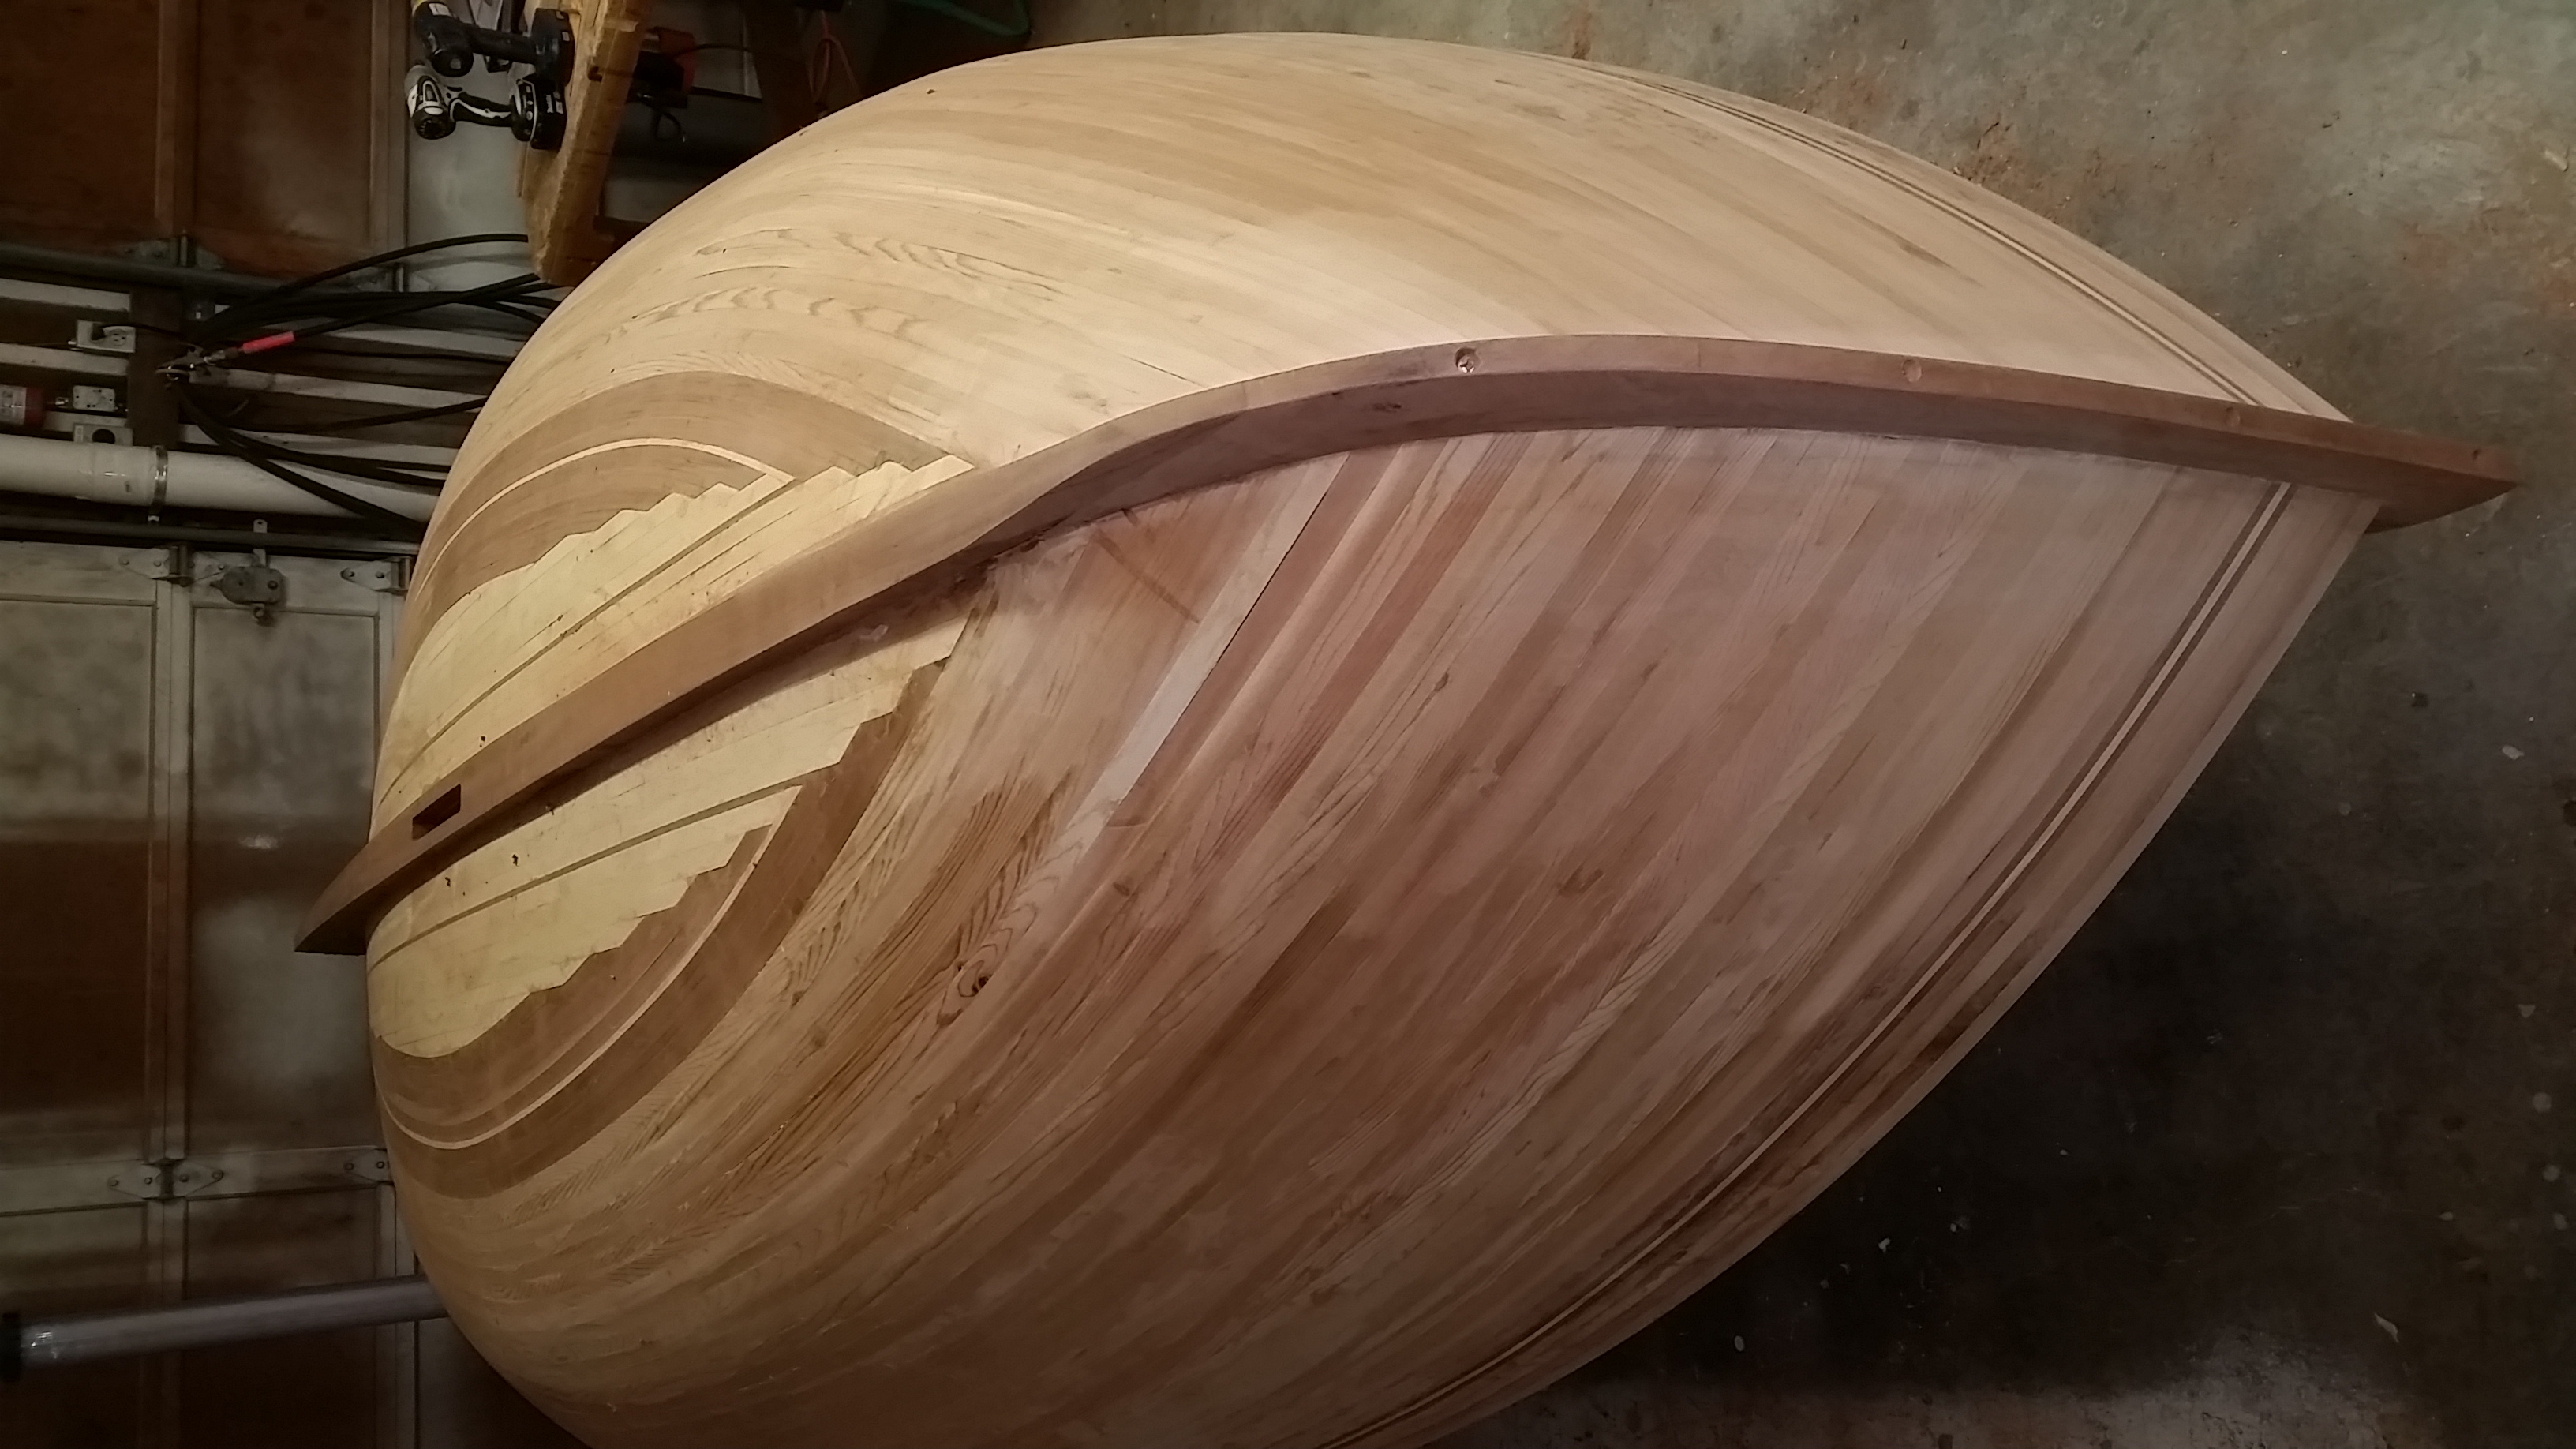
Installed the brass keel band, entire length from stem to stern. Flipped her right side up so I can do some finish work and start rigging.
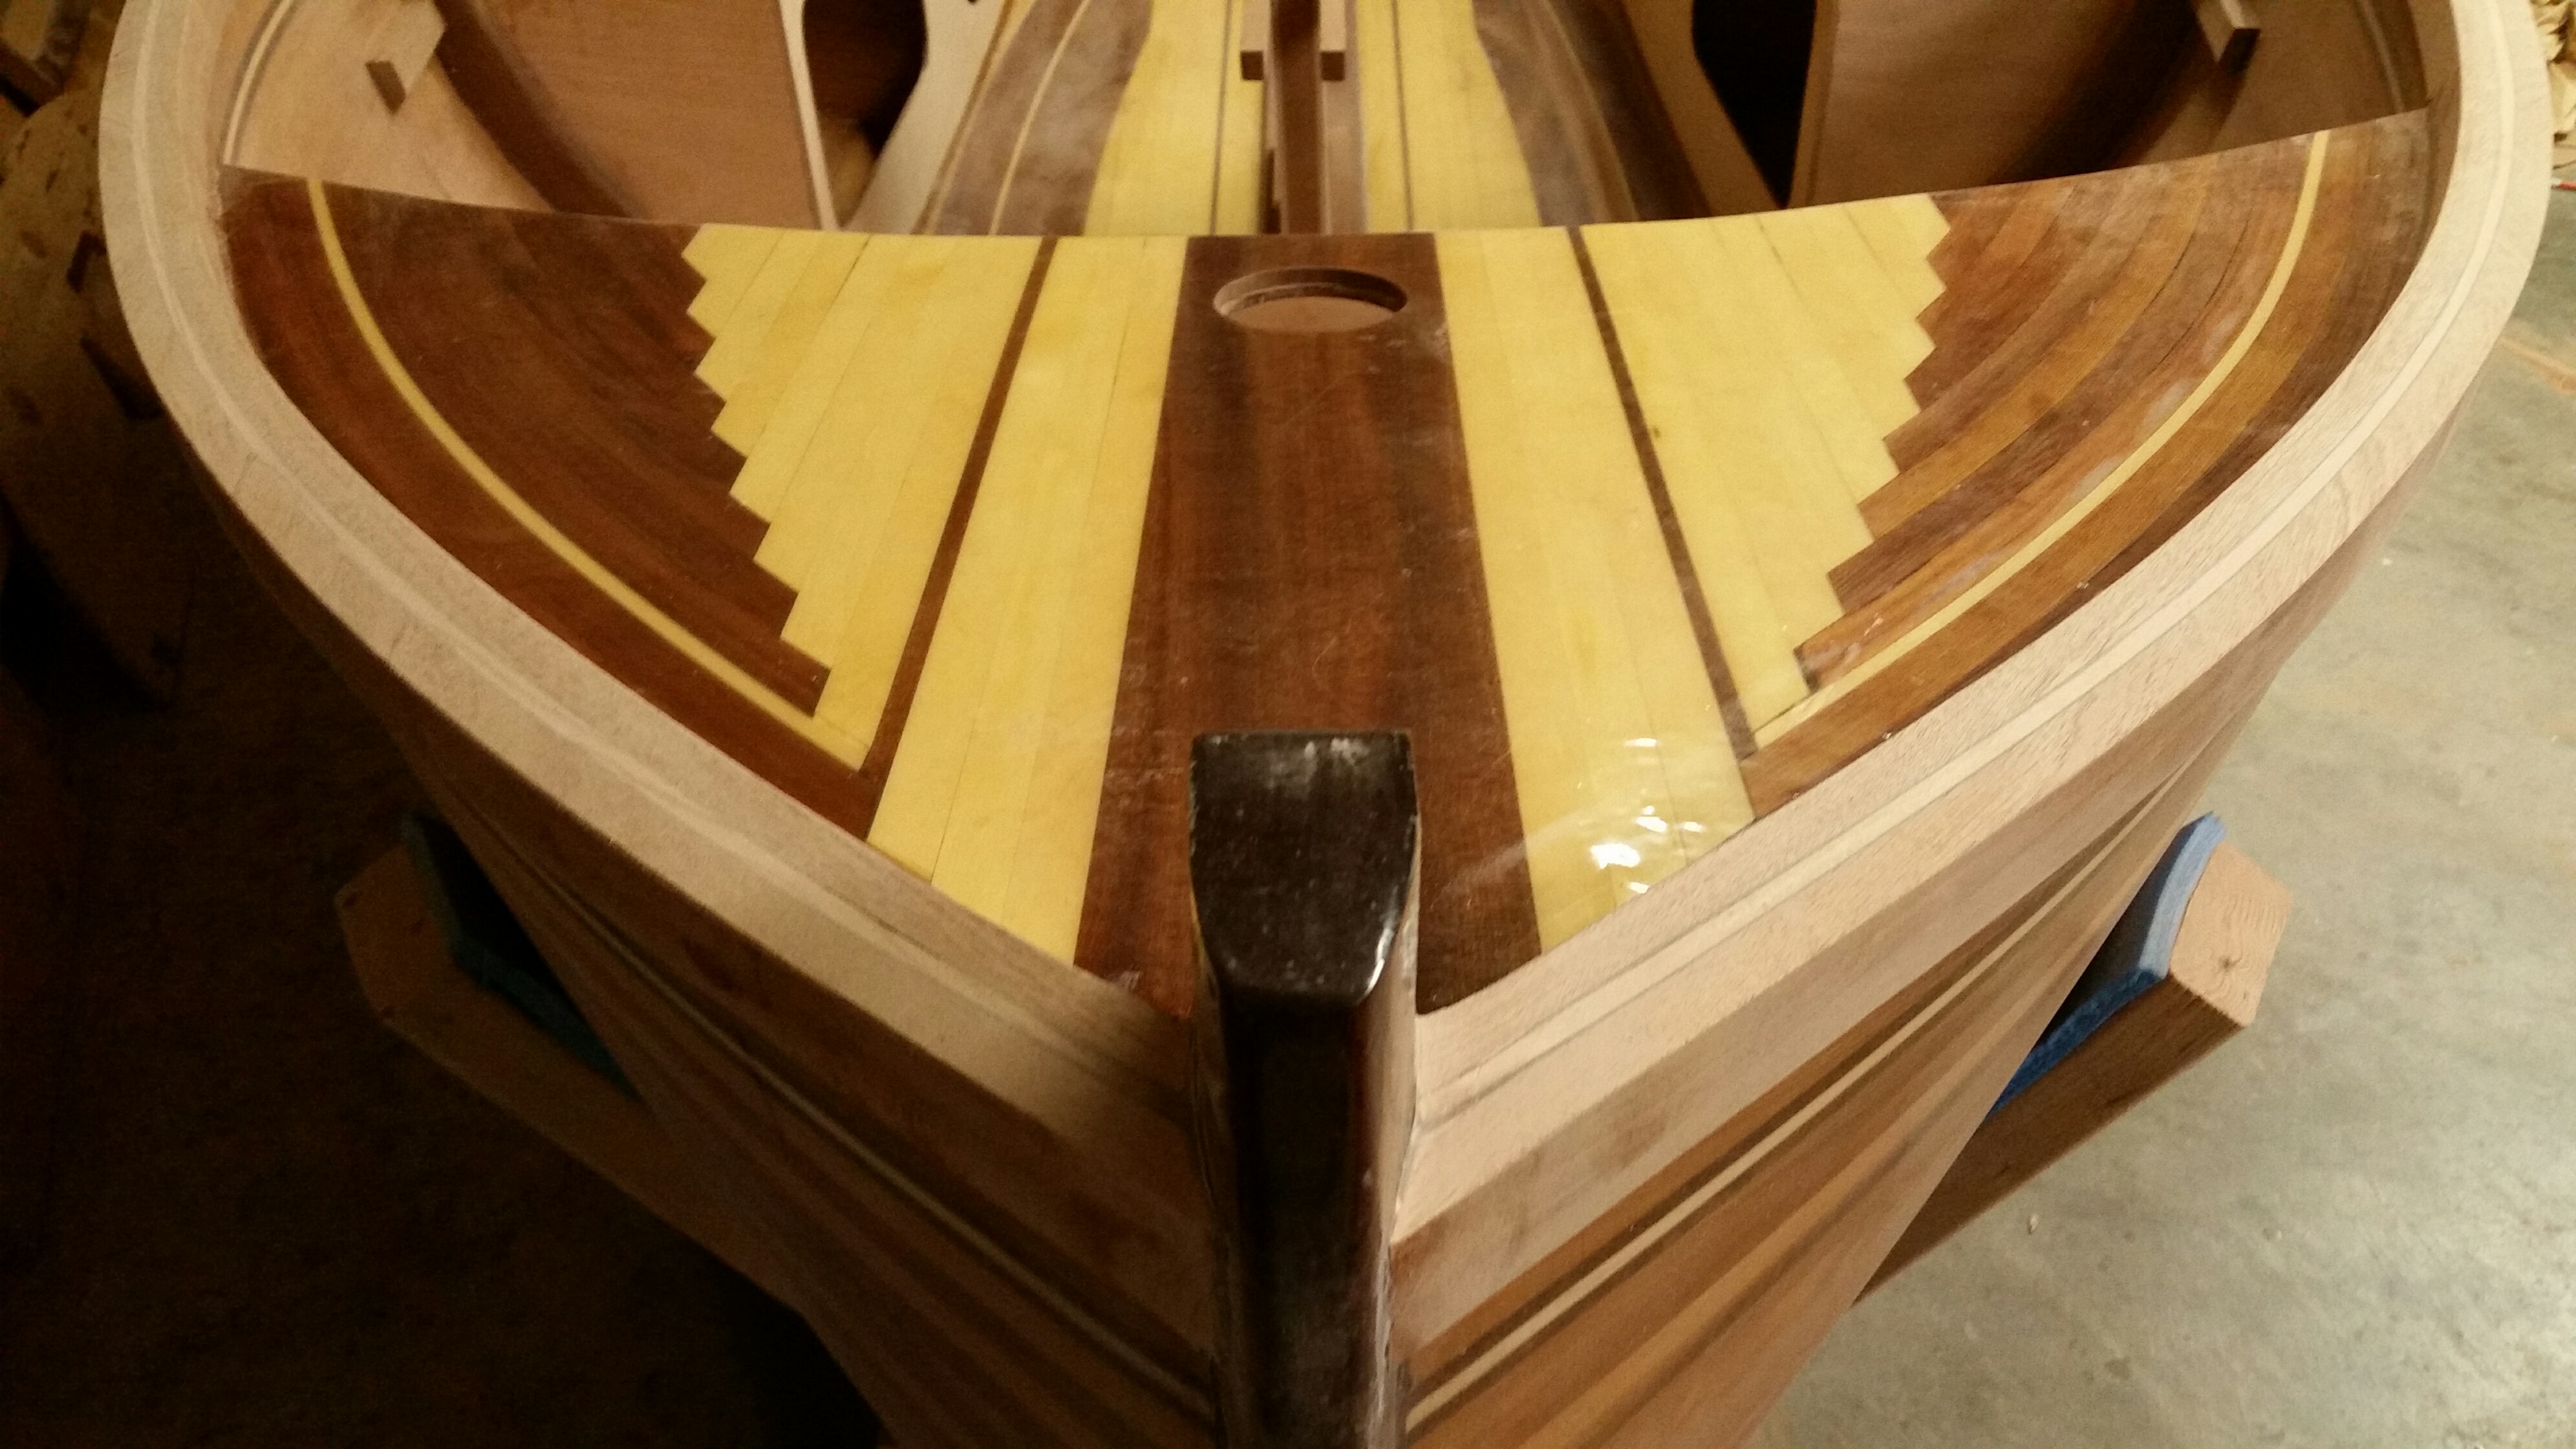
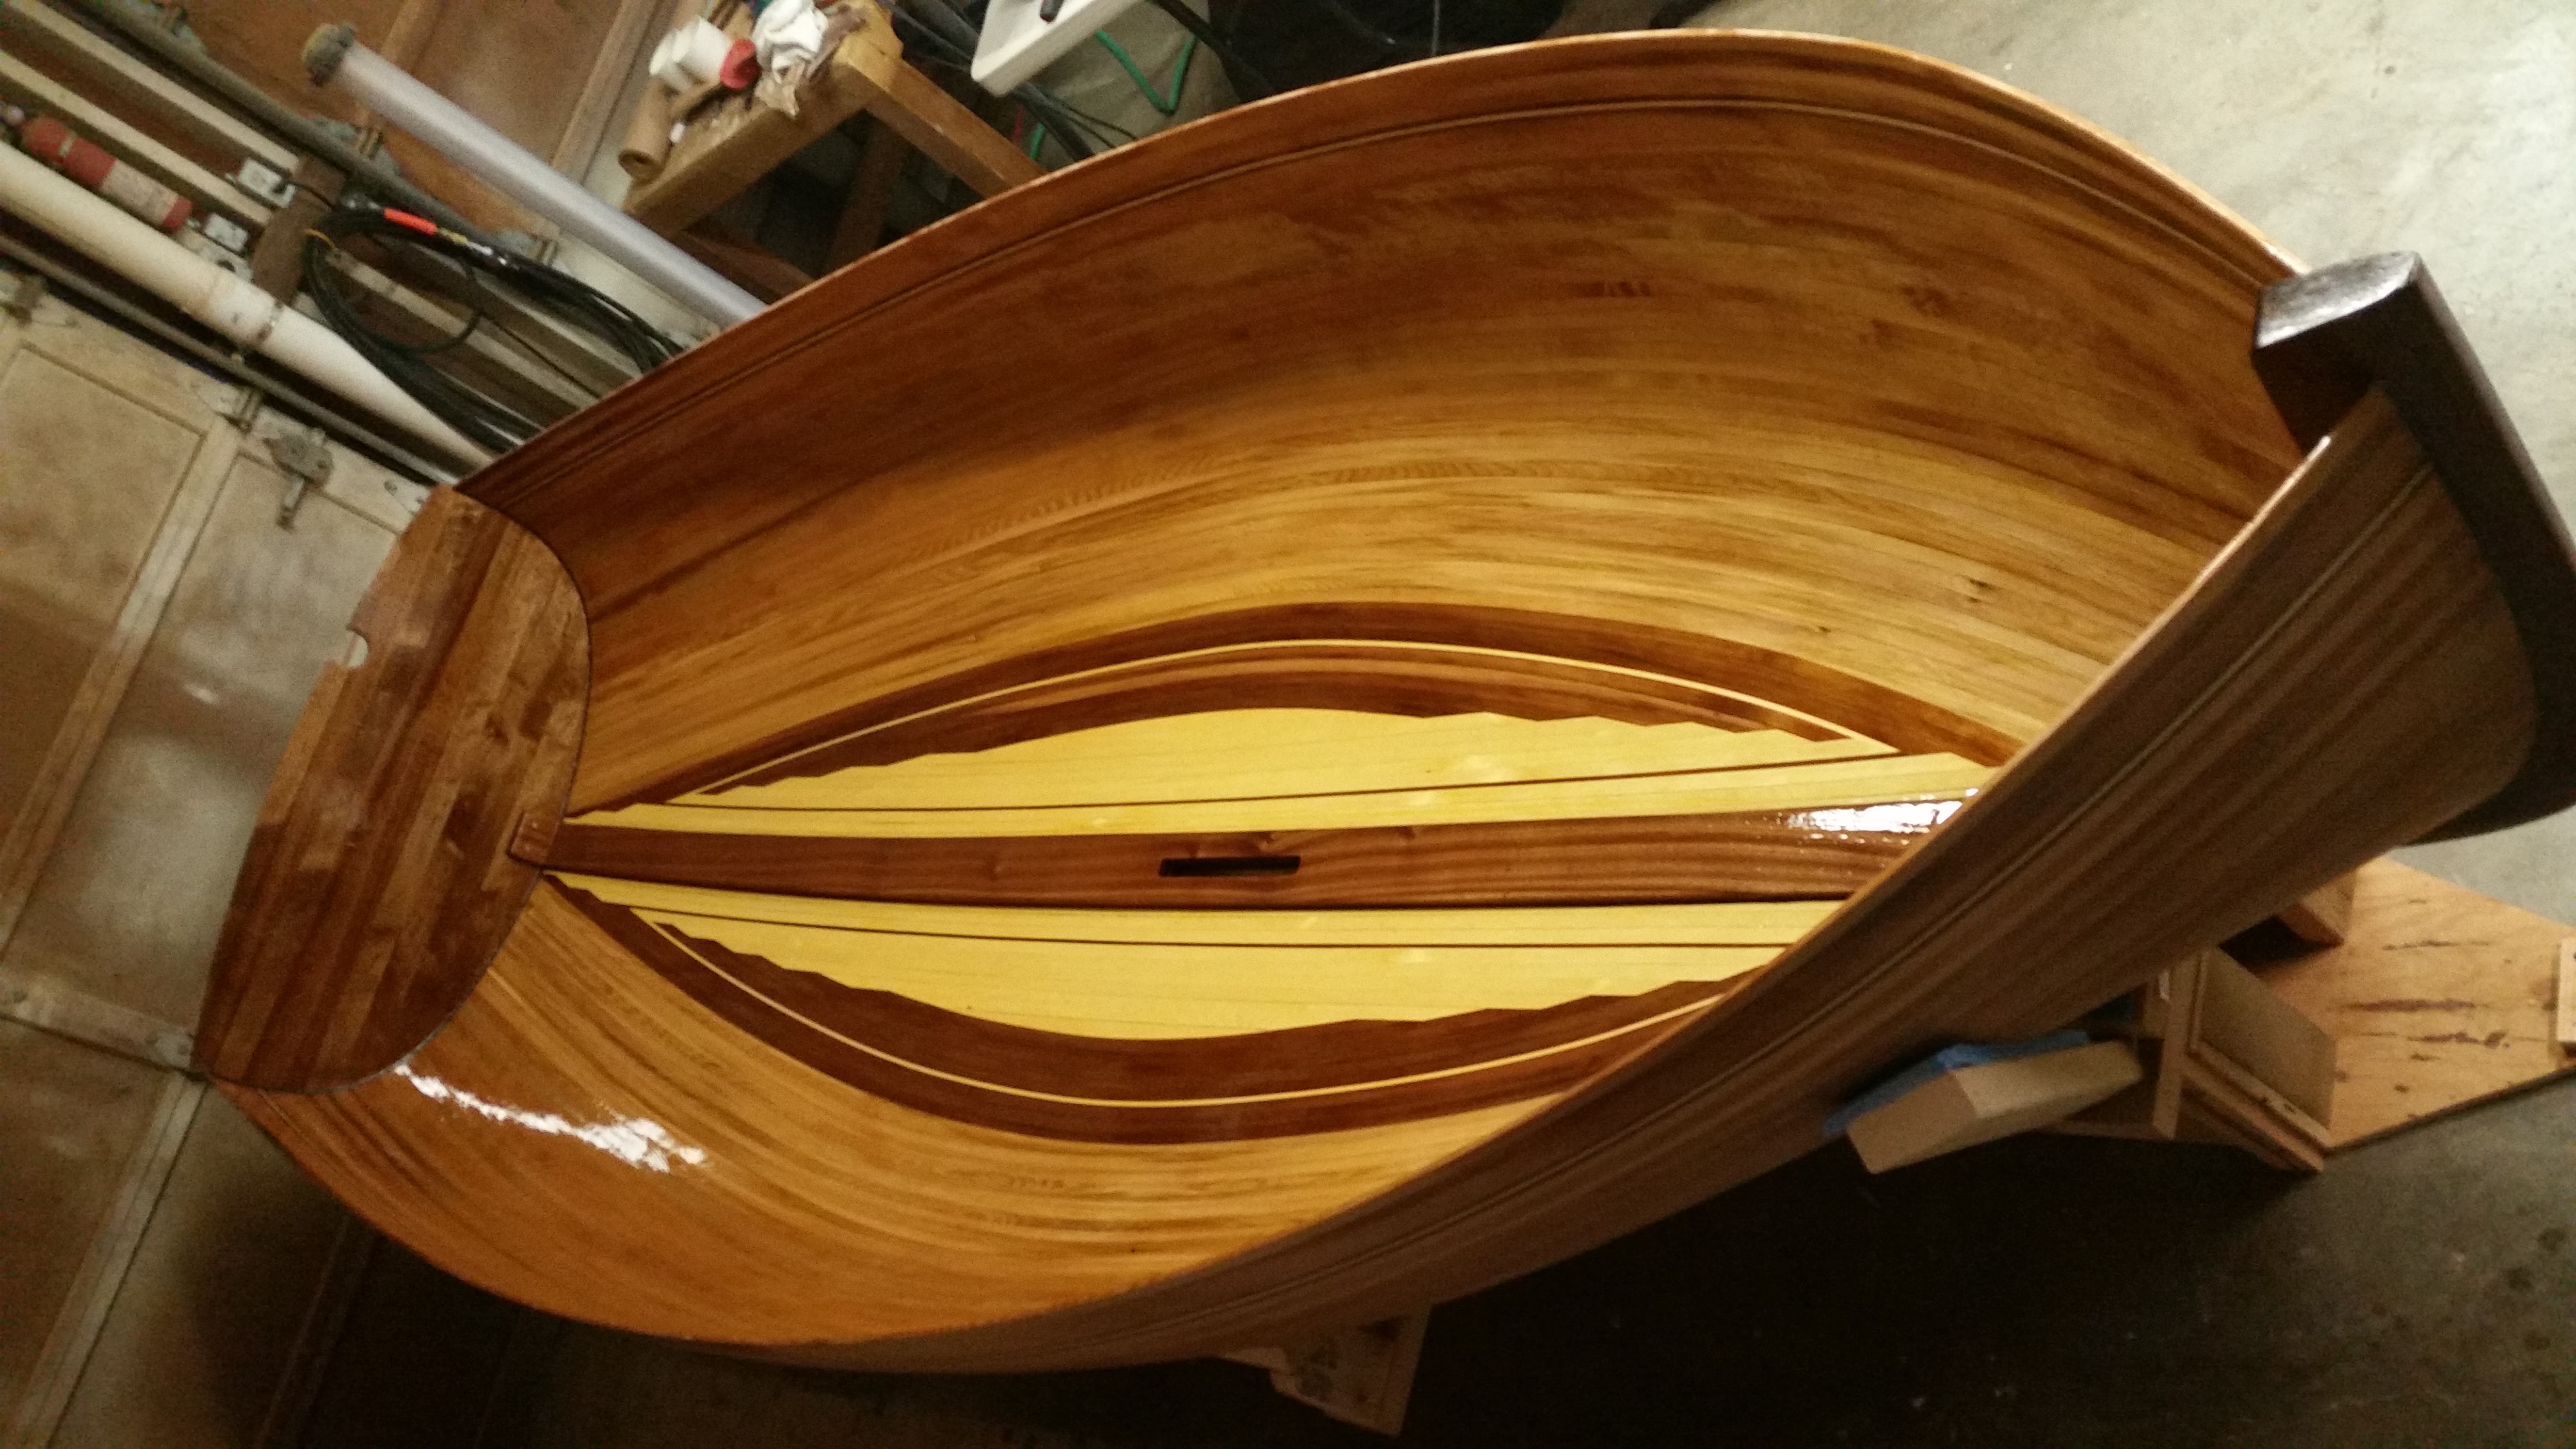
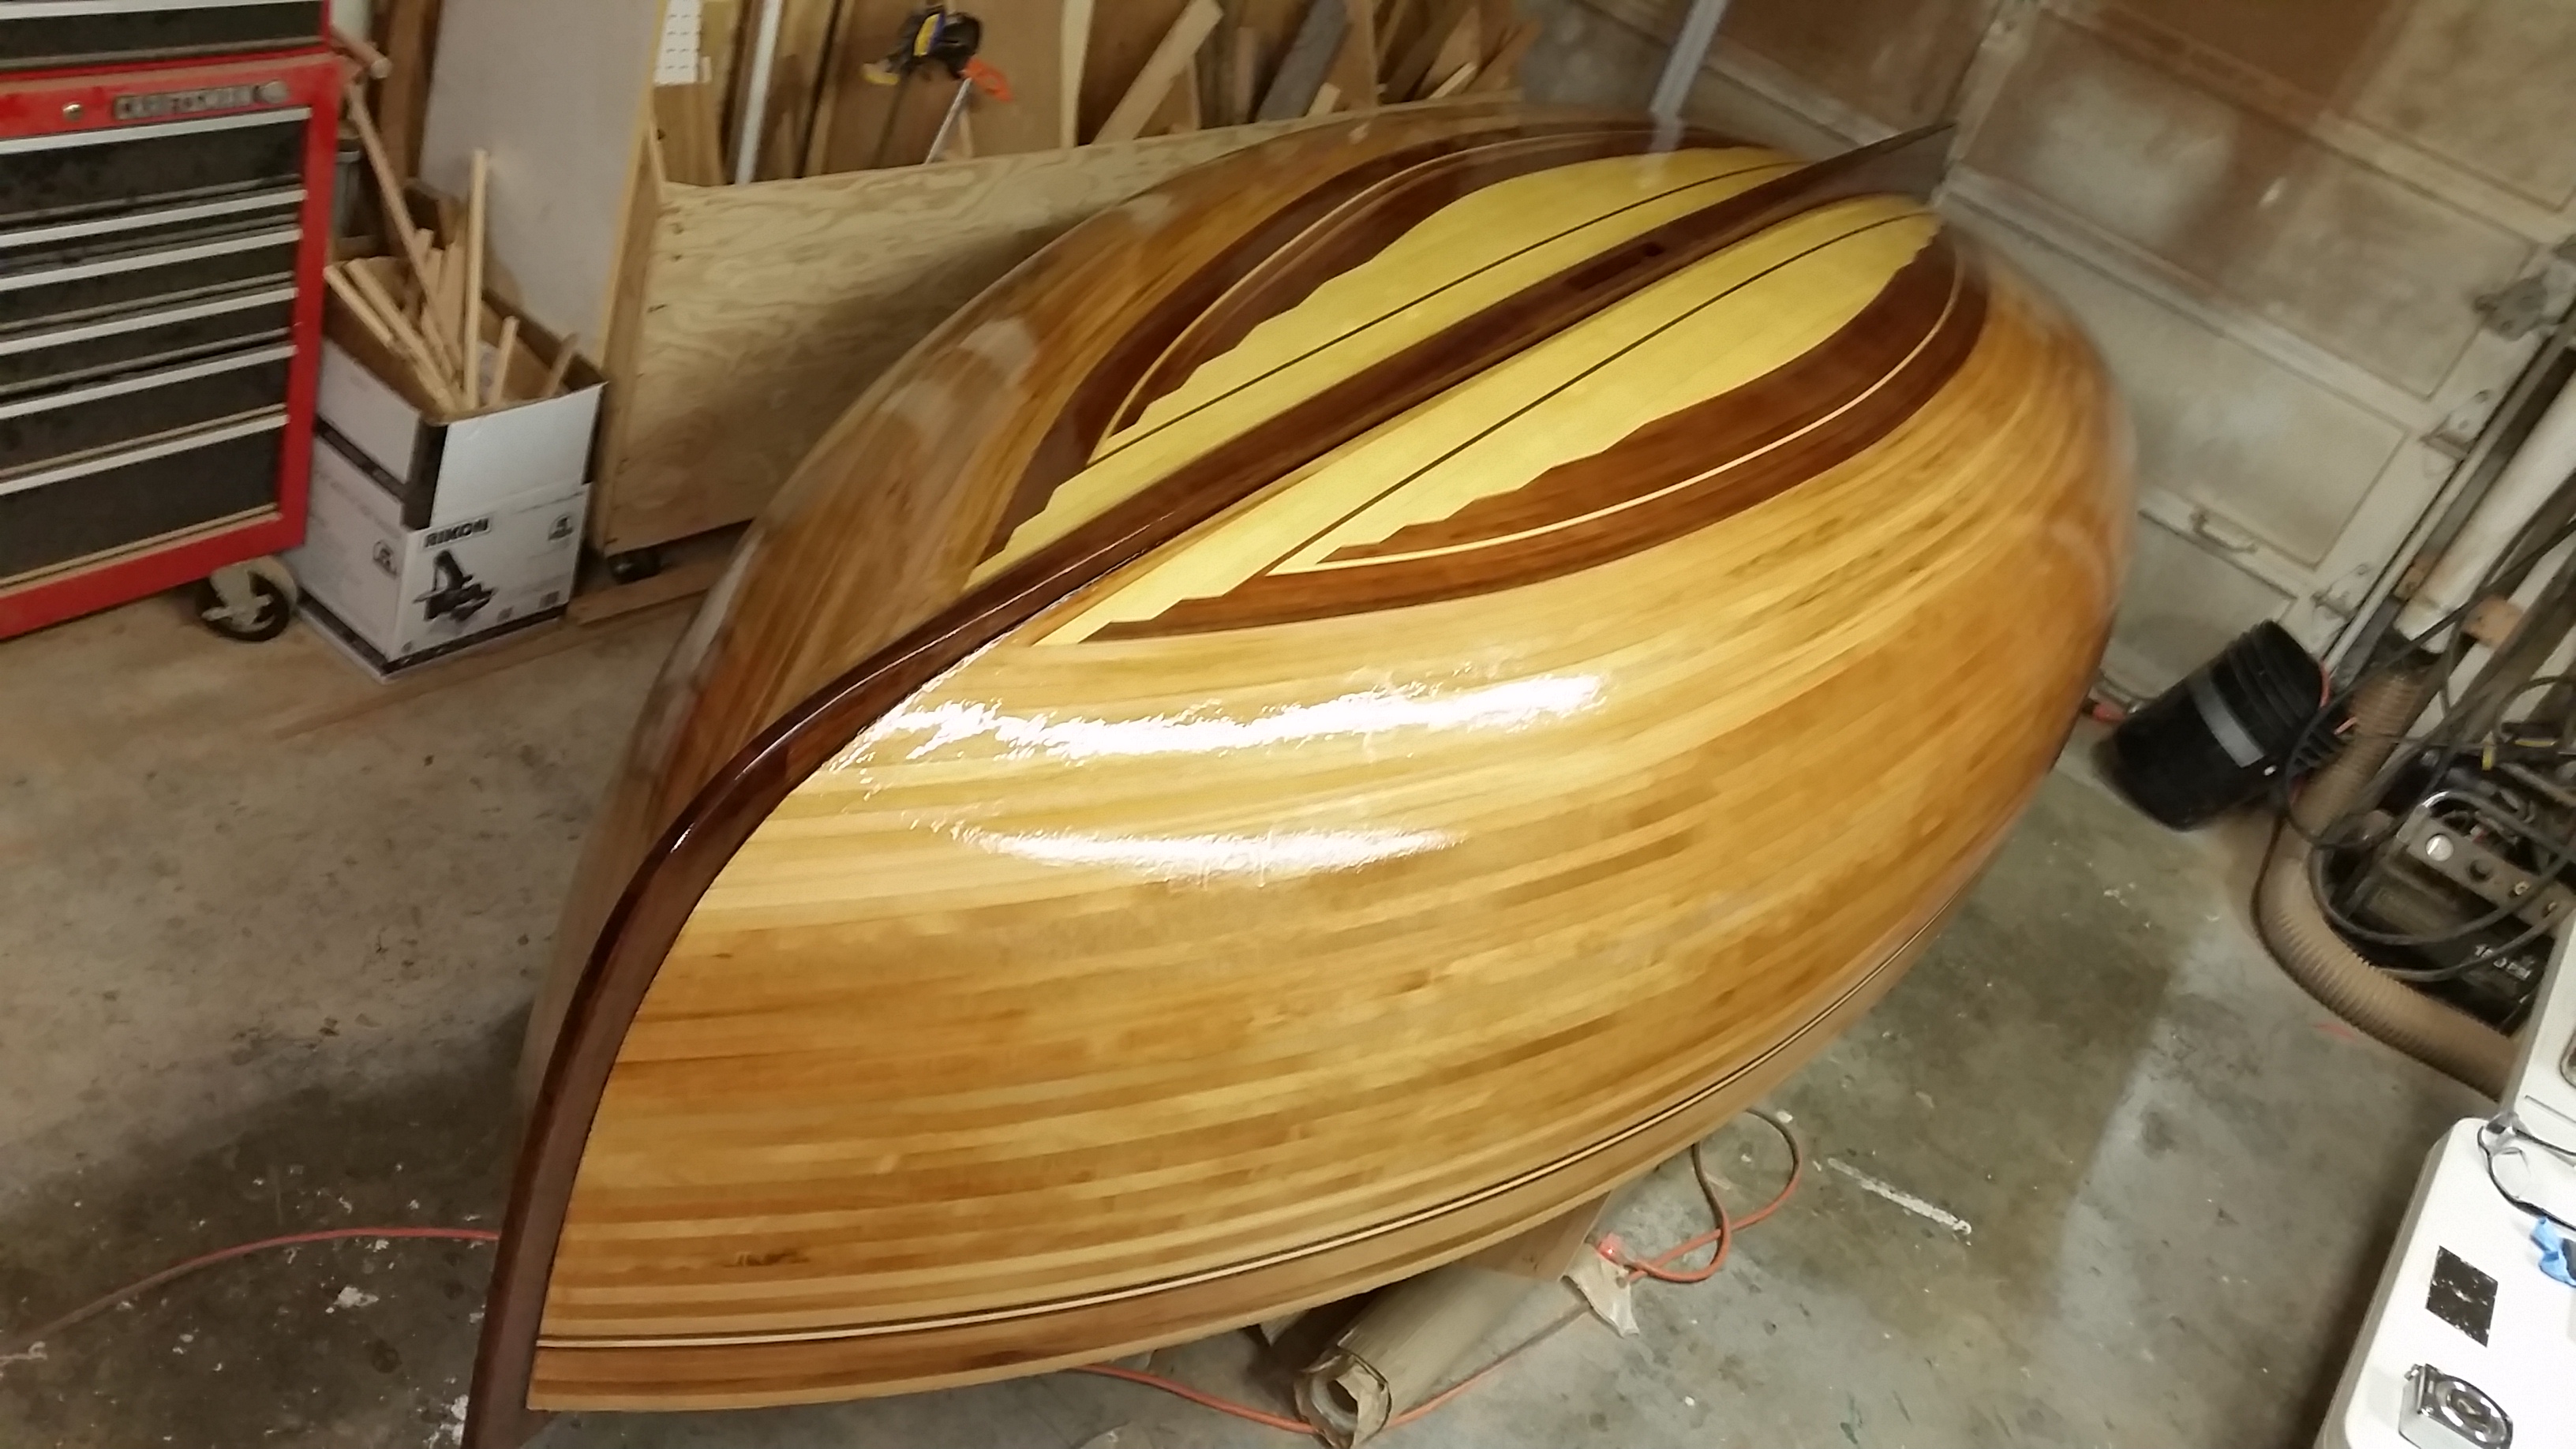
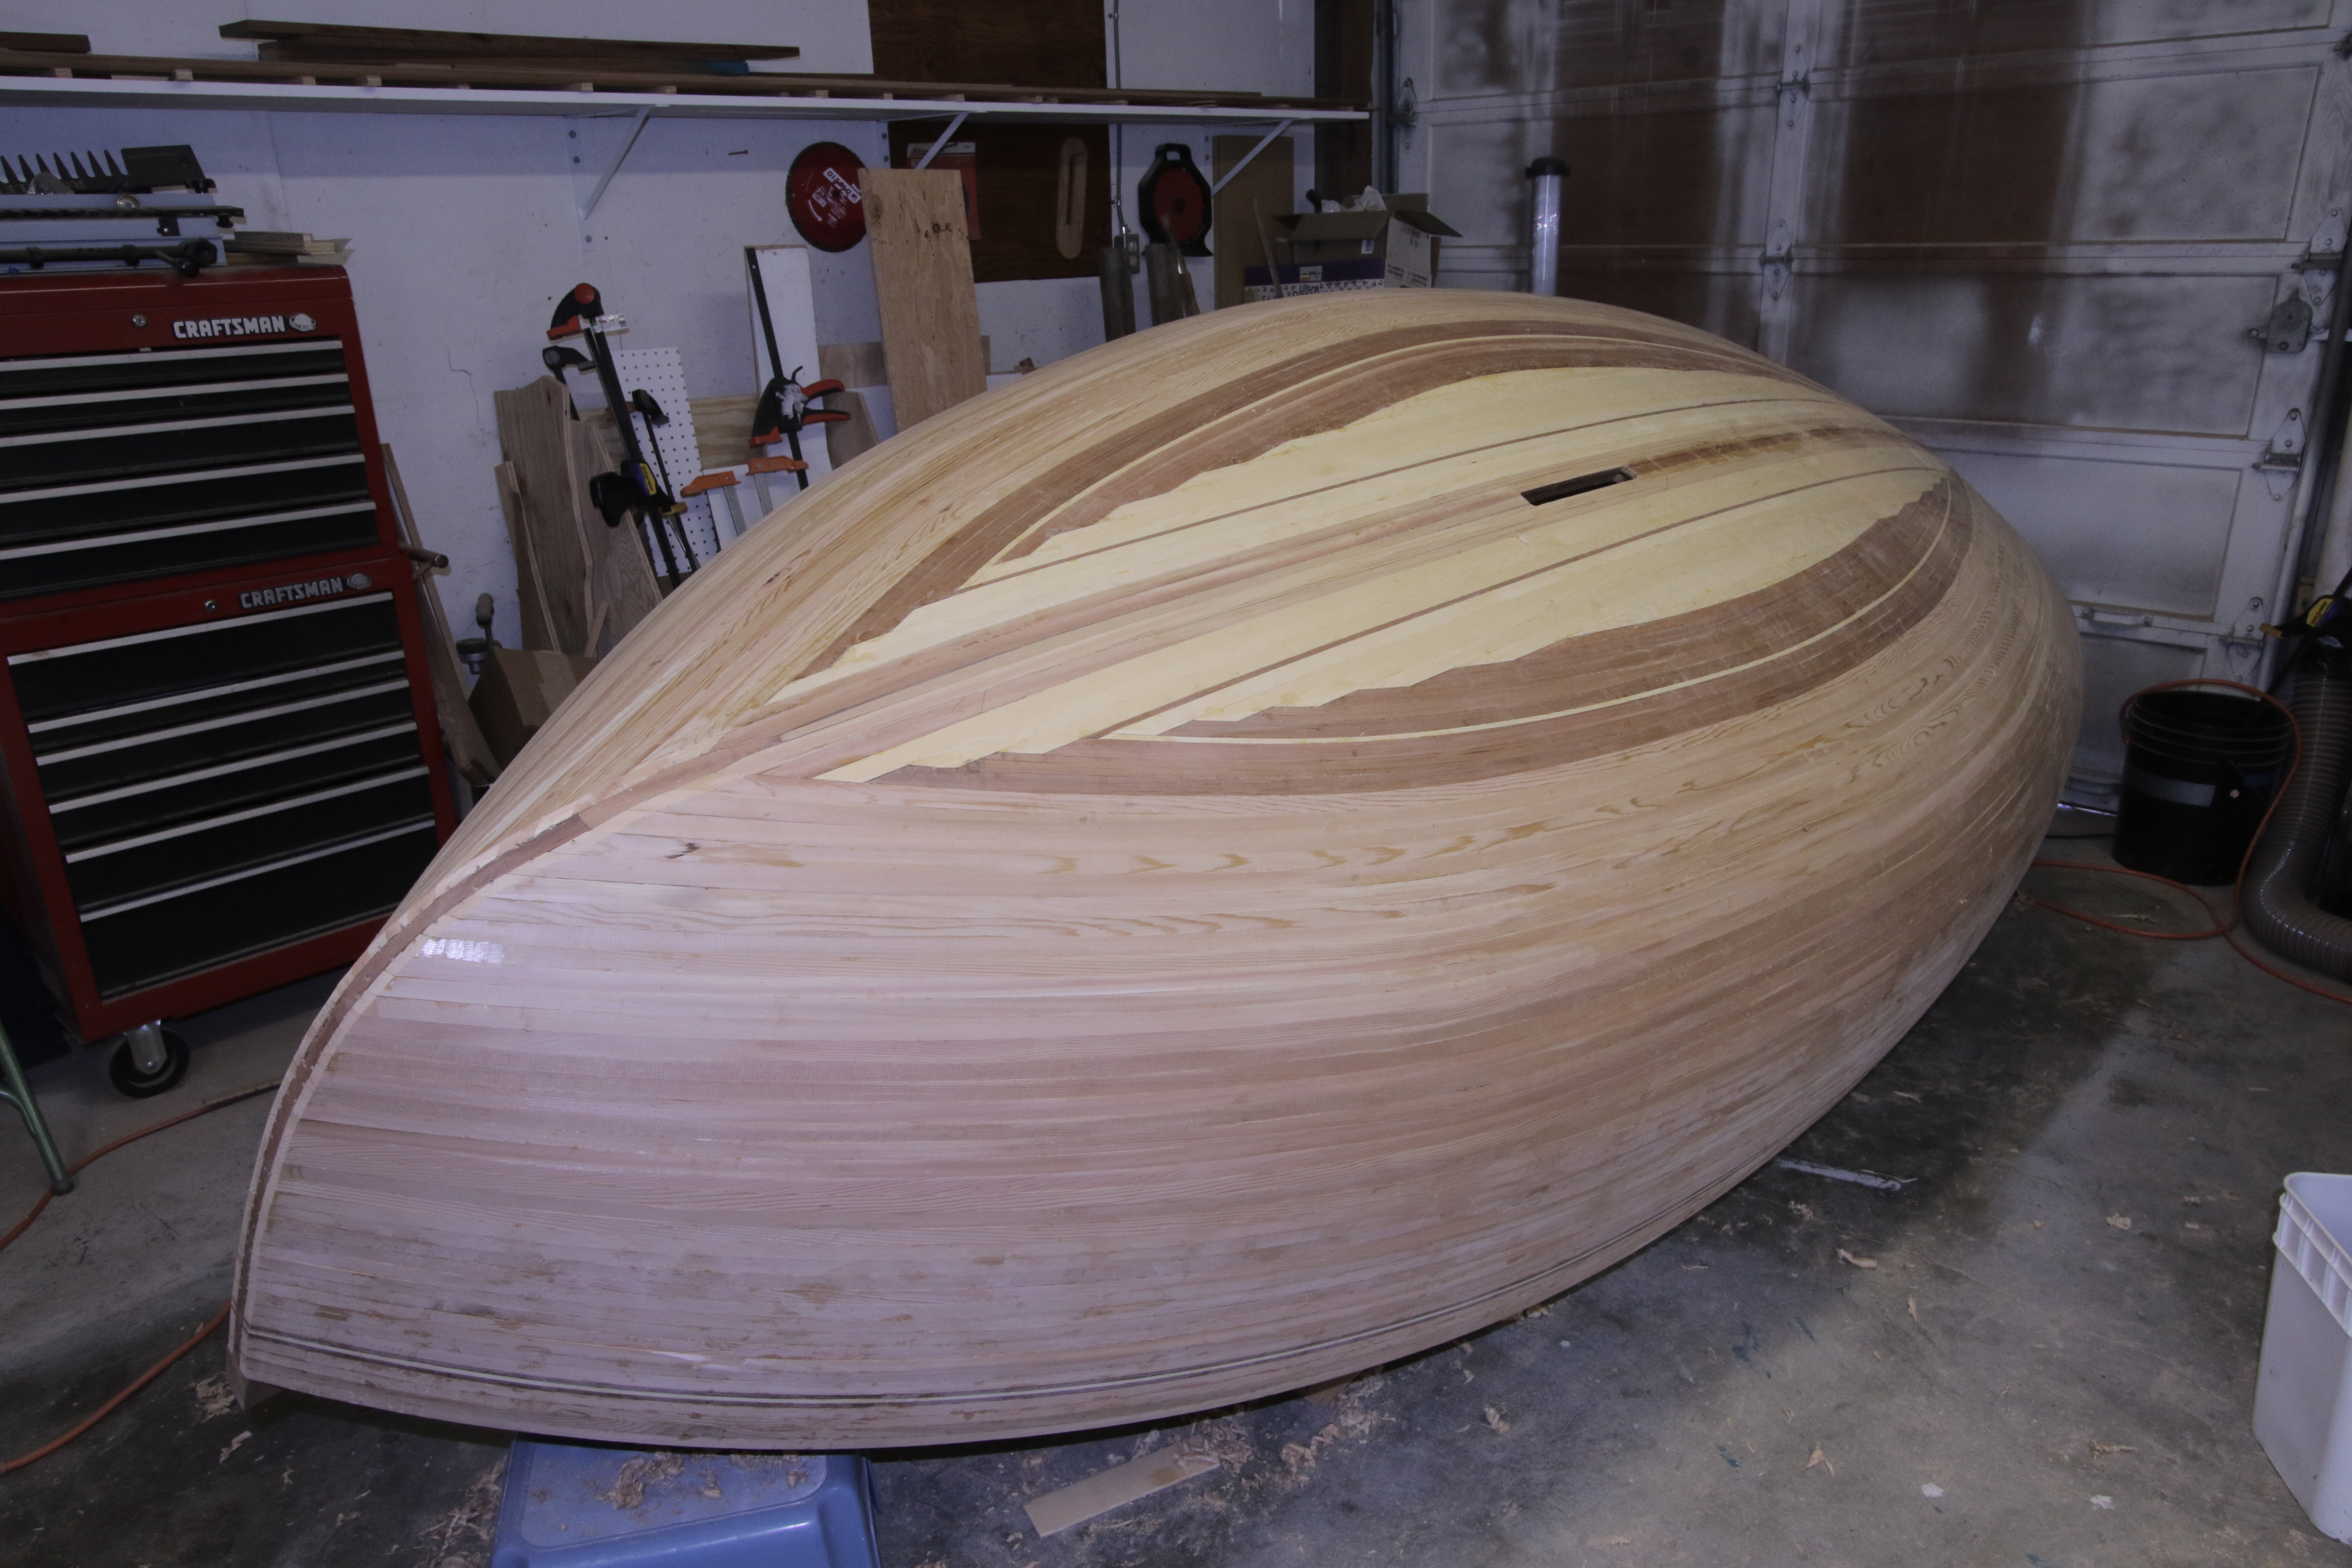
First time in the sunshine – gotta like that varnish! 🙂 I like how the maple pin stripe on hull ties right into the Yellow Alaska pin stripe on the fore-deck, from this angle.
3/6/2018
Have finished epoxy on all the misc rudder, case, dagger board, etc.. and sanded ready for varnish. Taking the corn-cob approach to epoxy/varnish on the spars, putting a screw in each end to support. I will fill the holes later – a small price to pay for the ease of finishing. Note the cuts on base of mast where it inserts into step. Used the Japanese hand saw for that.

3/3/2018
Finished shaping and sanding the mast today, except mounting the sheave. Got first coat of epoxy on a bunch of misc parts. Pintles and Gudgeons arrived from UK today – yay!
3/2/2018
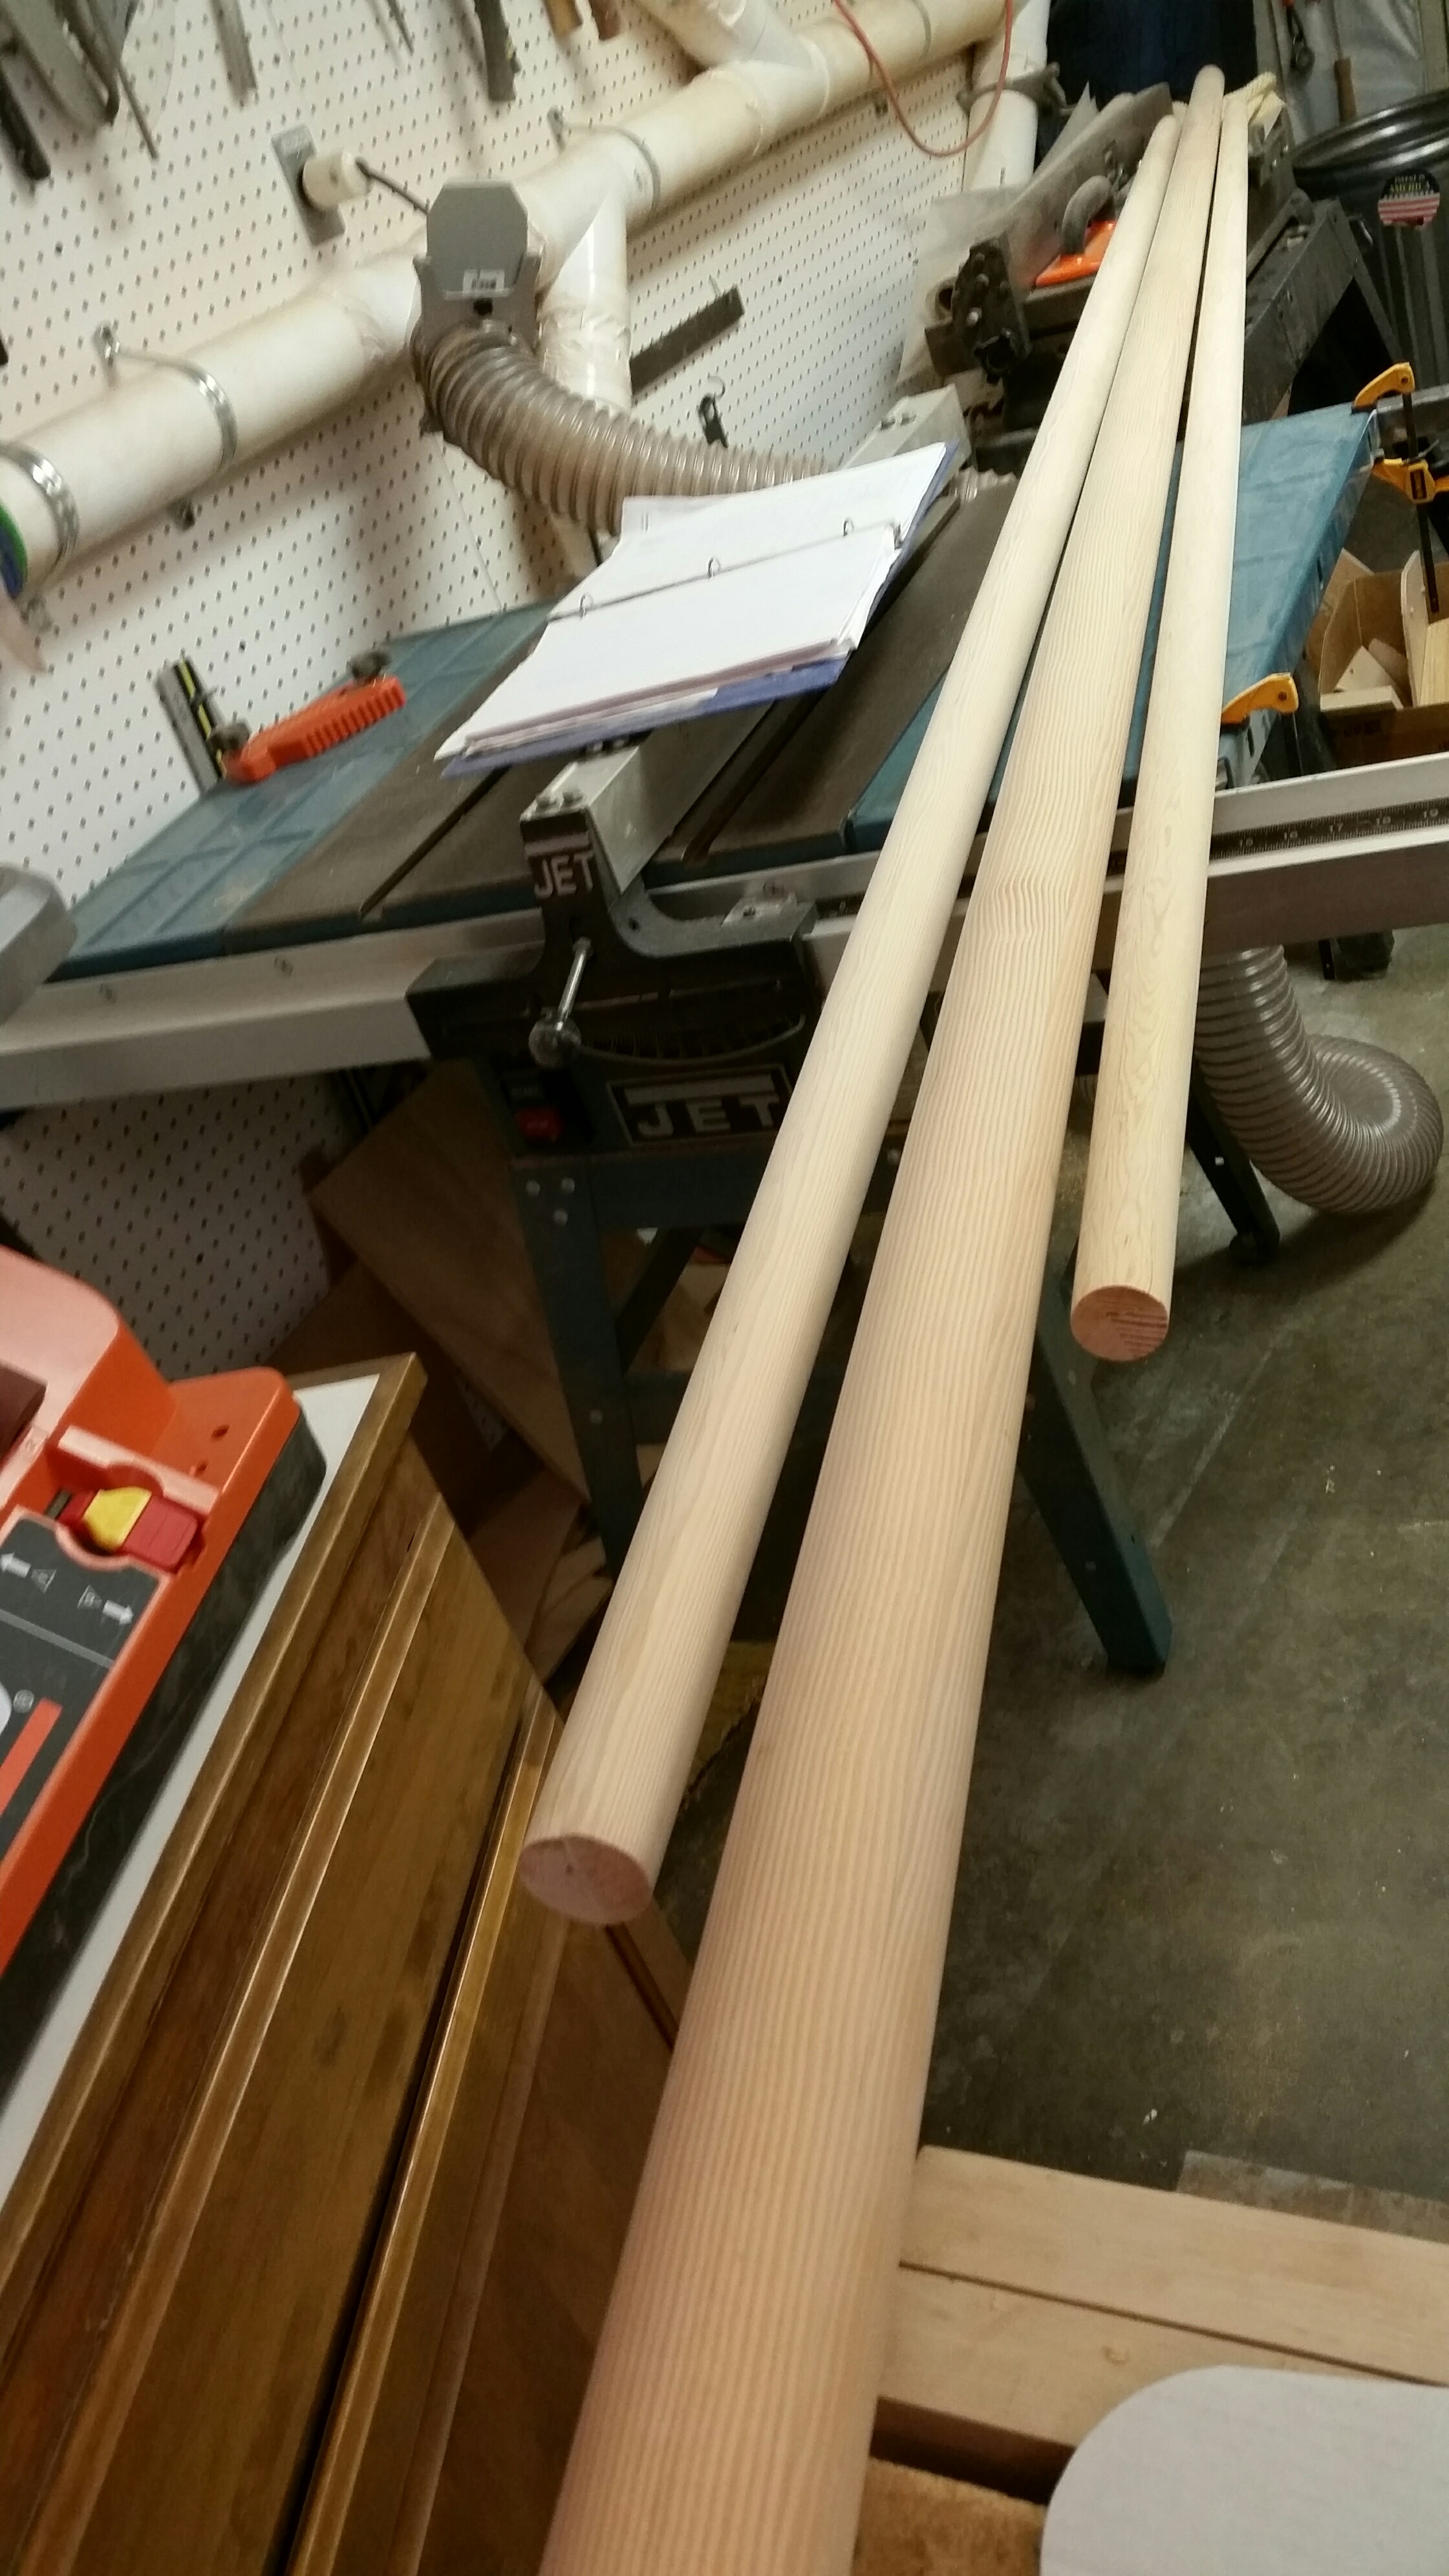
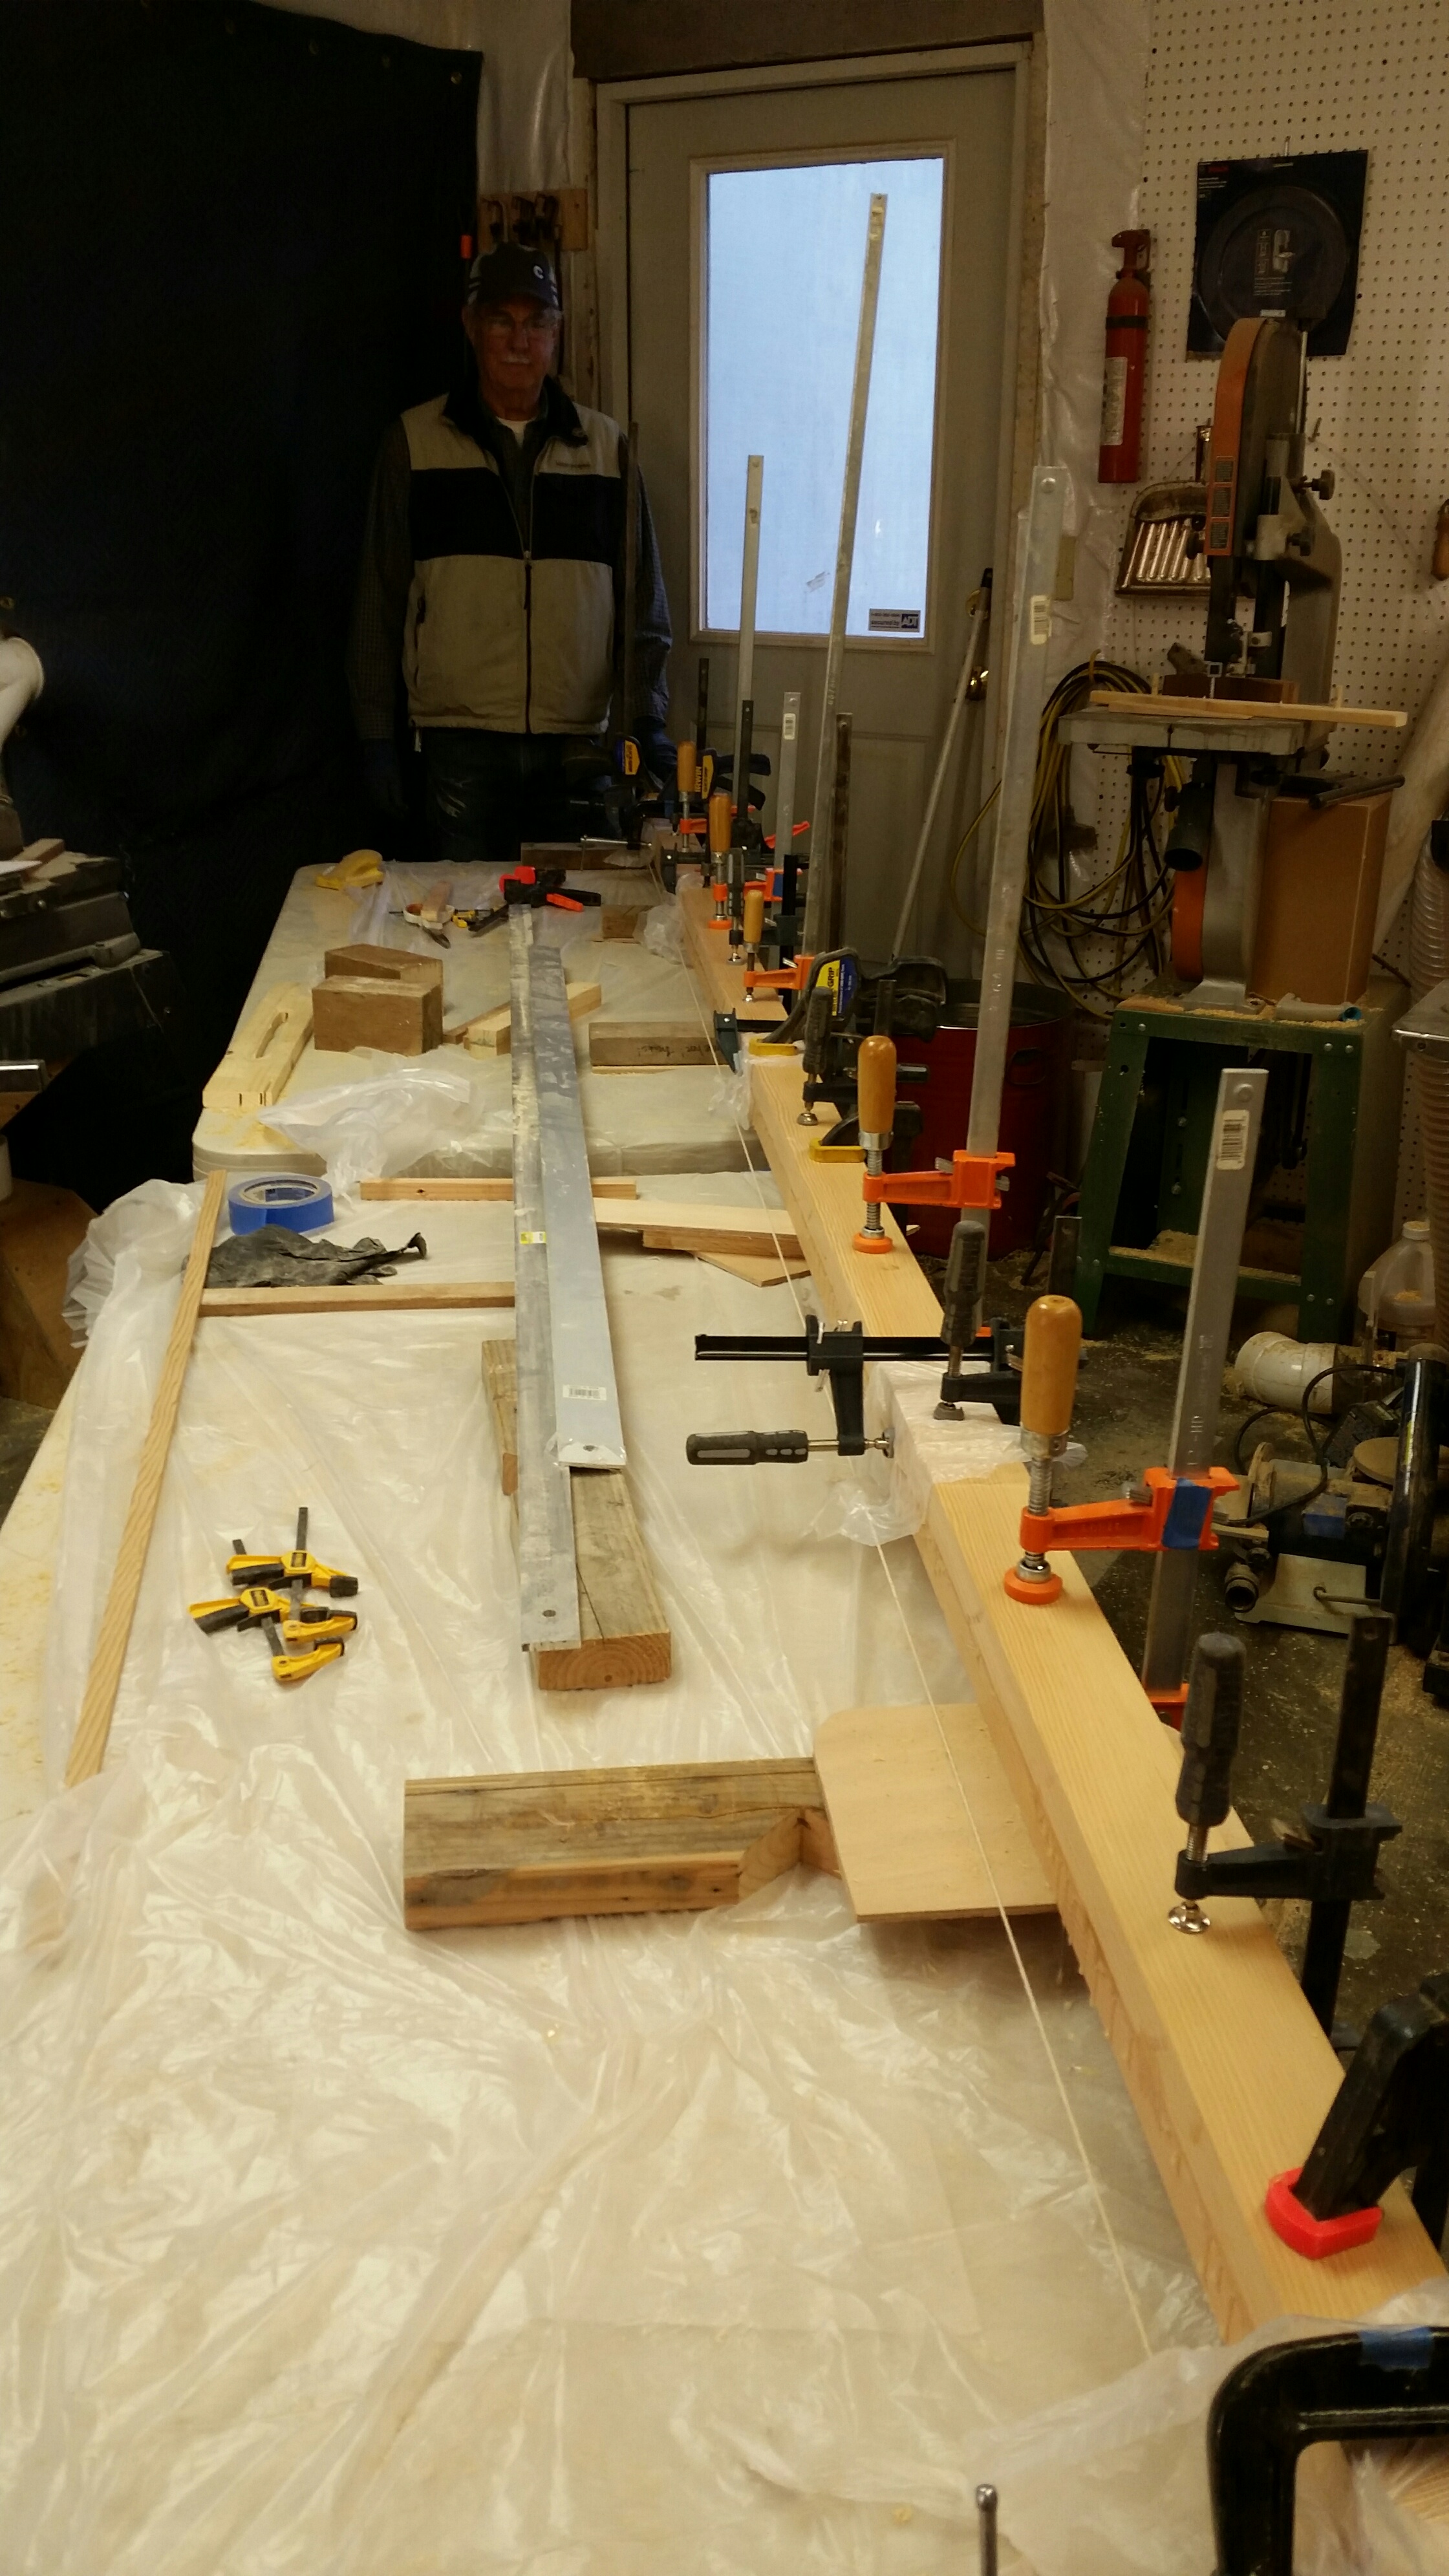
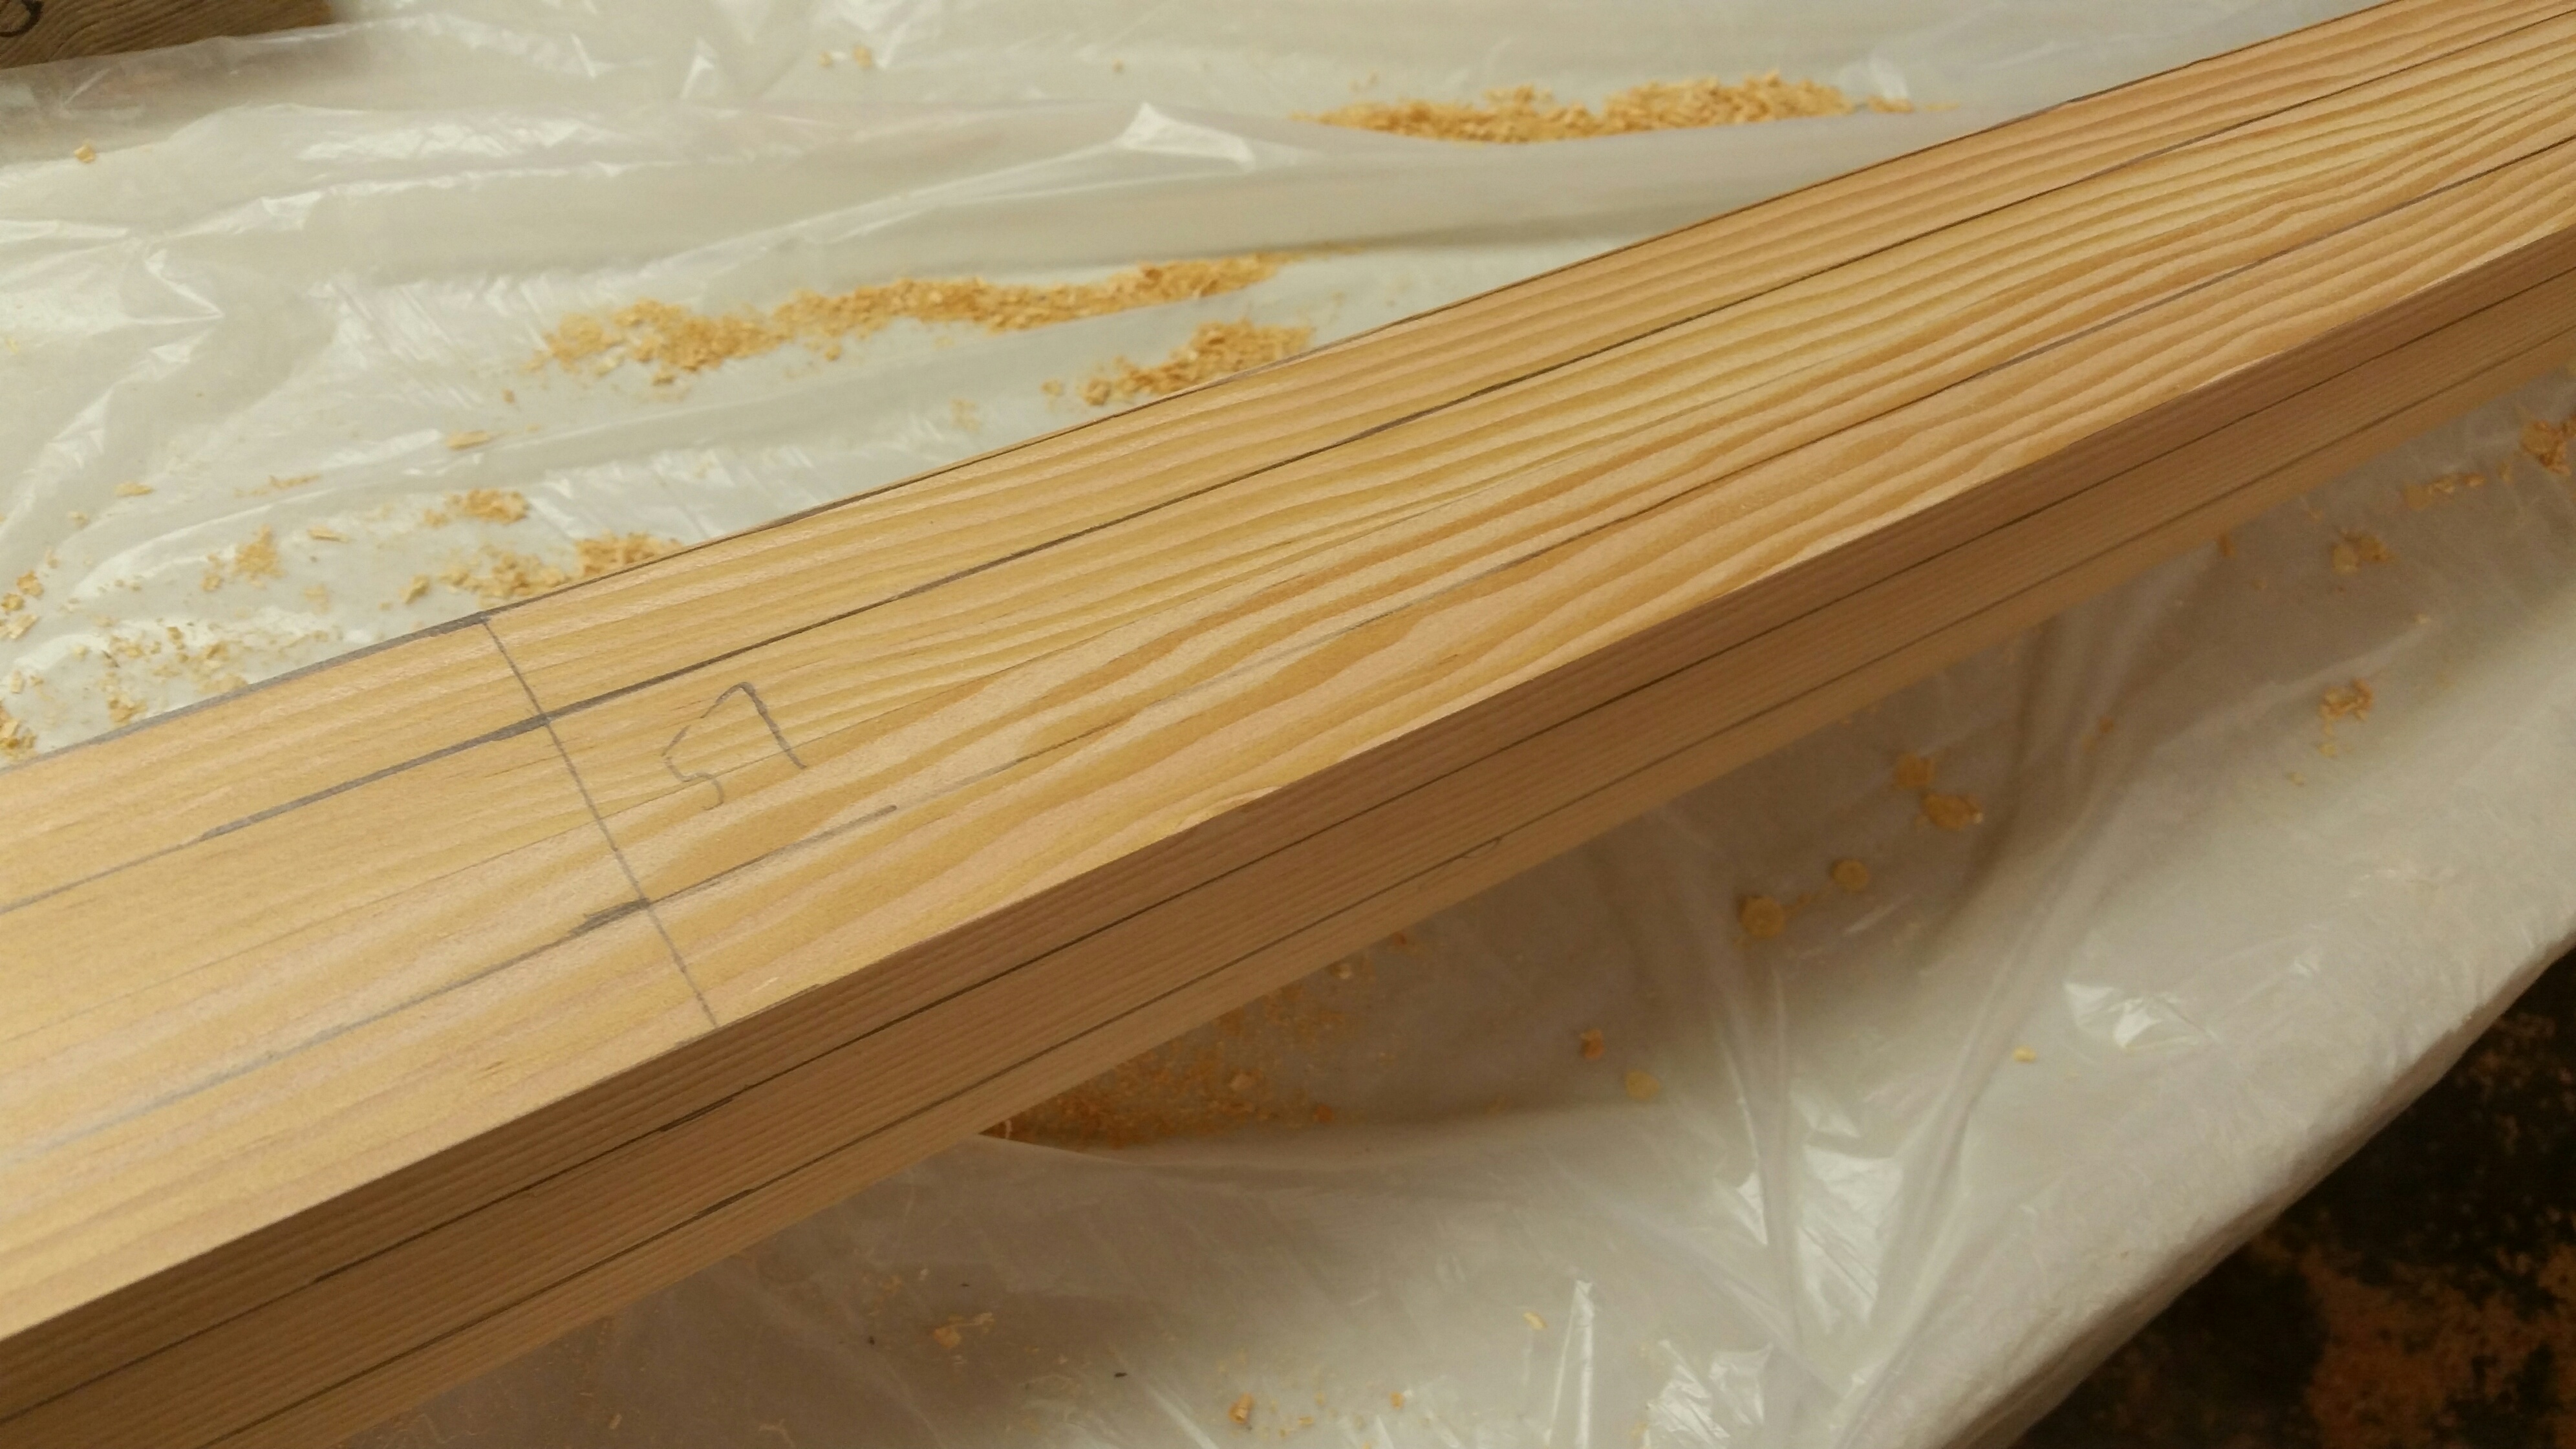
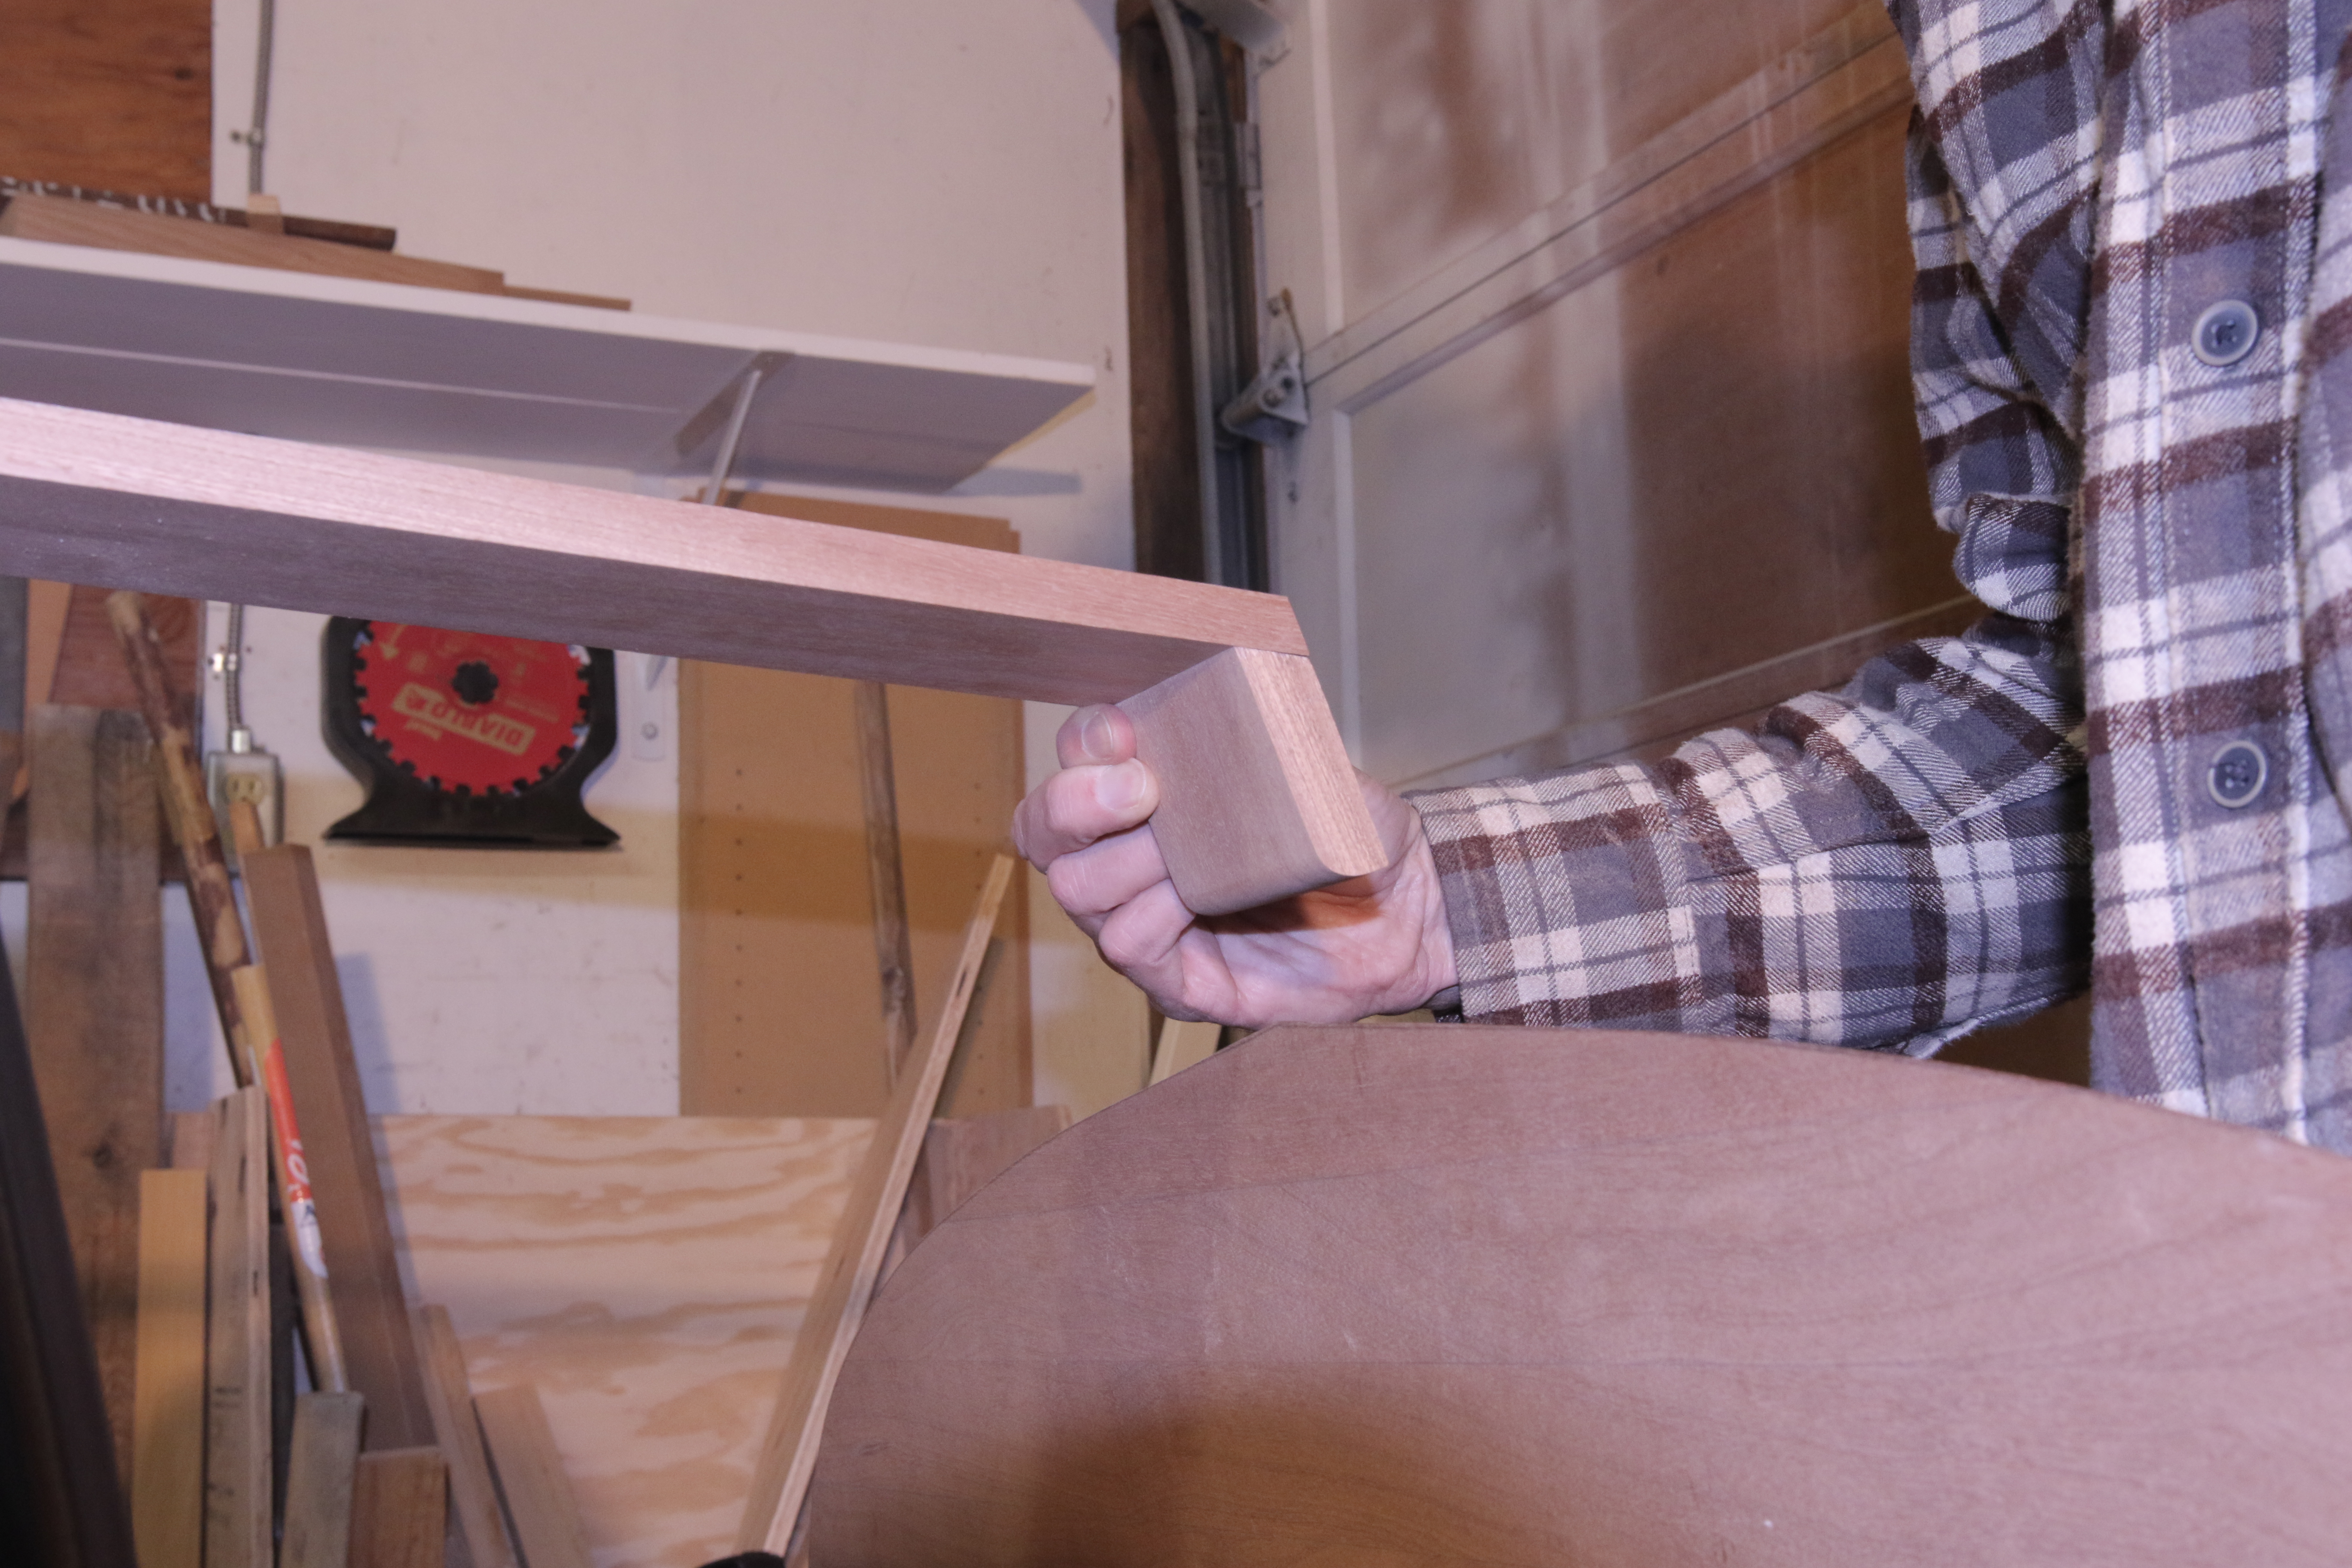
Worked on spars this week. Paul, our good neighbor, helped with the laminating all week. Got the Yard and Boom constructed and finish sanded. The mast was the big one. So far got it laminated, squared, tapered and then Shana was home for weekend for her bridal shower and did half of the planing to get to 8 sides. So far so good!

2/24/2018
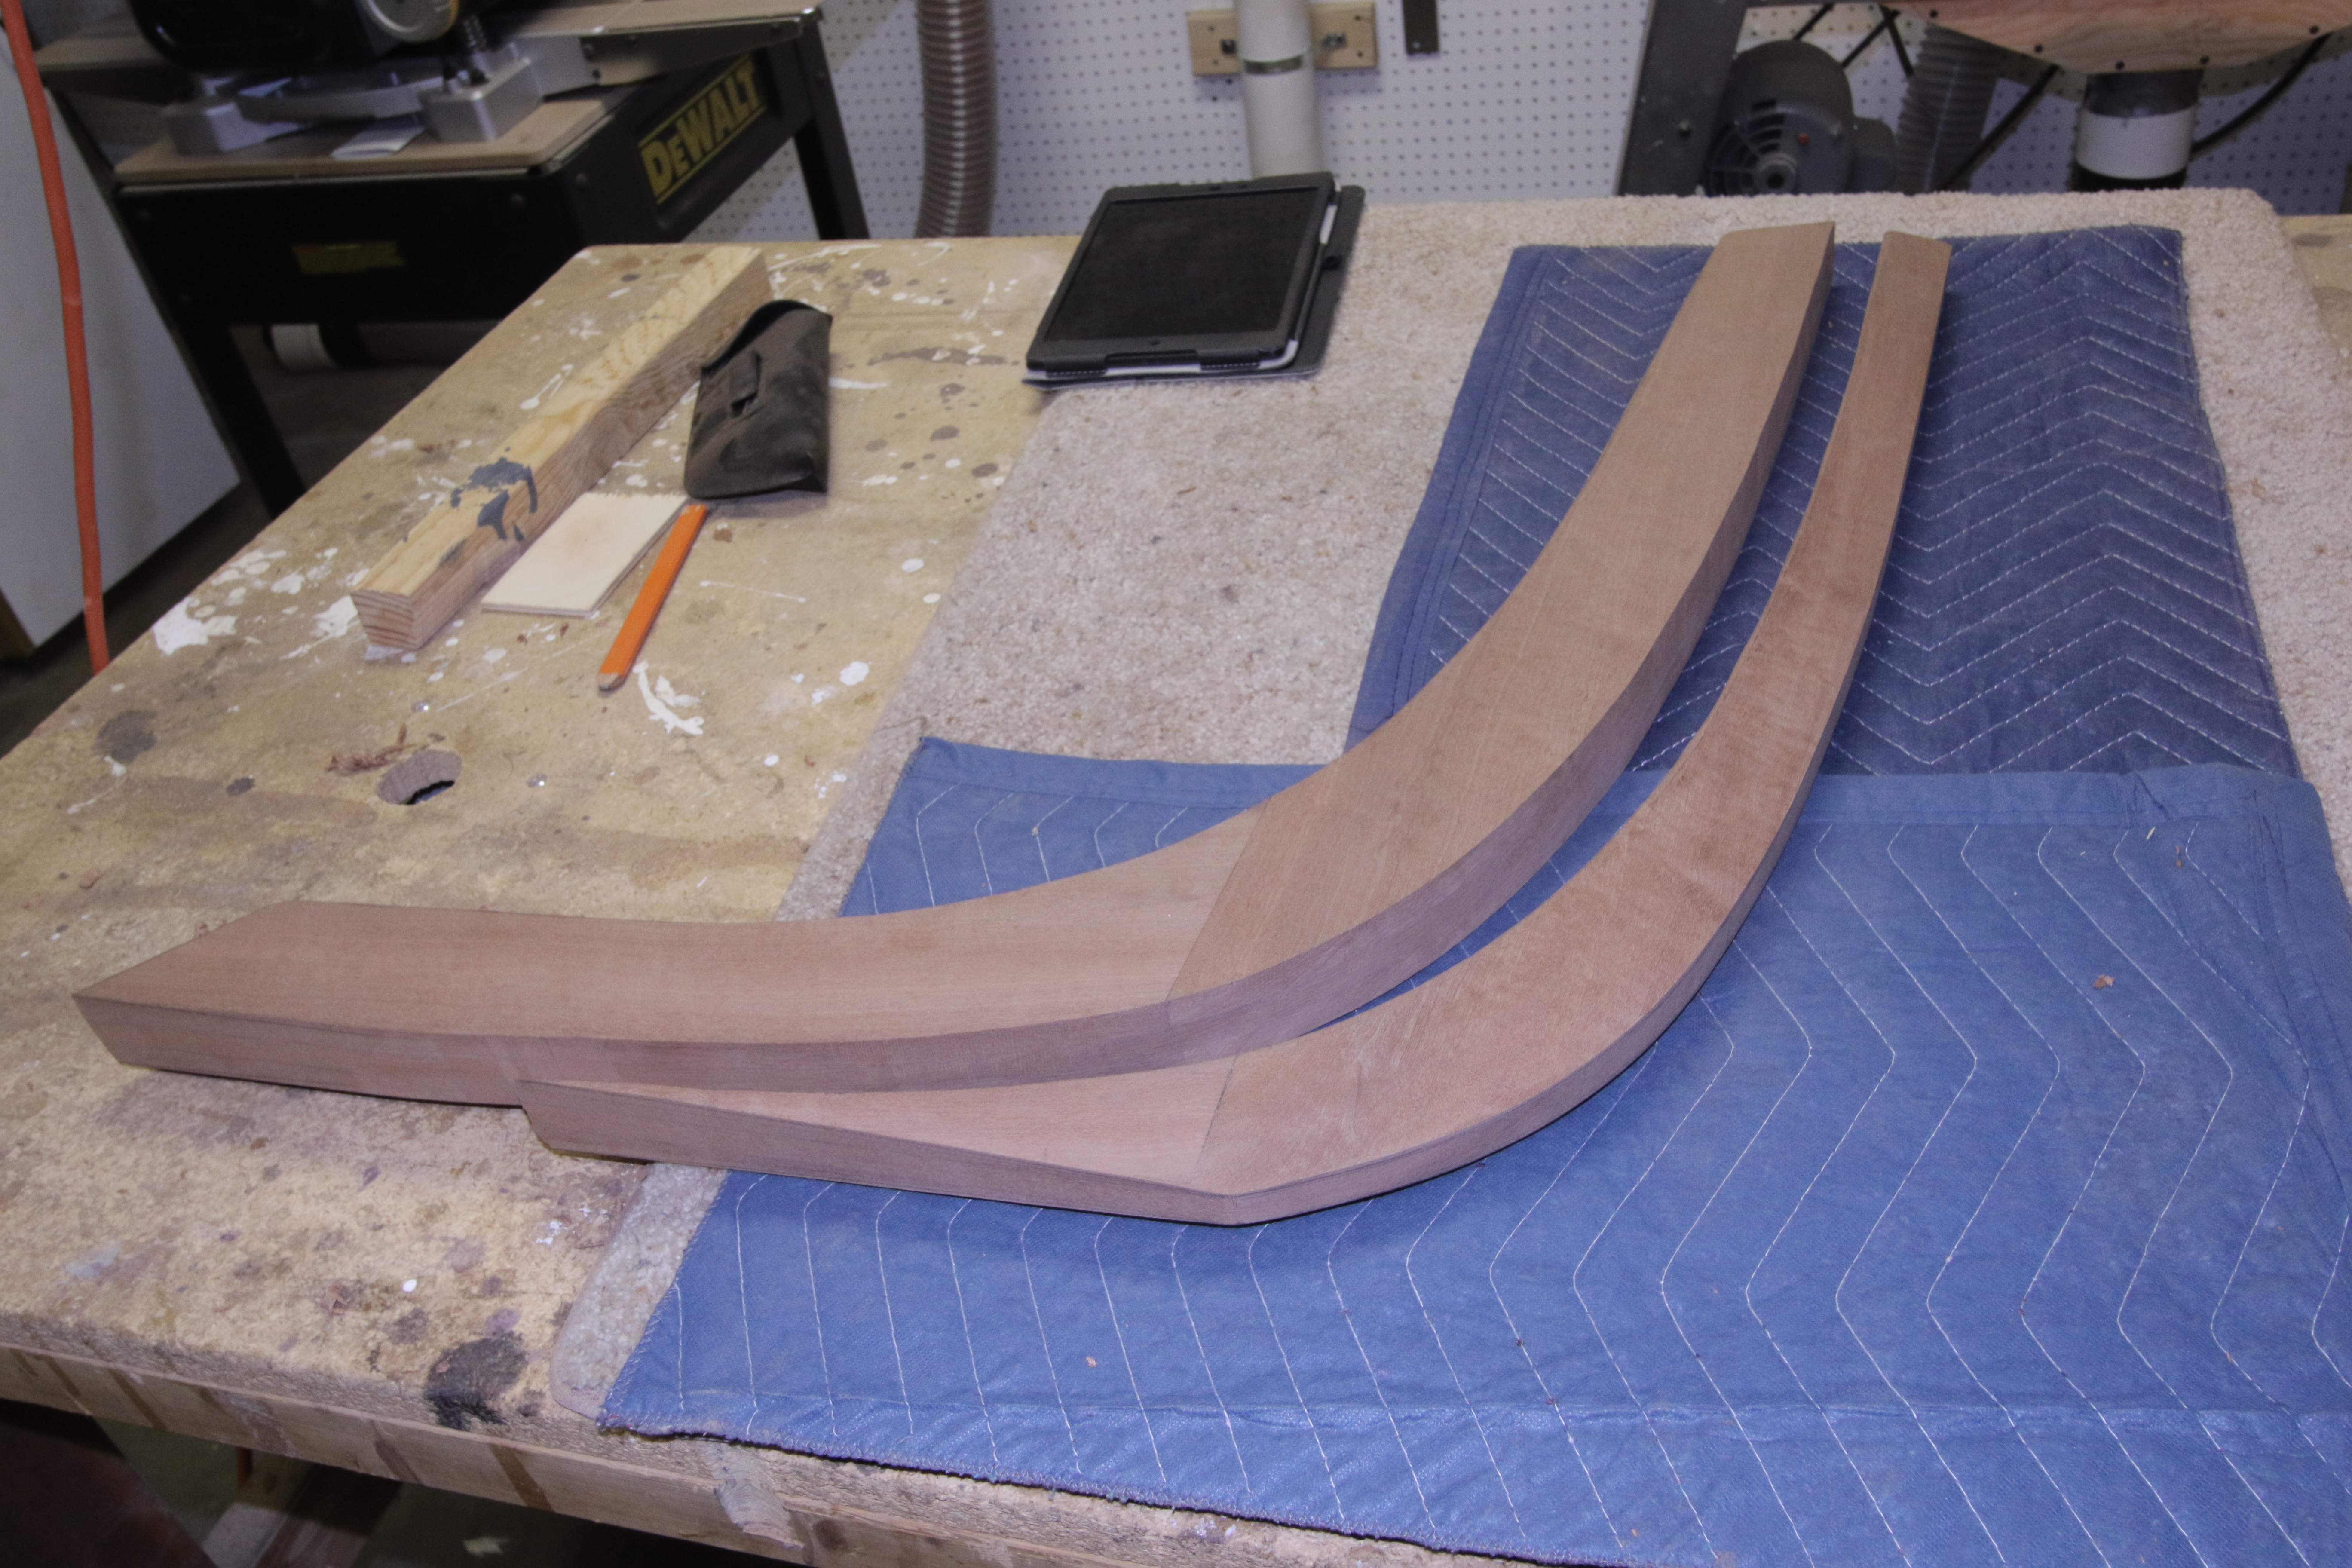
Finished assembly and shaping of the rudder case and rudder. Cut out and shaped the tiller. Planed all the spar materials (mast, yard, boom) to thickness and glued up the yard.

2/22/2018
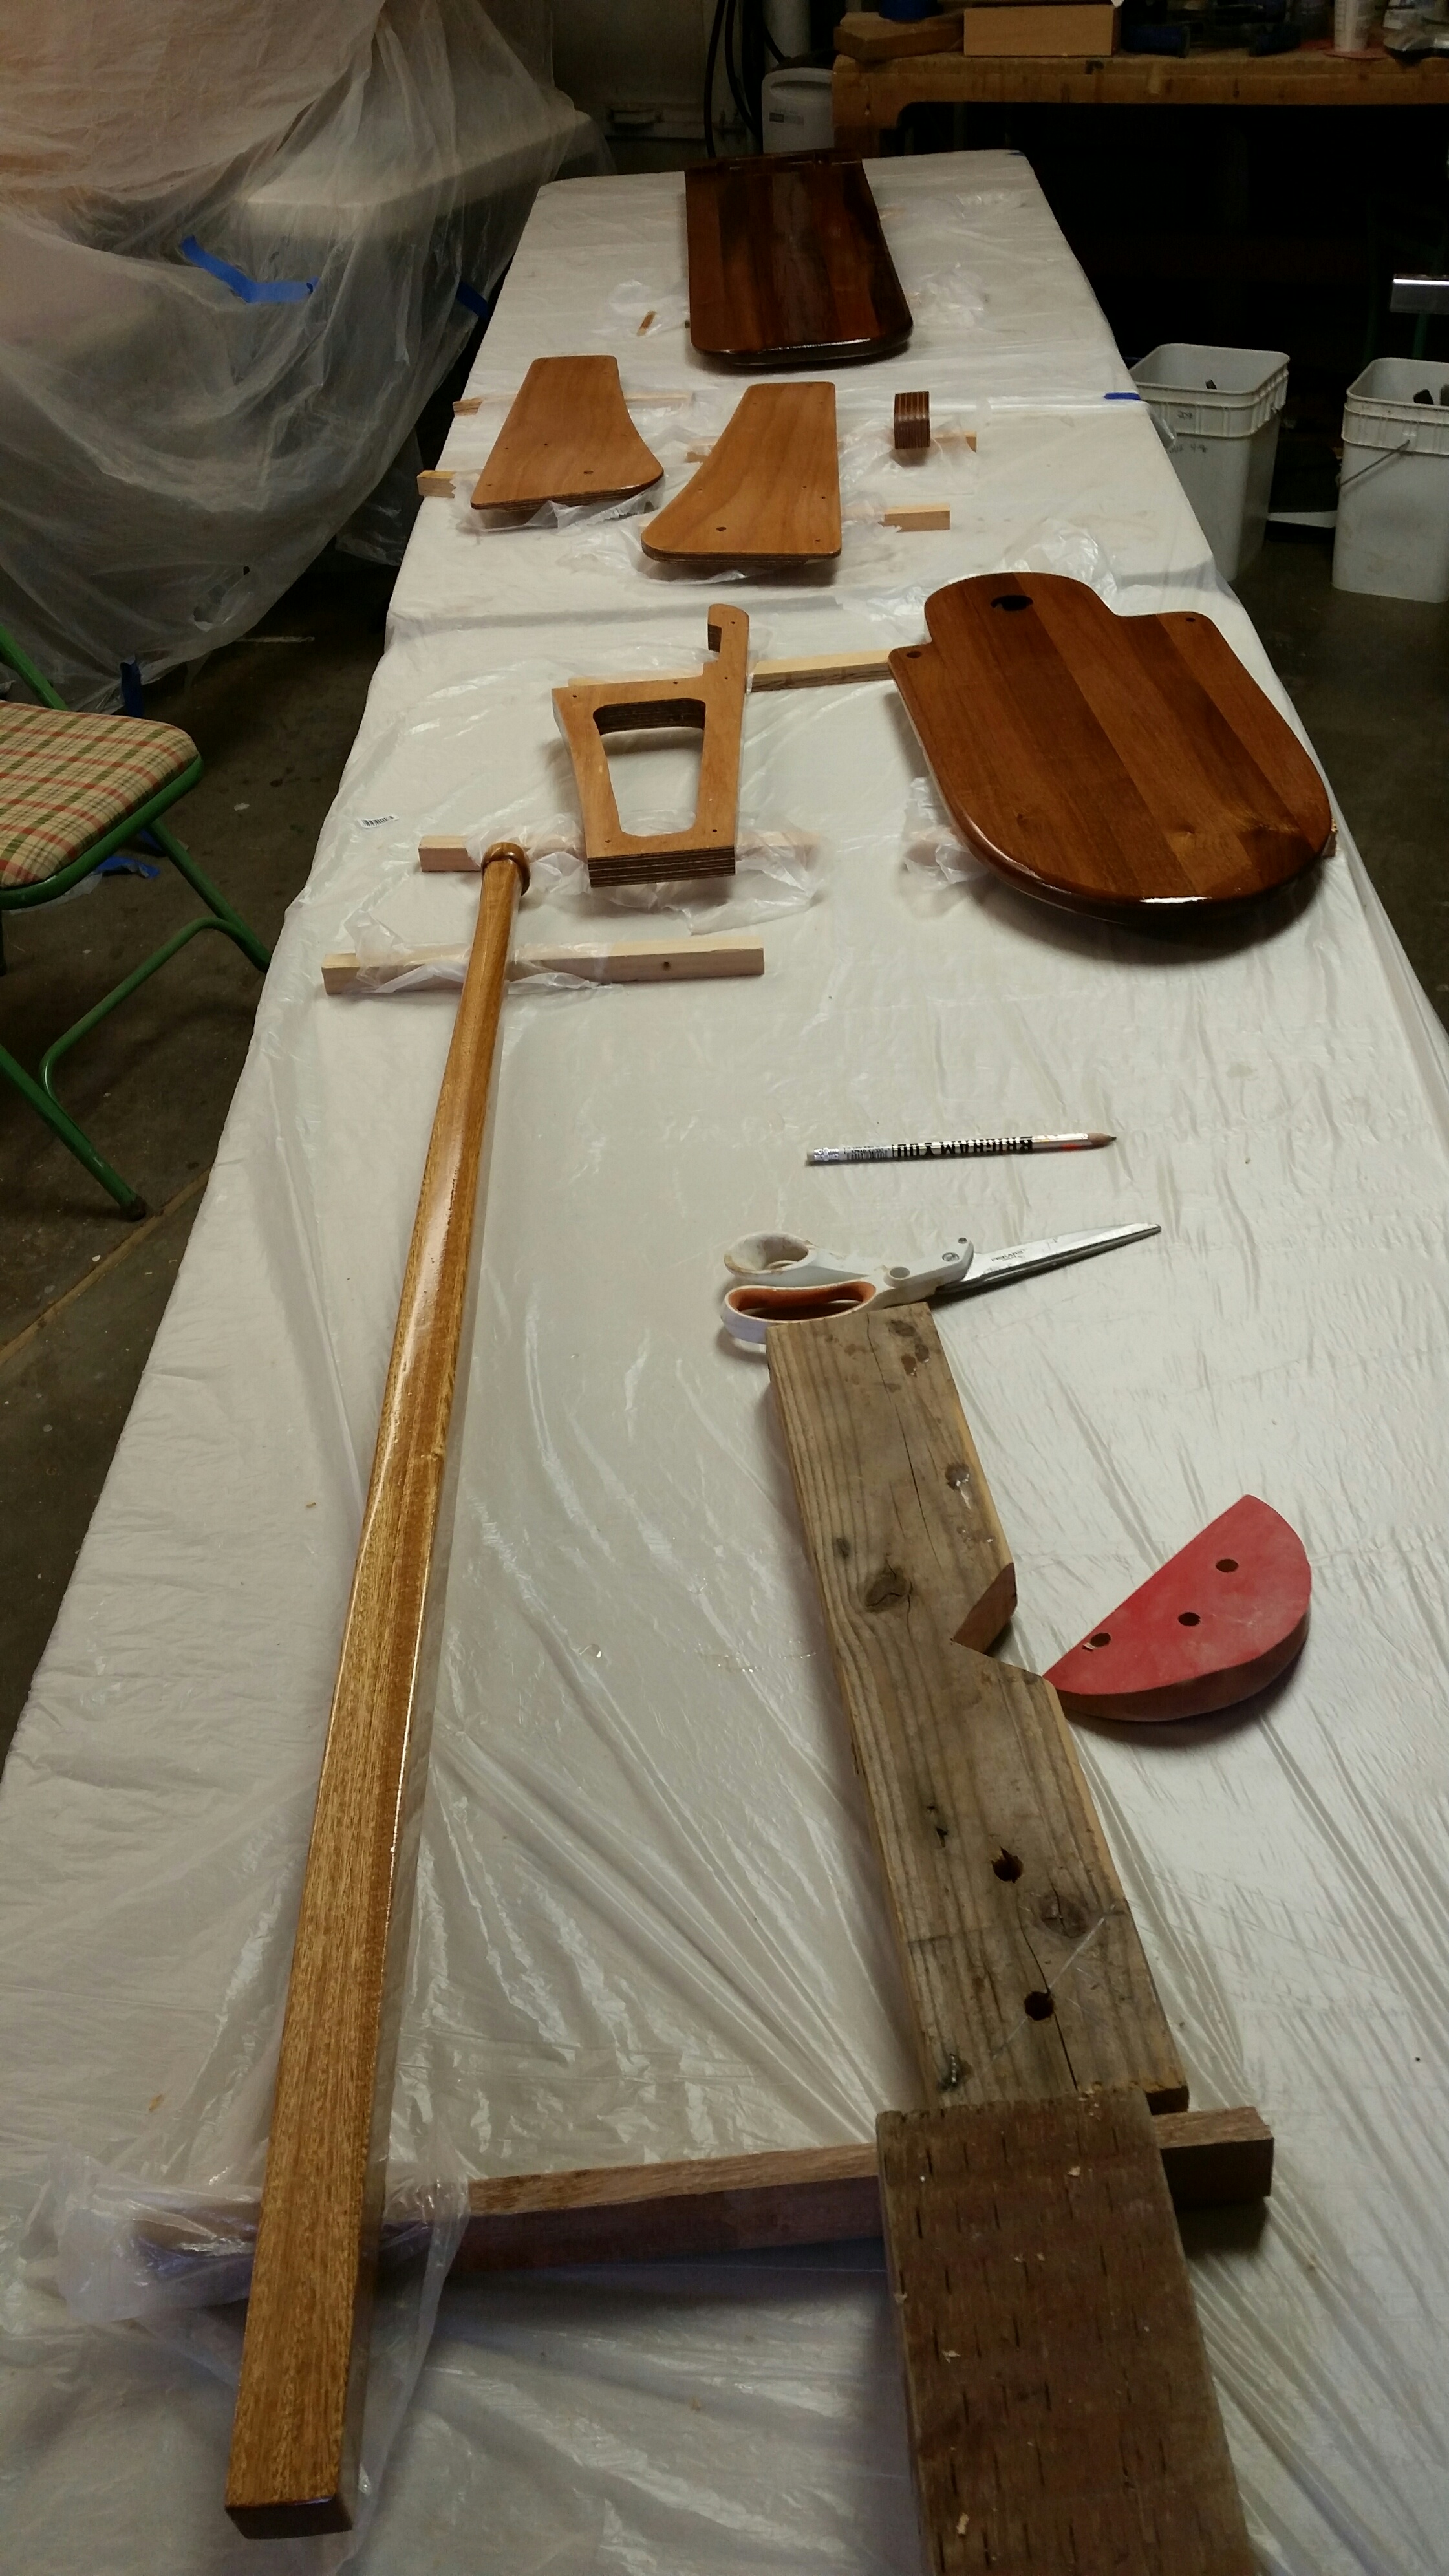
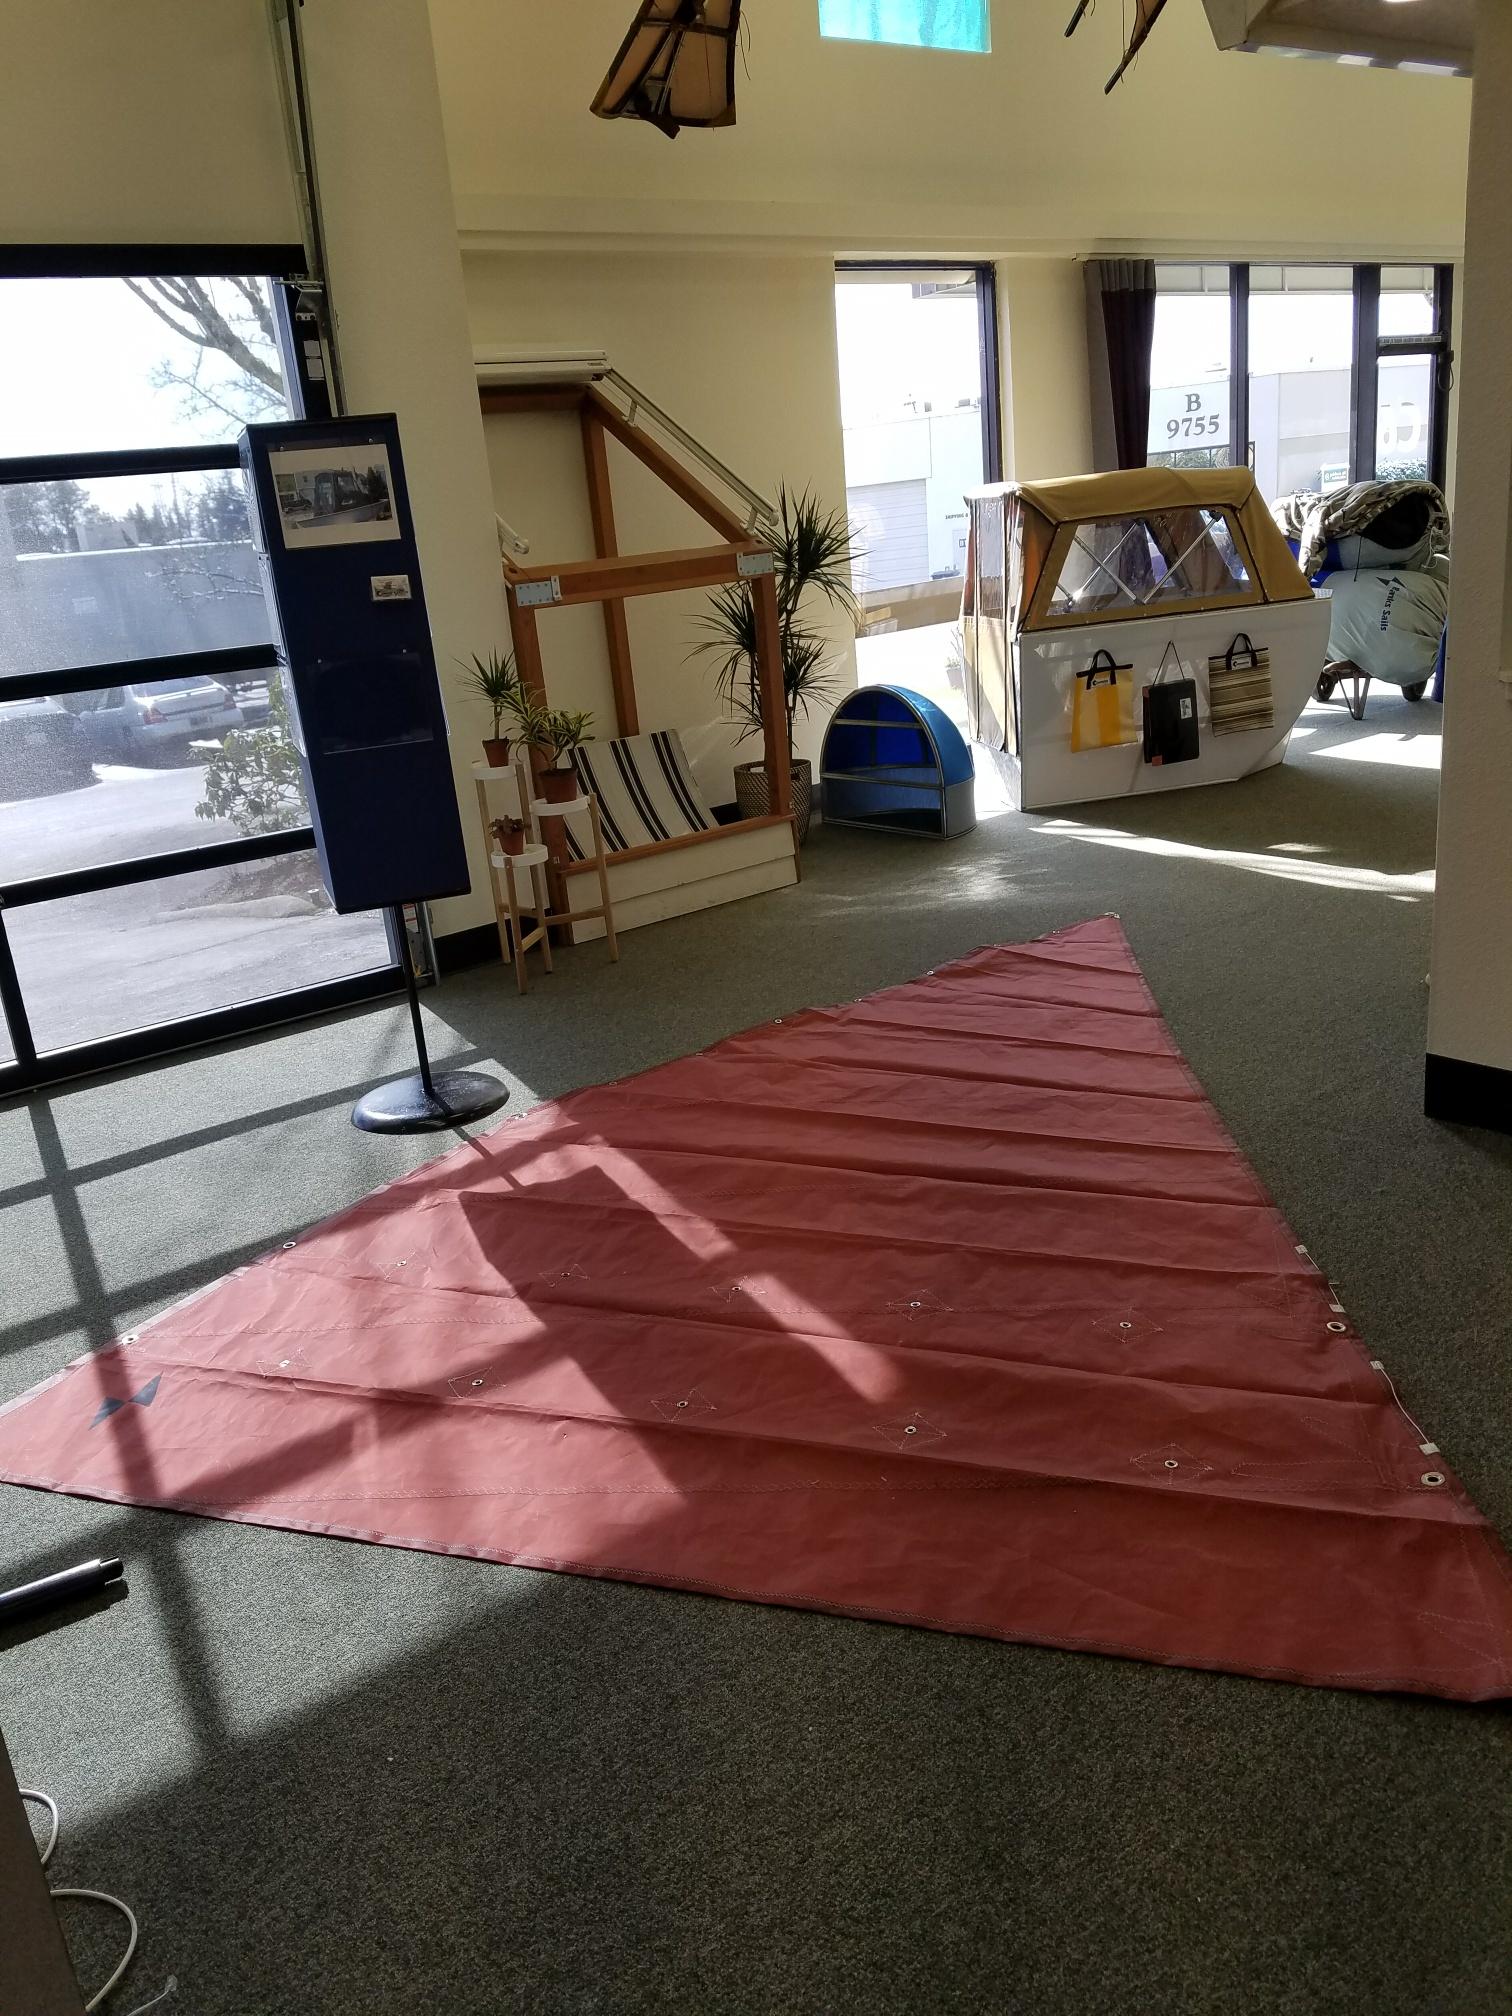
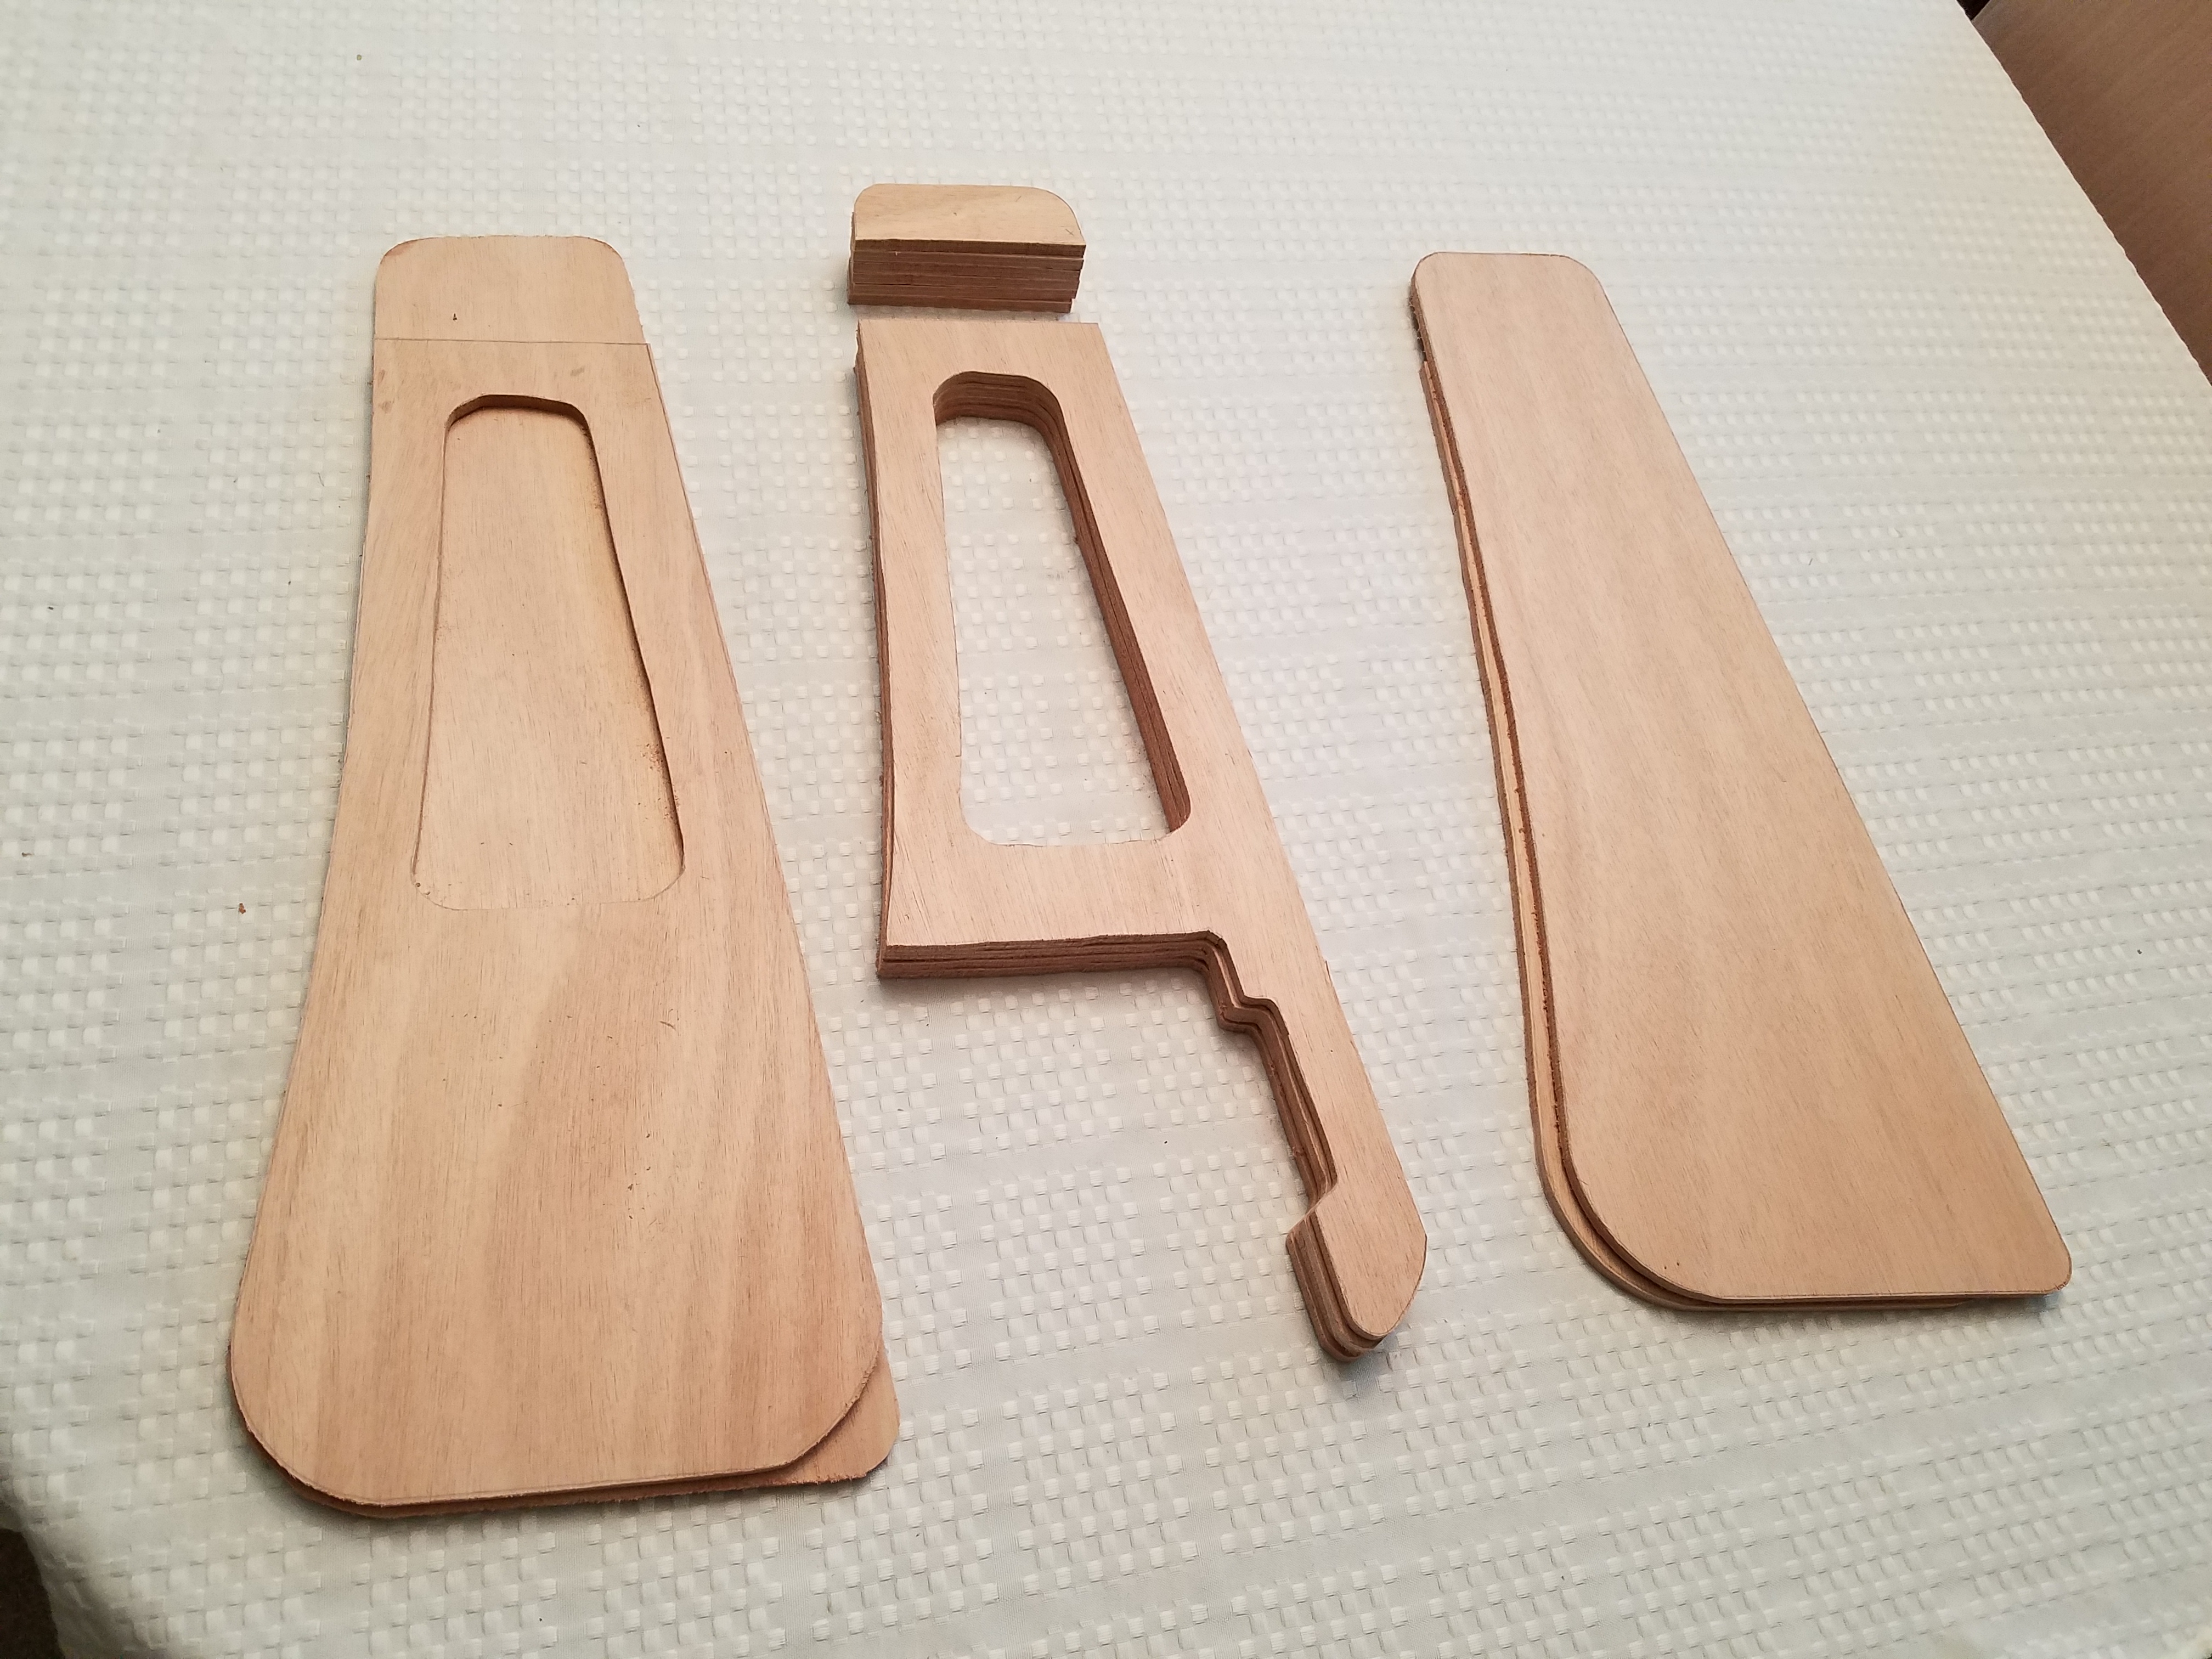
Daggerboard, rudder case and rudder are built. Some assembly required 🙂 Got an email that gudgeons and pintles manufacturing by Classic Marine are done and were shipped from UK today. Sail construction was completed by Banks Sails. Tanbark is the perfect color for this traditional sail & oar design.
2/19/2018
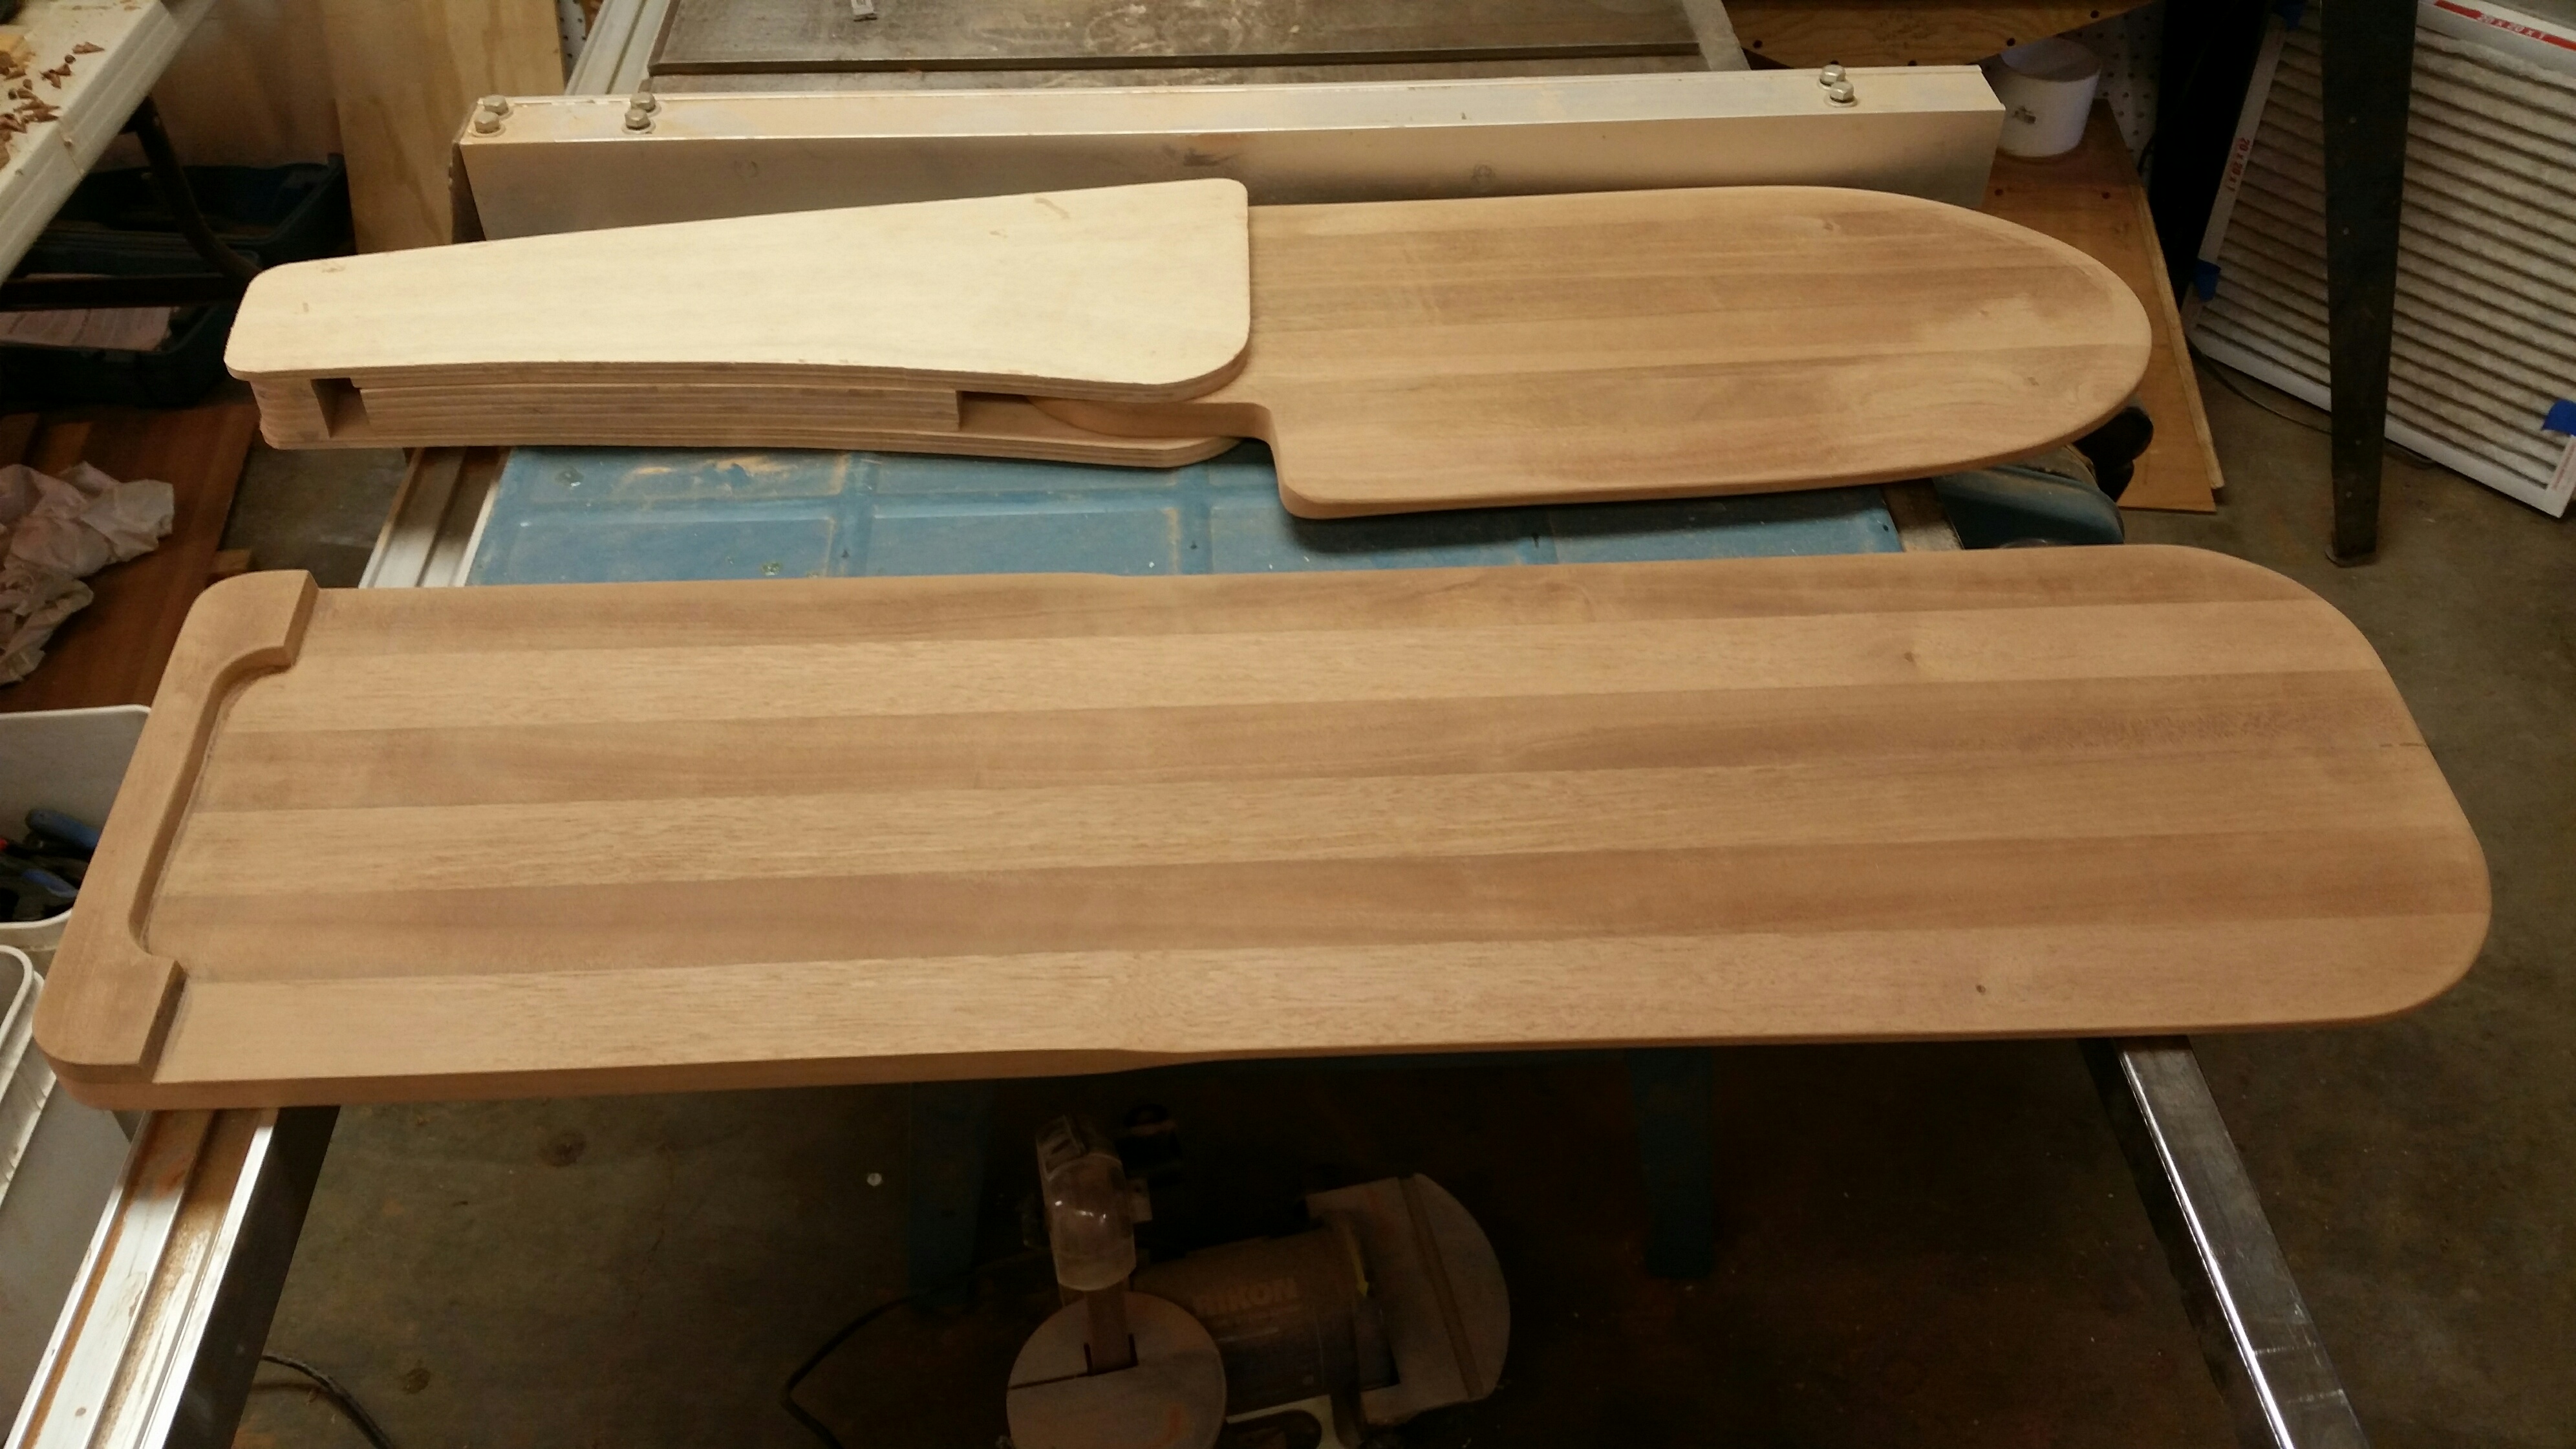
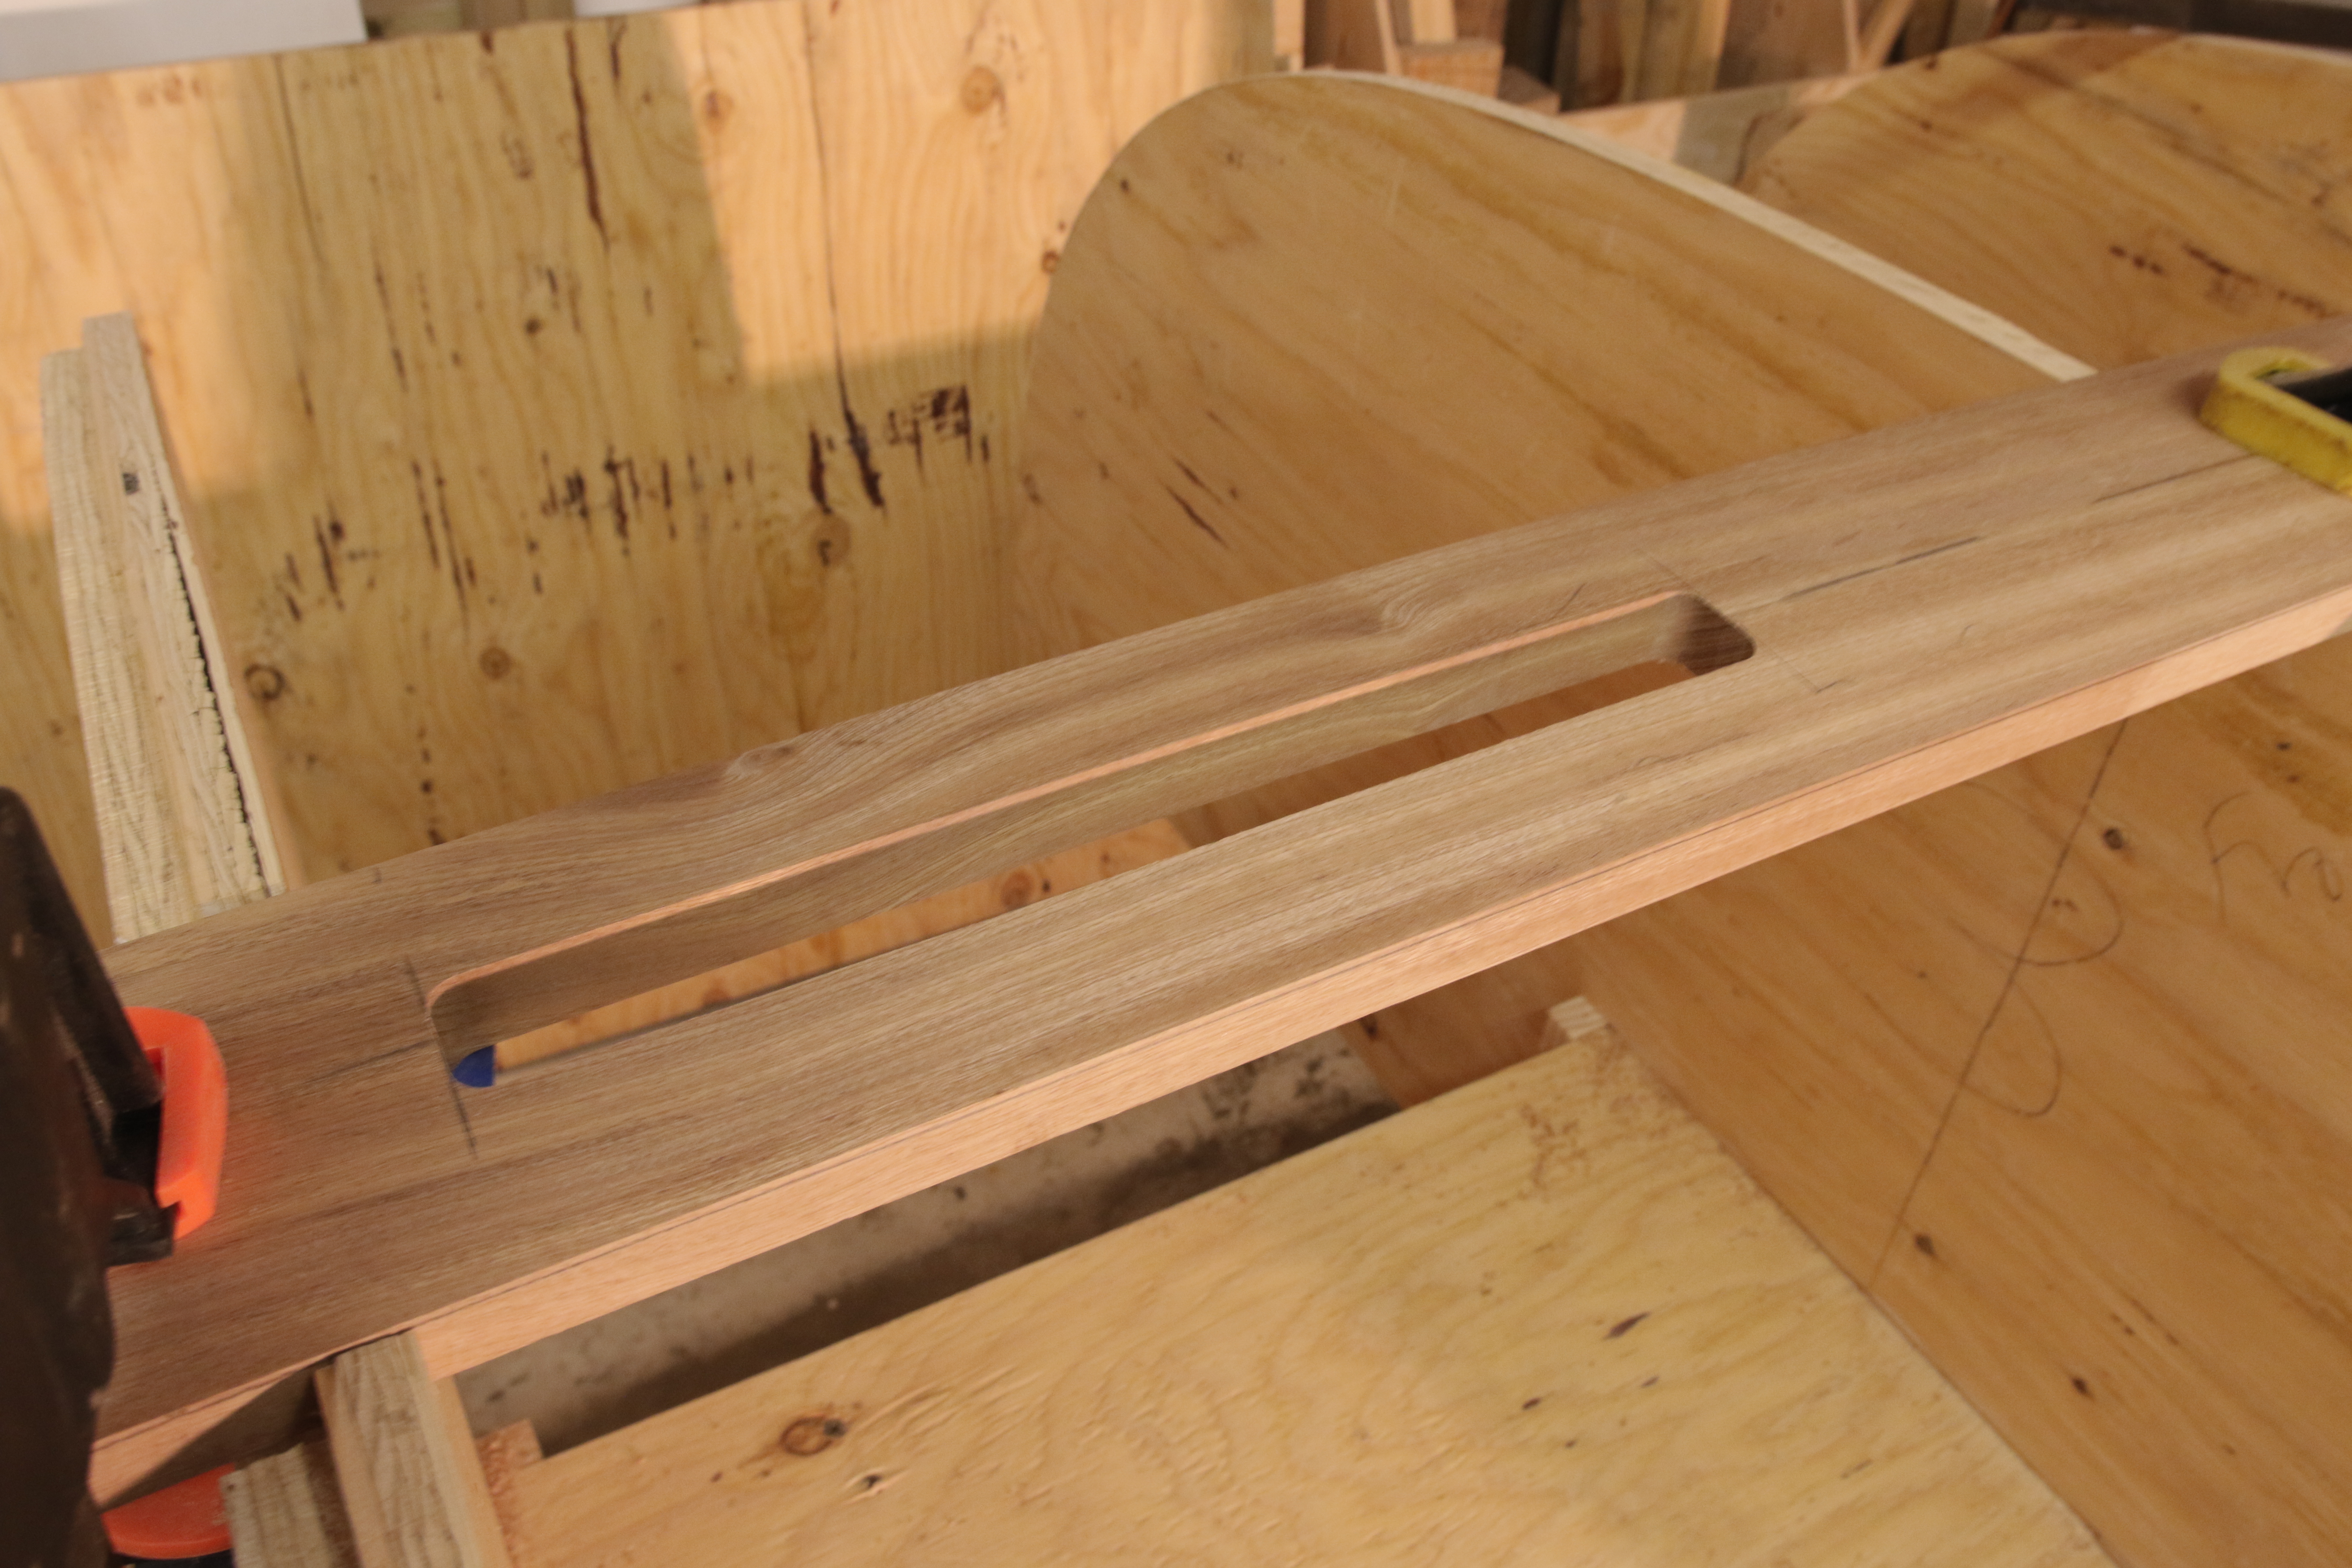
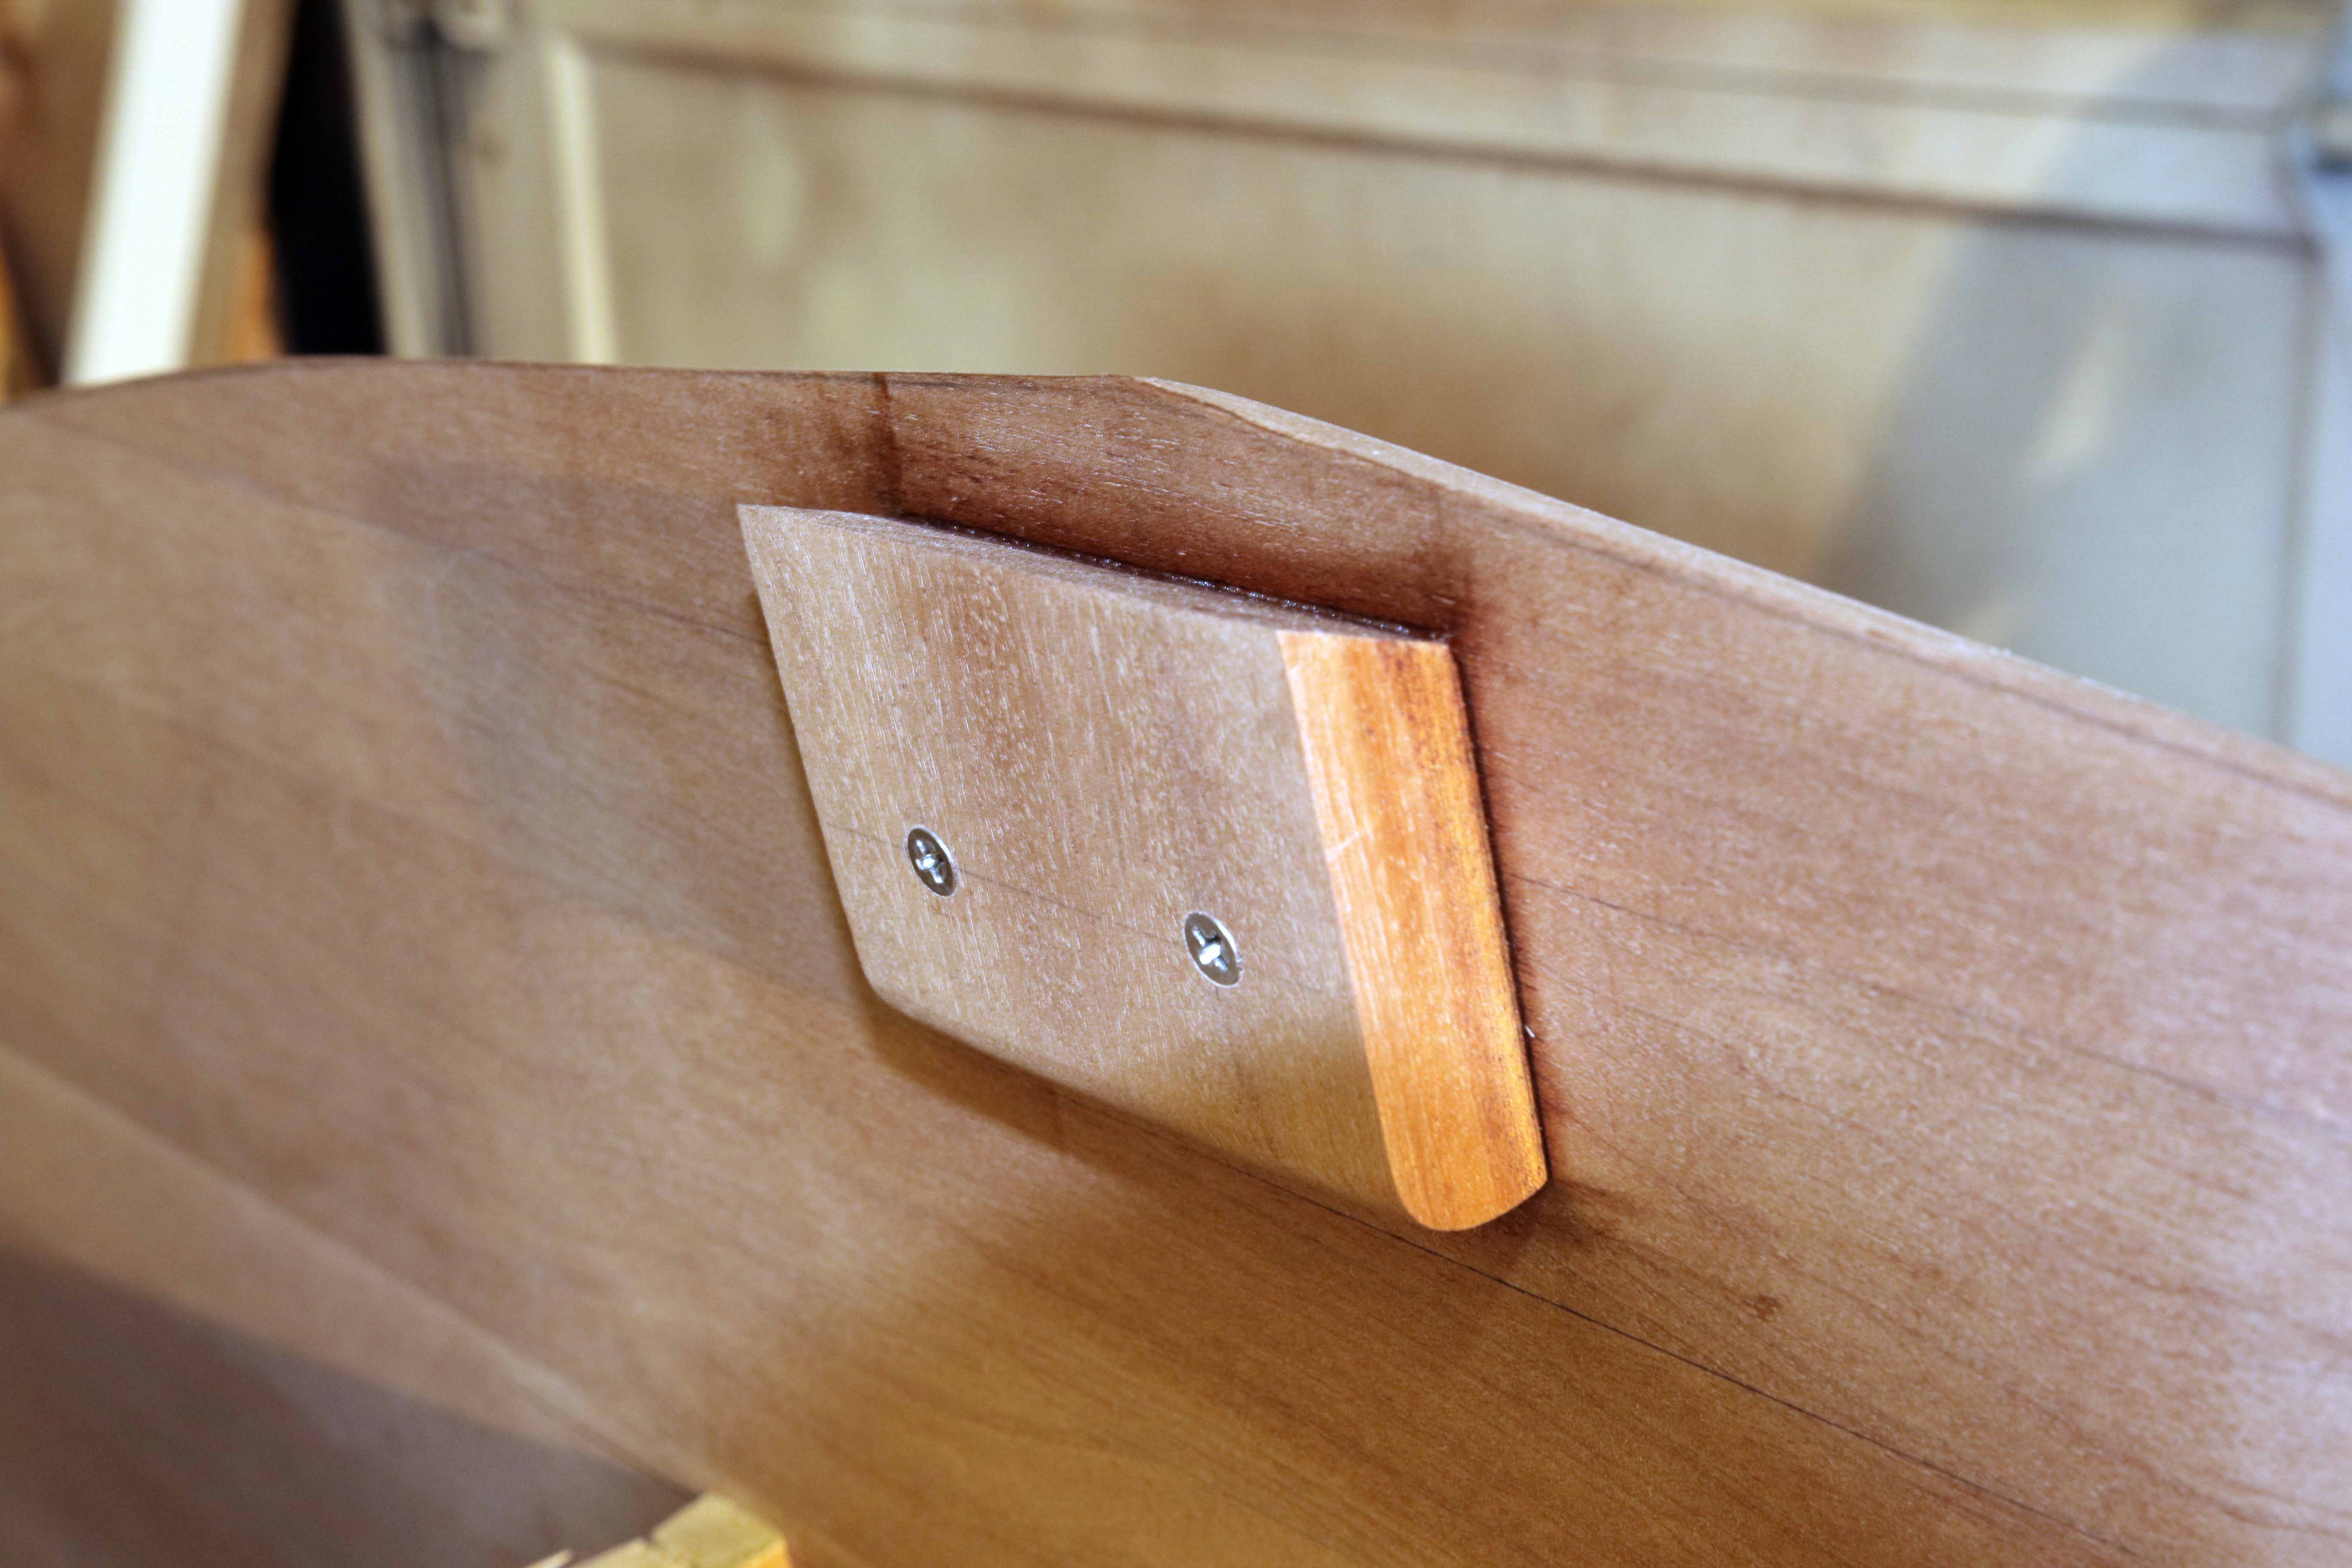
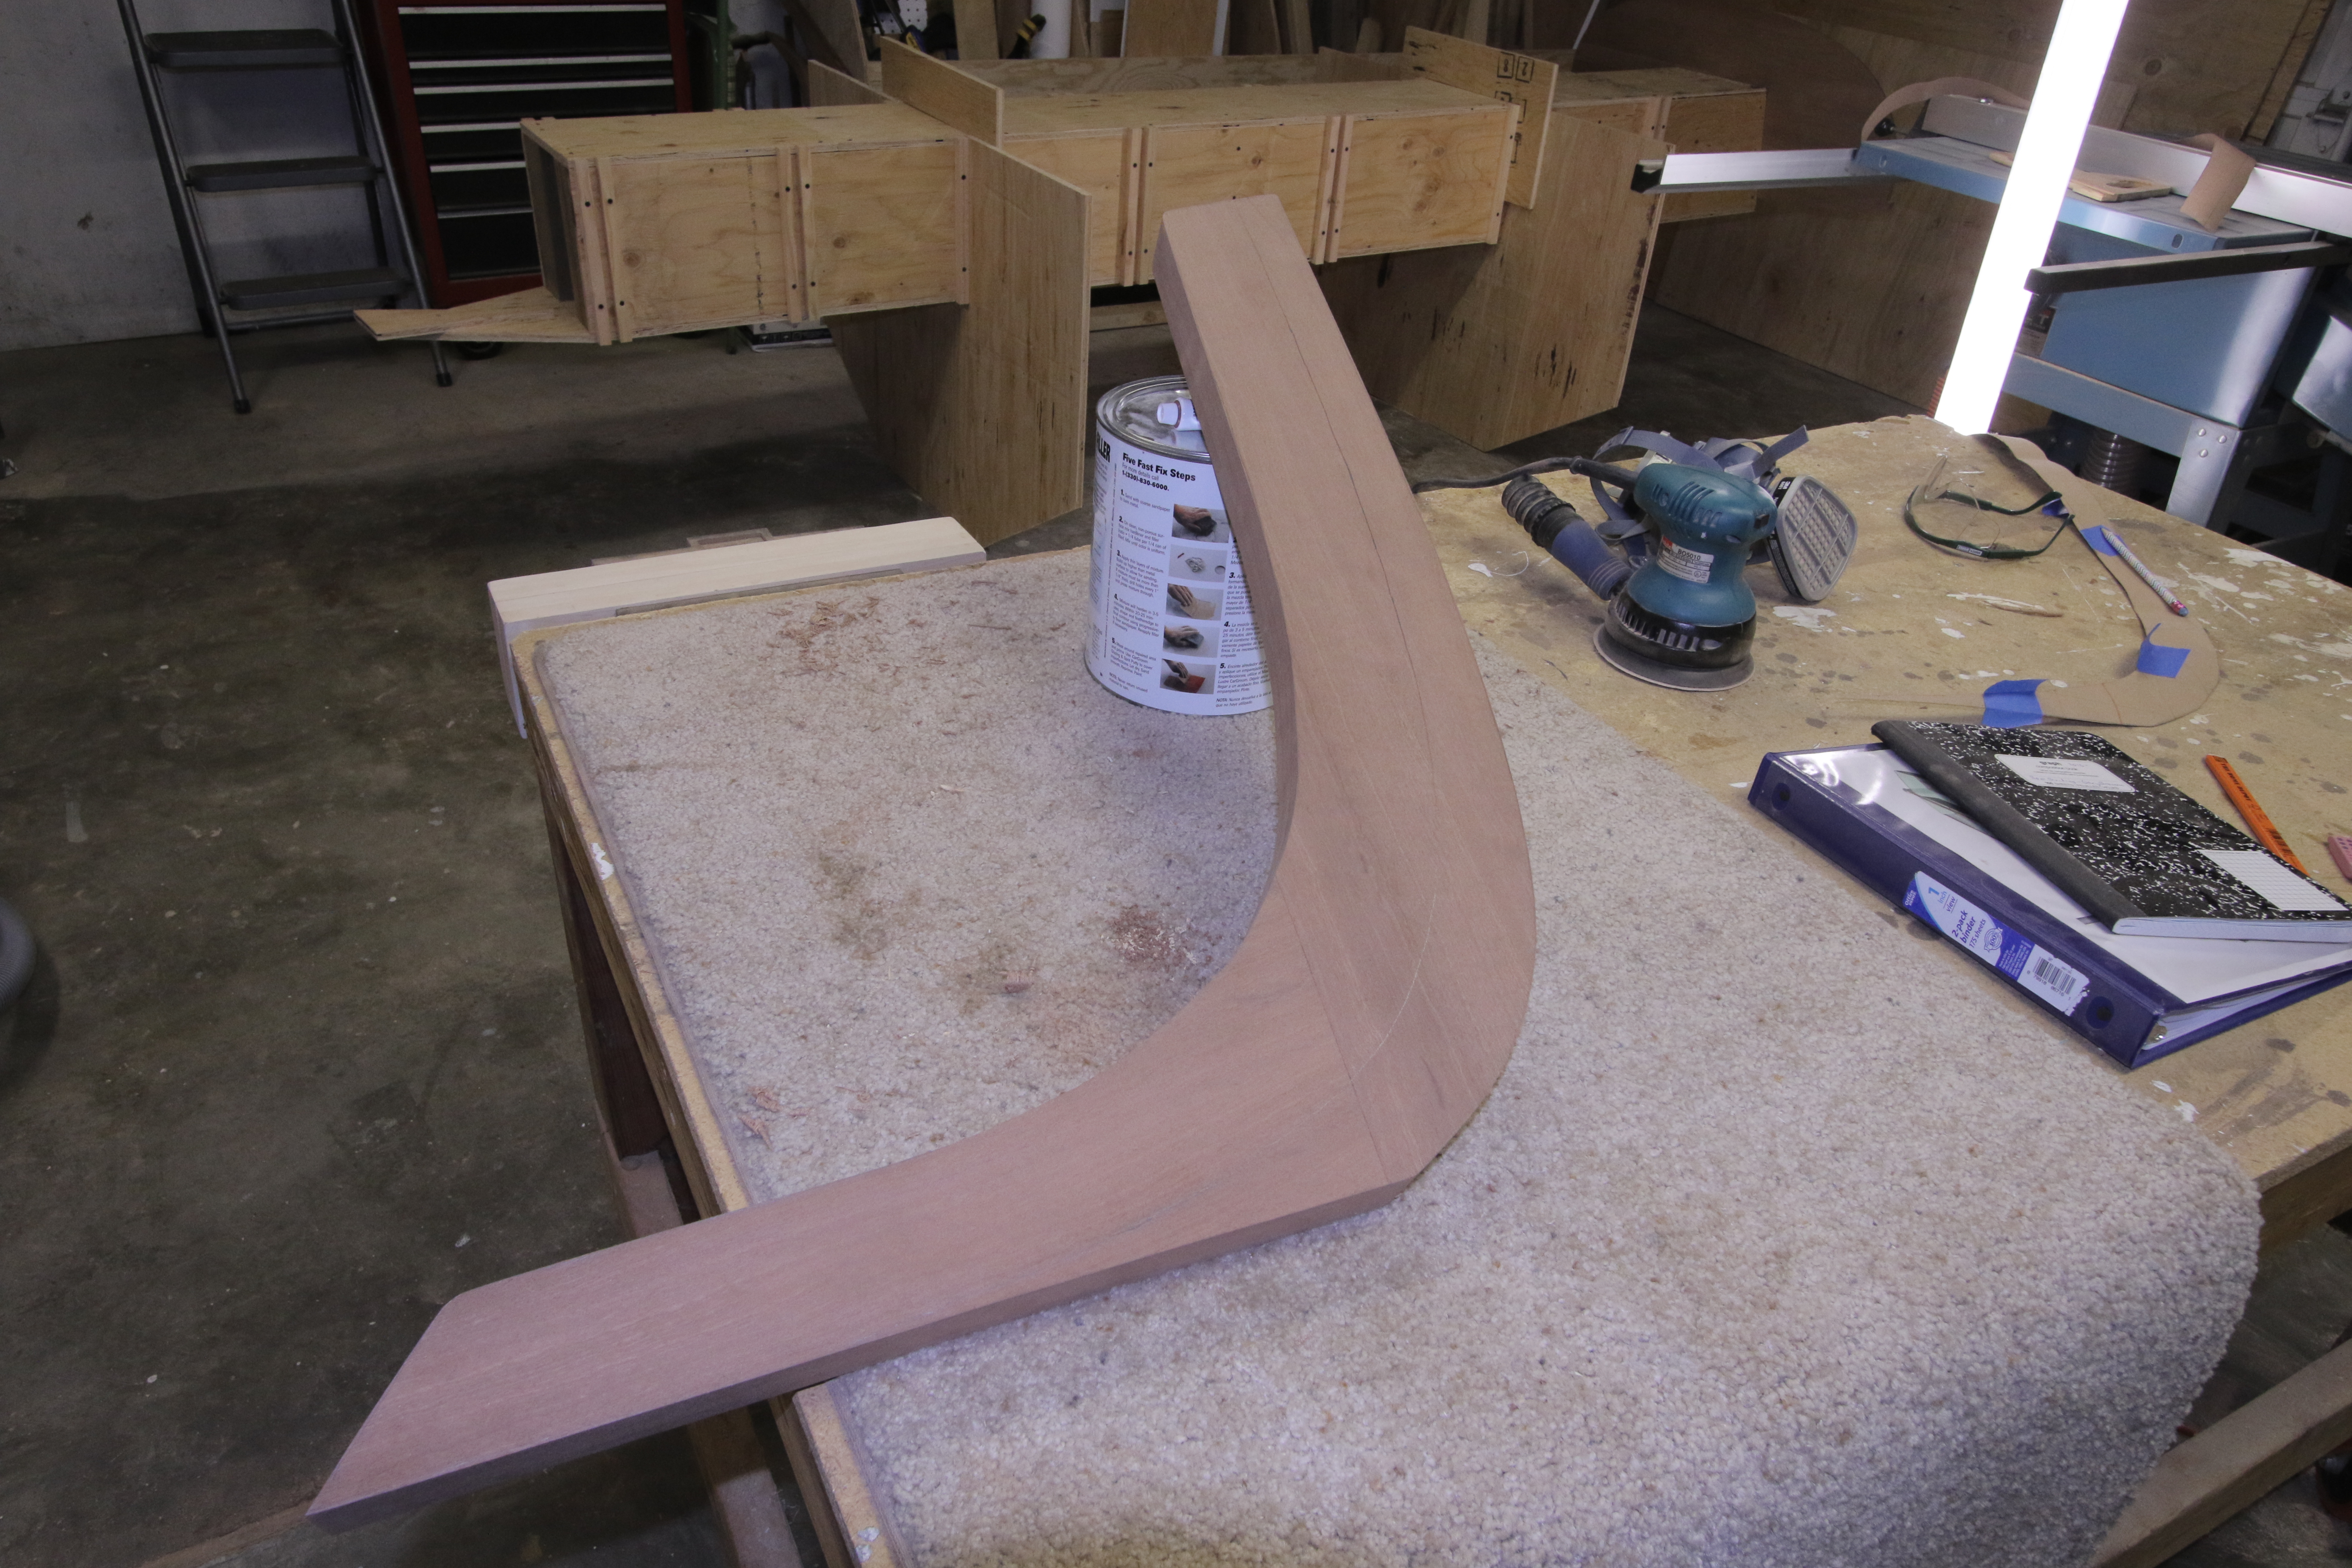
Finished up the last several coats of varnish on hull exterior. Now that the hull is done, I can get on with rudder and spars. Picked up Douglas Fir today for the spars, and then glued up the rudder, rudder case and tiller. The picture shows one of the rudder case cheeks.

2/16/2018
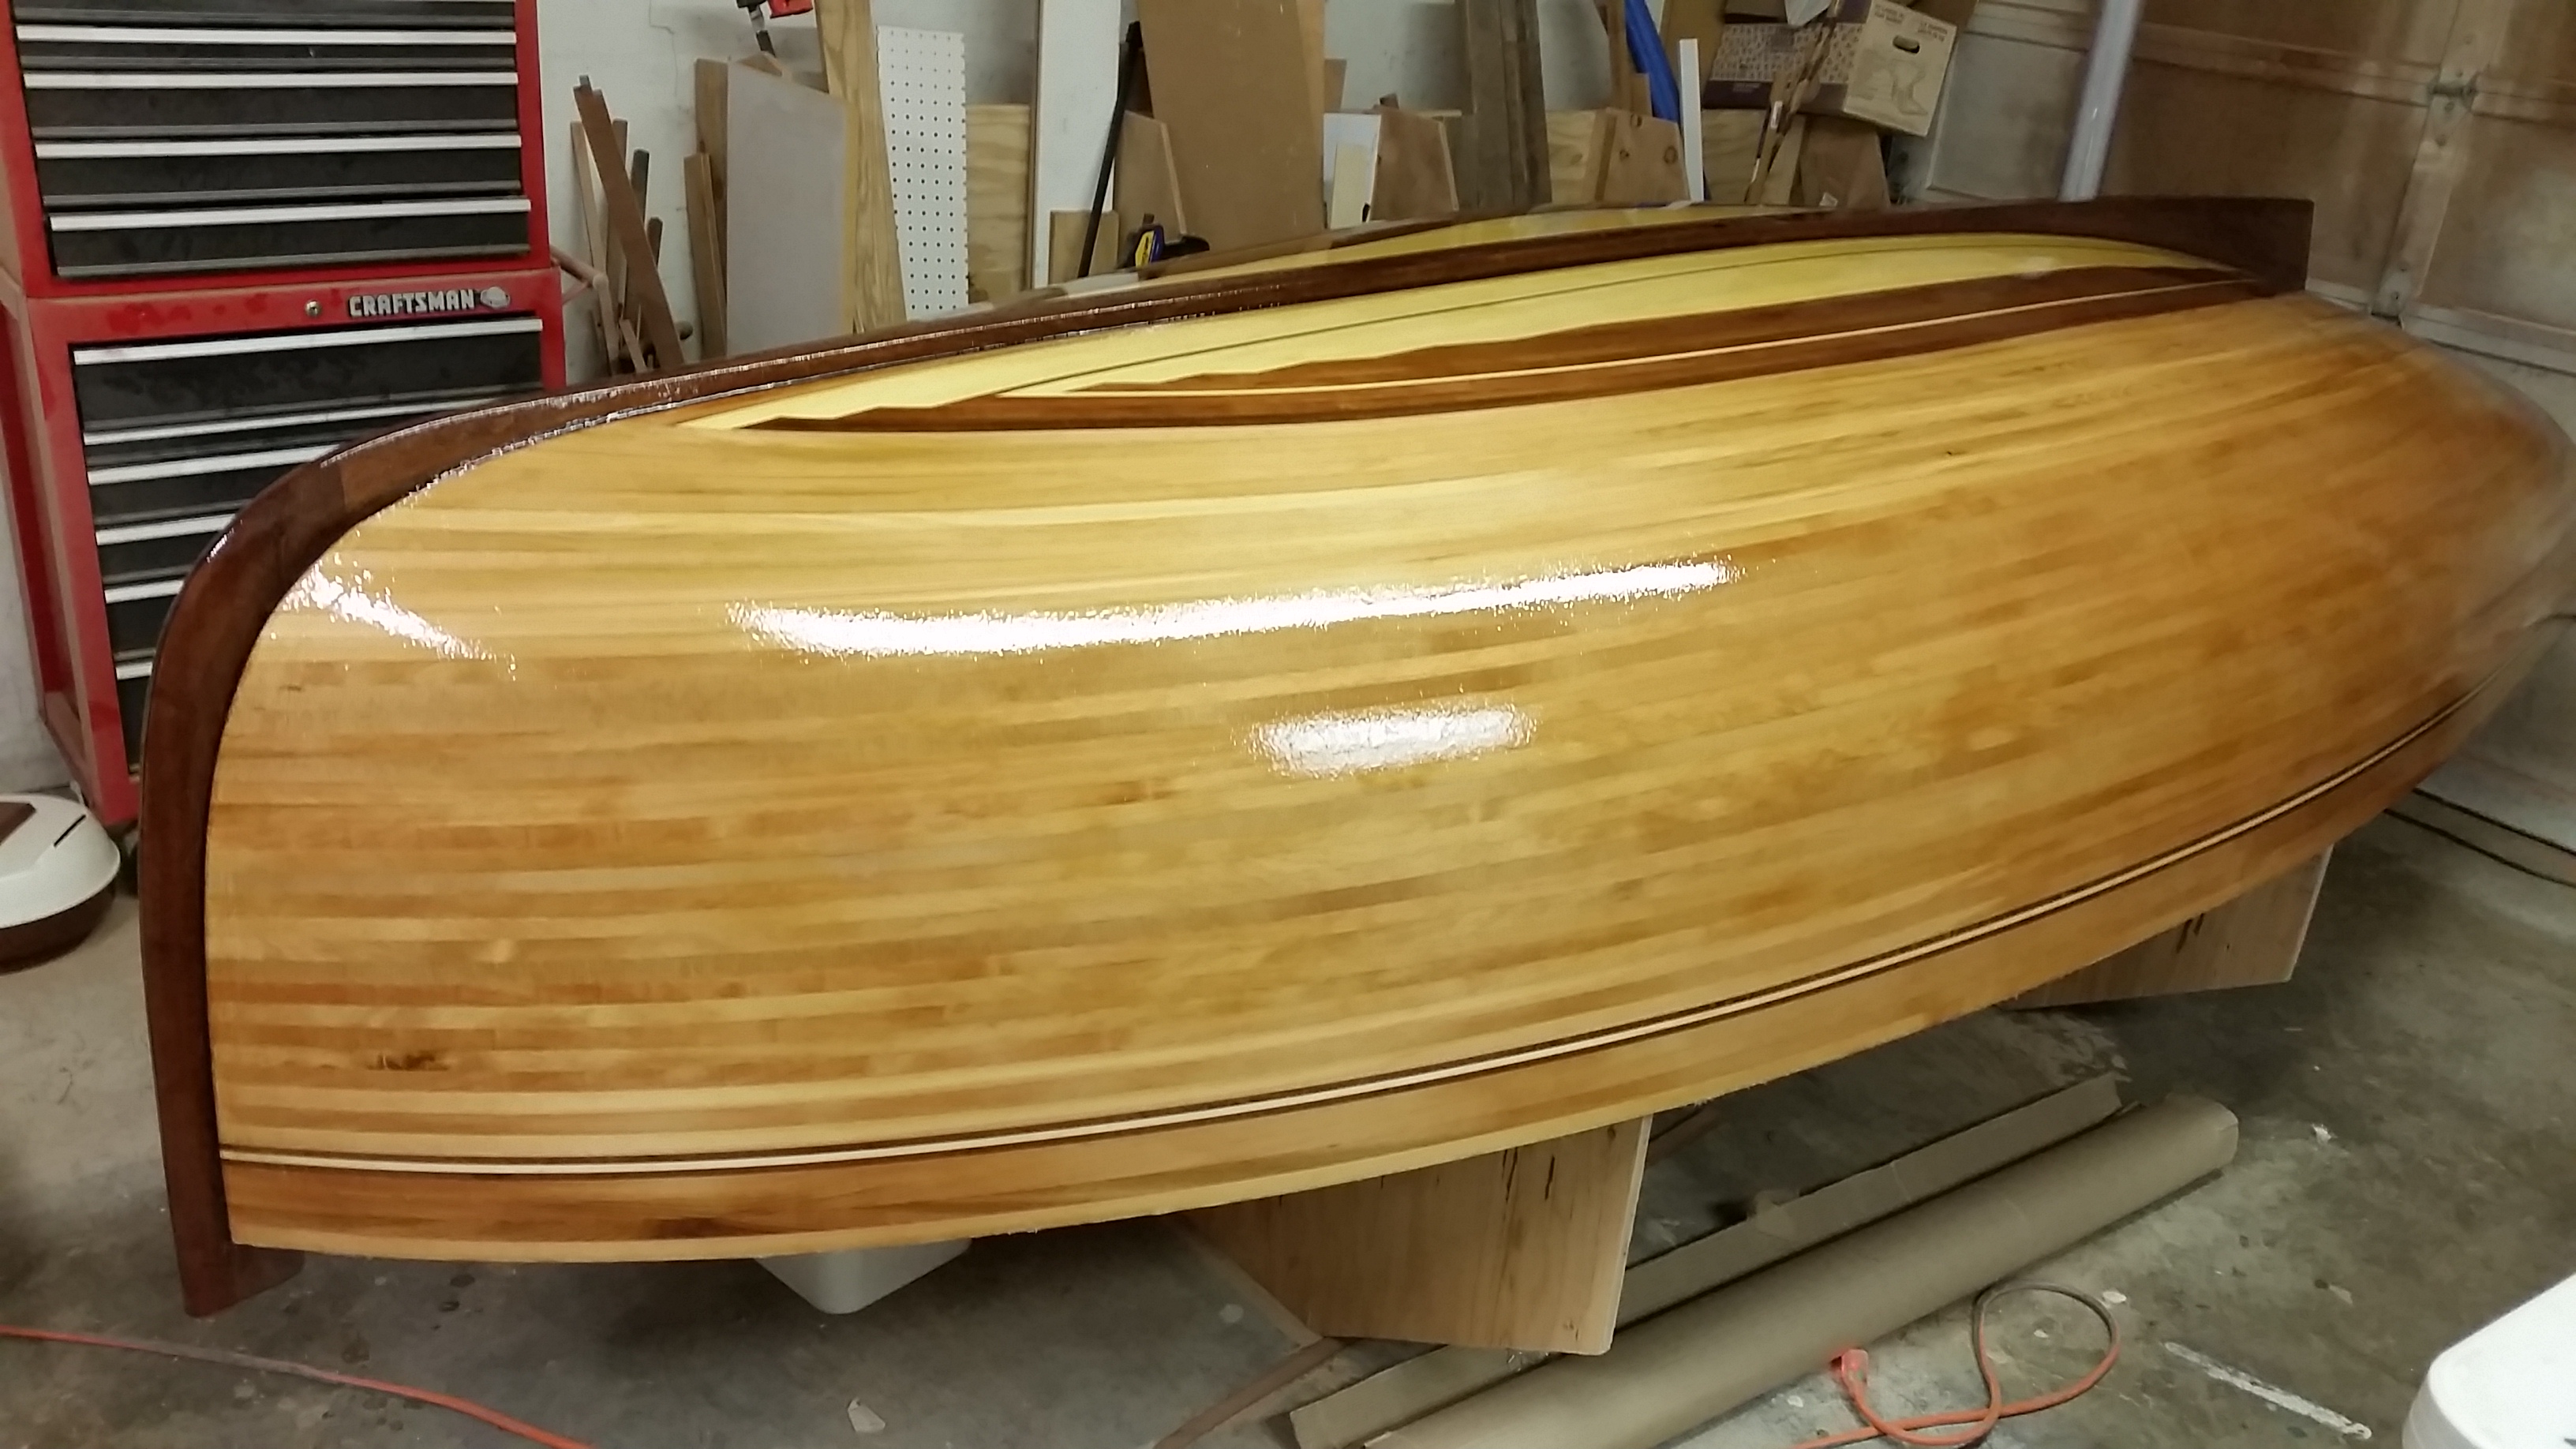
Got the outside sanded and first 2 coats of varnish on. Very happy with how this is coming out. I’ve become proficient at “keeping the wet edge” on the varnish, and it’s going on fairly well.

2/13/2018
Made a cardboard template for the rudder case pieces and cut them out of okoume. Boat flipping party scheduled for tonight so I can prep the outside of the hull for varnish.
2/10/2018
Got the 5th coat of varnish (Pettit Flagship) on. Looking as good as it can be, so I think I’ll flip and do the outside.

2/5/2018
Spent 24 hours total of hand sanding in prep for varnish – very tedious, admit I didn’t enjoy that. But, I am pleased with the appearance of the coat of varnish (on interior only), giving me the first glimpse of what she will look like. Beautiful! 🙂
1/20/2018
Finished sanding and put the first of two coats of epoxy on the remaining raw wood (seats, daggerboard case, trim, etc..).

1/11/2018
All the wood pieces for hull are in place! Big milestone. Made all the trim pieces and glued into place. The woodwork for oar locations was the last thing. Sanded up the deck. Routed the rails and now have a bunch of sanding to do before finishing with epoxy first on the raw wood and then varnish. Oh, I still need to do some epoxy fillets around the seating.
1/3/2018

1/2/2018
Tracy cut out all the pieces for dagger-board, planed to thickness and glued them up.
12/30/2017
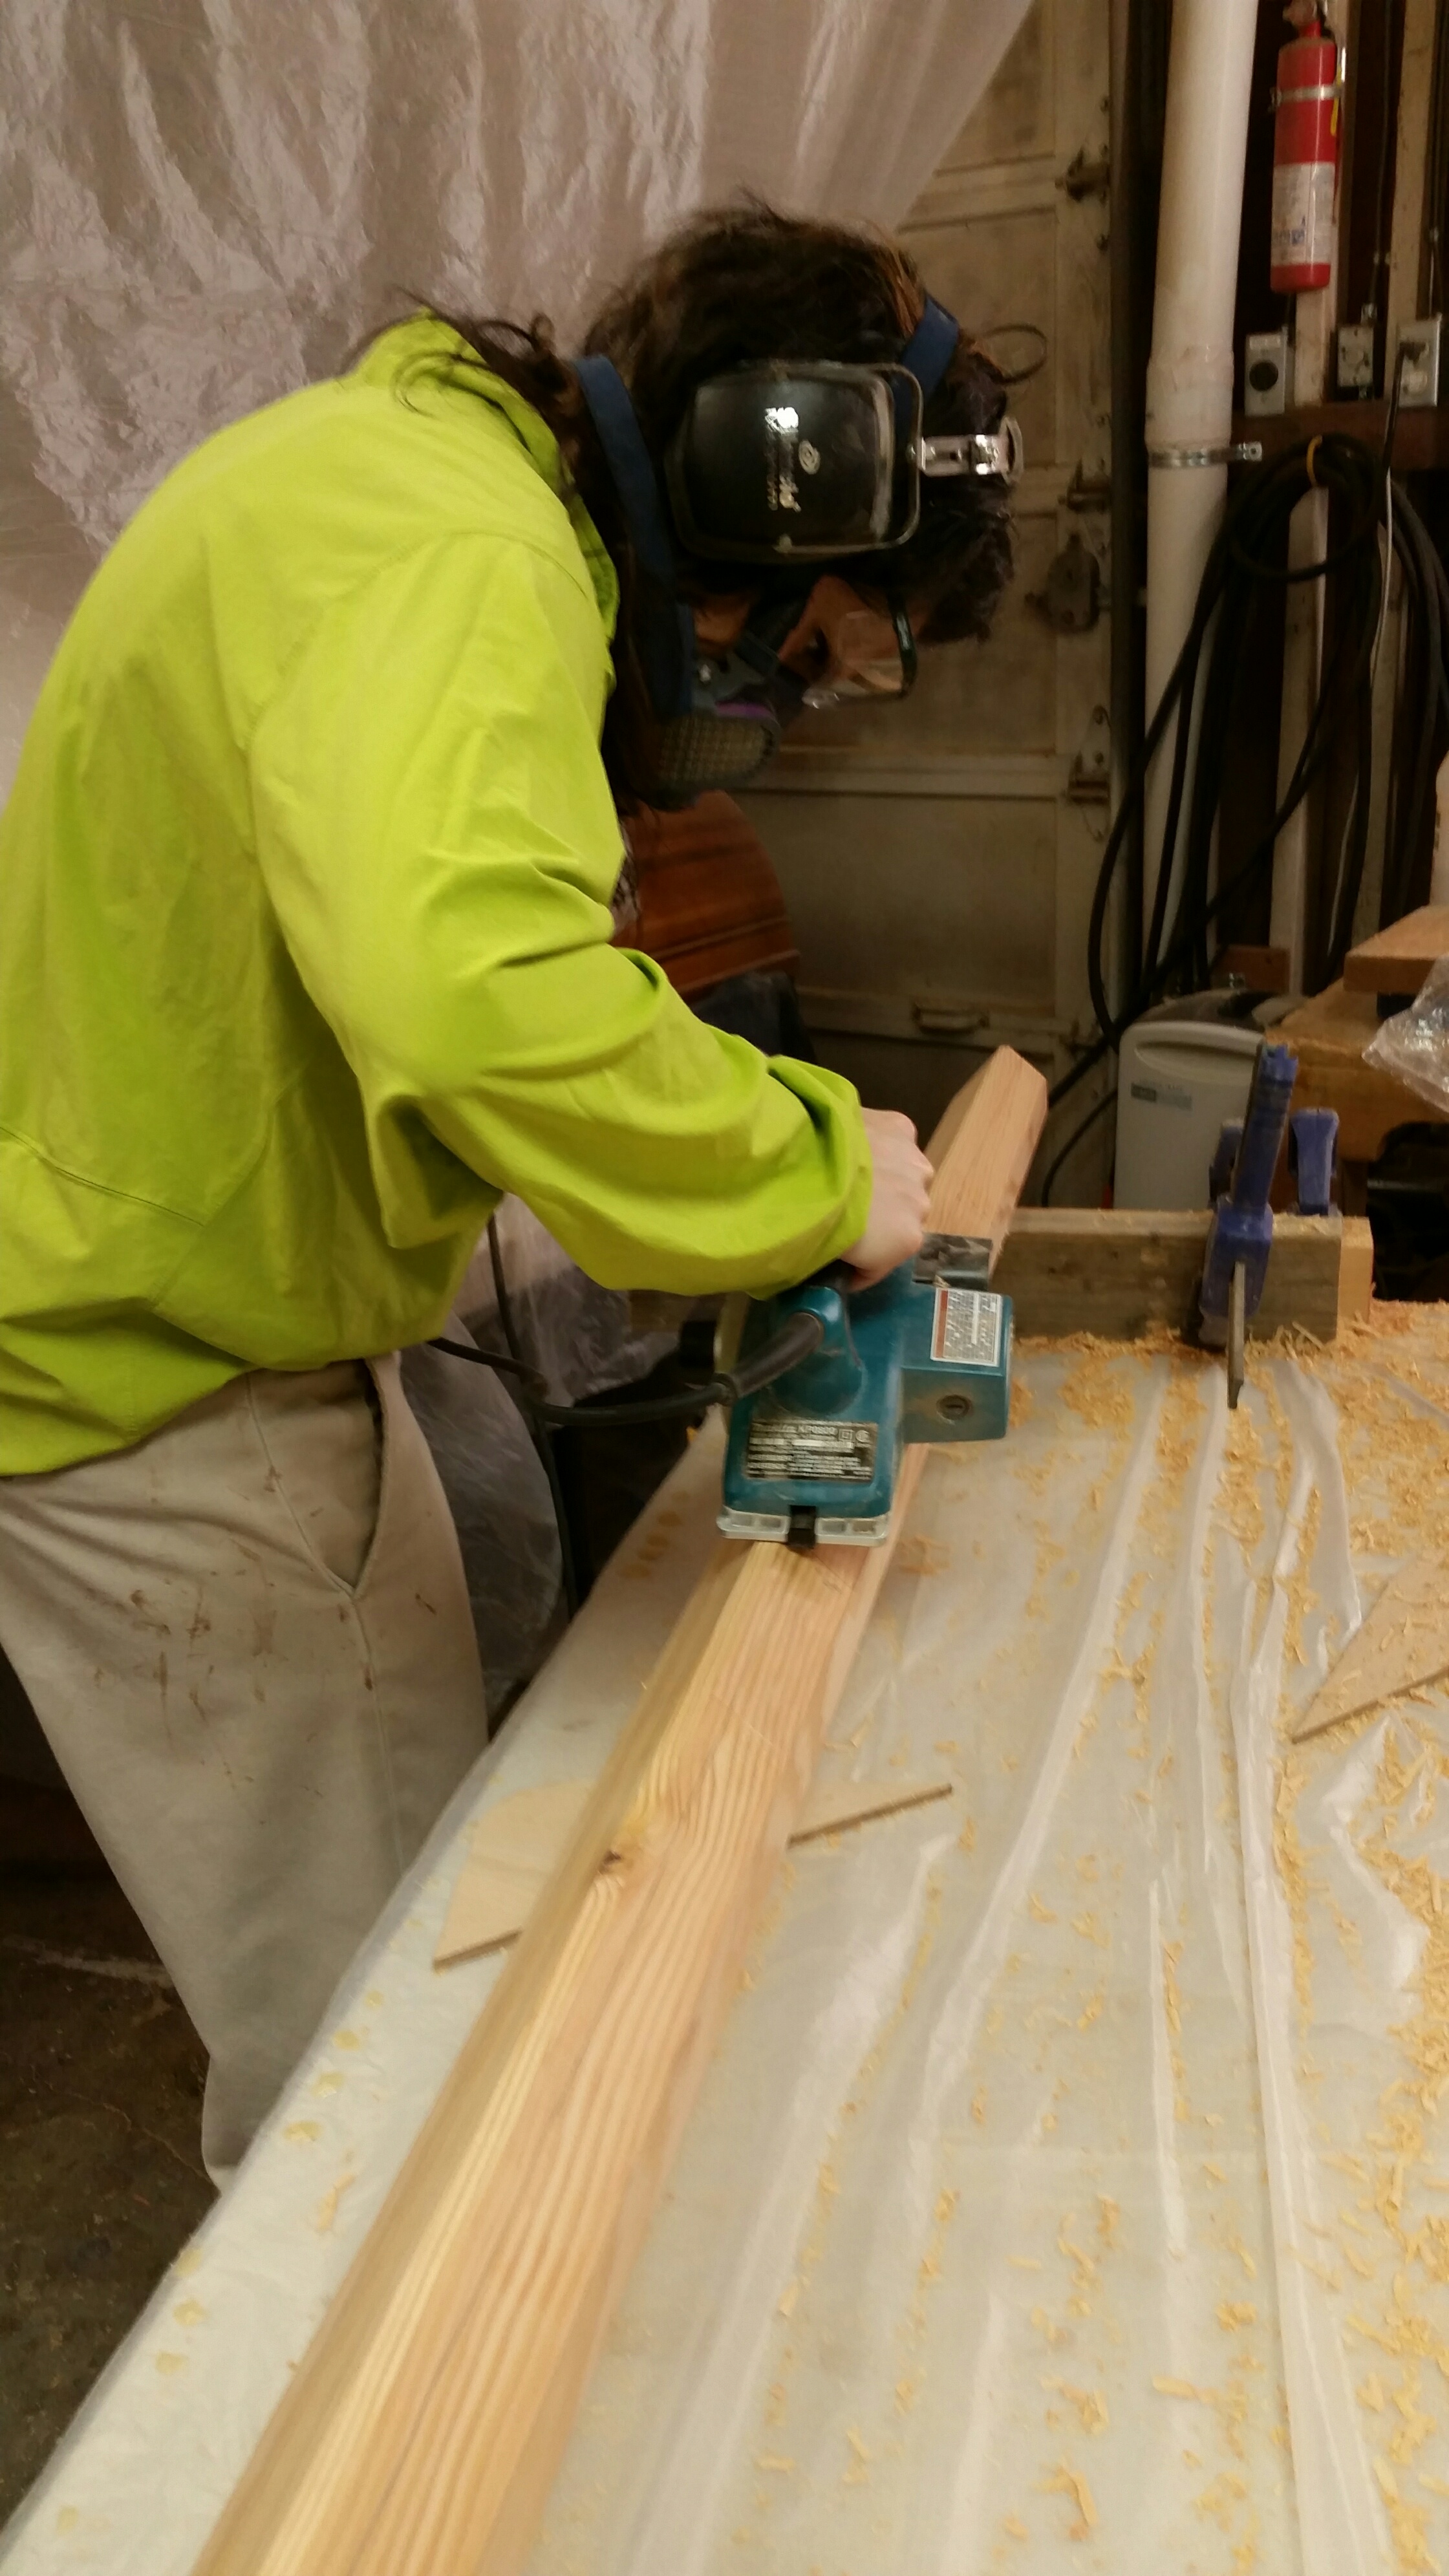
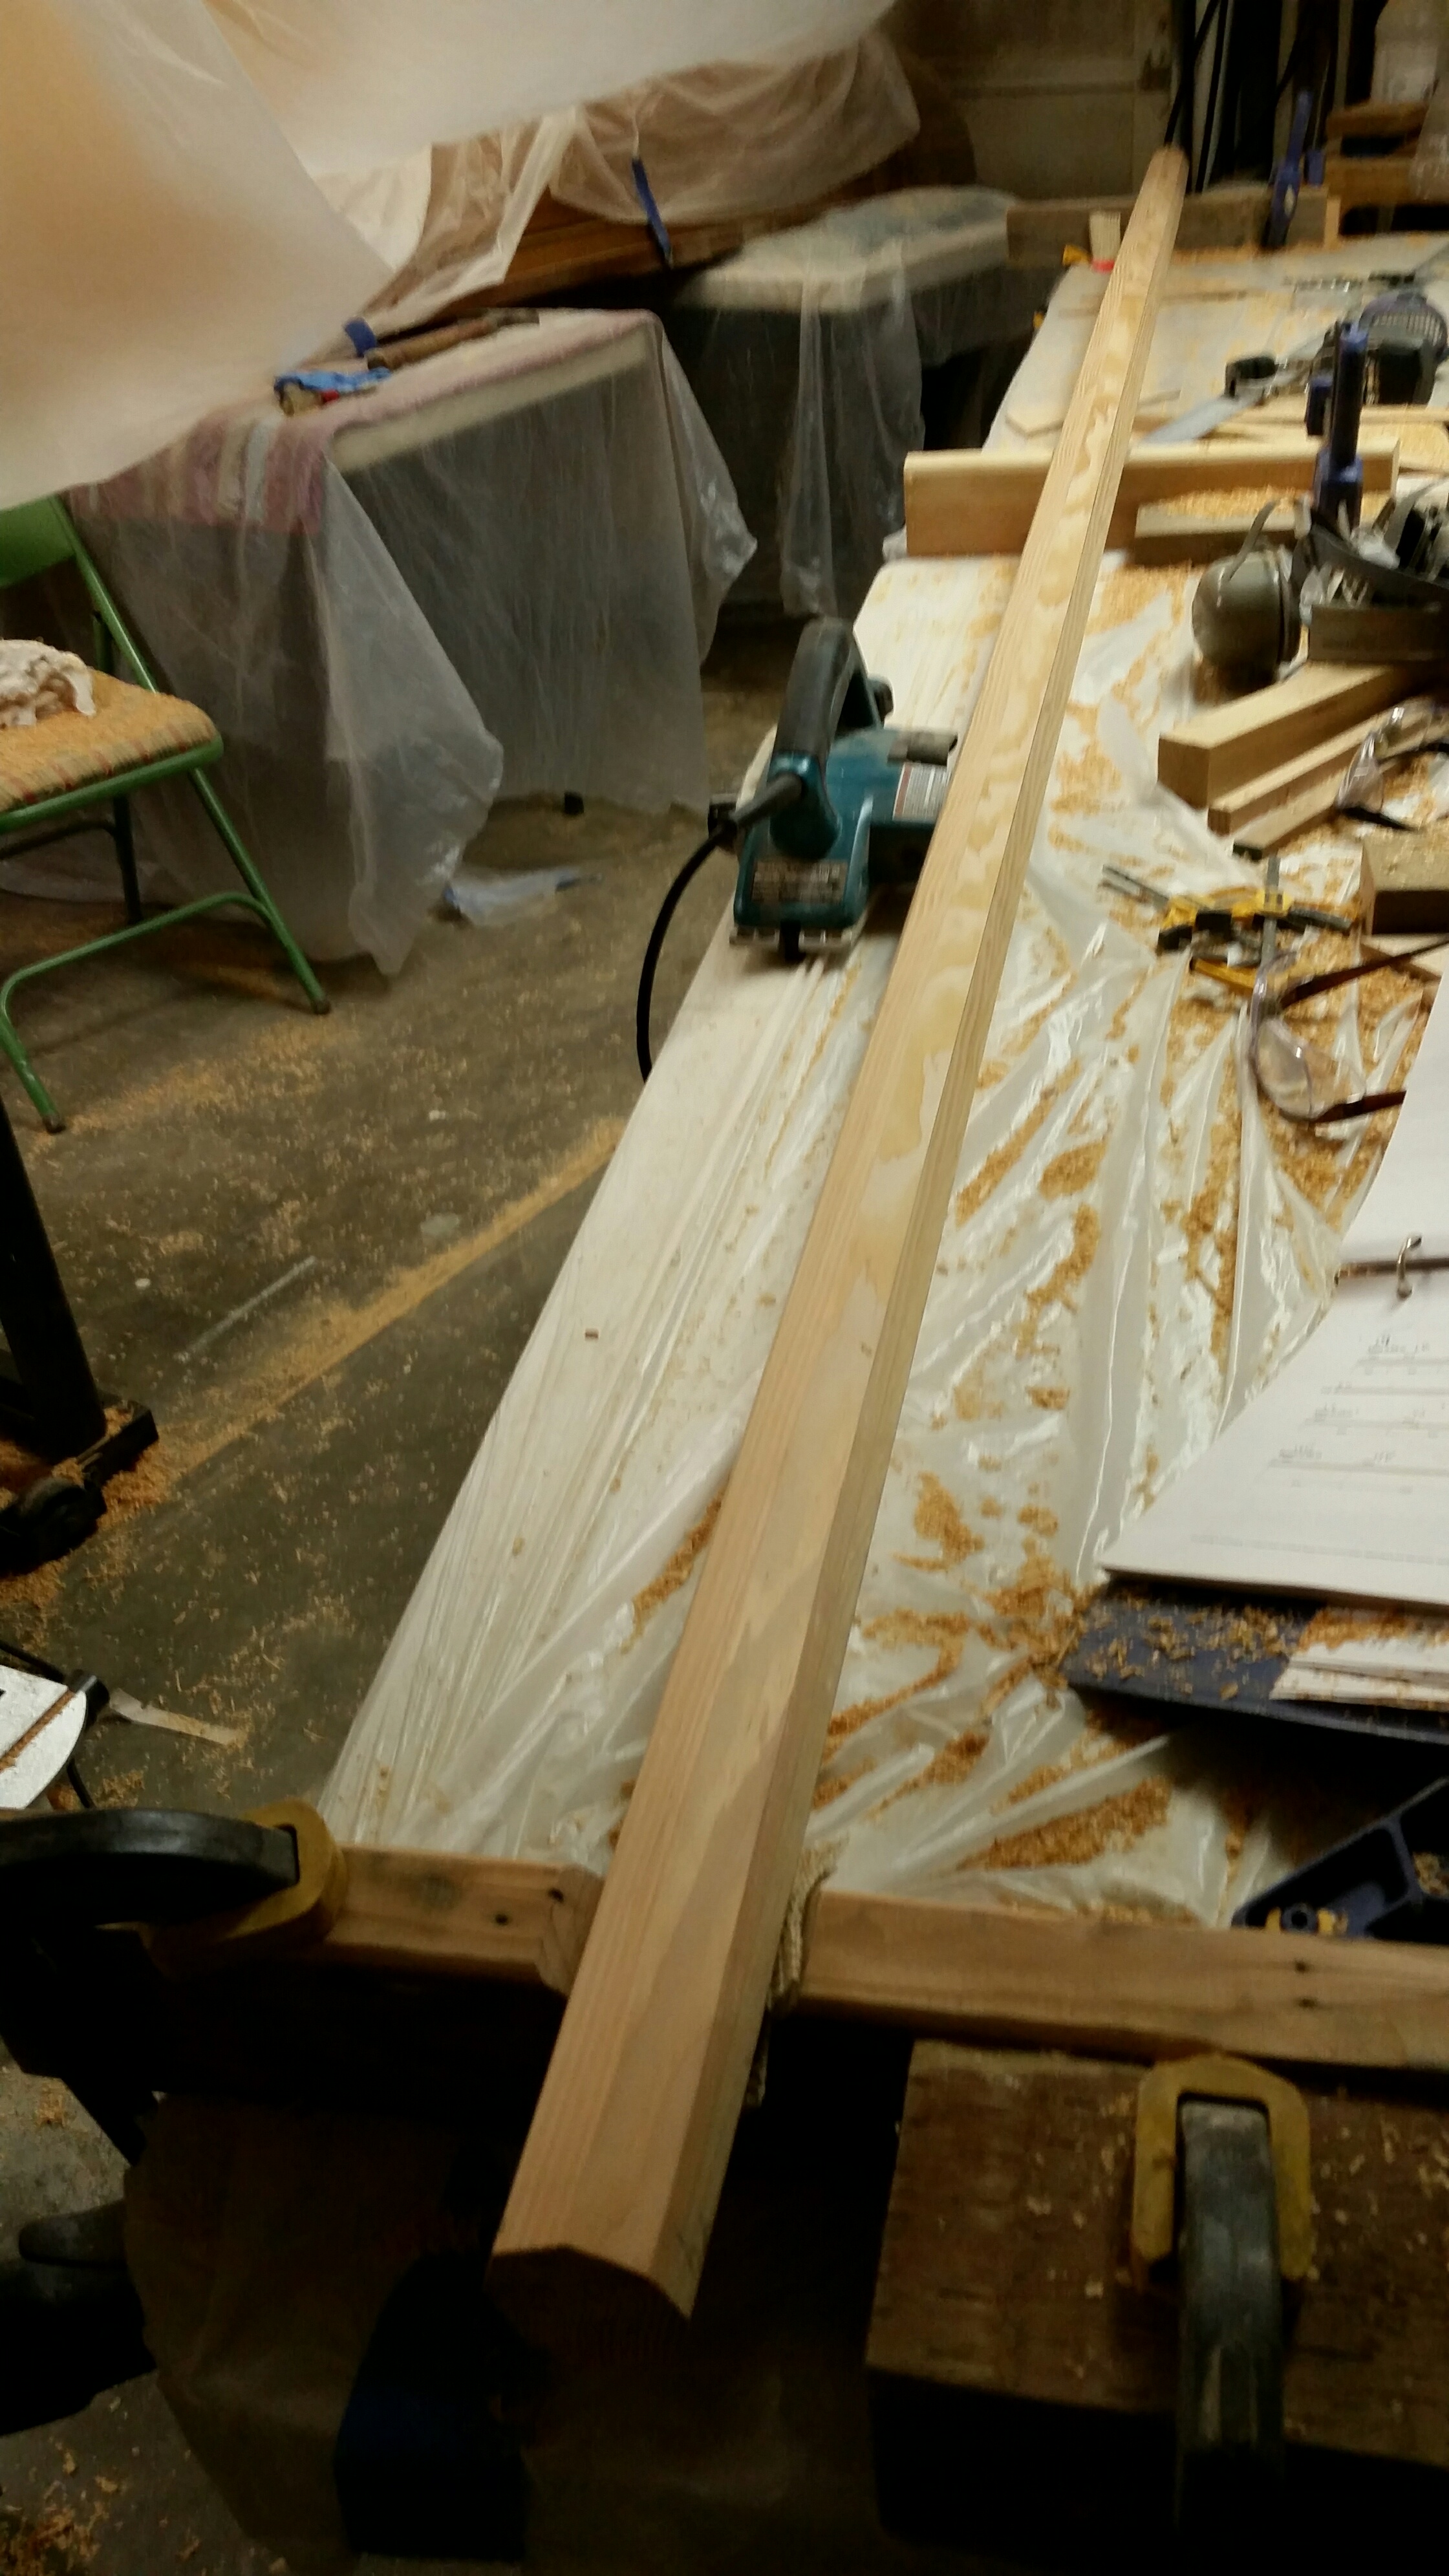
Planed and sanded the gunnels/rub-rails. Used an electric planer and then hand planed in the tight spots. Left them square for now until I position the spots for oarlocks, and then will route edges round.

12/29/2017
Fit and attached with epoxy the port and starboard gunnels. Also fashioned and installed mast step and thwart cleats recently. Took some time off for Christmas. Merry Christmas everyone!

12/16/2017
Built the thwart (tricky to get the right size/shape) and installed rub rails using some 5/8″ flat-head screws on inside to keep them aligned with sheer (top edge of hull).
12/14/2017
Trimmed up the deck. Finished the daggerboard case. Built frame/cleats for aft deck and got them glued up along with the aft deck plywood. Laminated the thwart.

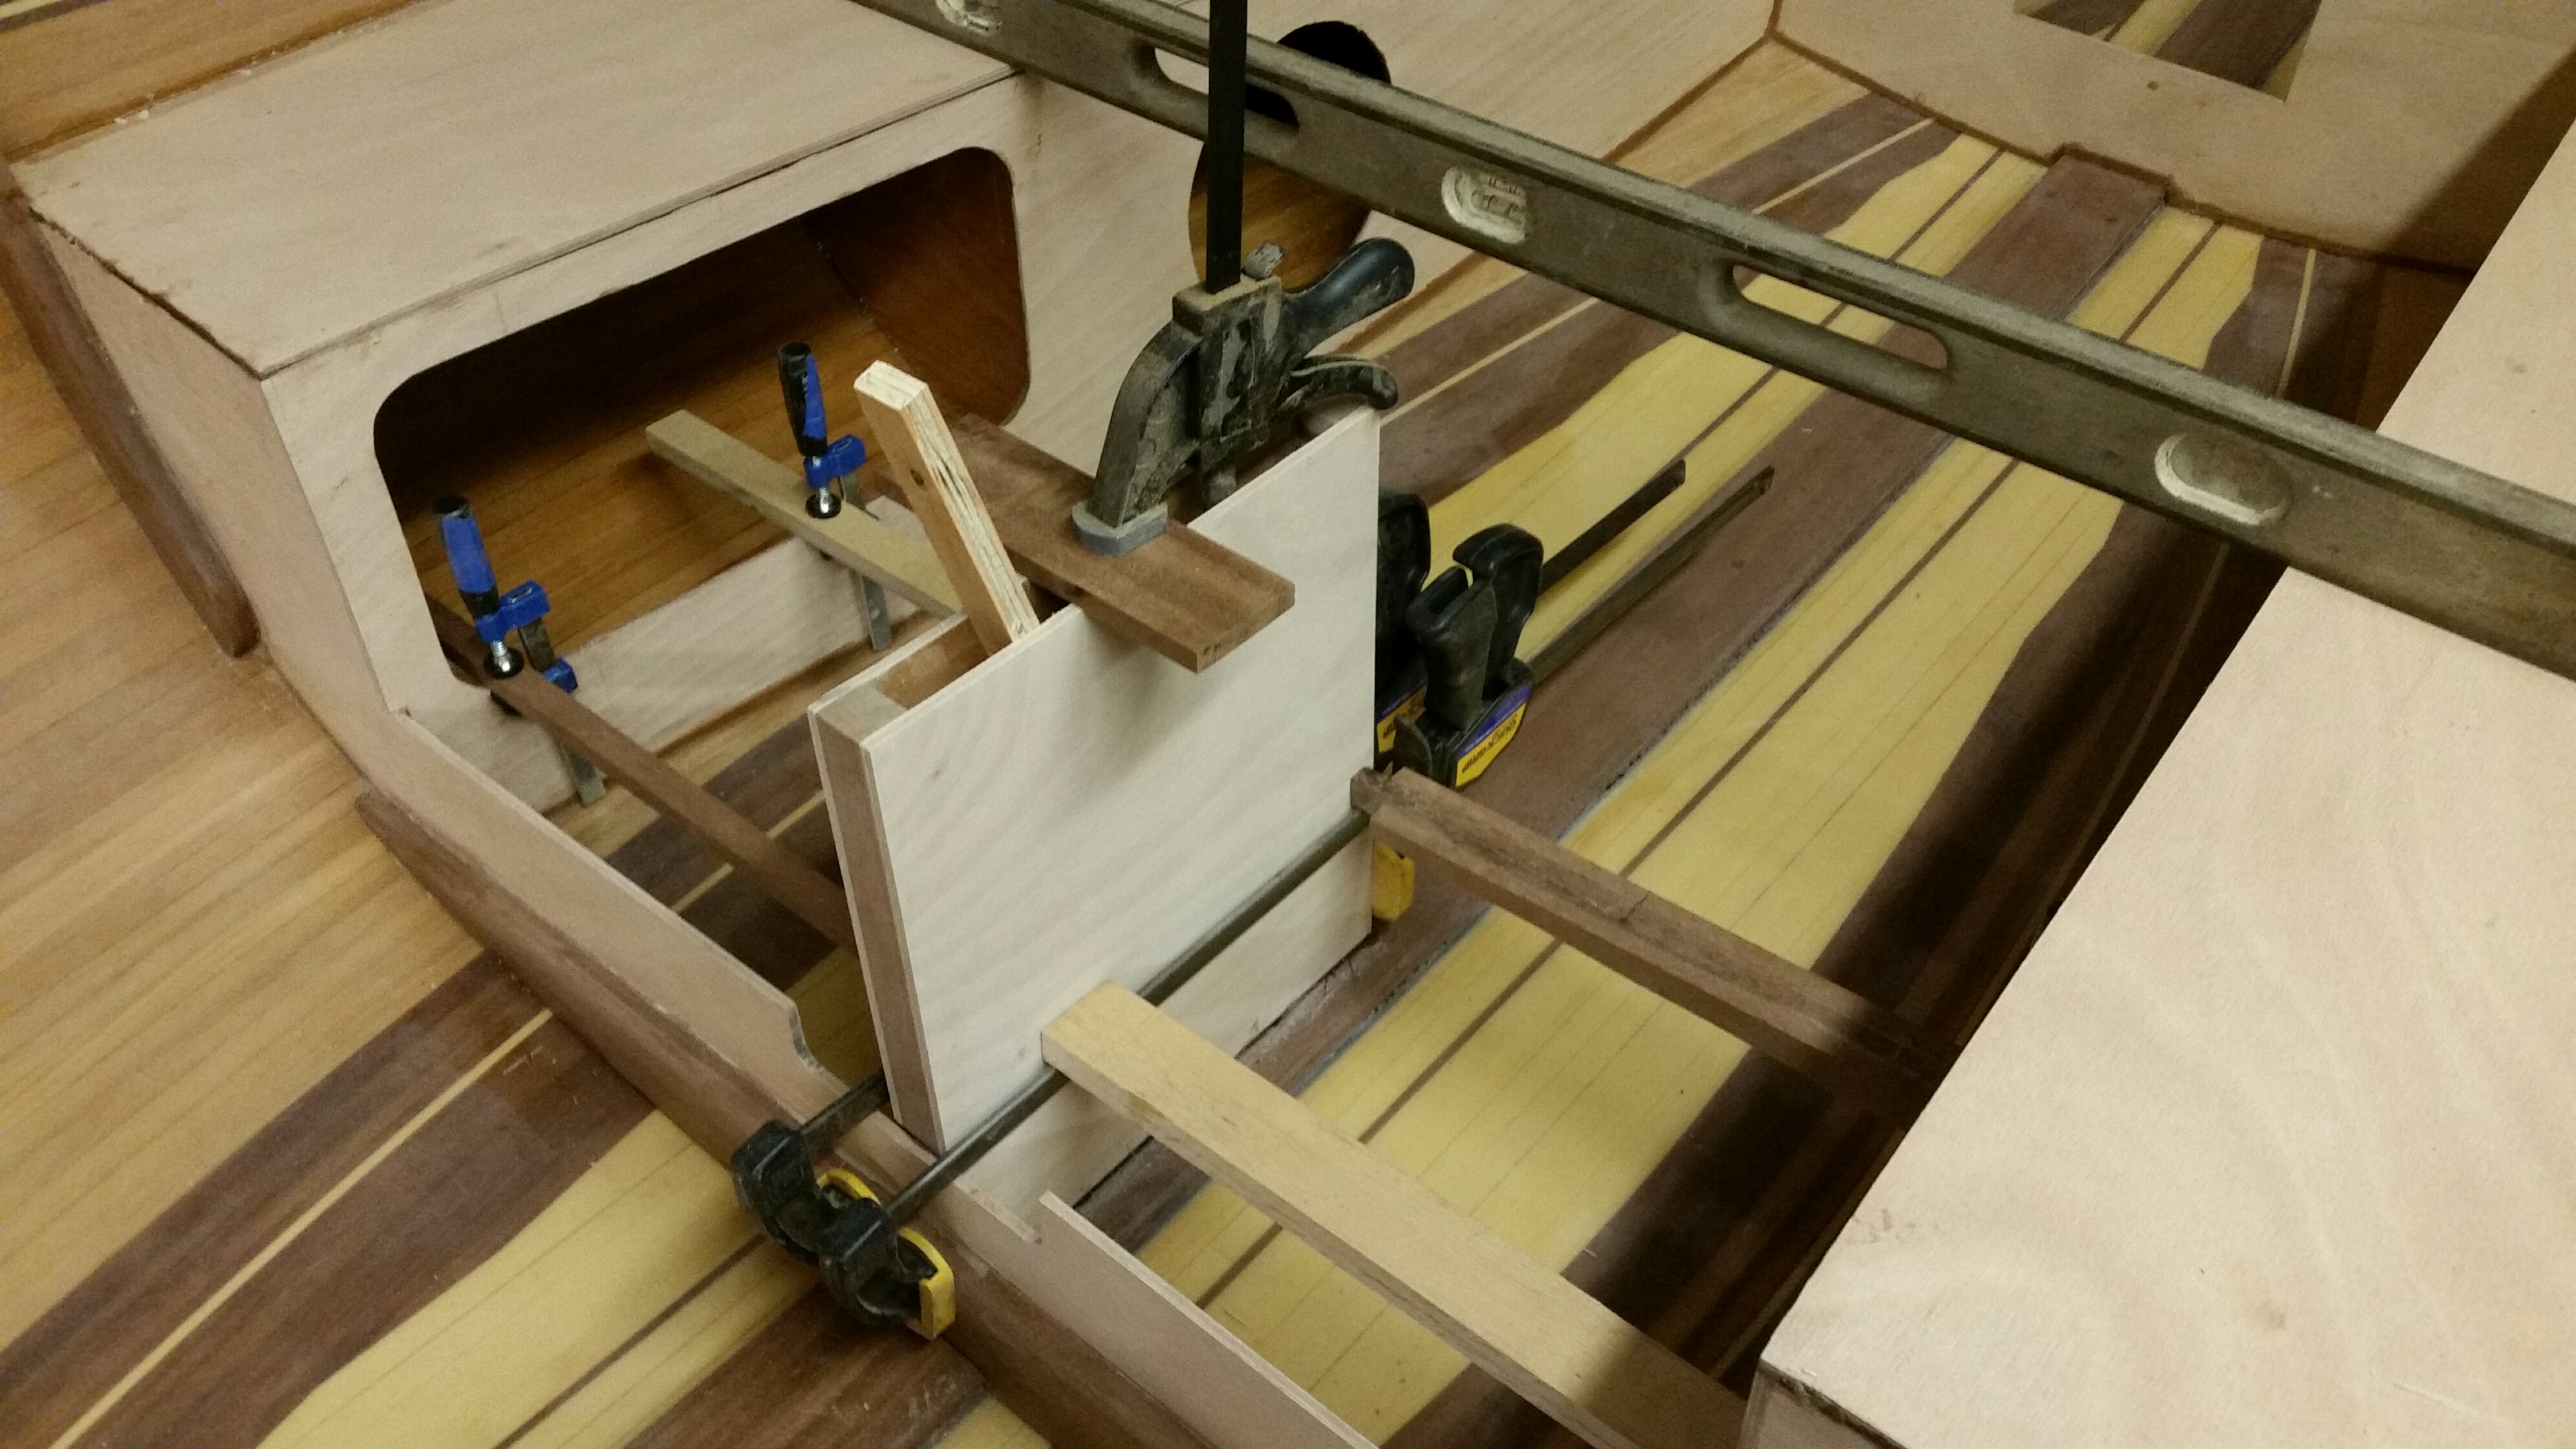
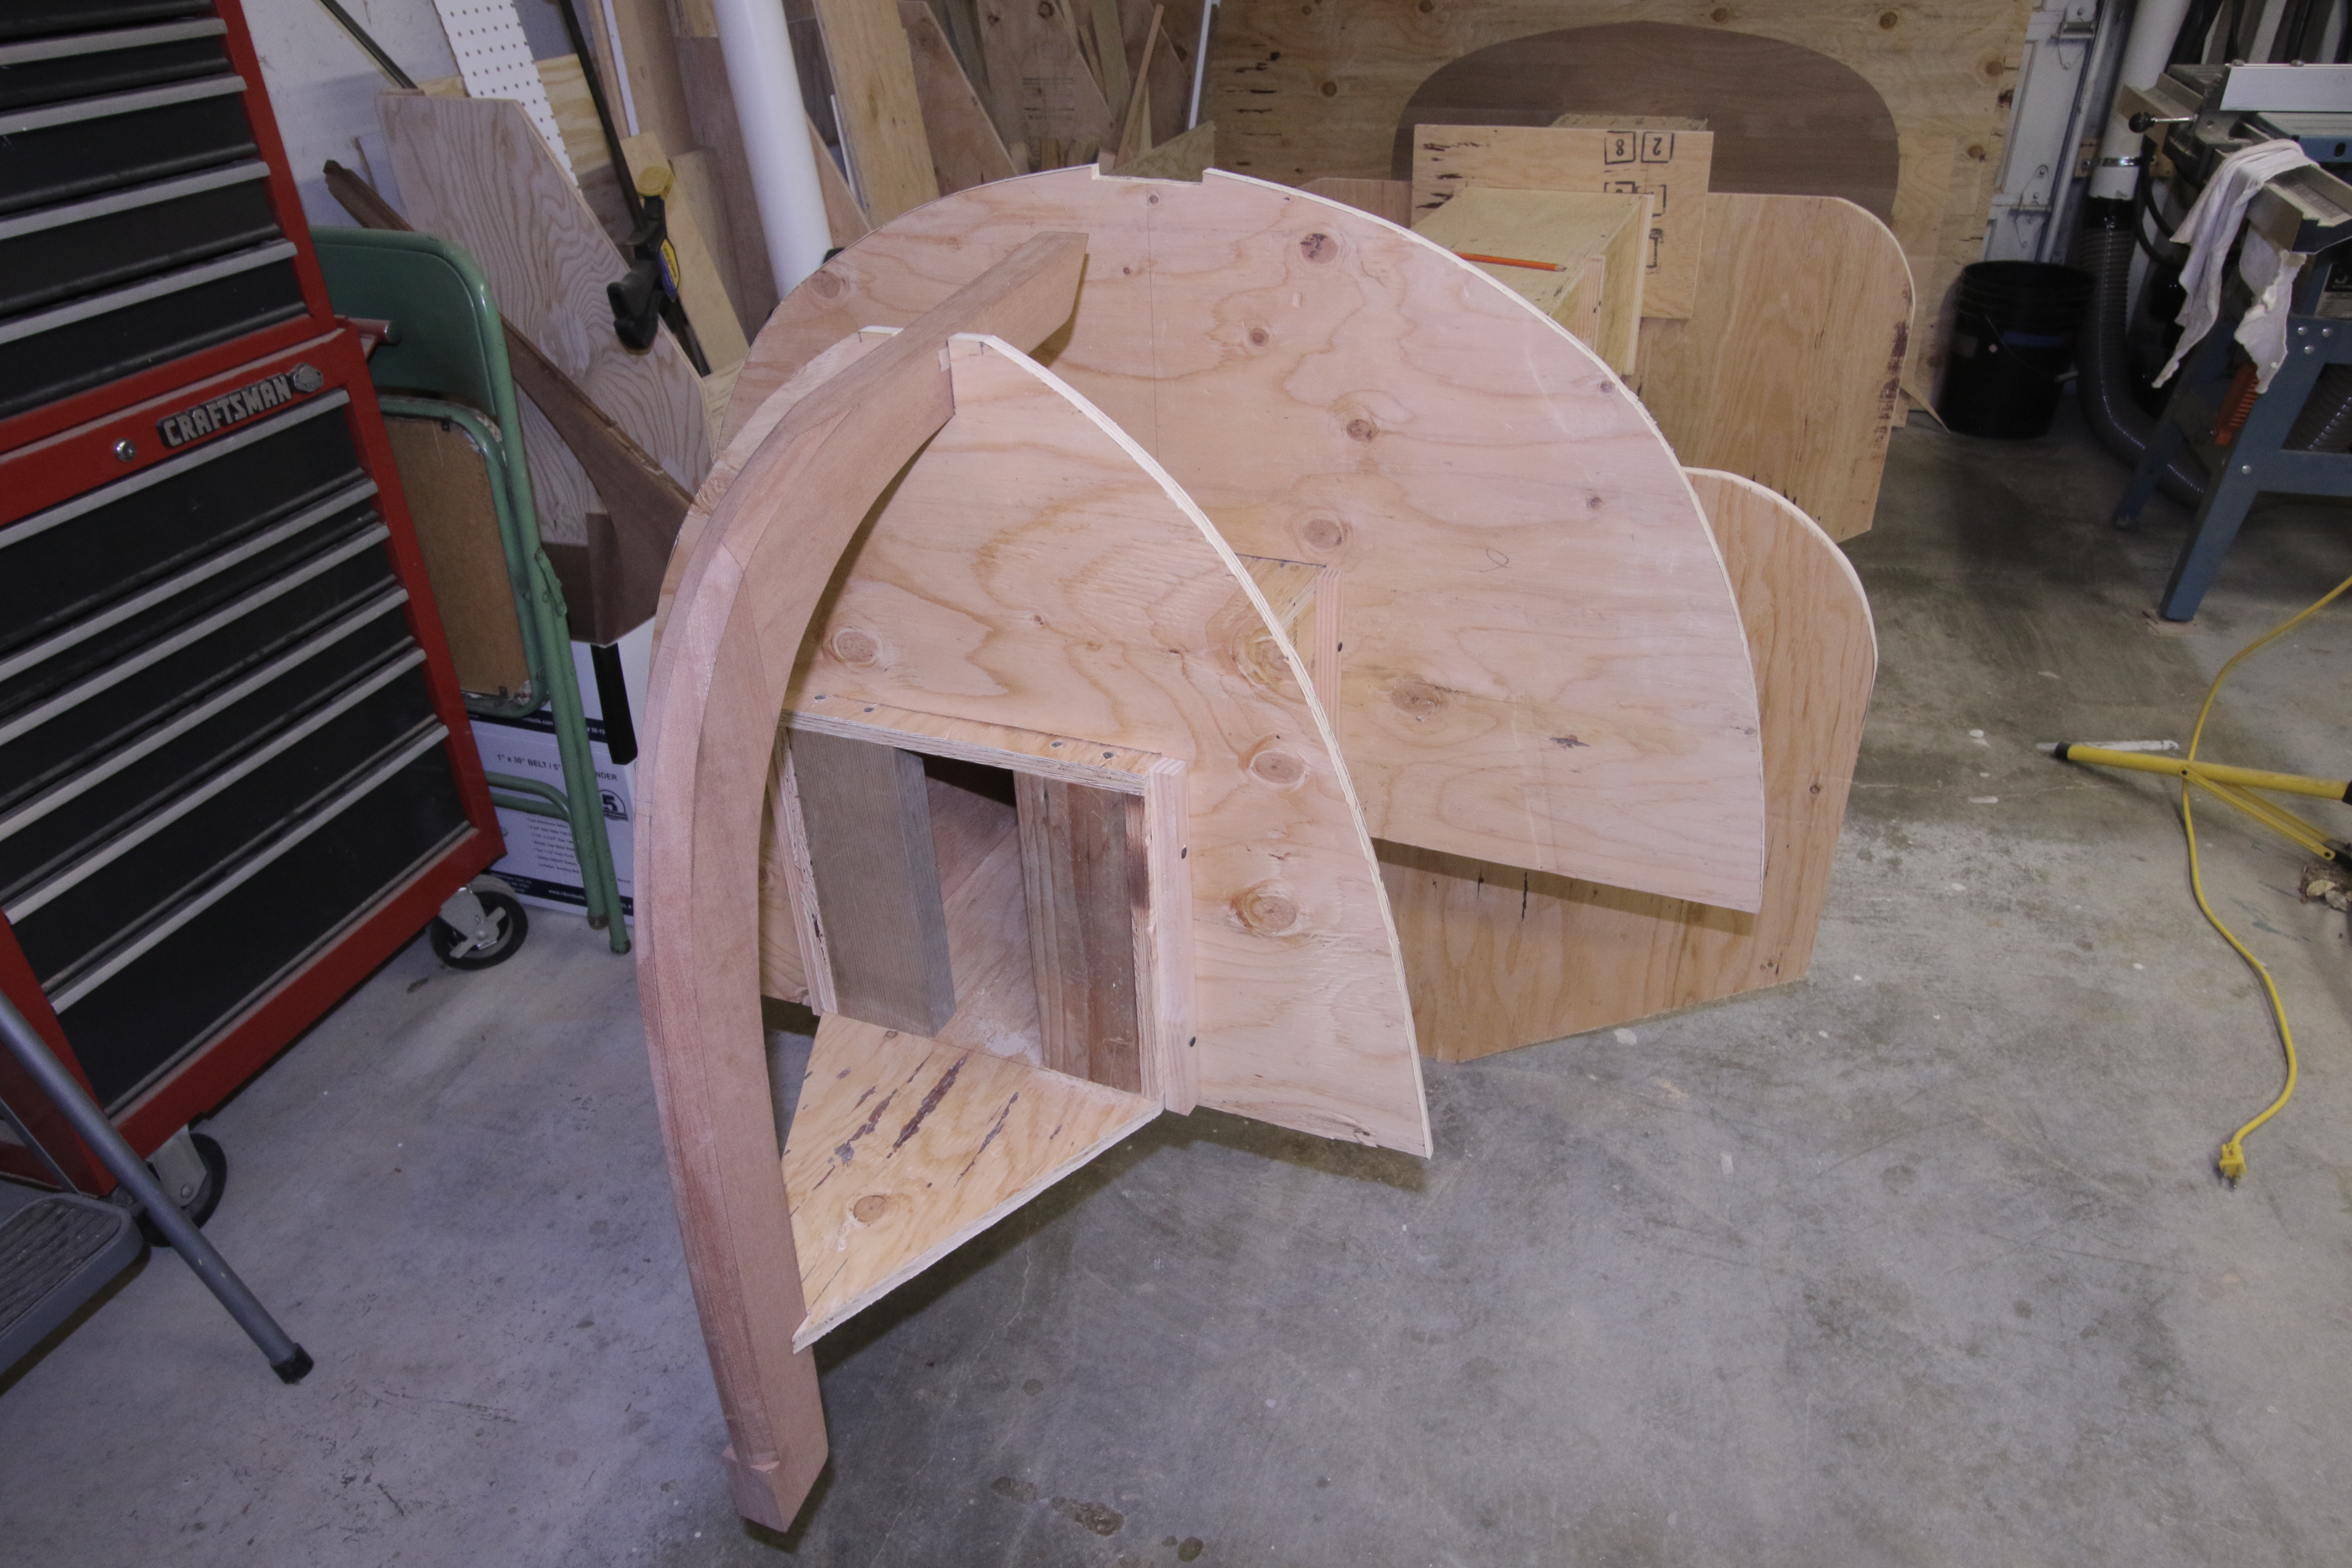
12/12/2017
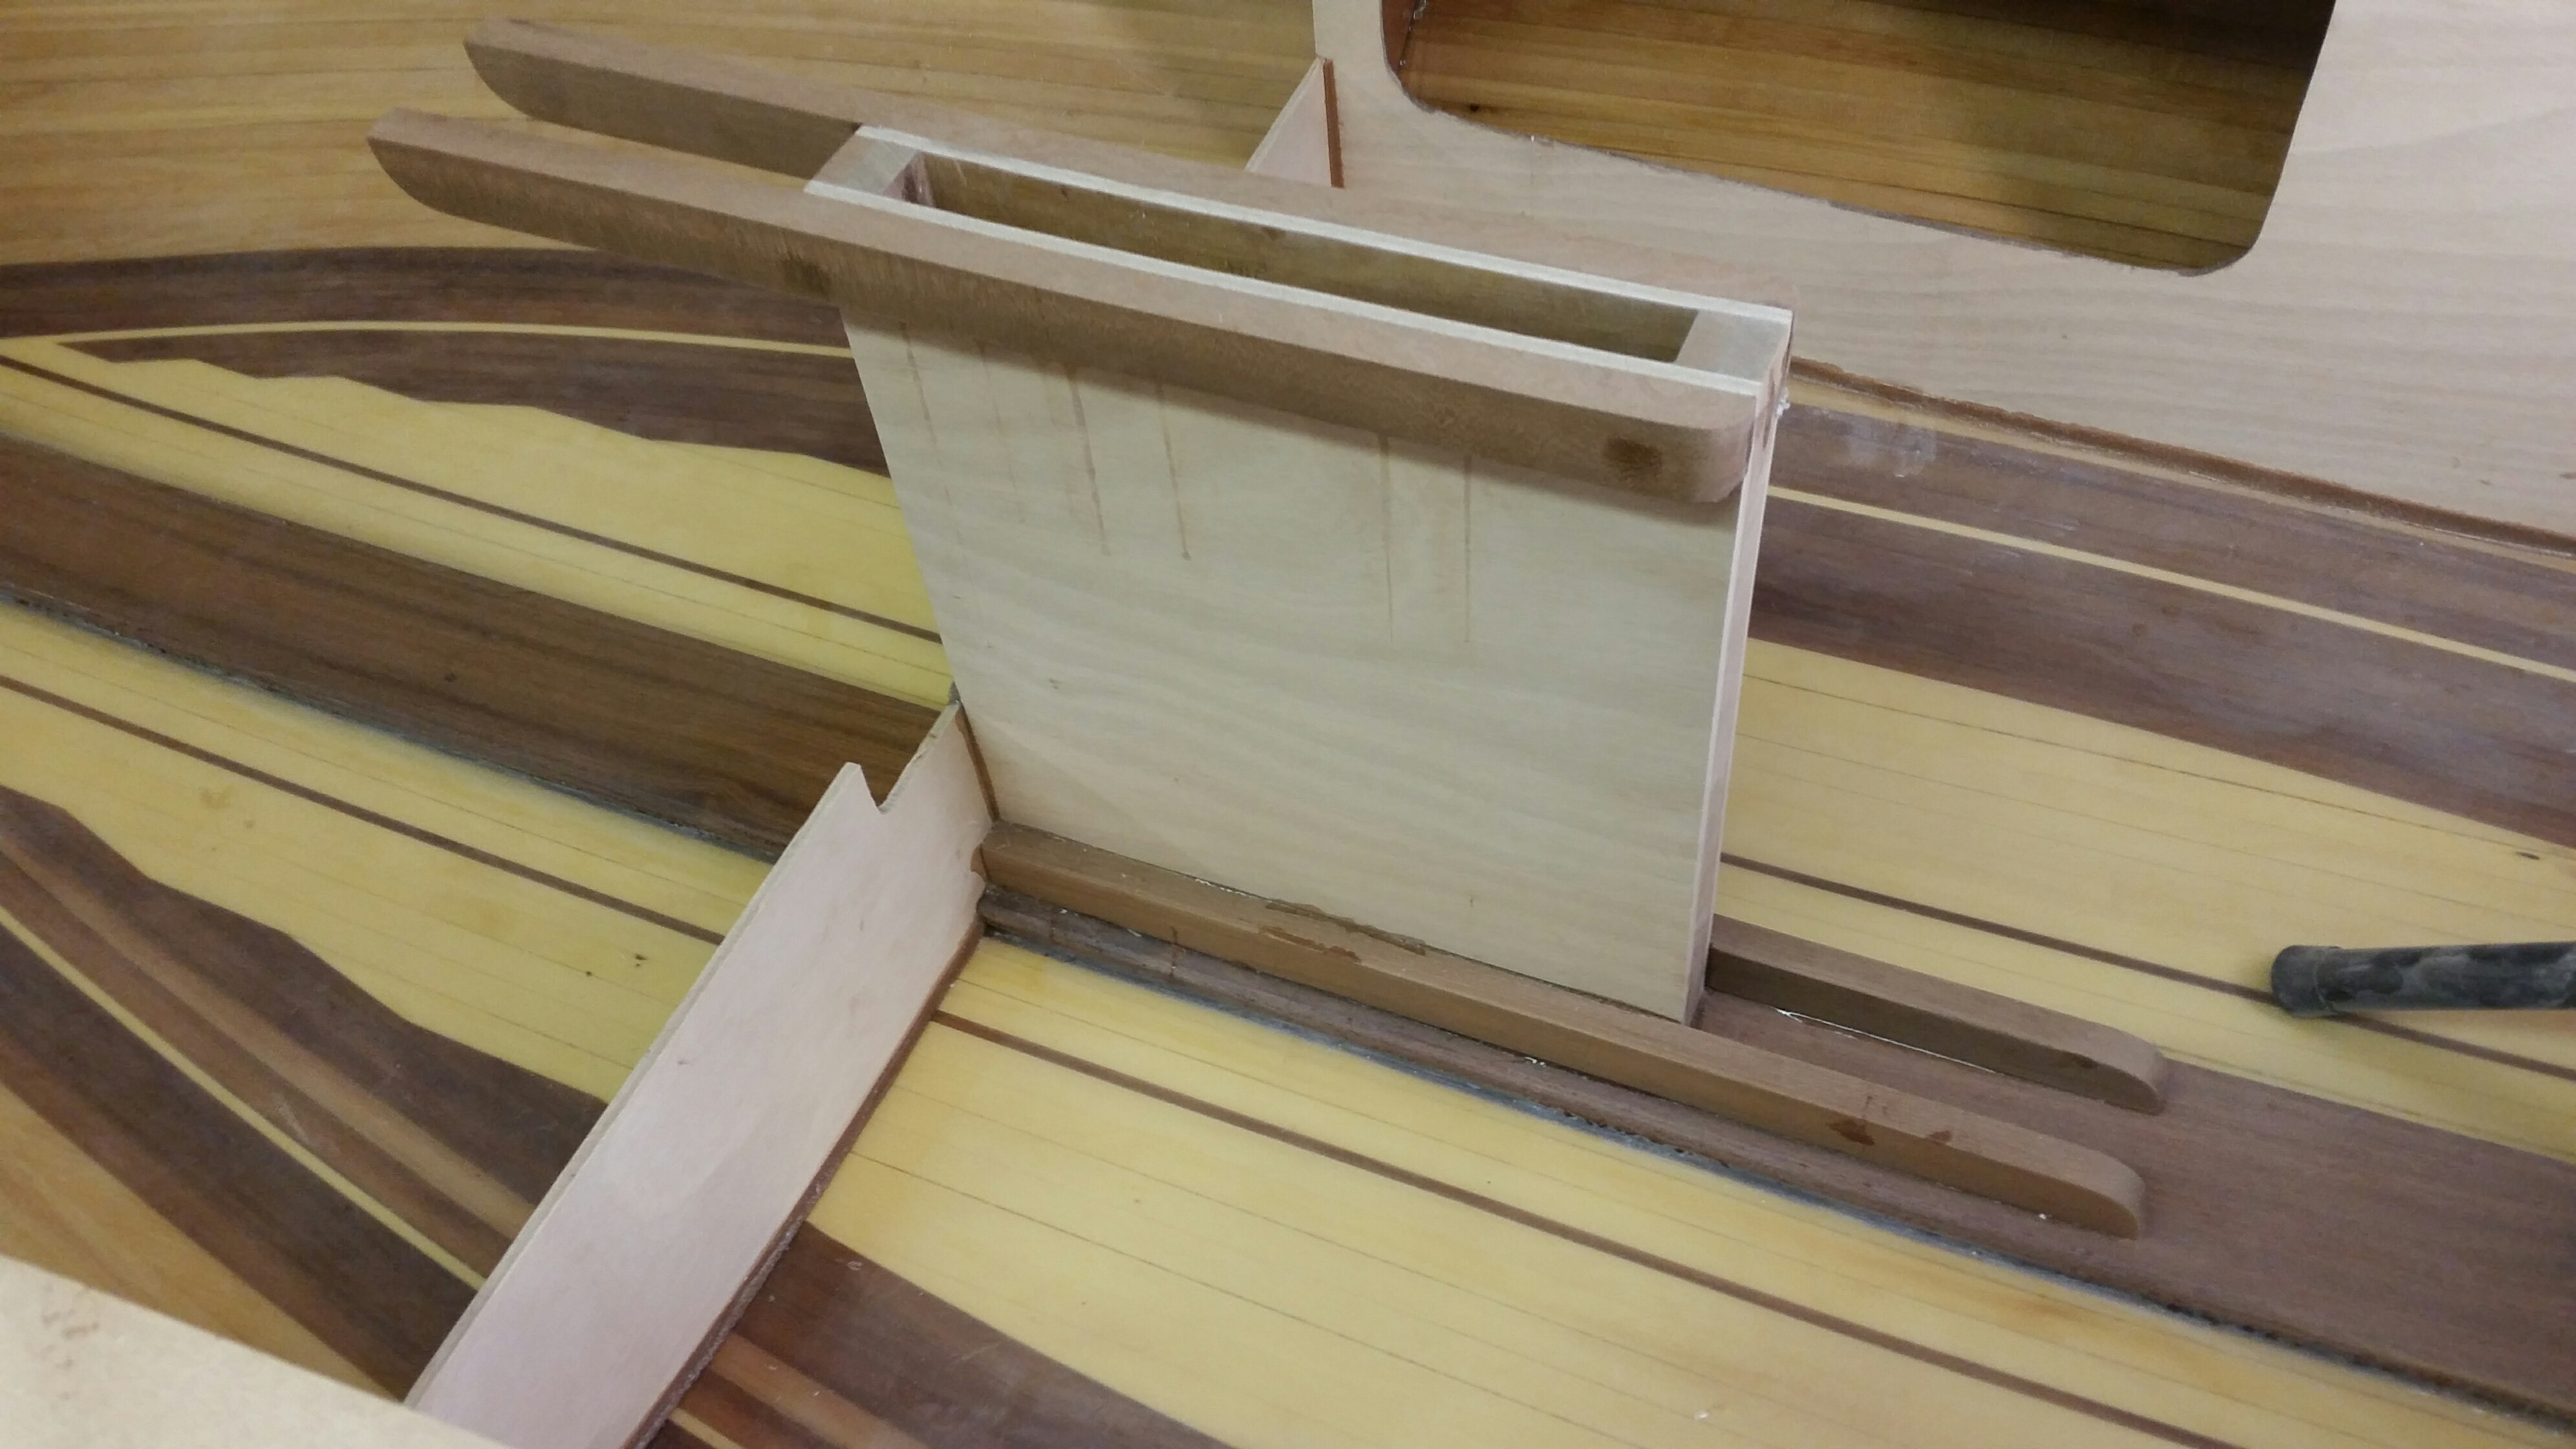
Finished fiberglass on deck. Built daggerboard case parts including sides (fiberglassed inside), posts, logs and carlins. Assembled case first and installed in hull after it was dry, ensuring all was square and plumb.
12/8/2017
Deck sanded up and epoxied before fiberglass.
12/7/2017
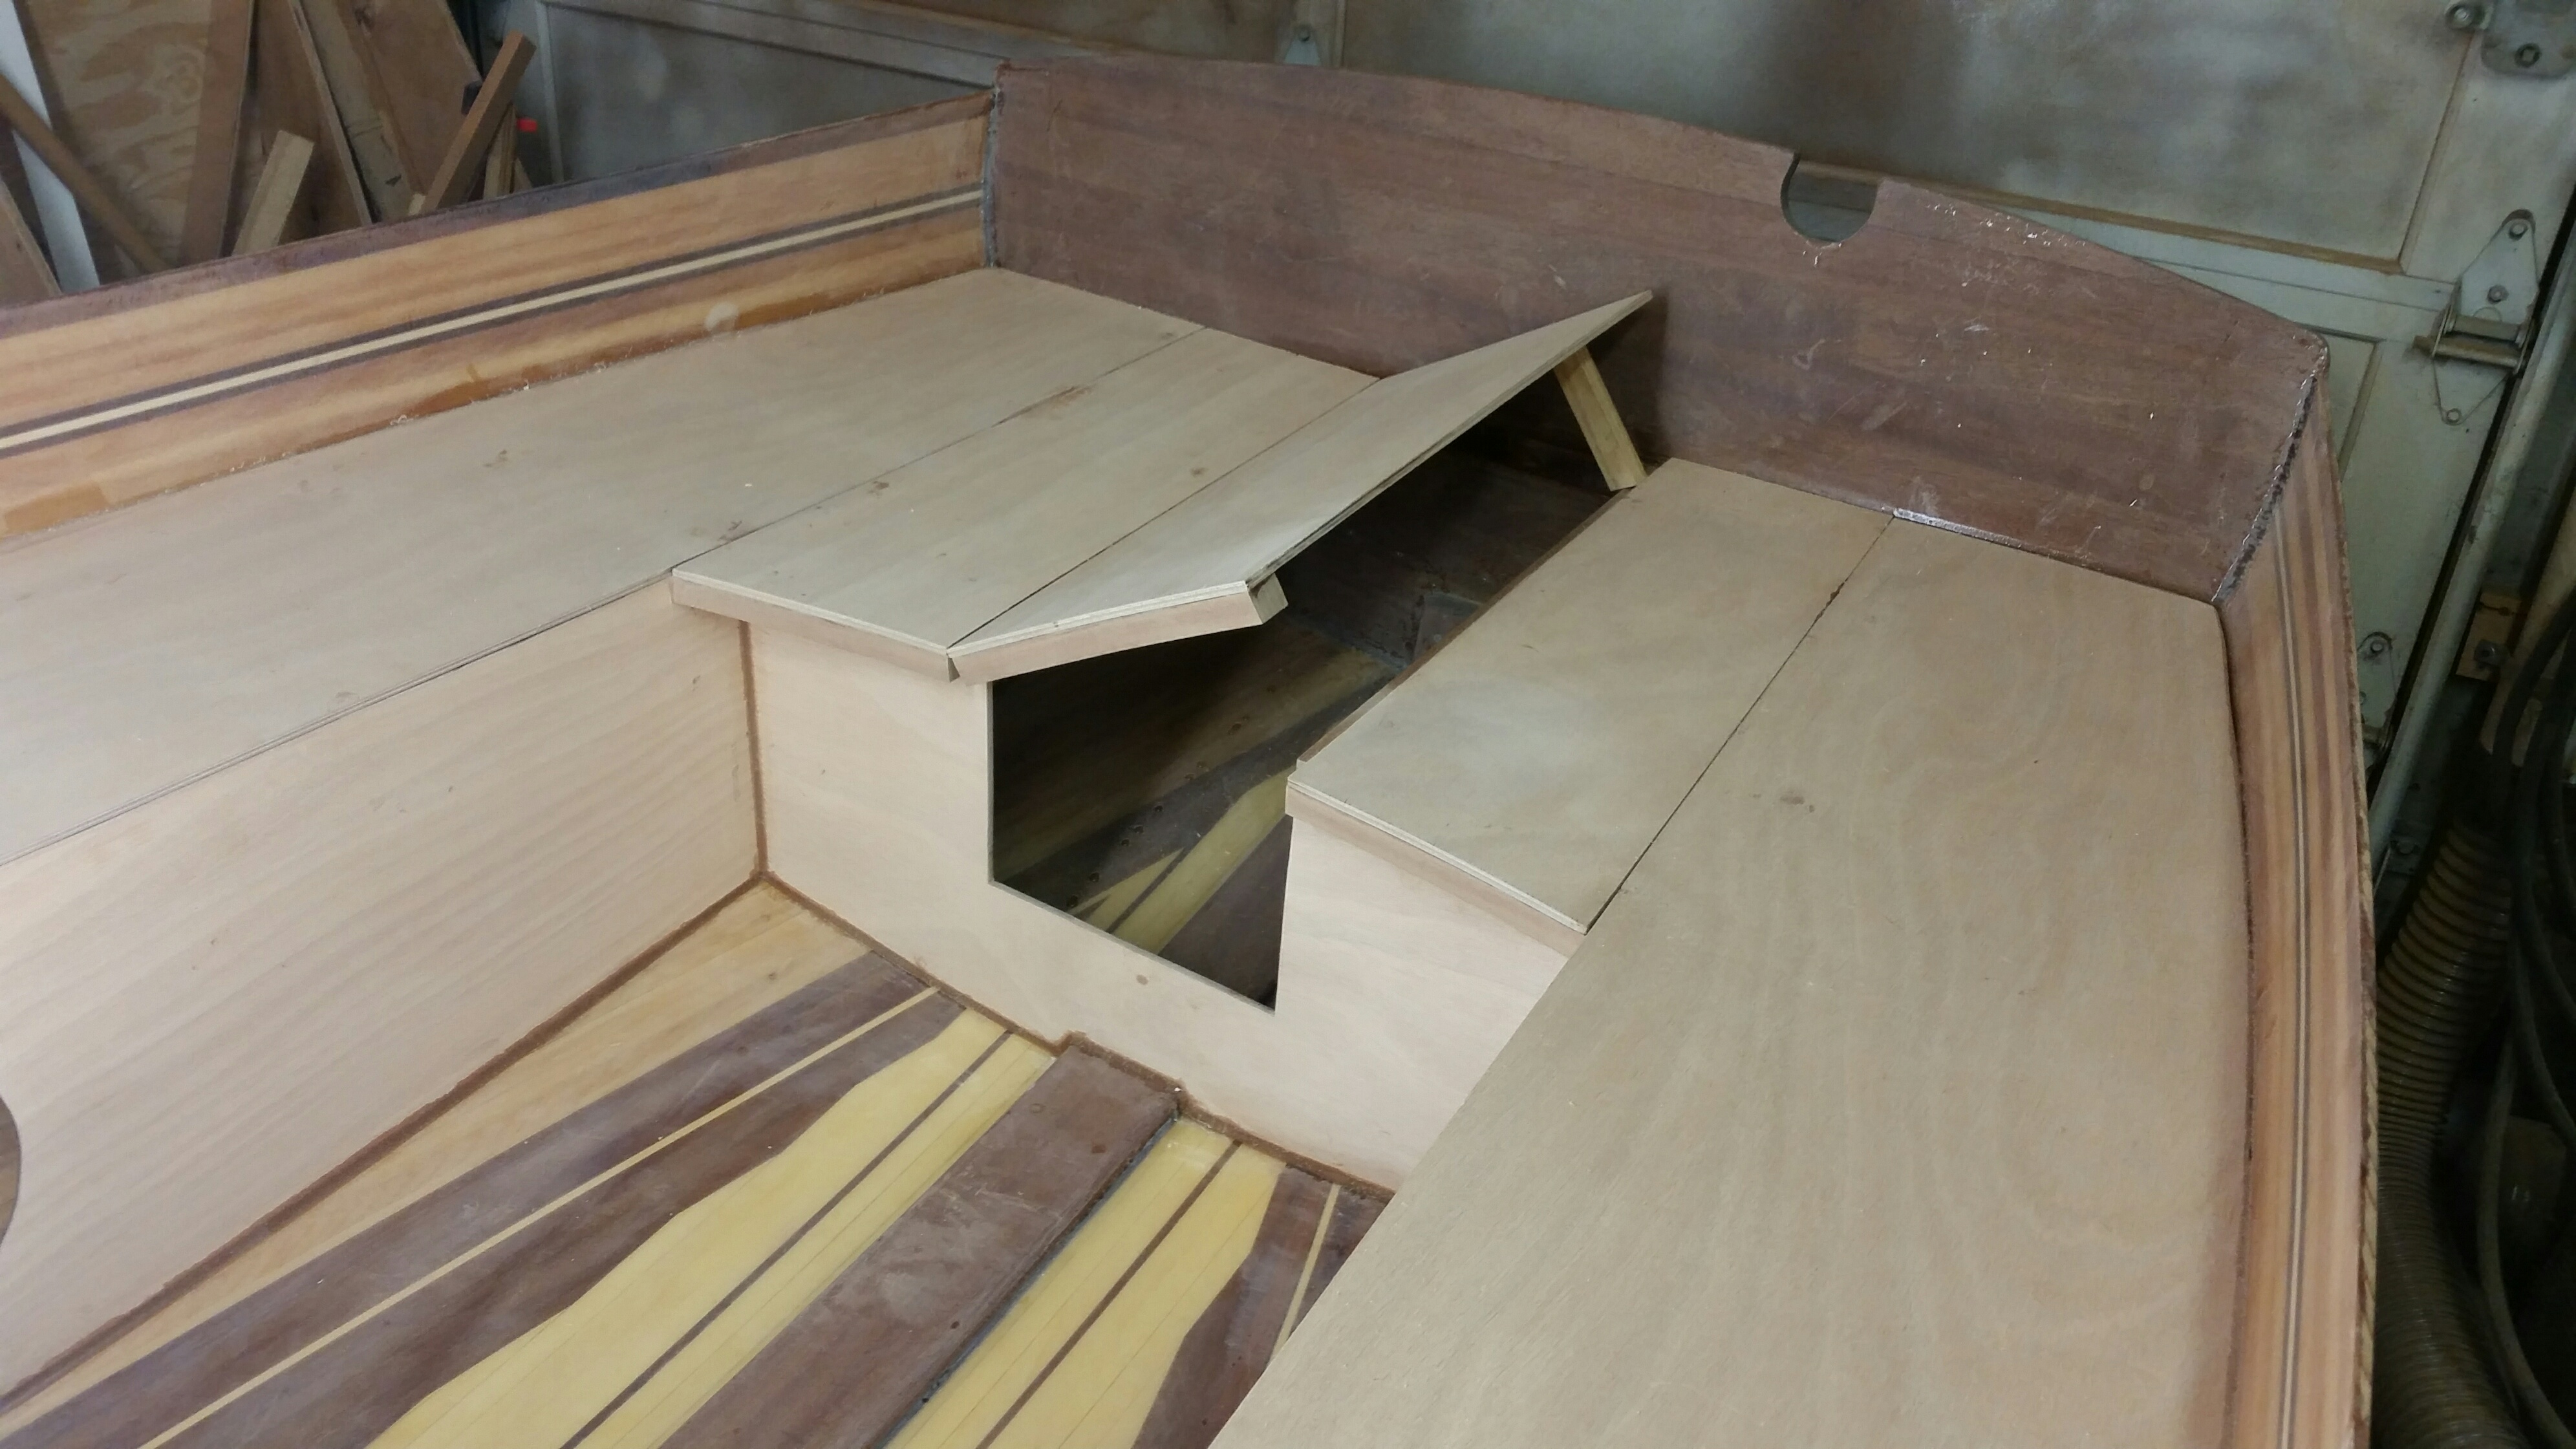
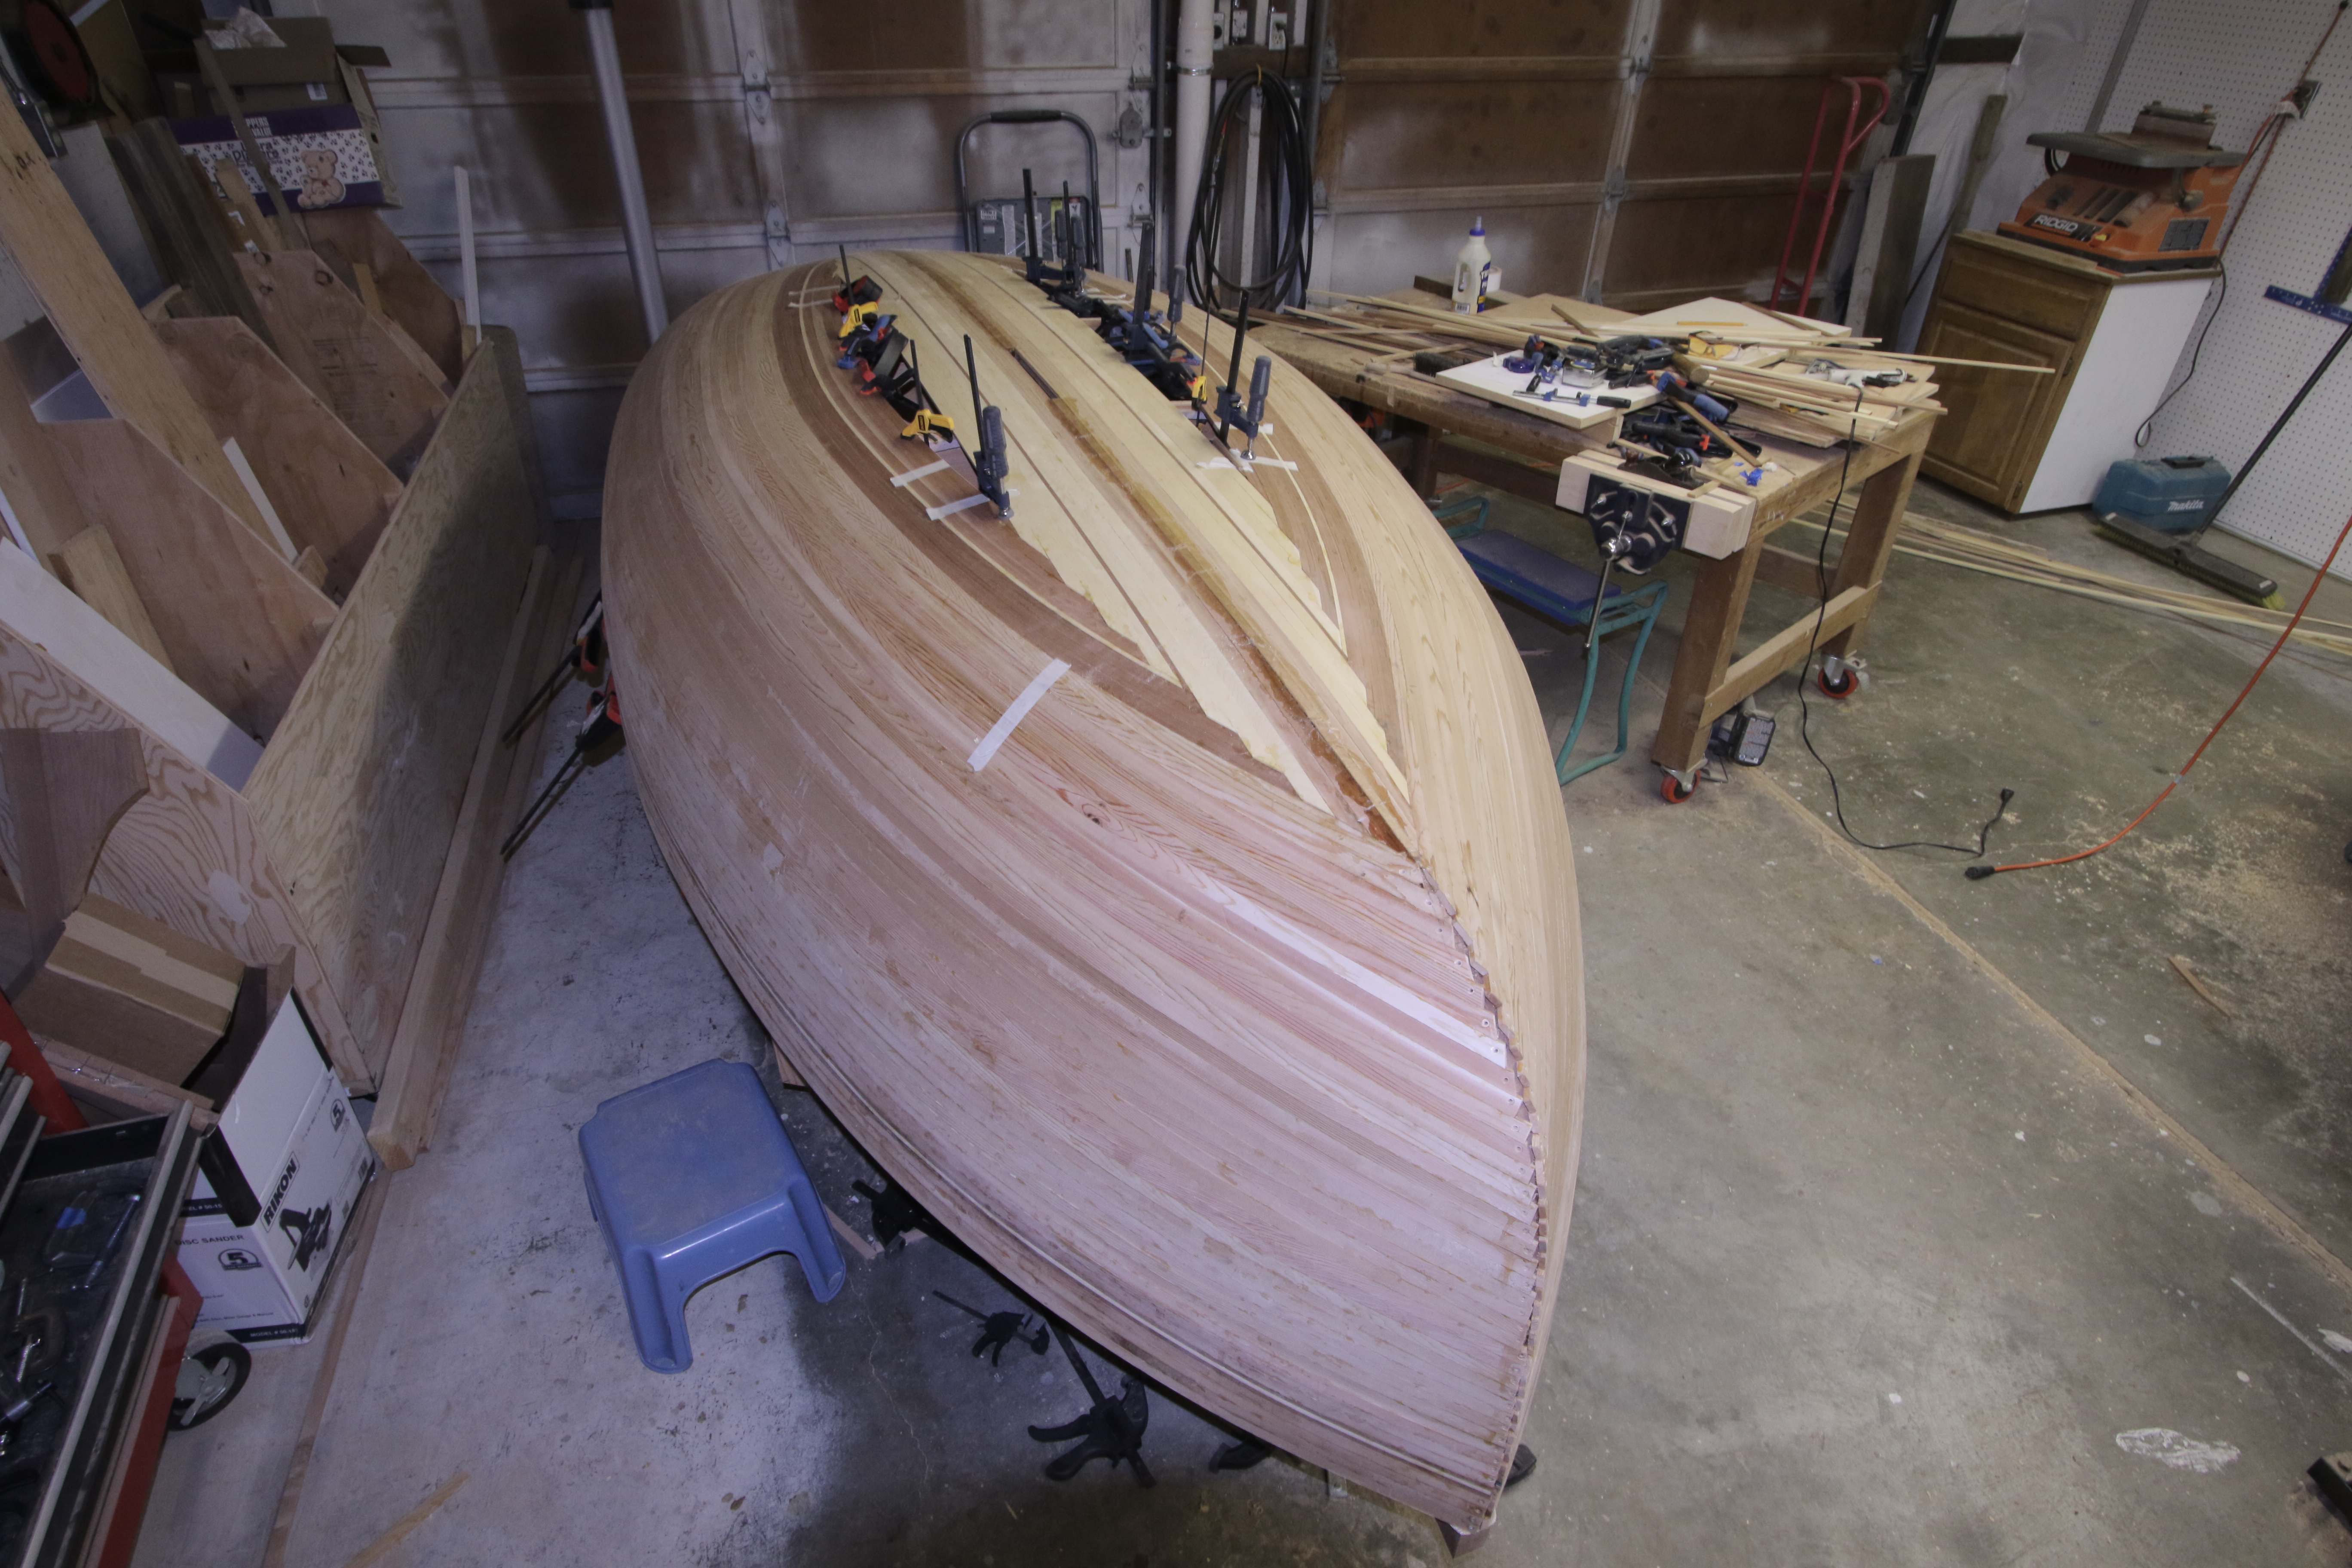
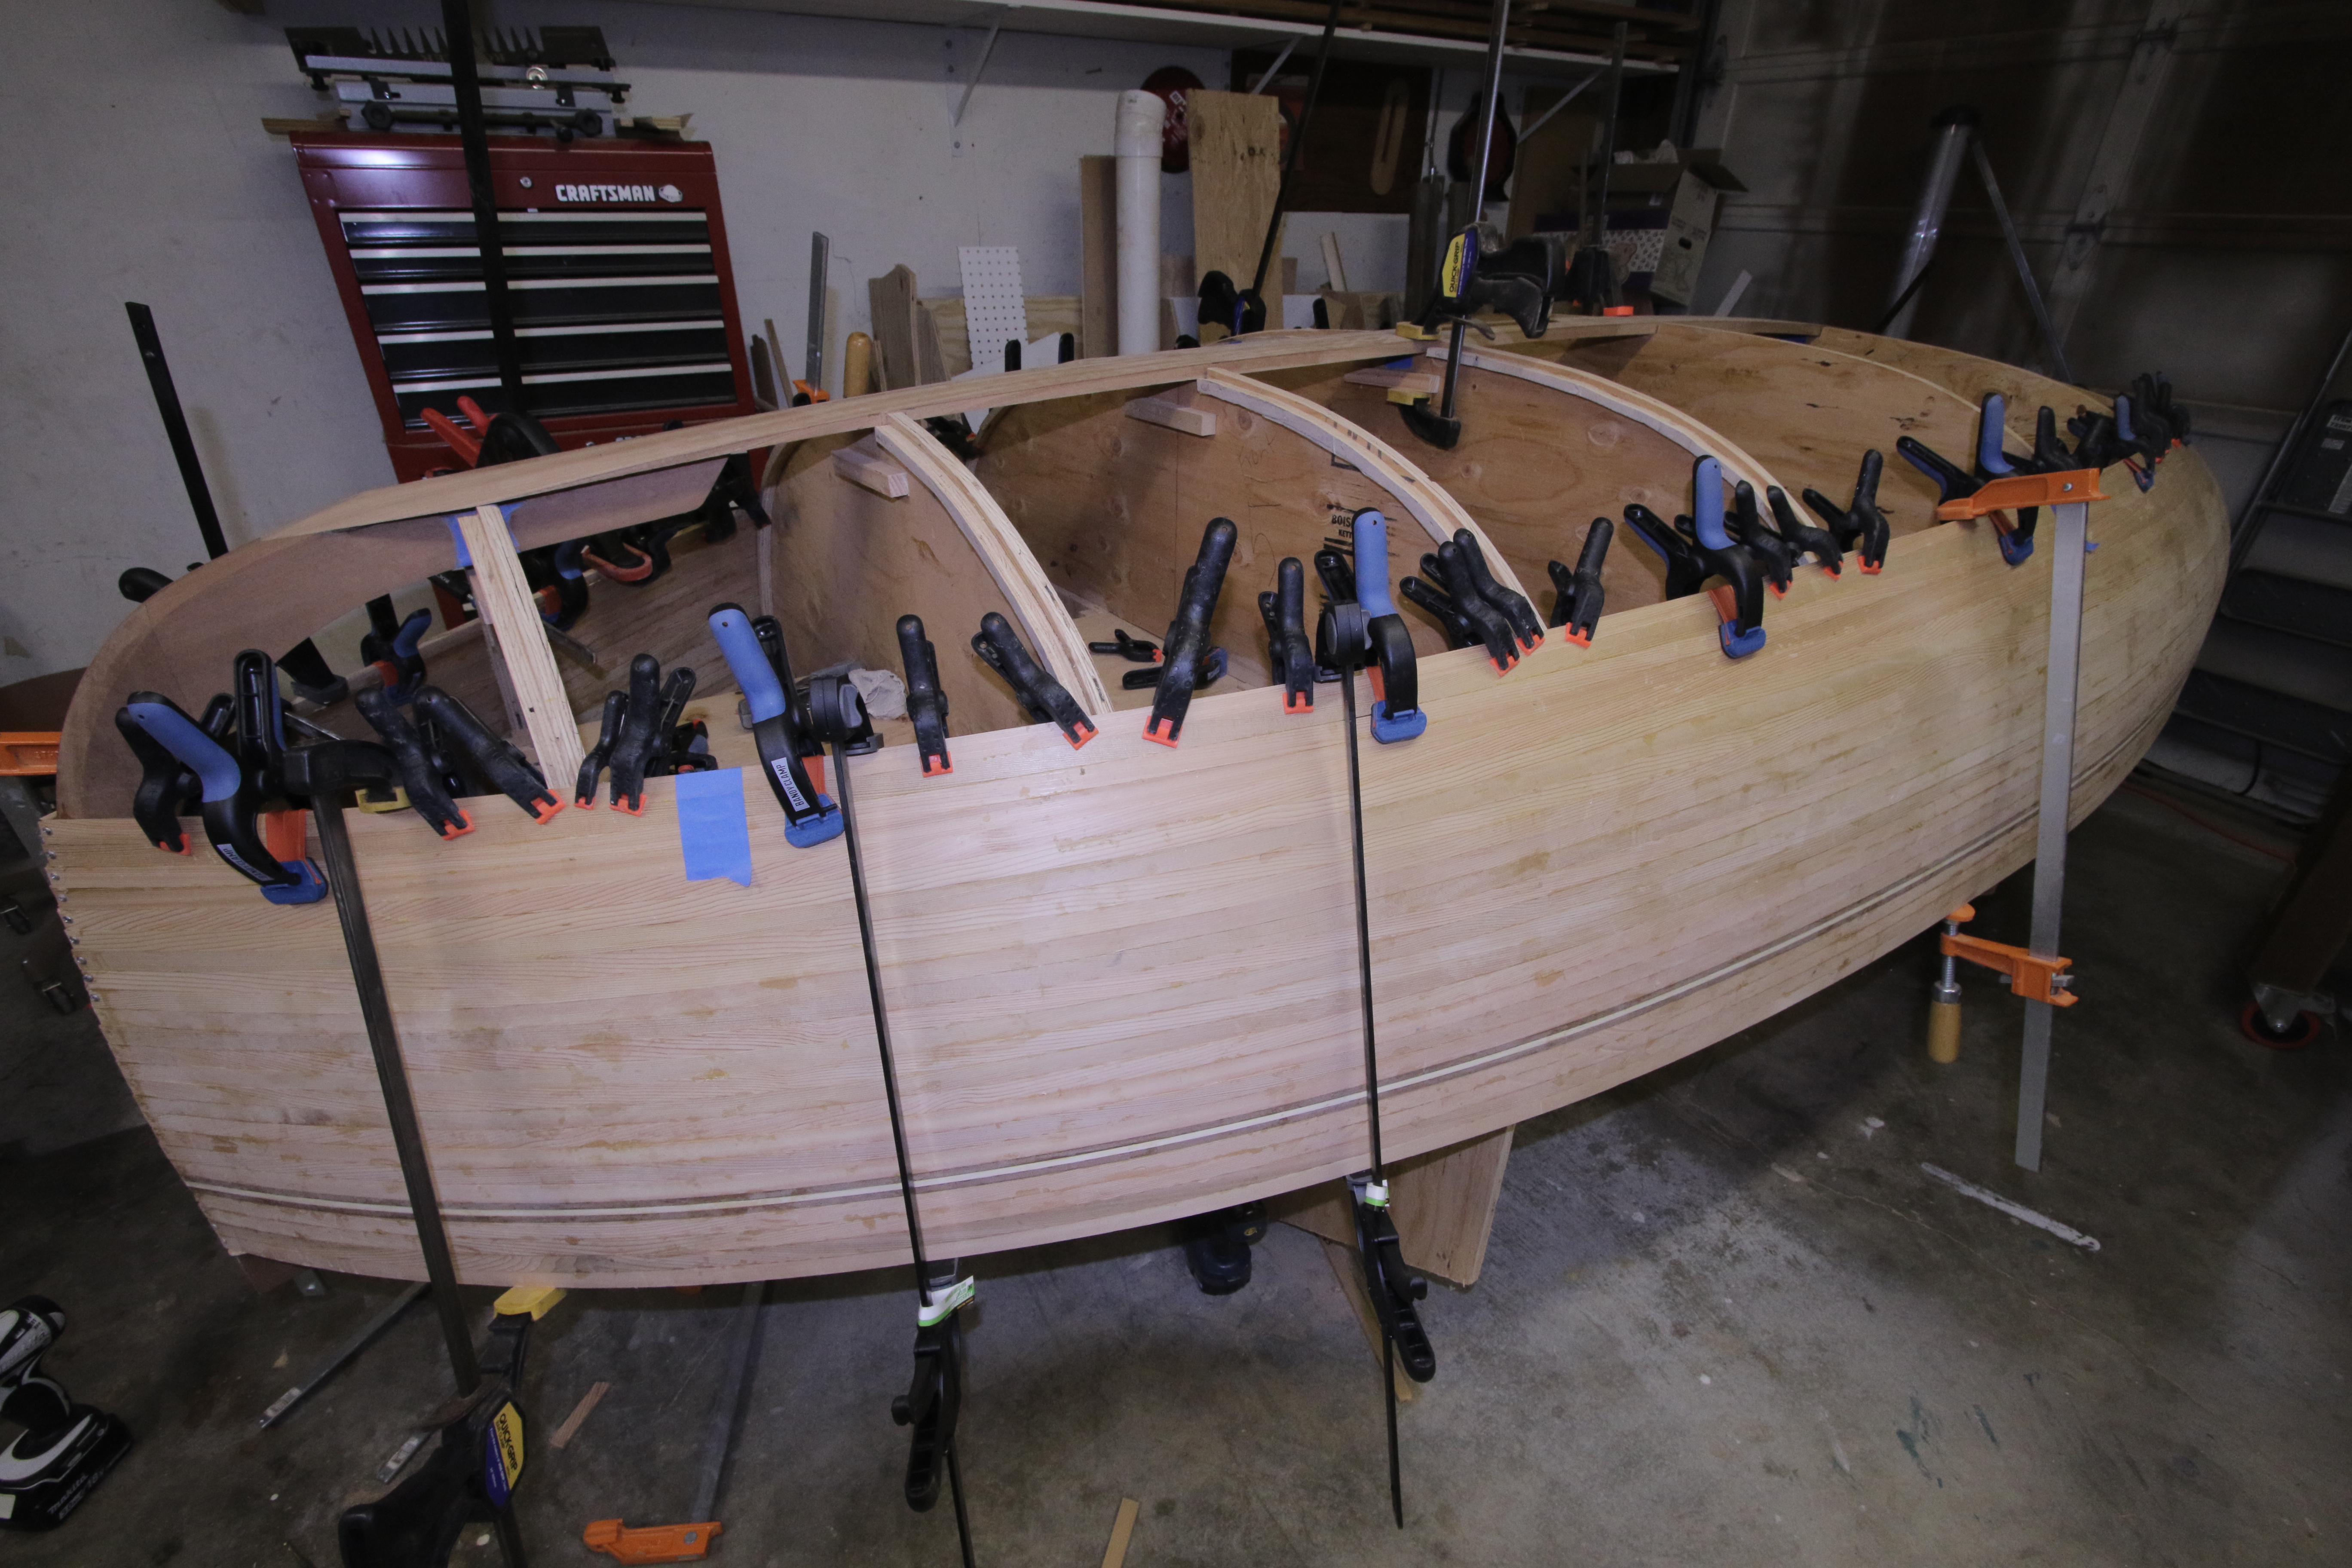
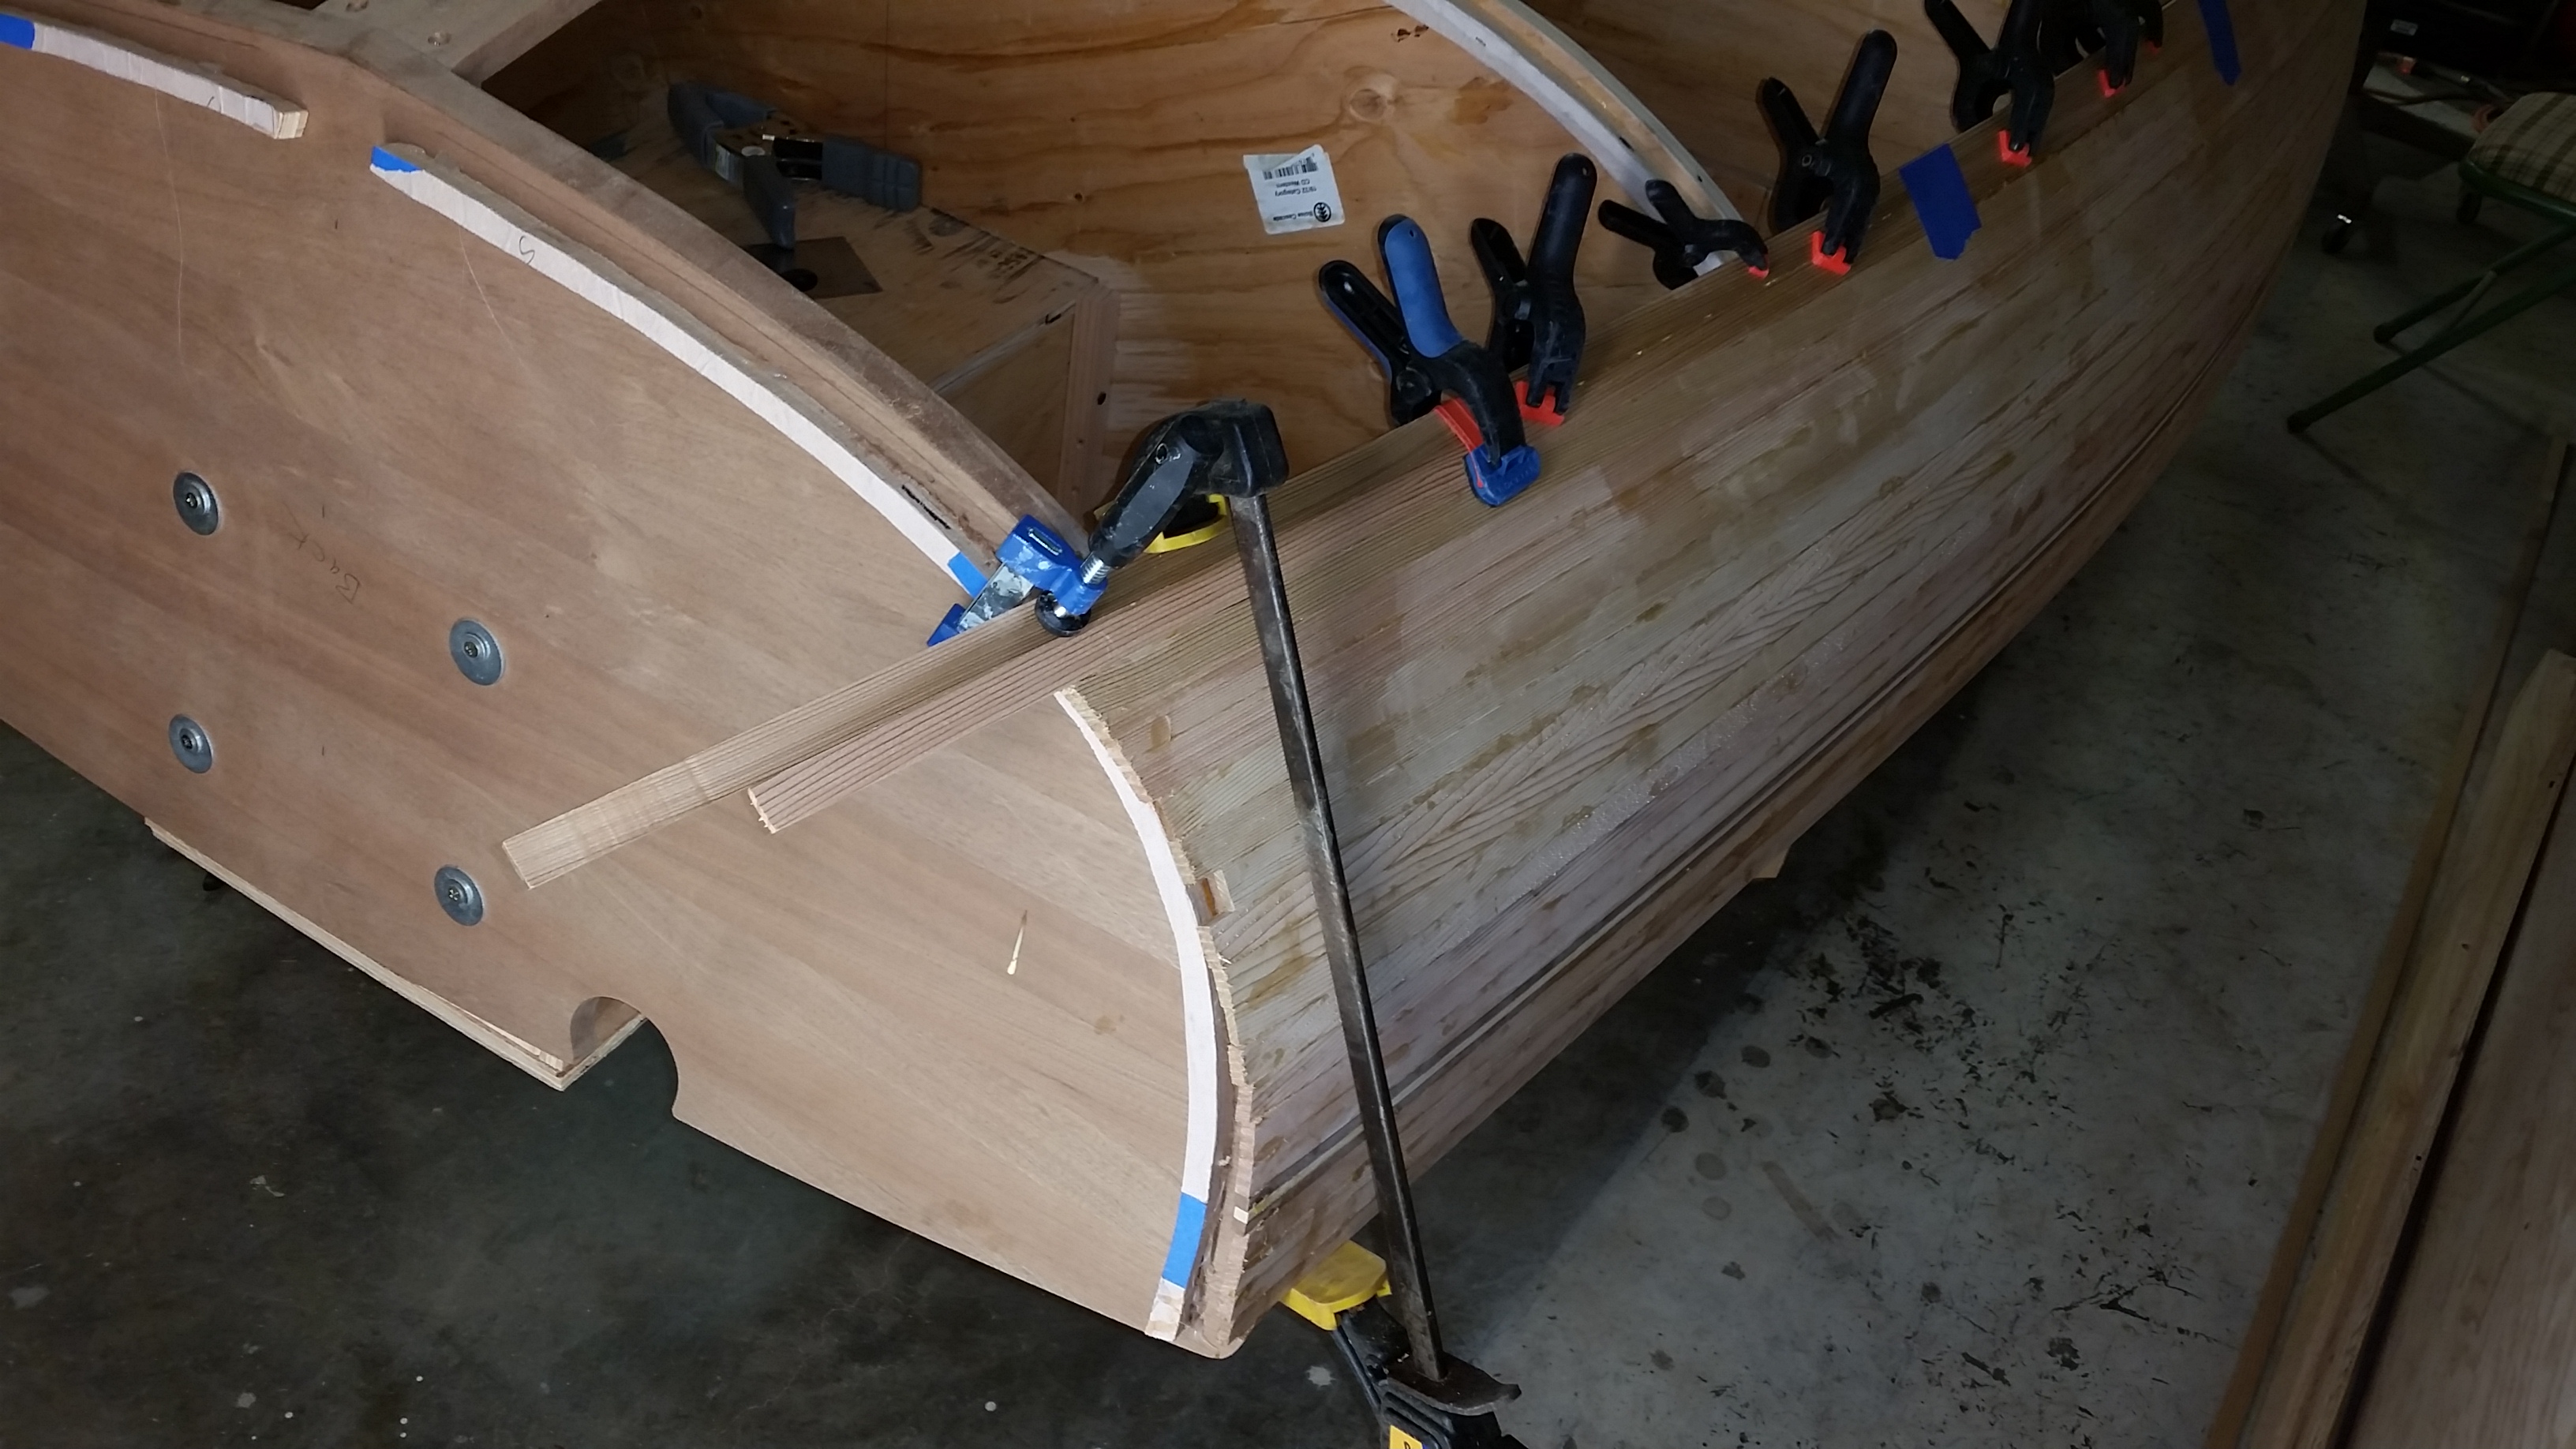
Added support cleats for the seat tops, cleat across transom and fitted the Okoume plywood seat tops. Epoxied in the rest of strip planking on deck.

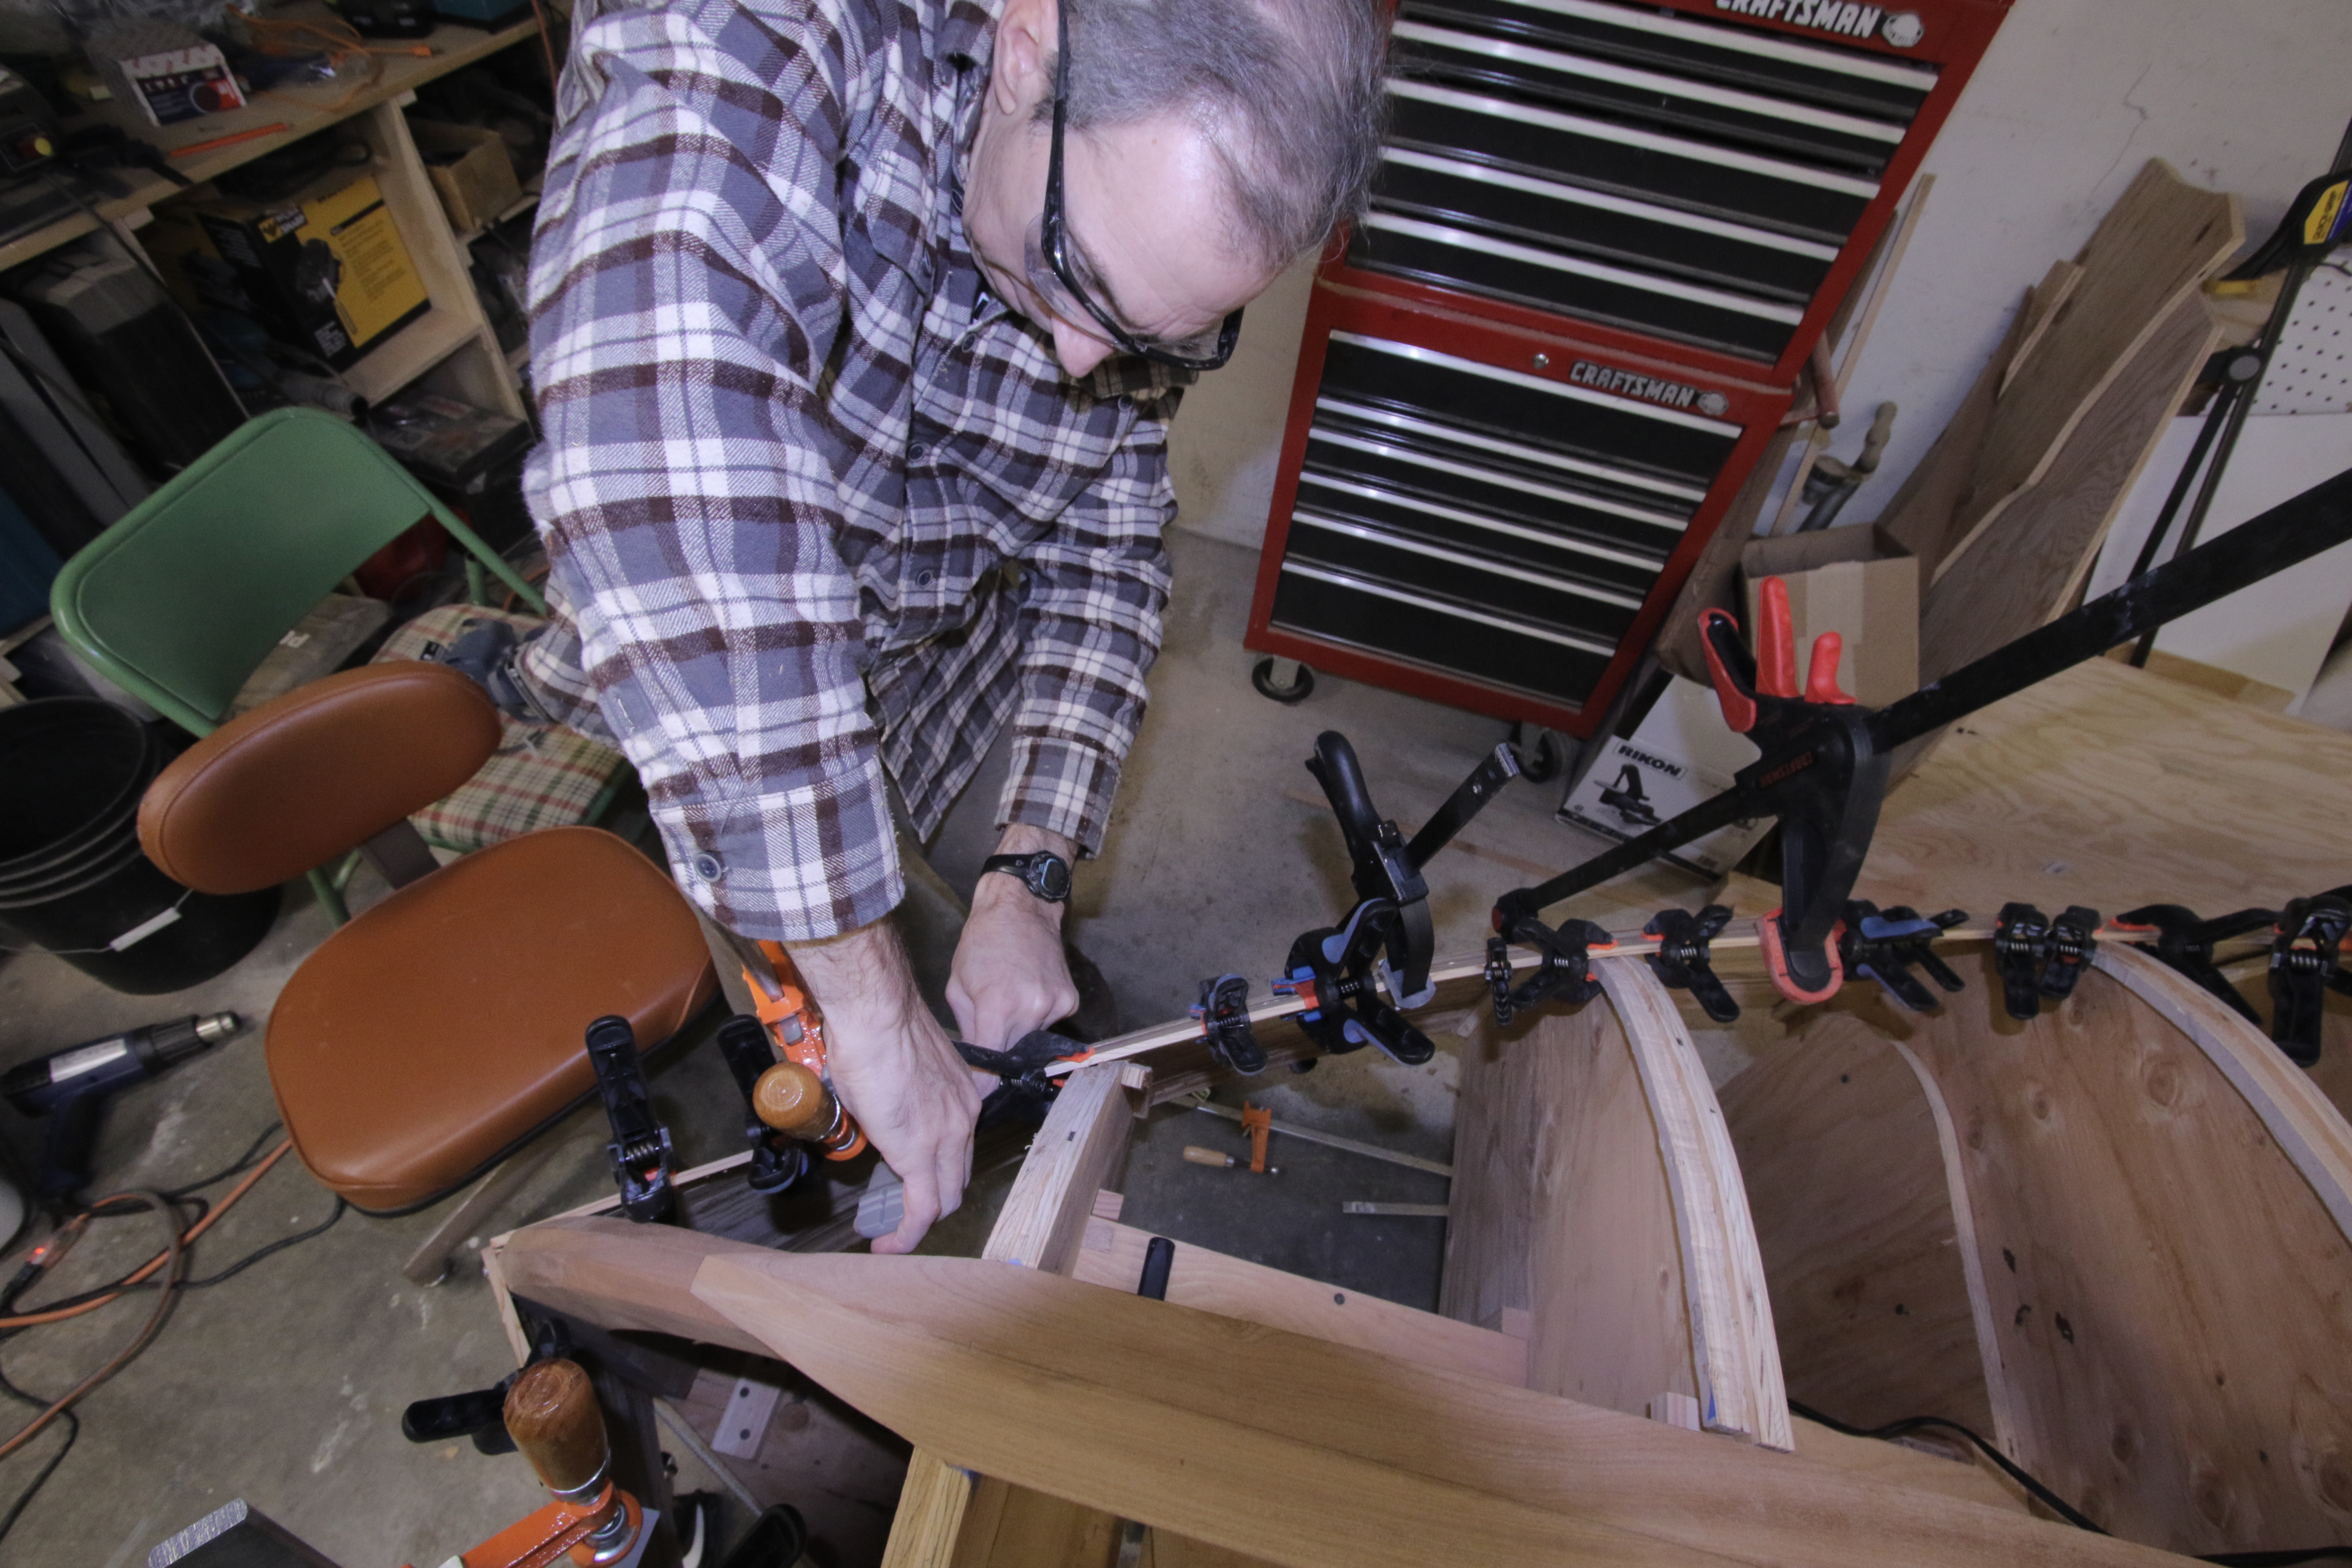
12/2/2017
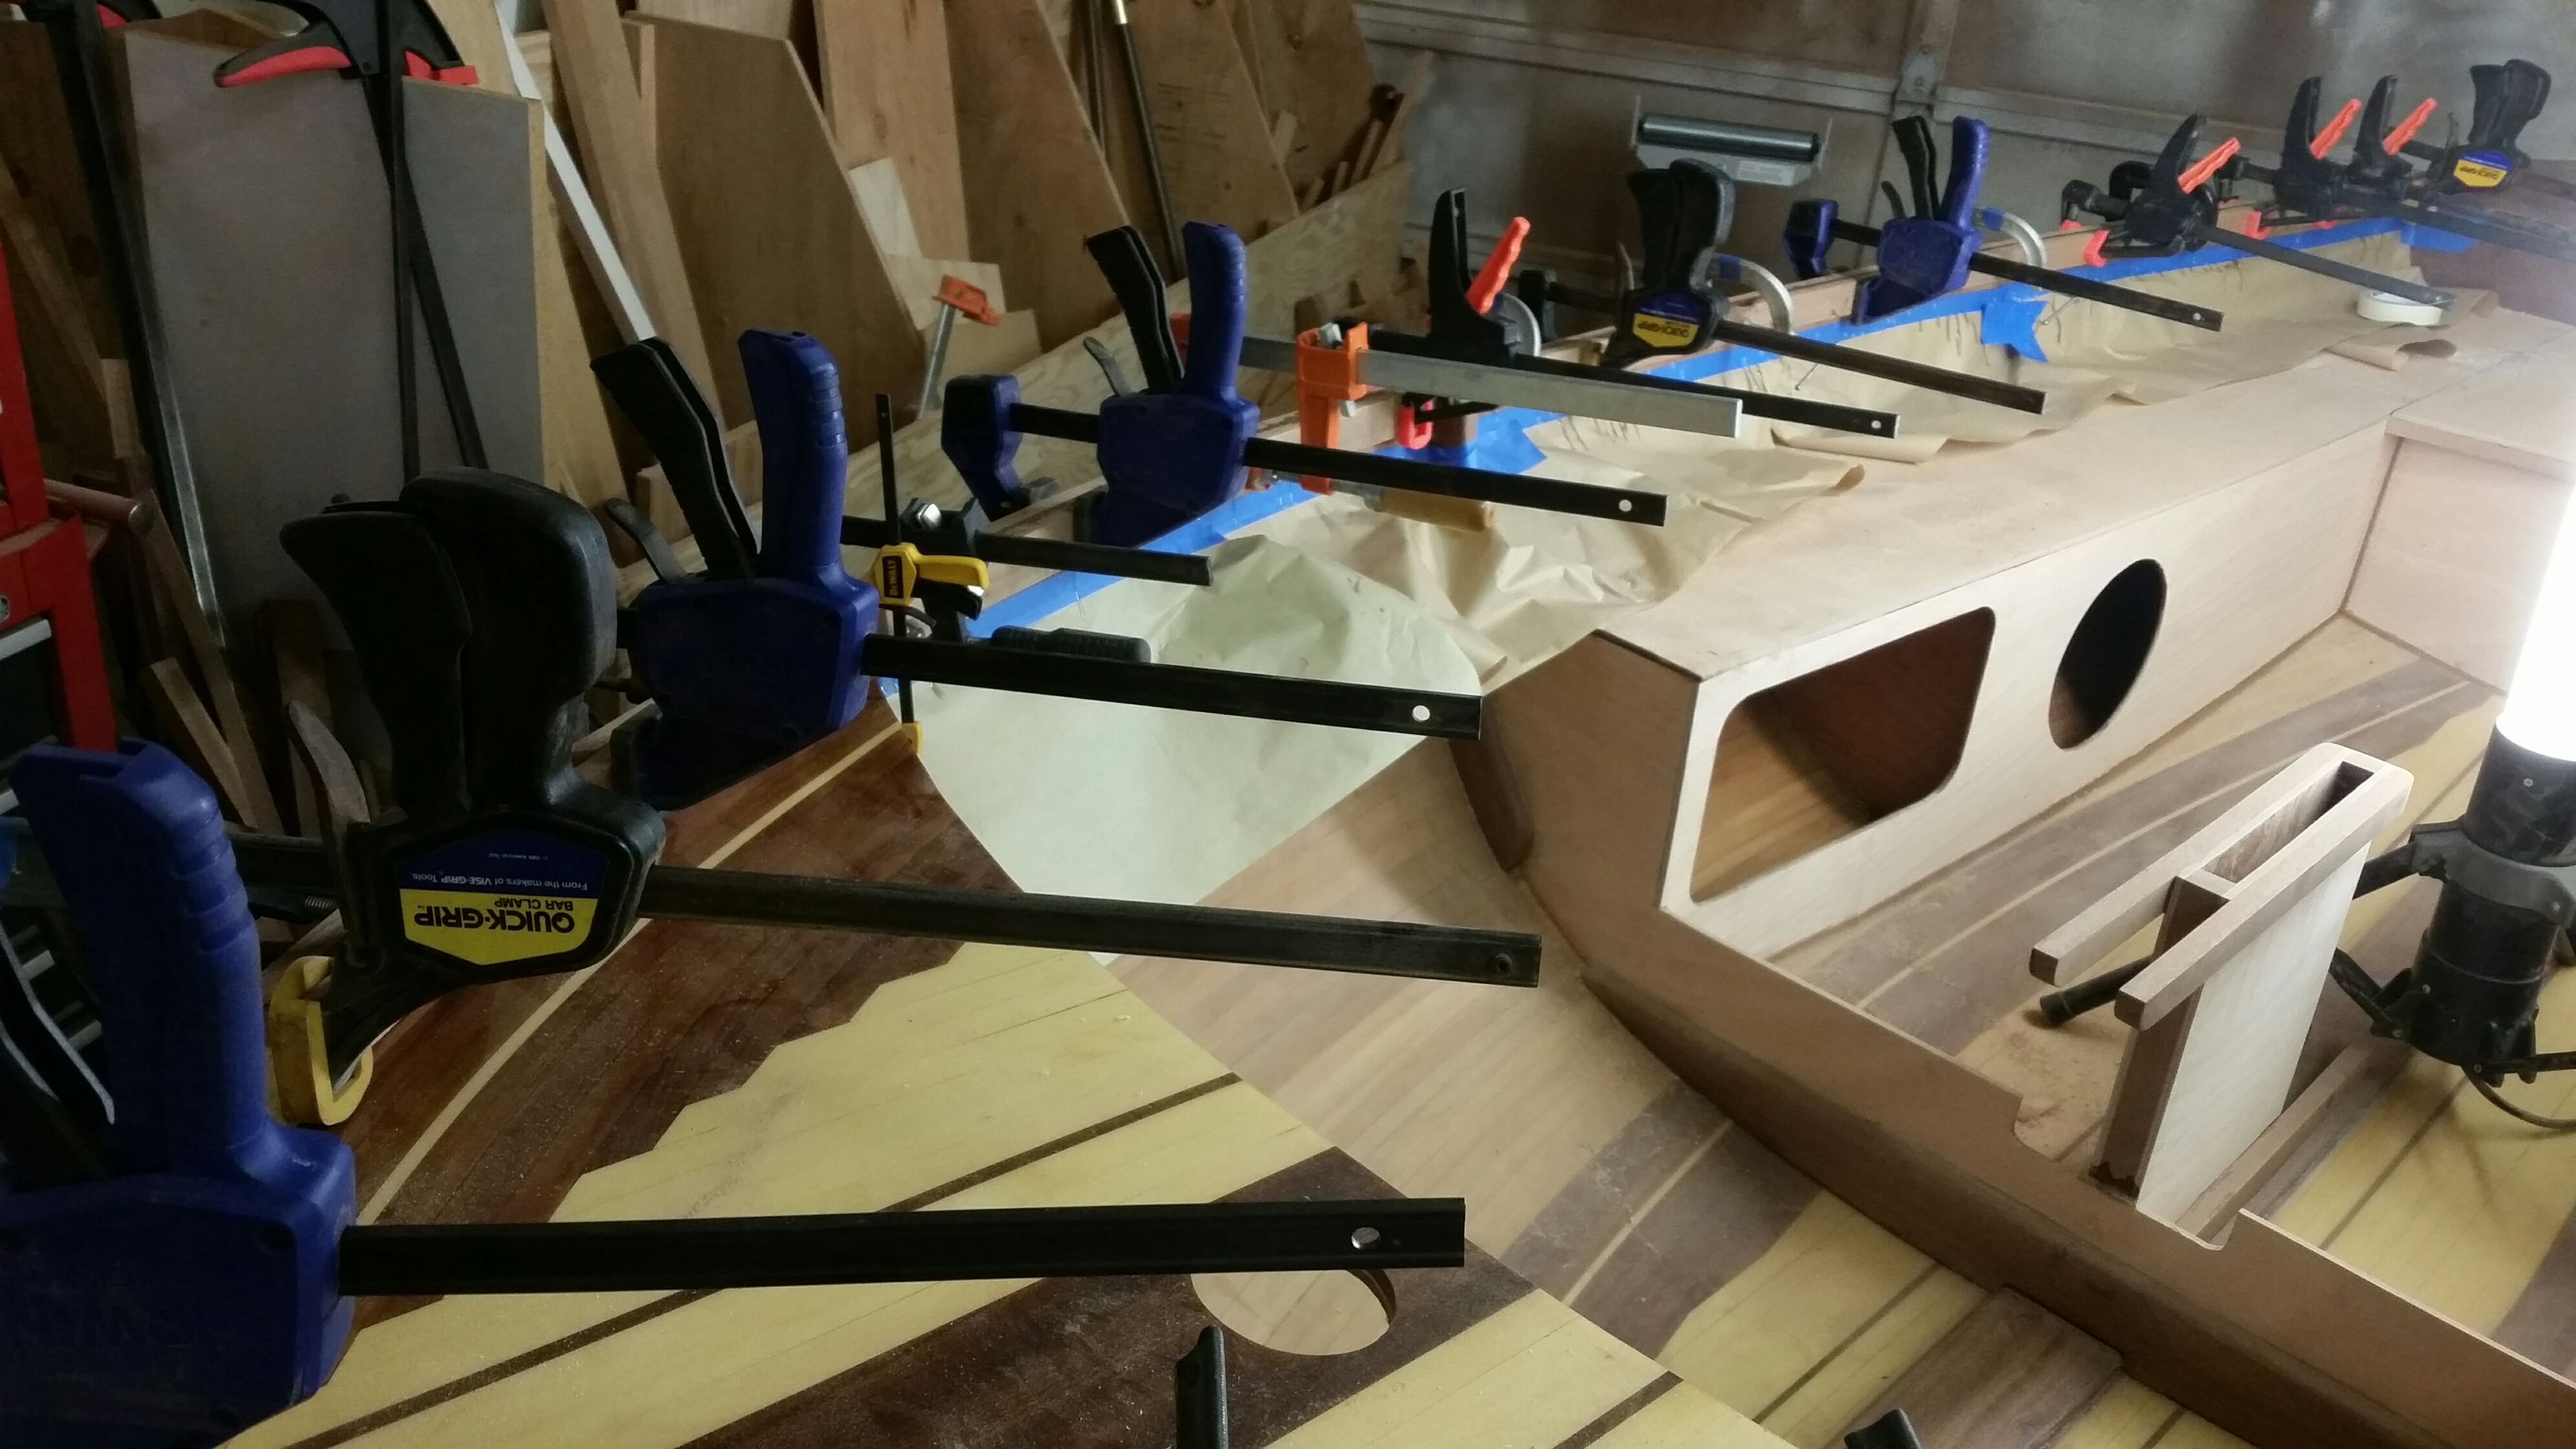
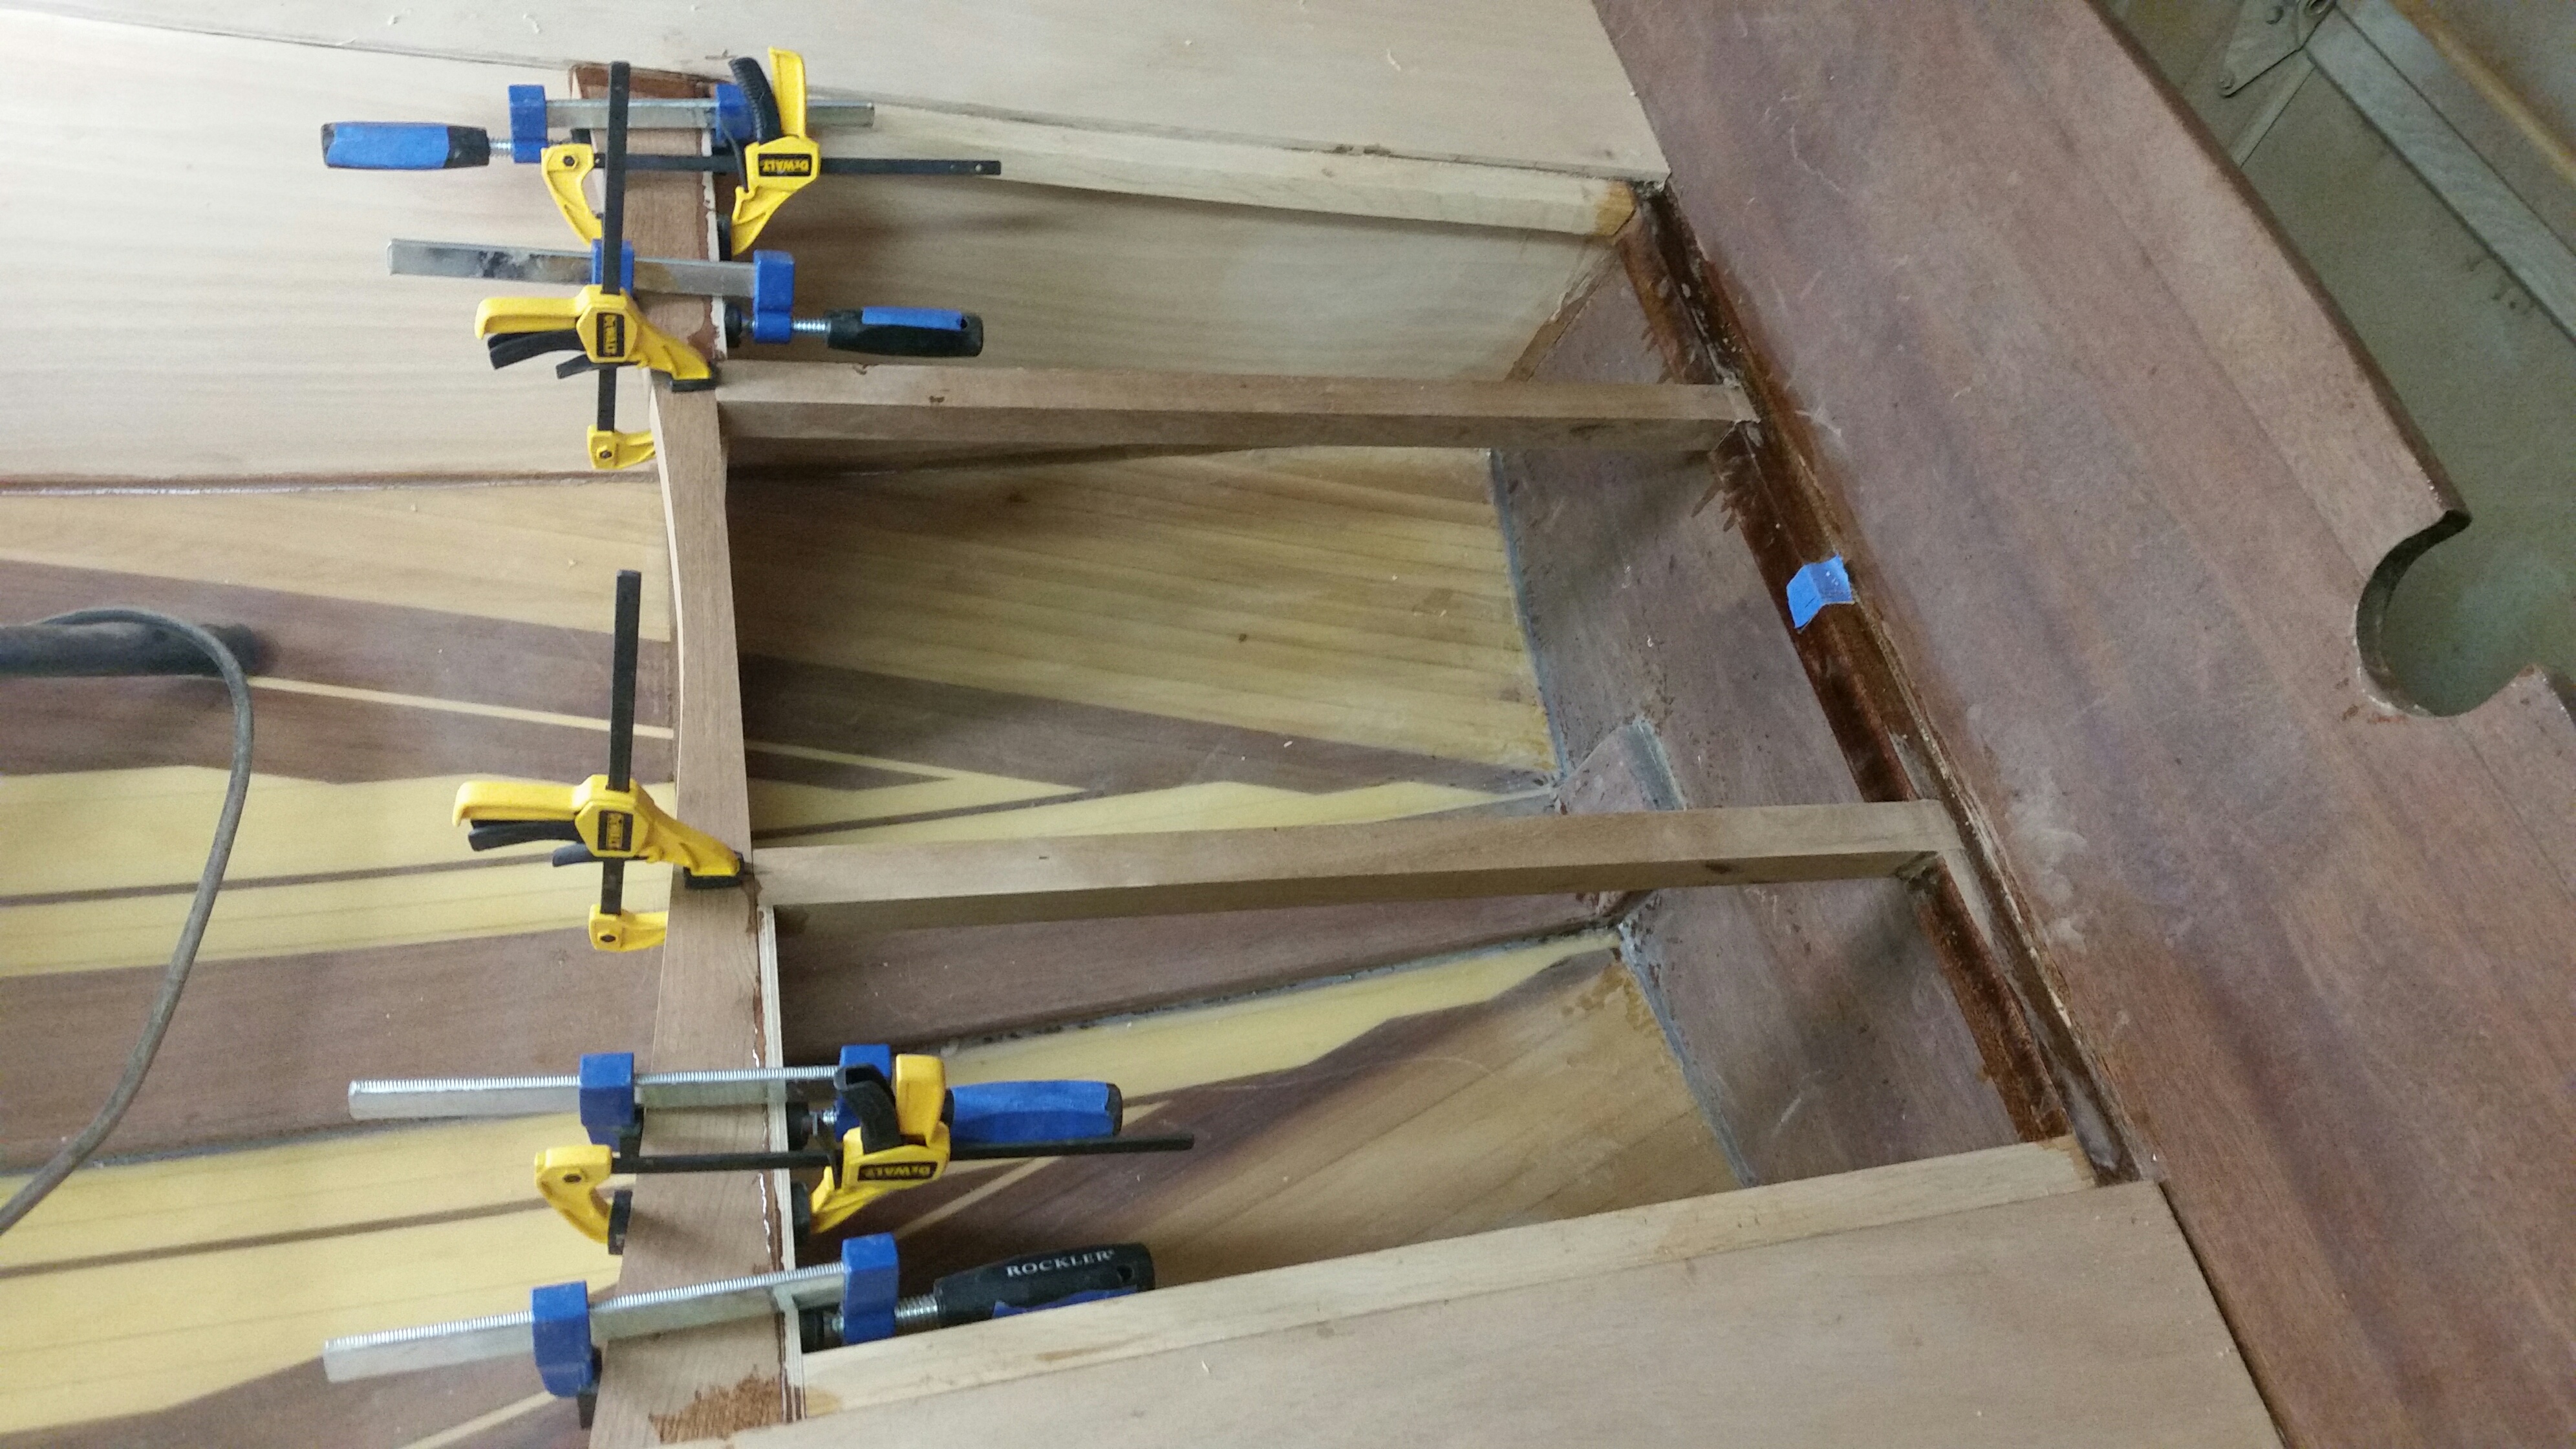
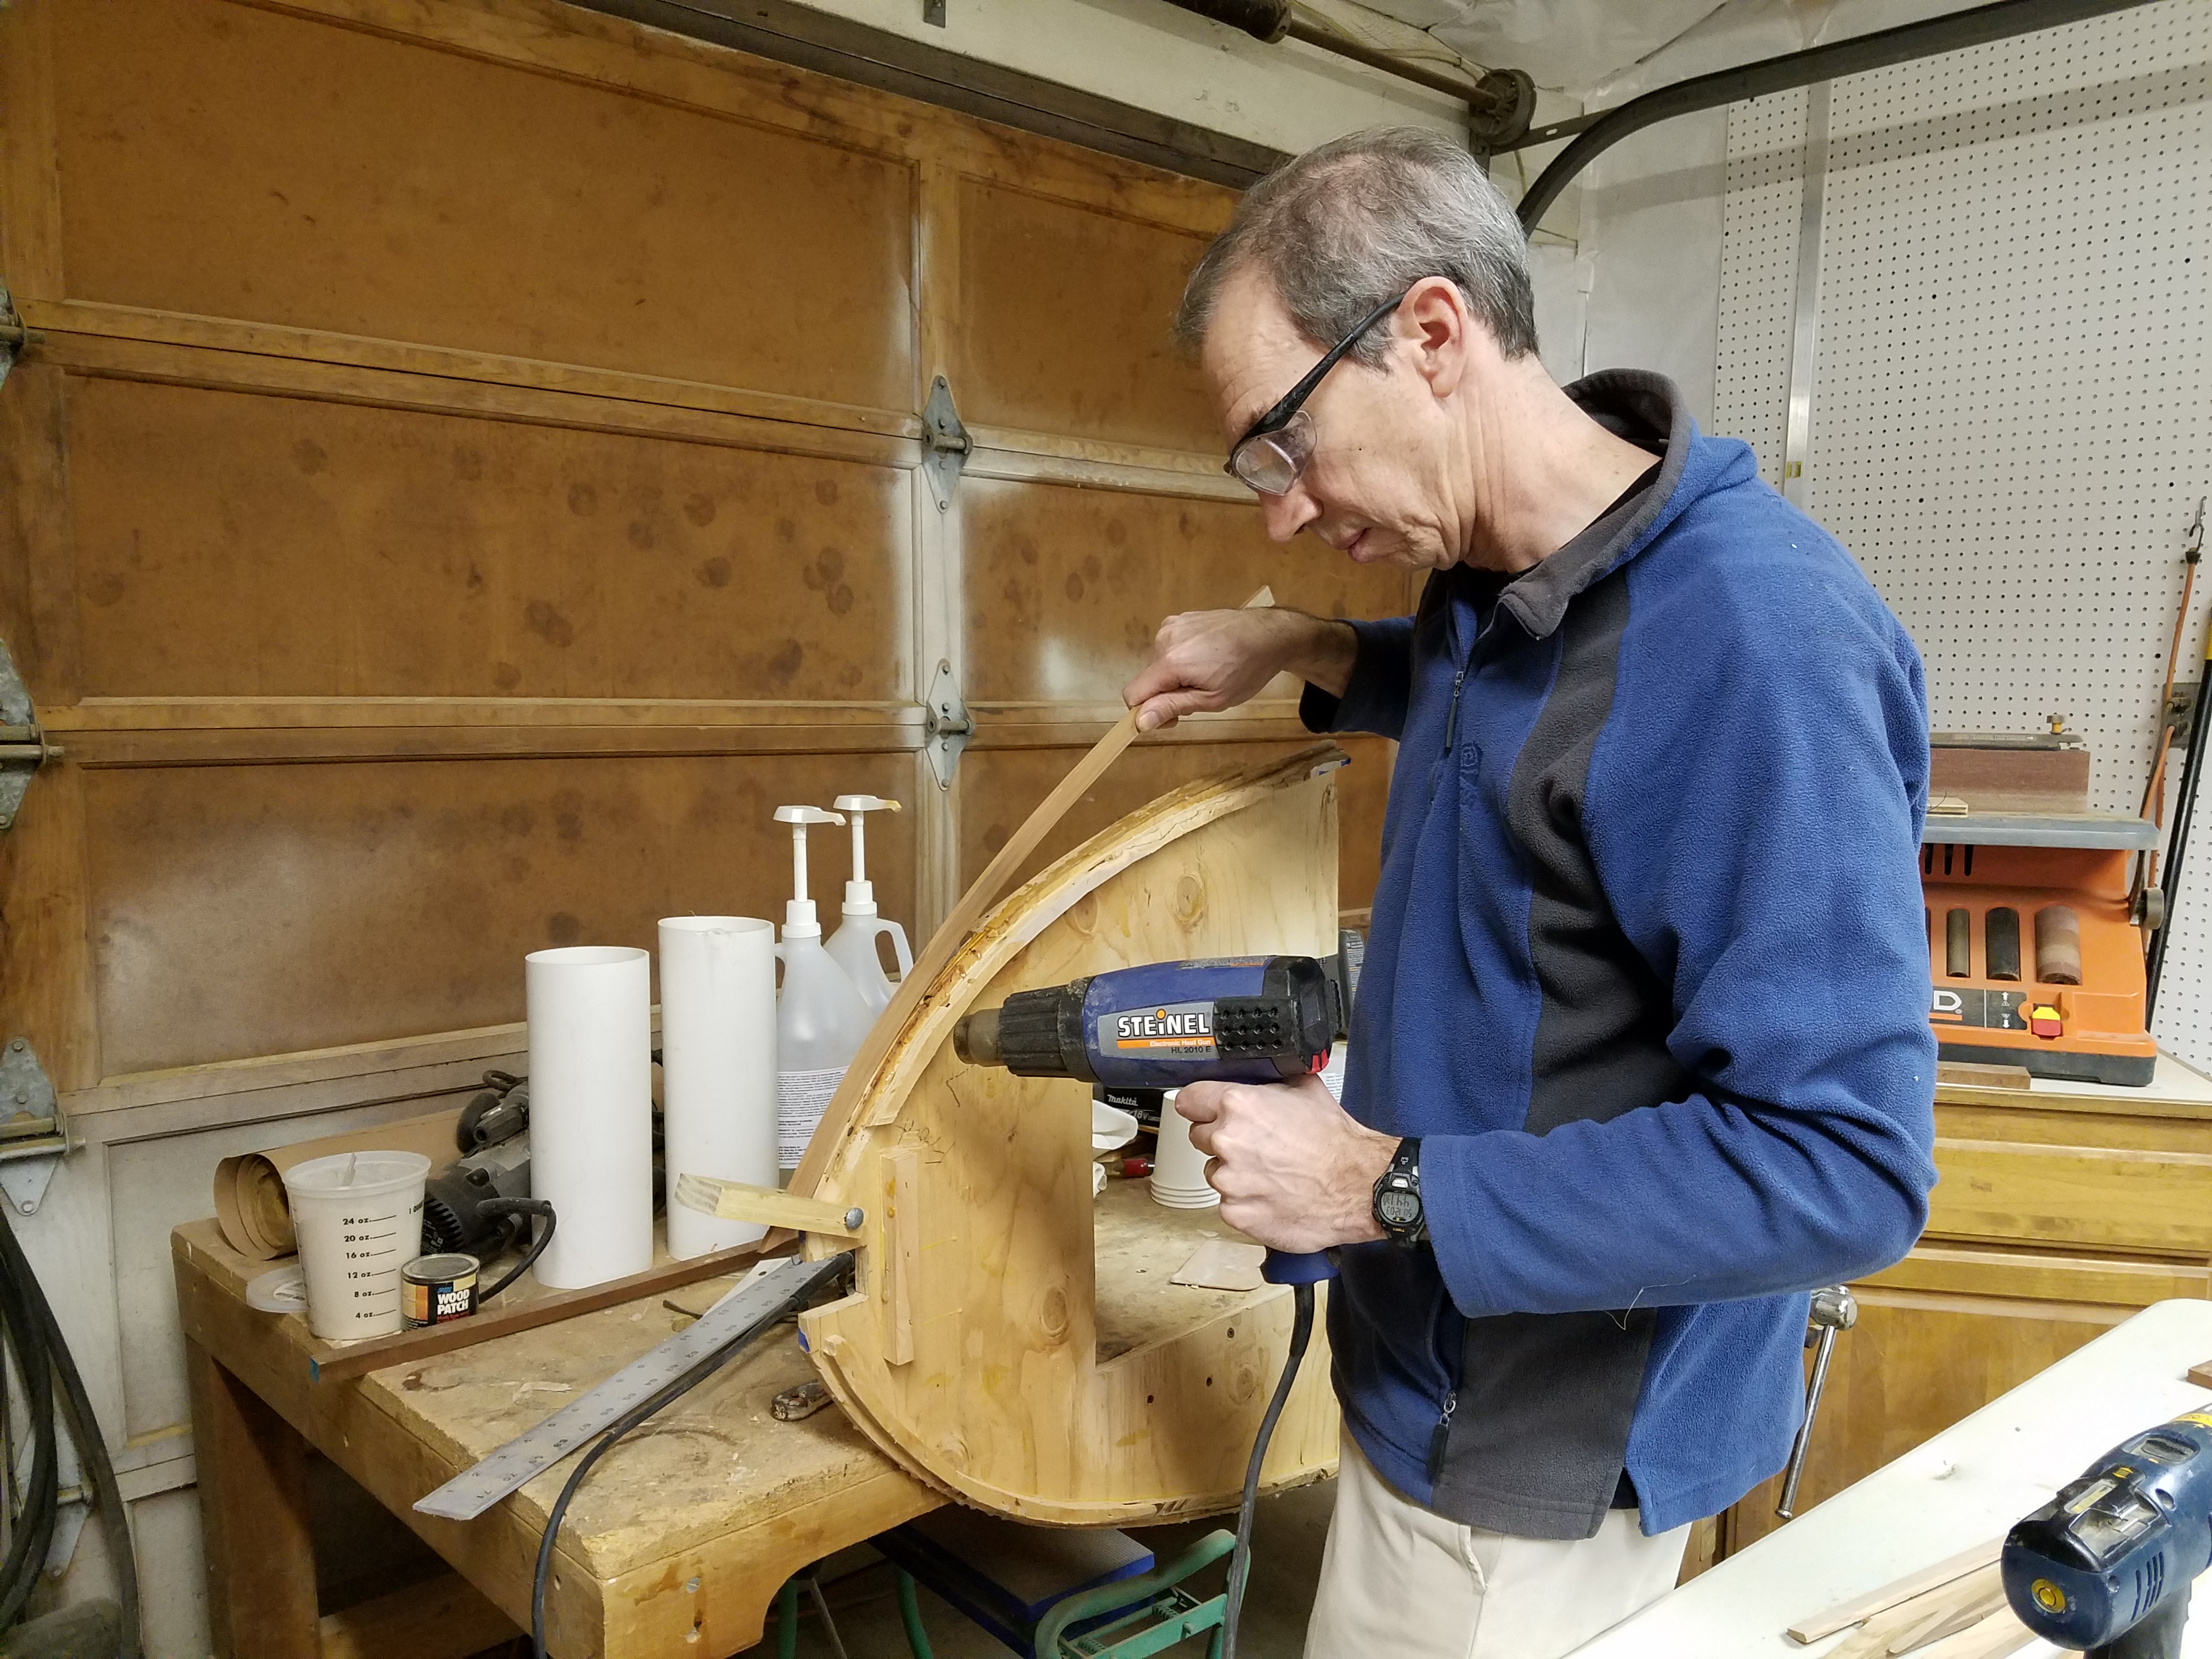
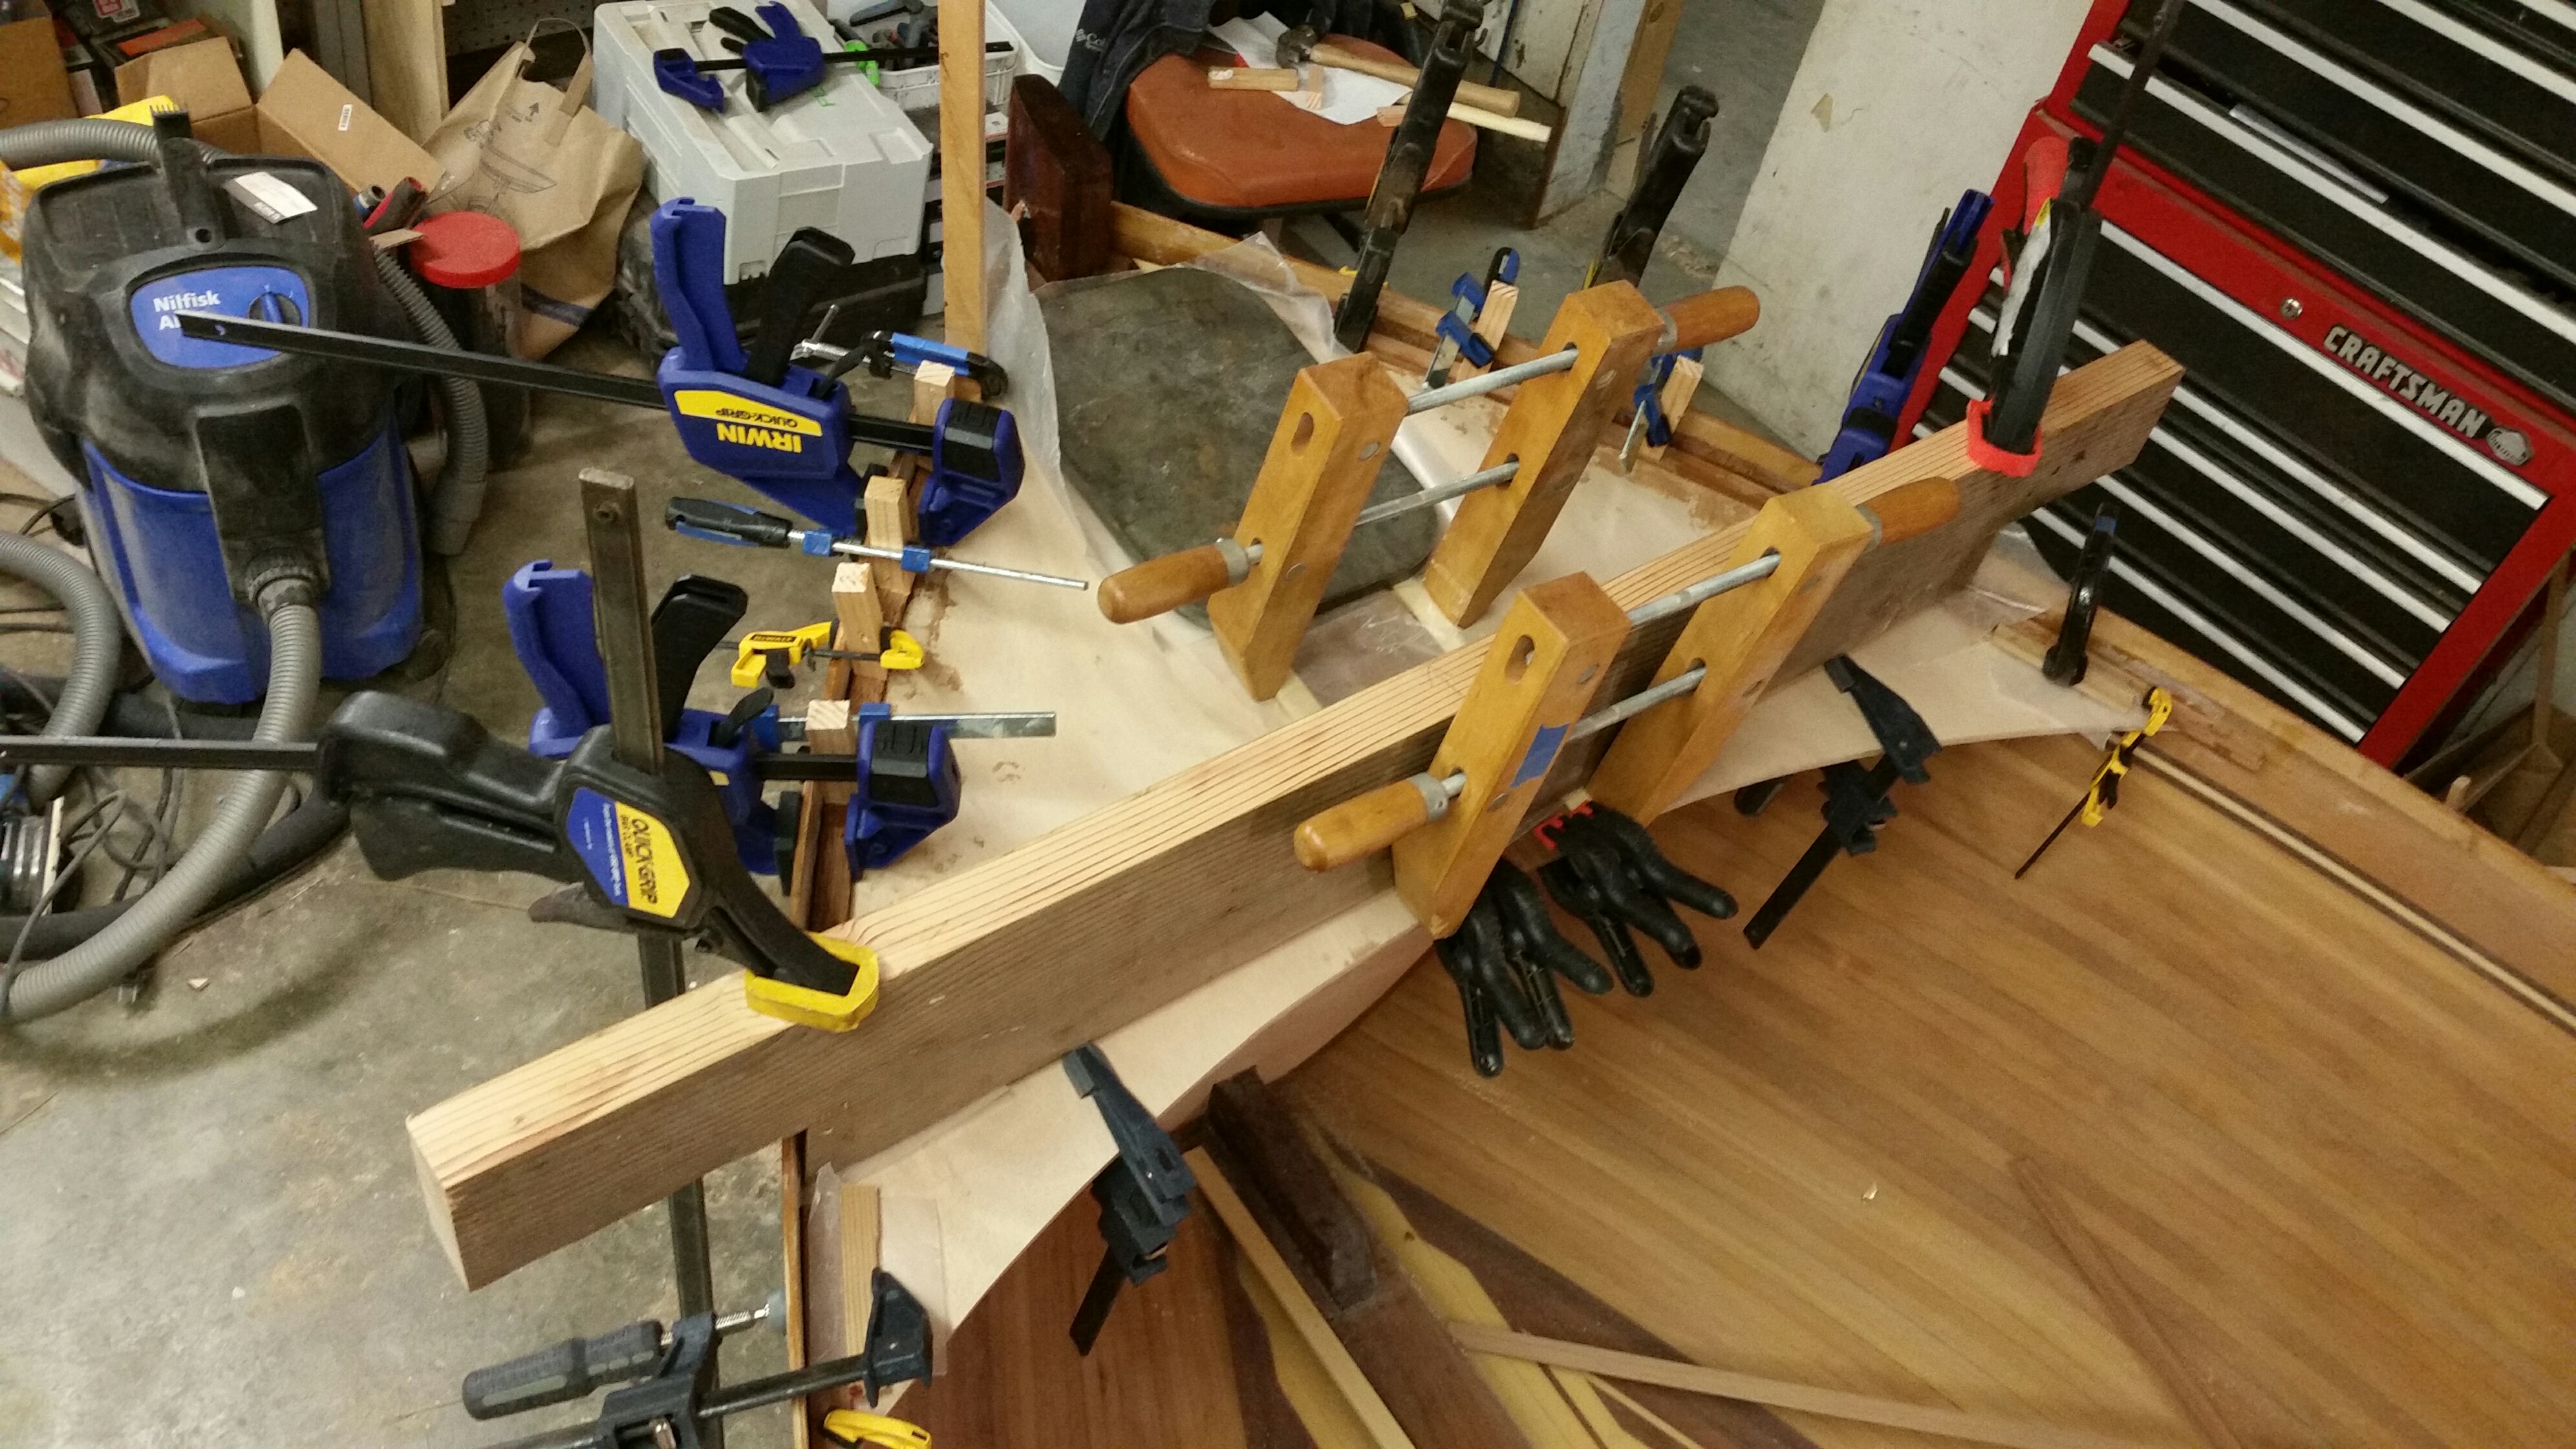
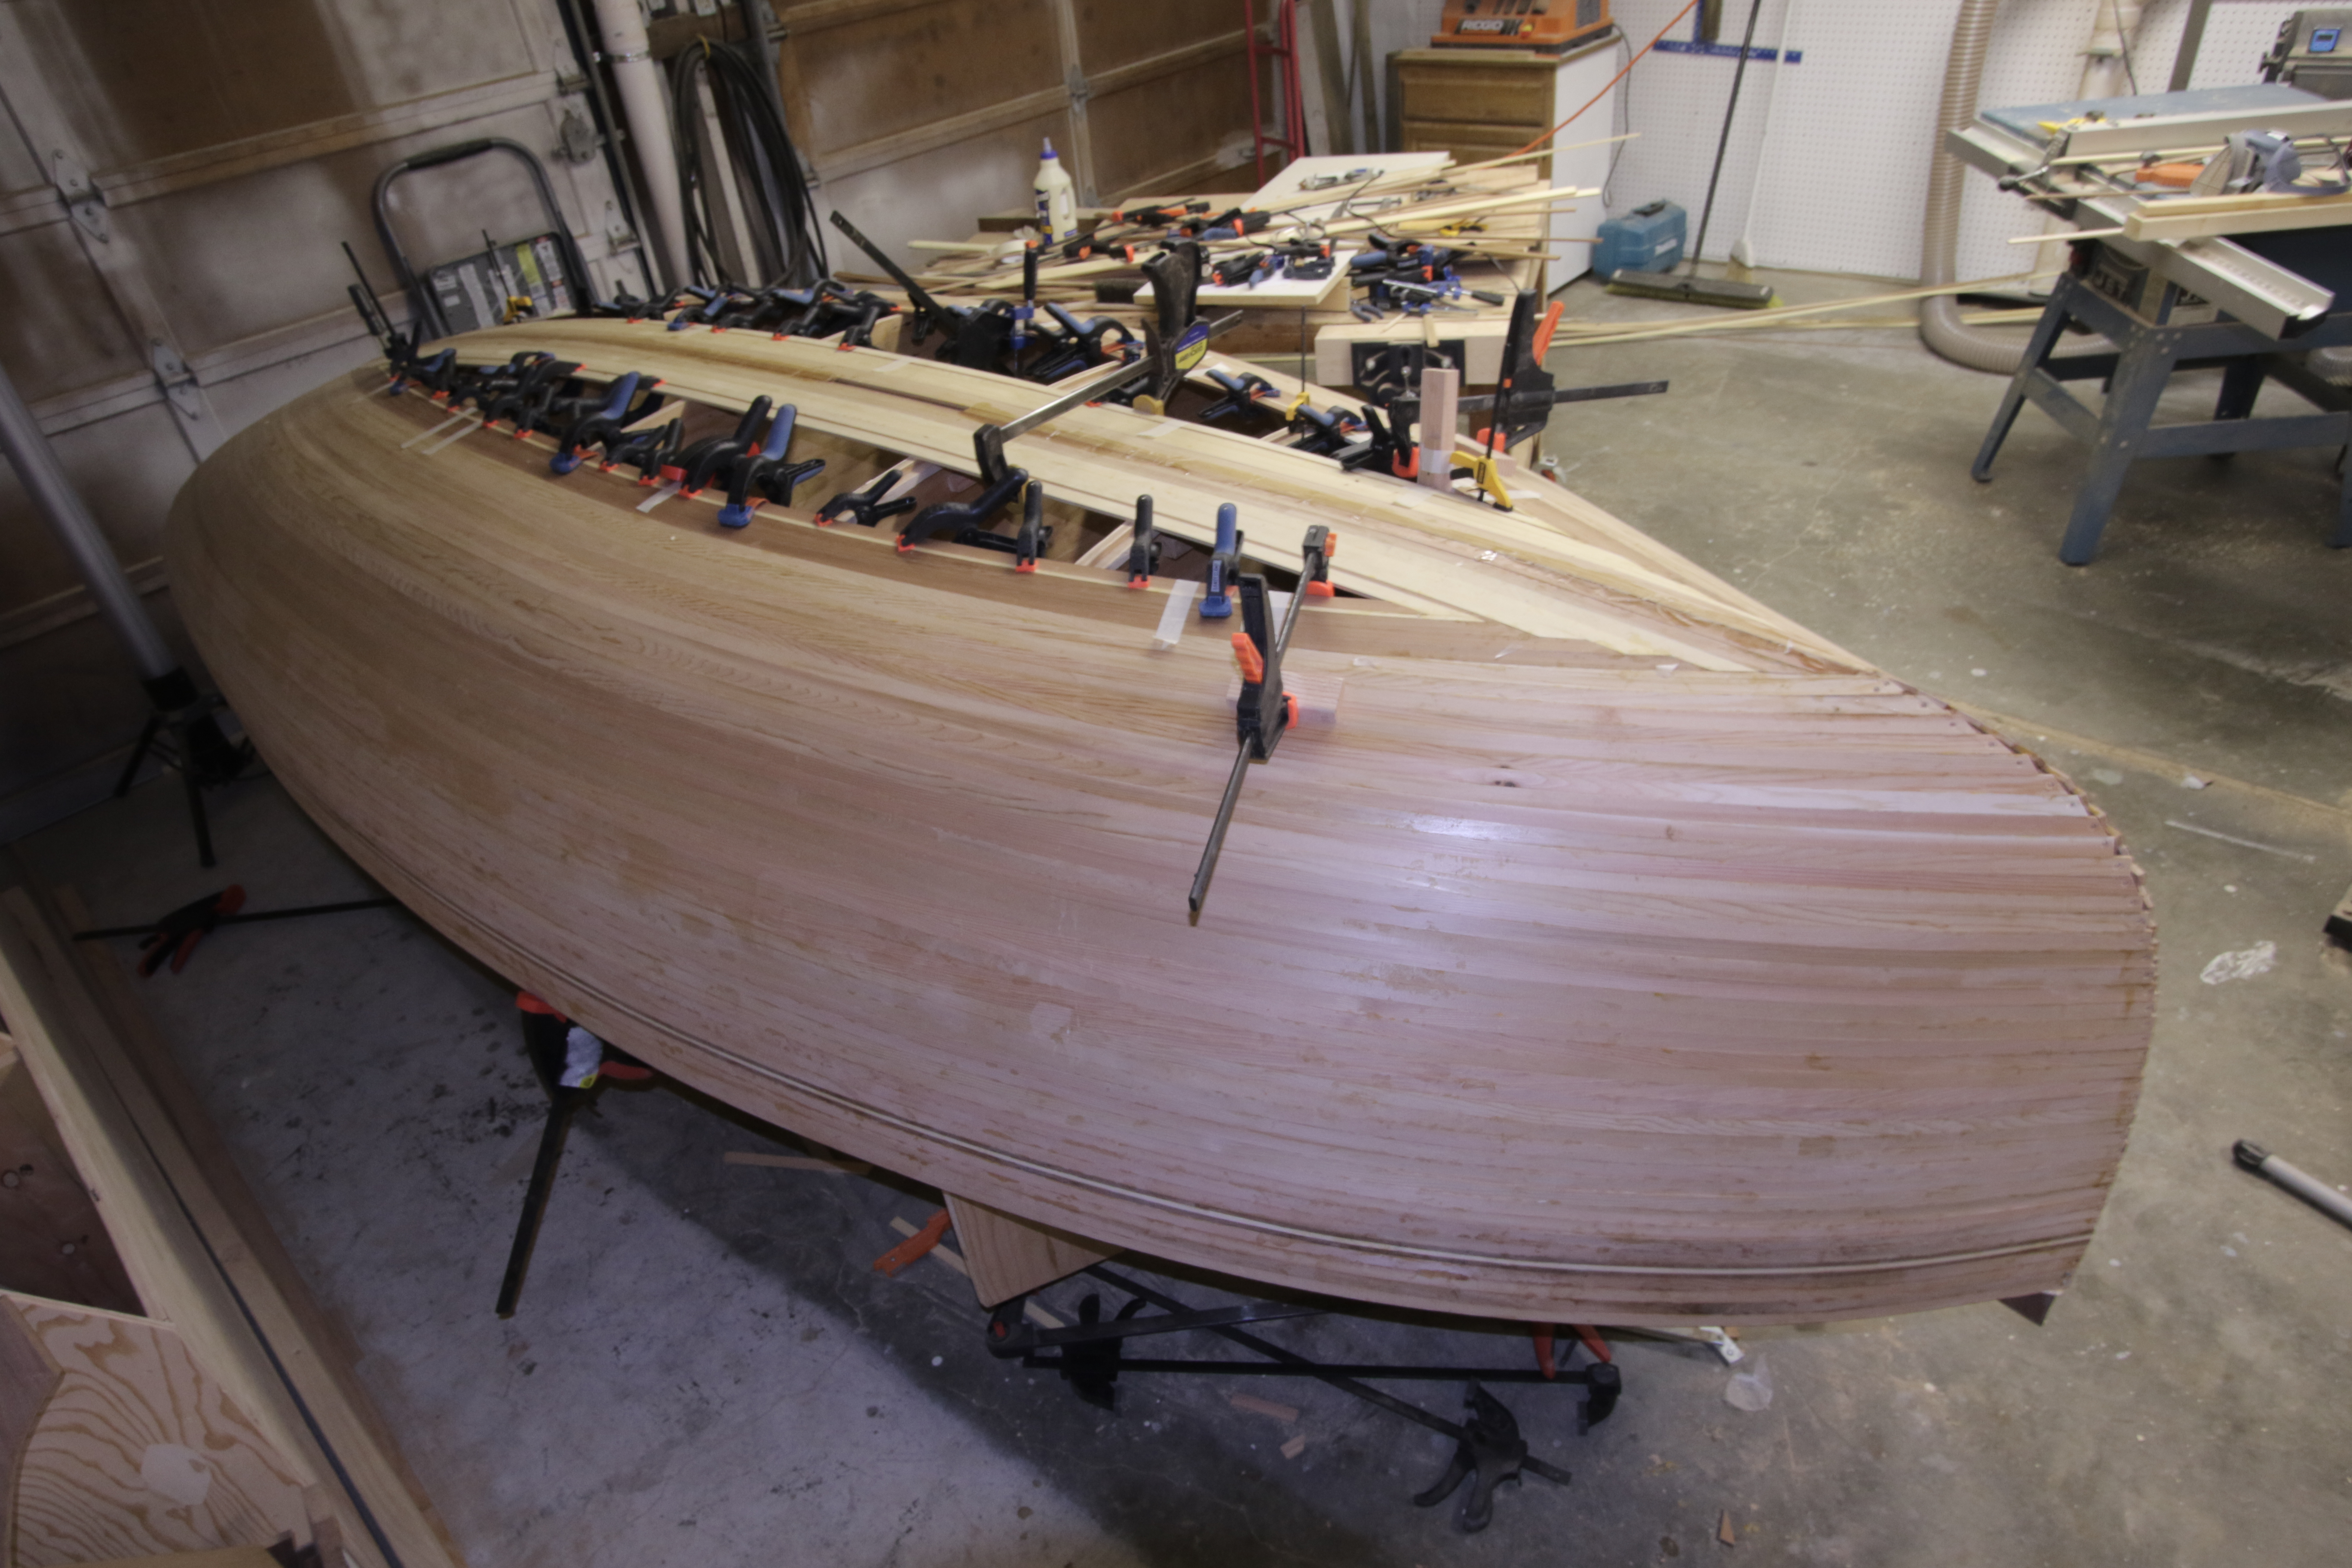
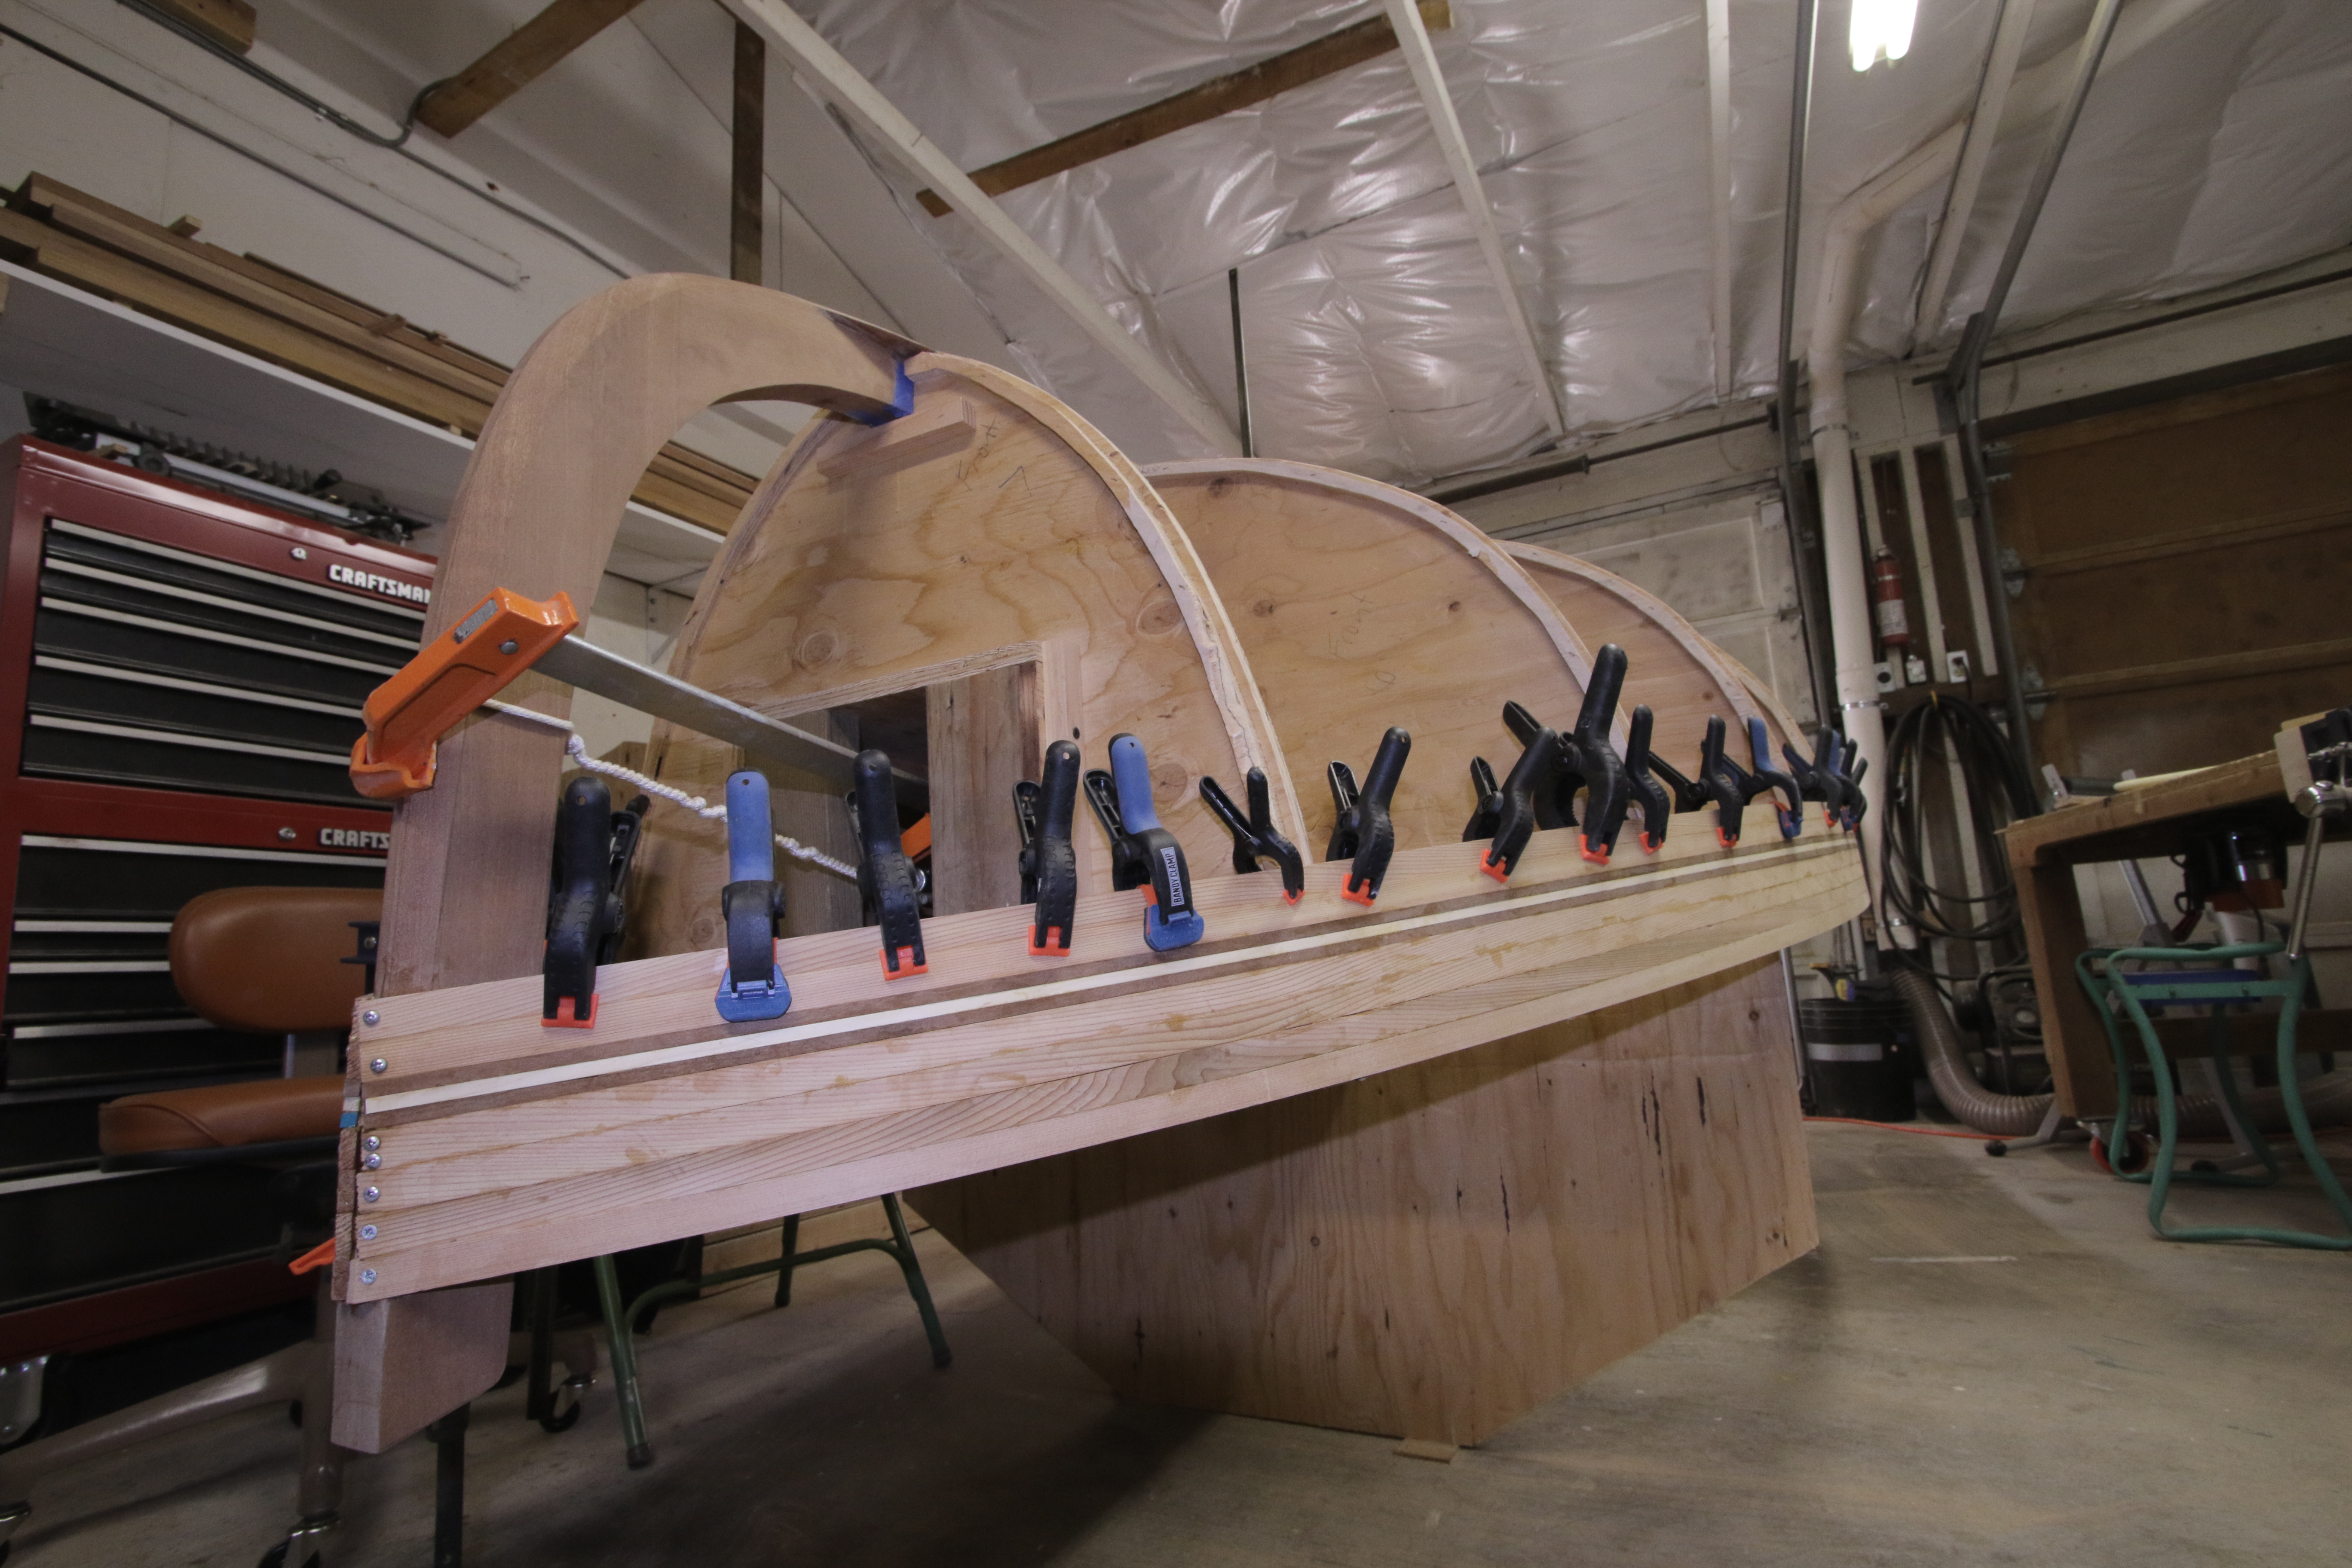
While I got away without the heat-gun or steaming to bend the strips for the hull.. not so for deck. The first 2 outside strips were SO HARD to bend – took a ton of clamps and creativity to get them glued in right. Decided to try the heat gun from now on. Made a jig using the left-over bow station. You can see the bent strips laying on deck, dry fit, now ready for epoxy. Much better! Following the same pattern as I did on bottom of hull, to maintain the theme, per a suggestion from wife Lorena – good call!

11/29/2017
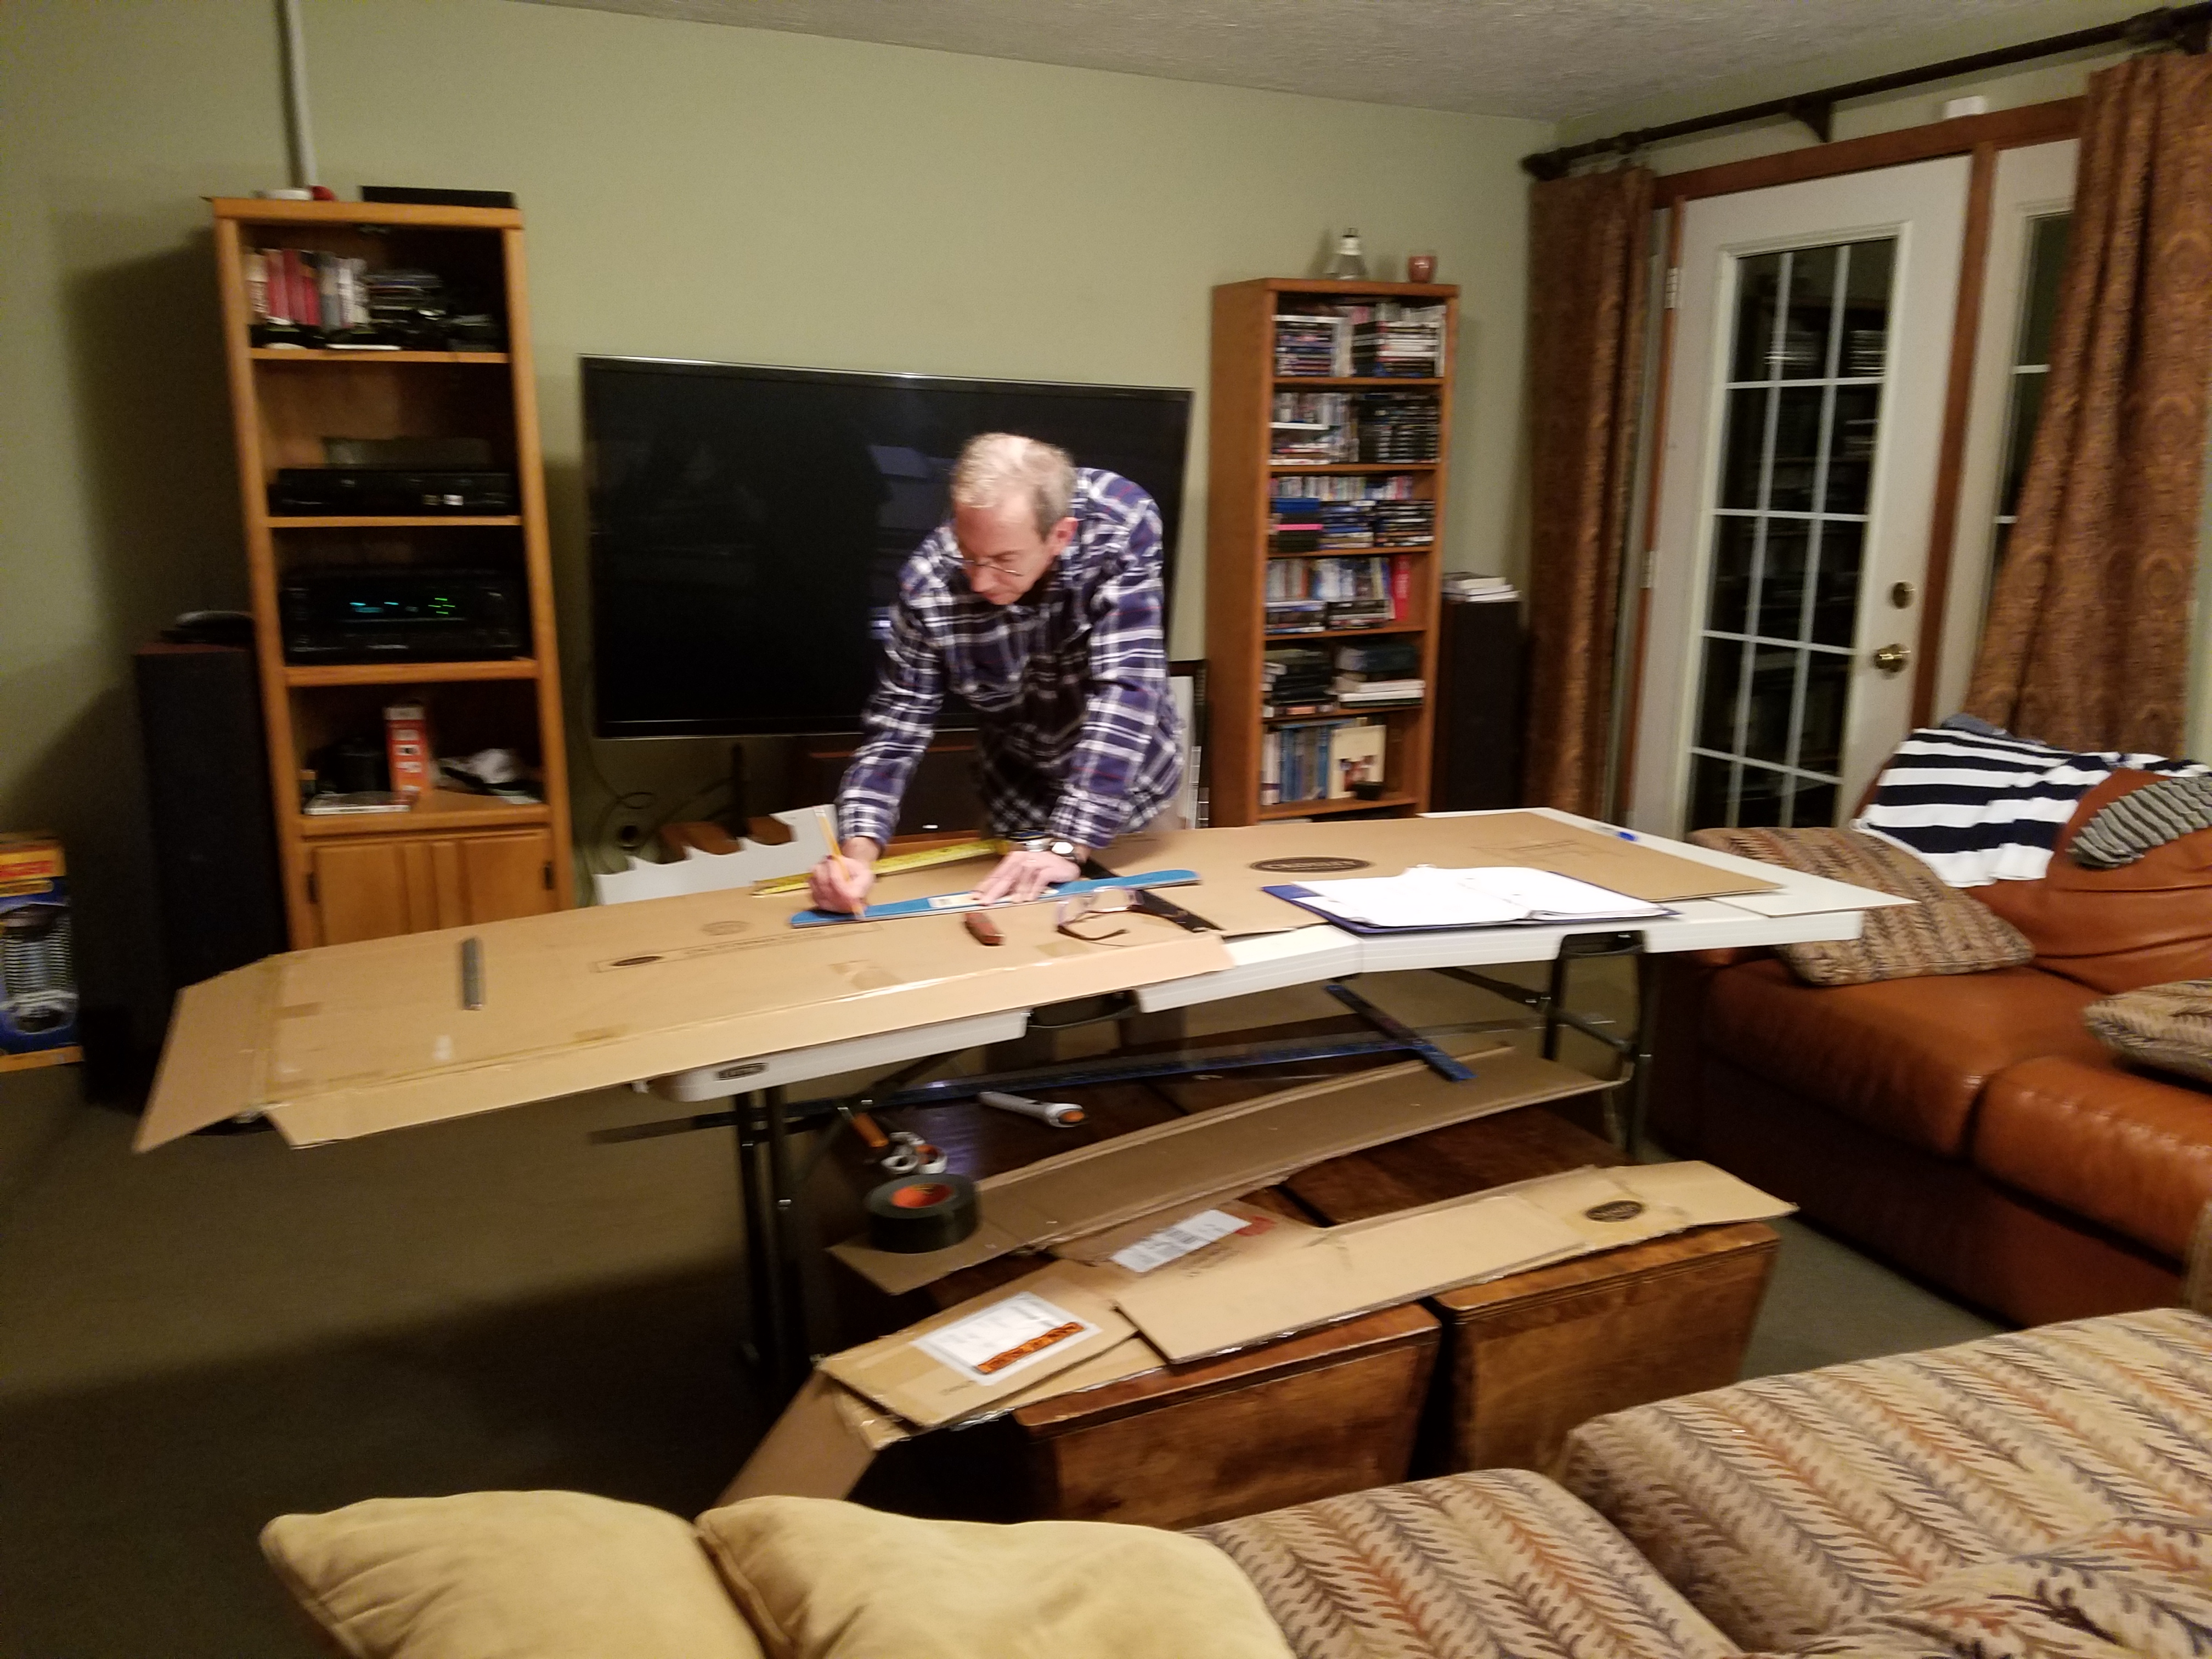
Have the seat cleats all glued in and sanded up. Made template for and cut out deck. Still doing some calculations to make sure I get the hole for mast in the right spot. Need 6 degrees of rake plus/minus a bit of adjustment.

11/25/2017
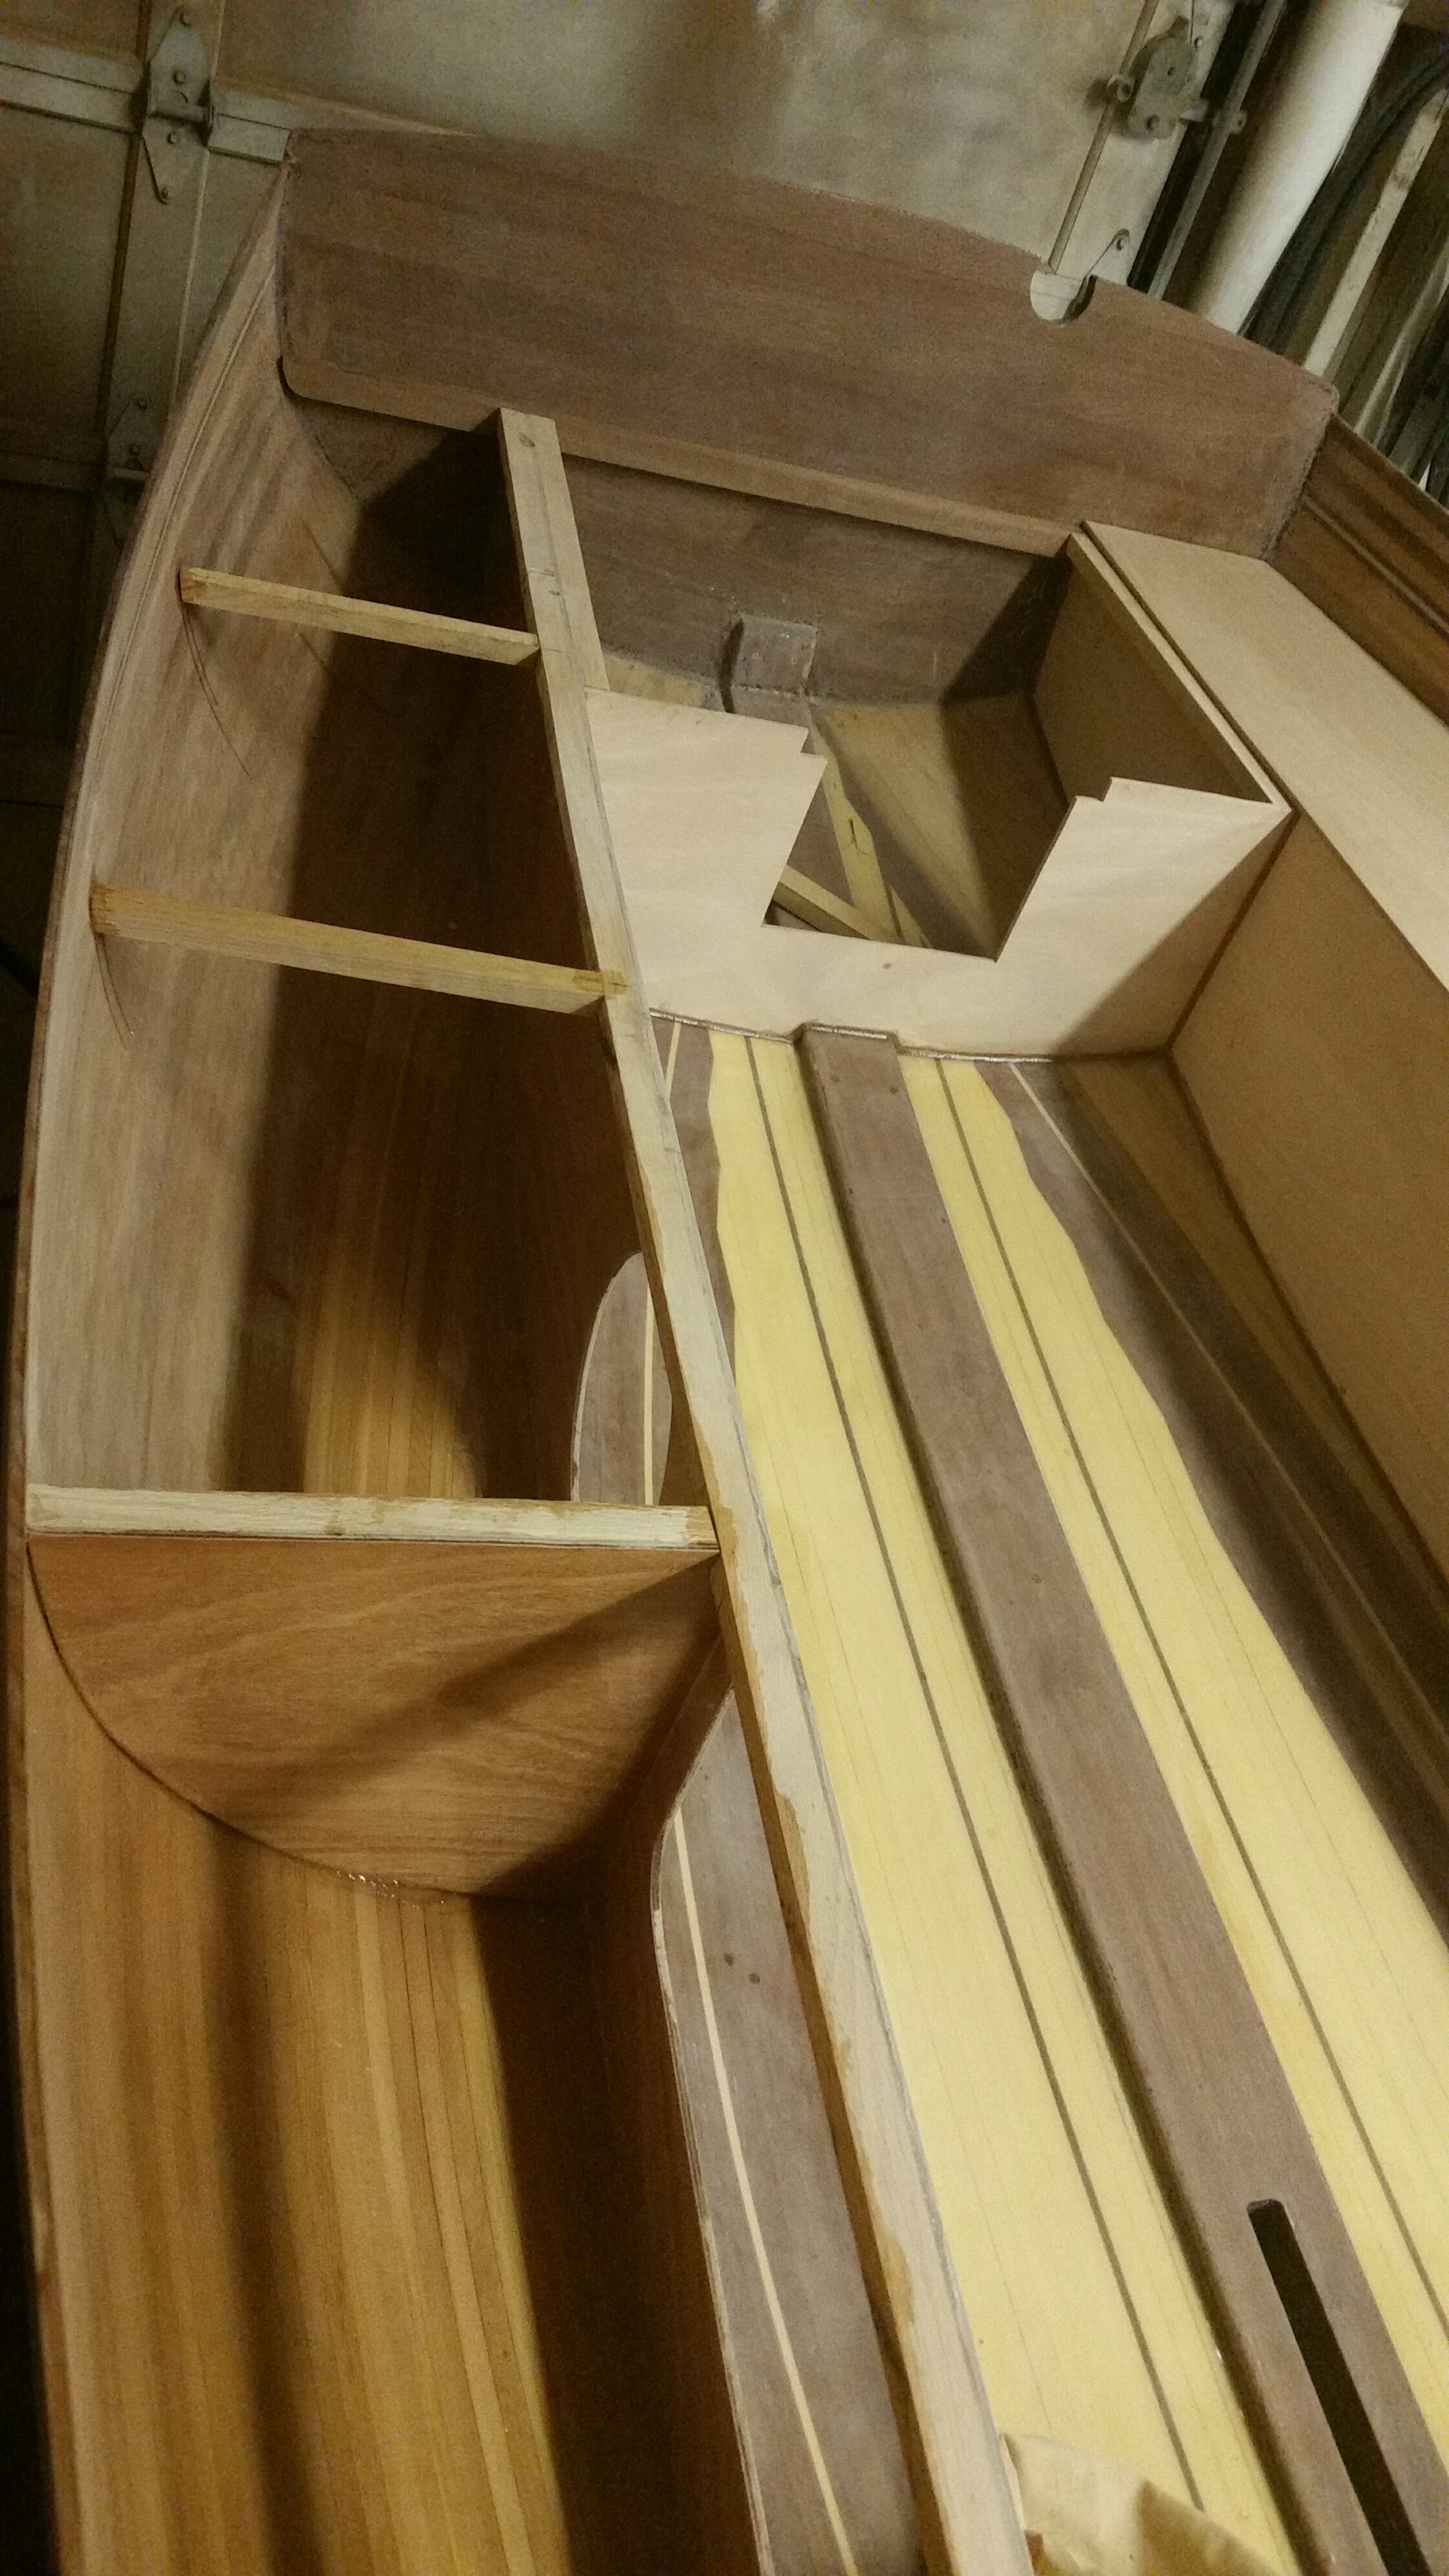
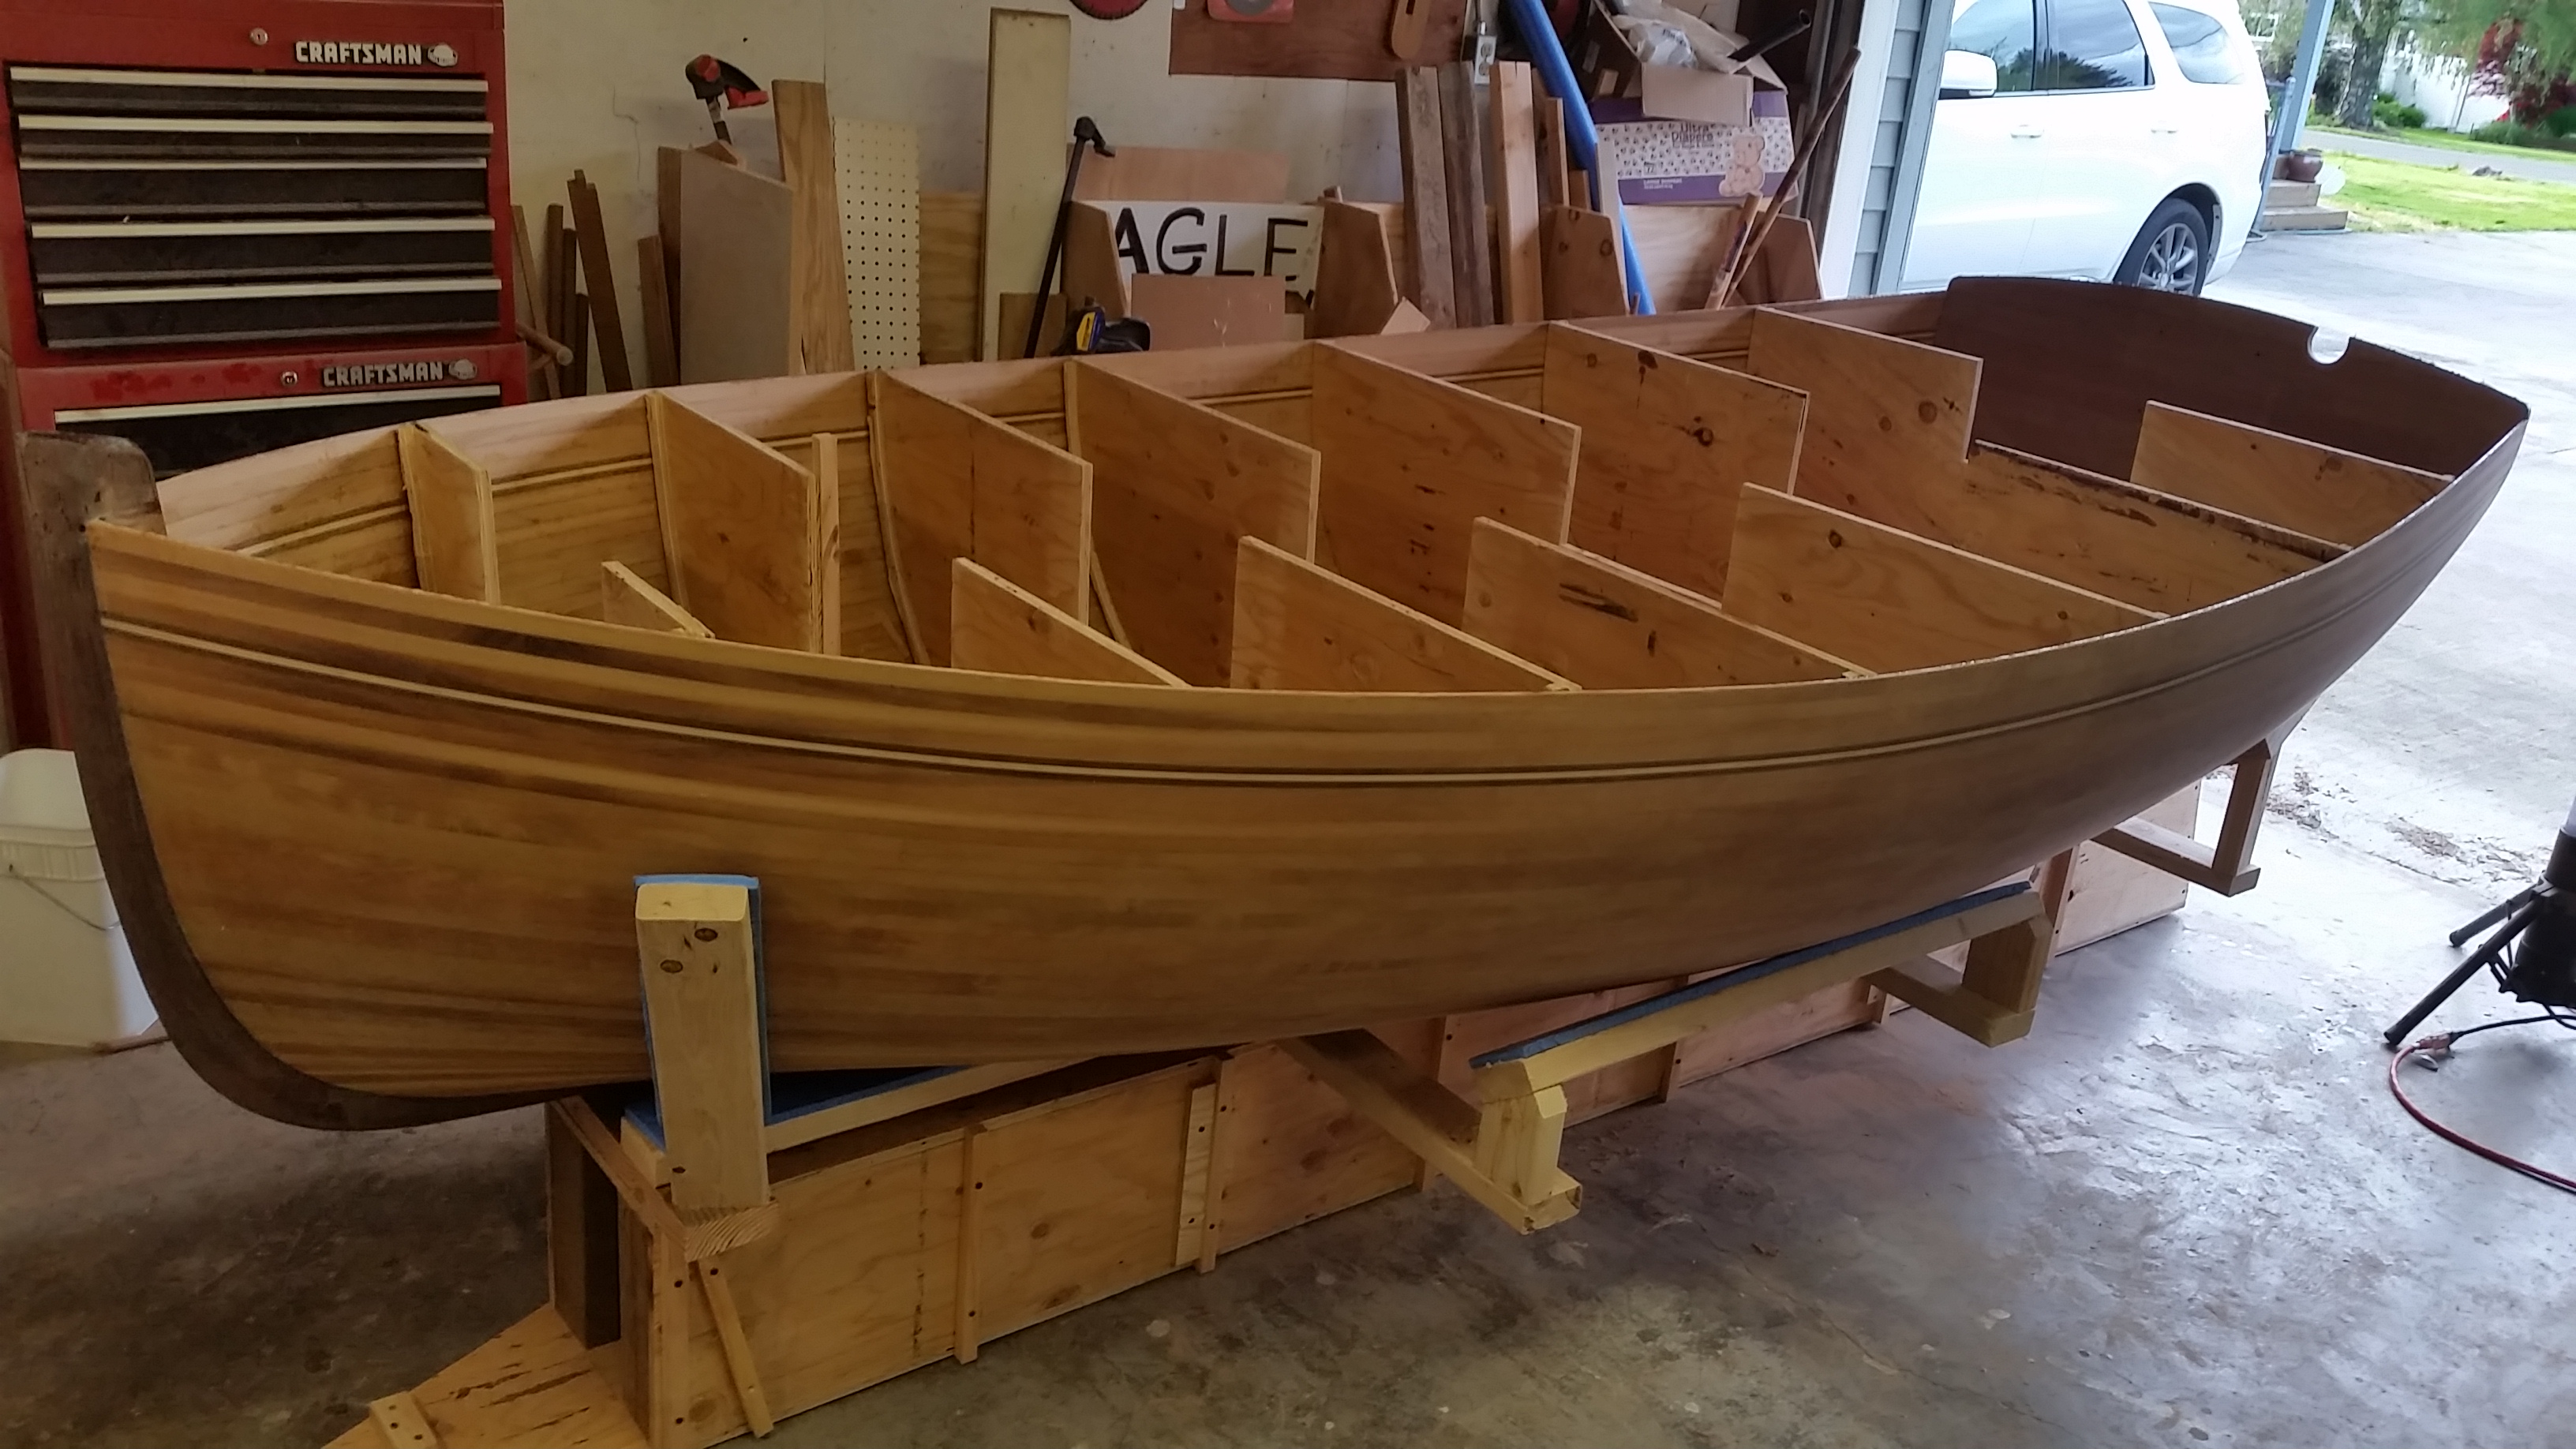
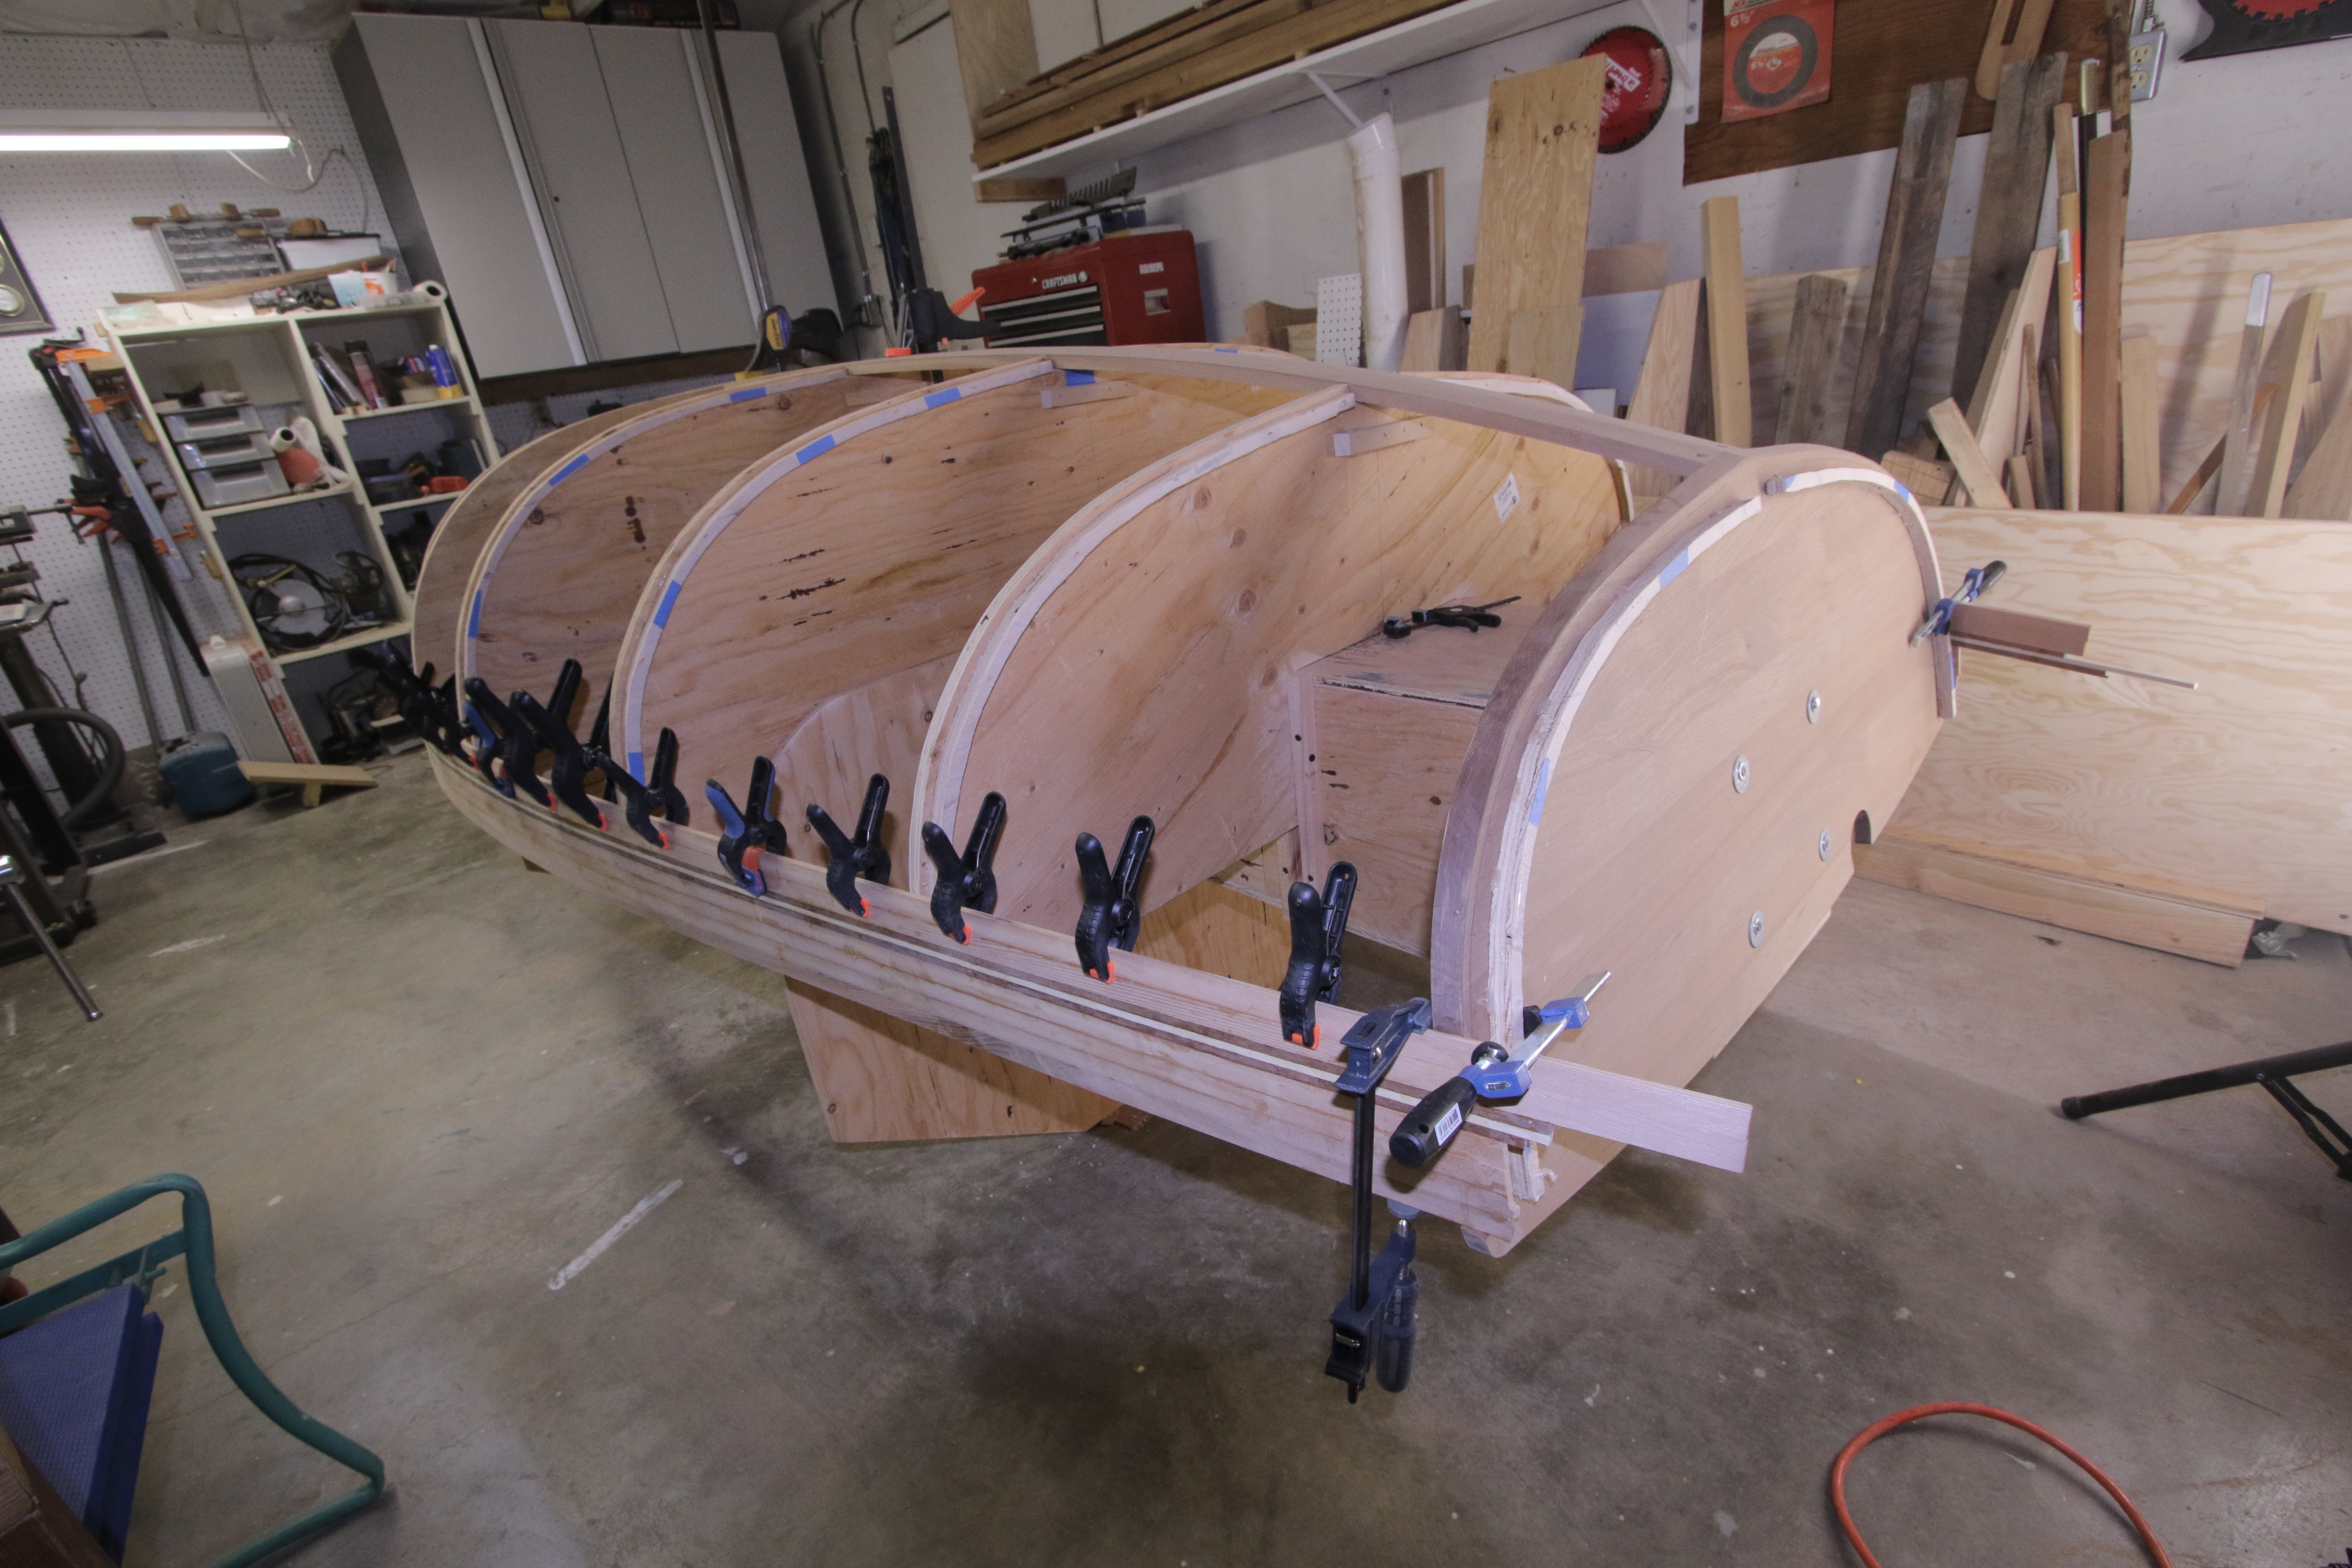
Finished fitting all the bulkheads, floor and side supports. Glued it up using T-88 epoxy.
11/22/2017
Fit bow and side bulkheads.
11/21/2017
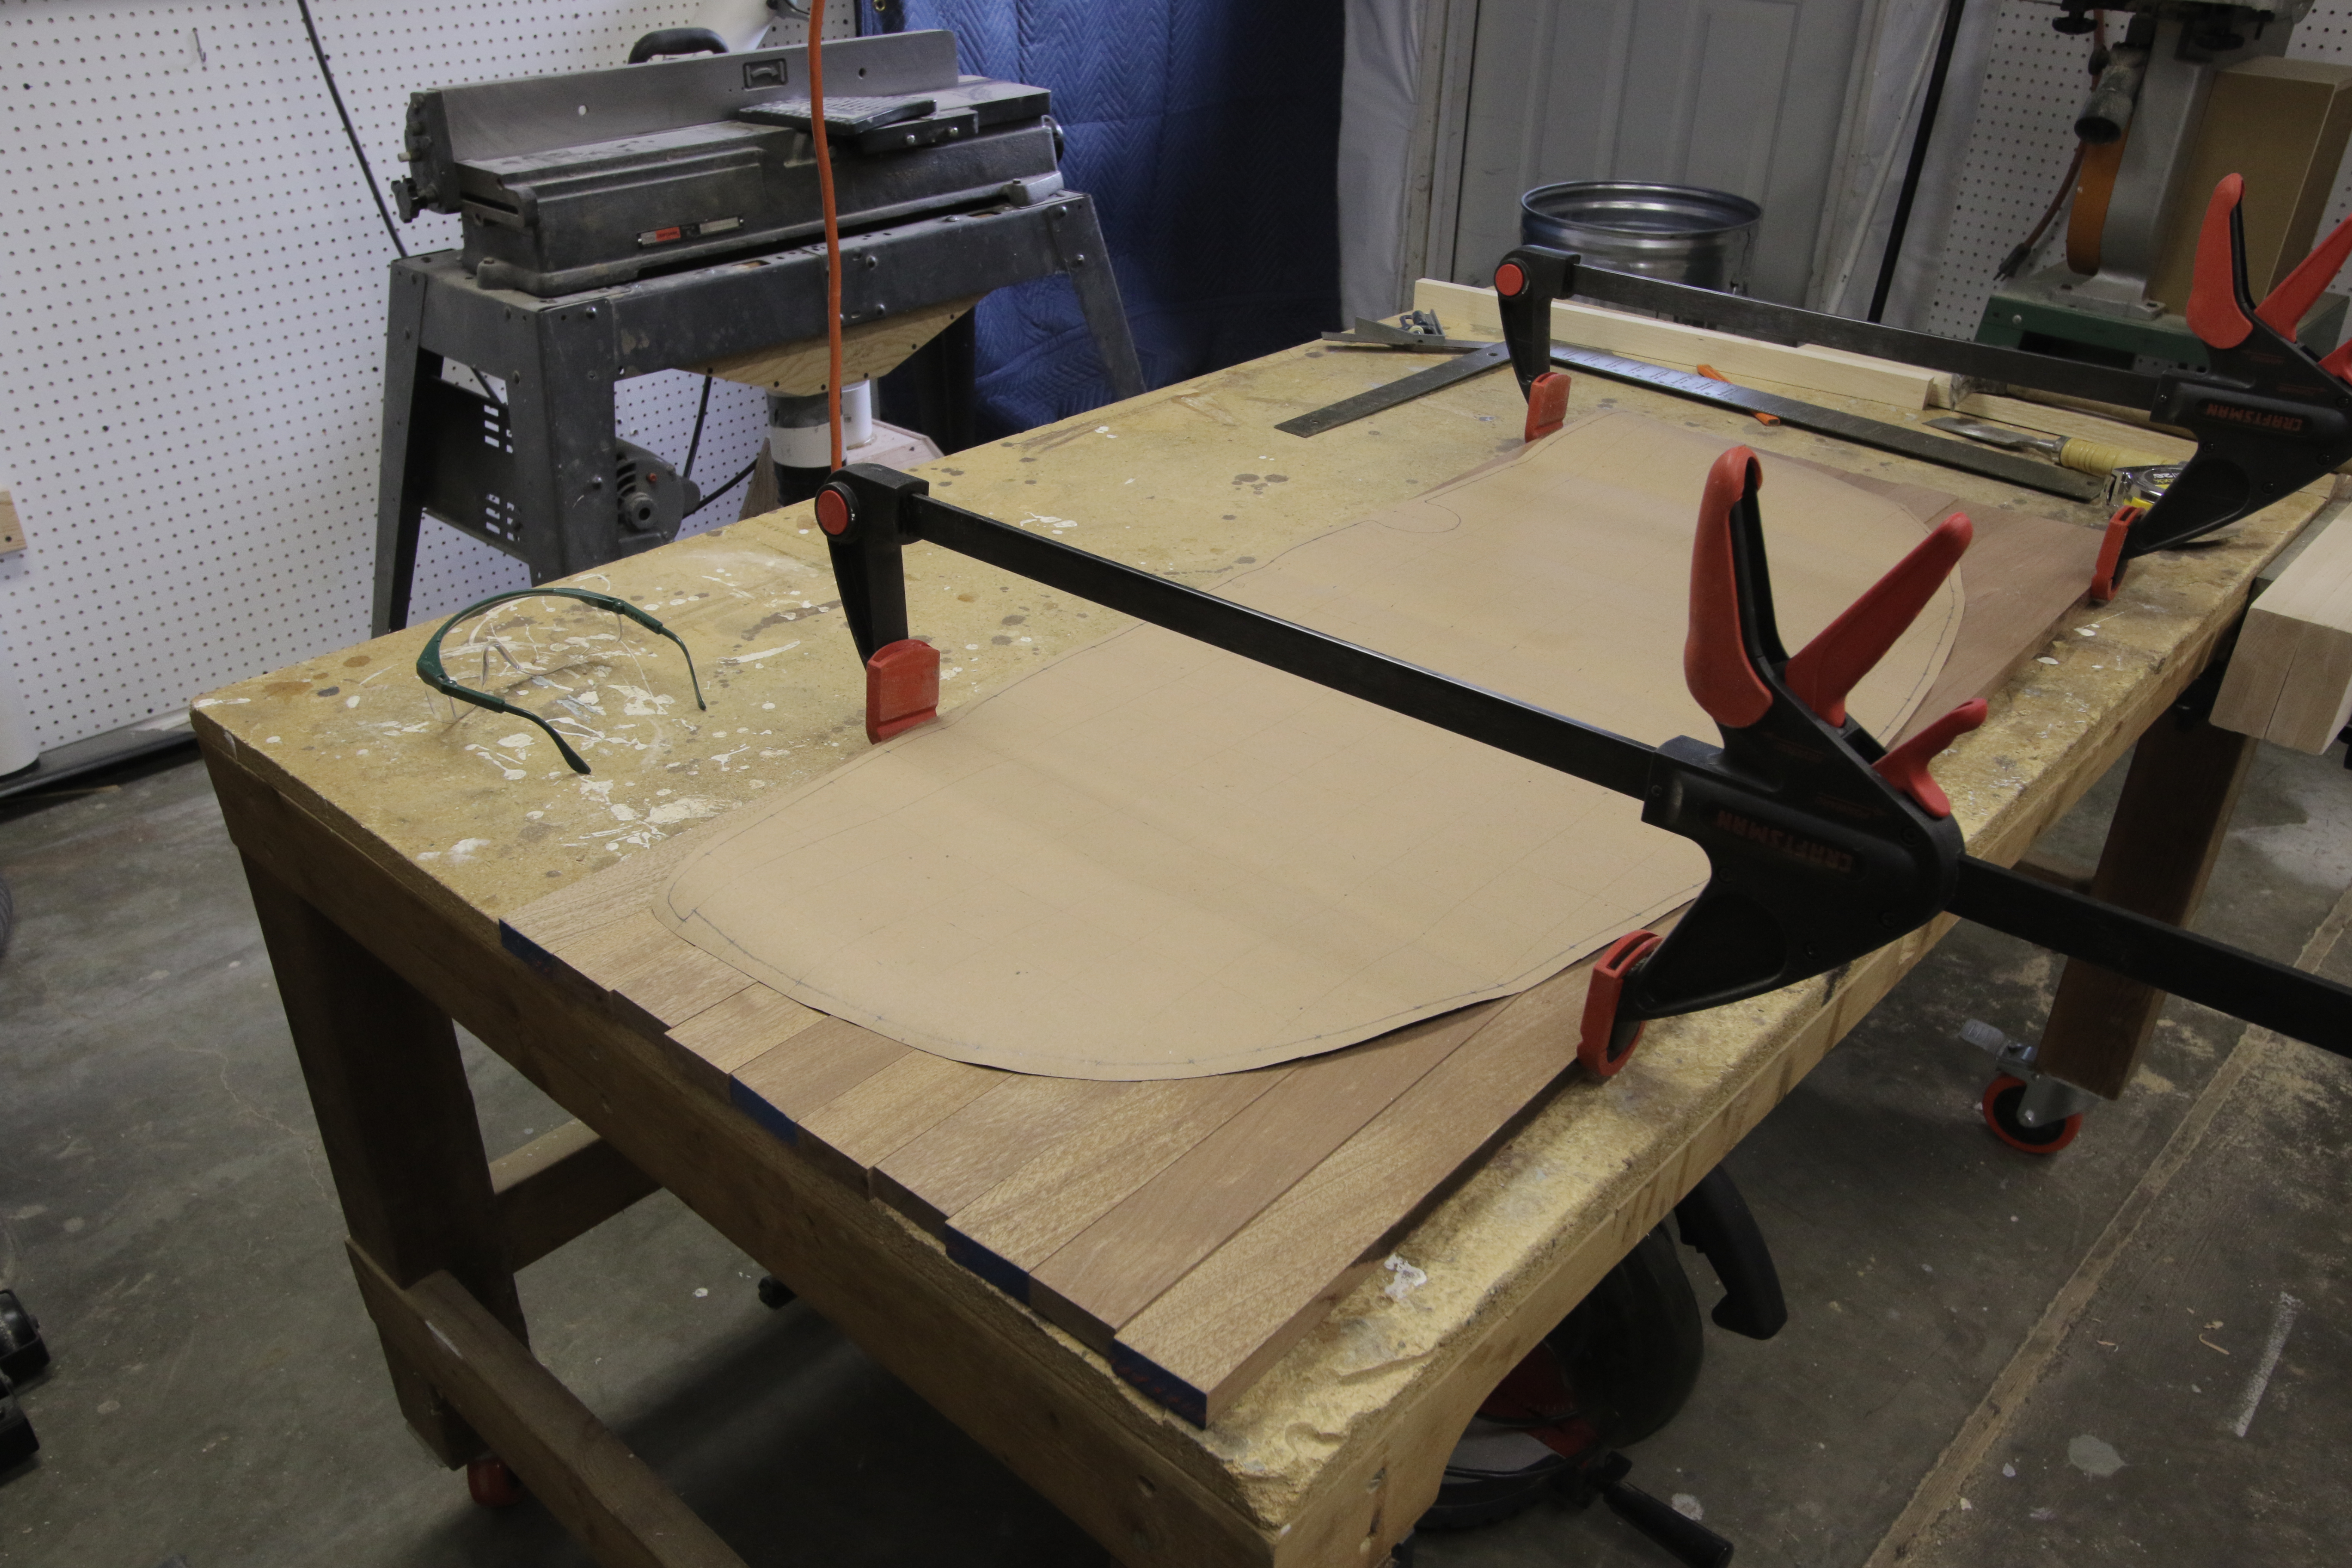
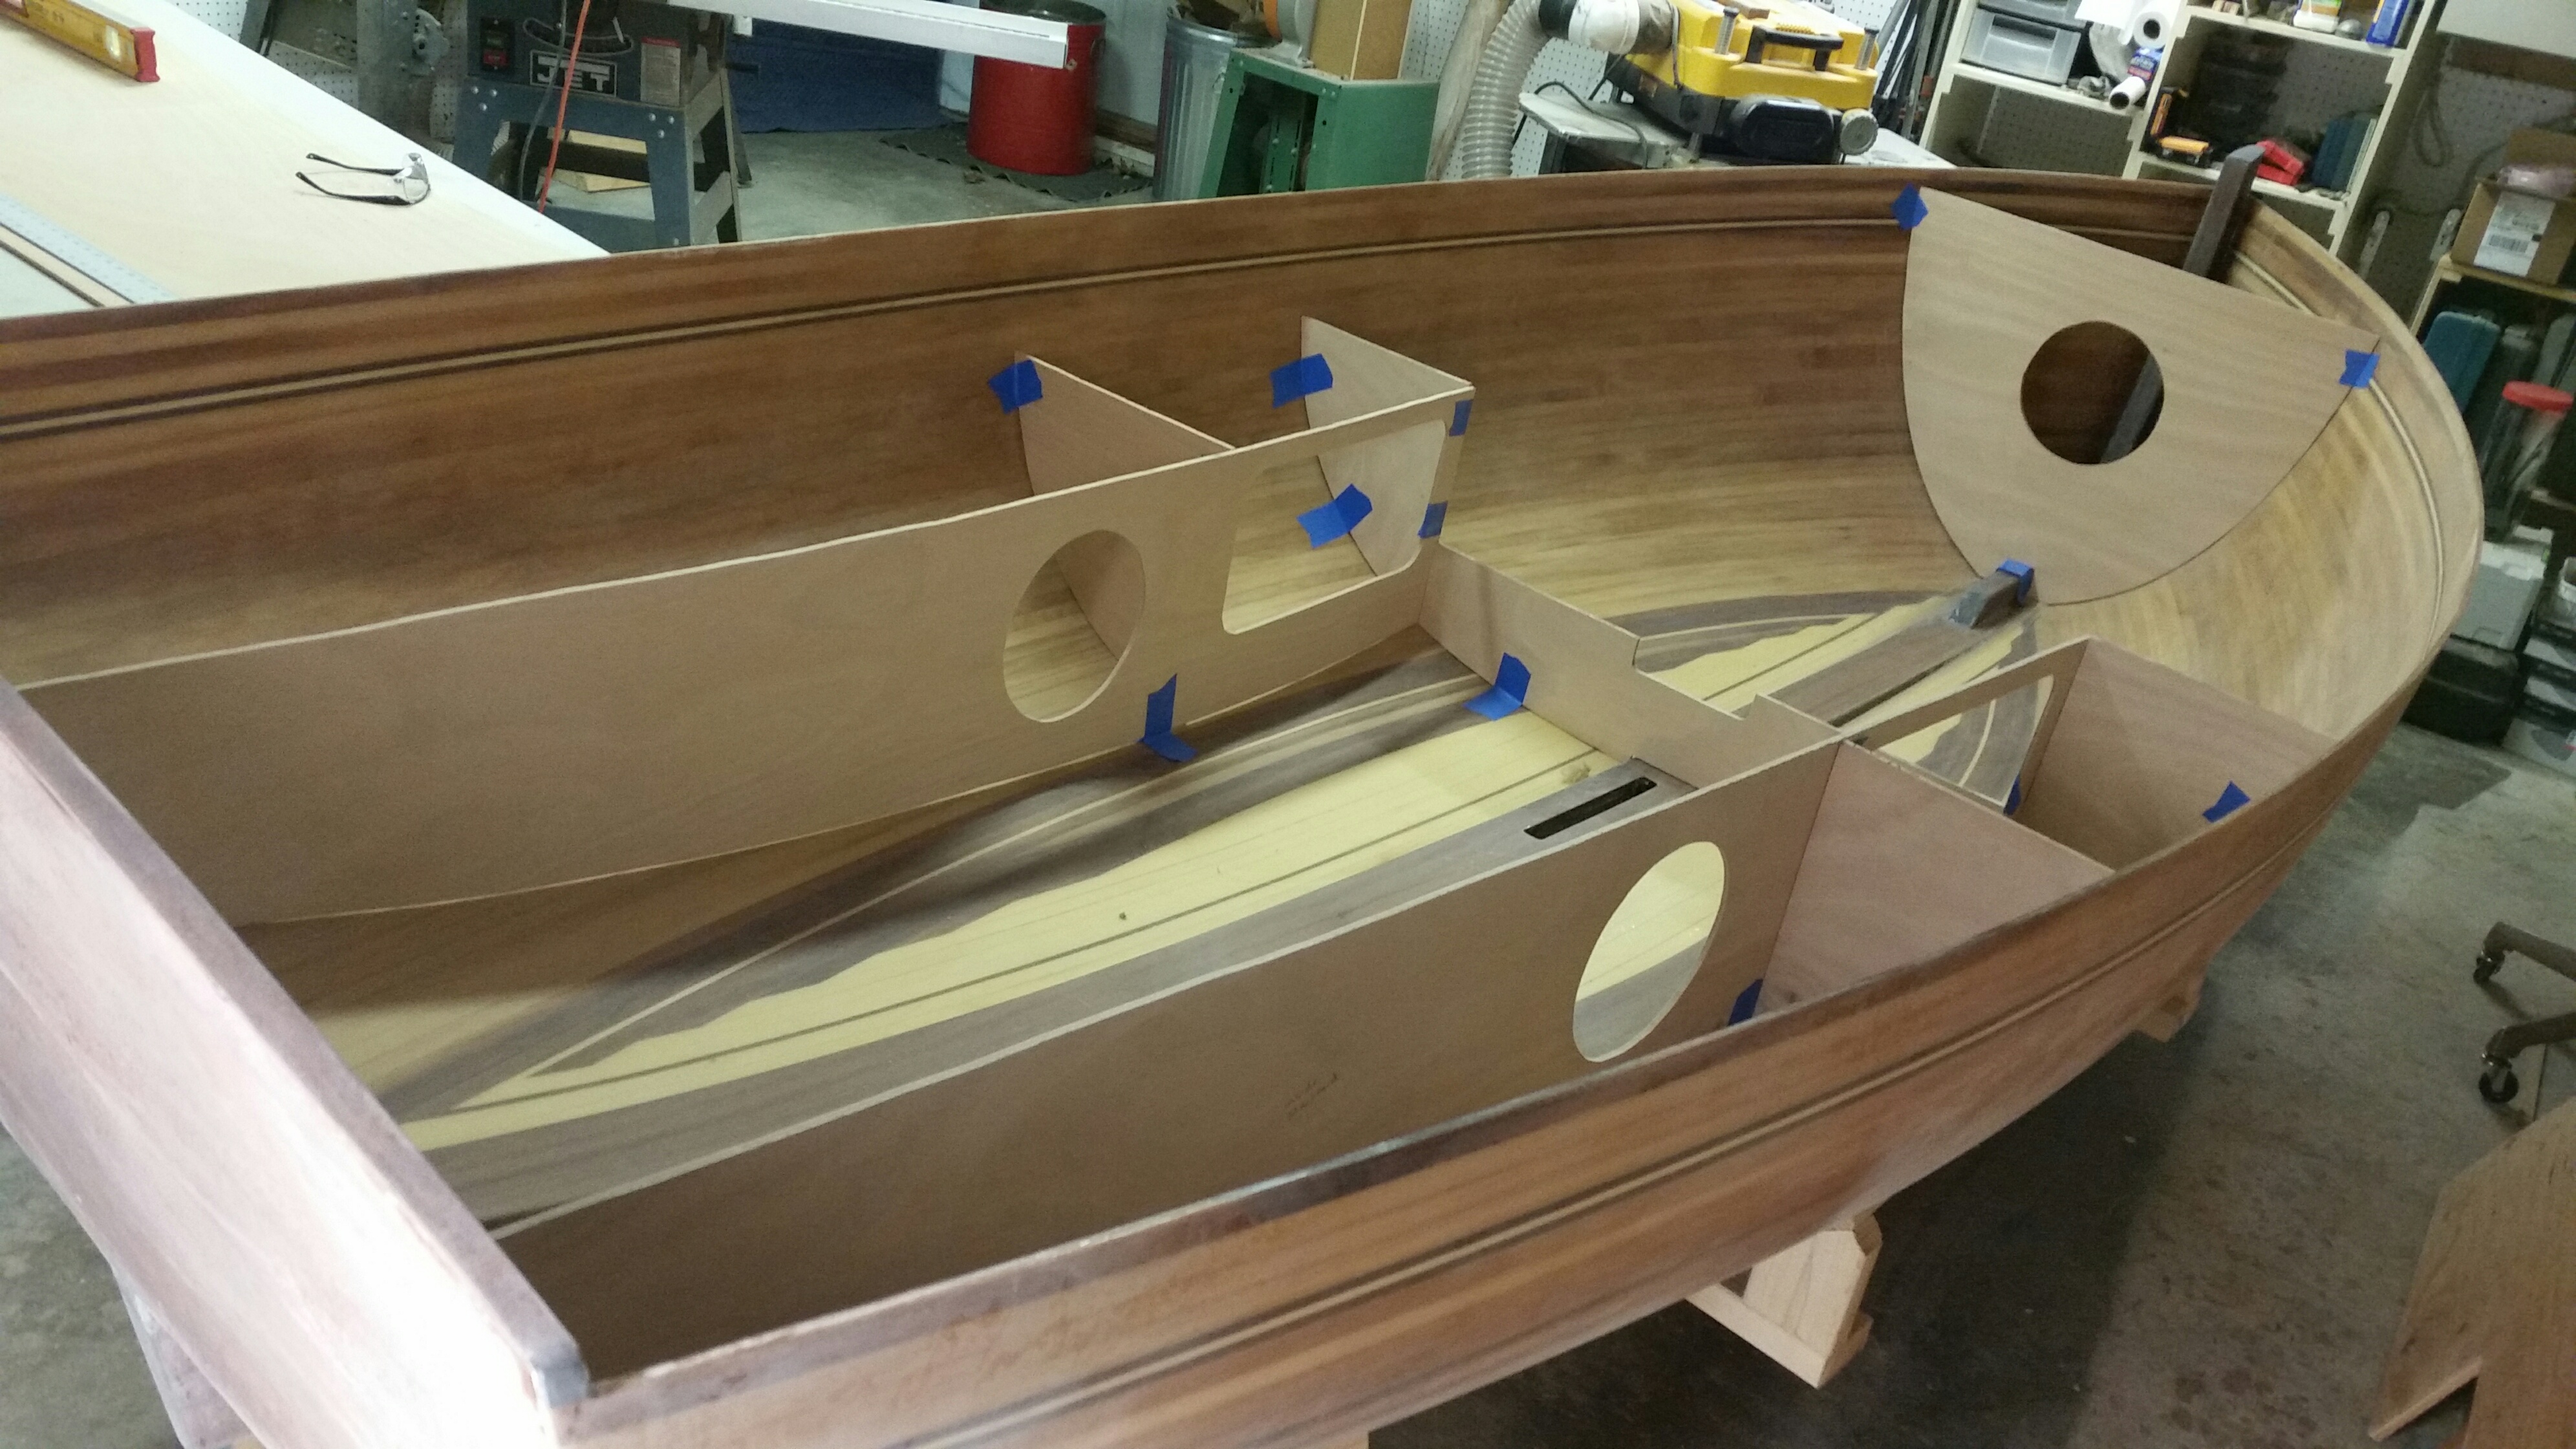
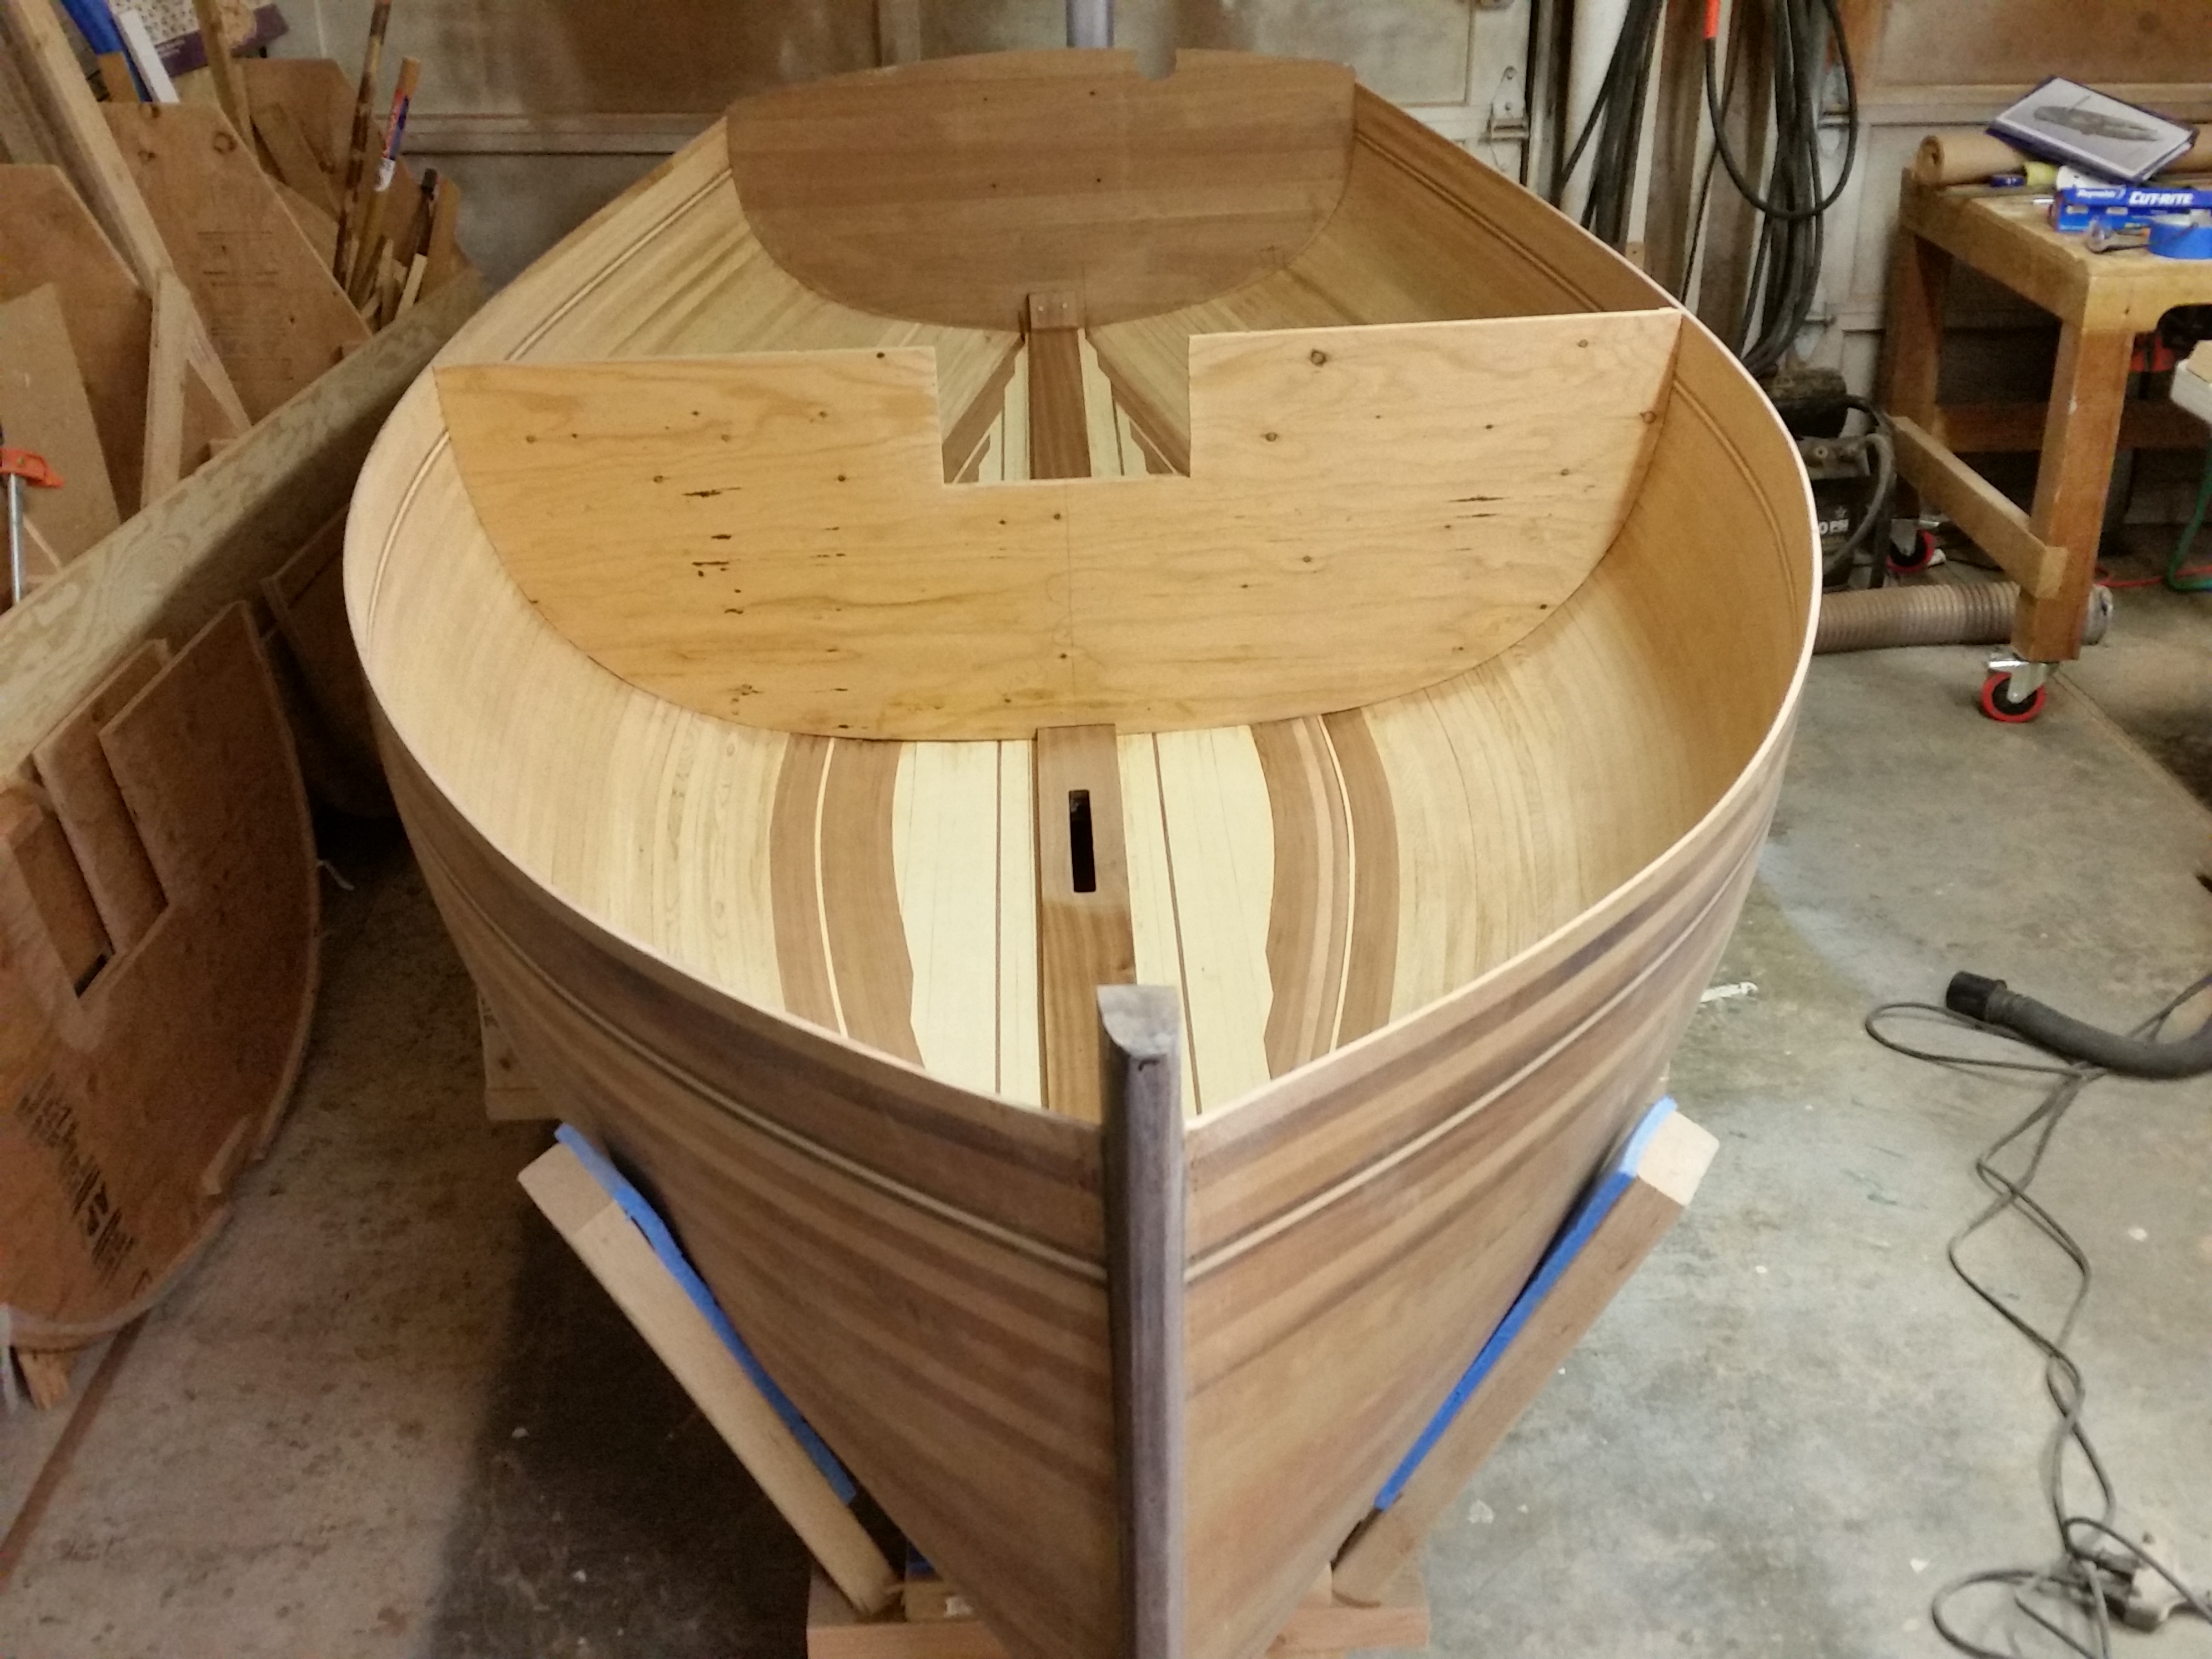
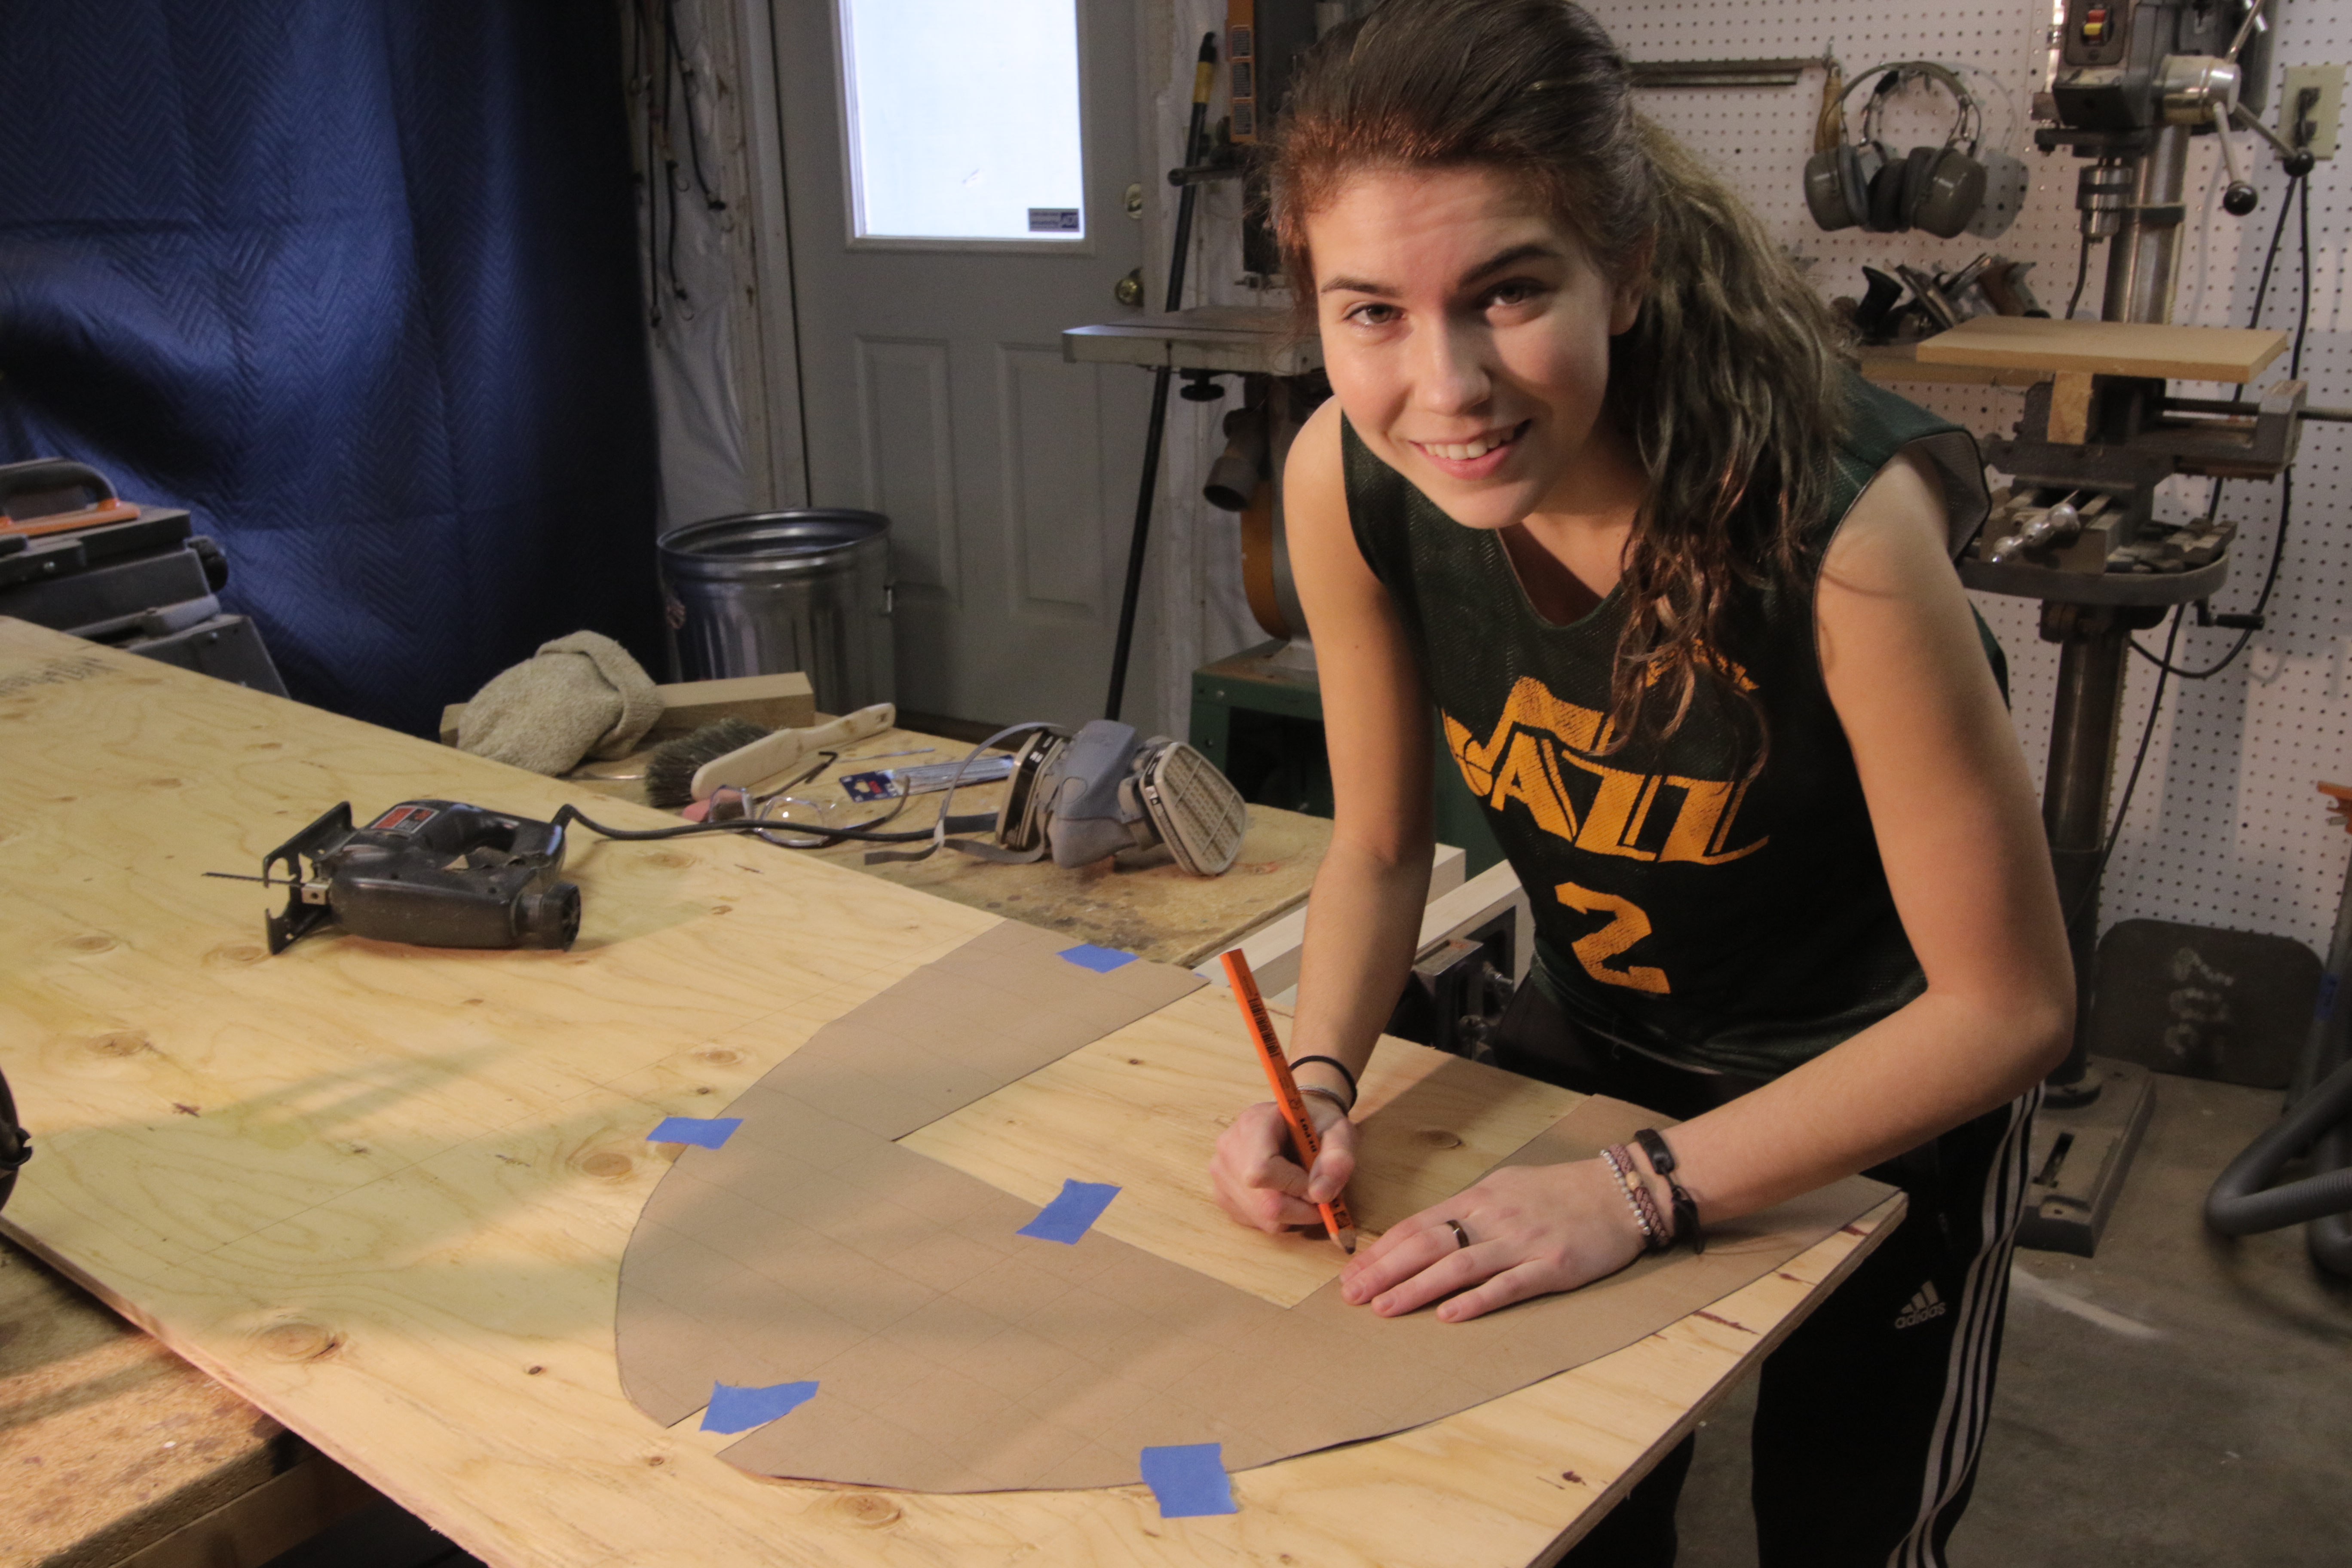
Made a cardboard template for longitudinal bulkheads and fit to hull. Cut from Okoume.

11/11/2017
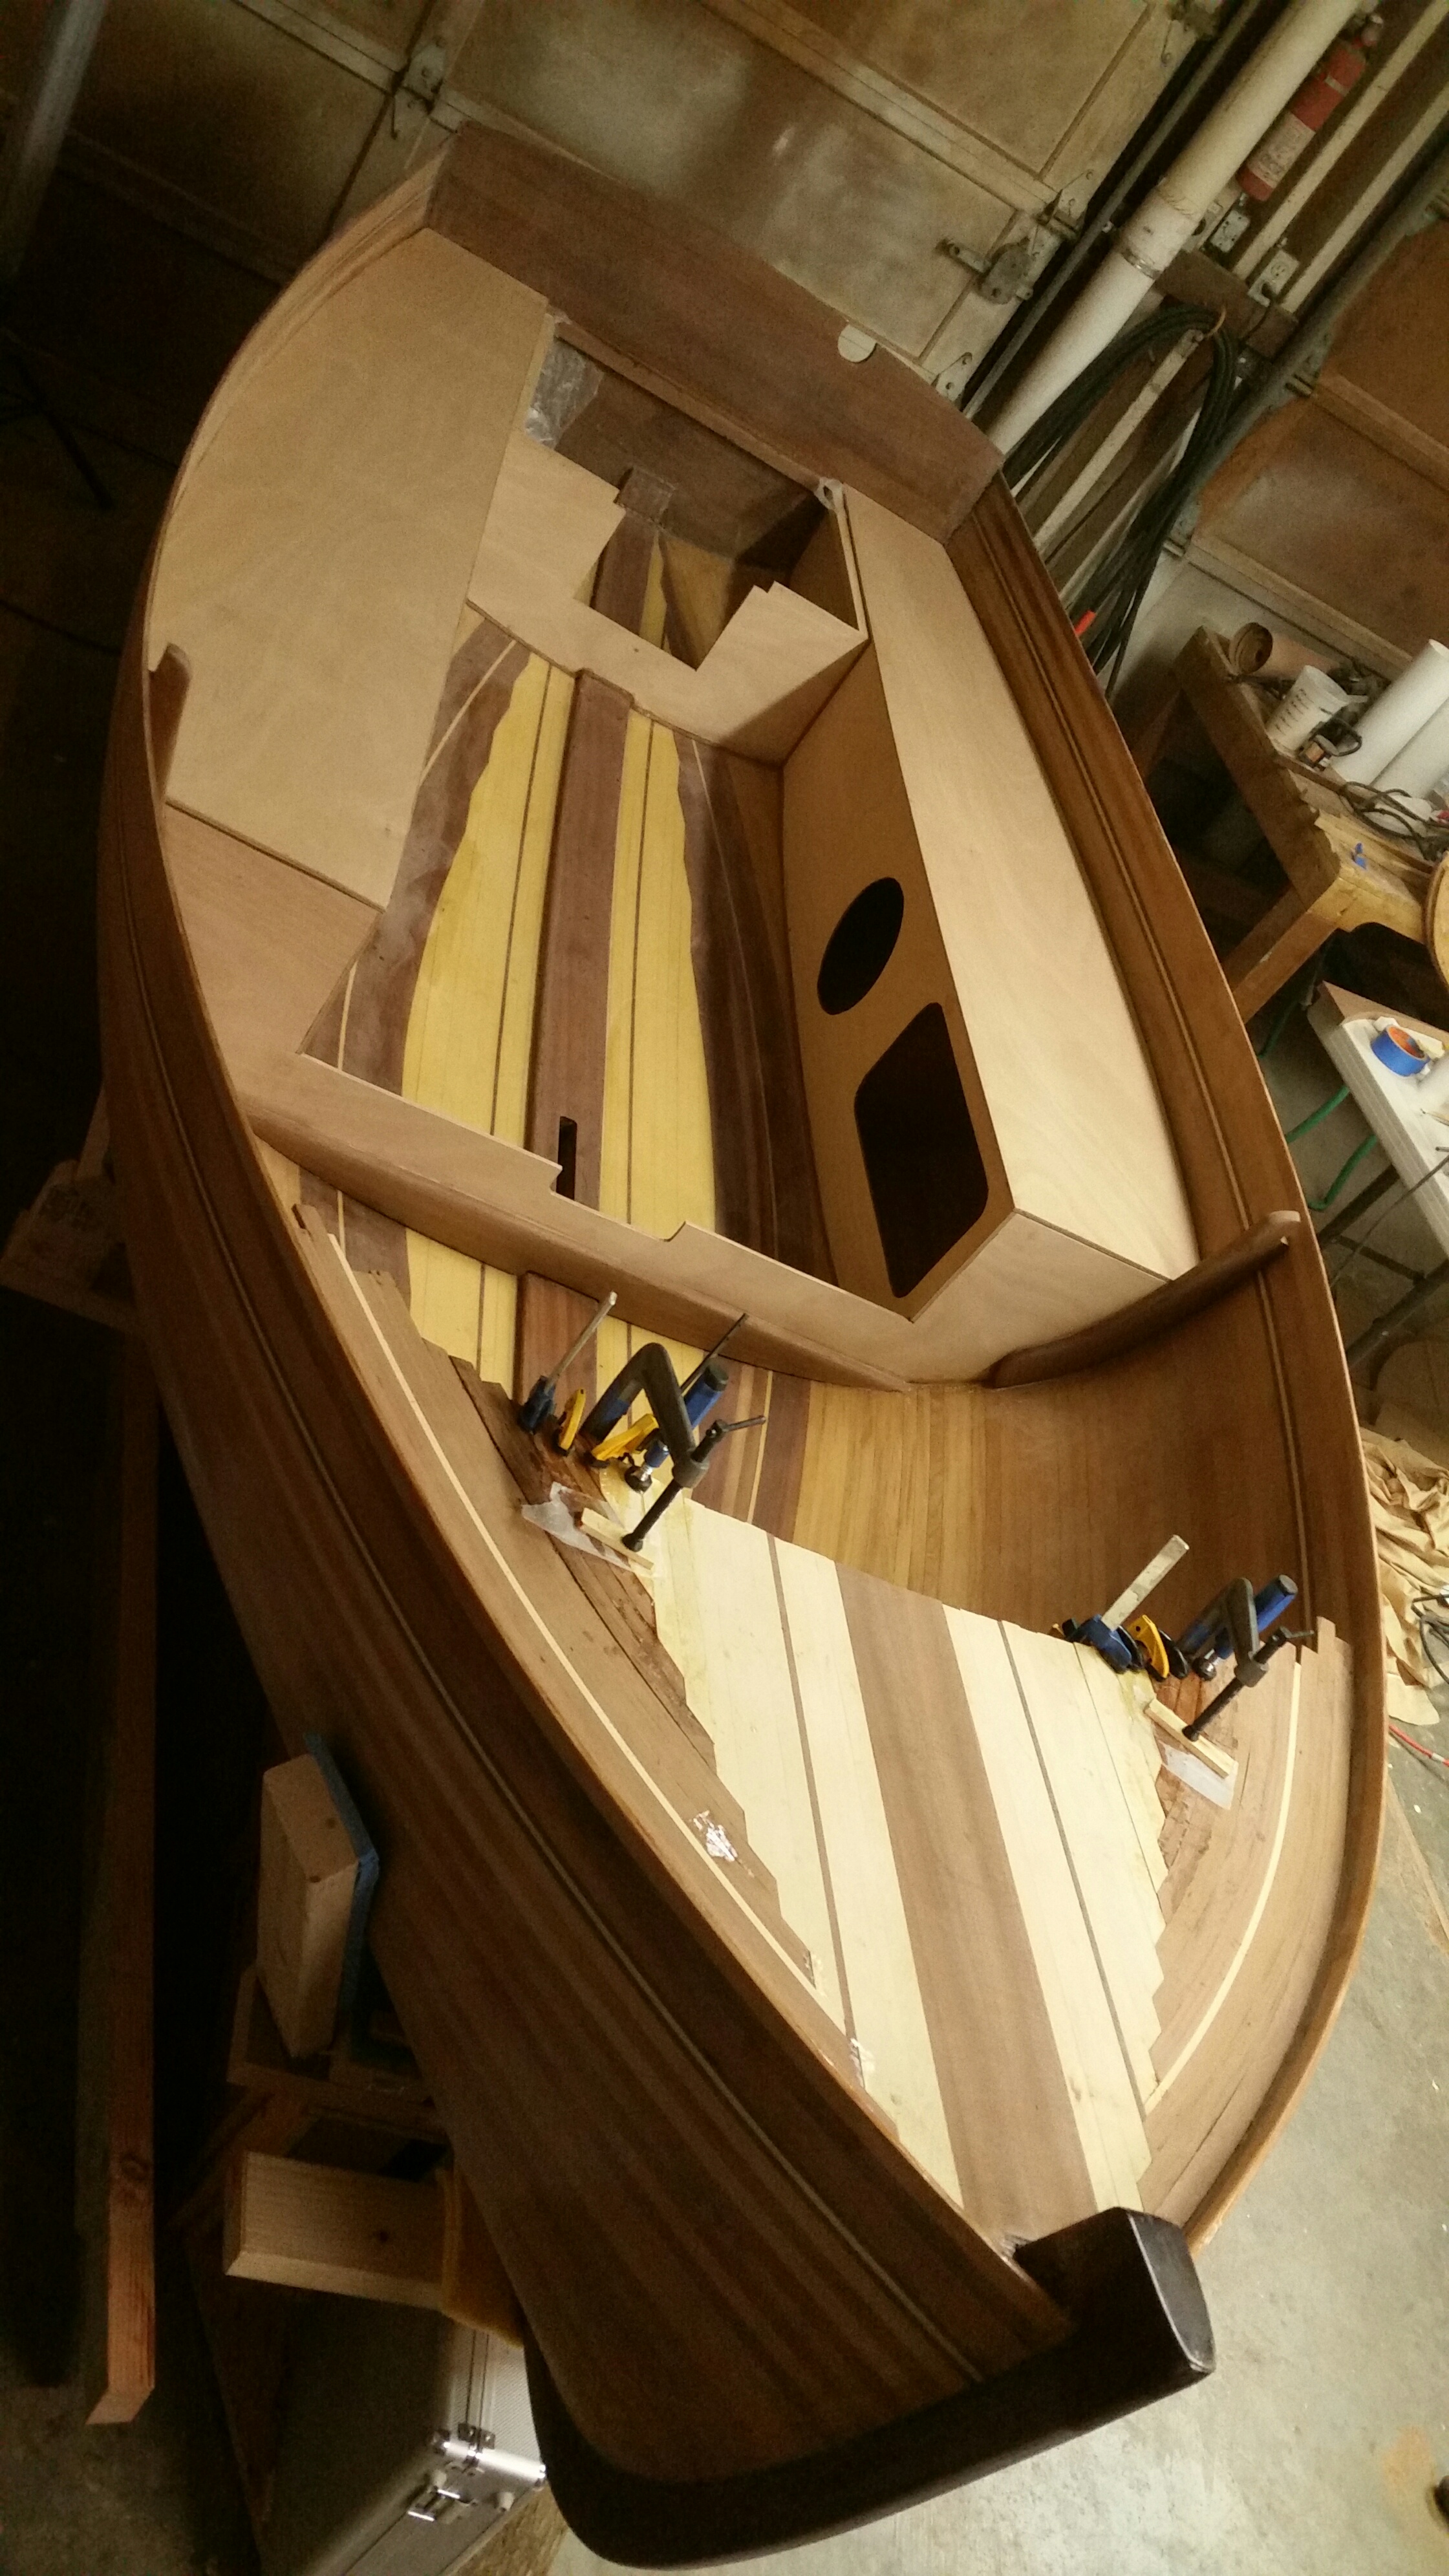
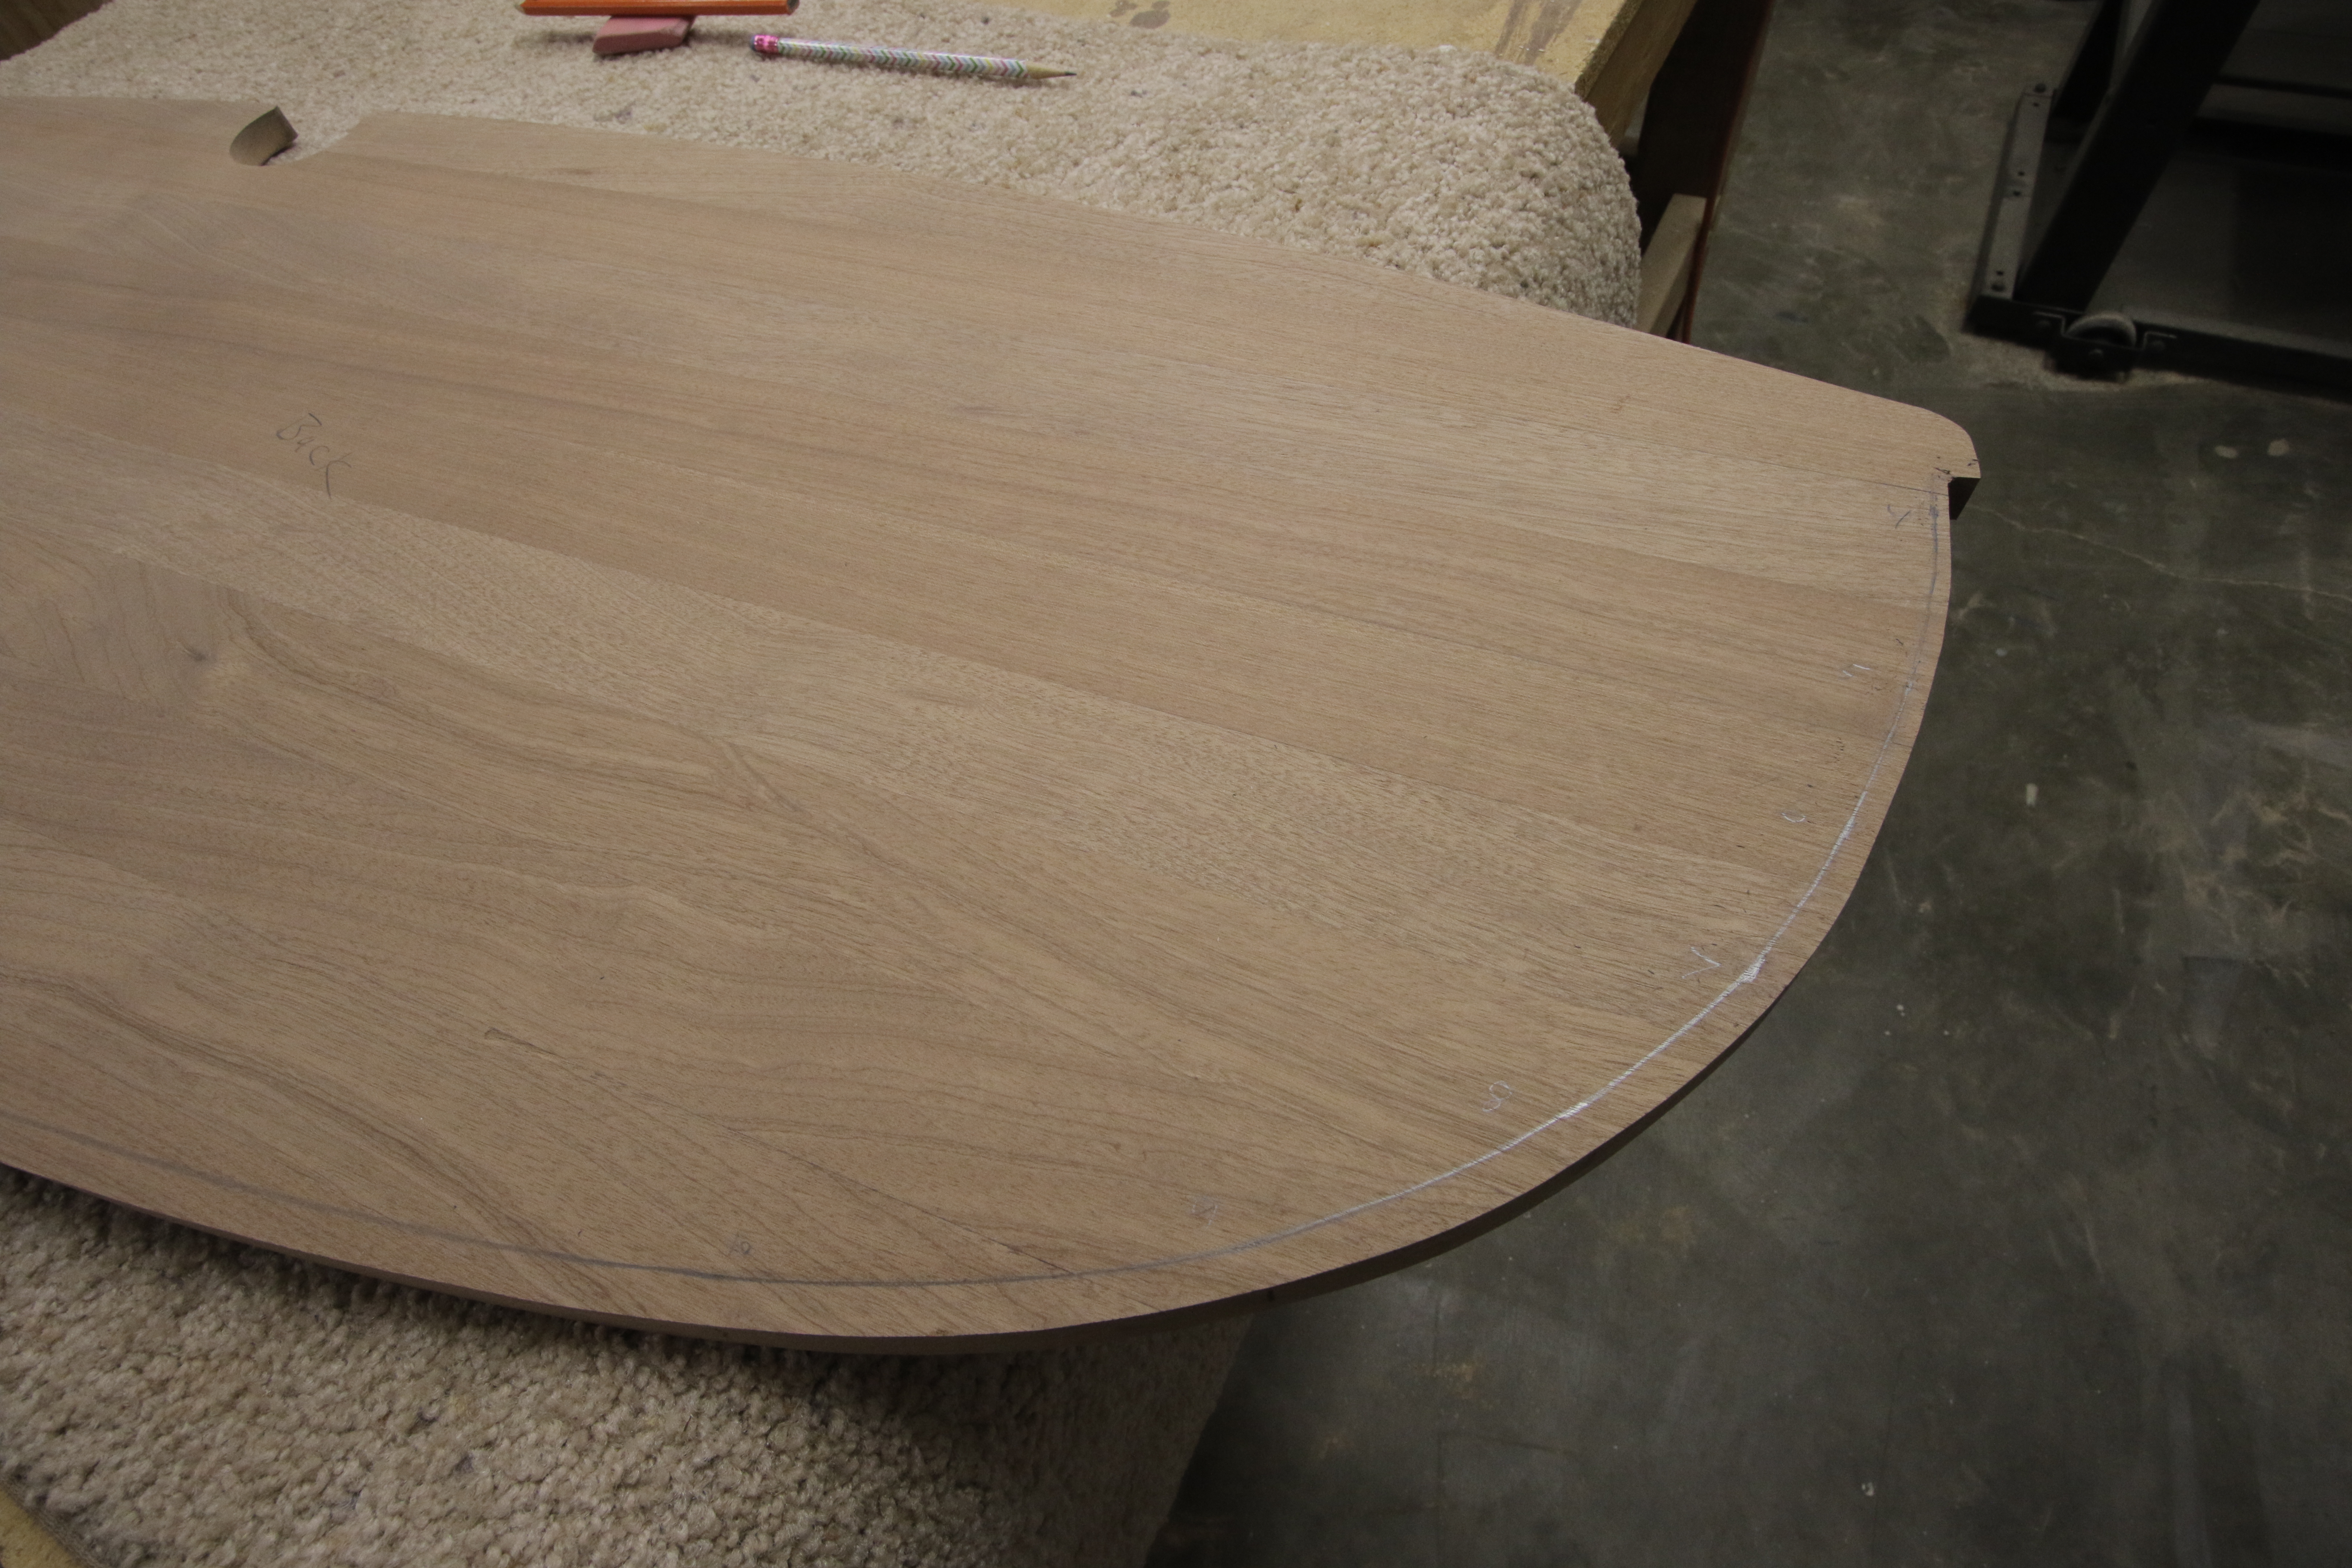
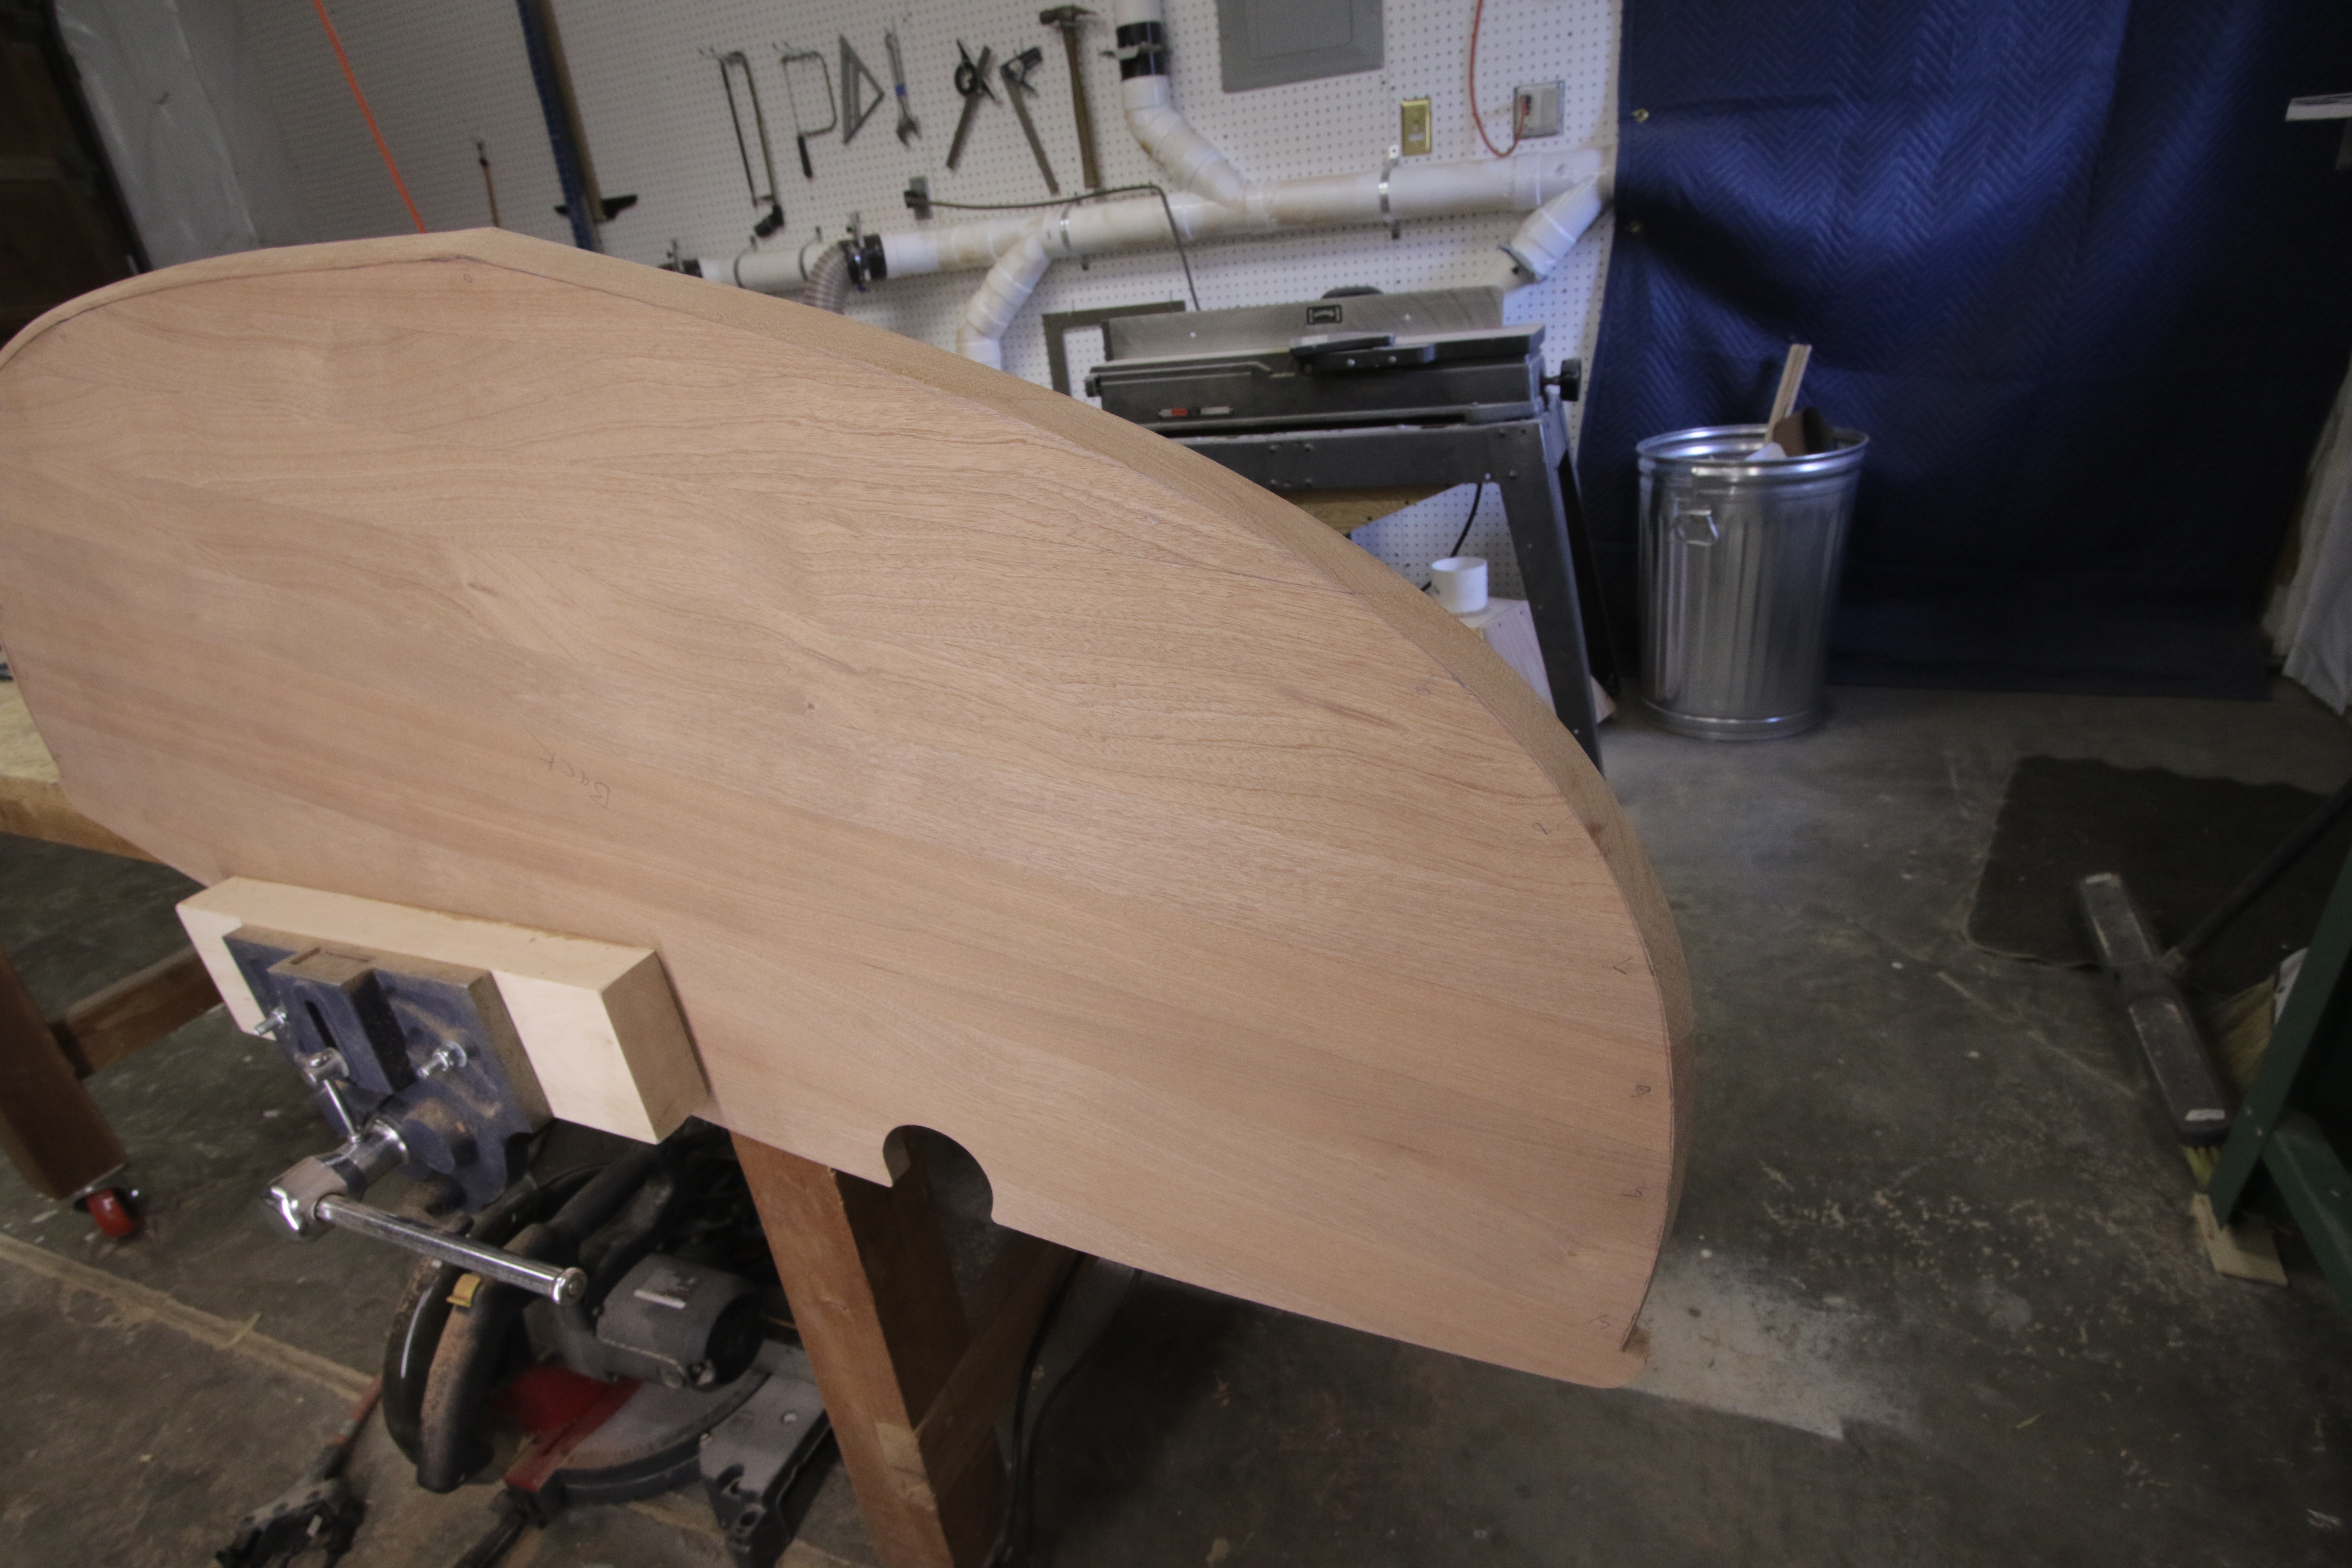
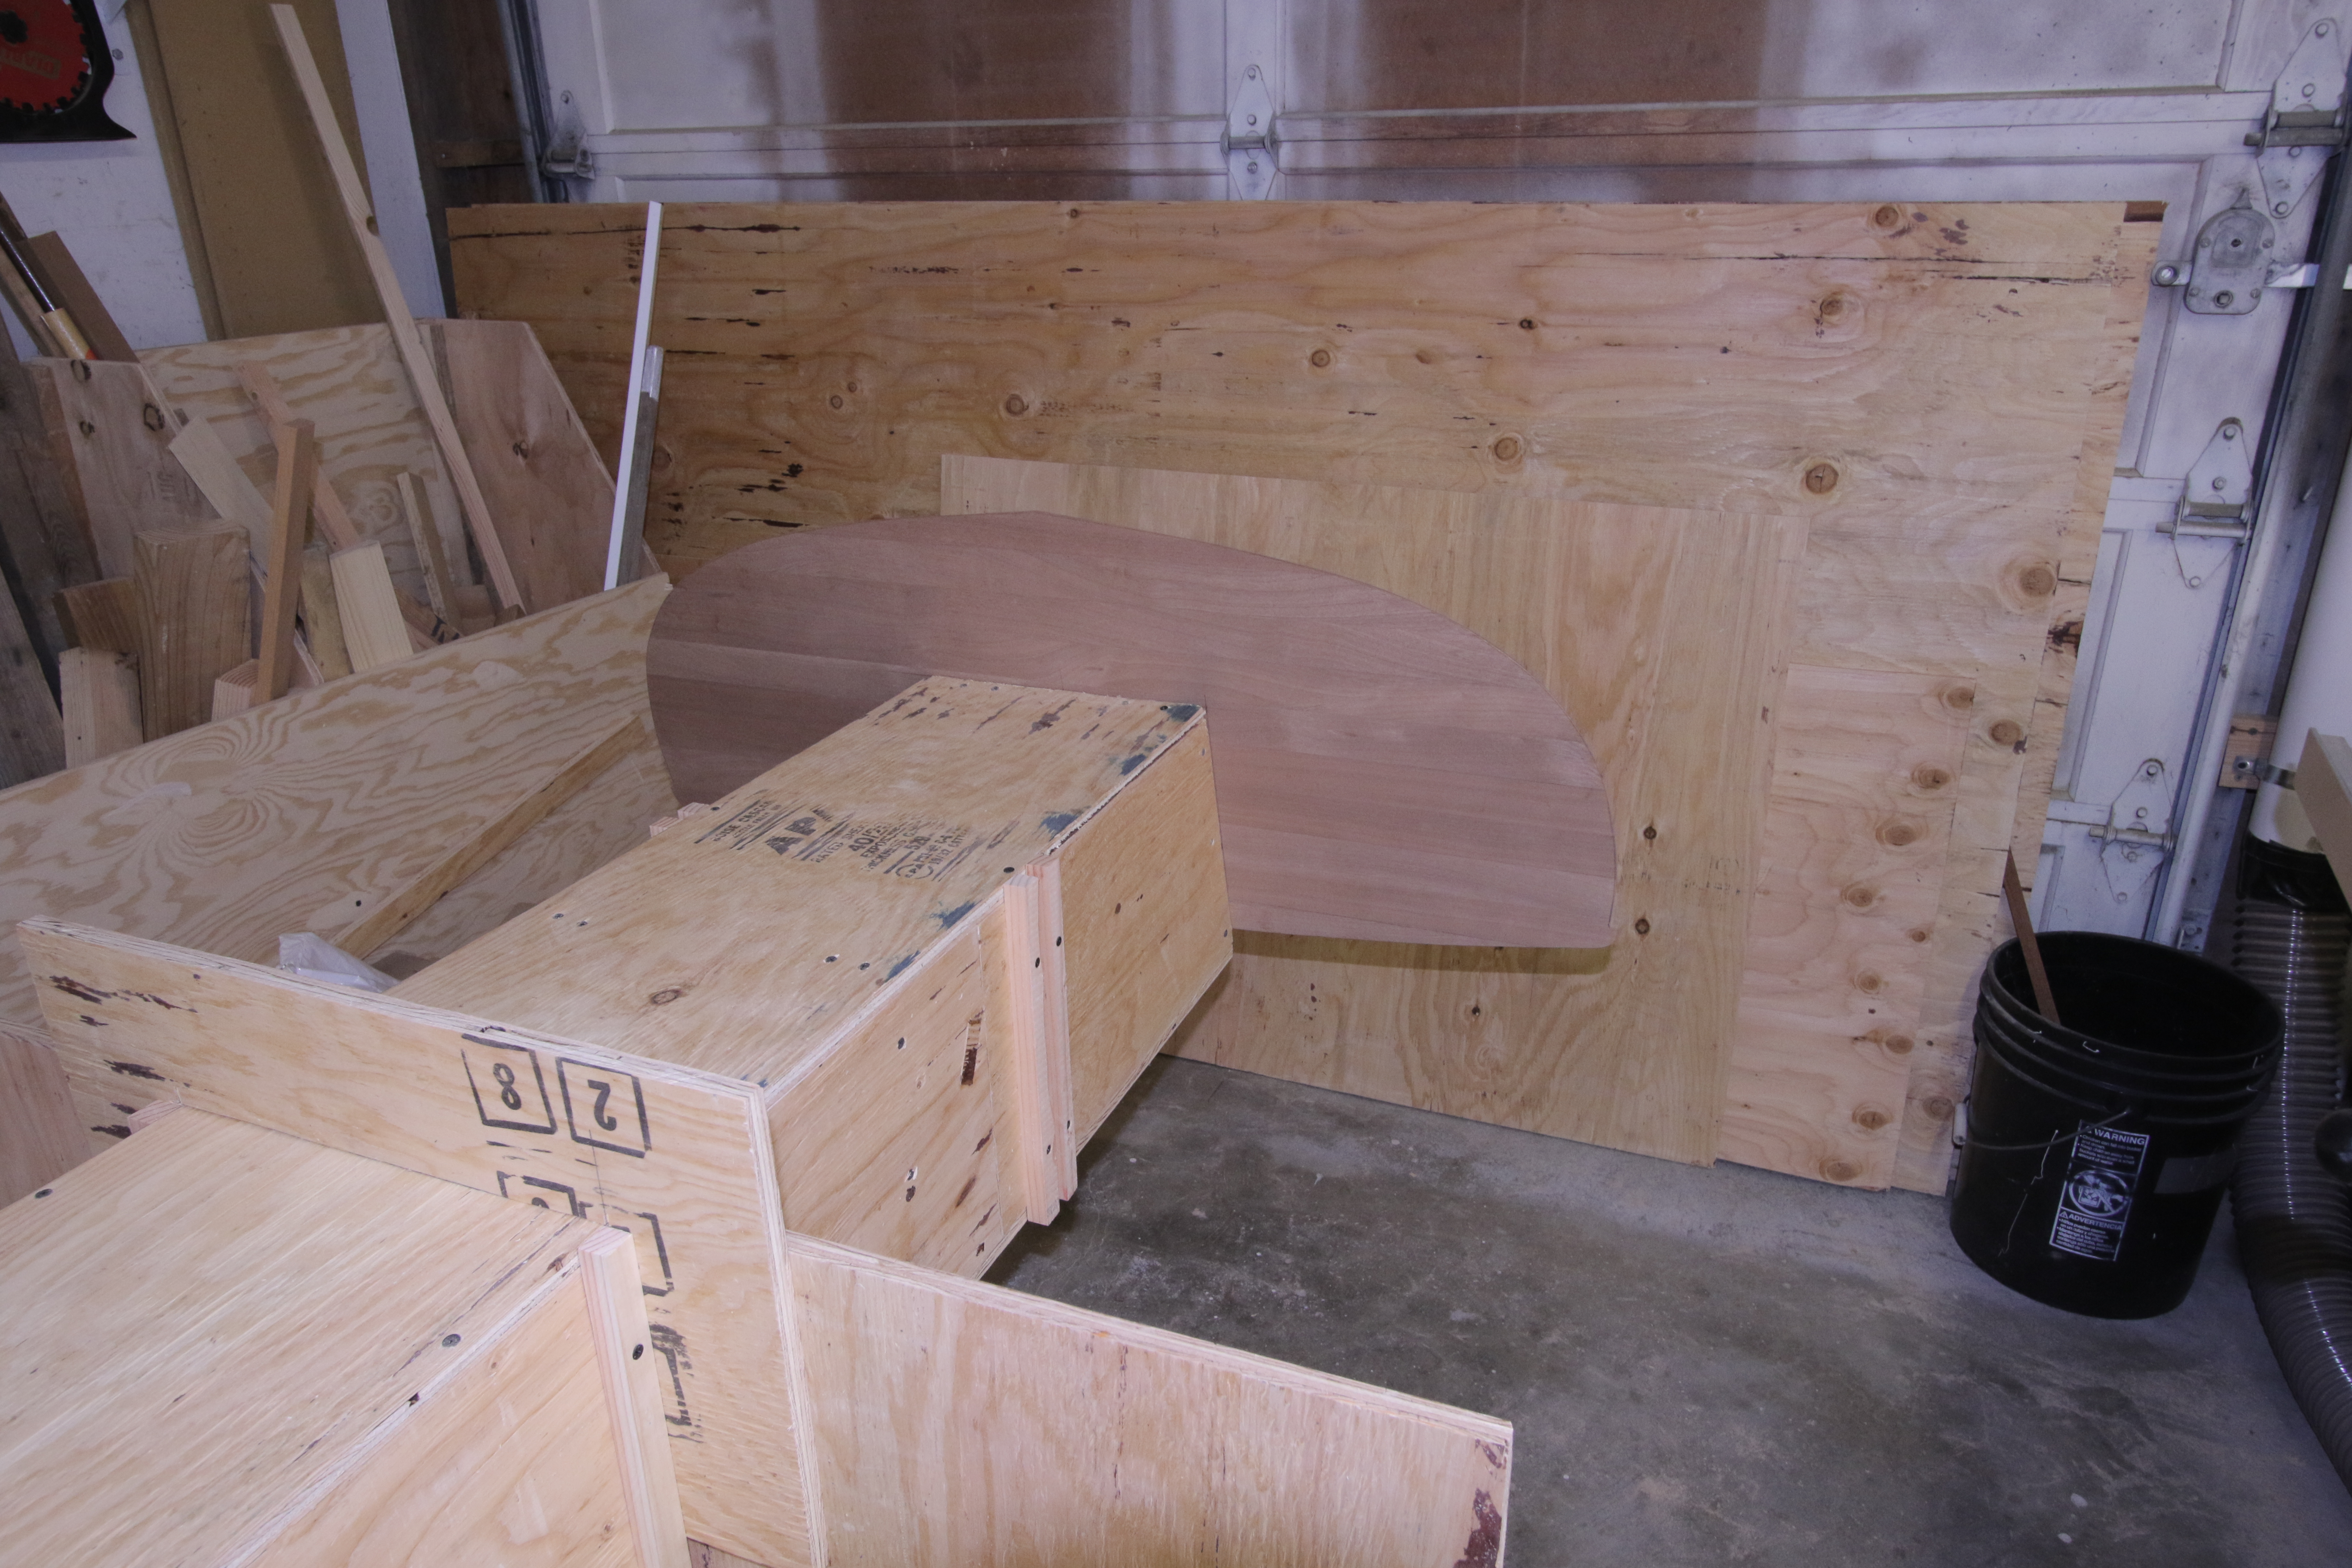
Picked up a couple sheets of 6mm Marine grade Okoume today for the interior build-out and cut out the forward bulkhead. I used the plywood from Station #4 as a template and cut it to shape. Then after fitting this, used it as a template to trace onto the okoume ply. Cut close to the line with jig and band saws, and then finished on the oscillating belt sander table. Dry-fitting for now – the picture has both the template and okoume bulkhead, explaining why it looks so thick.
11/10/2017
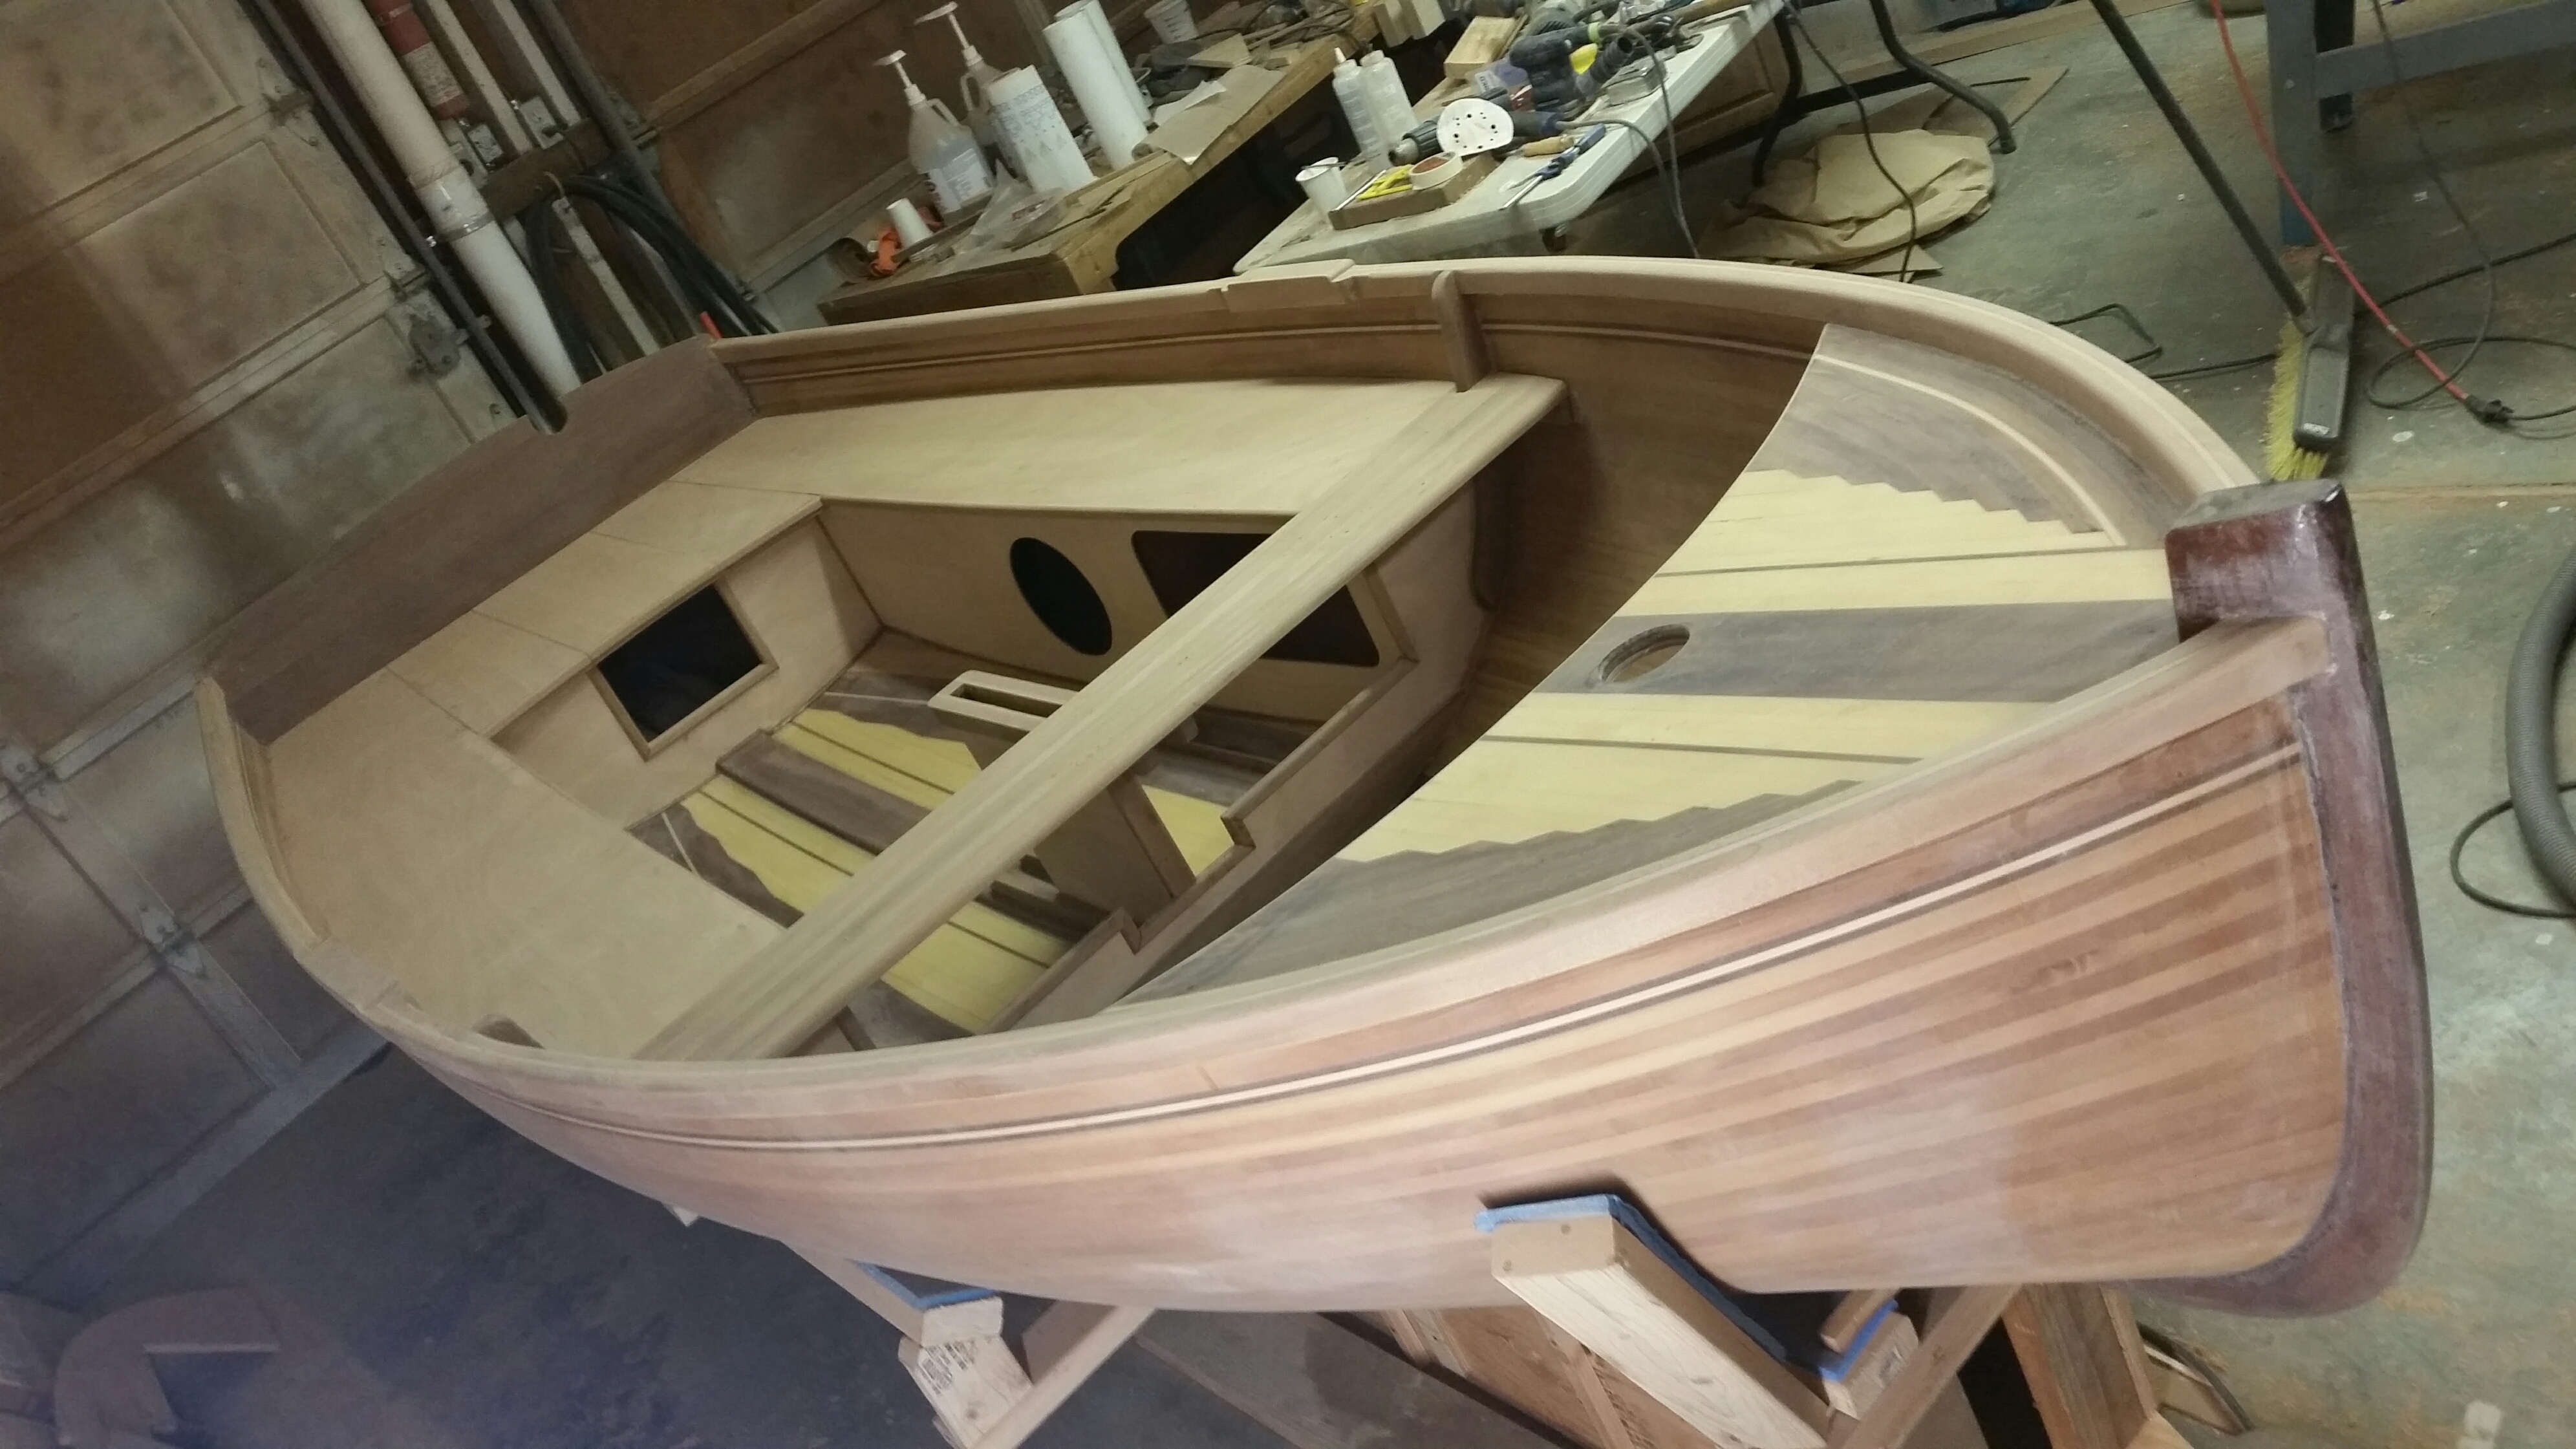
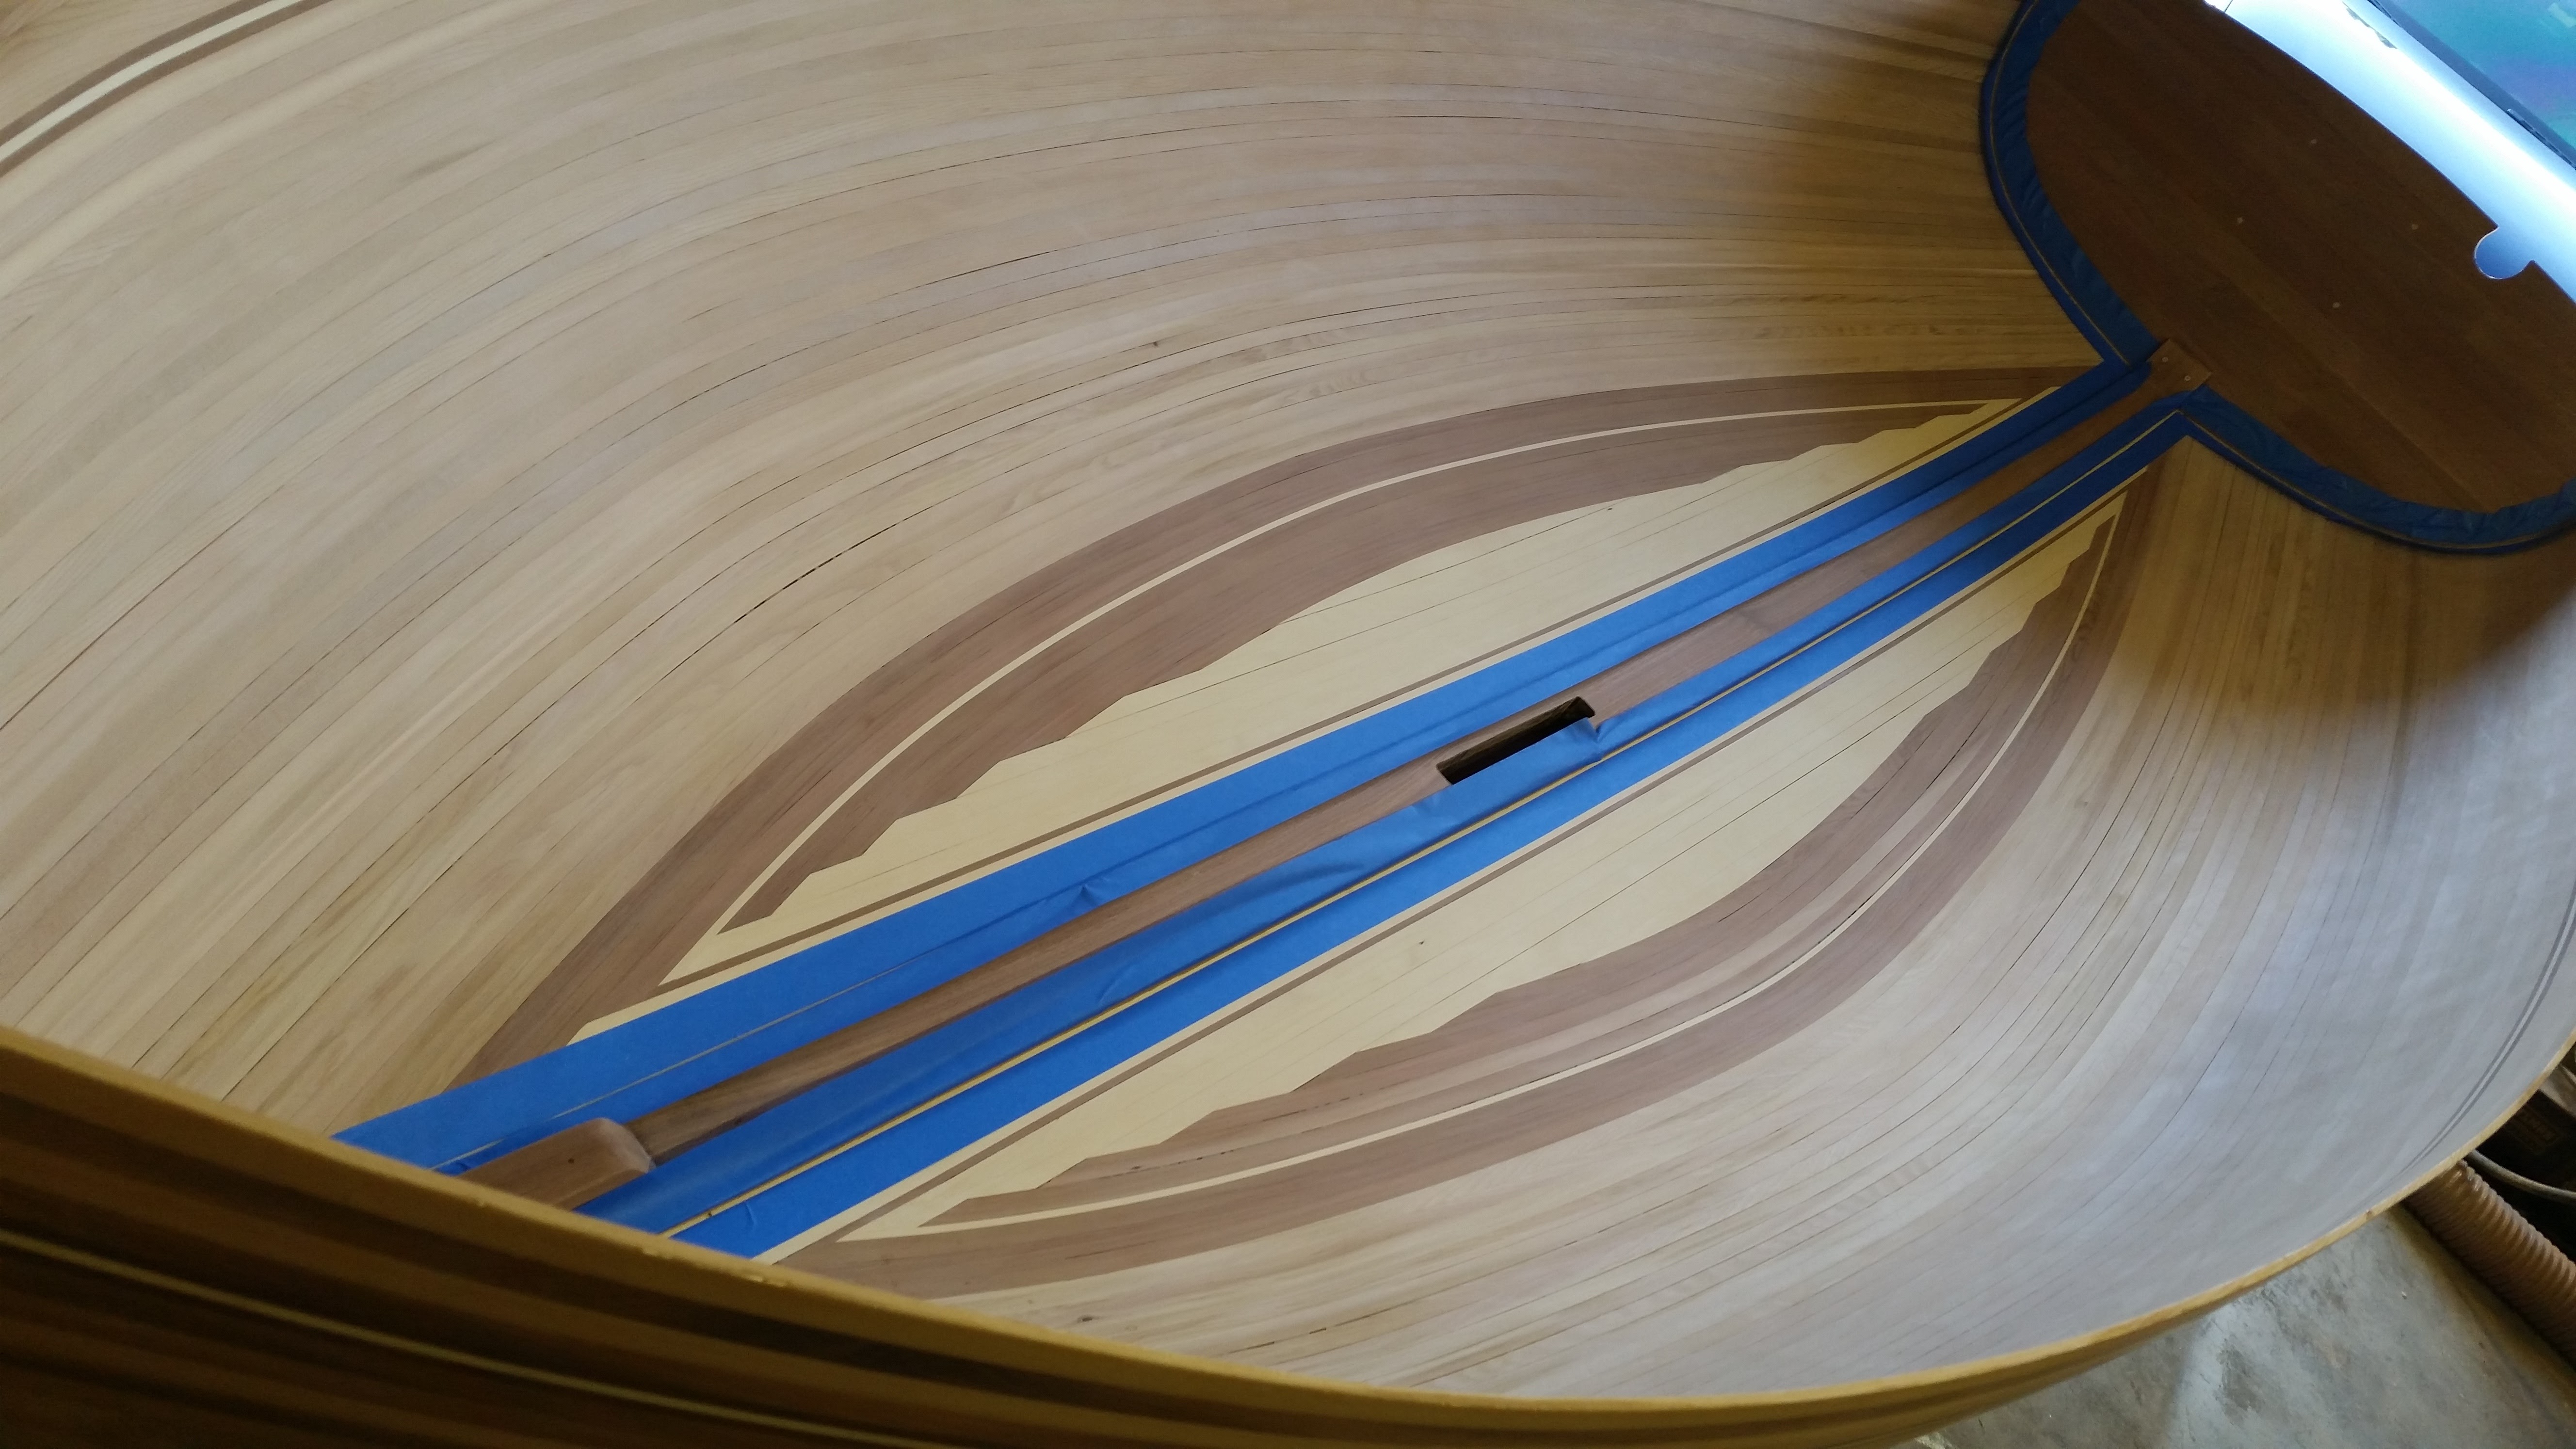
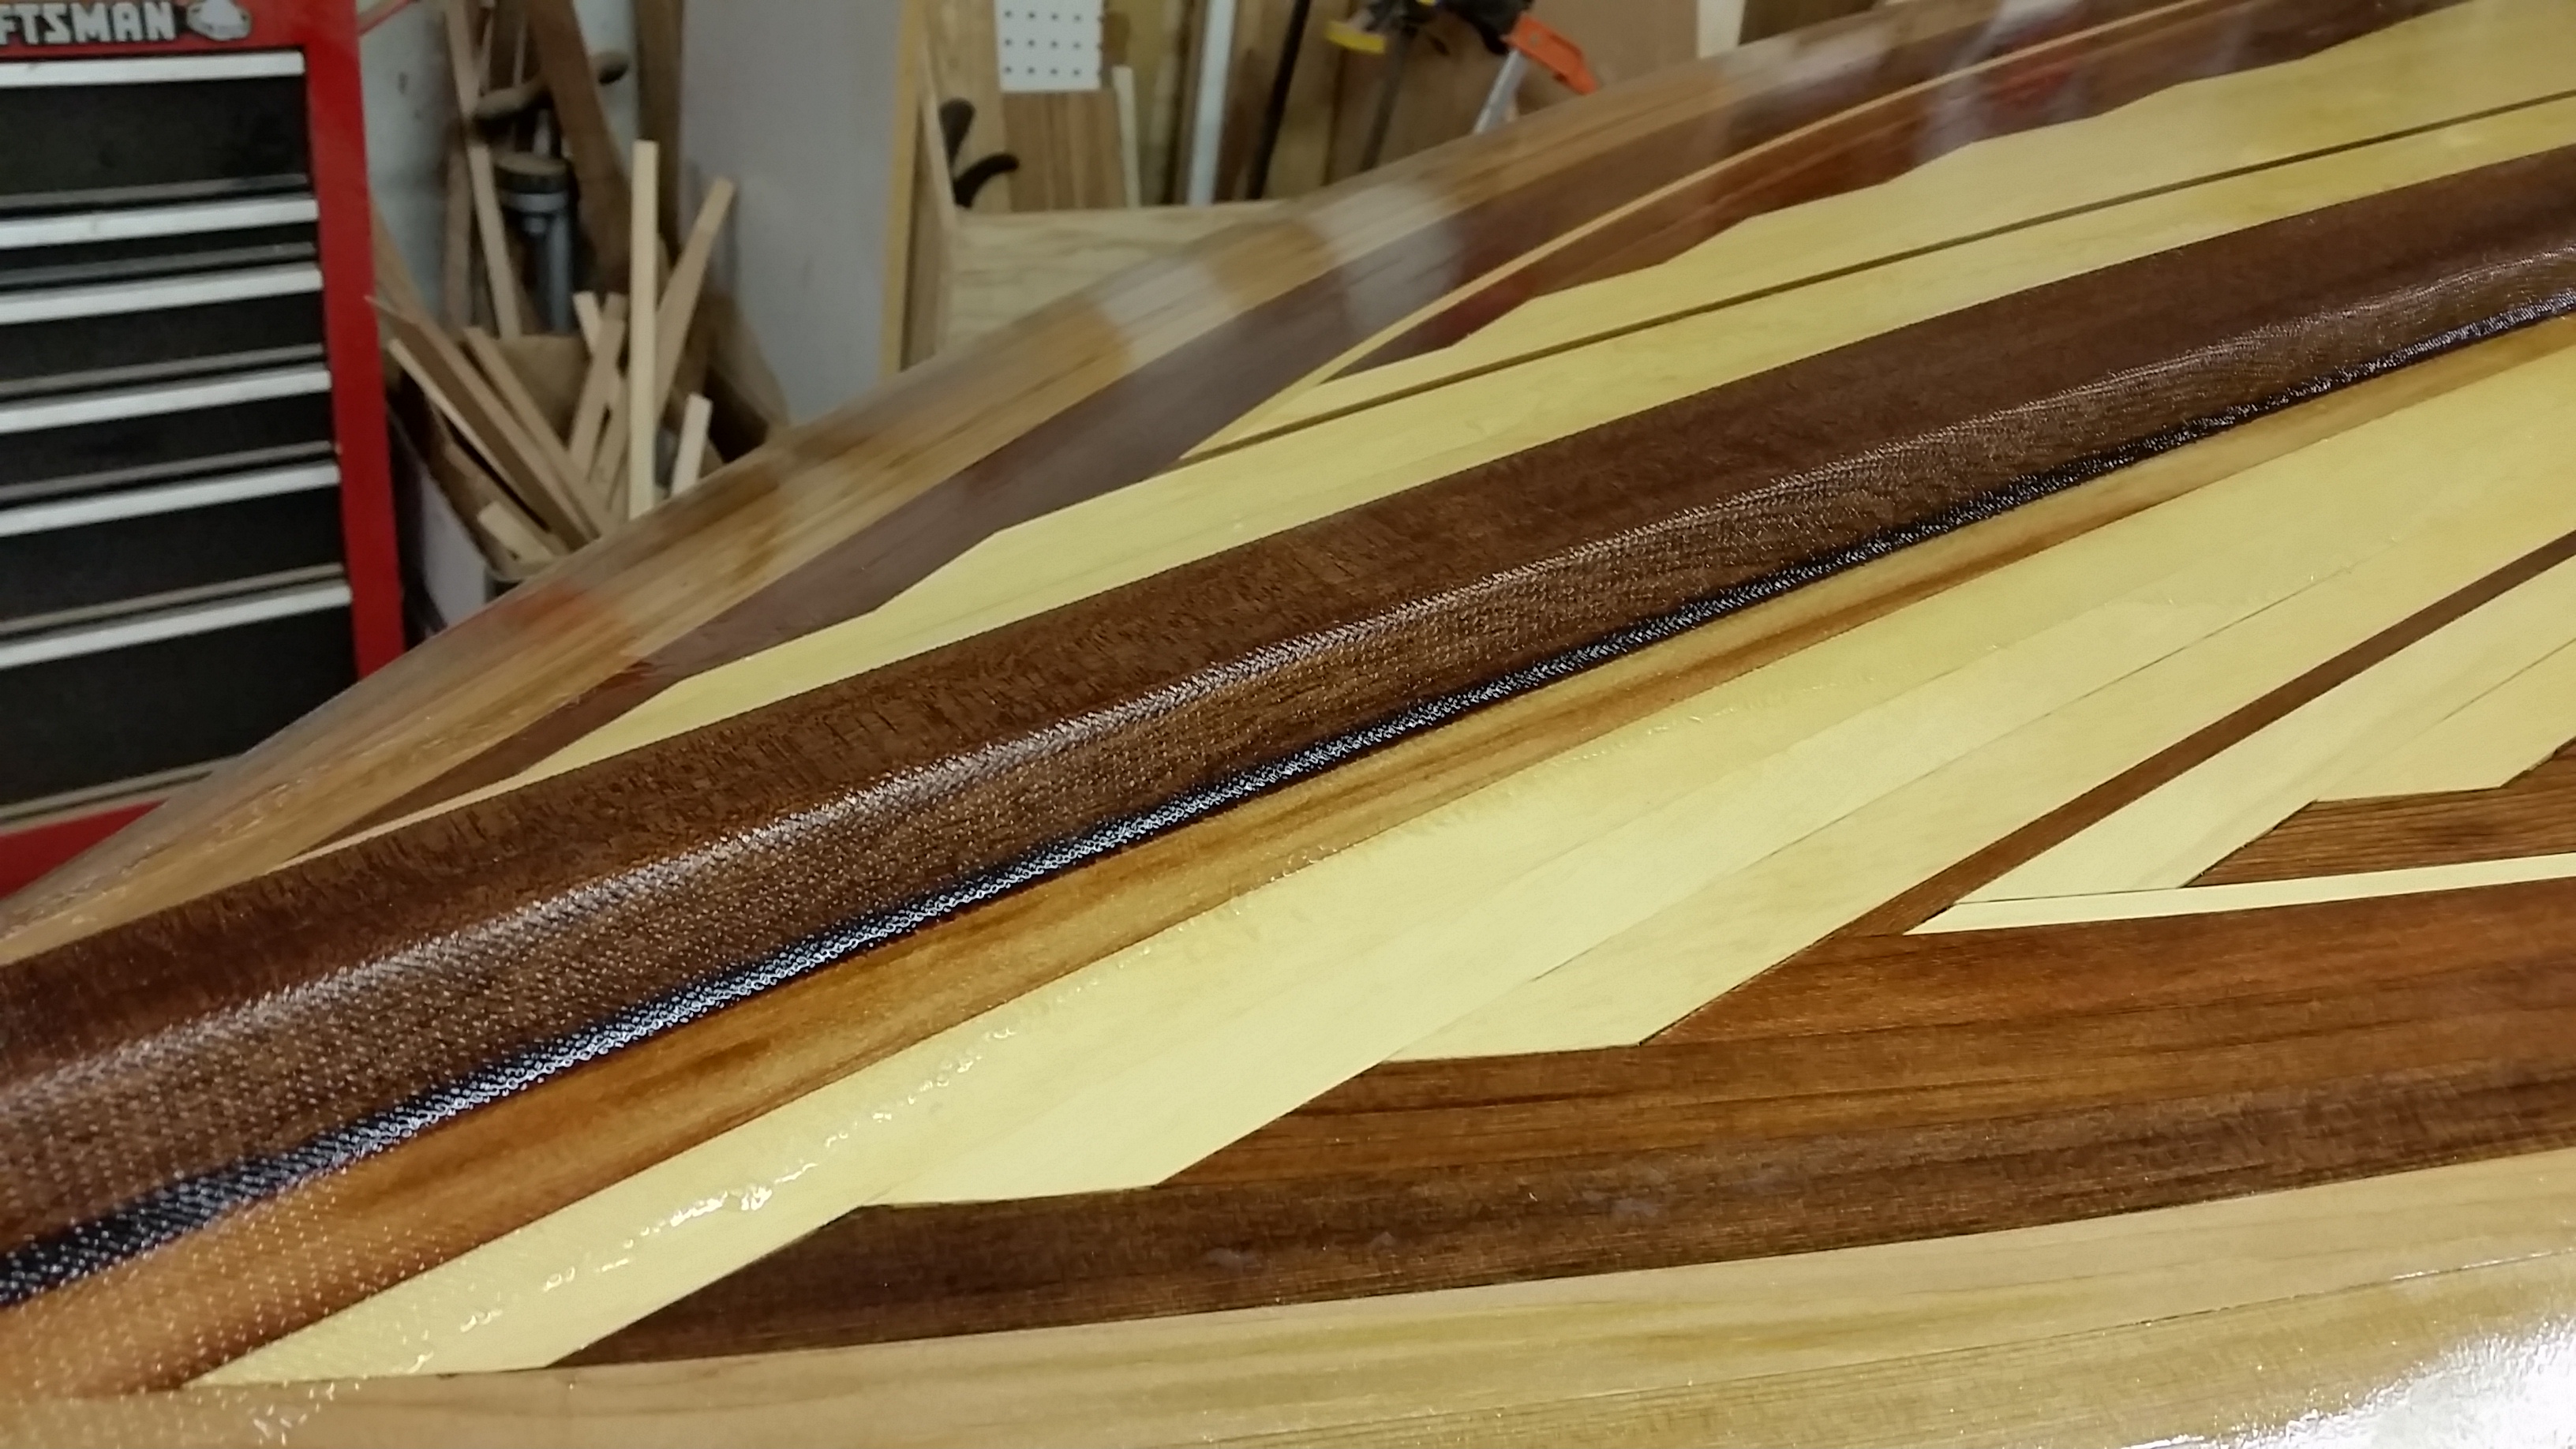
During September I finished applying 6 coats of epoxy to interior. Took another break and during the last week or so spent 7 hours sanding the interior. Mostly 150 -> 220 grit. Now ready to start building out the interior. The pic on the right shows it wiped down with a wet rag, giving some idea of what it will look like when varnish is applied at very end.

8/30/2017
Applied a coat of epoxy to entire interior in morning and a 2nd in the evening.. Did a very small bit of scaping/sanding of obvious high spots ahead of each coat, so I’ll have less work of sanding to do at the end.

8/29/2017
Finished glassing the interior with cloth – yay, done with that!
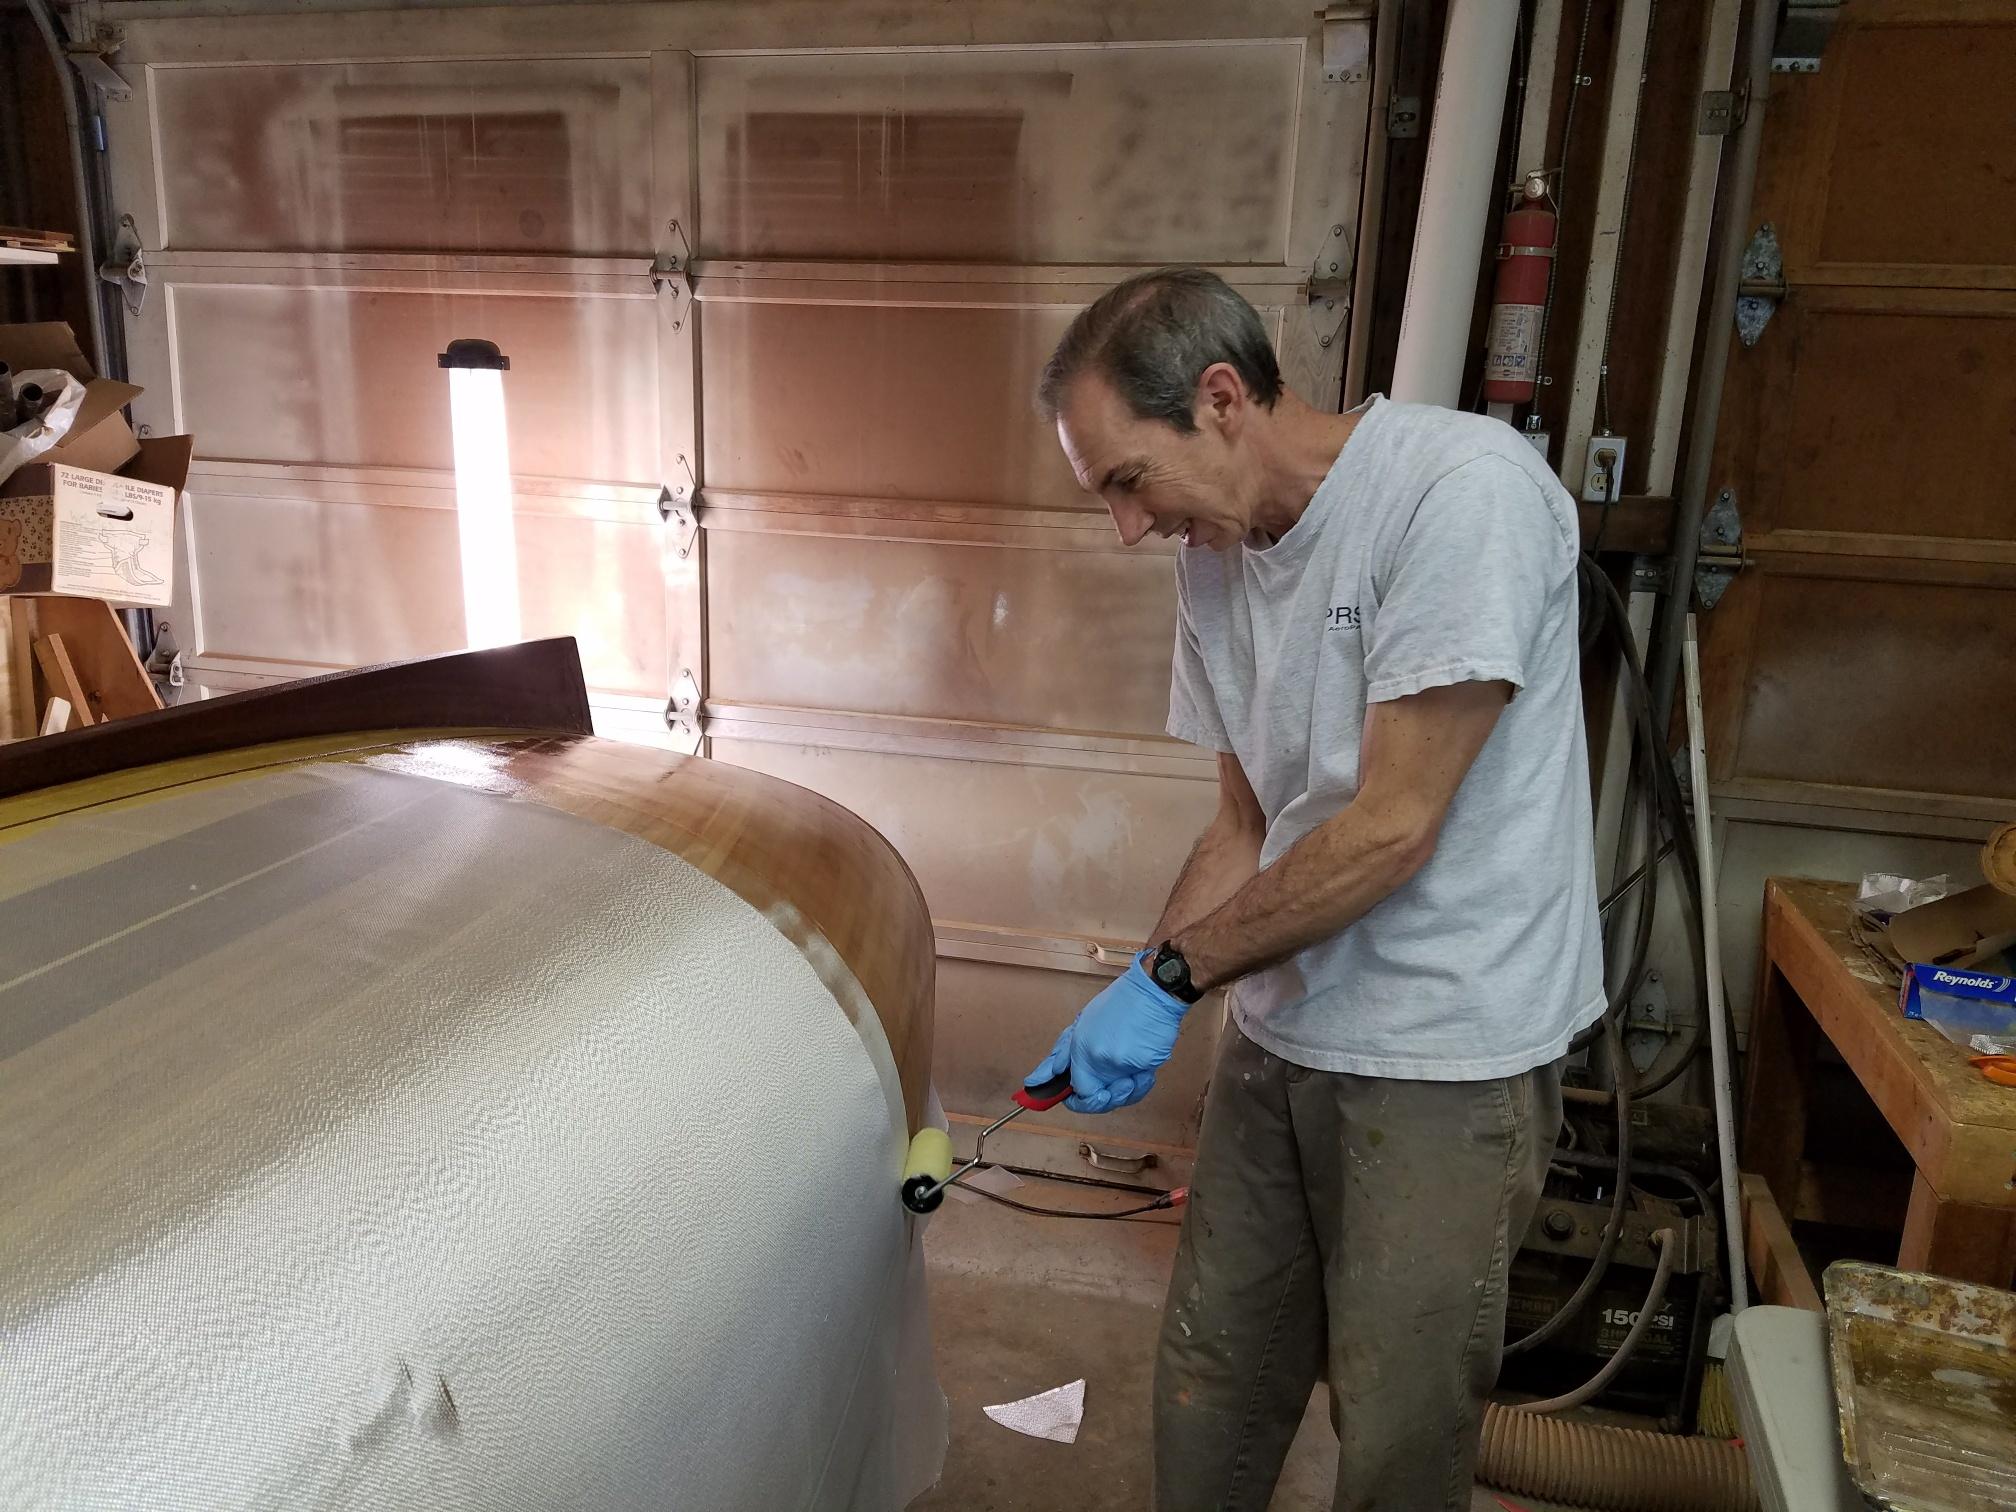
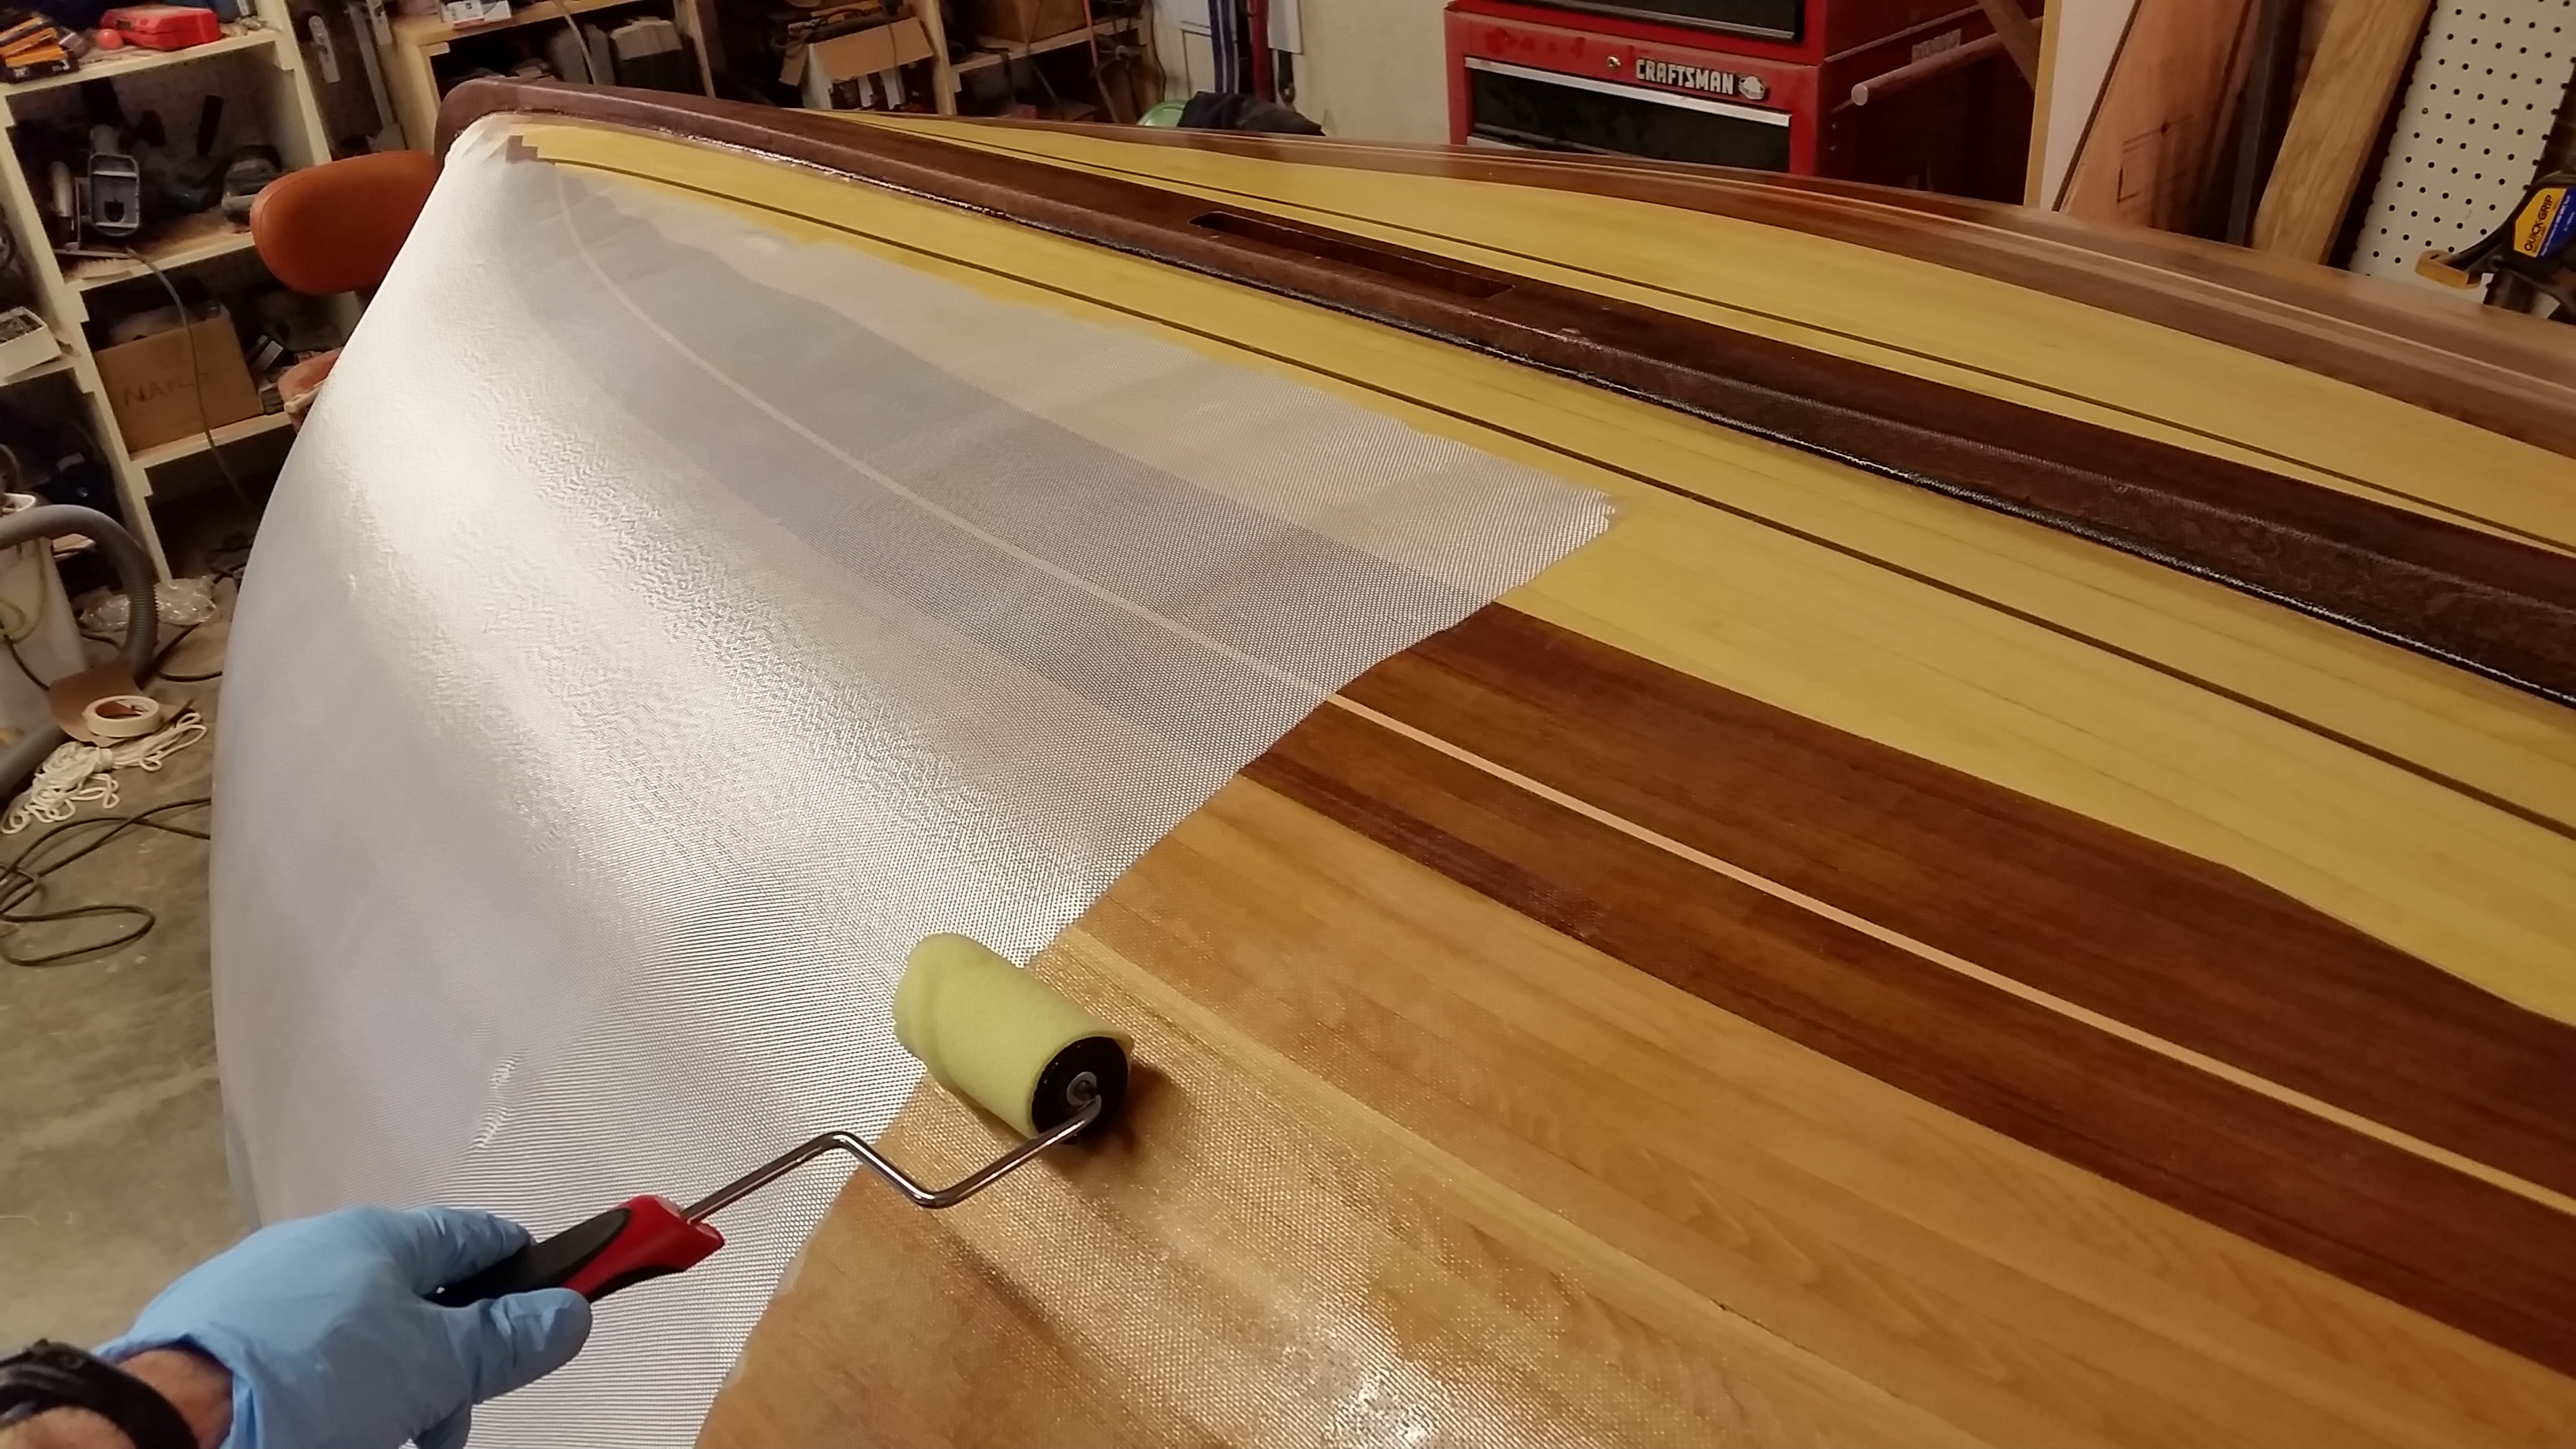
8/26/2017
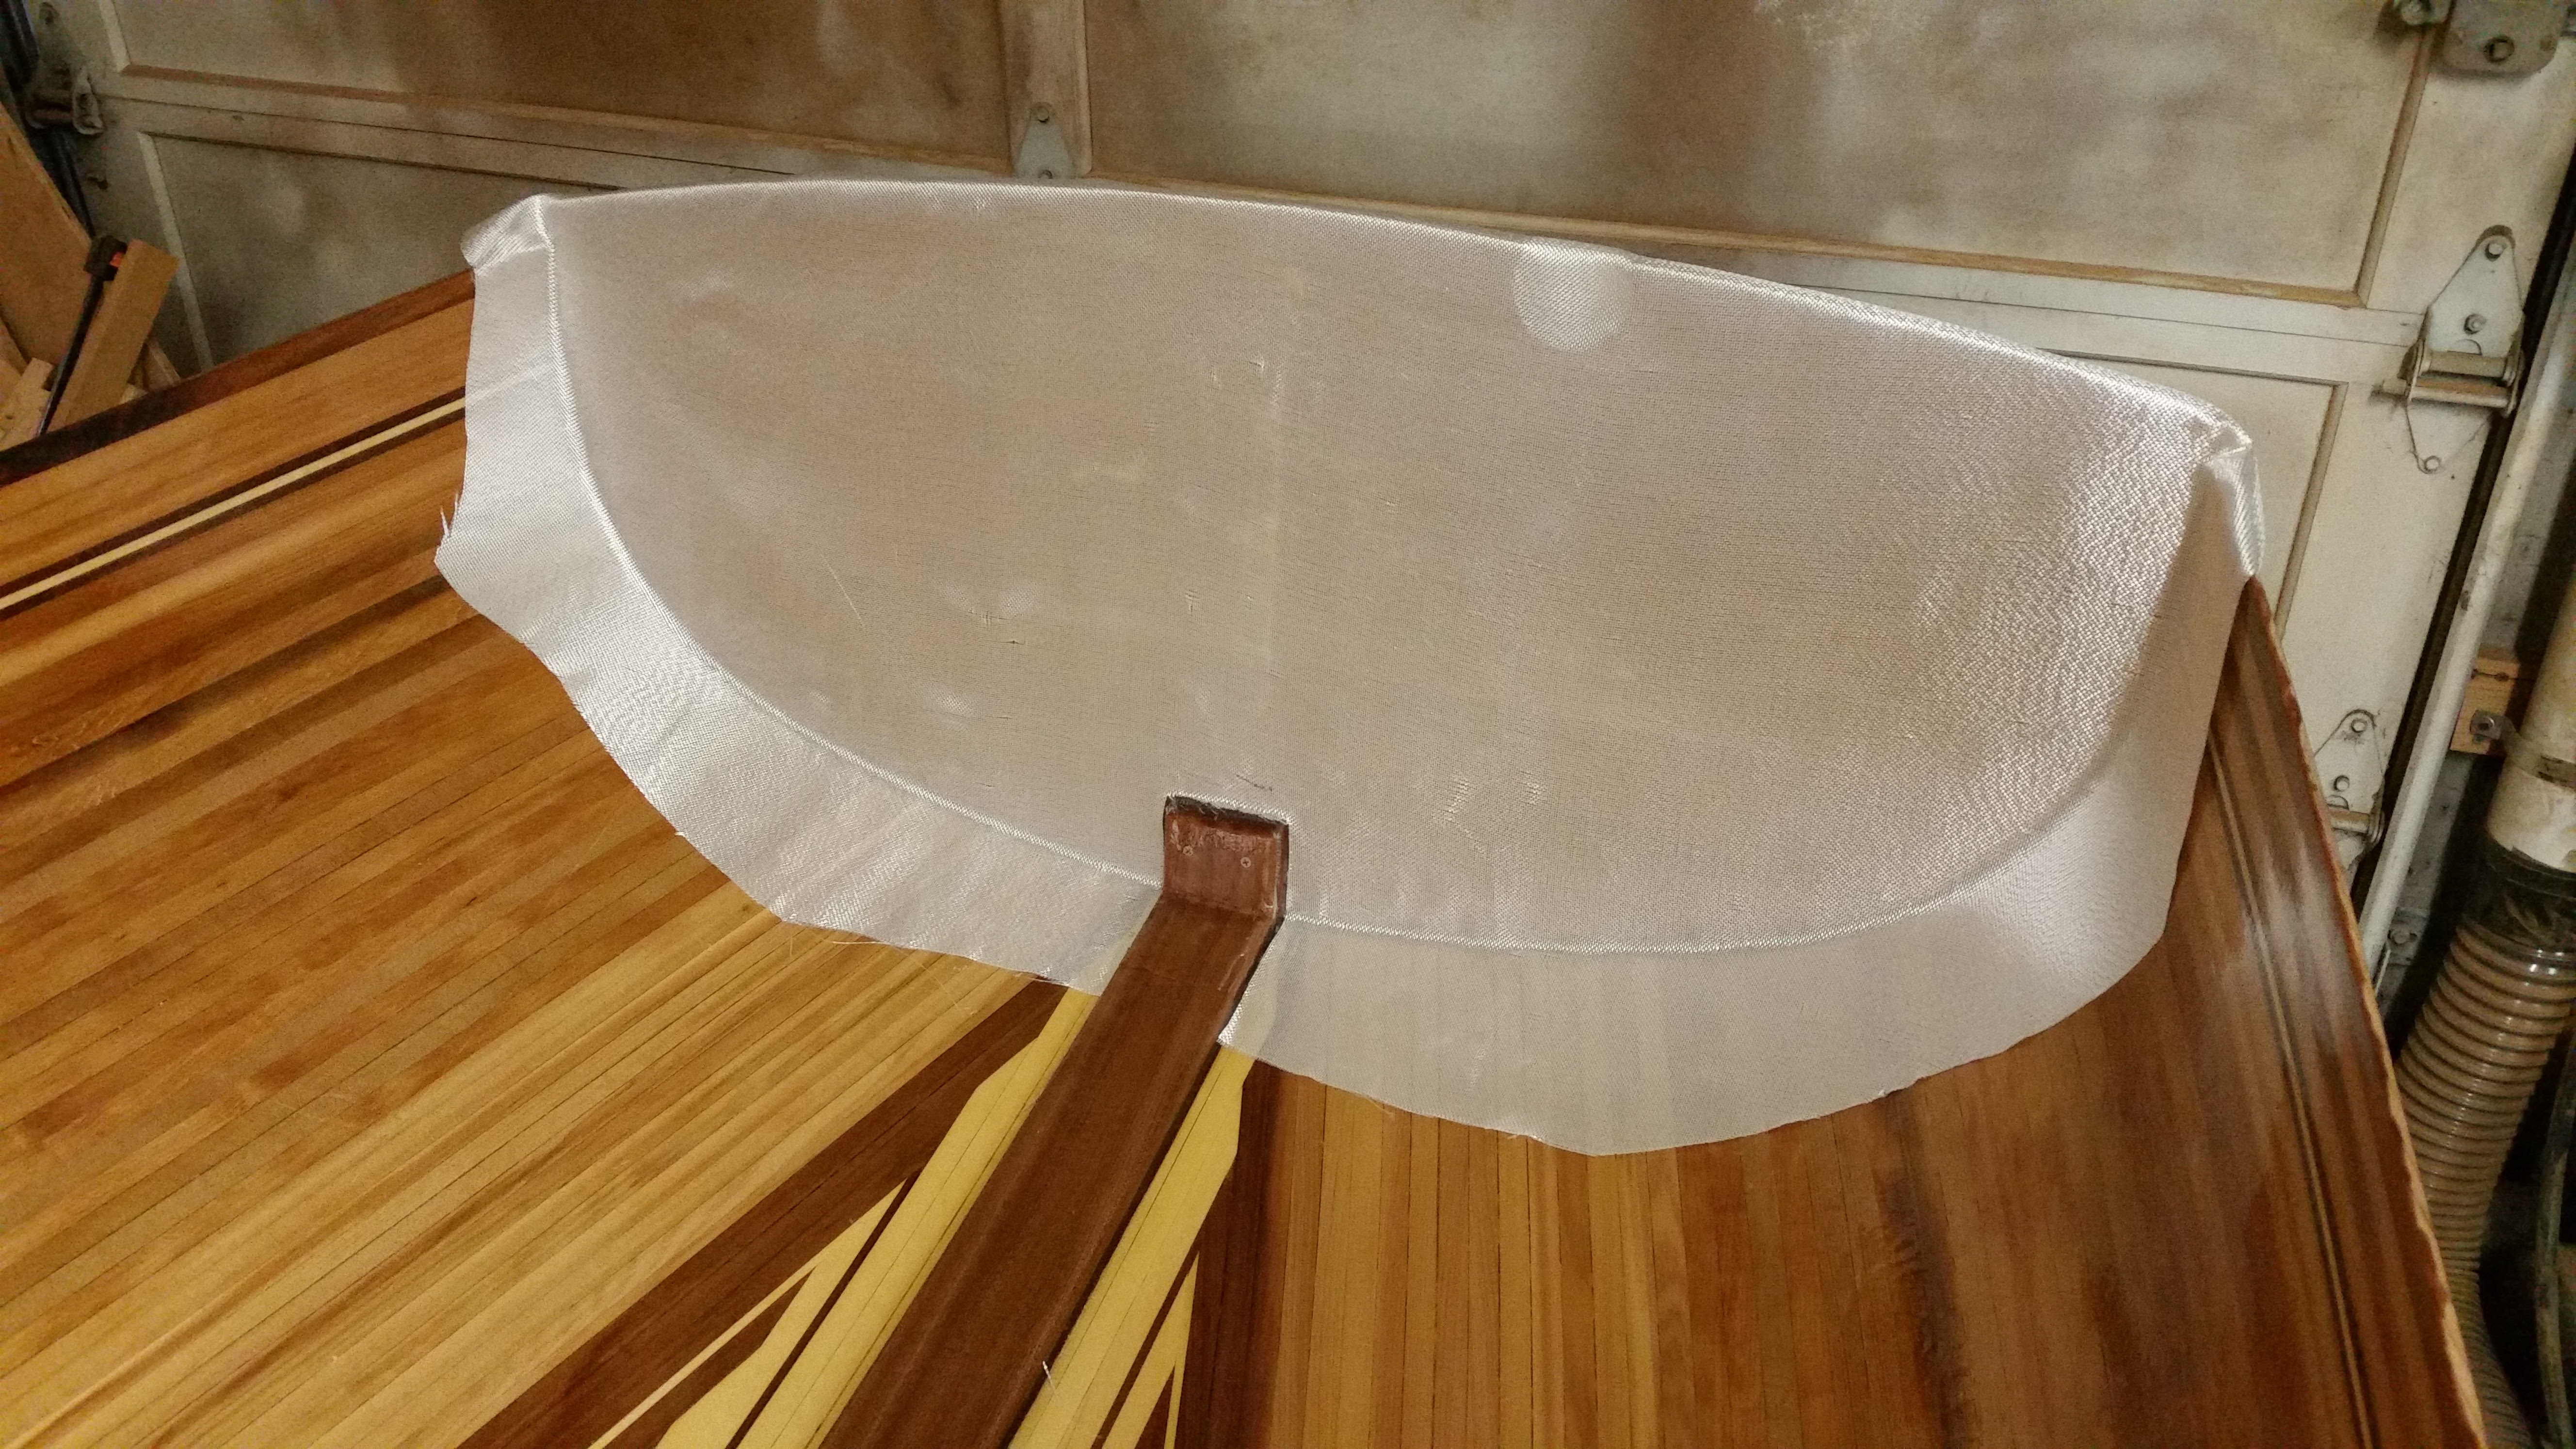
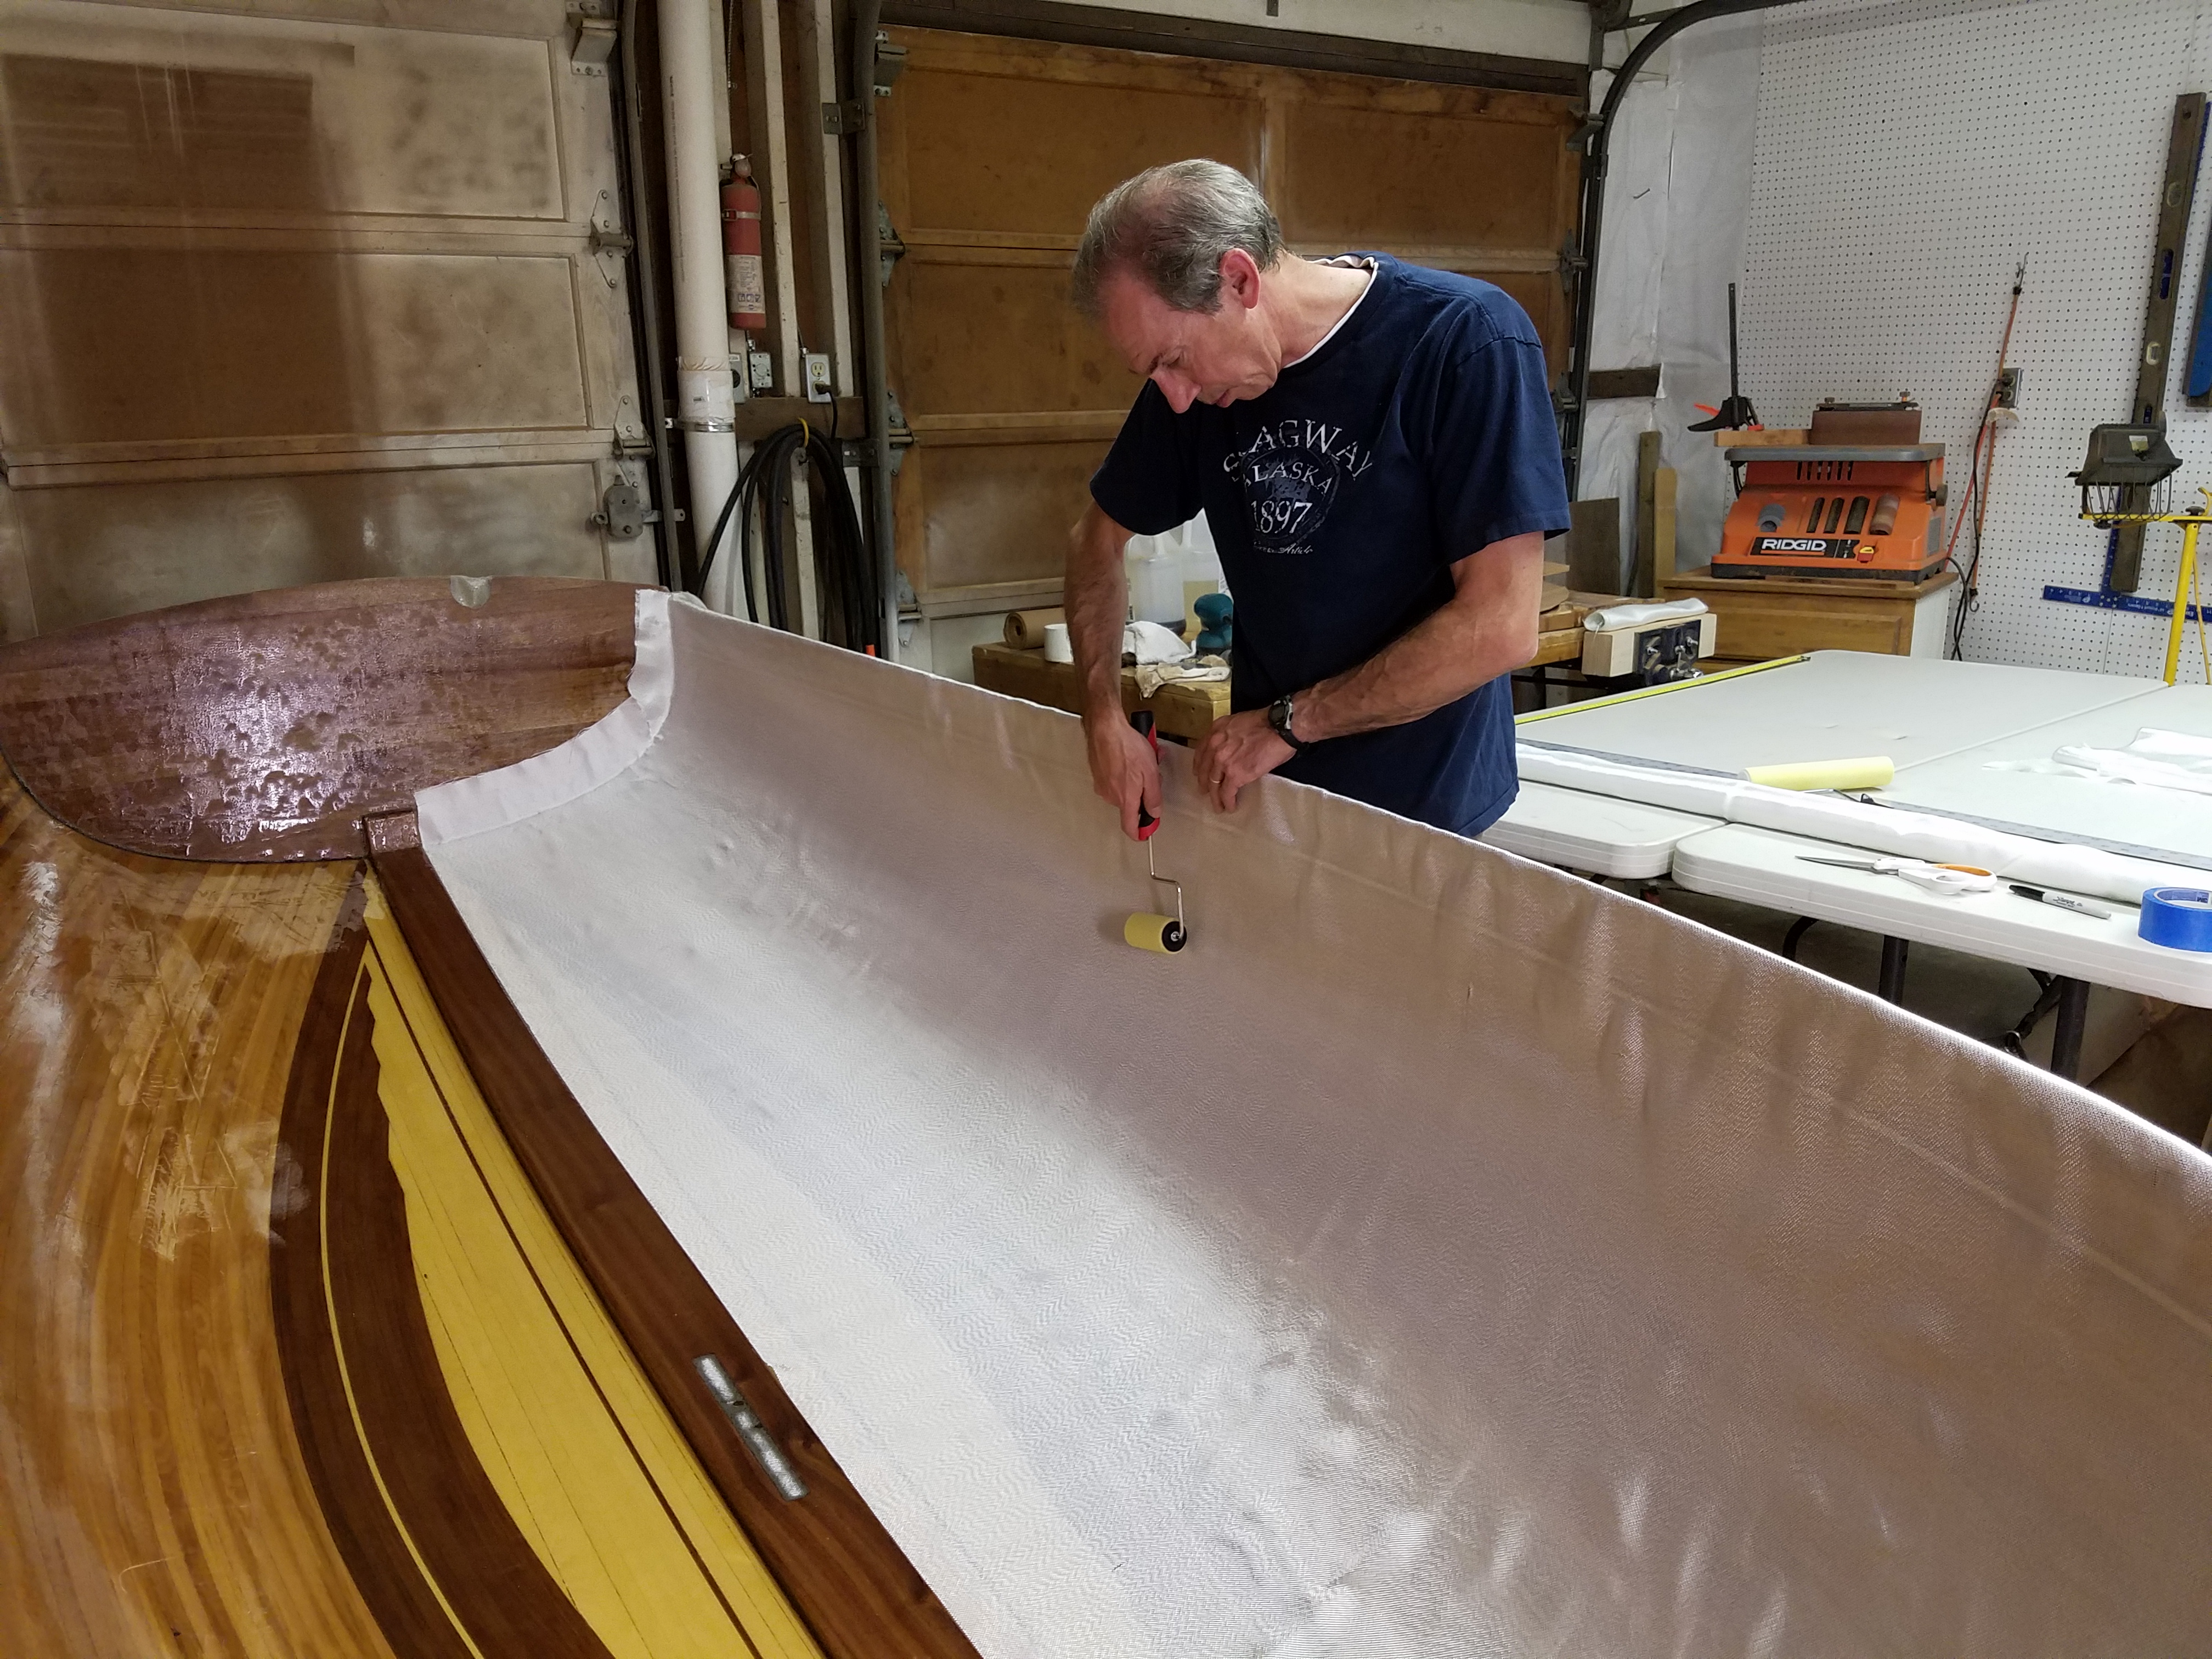
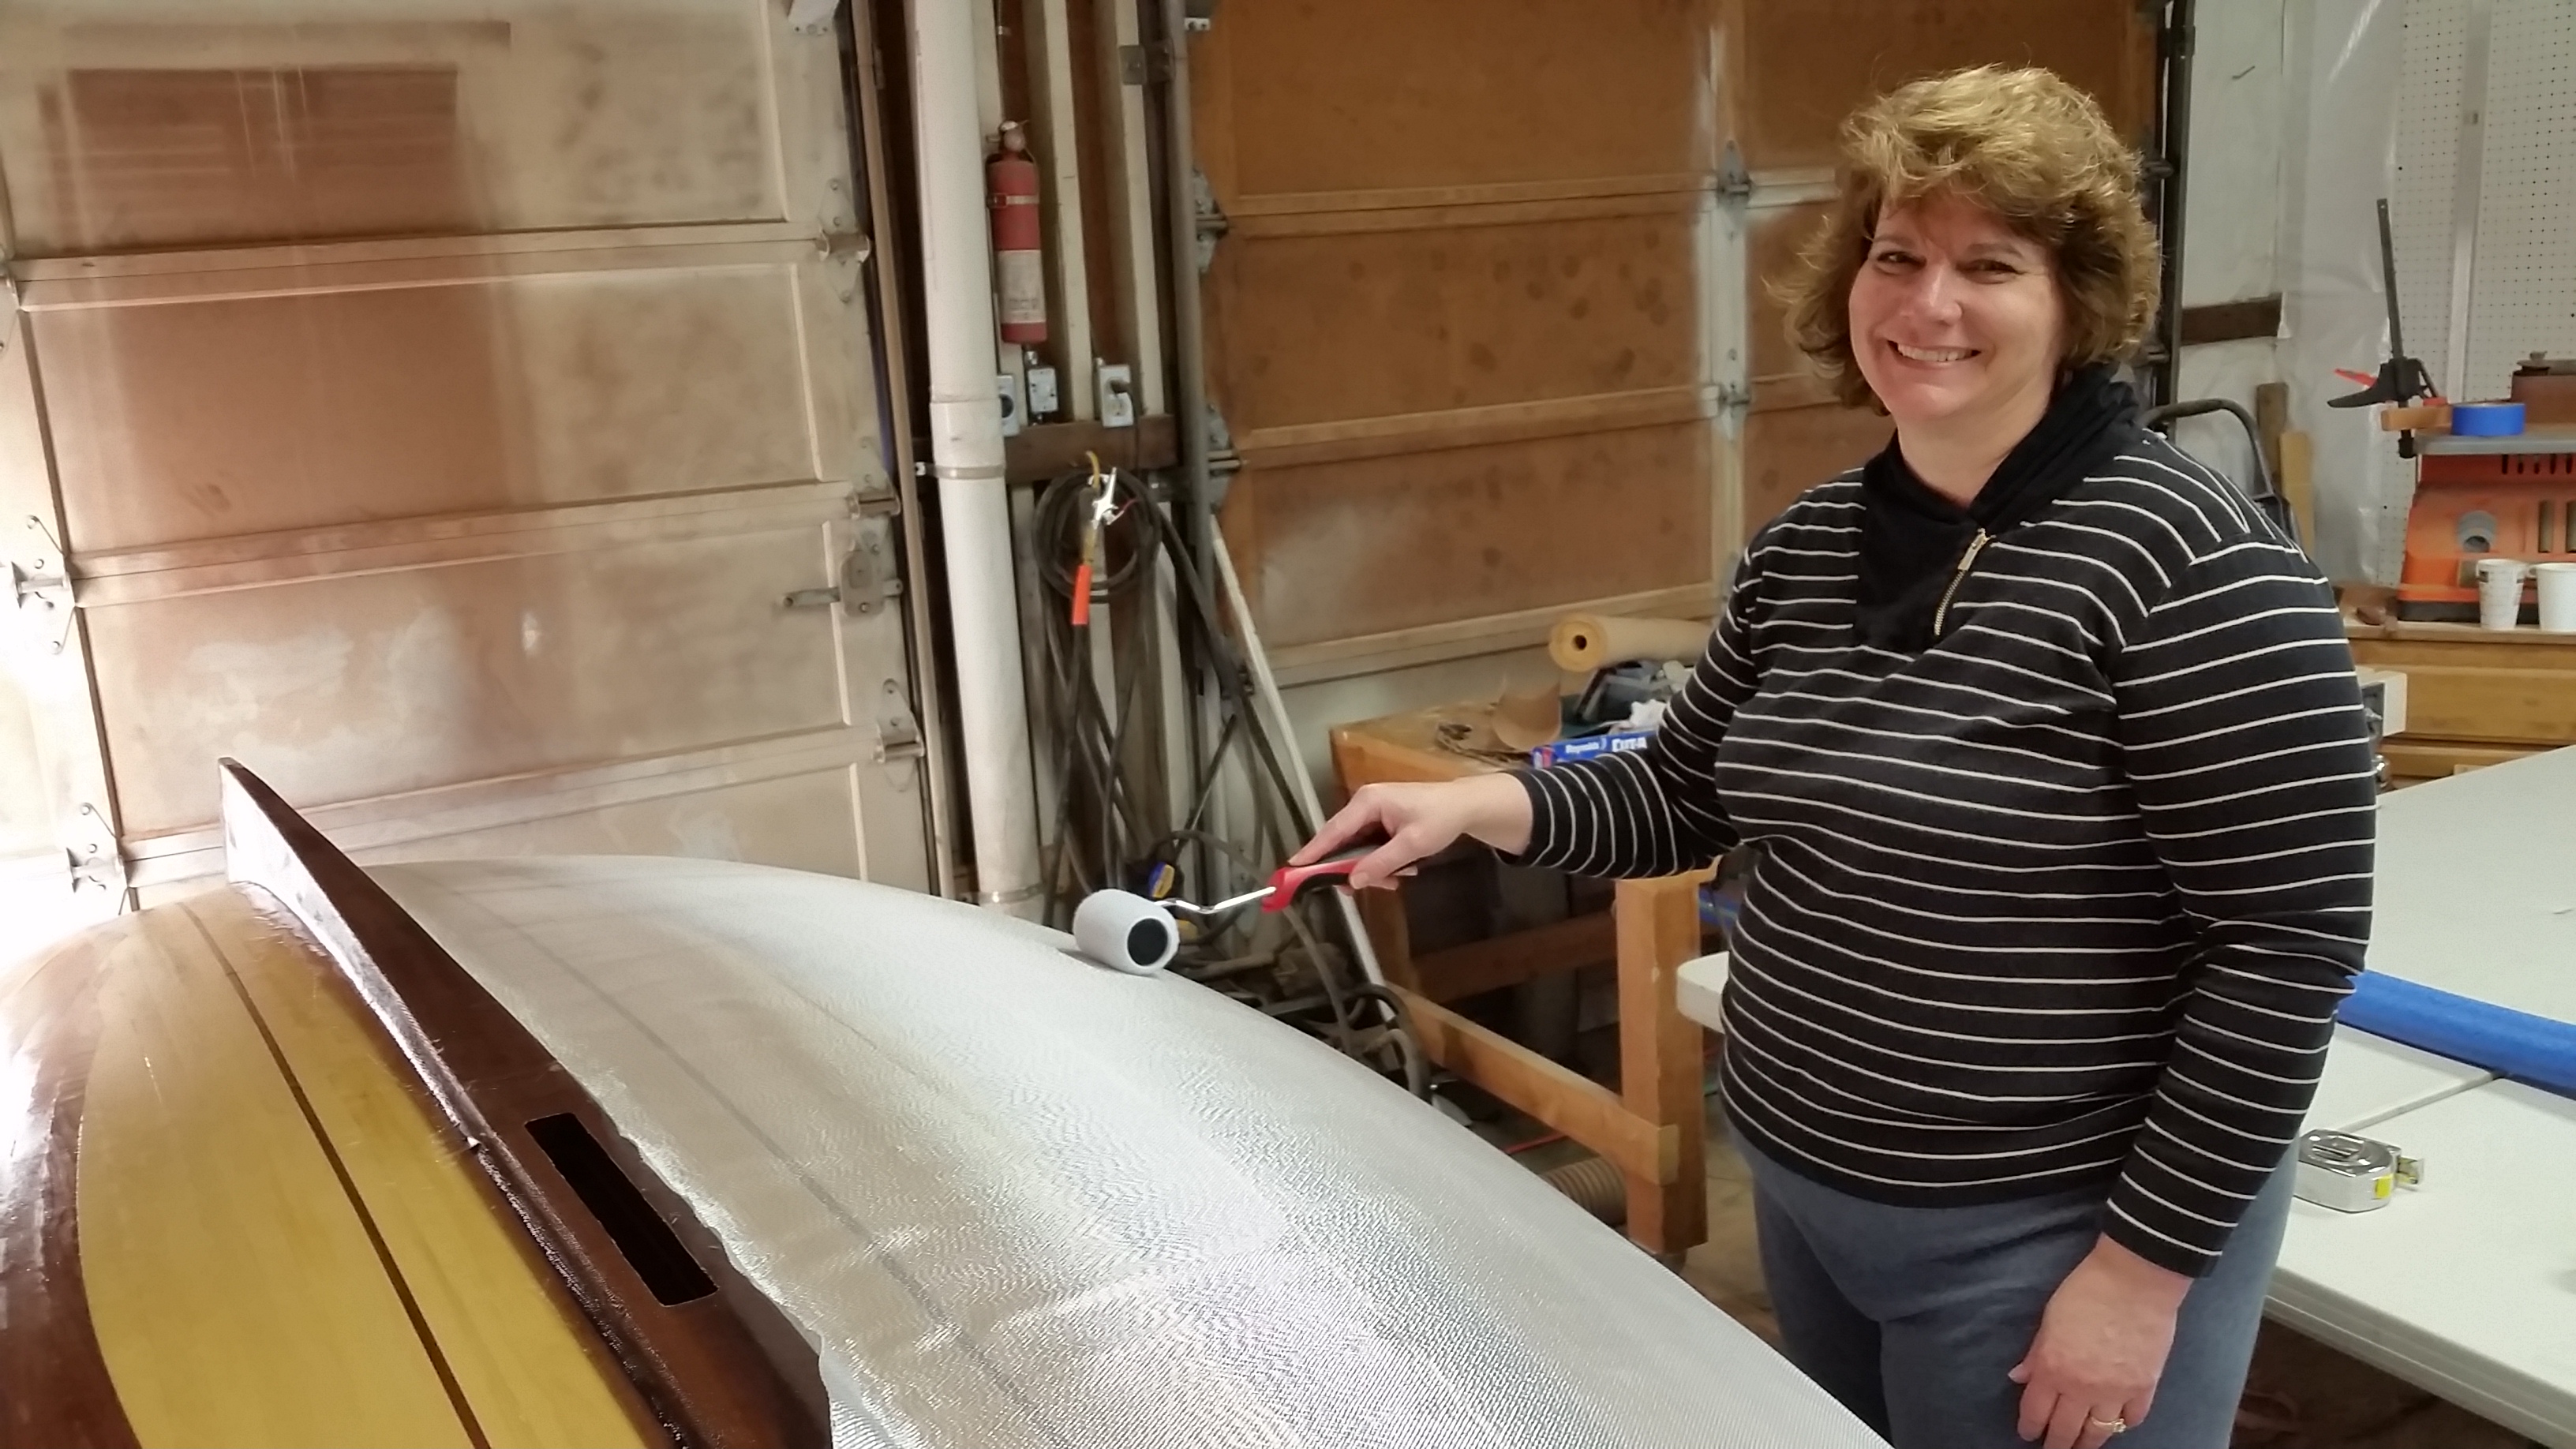
Fiberglassing the interior. I admit this is my least favorite part of the boat building process. I enjoy the wood-working more. But I haven’t muffed the fiberglass/epoxy in any truly bad way, that I can tell. Will be glad when I’m done with it though. I found that using a roller first, on the fiberglass dry, gets it fitted really well before wetting with epoxy, also with a roller. Note that there are 2 layers of glass on the interior floor. The rest is mostly 1 layer, except for overlaps in the corners, like transom to hull. A couple more days of applying glass, and then I have a number of coats of epoxy to apply after that.

Aug 24, 2017
Off and on, over the last 3 months I got the interior sanded and completely ready for fiberglass. Started with some sapele filled filets, and then got the first coat of epoxy on before glassing.
Aug 21, 2017
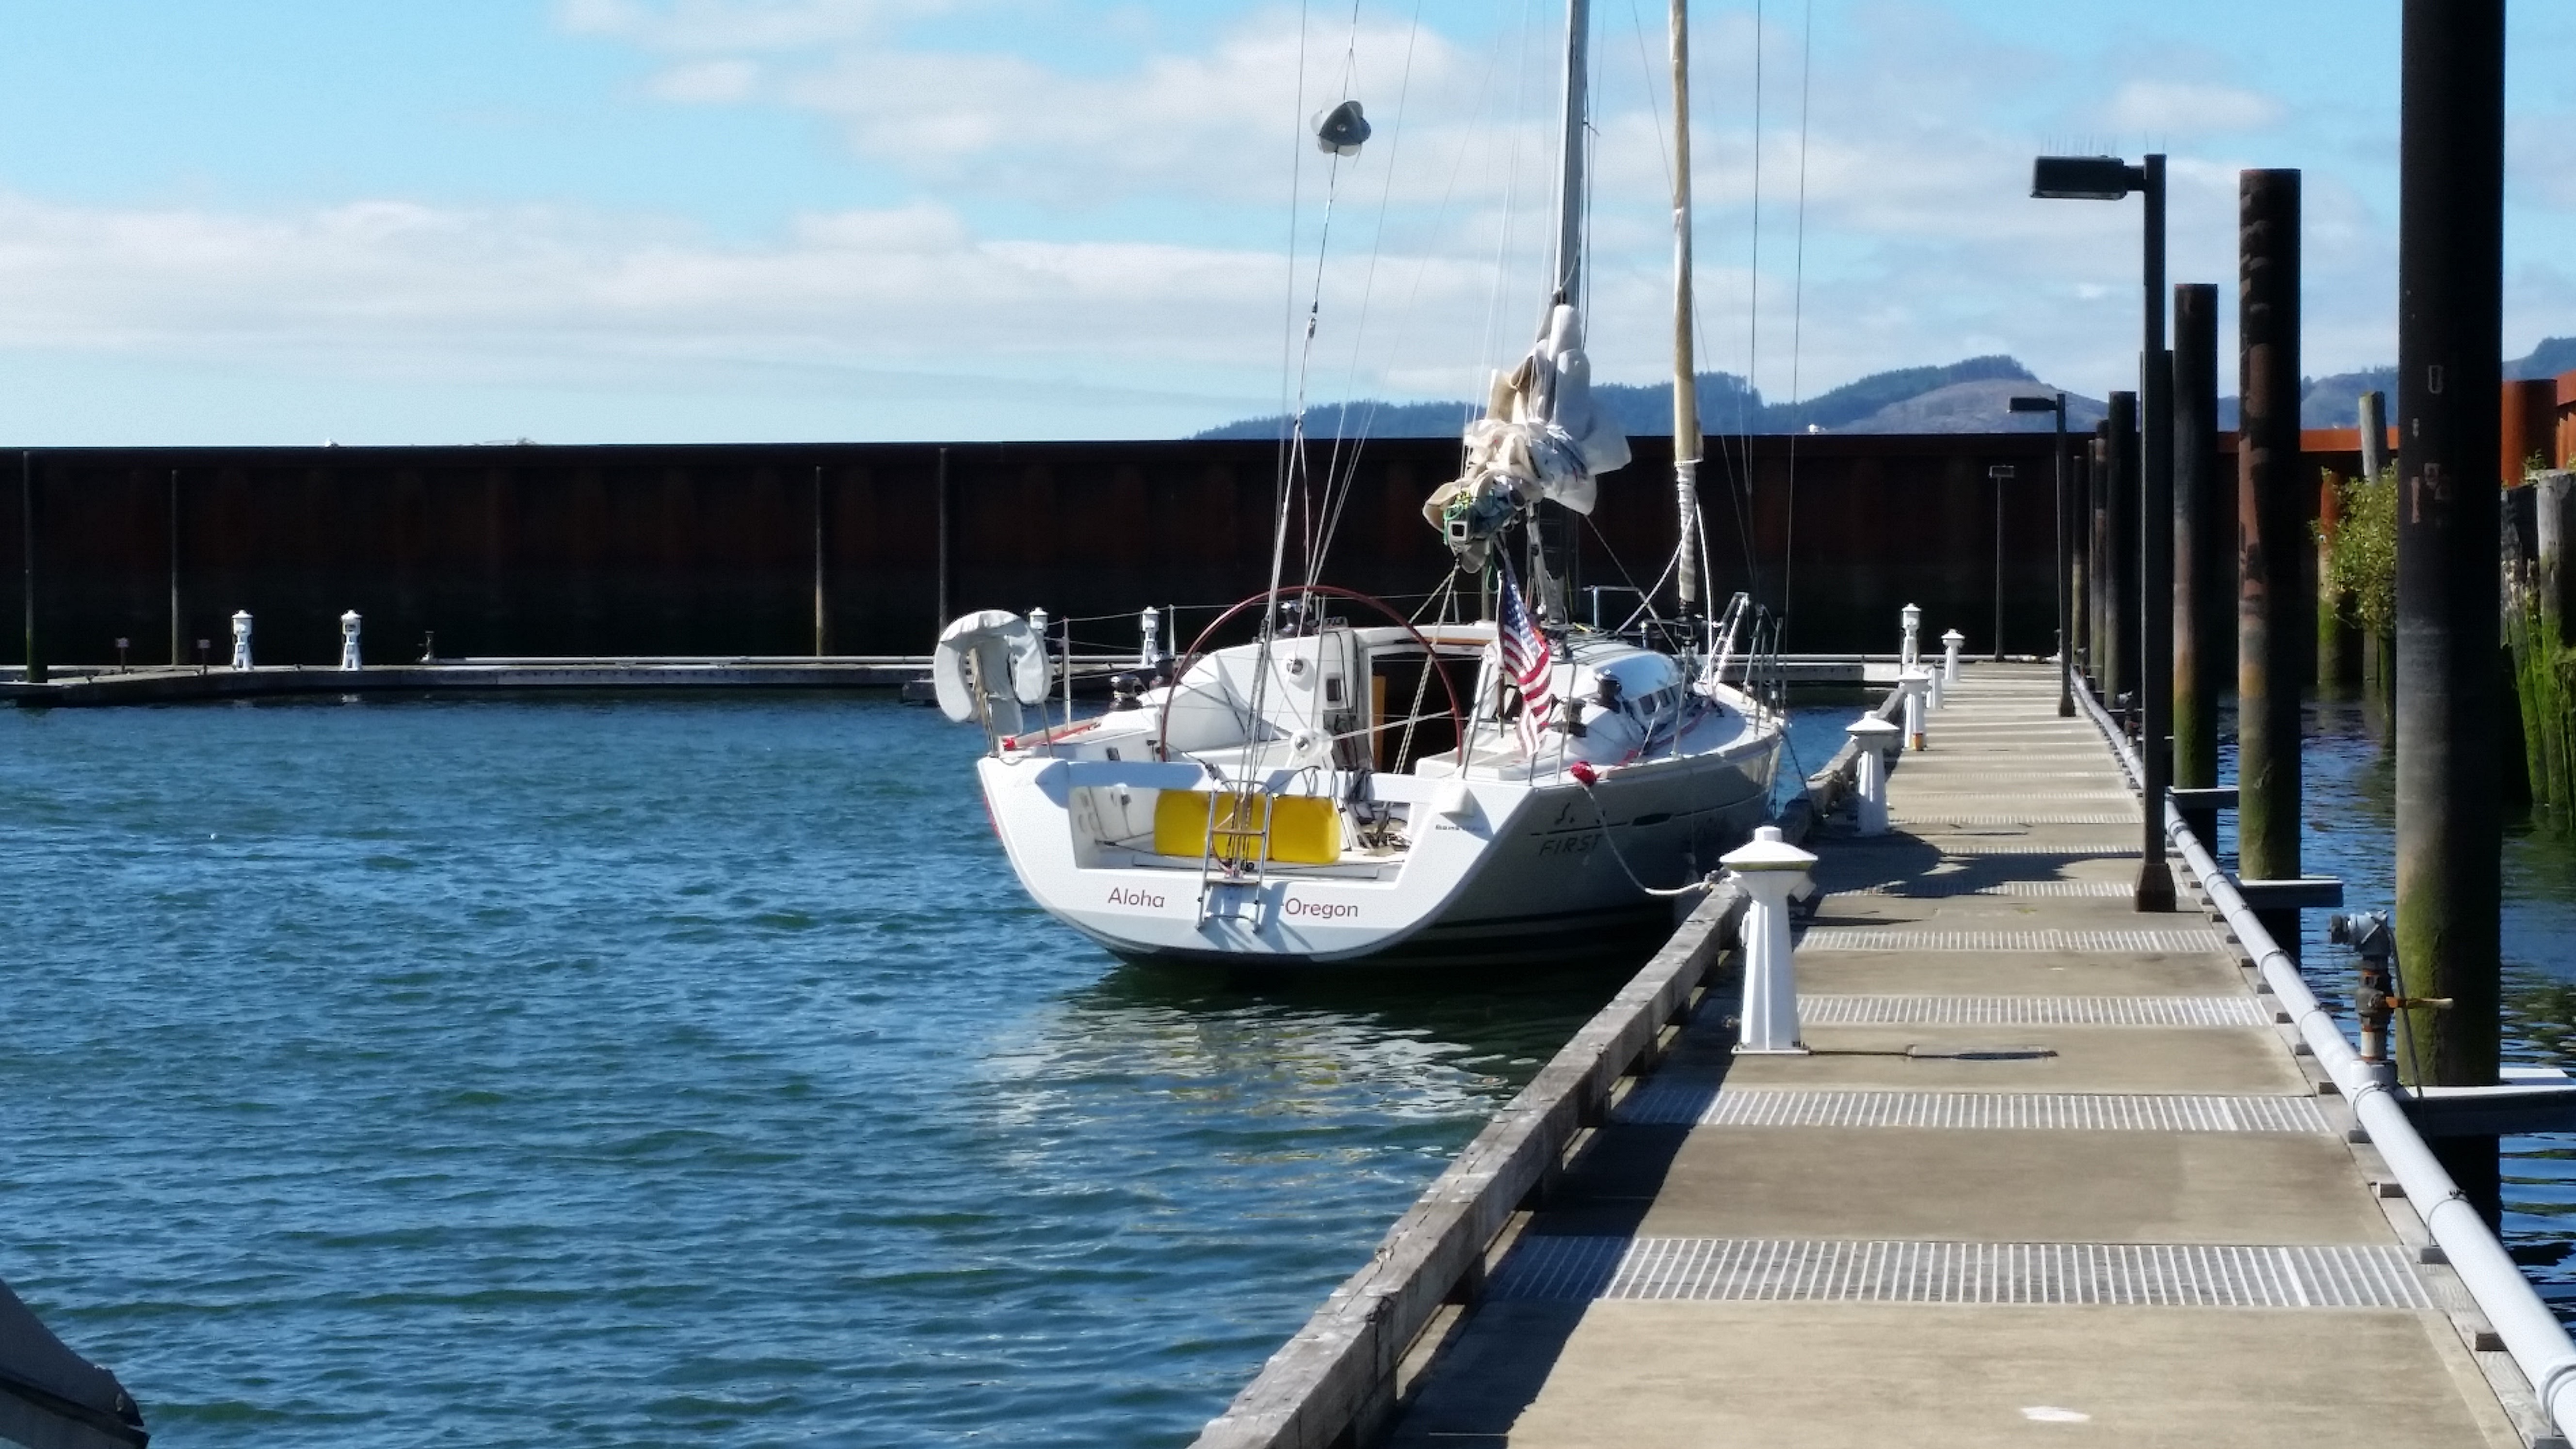
Took about 3 months off boat building to enjoy some summer activities and some travel. One major (fun) distraction was our new (to us) Beneteau First 35 that we found in Seattle and sailed down to Portland. Have had a great time getting used to a monohull, after 8 seasons with the Corsair trimaran, which my brother Jim now has in Vermont (Lake Champlain actually).
May 31, 2017
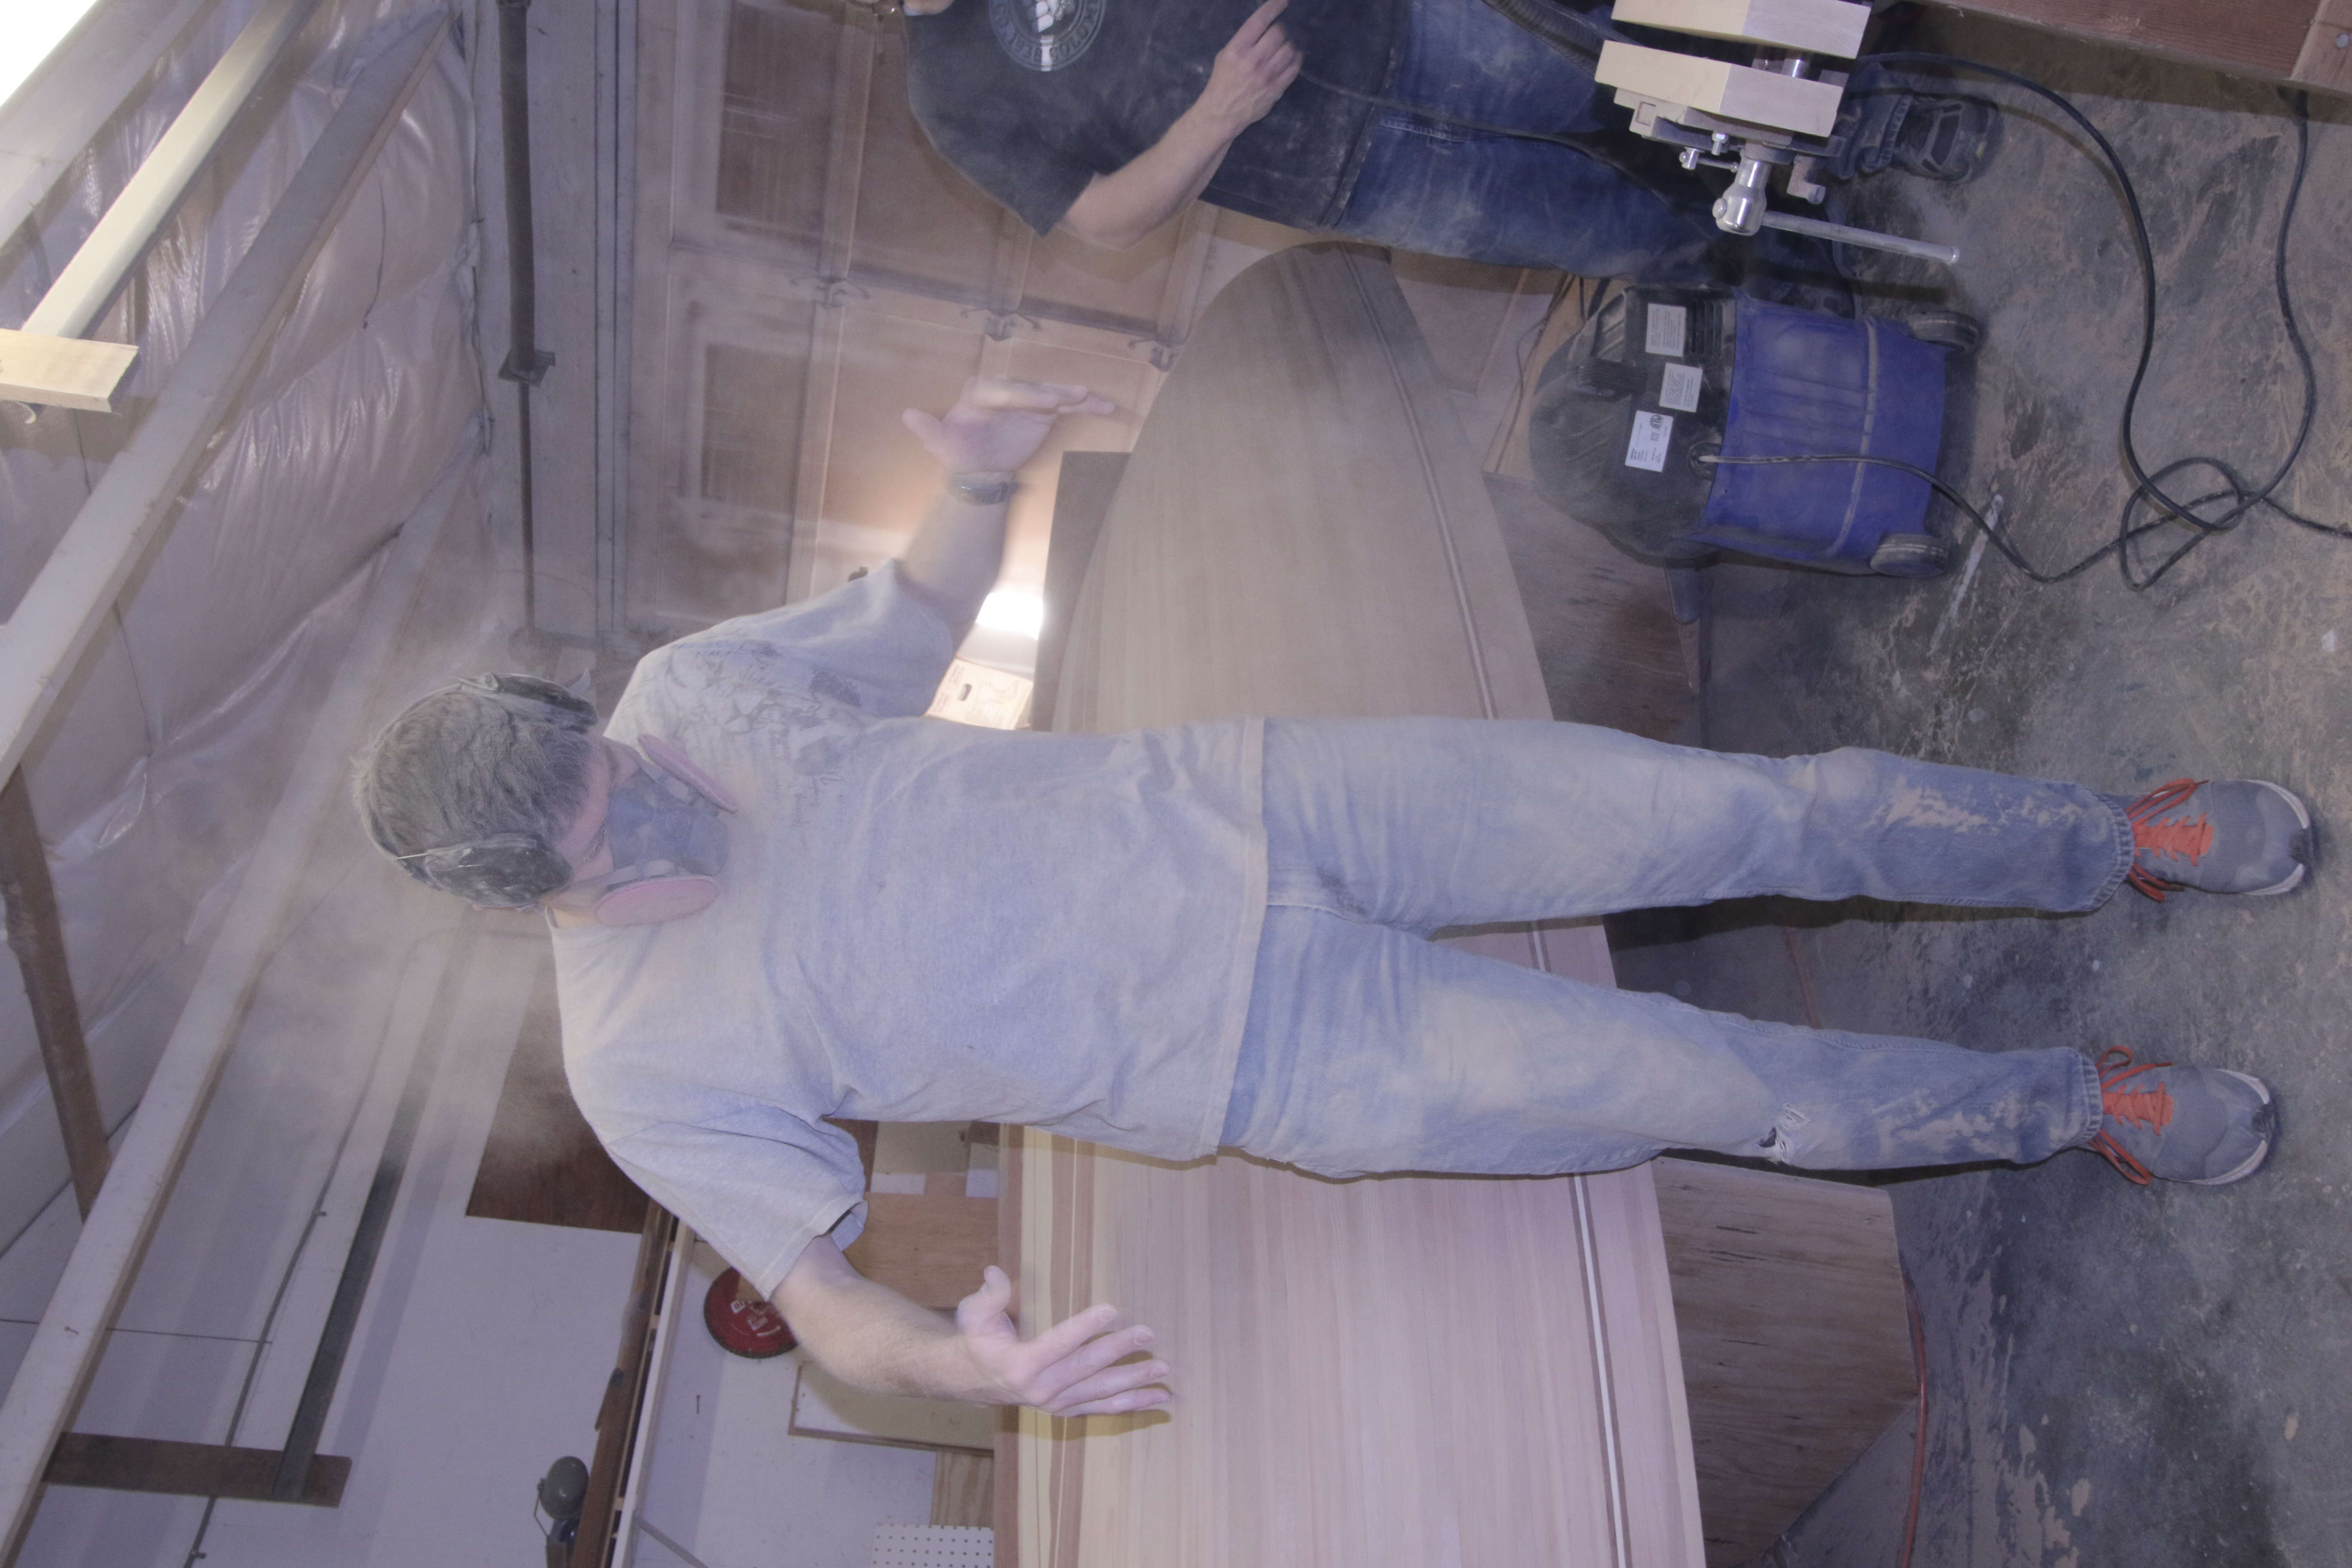
Removed all the stations but one in the center, to keep some strength while I do most of sanding. Used the heat gun to slowly heat up the hot glue, and then wiggled and removed each station – no damage. Rough sanded the interior with 6″ rotating orbital, 60 grit. was quite aggressive but I didn’t have the patience to do differently. Kept it moving – Worked well actually. Using a Festool detail sander in the corners. Still a ways to go. Funny that while the hull was still upside-down, so many people asked why I put such elaborate detail on the outside bottom of boat, where it won’t be seen while under water.. Well, one can also see it at your feet inside!
May 10, 2017
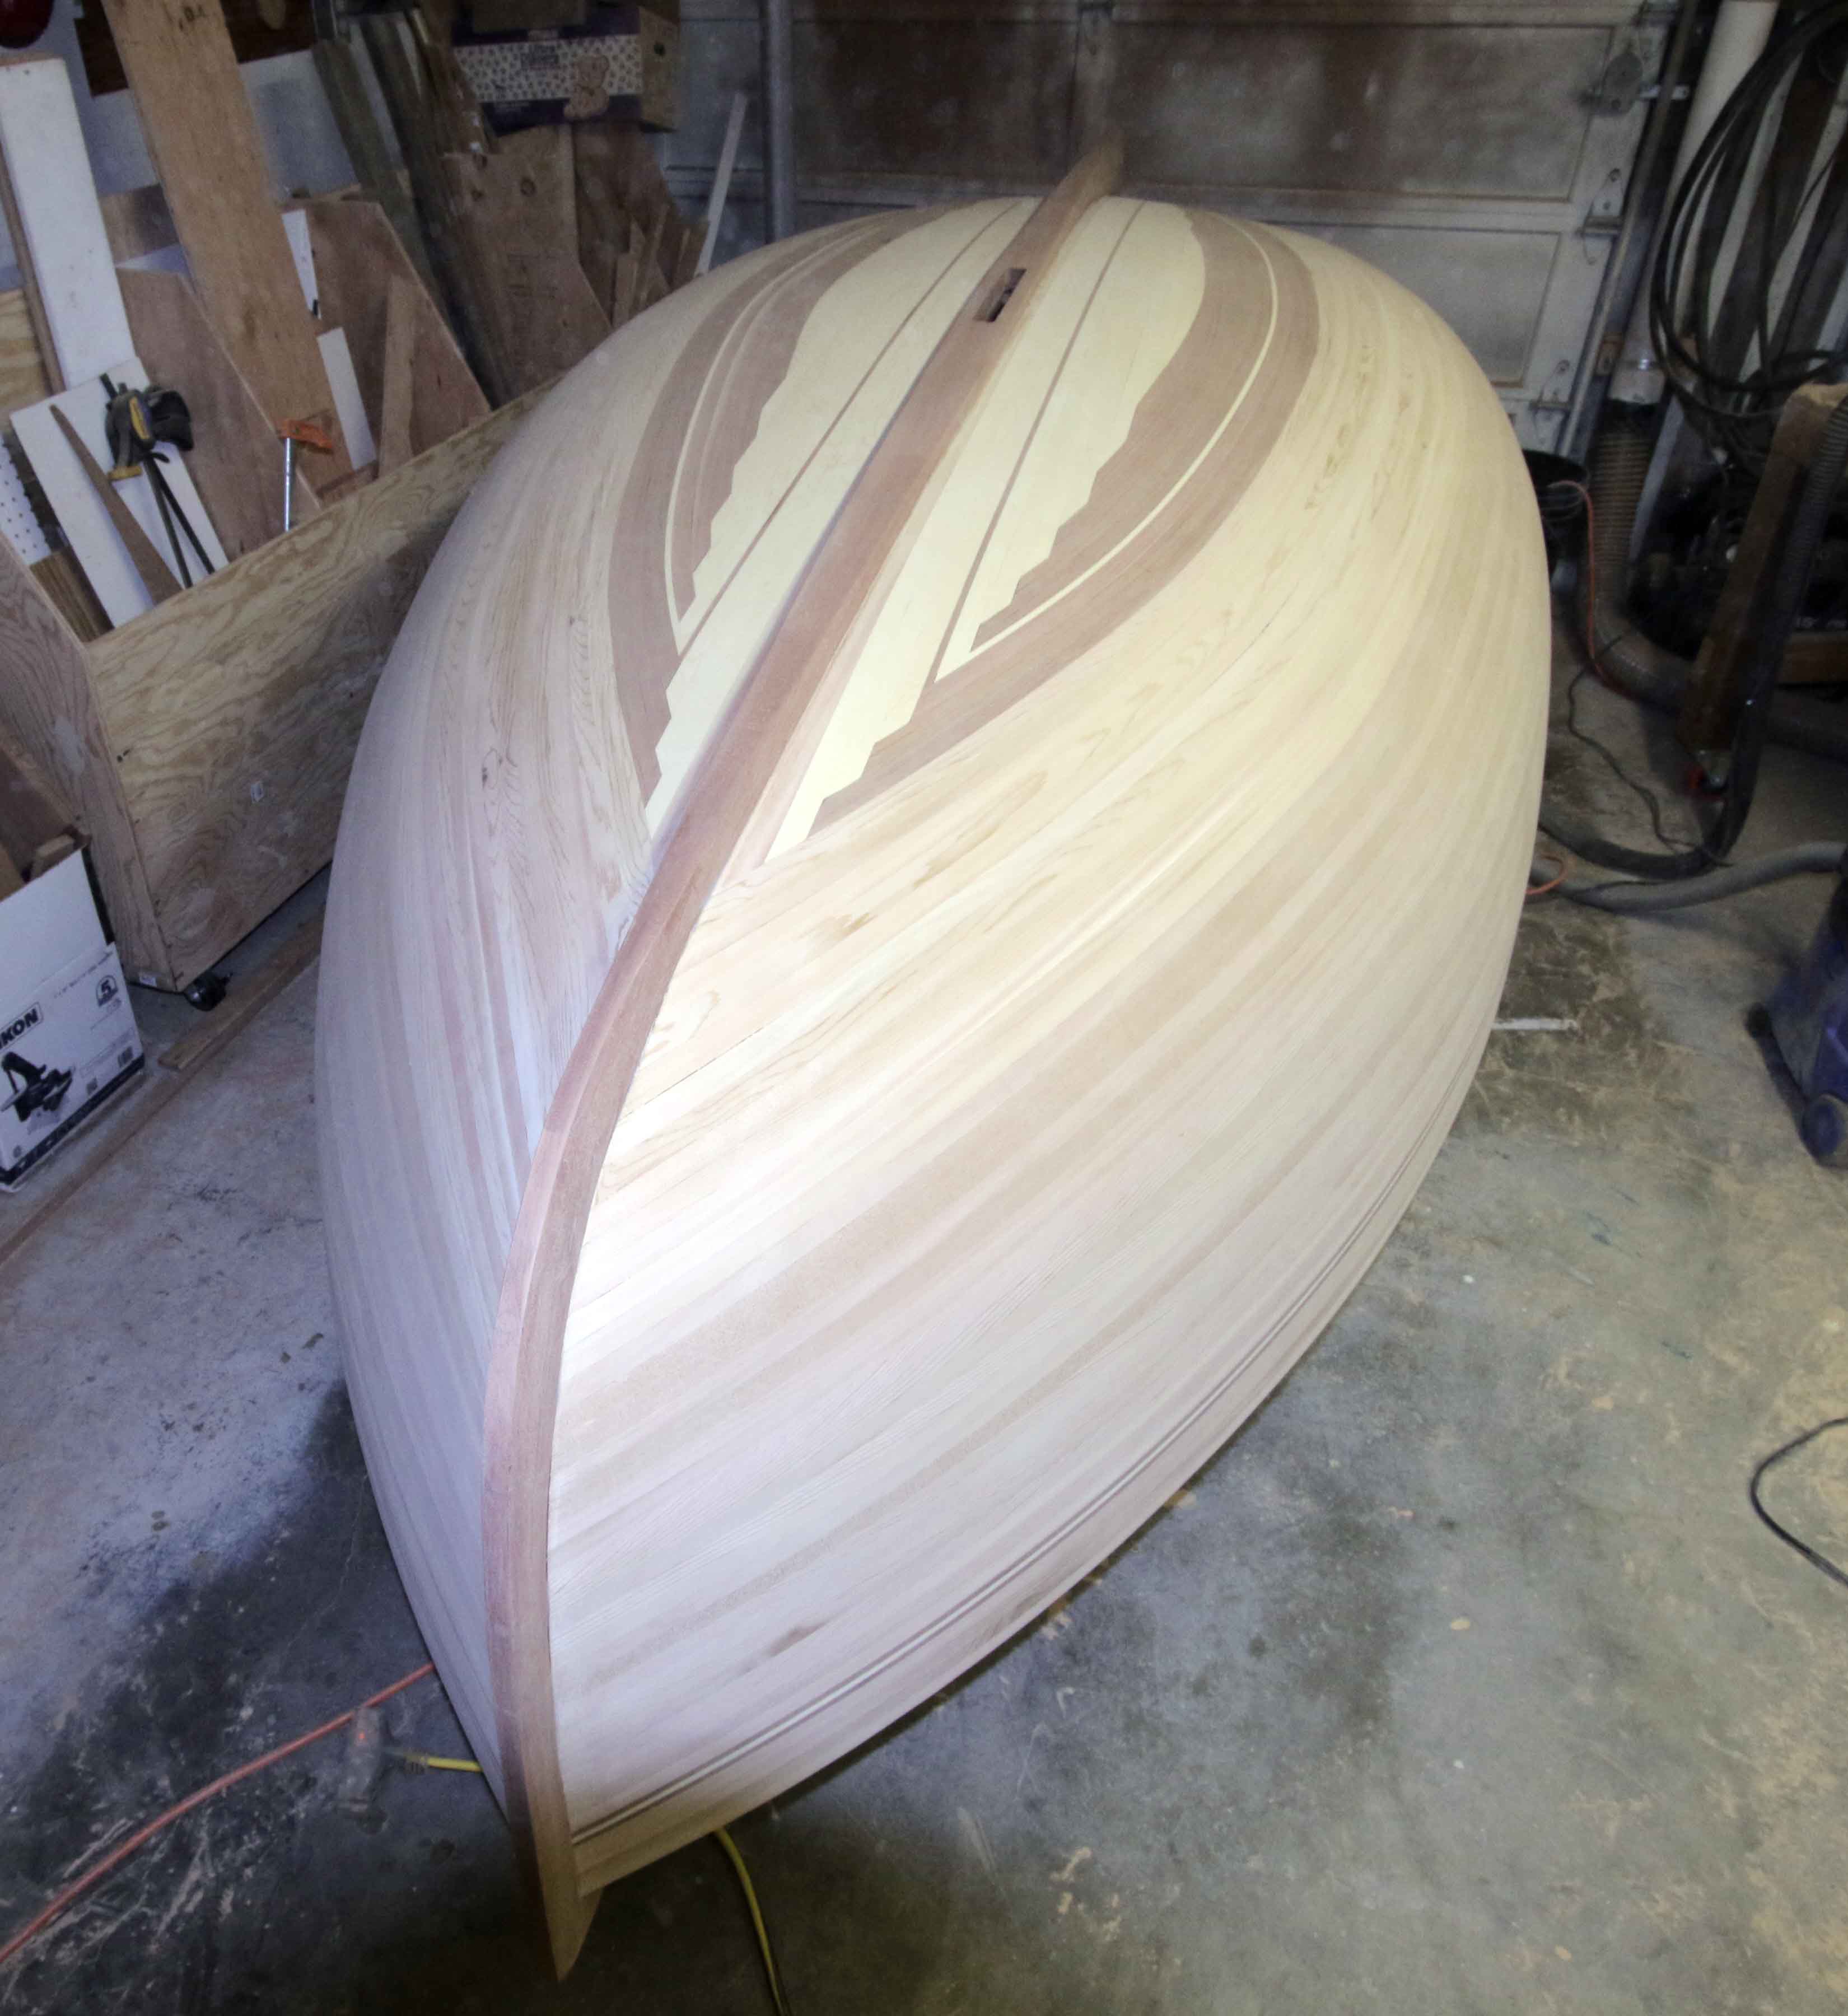
Finished sanding hull exterior to 220 grit. Used the orbital, but also a lot of hand sanding. Didn’t varnish yet, so the finish looks very flat, but it will shine right up later.
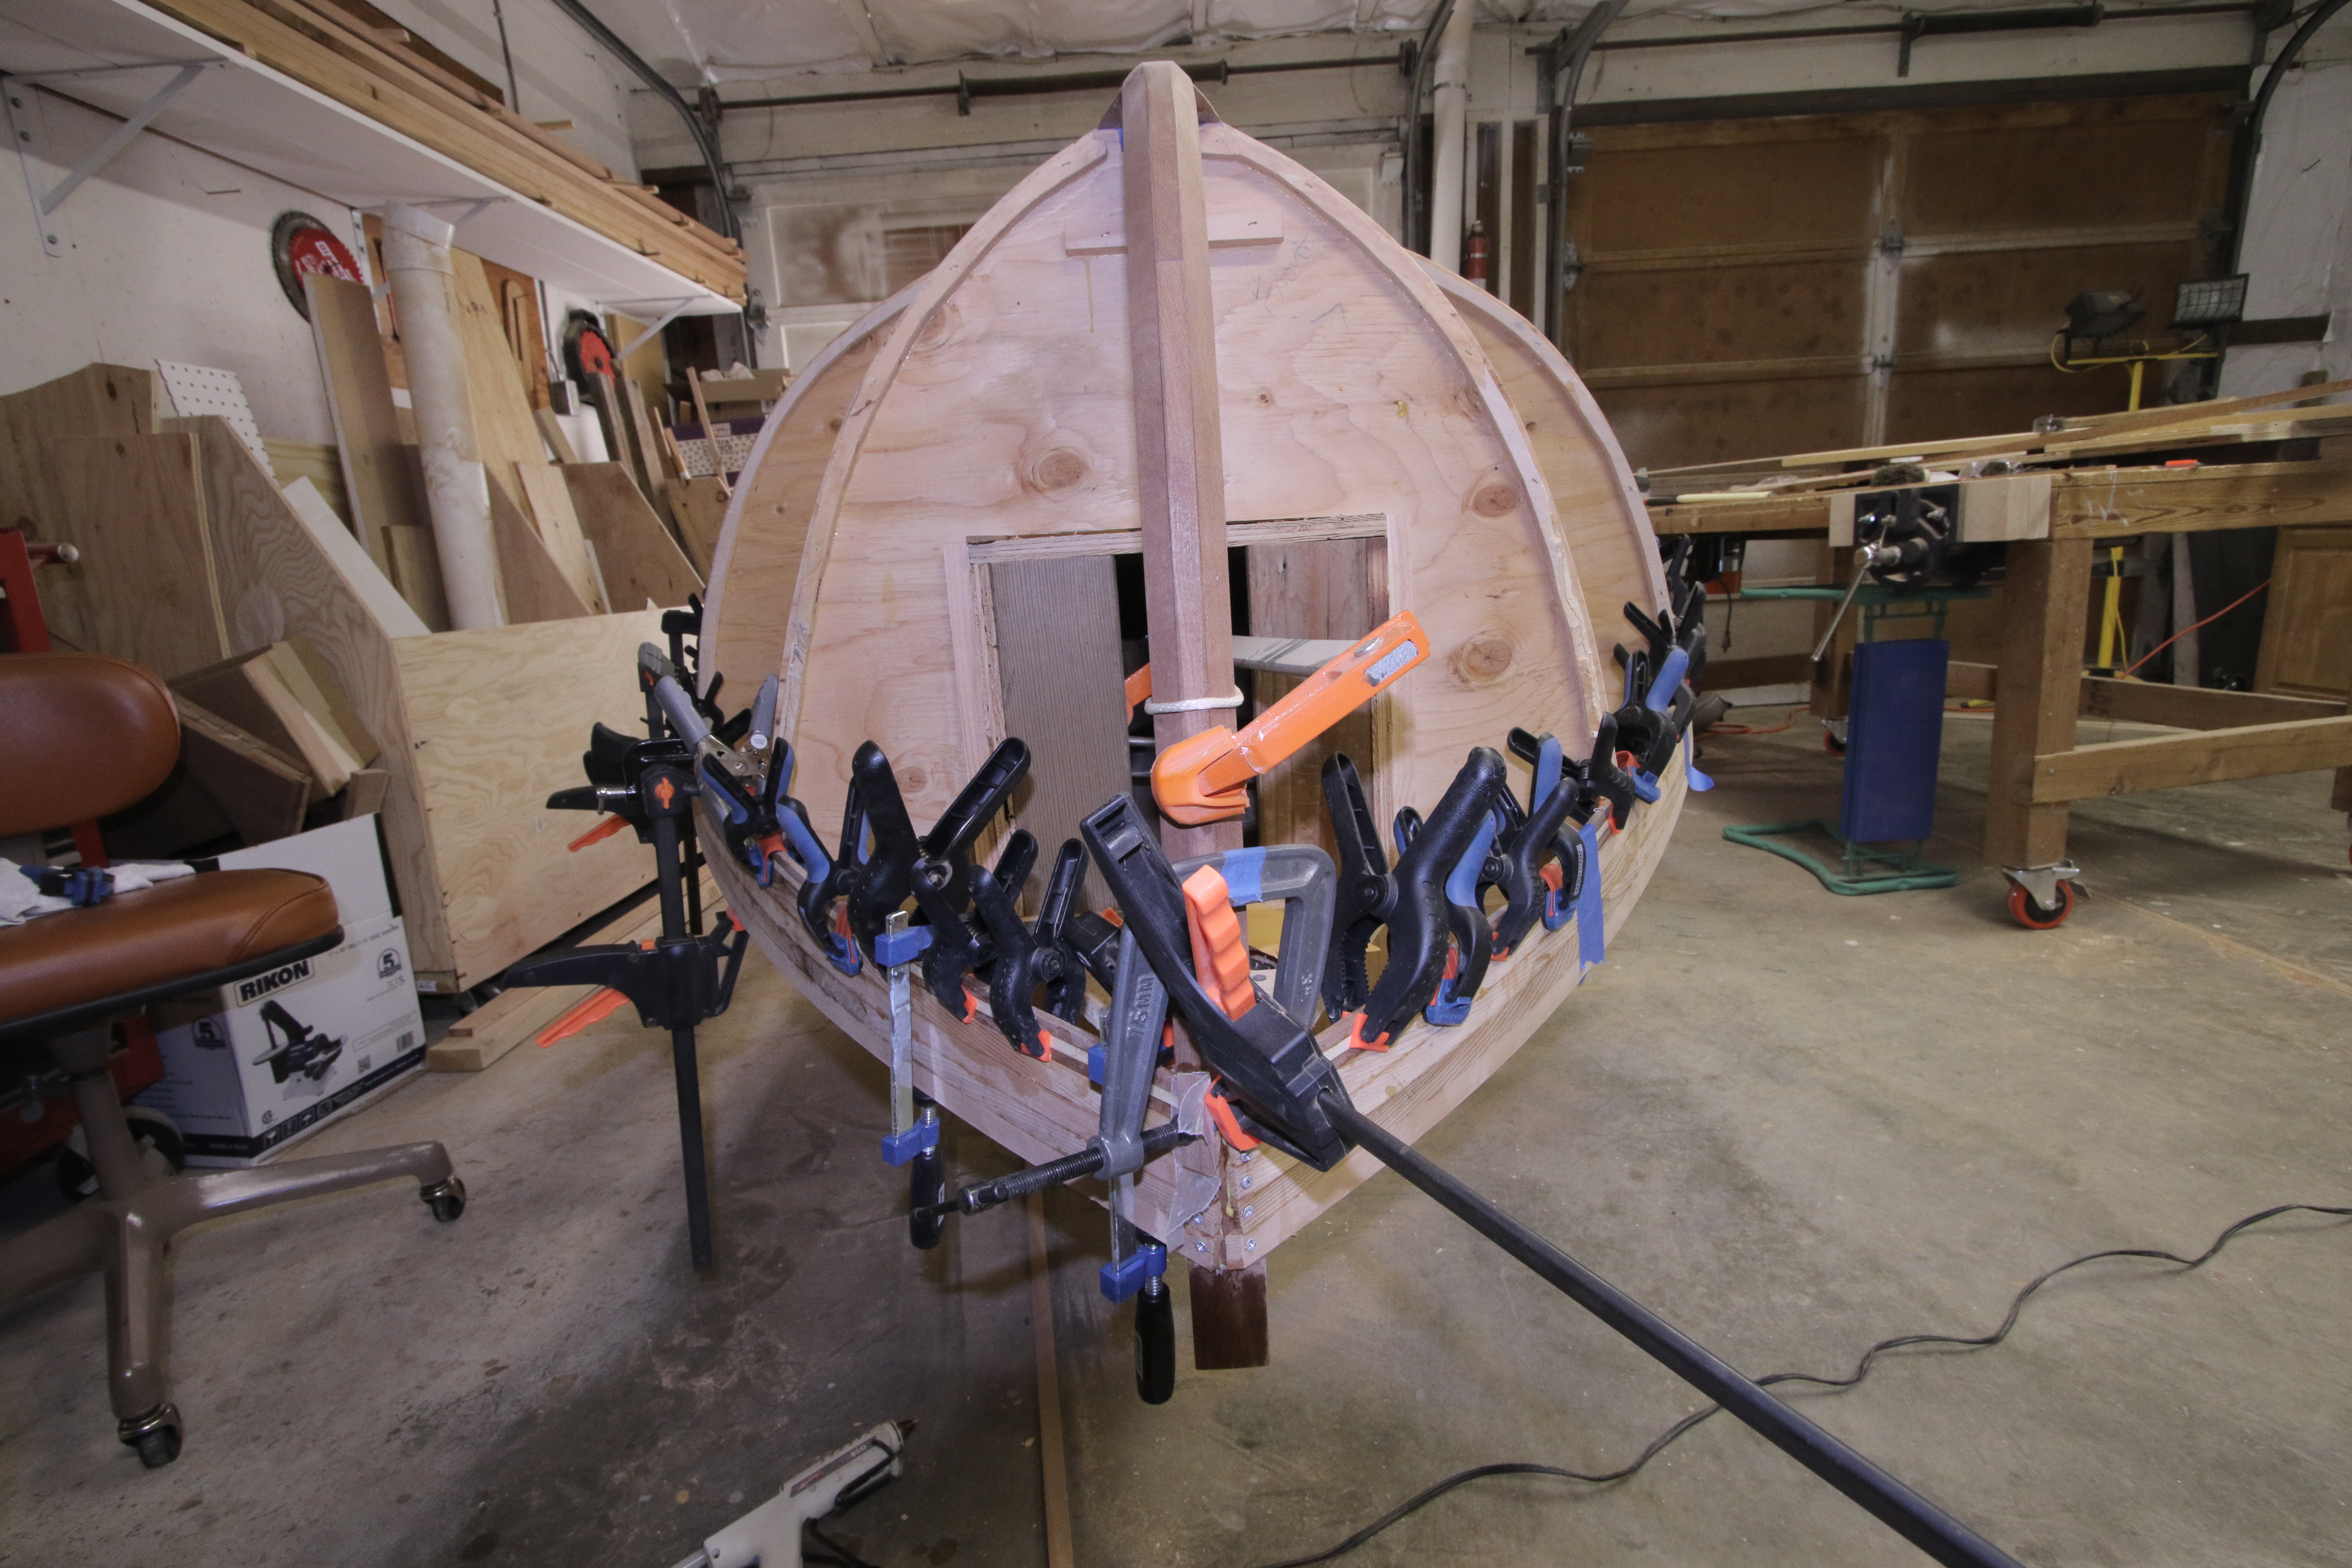
Ready to flip.. and now it’s flipped. Yay – that’s a milestone! Looks like a boat. Now to figure out how to get the stations out without damage to the hull. Used a heat gun at 500 degrees (kept it moving) to slowly heat up the hot glue along the station edge in long strokes until I could wiggle it free. Removed 2 so far (not shown), but did it without burning or damaging the wood. That’s the ticket! (I was afraid to hit it with a hammer, as I’ve read some do.)

April 29, 2017
Done with epoxy, and built a frame that will be flipped over and attached to the top of the existing building frame to hold the hull in place, right side up, while building out the interior. I built it right in place, so it is guaranteed to fit. Attached some foam padding (old camp pad) with spray adhesive.
April 25, 2017
After glass plus 3 coats of epoxy (so far). Still working some spots where fiberglass overlaps and it’s not totally planer yet, but it’s getting better with each coat. I’ve been rolling epoxy on with an 1/8″ foam roller, then tipping with a foam brush. Haven’t done any sanding of epoxy yet, but that’s coming soon.
April 22, 2017
Fiberglass cloth put on entire hull and transom. Used a roller to spread the epoxy resin. Admit that was one of my least favorite things on this project. Appreciated Lorena’s help to help me get the cloth in place and smoothed out prior to wetting.
April 21, 2017
Although I had used a System 3 white filler in the epoxy for the fillet on my test platform, I decided at last minute that I didn’t want a white fillet on the boat along the keel, so I took a piece of sapele to the belt sander and made up a bunch of fine dust to use as a dark brown filler for the real thing. I loaded it into a syringe and after masking along the keel and stem, laid a bead as a fillet. I ran my home-made tongue depressor along the edge to make a nicely rounded fillet. I made a paper template for the fiberglass cloth and laid the cloth over the keel, extending about 40 mm onto the hull on each side. The cloth was cut on the bias so it laid nicer around the inside and outside corners. I like the darker fillet – good call!

April 19, 2017
Had a couple weeks of biz and other travel, and finally getting back at it. Played around with fiberglass, epoxy resin and varnish on my test platform. Learned a lot in the process of doing the fillets, laying 1 layer of fiberglass cloth (6 oz), 4 coats of resin and now on my 3rd coat of varnish. Will put a couple more on.

Gained enough confidence with that, that I started the real deal tonight with 1st coat of resin to seal the wood.
Mar 25, 2017
Have been finish sanding, rounding edges, and prepping for fiberglass. Got all the materials for that procured, or at least ordered. Also have been asking a lot of questions on the internet and to my kayak builder friend. I will need some practice, to build confidence, since this is my first time, so I built this test vehicle (not sanded yet). Will give me the chance to make some fillets along the “keel”, glass the keel with some material “on the bias” (45 degree angle) around corners, how many coats of epoxy to fully wet, without applying too much, get a feel for cure rates, etc..
Mar 15, 2017
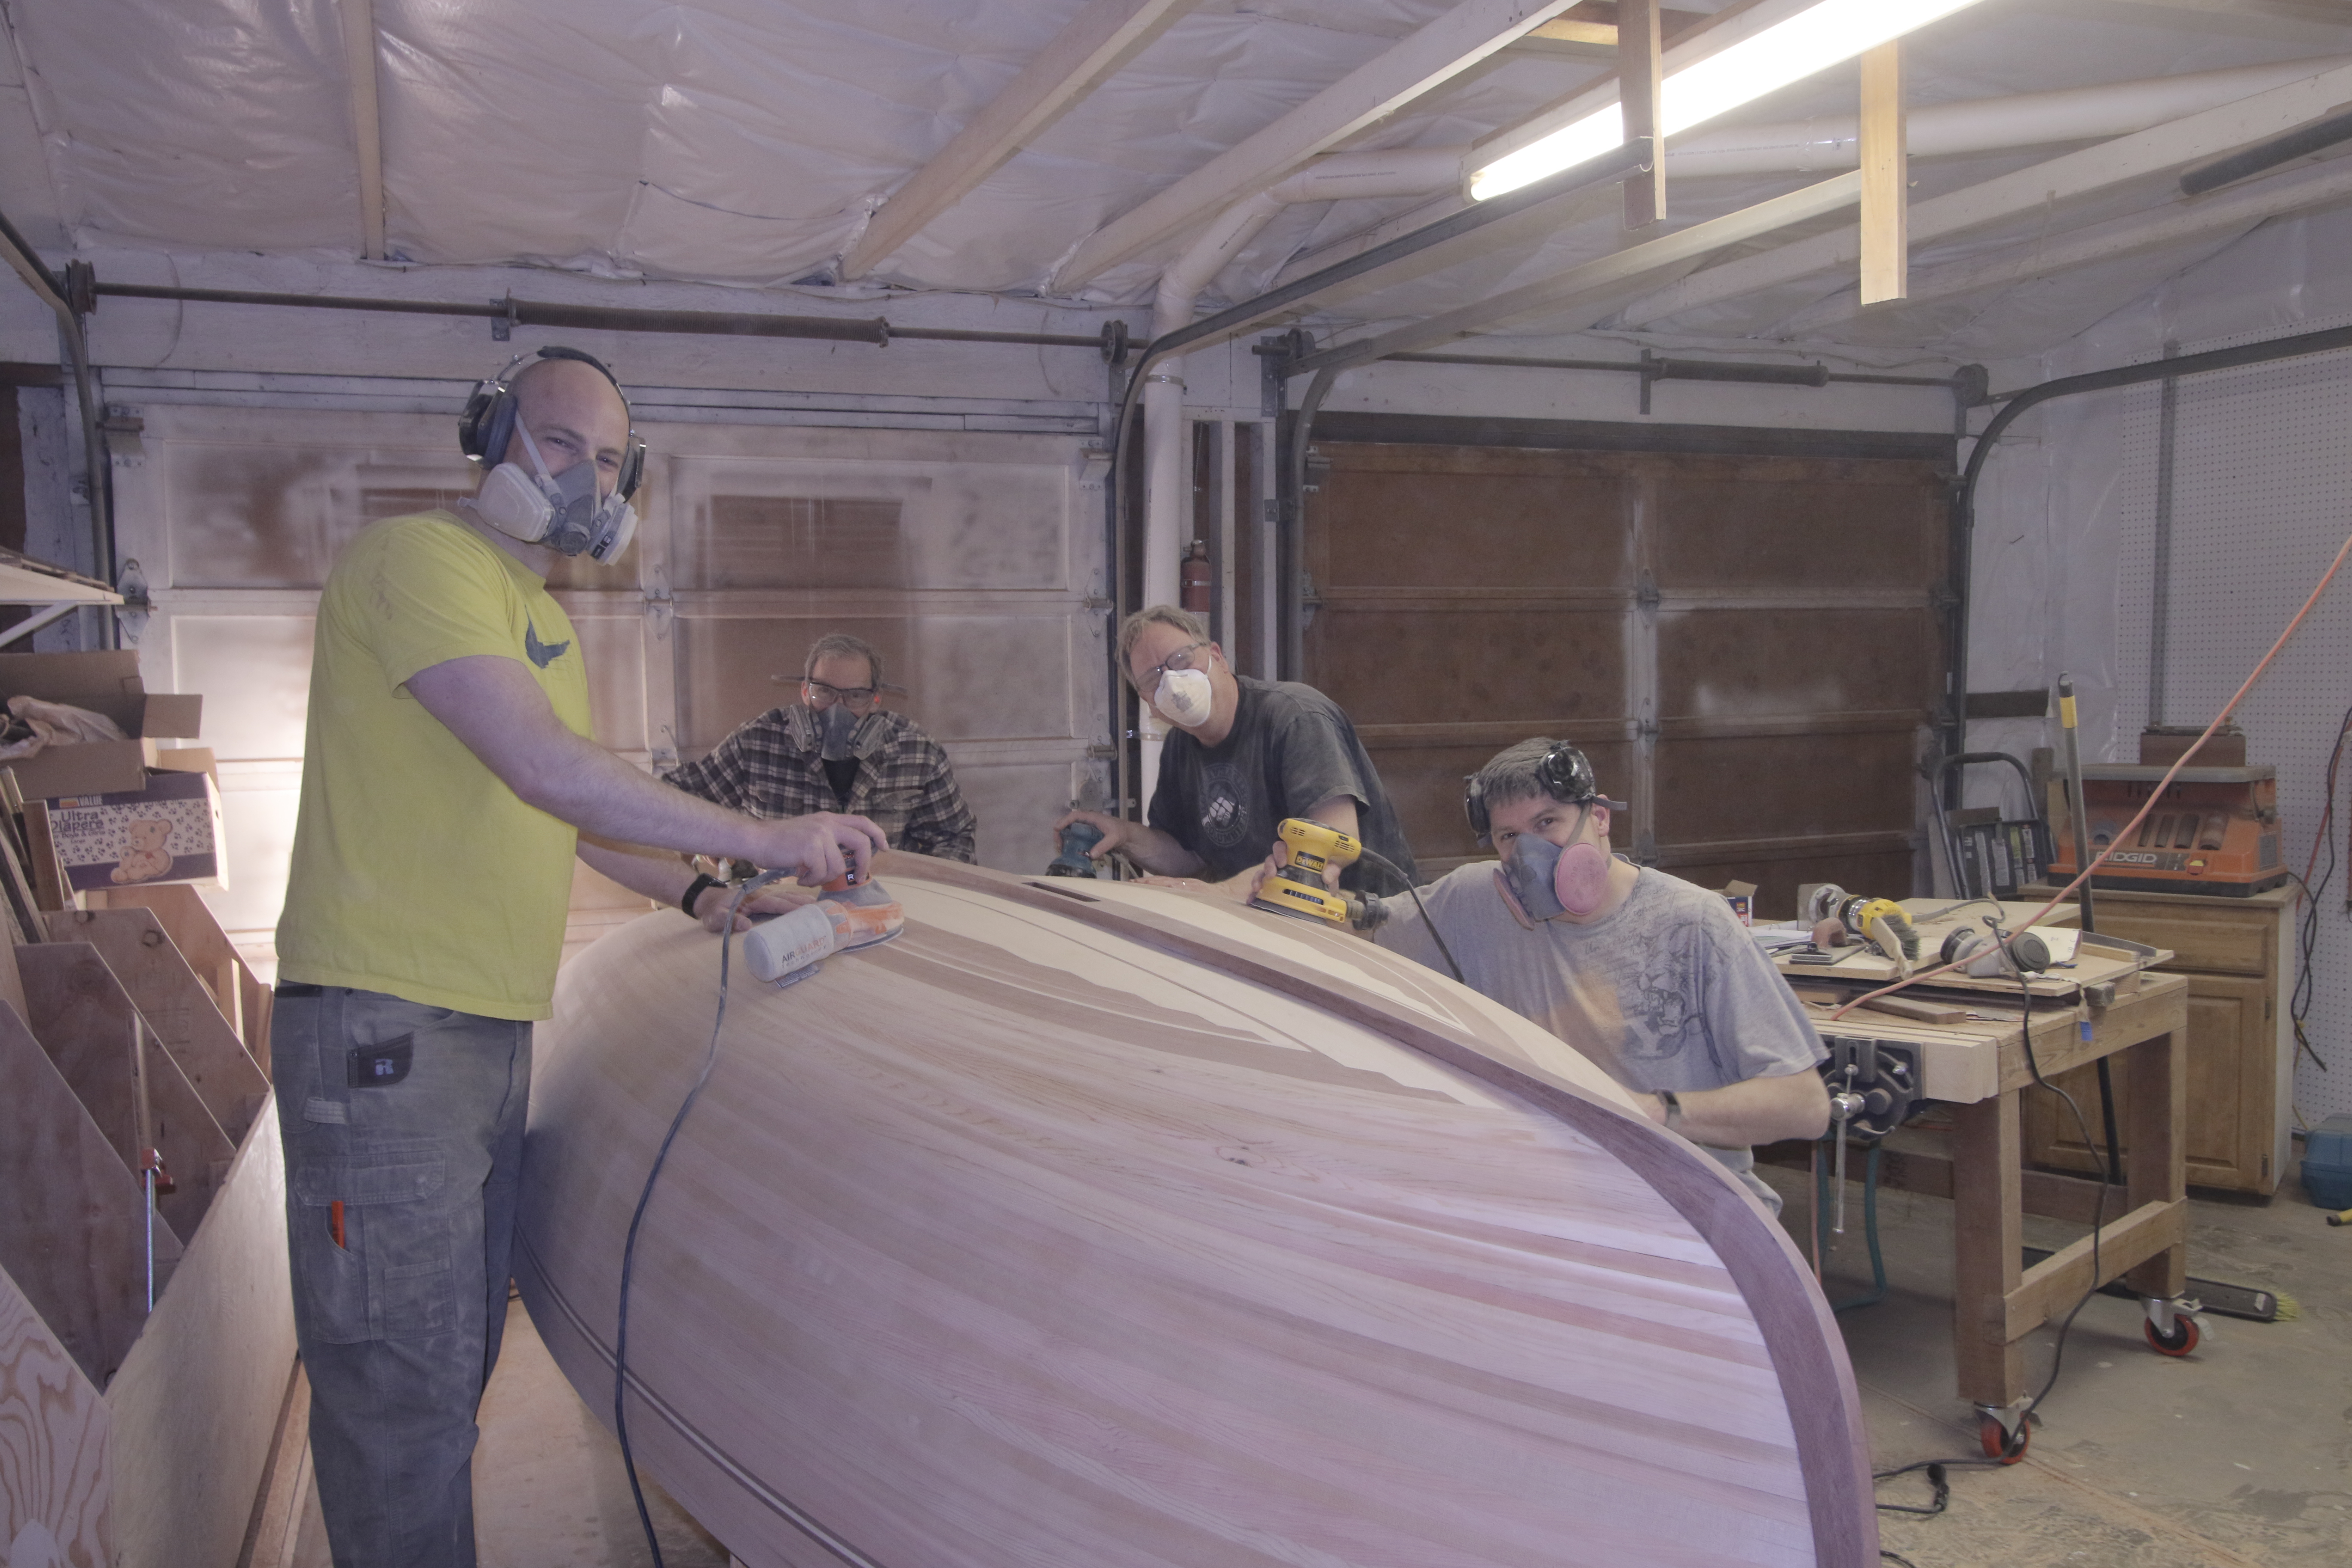
My good friends Branden, Brandon and Steve helped me sand her up. 60 -> 120 -> 180 -> 220. Just have a few finishing touches and she will be ready for fiberglass with epoxy resin.
Mar 11, 2017
Sanded up the skeg. Friend Steve helped rough sand the hull – many thanks!

Mar 10, 2017
Started sanding the false keel starting at bow. Happy with connection to stem, so far, not done yet. Used a flush-trim bit to route out the dagger board hole in false keel to match the hole underneath in the keel.
Mar 9, 2017
False keel is fitted and epoxied in place.
Mar 8, 2017
Skeg is shaped and hull is planed from stem to skeg and ready to accept the false keel, which is laying along side (still need to cut it to shape).
Mar 7, 2017
Laminating the skeg with epoxy.

Mar 4, 2017
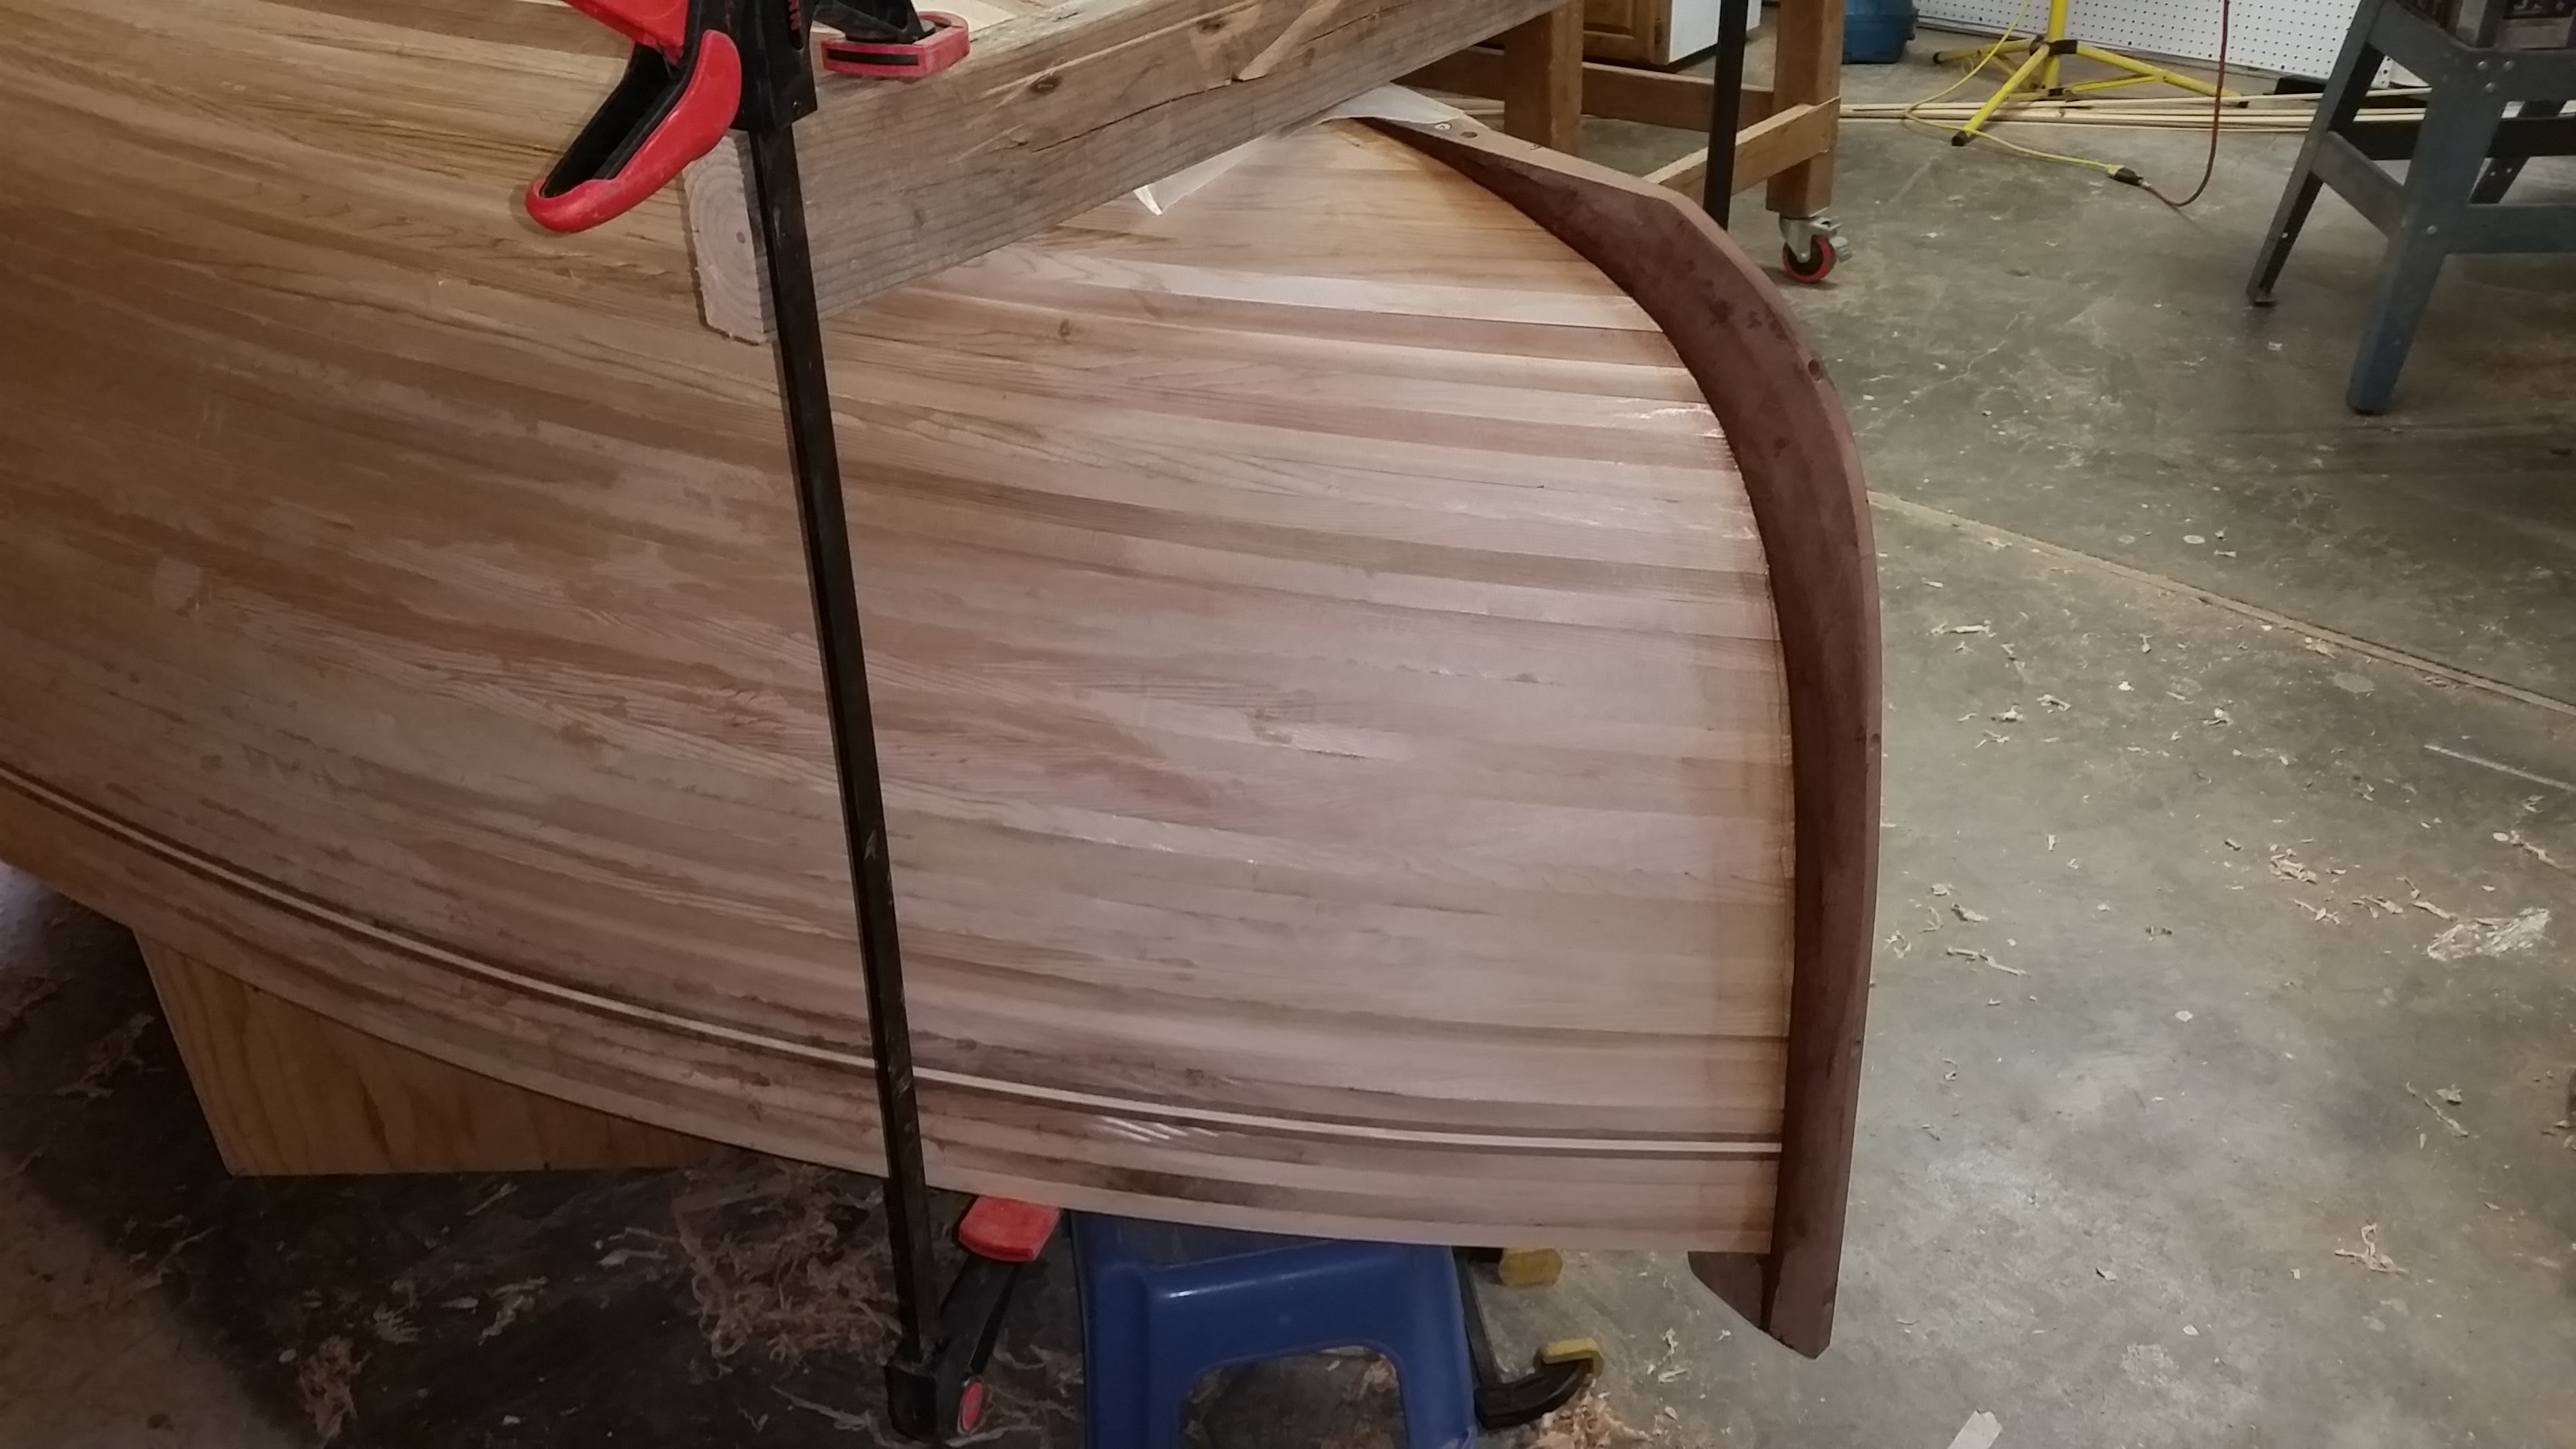
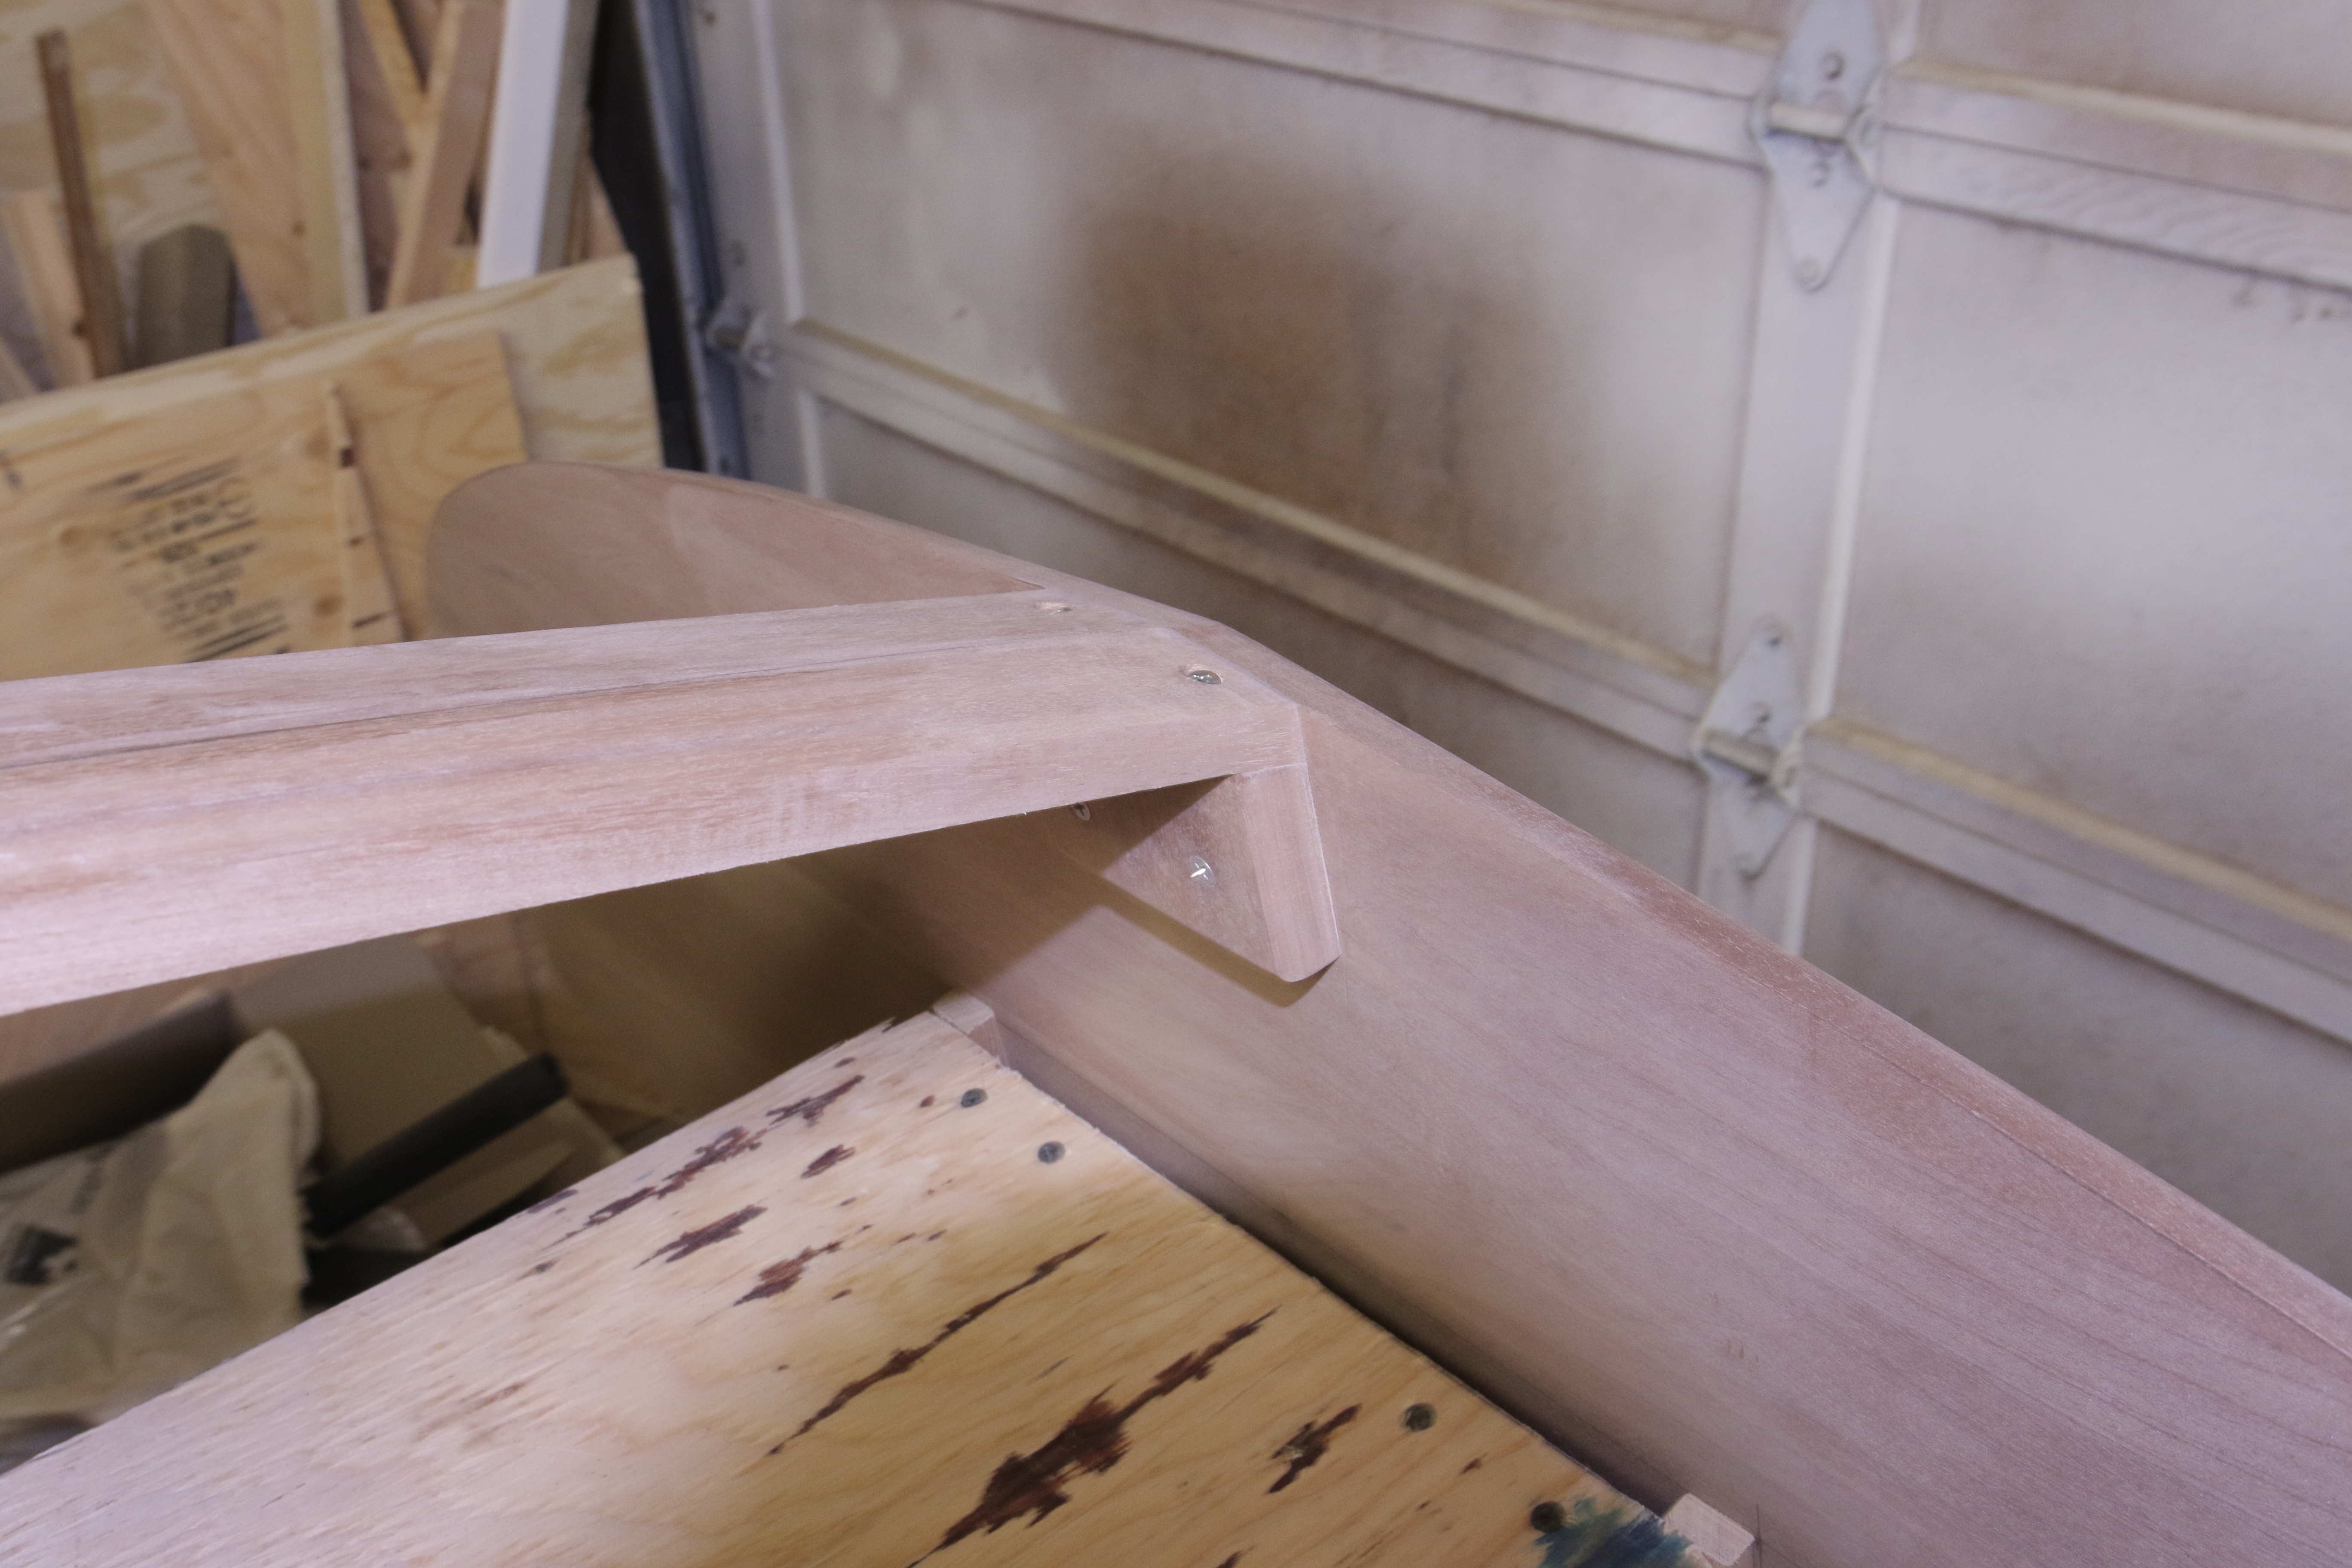
False stem carefully fitted and then epoxied/screwed on. The clamp is to hold the thin end down while epoxy sets.
Feb 25, 2017
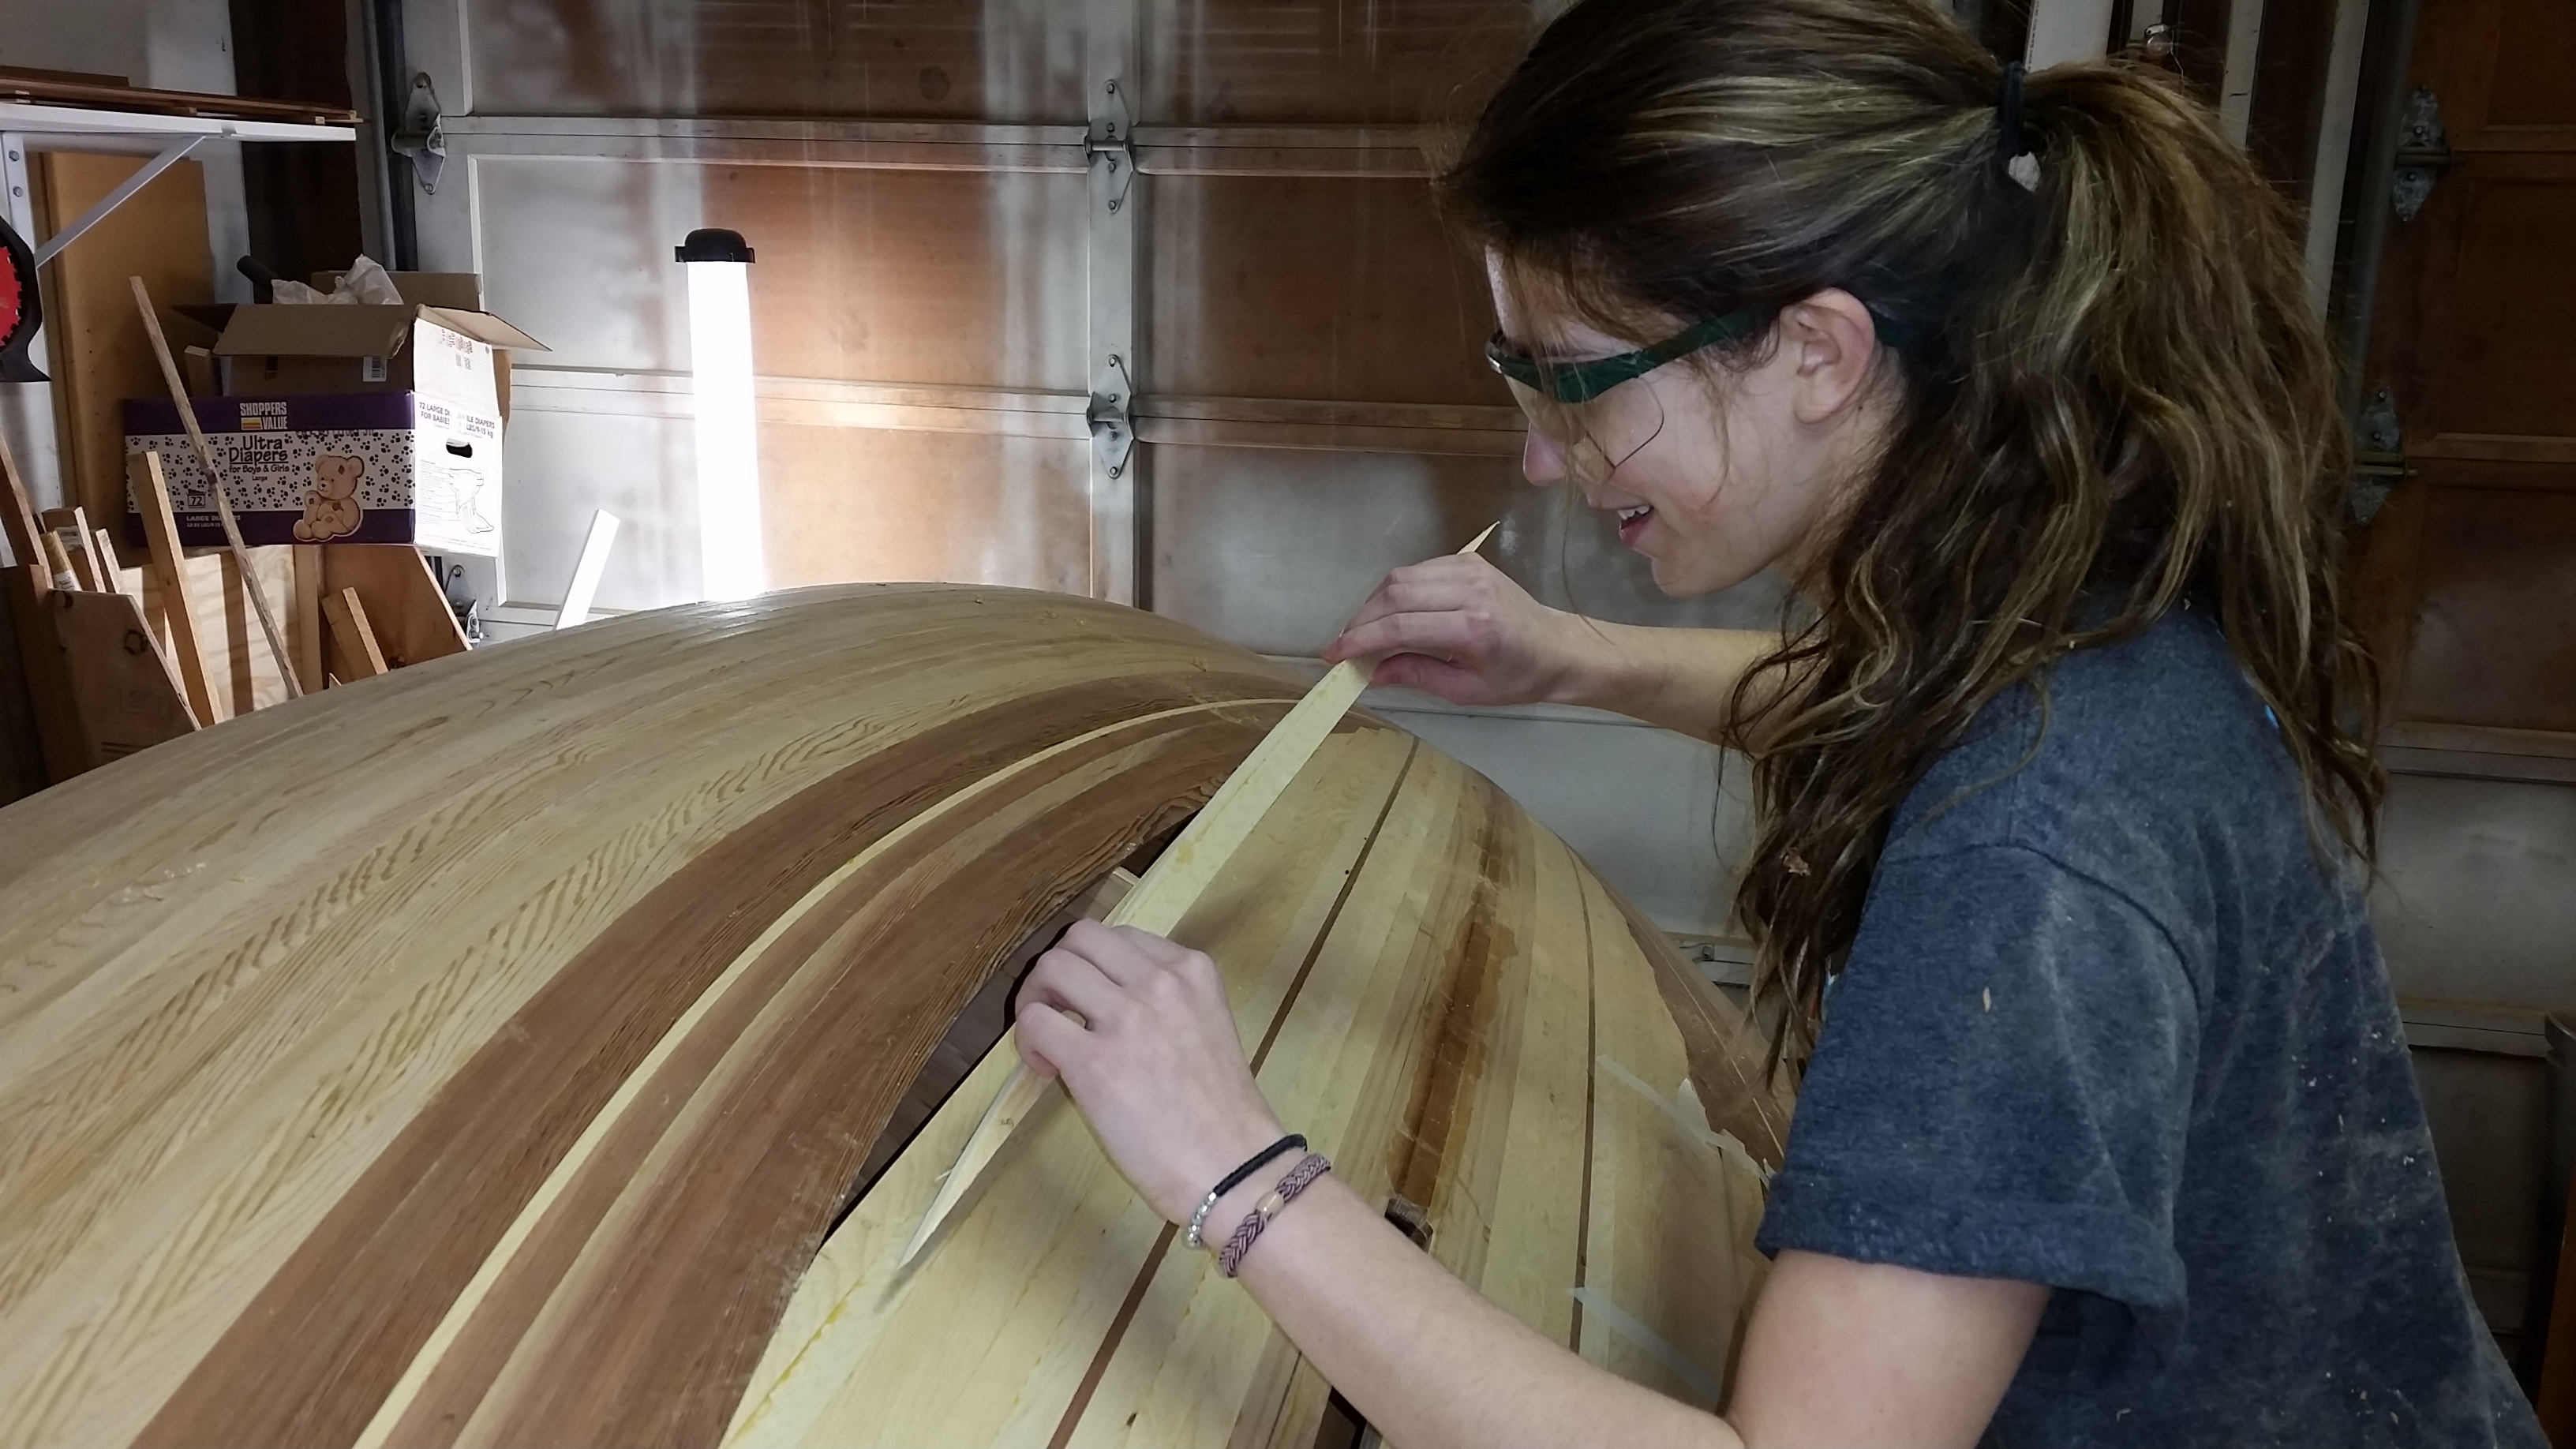
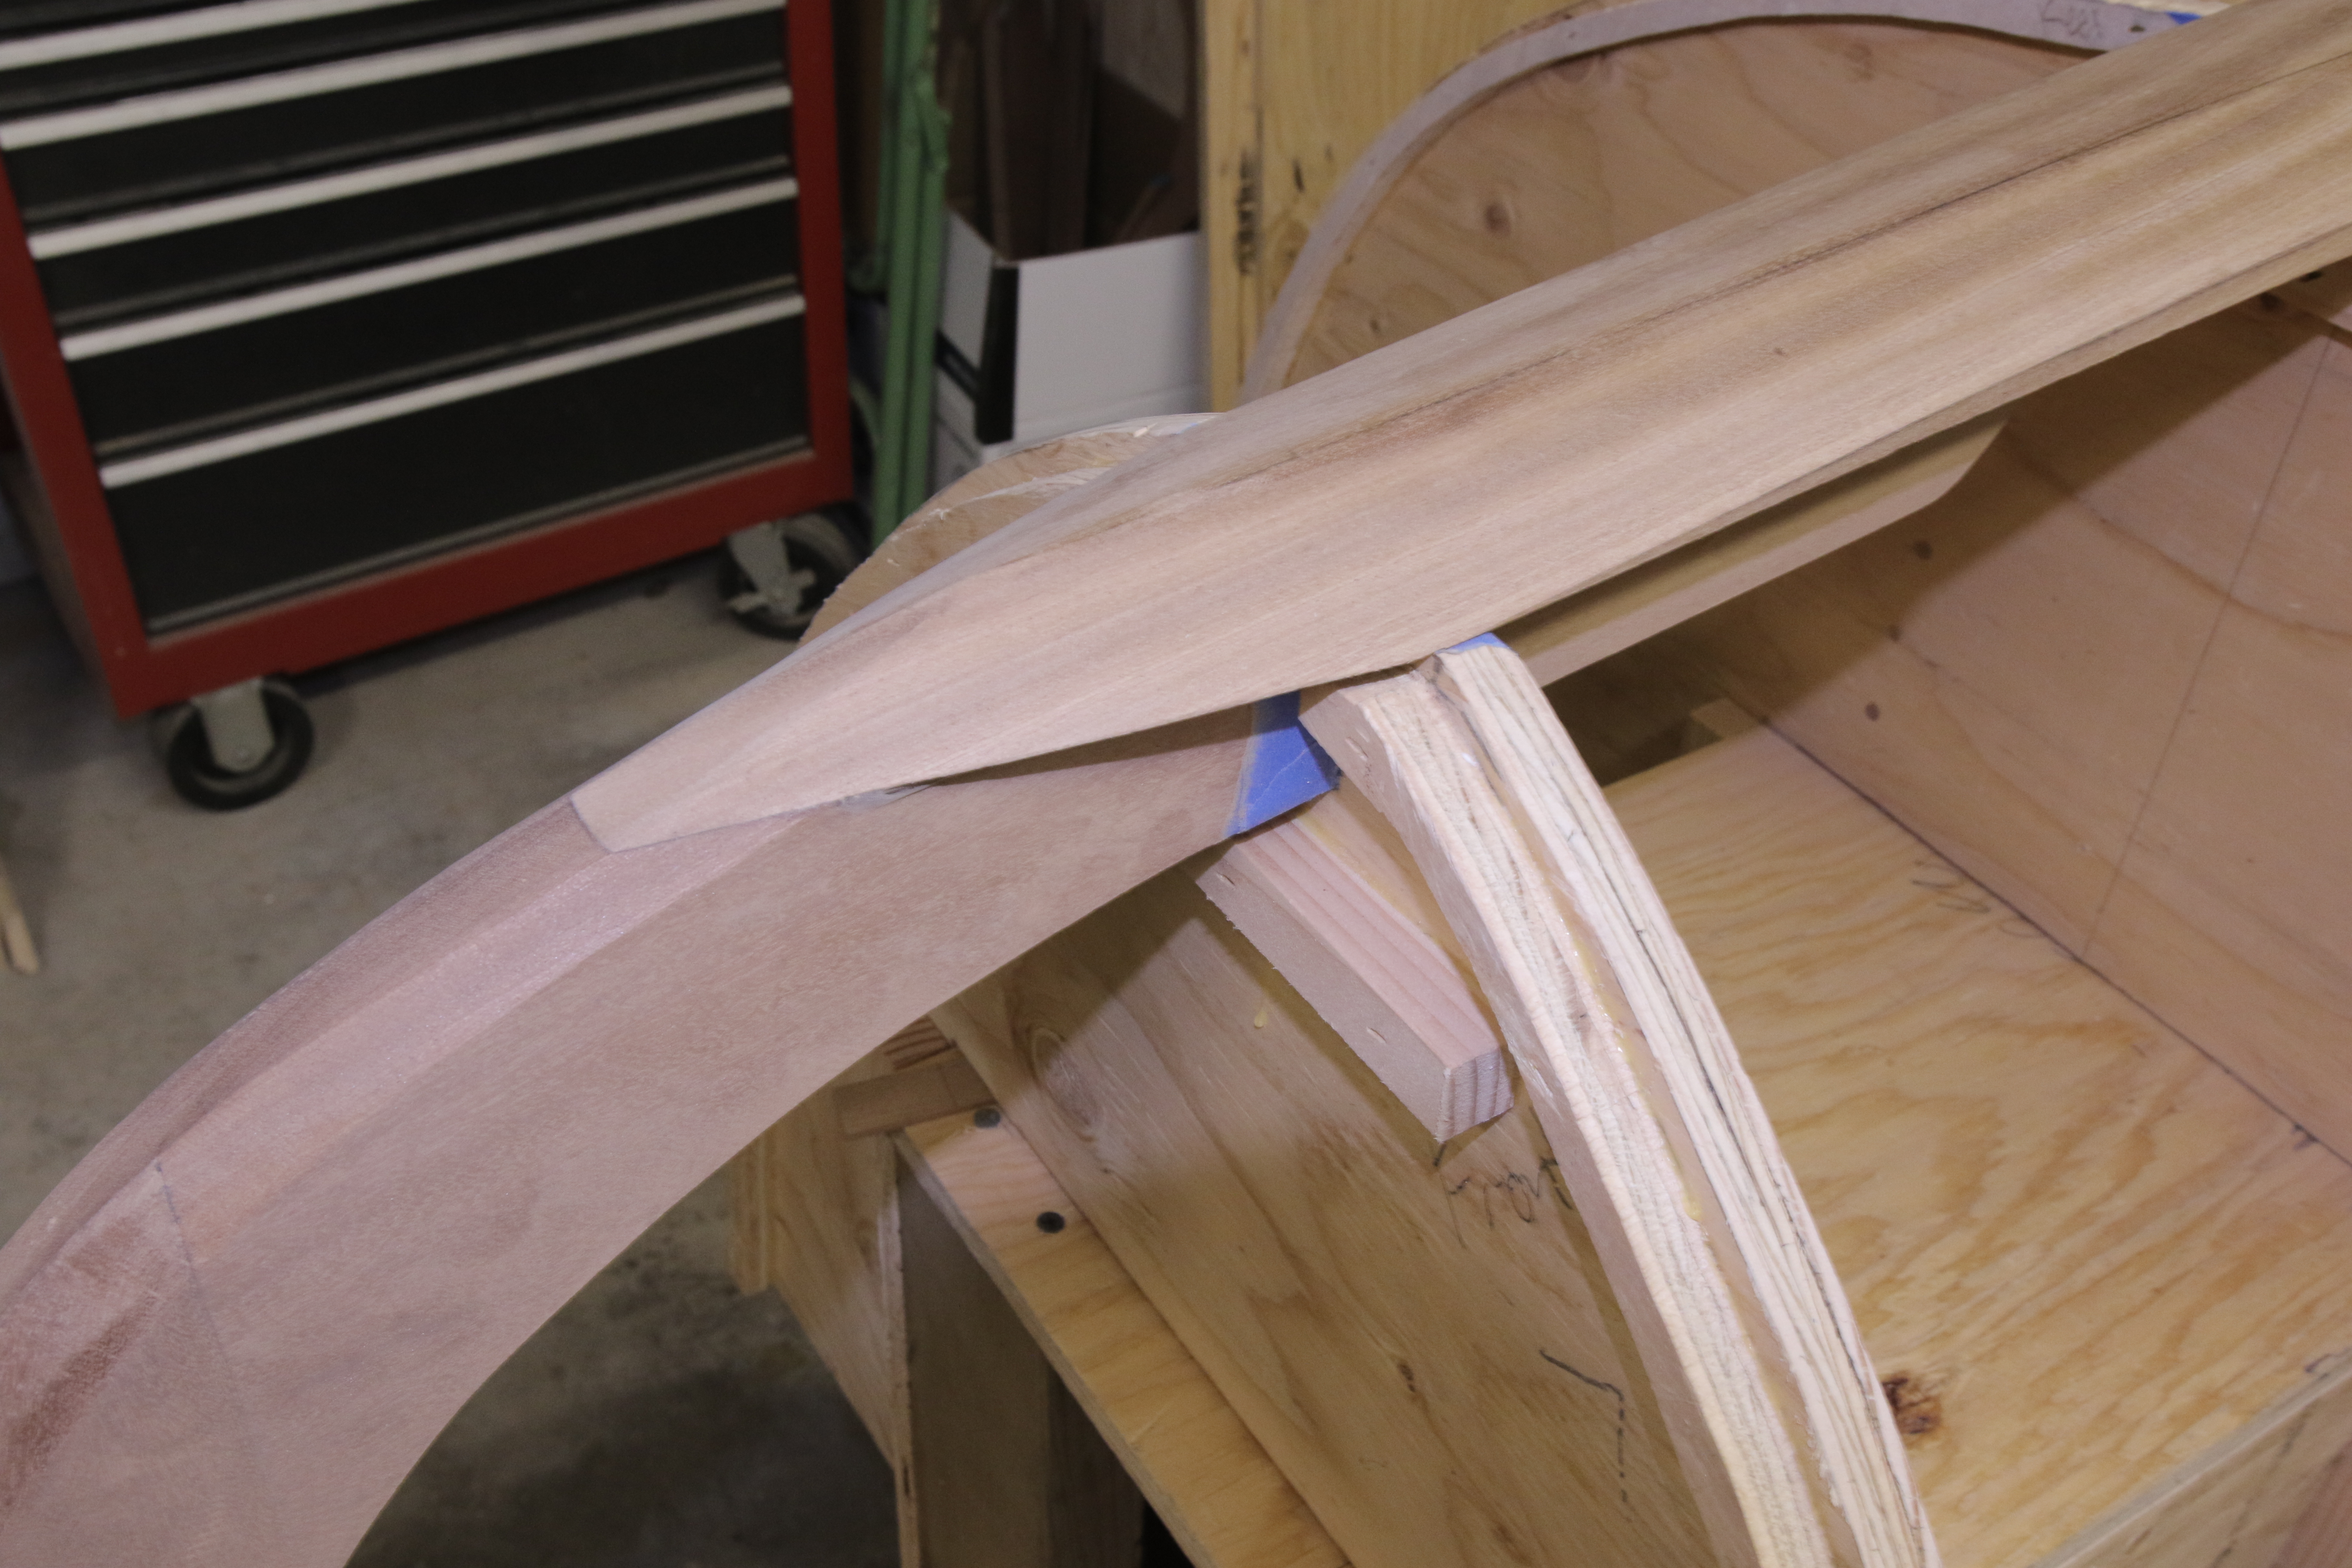
Tracy shaped and installed the last 2 strips. They fit very good – well done Tracy! Now I have a lot of planing, scraping and sanding to do. I got the bow shaped to accept the false stem. The false stem is a little wider than needed, so need to tighten up the bevel a bit. Planed the center-line from bow to dagger-board hole where the forward part of false keel mounts.
![]()
Feb 20, 2017
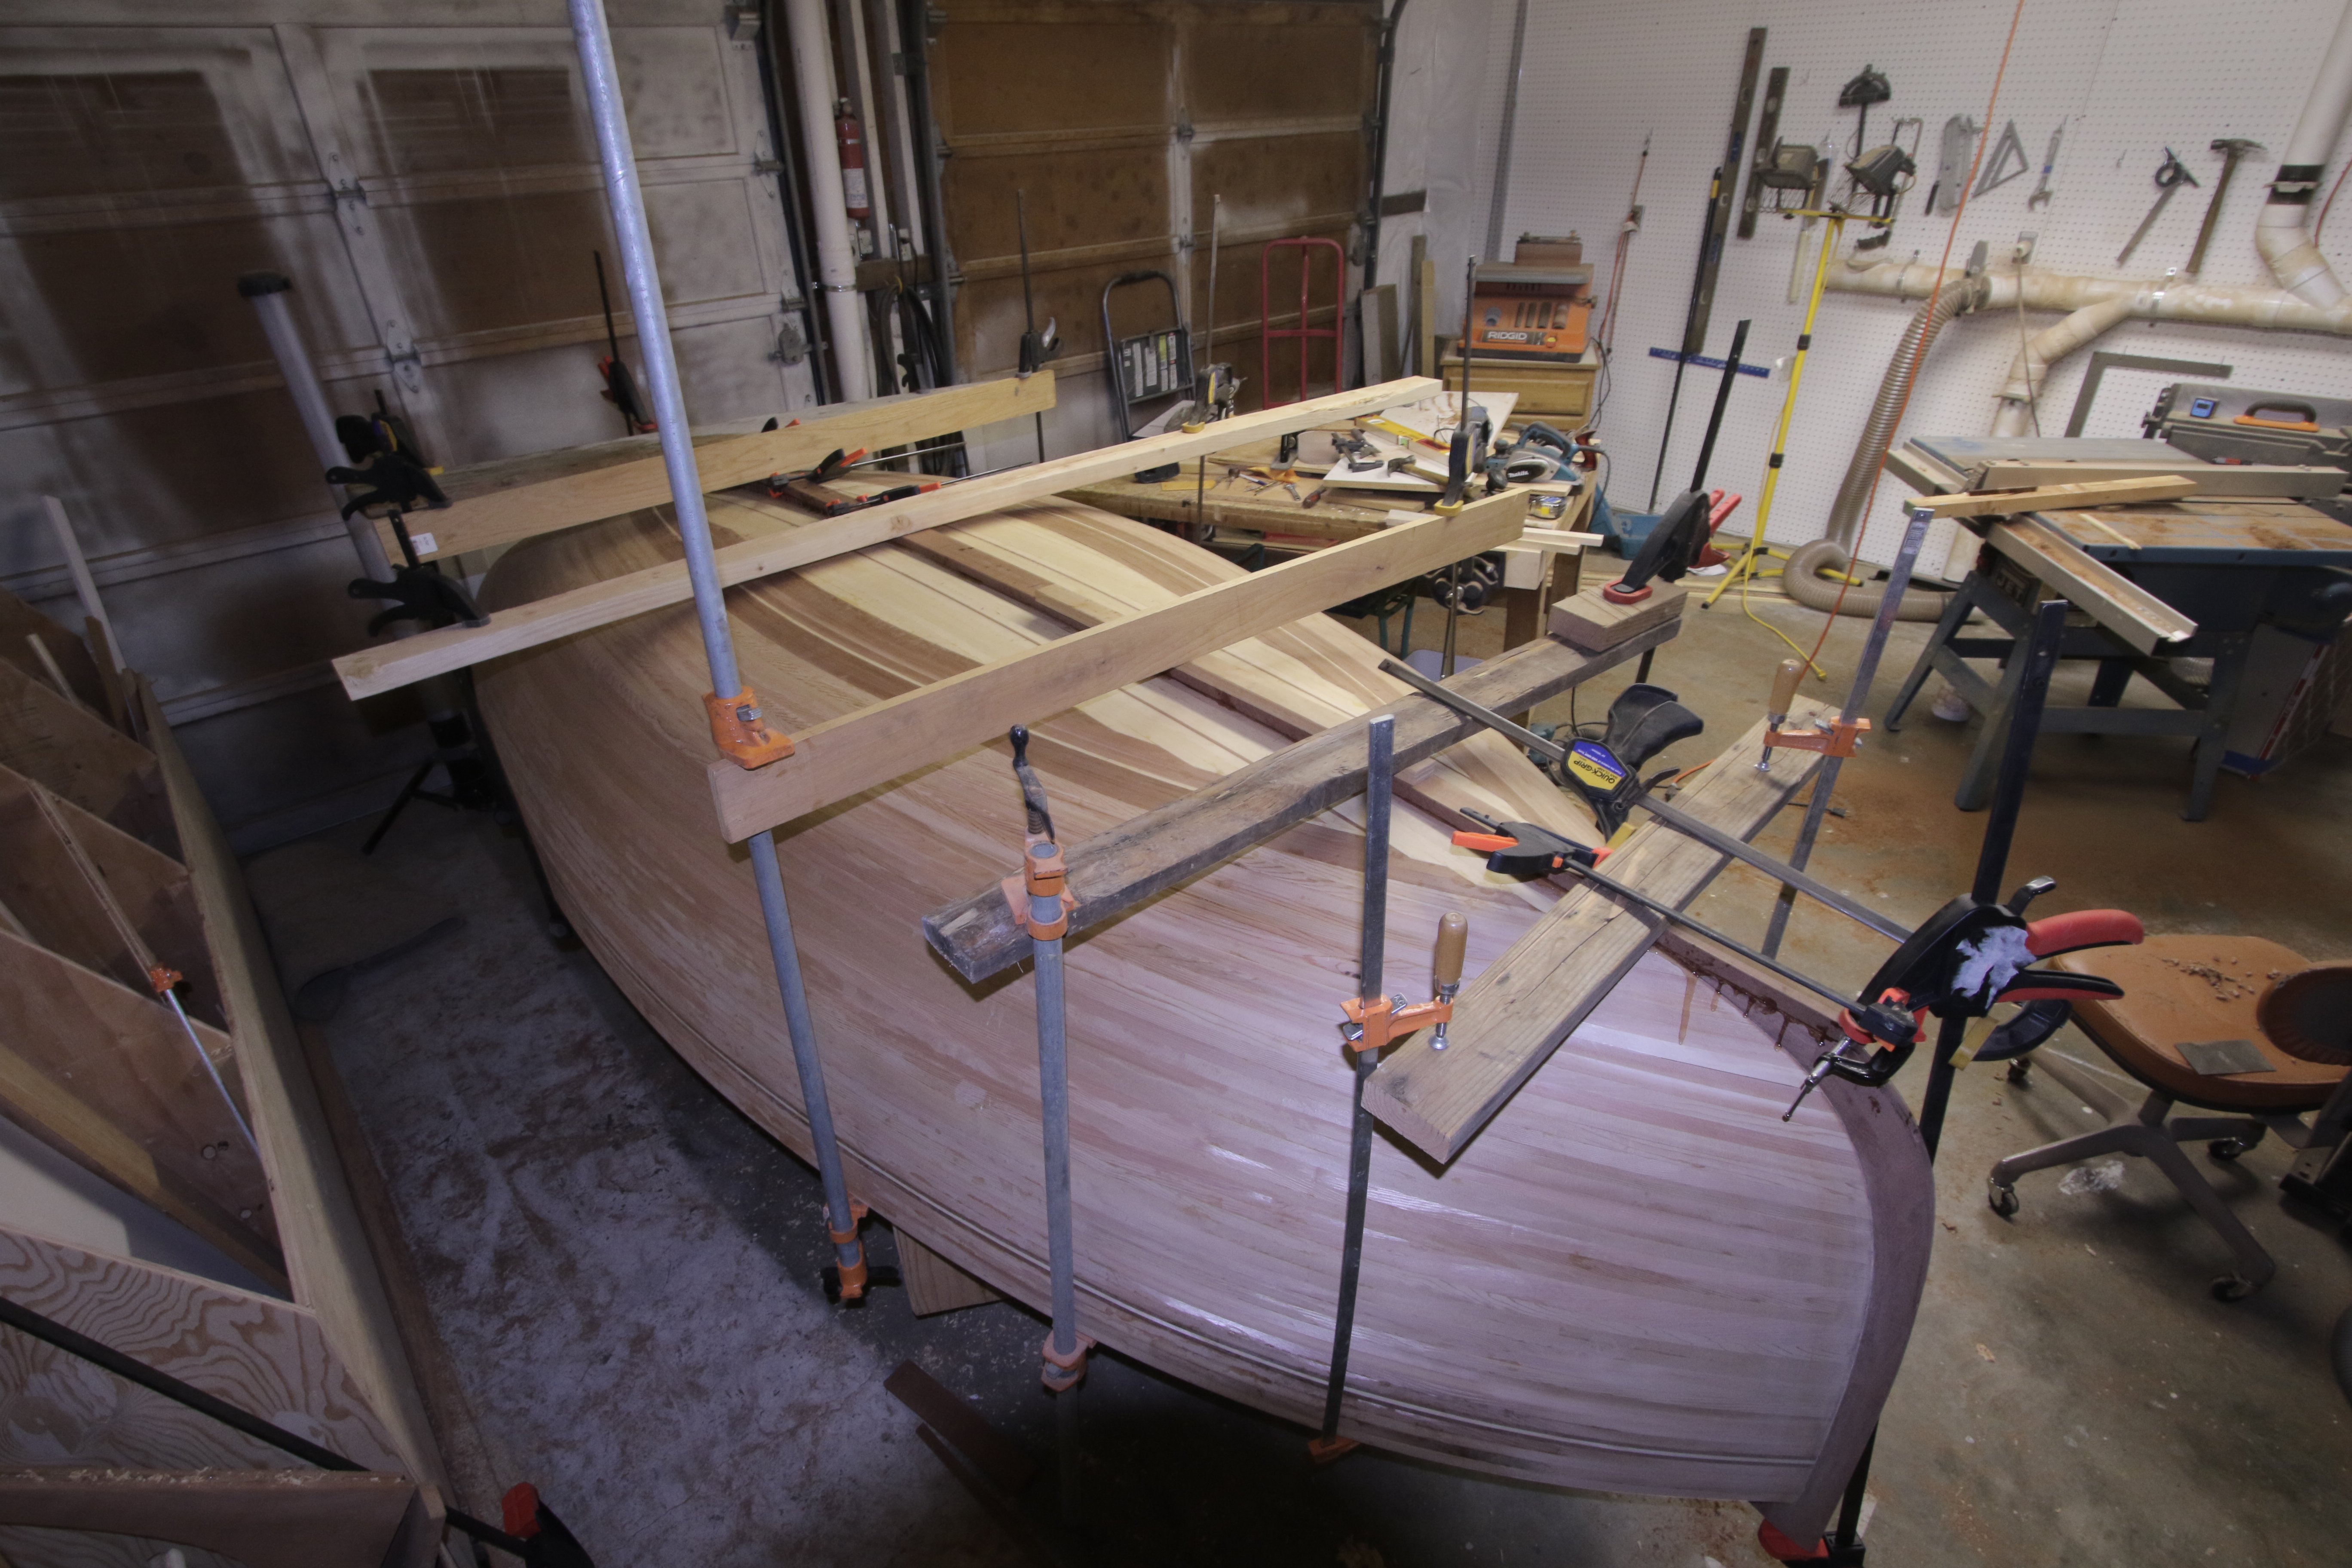
Presidents Day, so I got to play today. A 12 strip day. The first 2 dark strips today were so hard, I wasn’t sure how I was going to get them bent. But after that they got pointier and shorter and easier. I can see light at end of tunnel! Has been an exercise in perseverance..
Feb 18, 2017
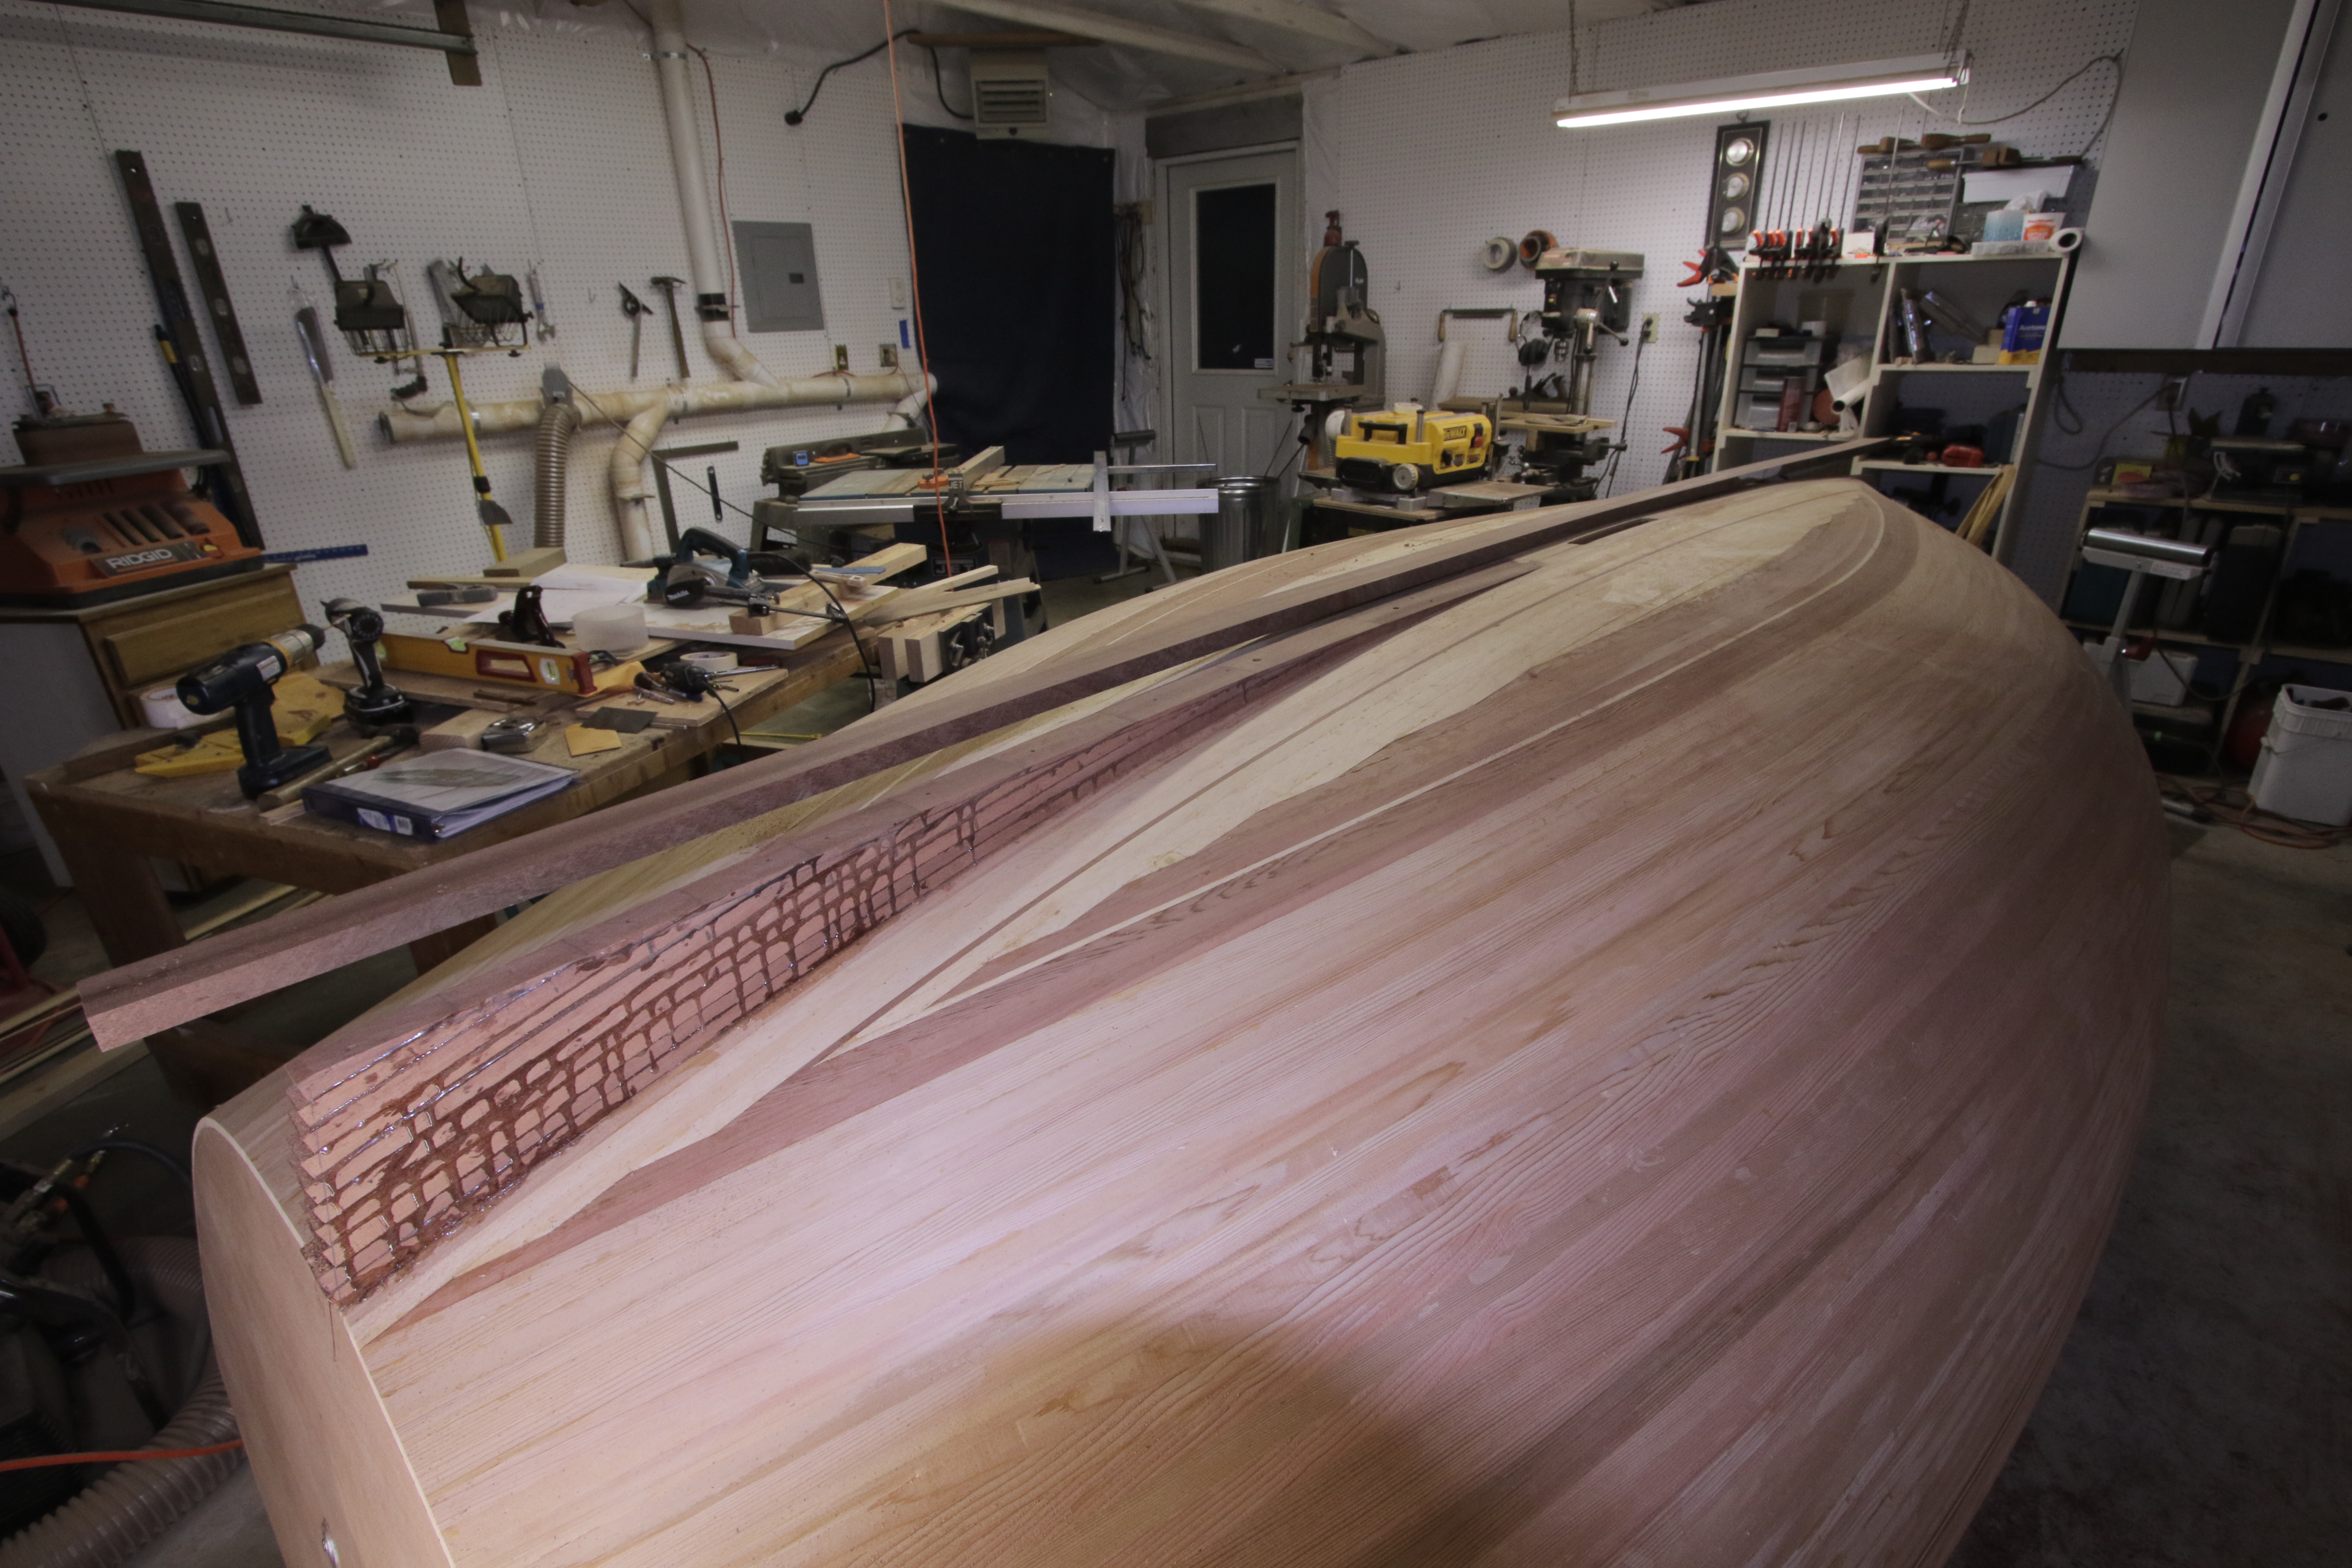
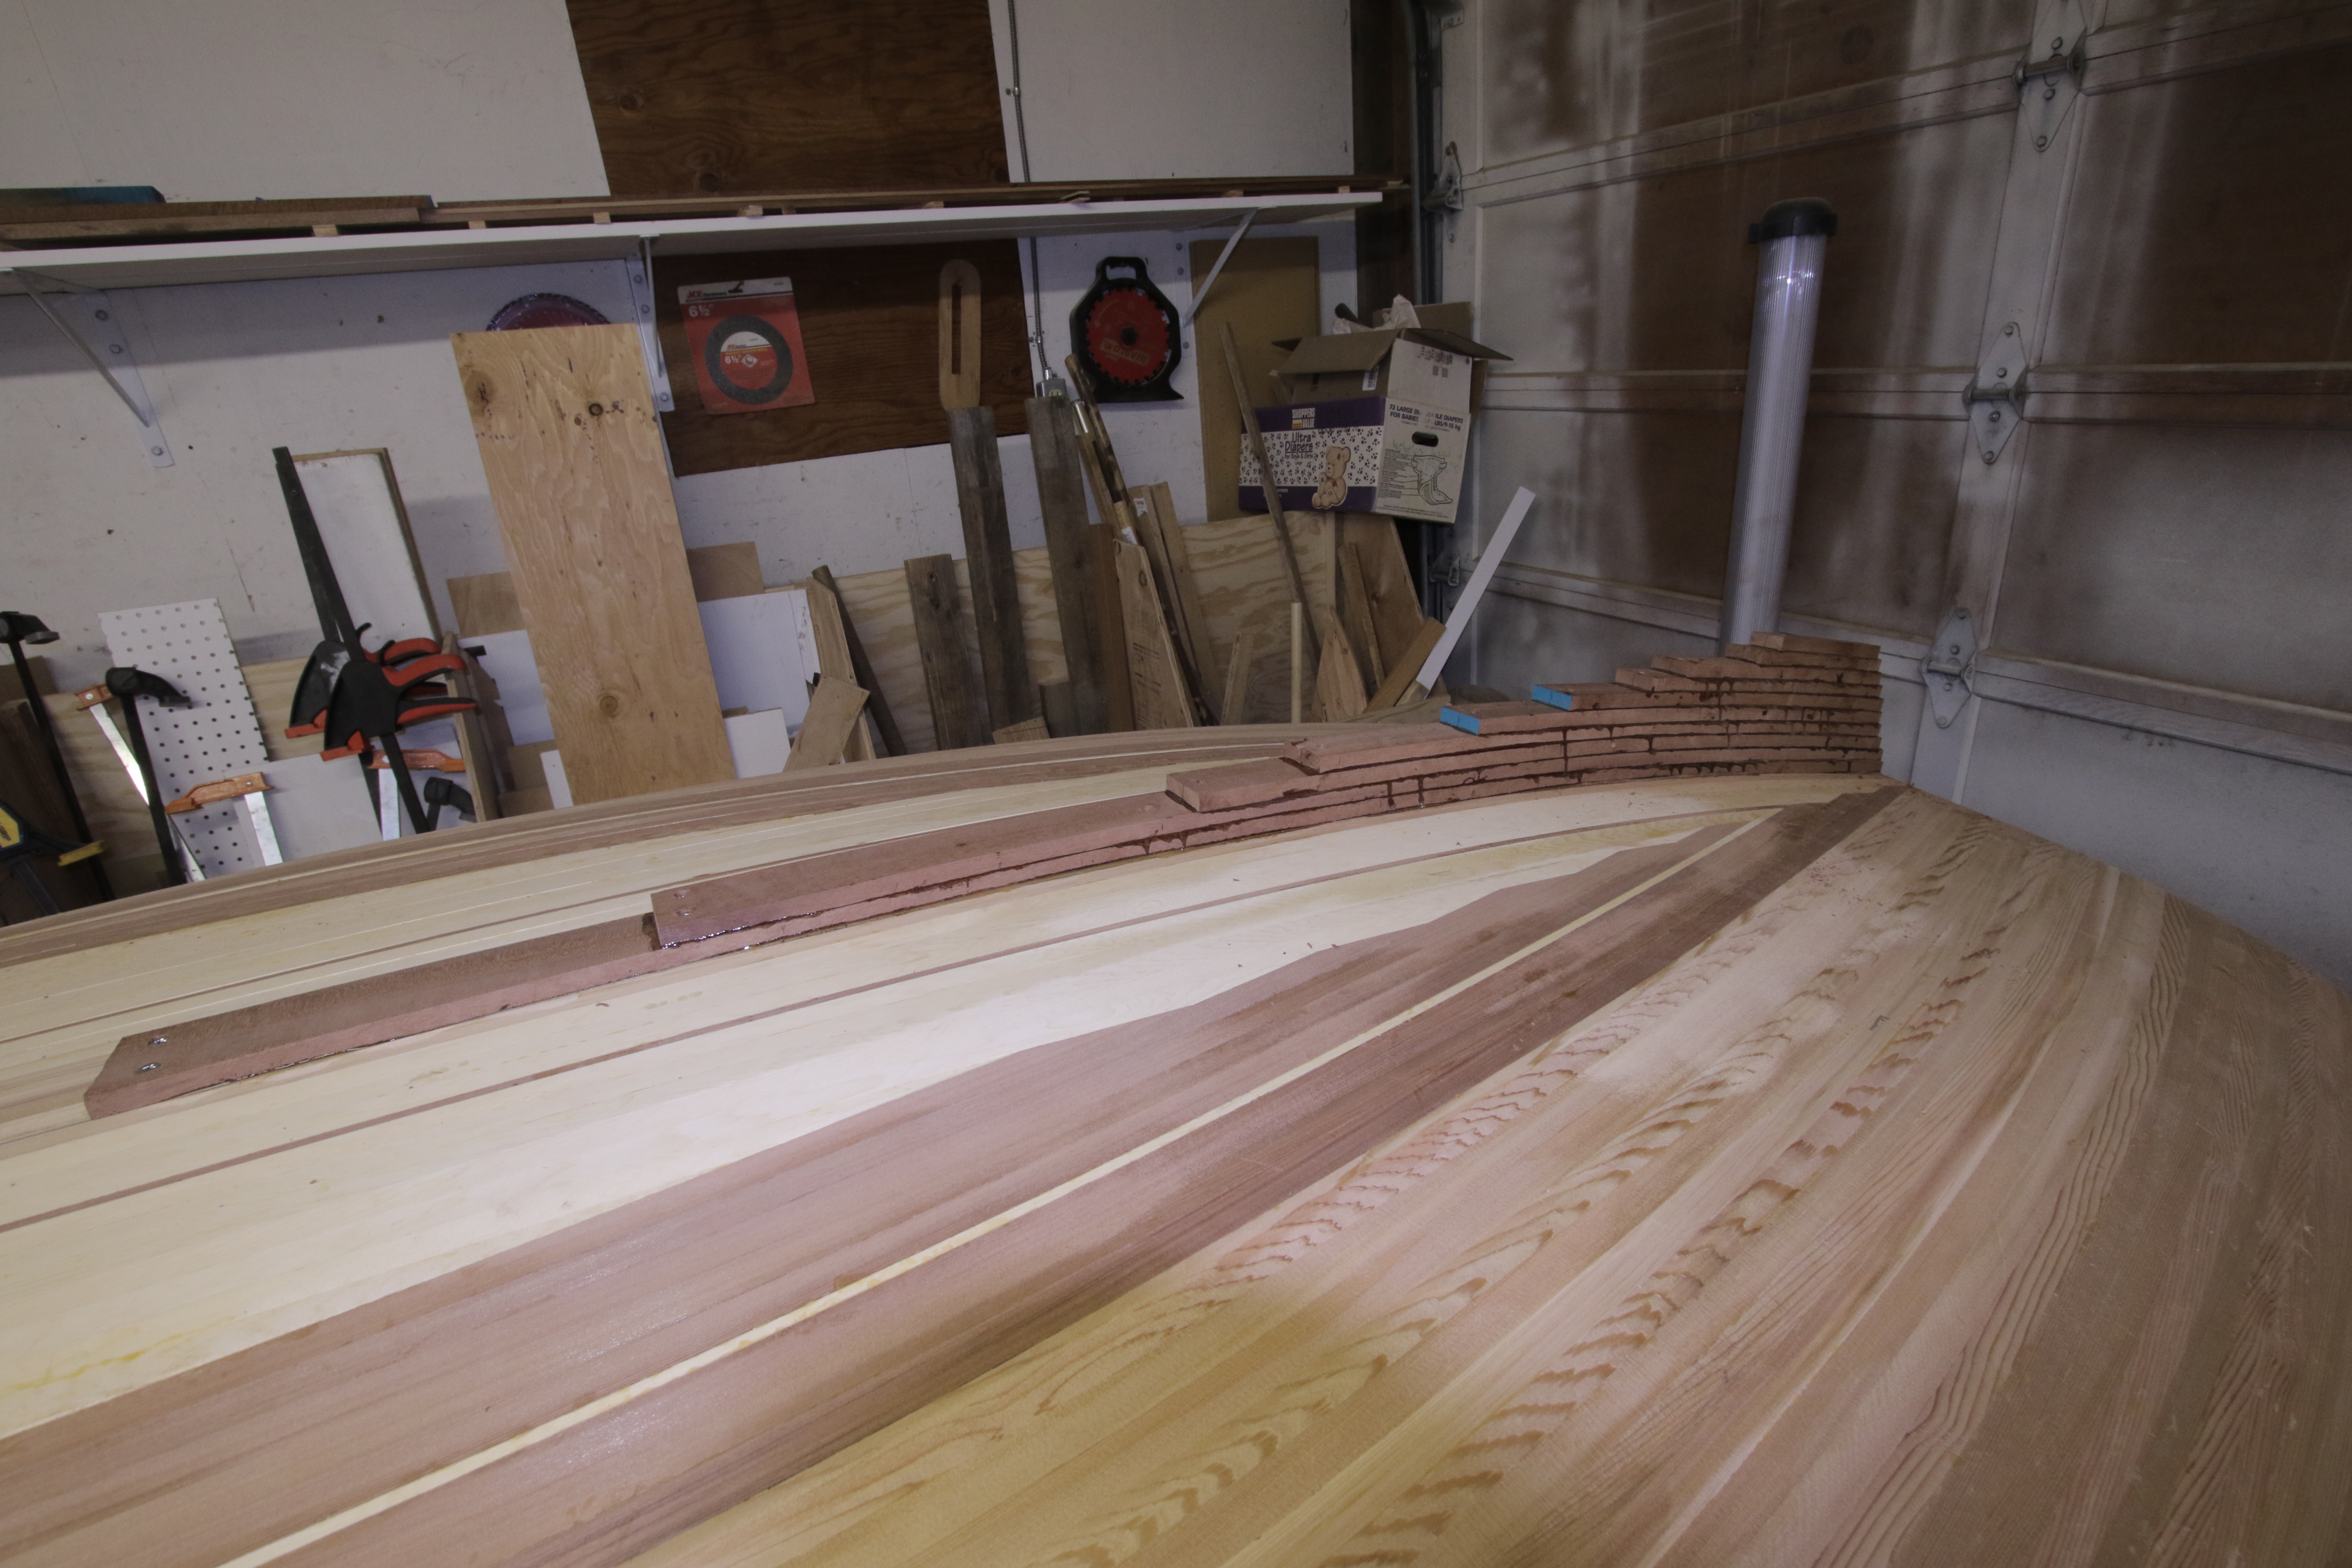
Getting harder to bend the dark red cedar. Almost there. Notice the little pin stripes I added today (click on pic to zoom in). 98 strips down, 22 to go, and each is getting a bit shorter.
Feb 16, 2017
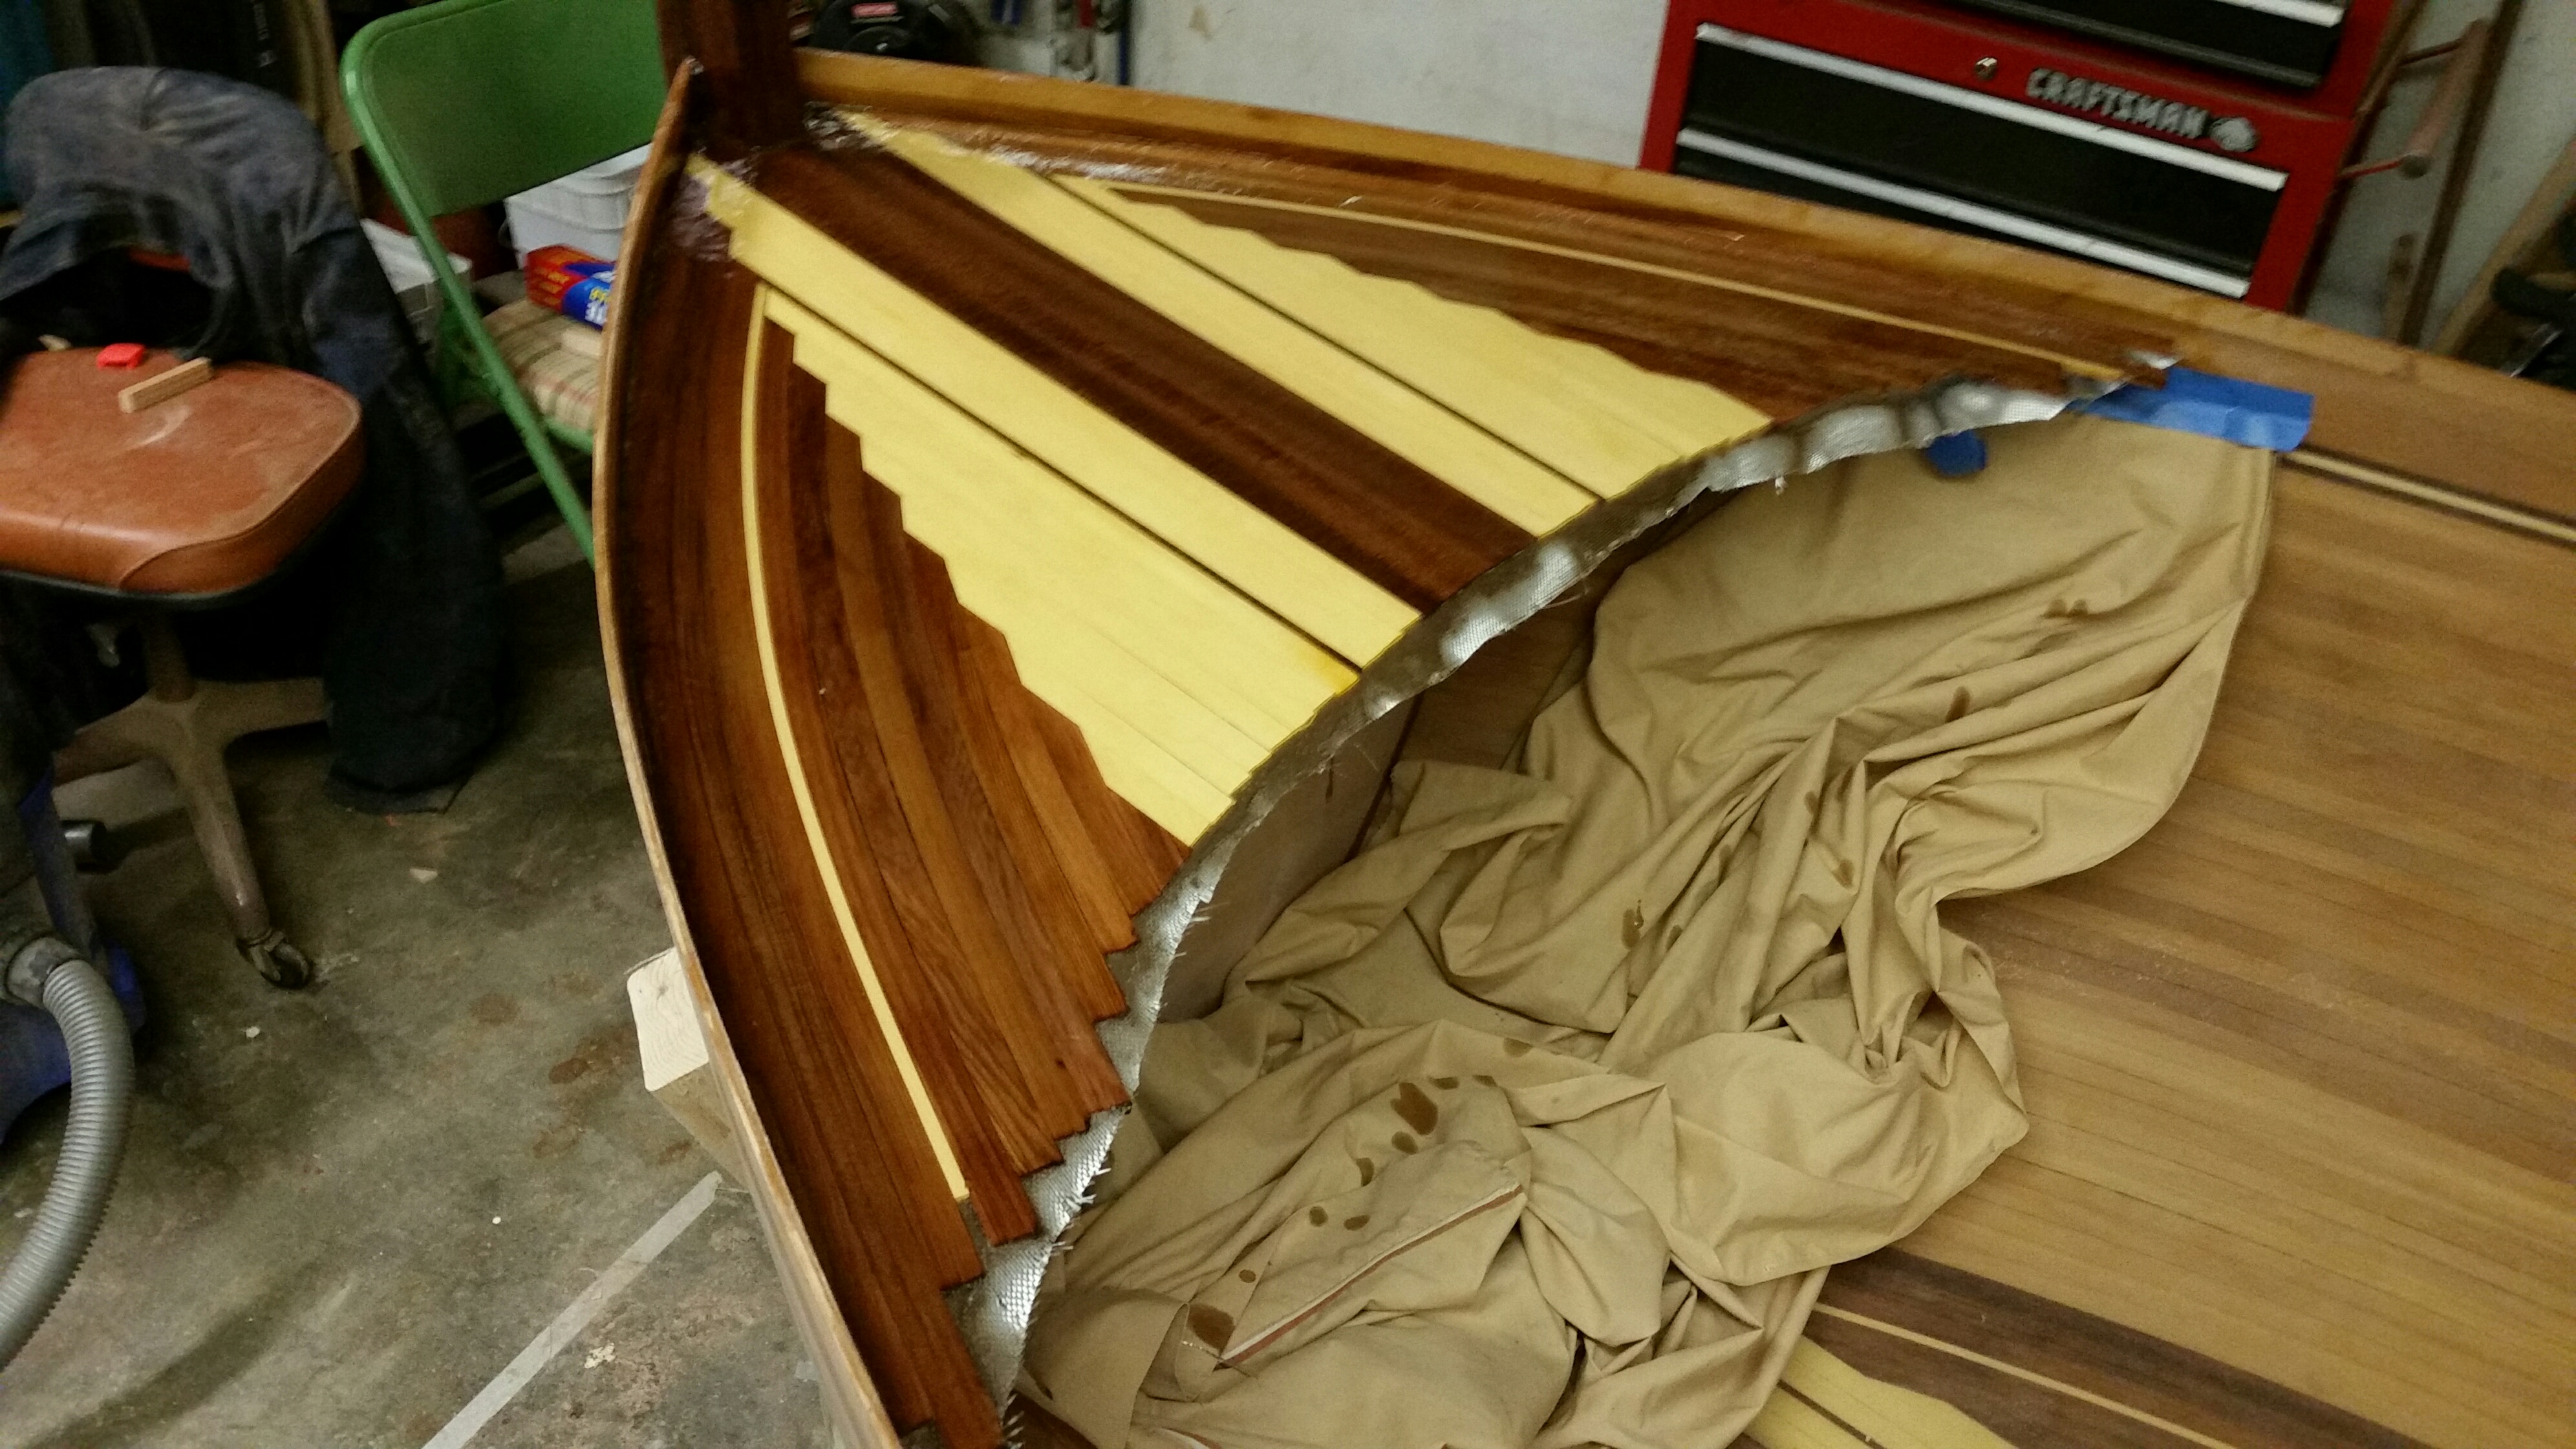
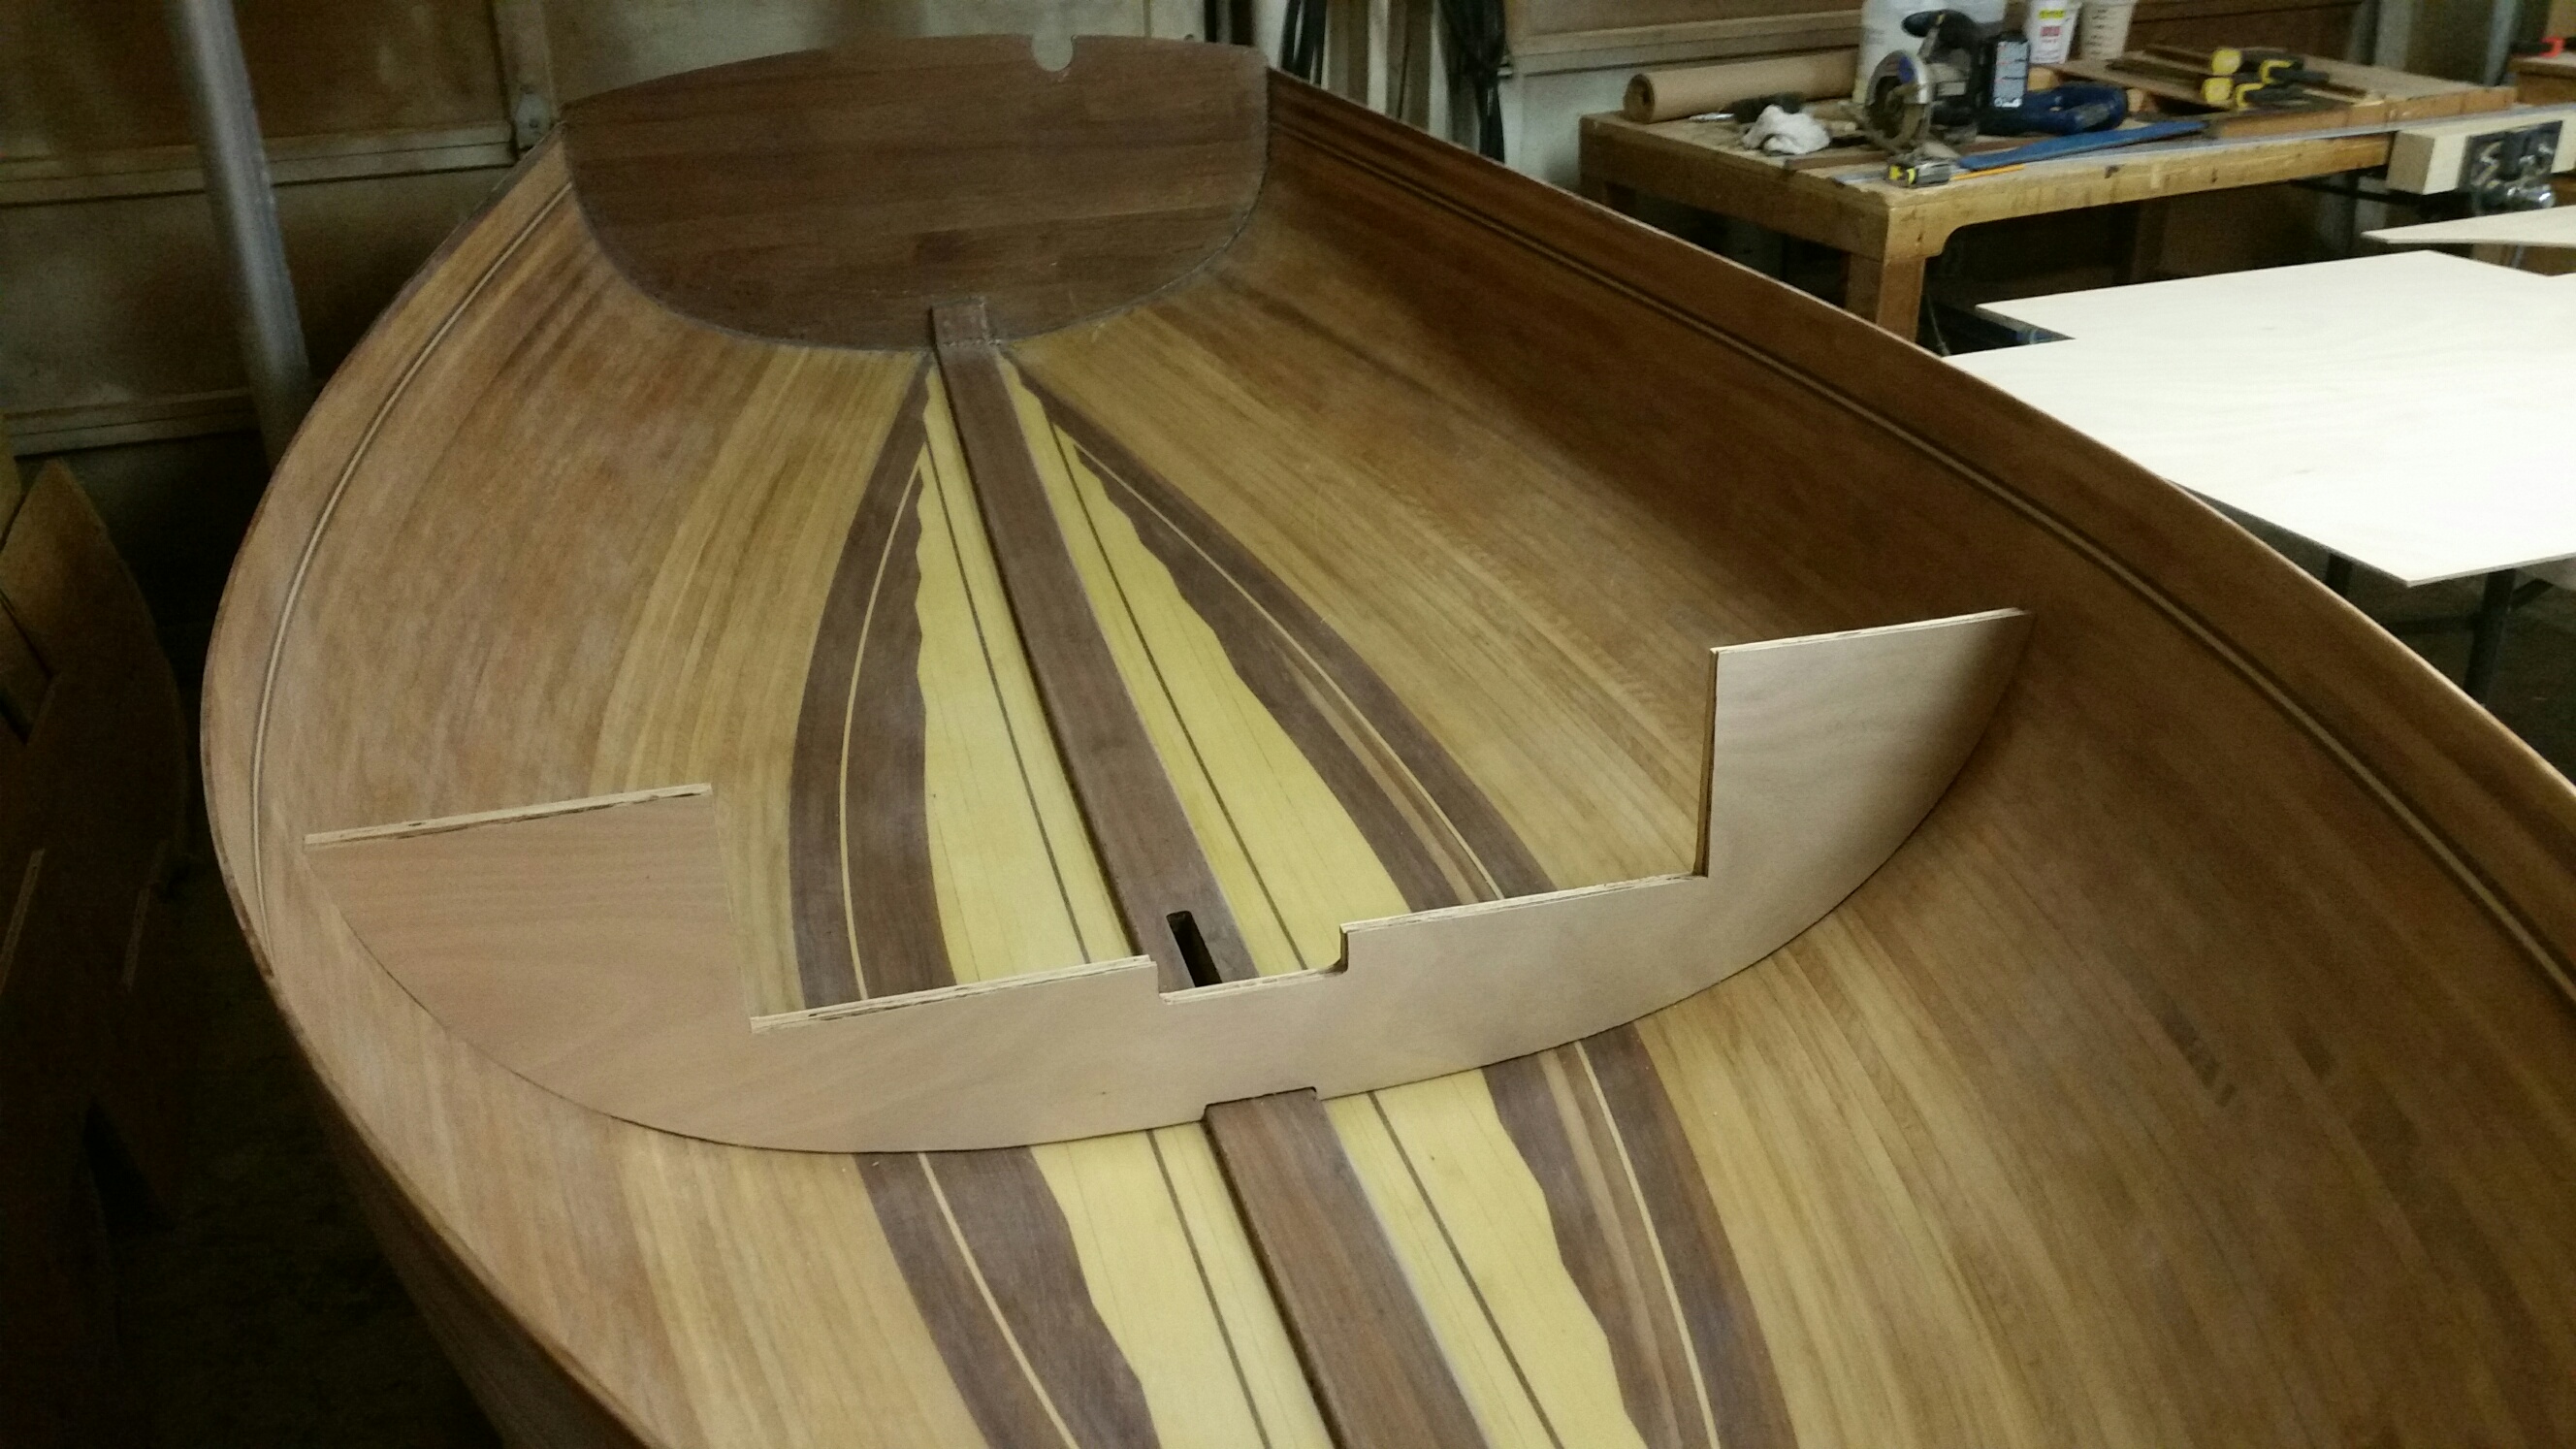
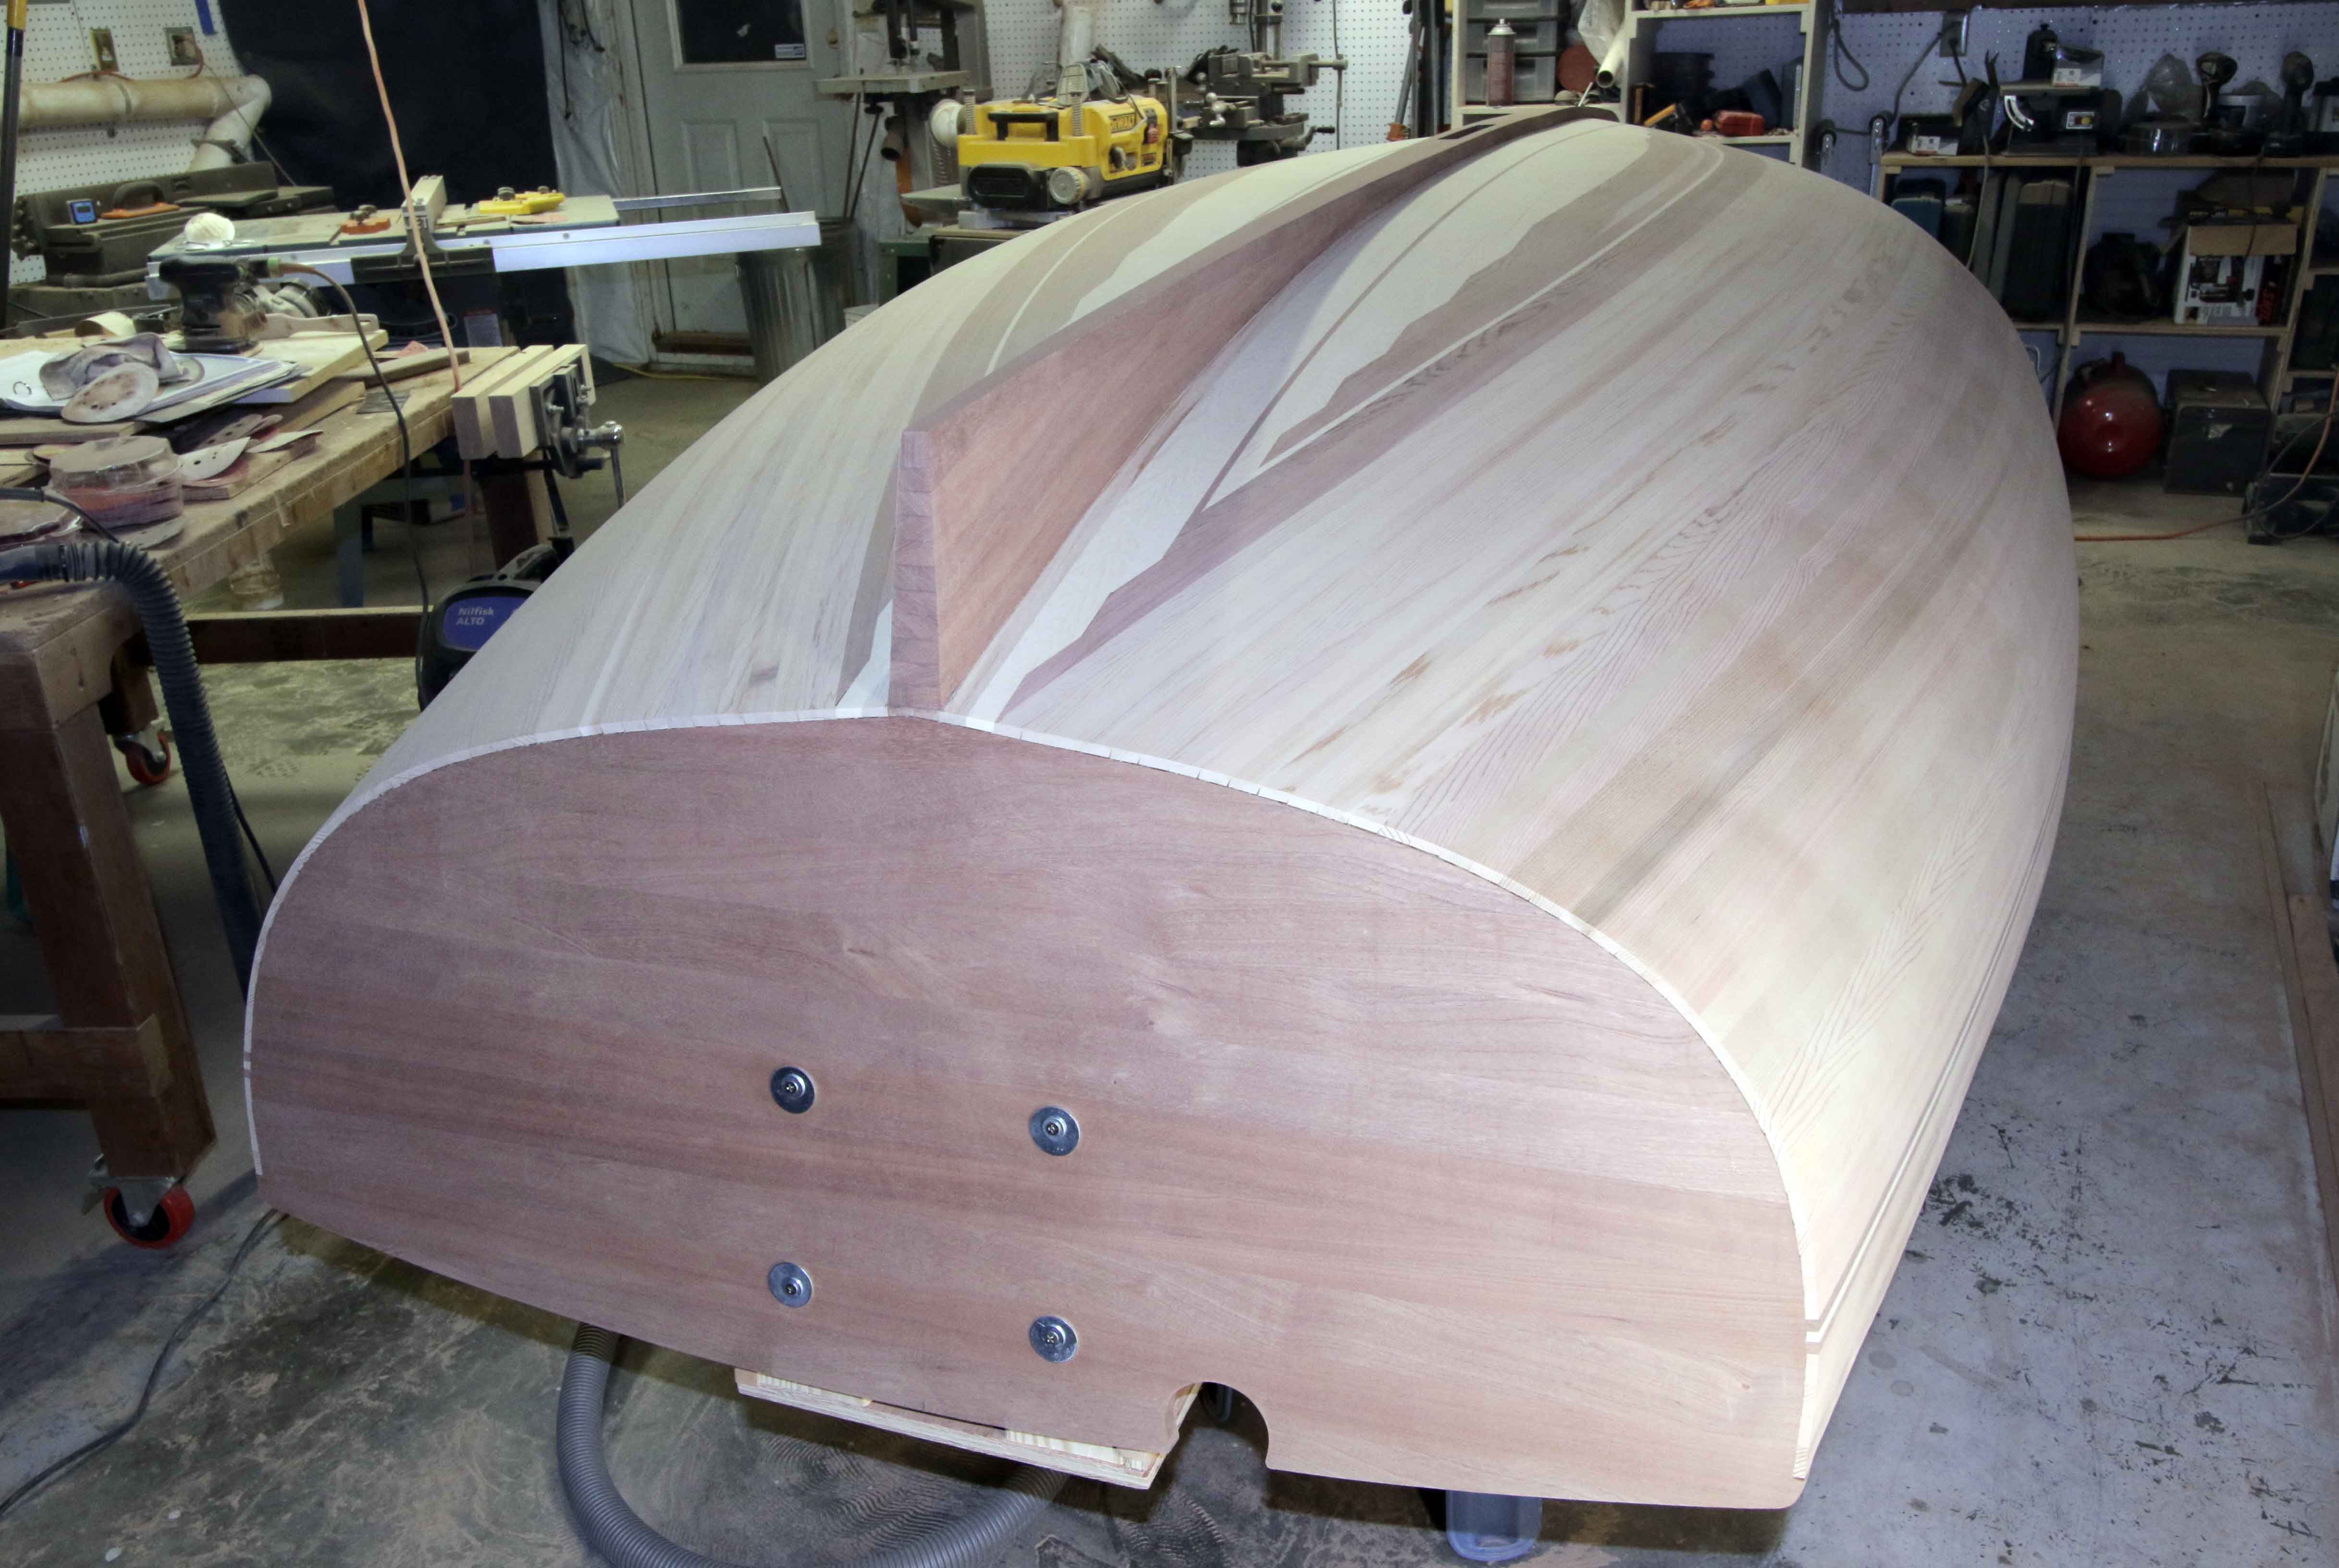
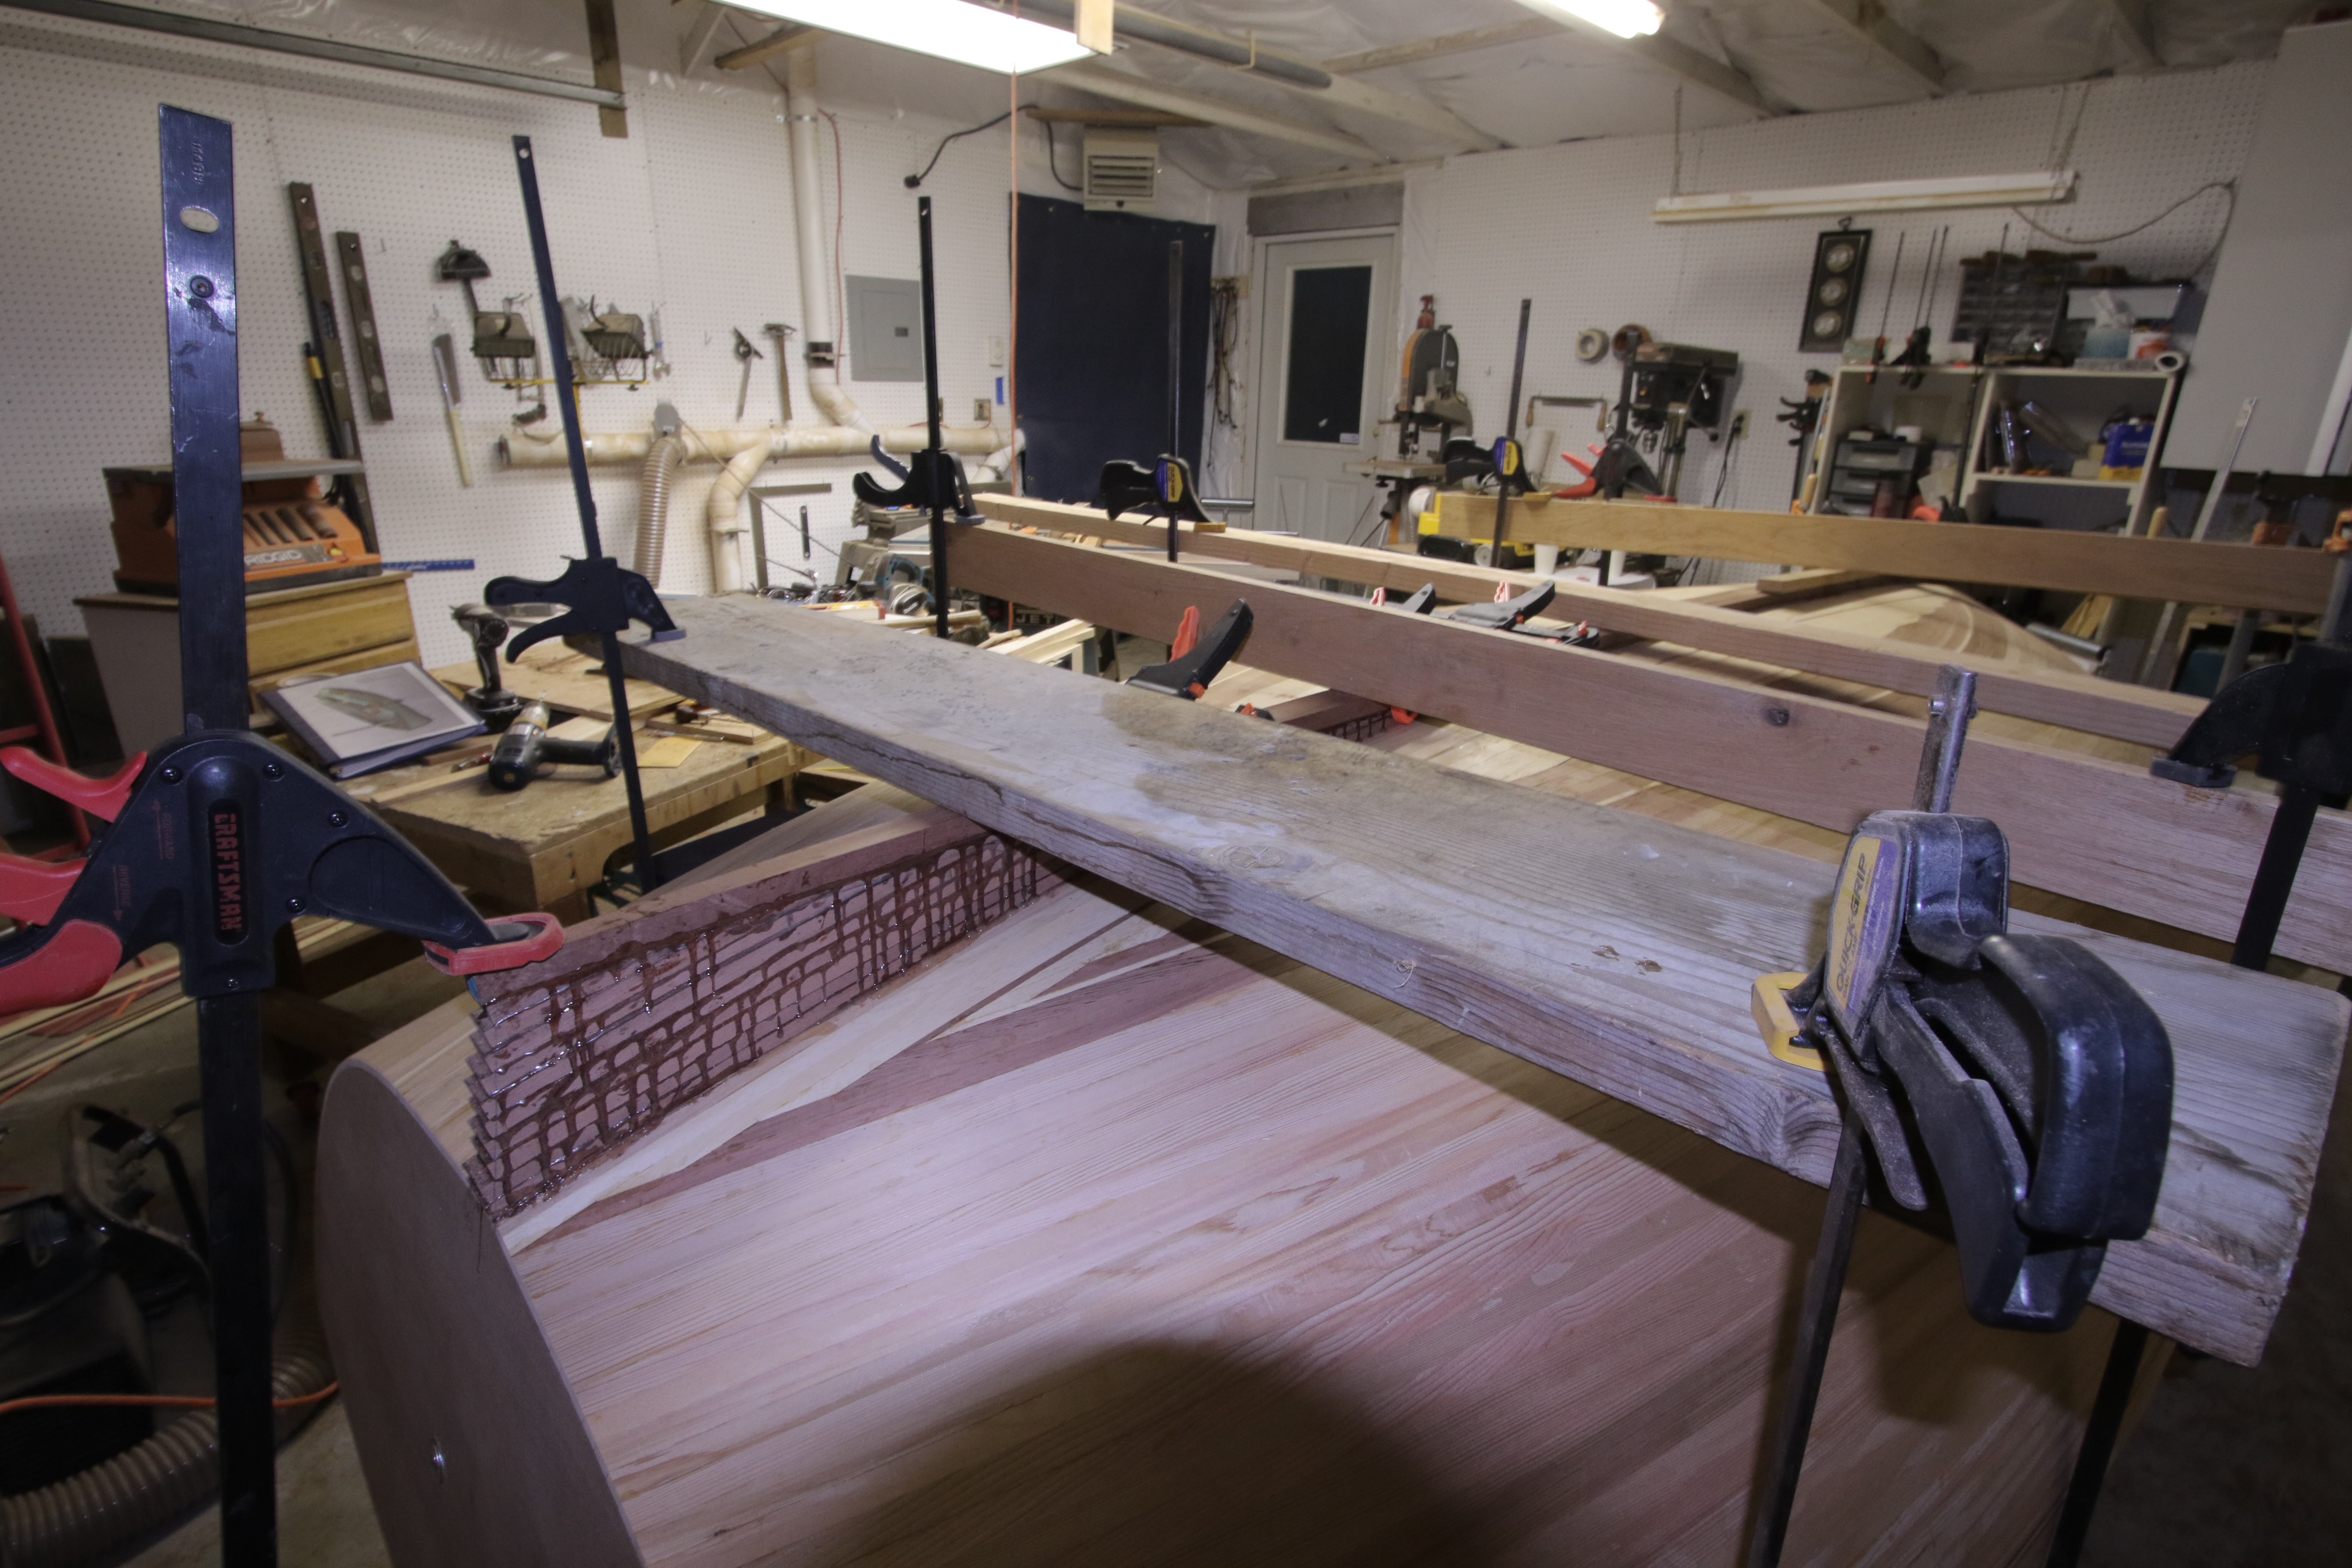
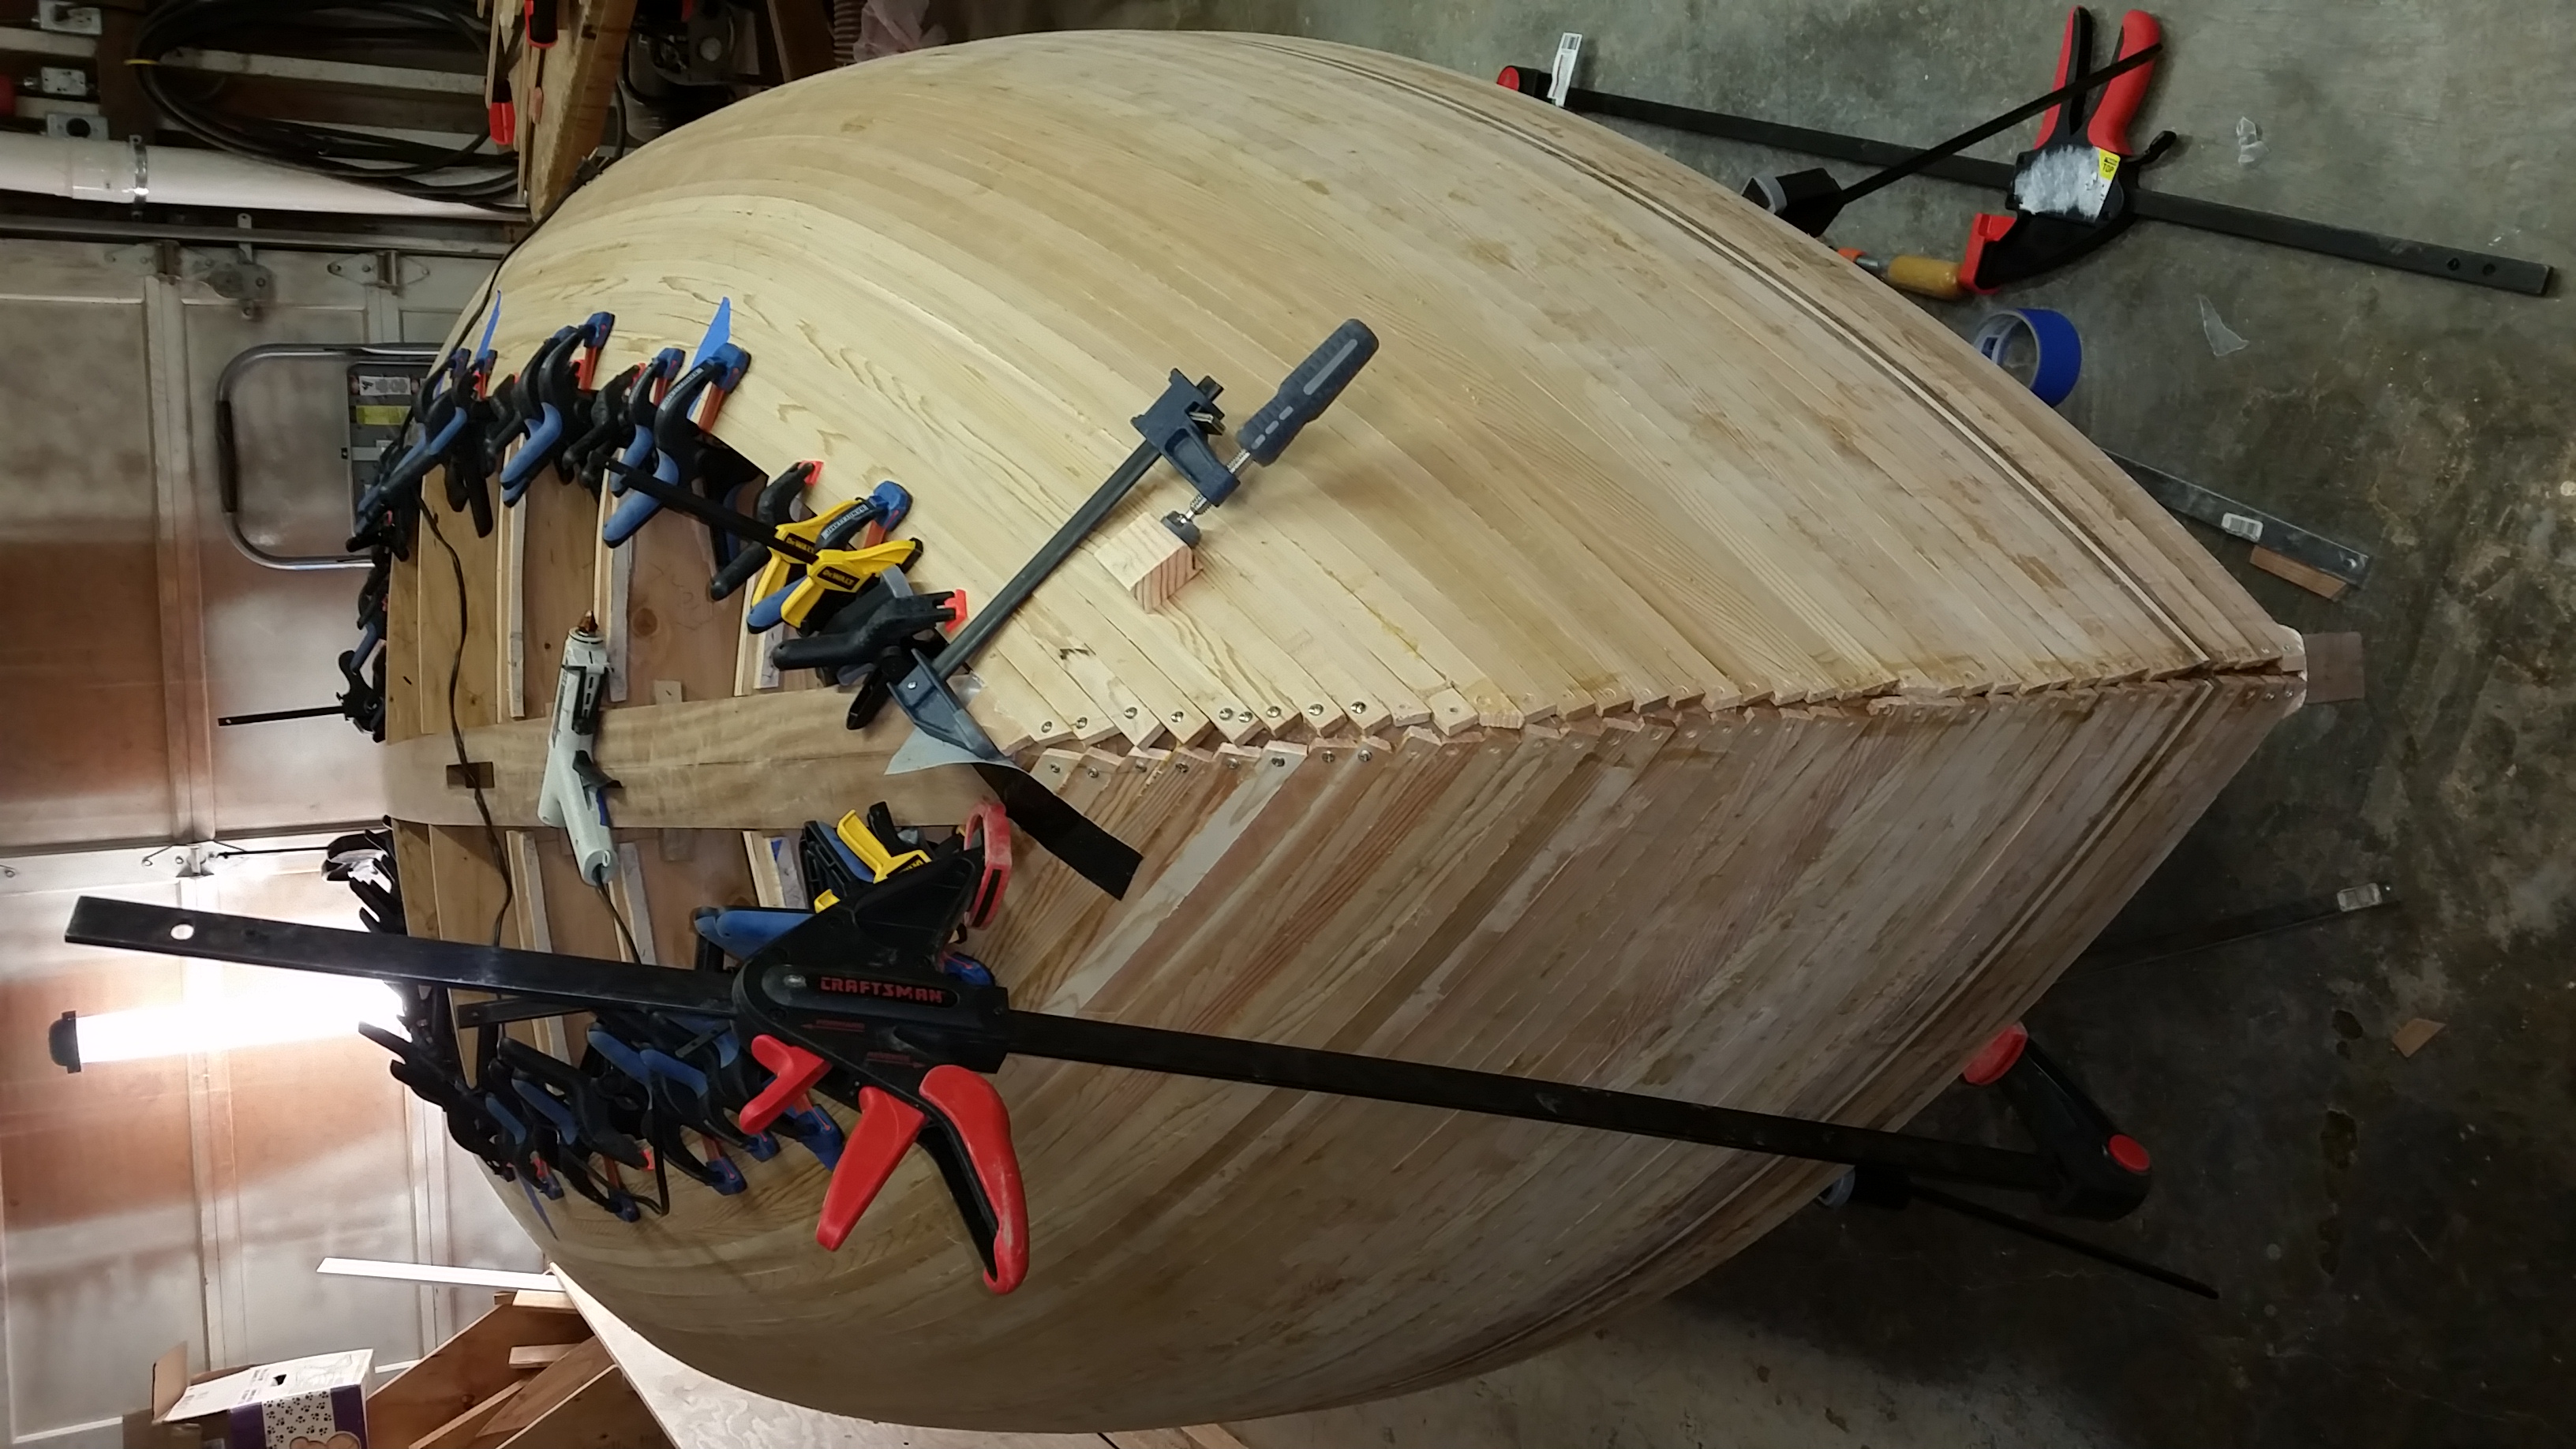
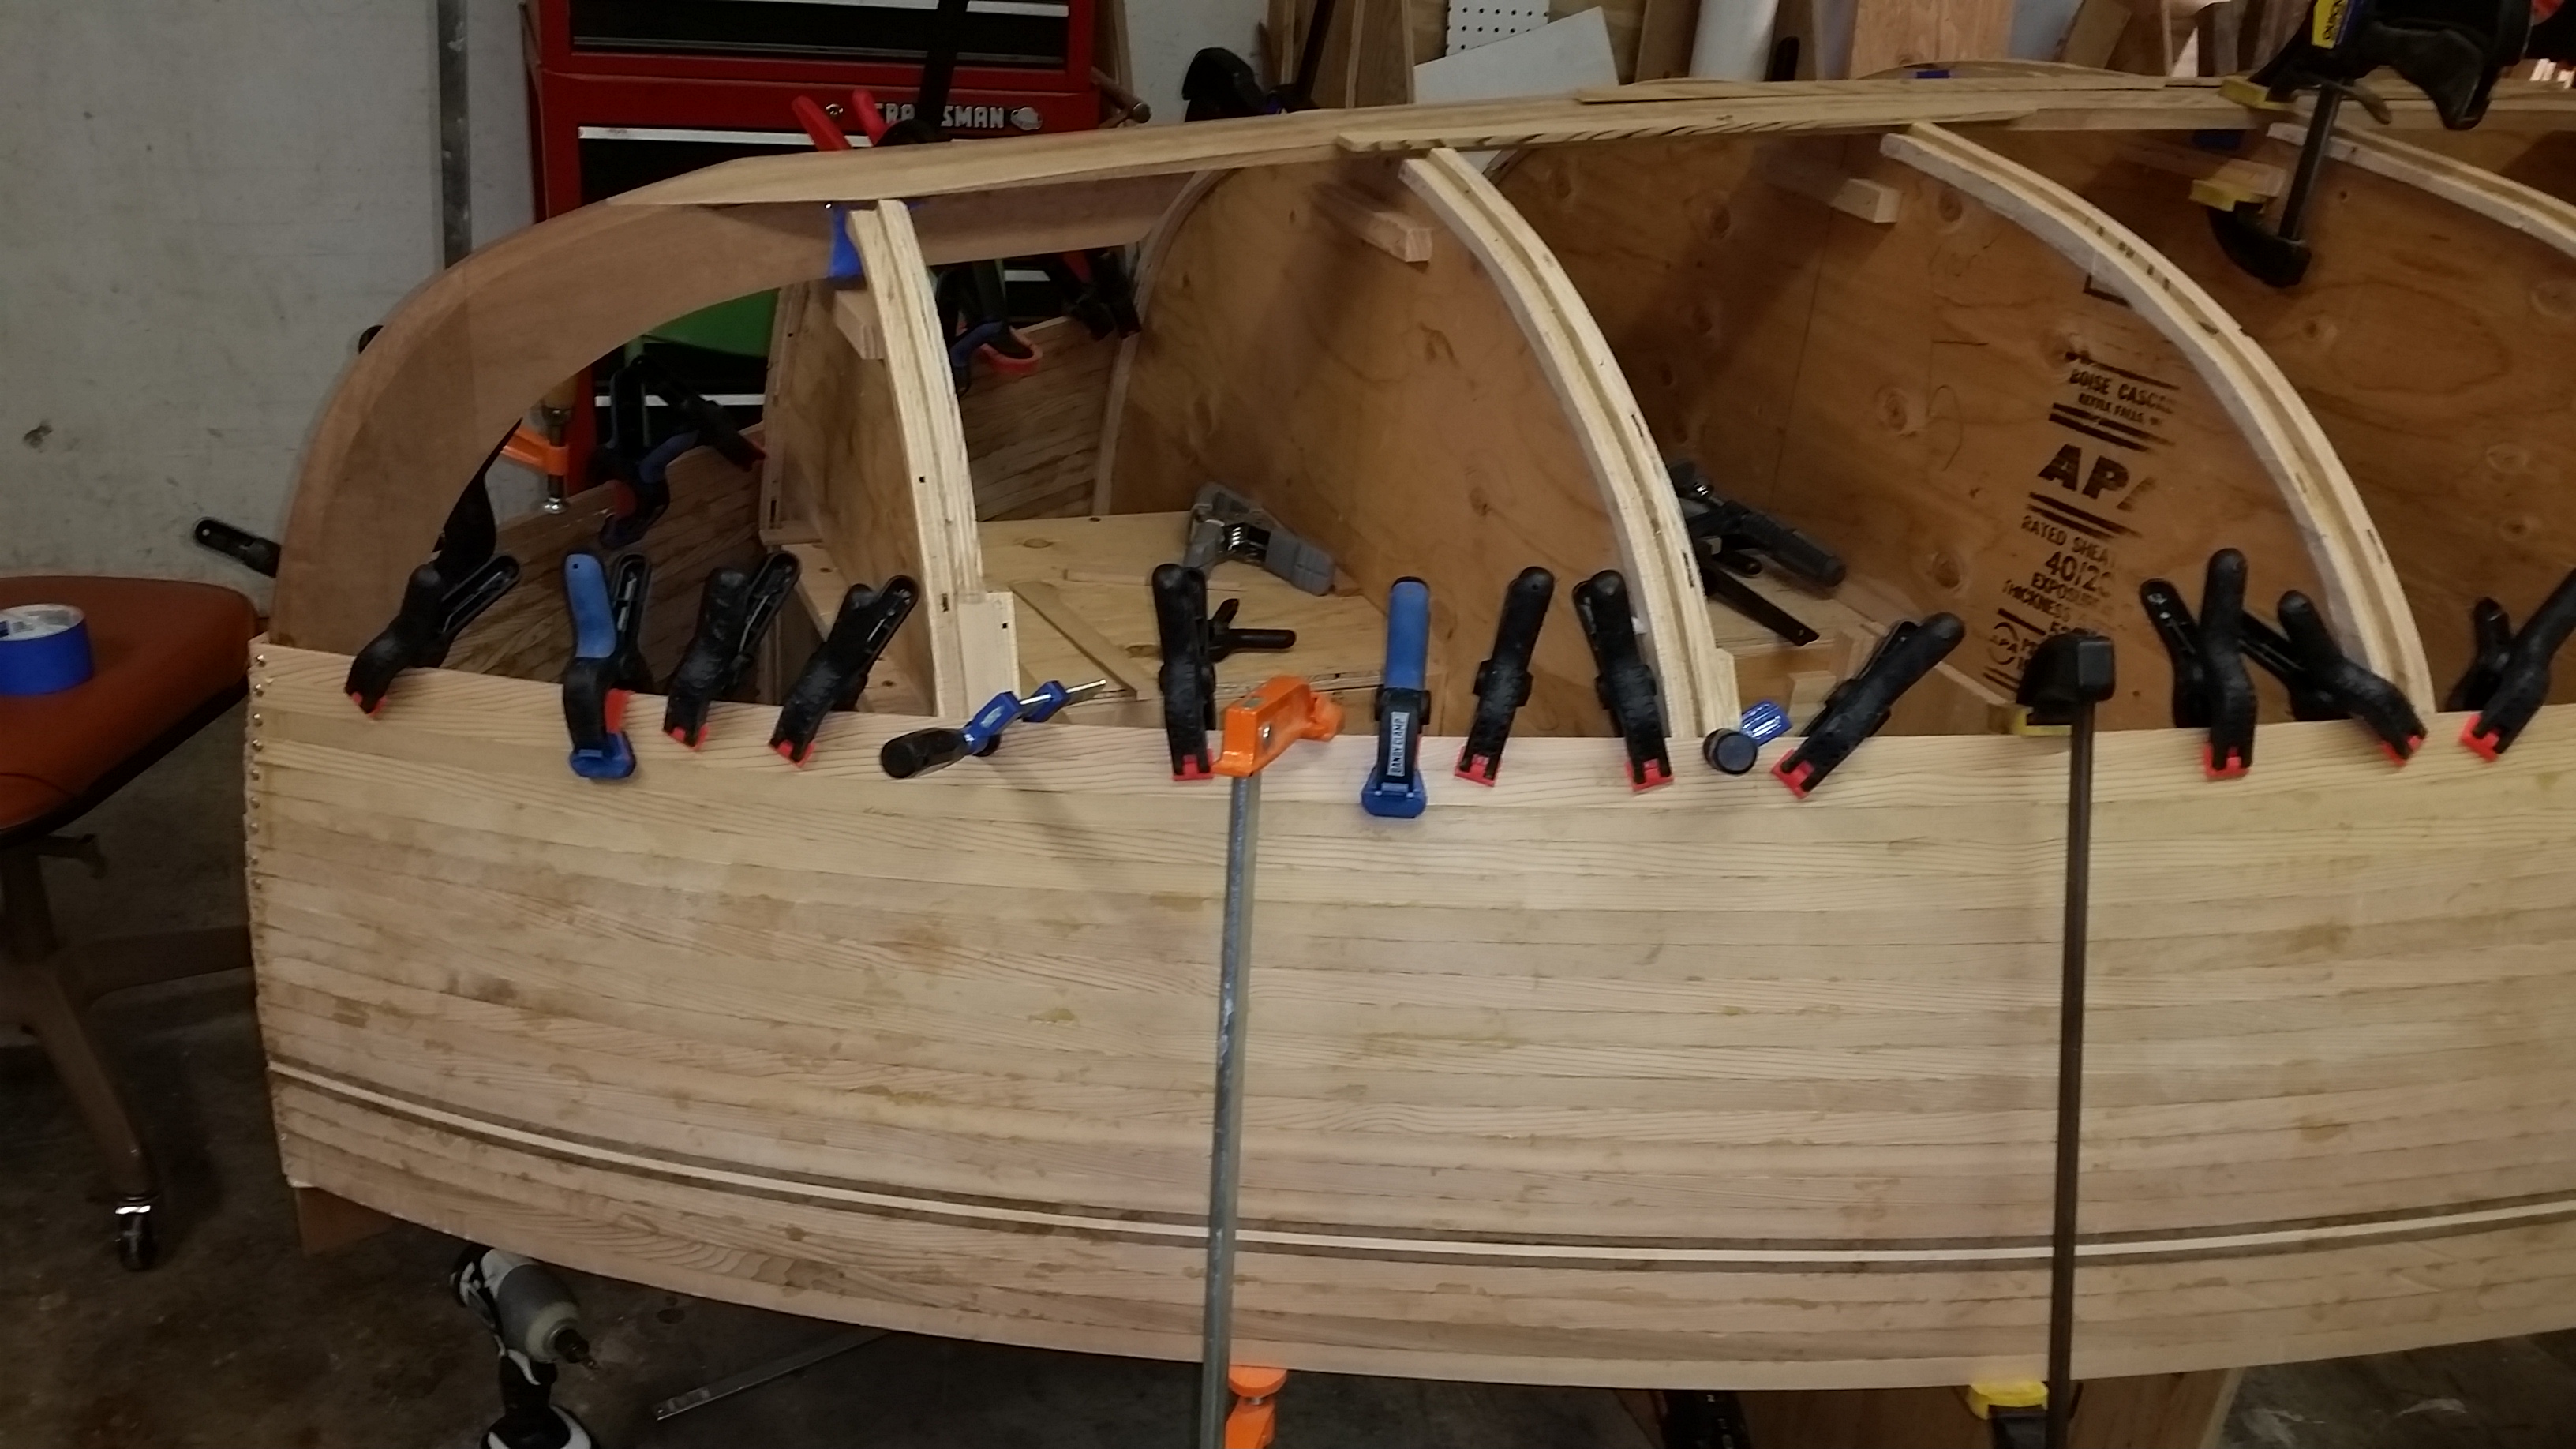
Started closing the bottom. Doing a side herringbone. Looks kind of messy with the epoxy I used along the keel area, but that will get planed flat and the keel will be on top of it. Using a Japanese pull saw to cut the pointy ends. Works pretty well. The White Alaskan Cedar runs parallel to the keel and is much easier than the curved dark Red Western Cedar, but I haven’t found any of it impossible, so on I go.

Feb 9, 2017
Getting closer to closing time. Just glad these strips are as flexible as they are, as they have a lot of bend and twist, but not so much that I need to heat gun nor steam them. Still just hot glue and no staples! I got closer to where the stem ties into the keel the angle on bottom edge of each strip reduced back to a 5 degree angle. Had peaked at 11 degrees for a couple strips.

Feb 4, 2017
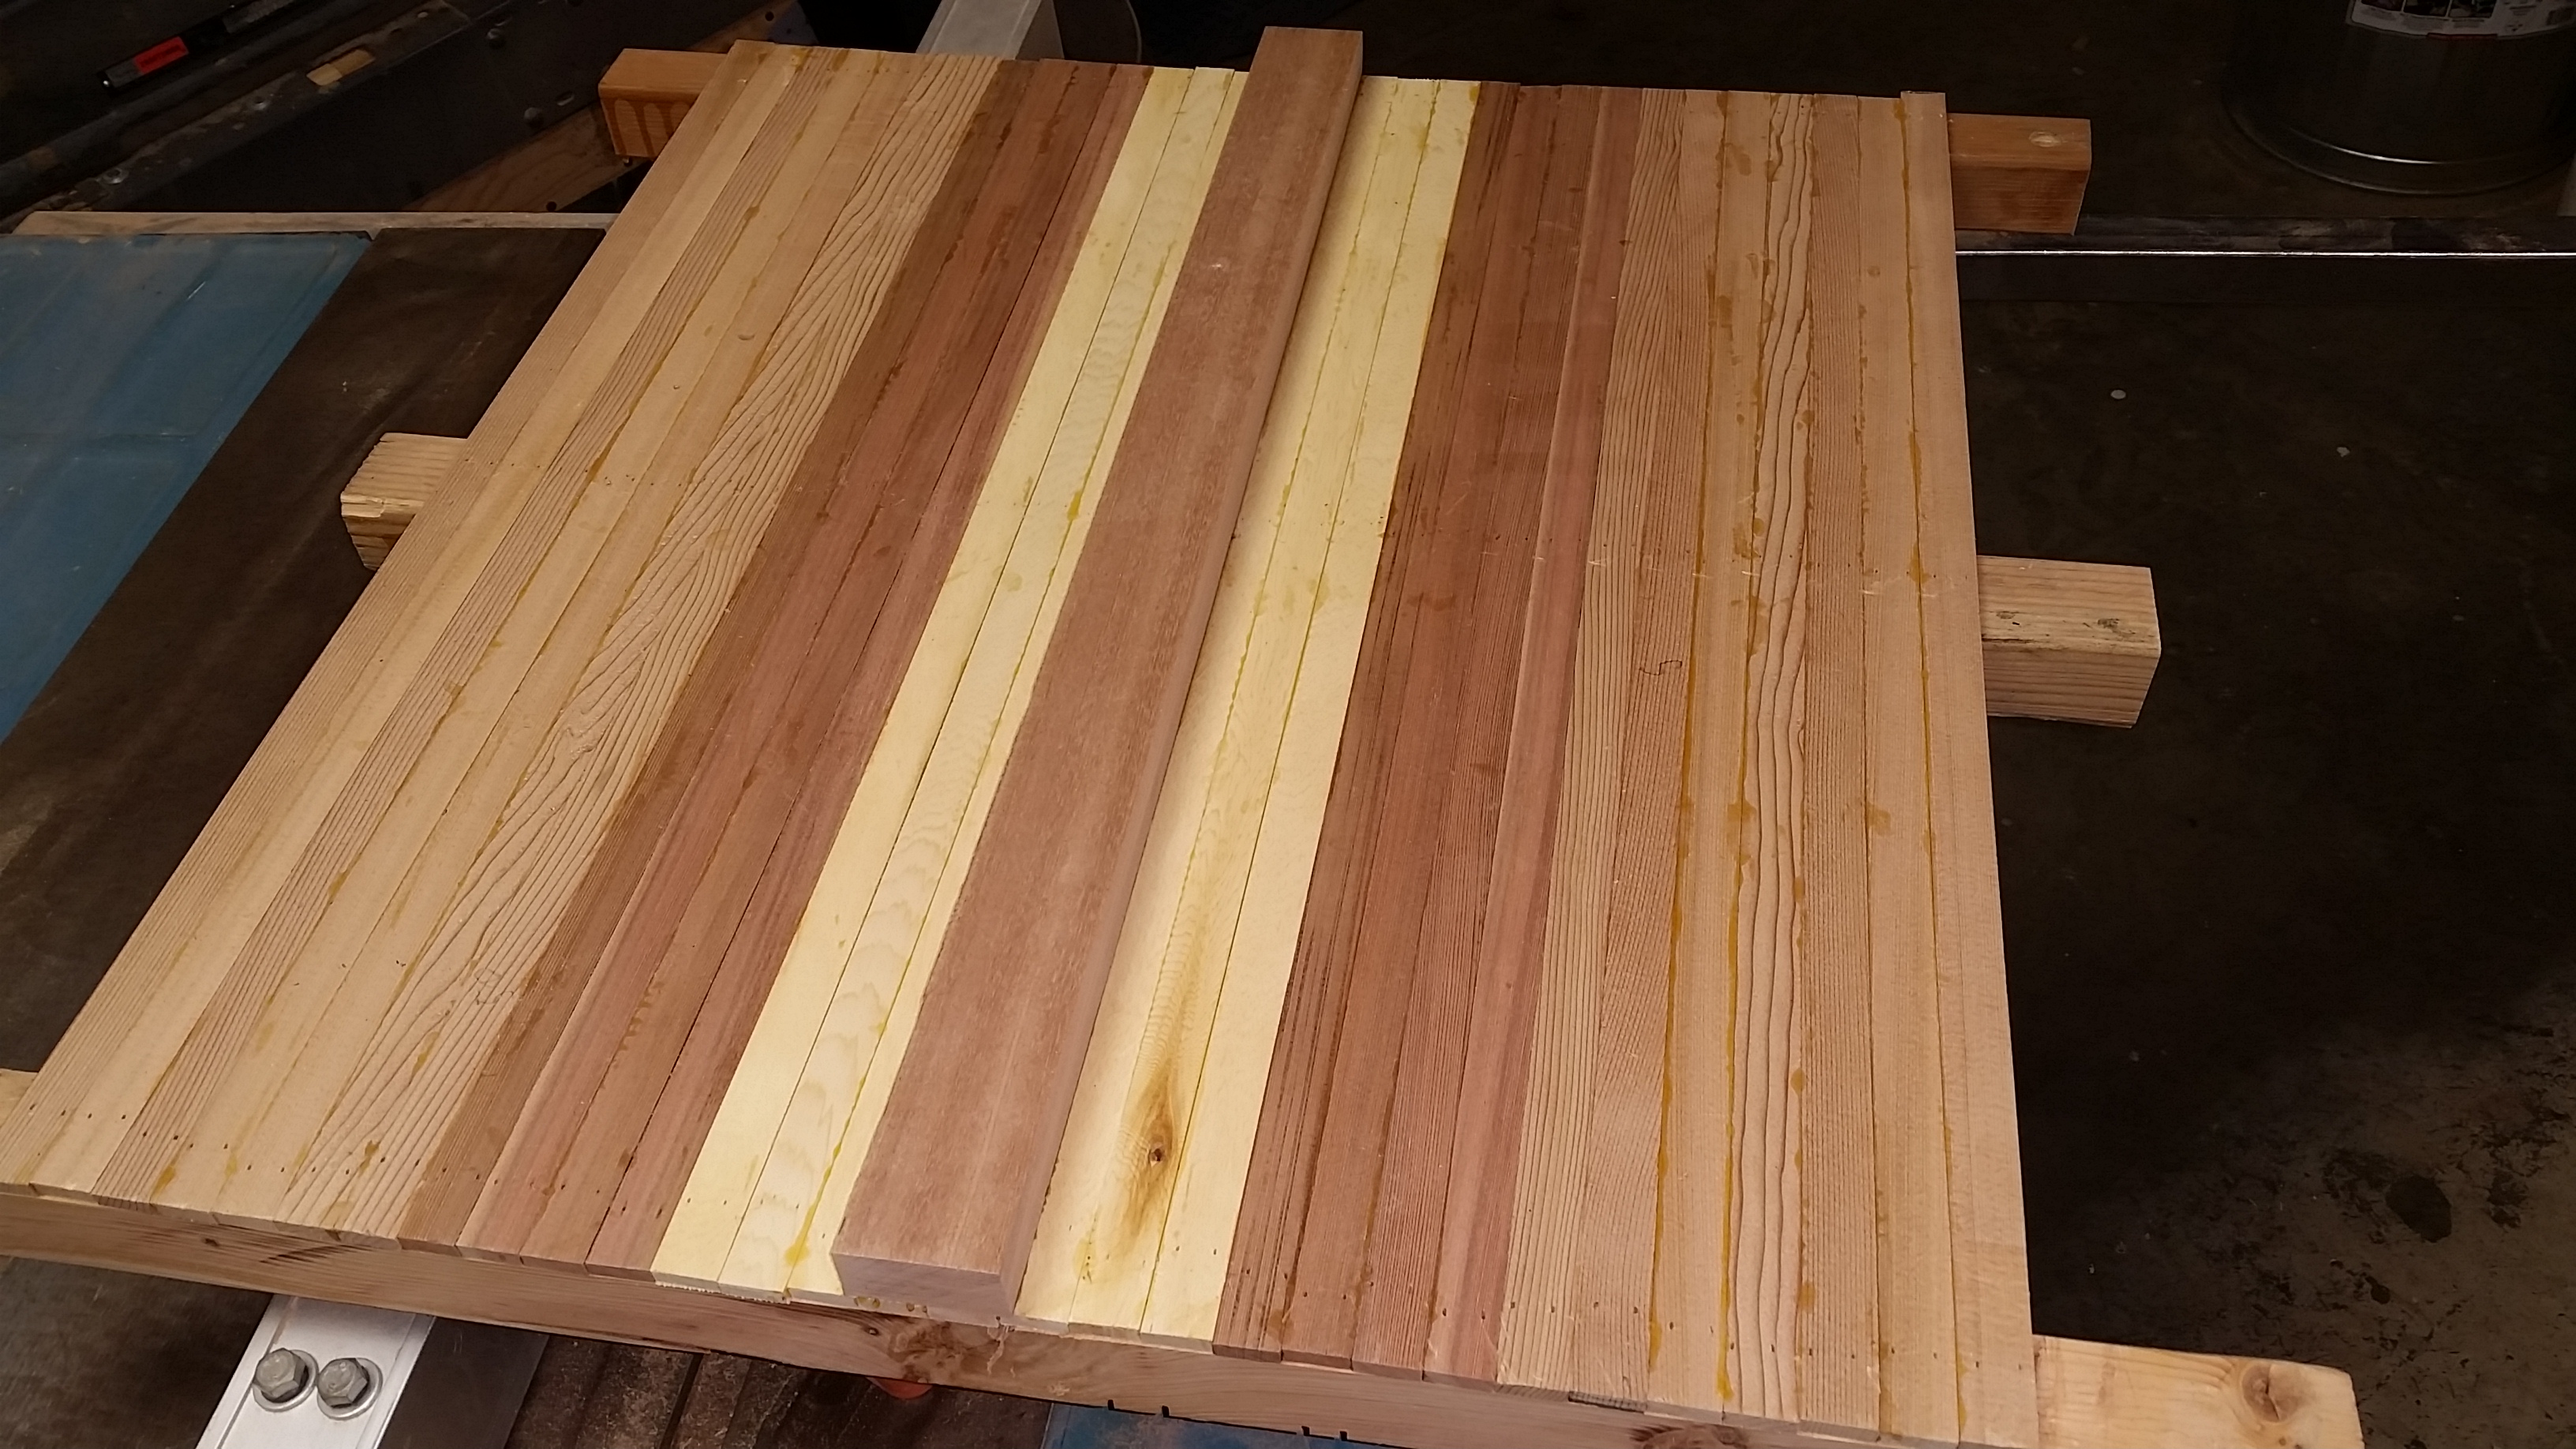
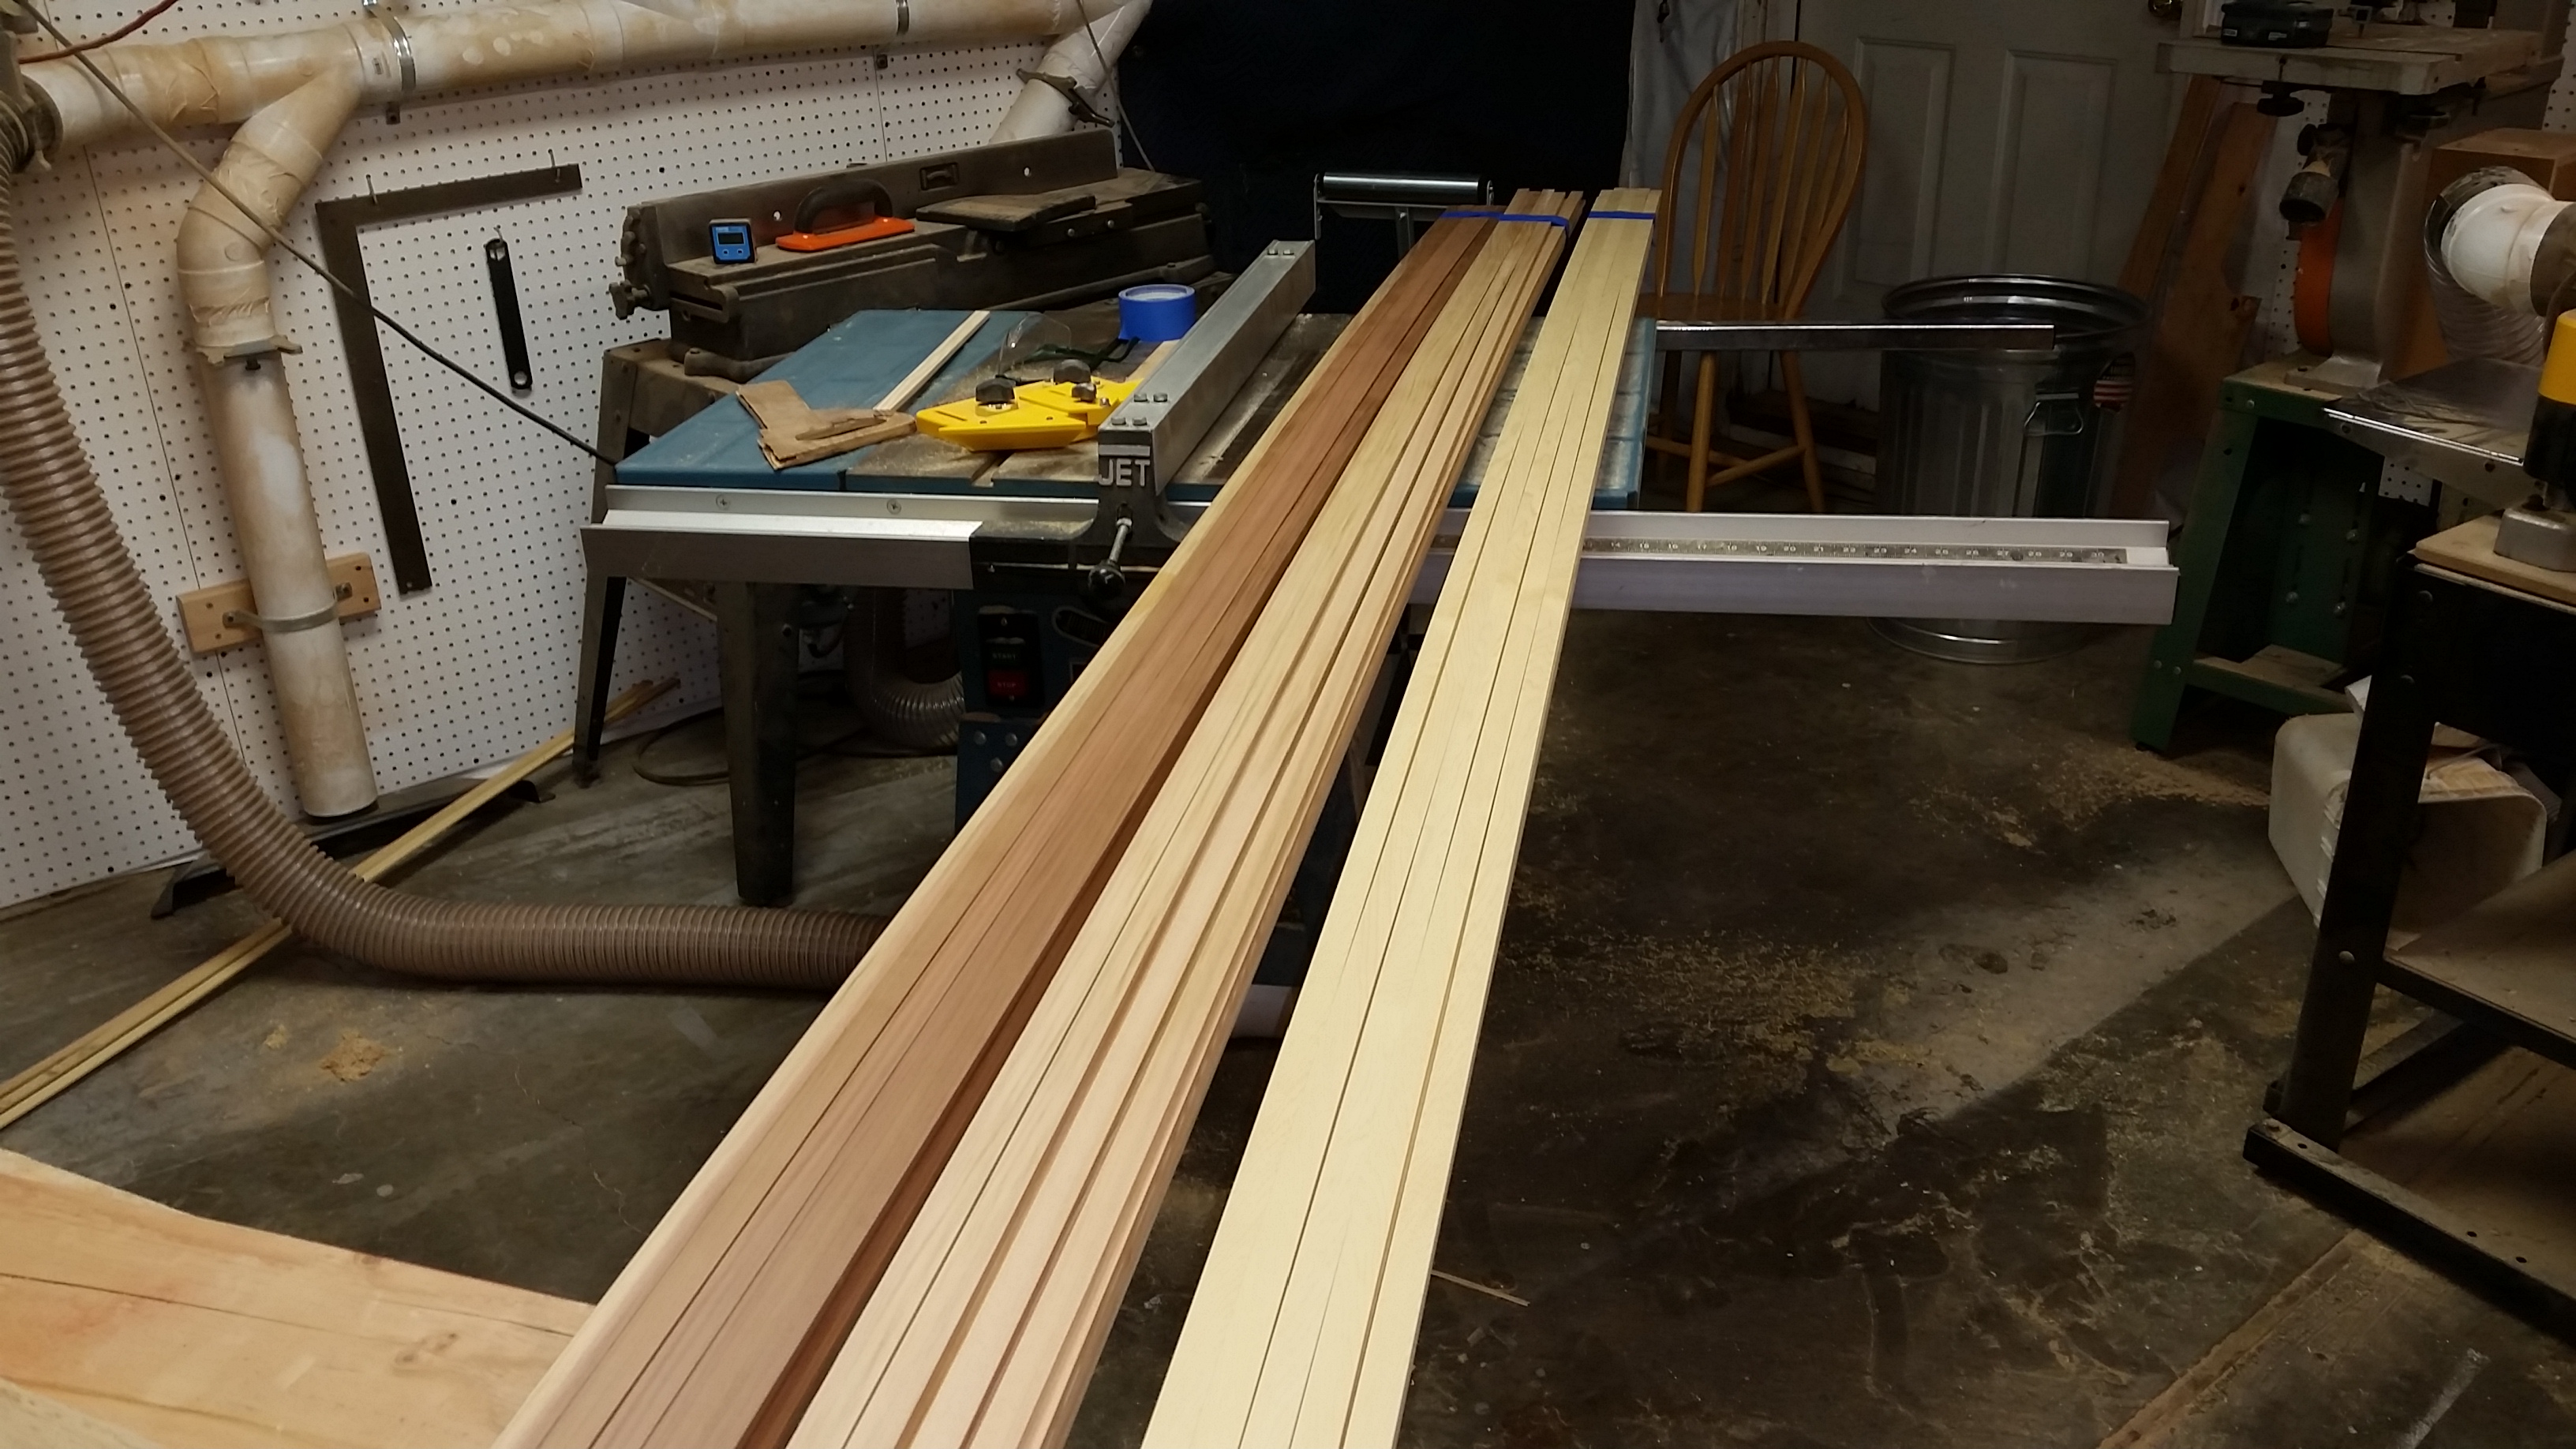
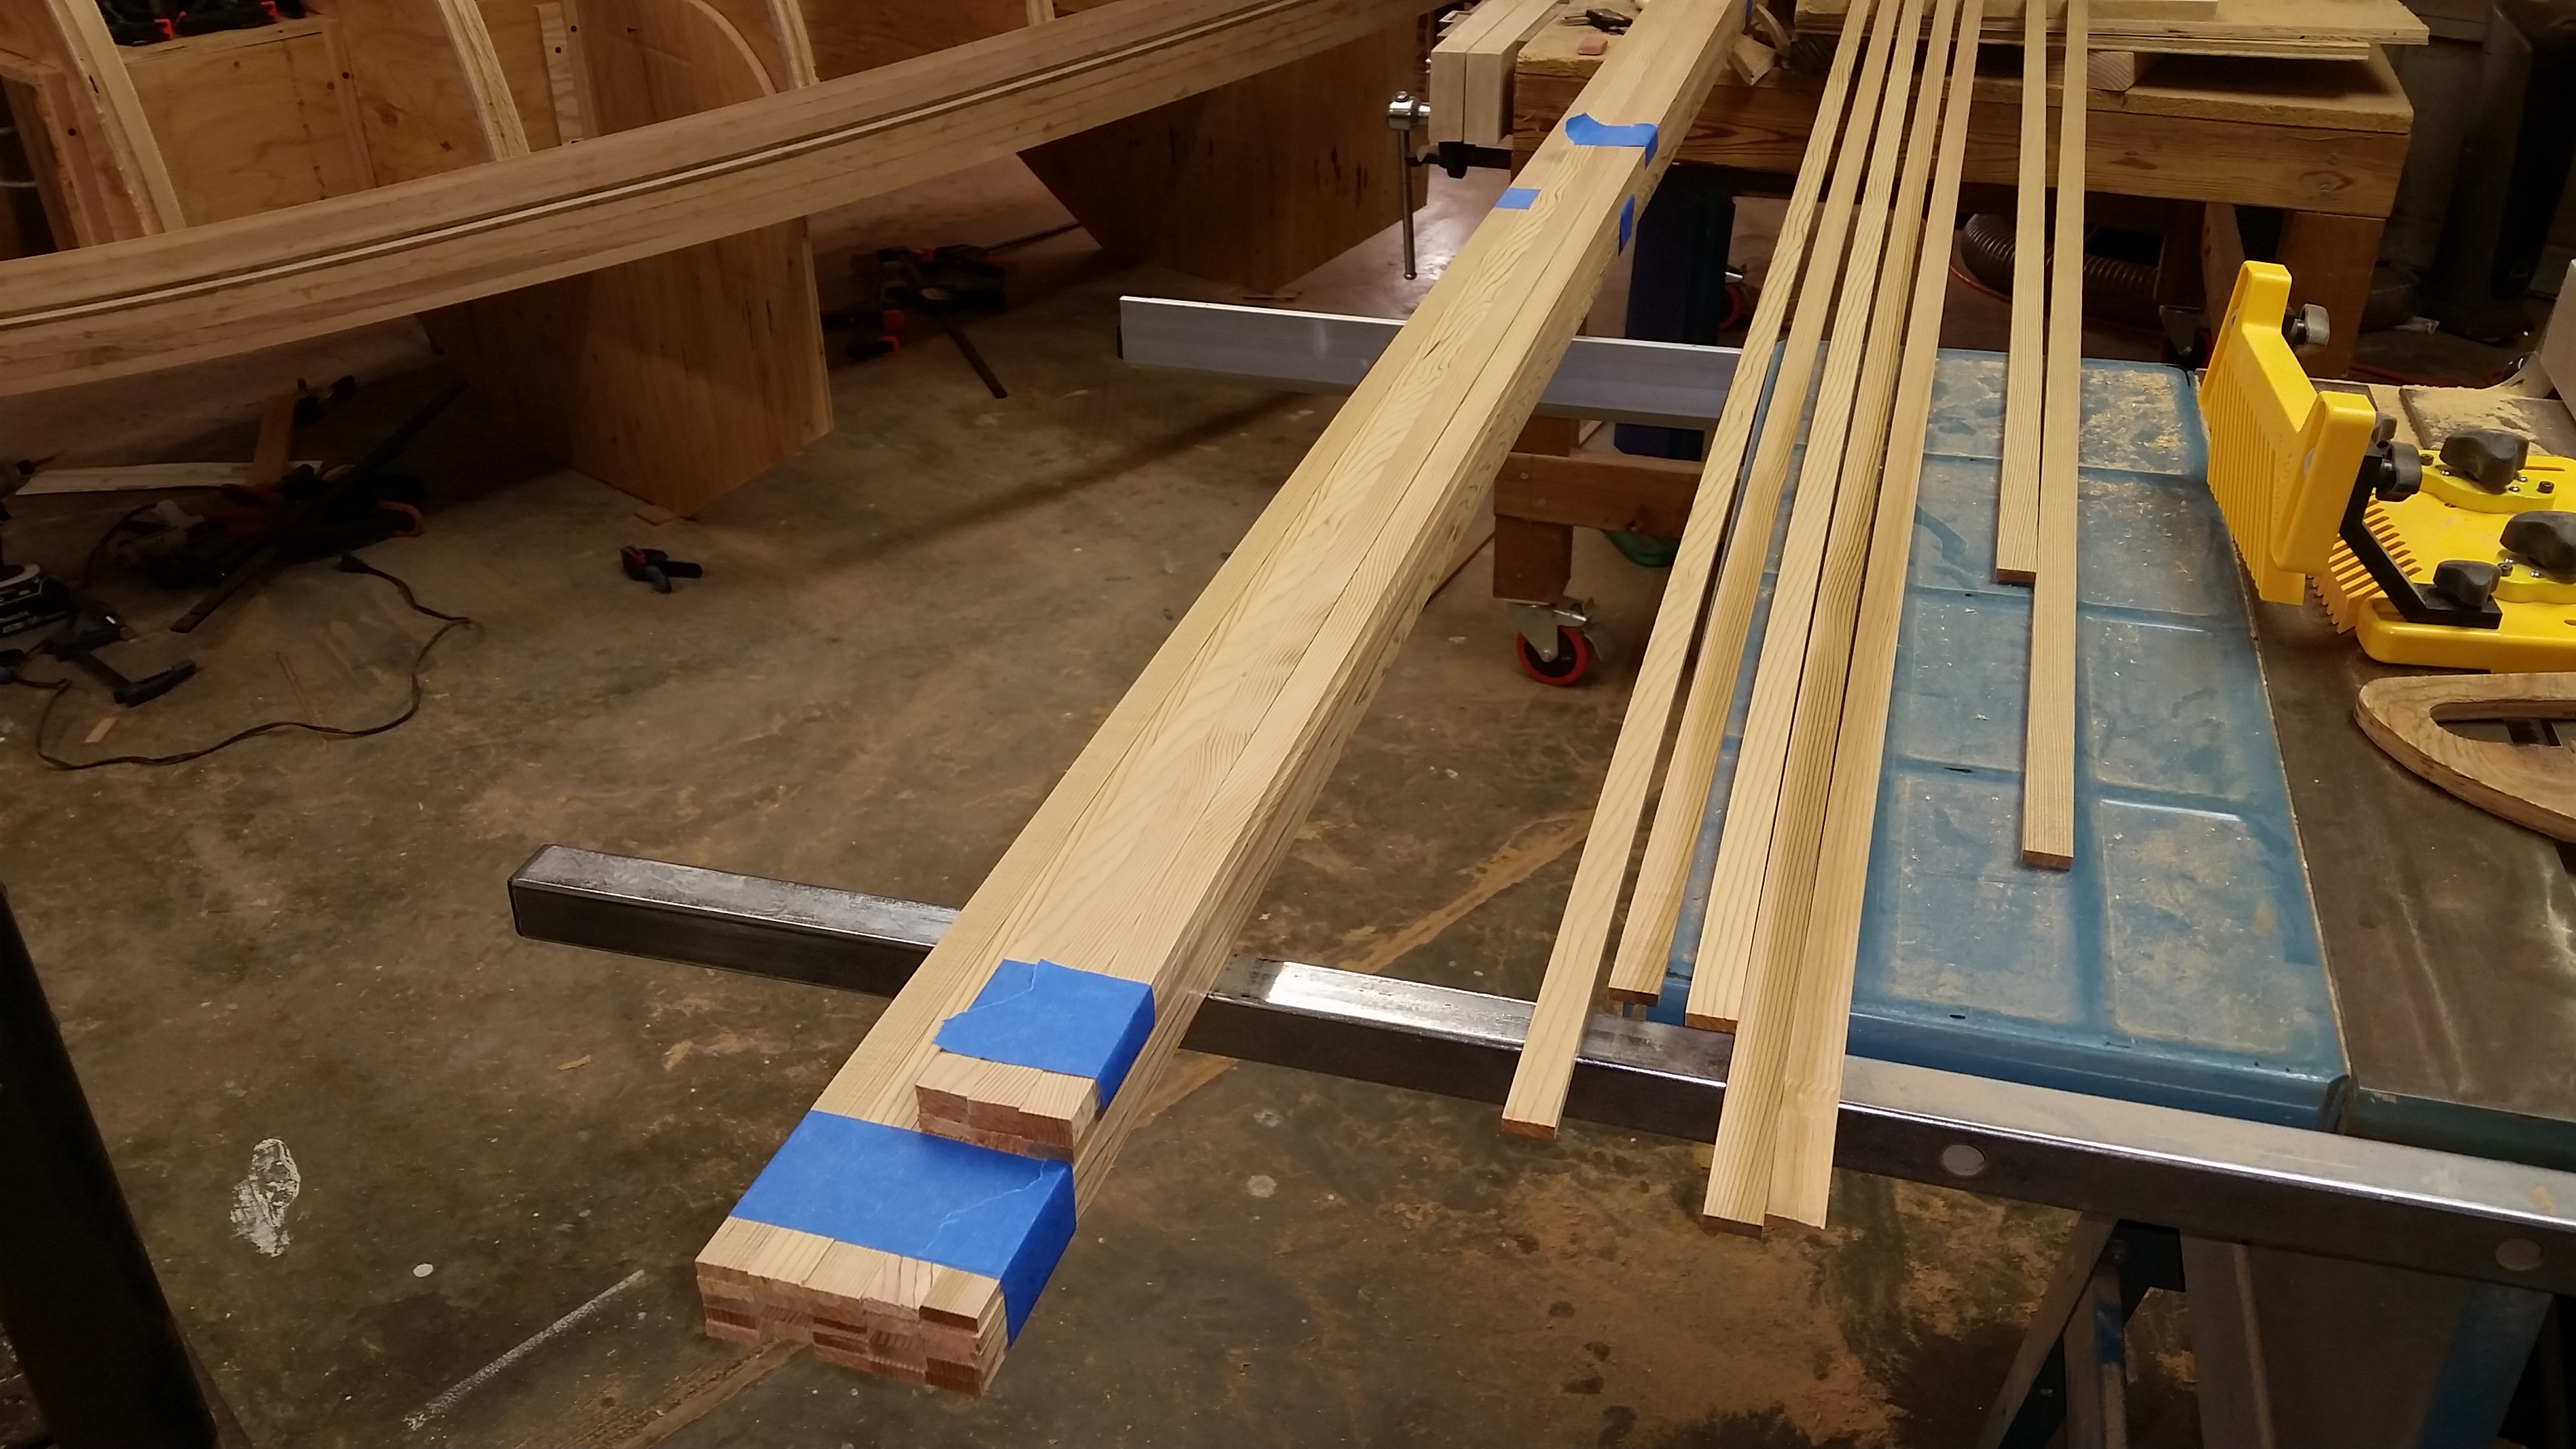
Went wood shopping, and then made up the rest of the strips (hopefully) that I’ll need. This time, instead of 5/4 x 6″ x 12′ for the Red Cedar I got 2 x 6 x 12. The extra 1/2″ thick yielded twice as many strips as the 5/4 gave.
20 Yellow Alaska Cedar
30 light Red Western Cedar
20 dark Red Western Cedar
Feb 3, 2017
52 strips down, 68 to go.

Feb 2, 2017
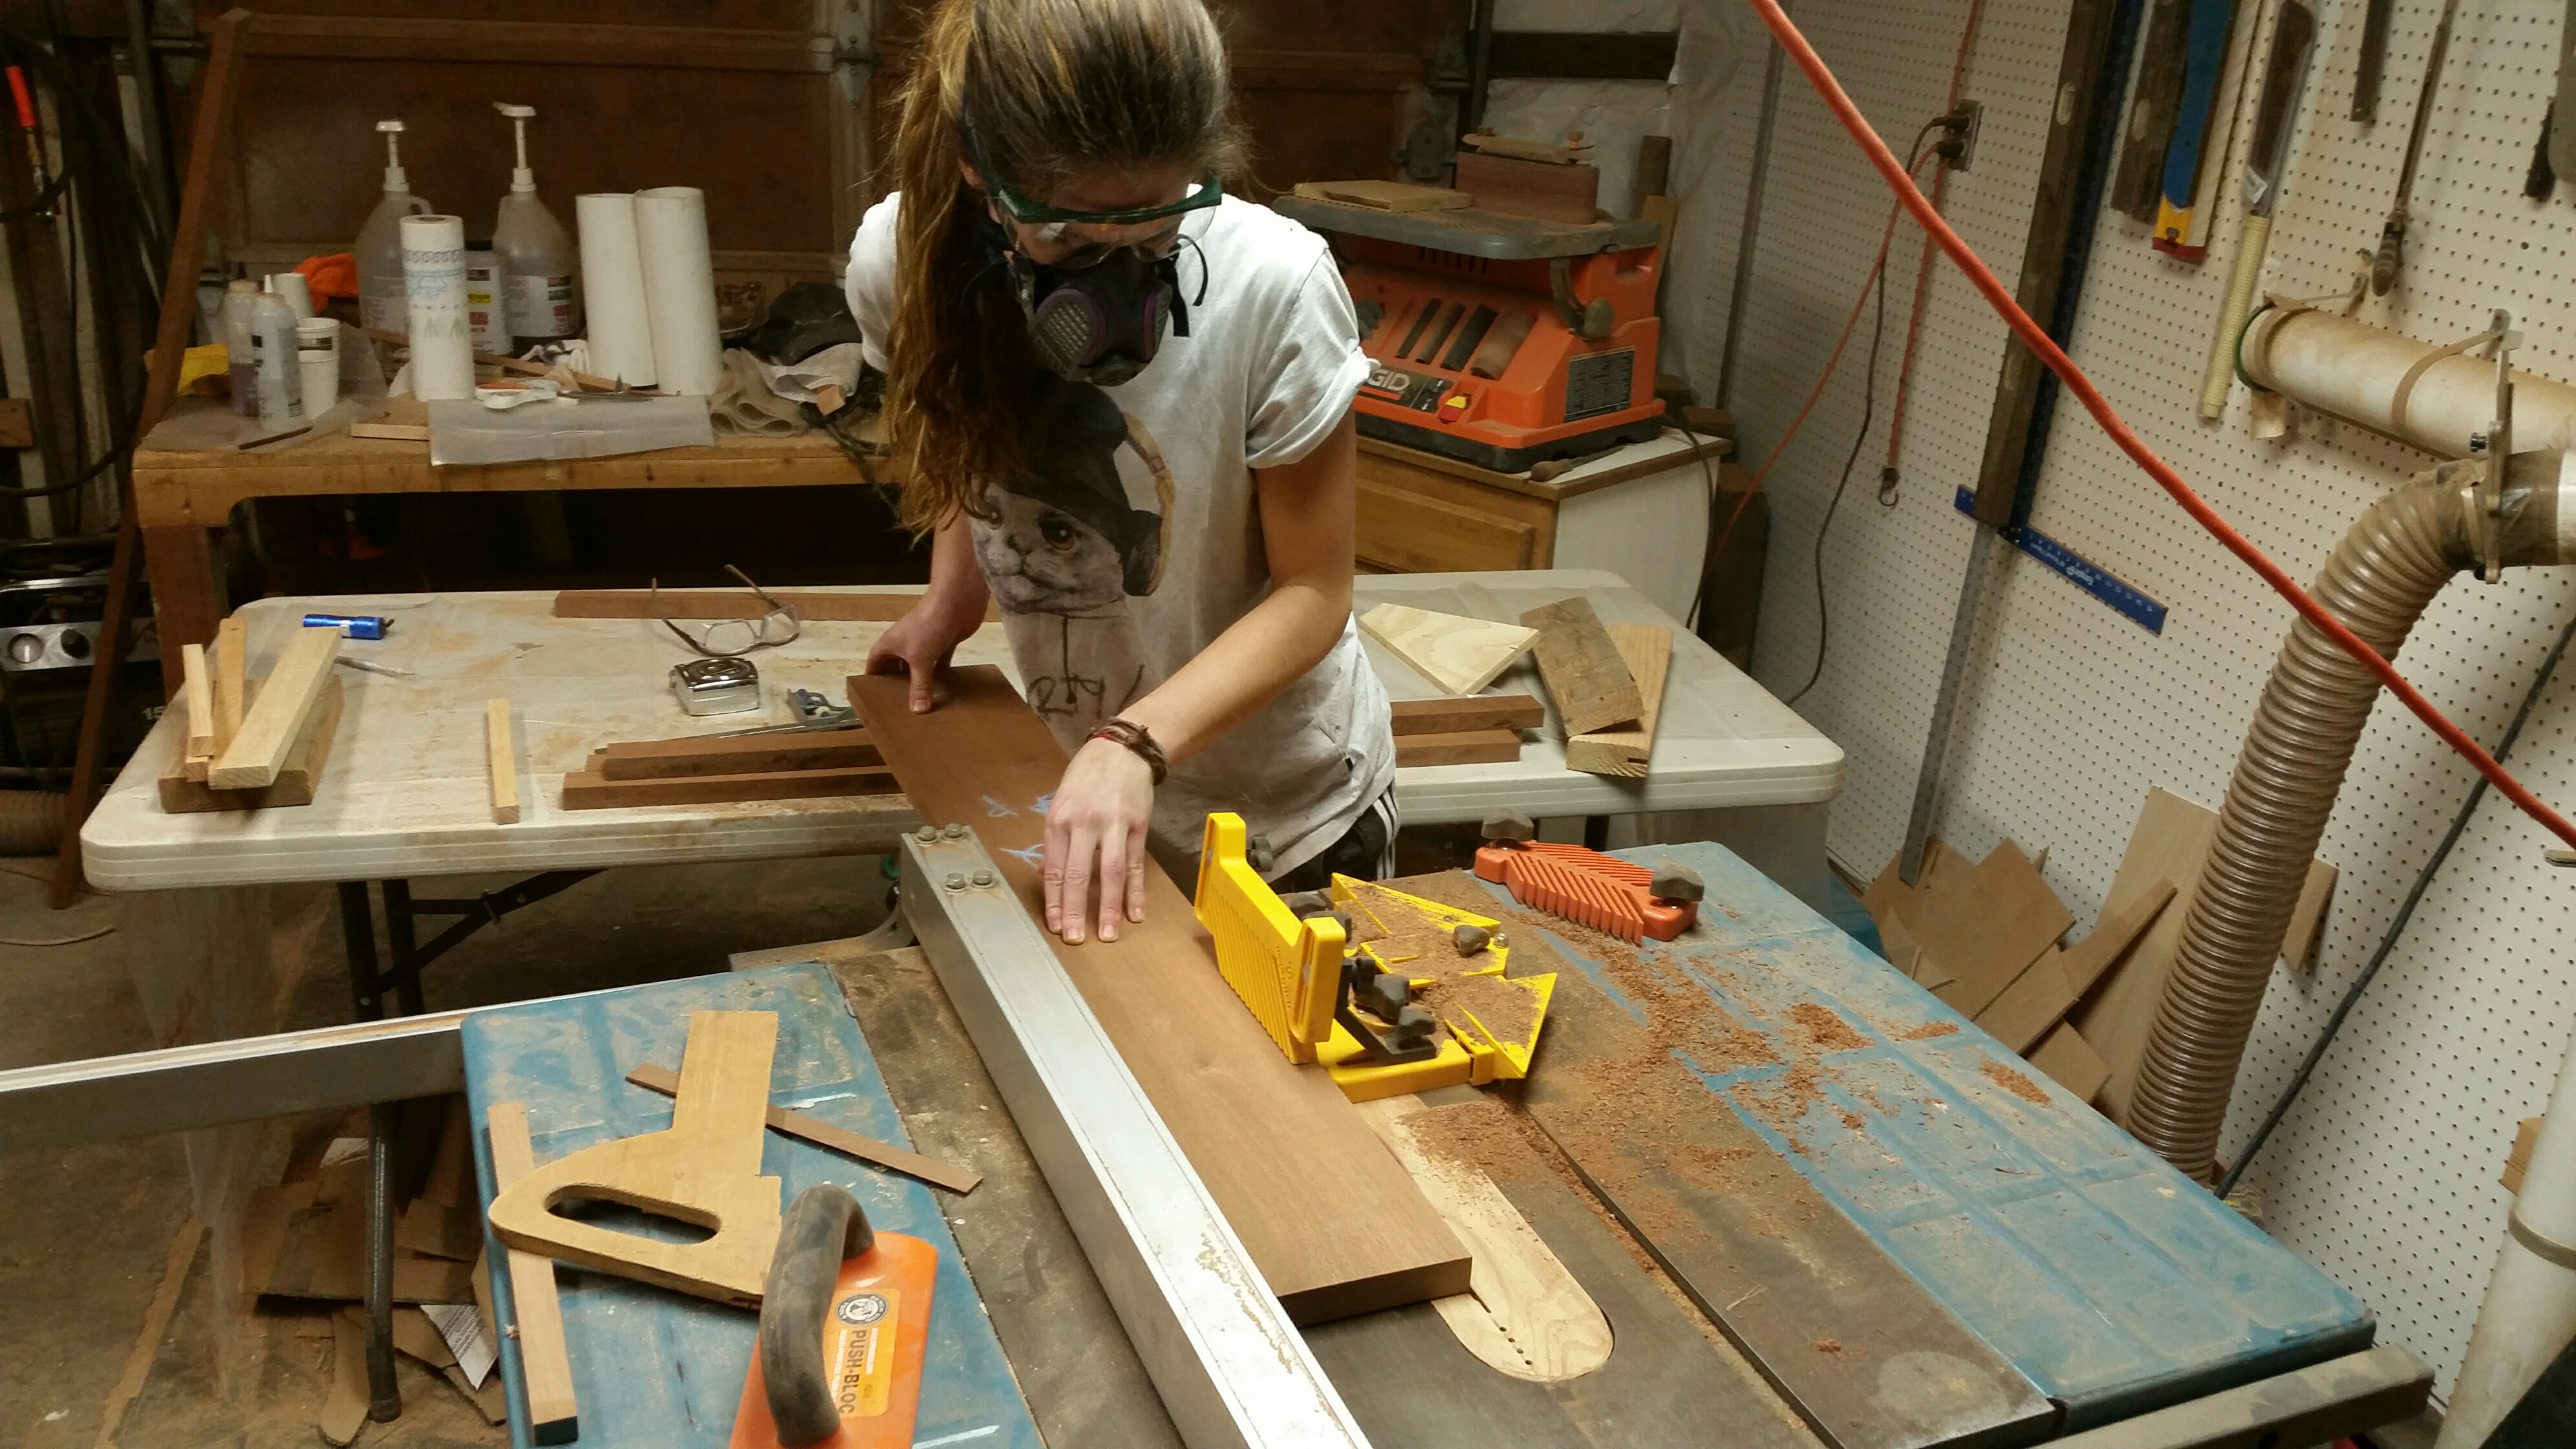
First picture is of the Magswitch ultra-thin ripping guide that I use for cutting the bevel on bottom of each strip – works really well. Here, I’m cutting a 9 degree bevel. The twist on each strip is becoming quite a challenge, but nothing that a ton of clamps and small dabs of hot glue can’t tackle – at least so far..


Jan 31, 2017
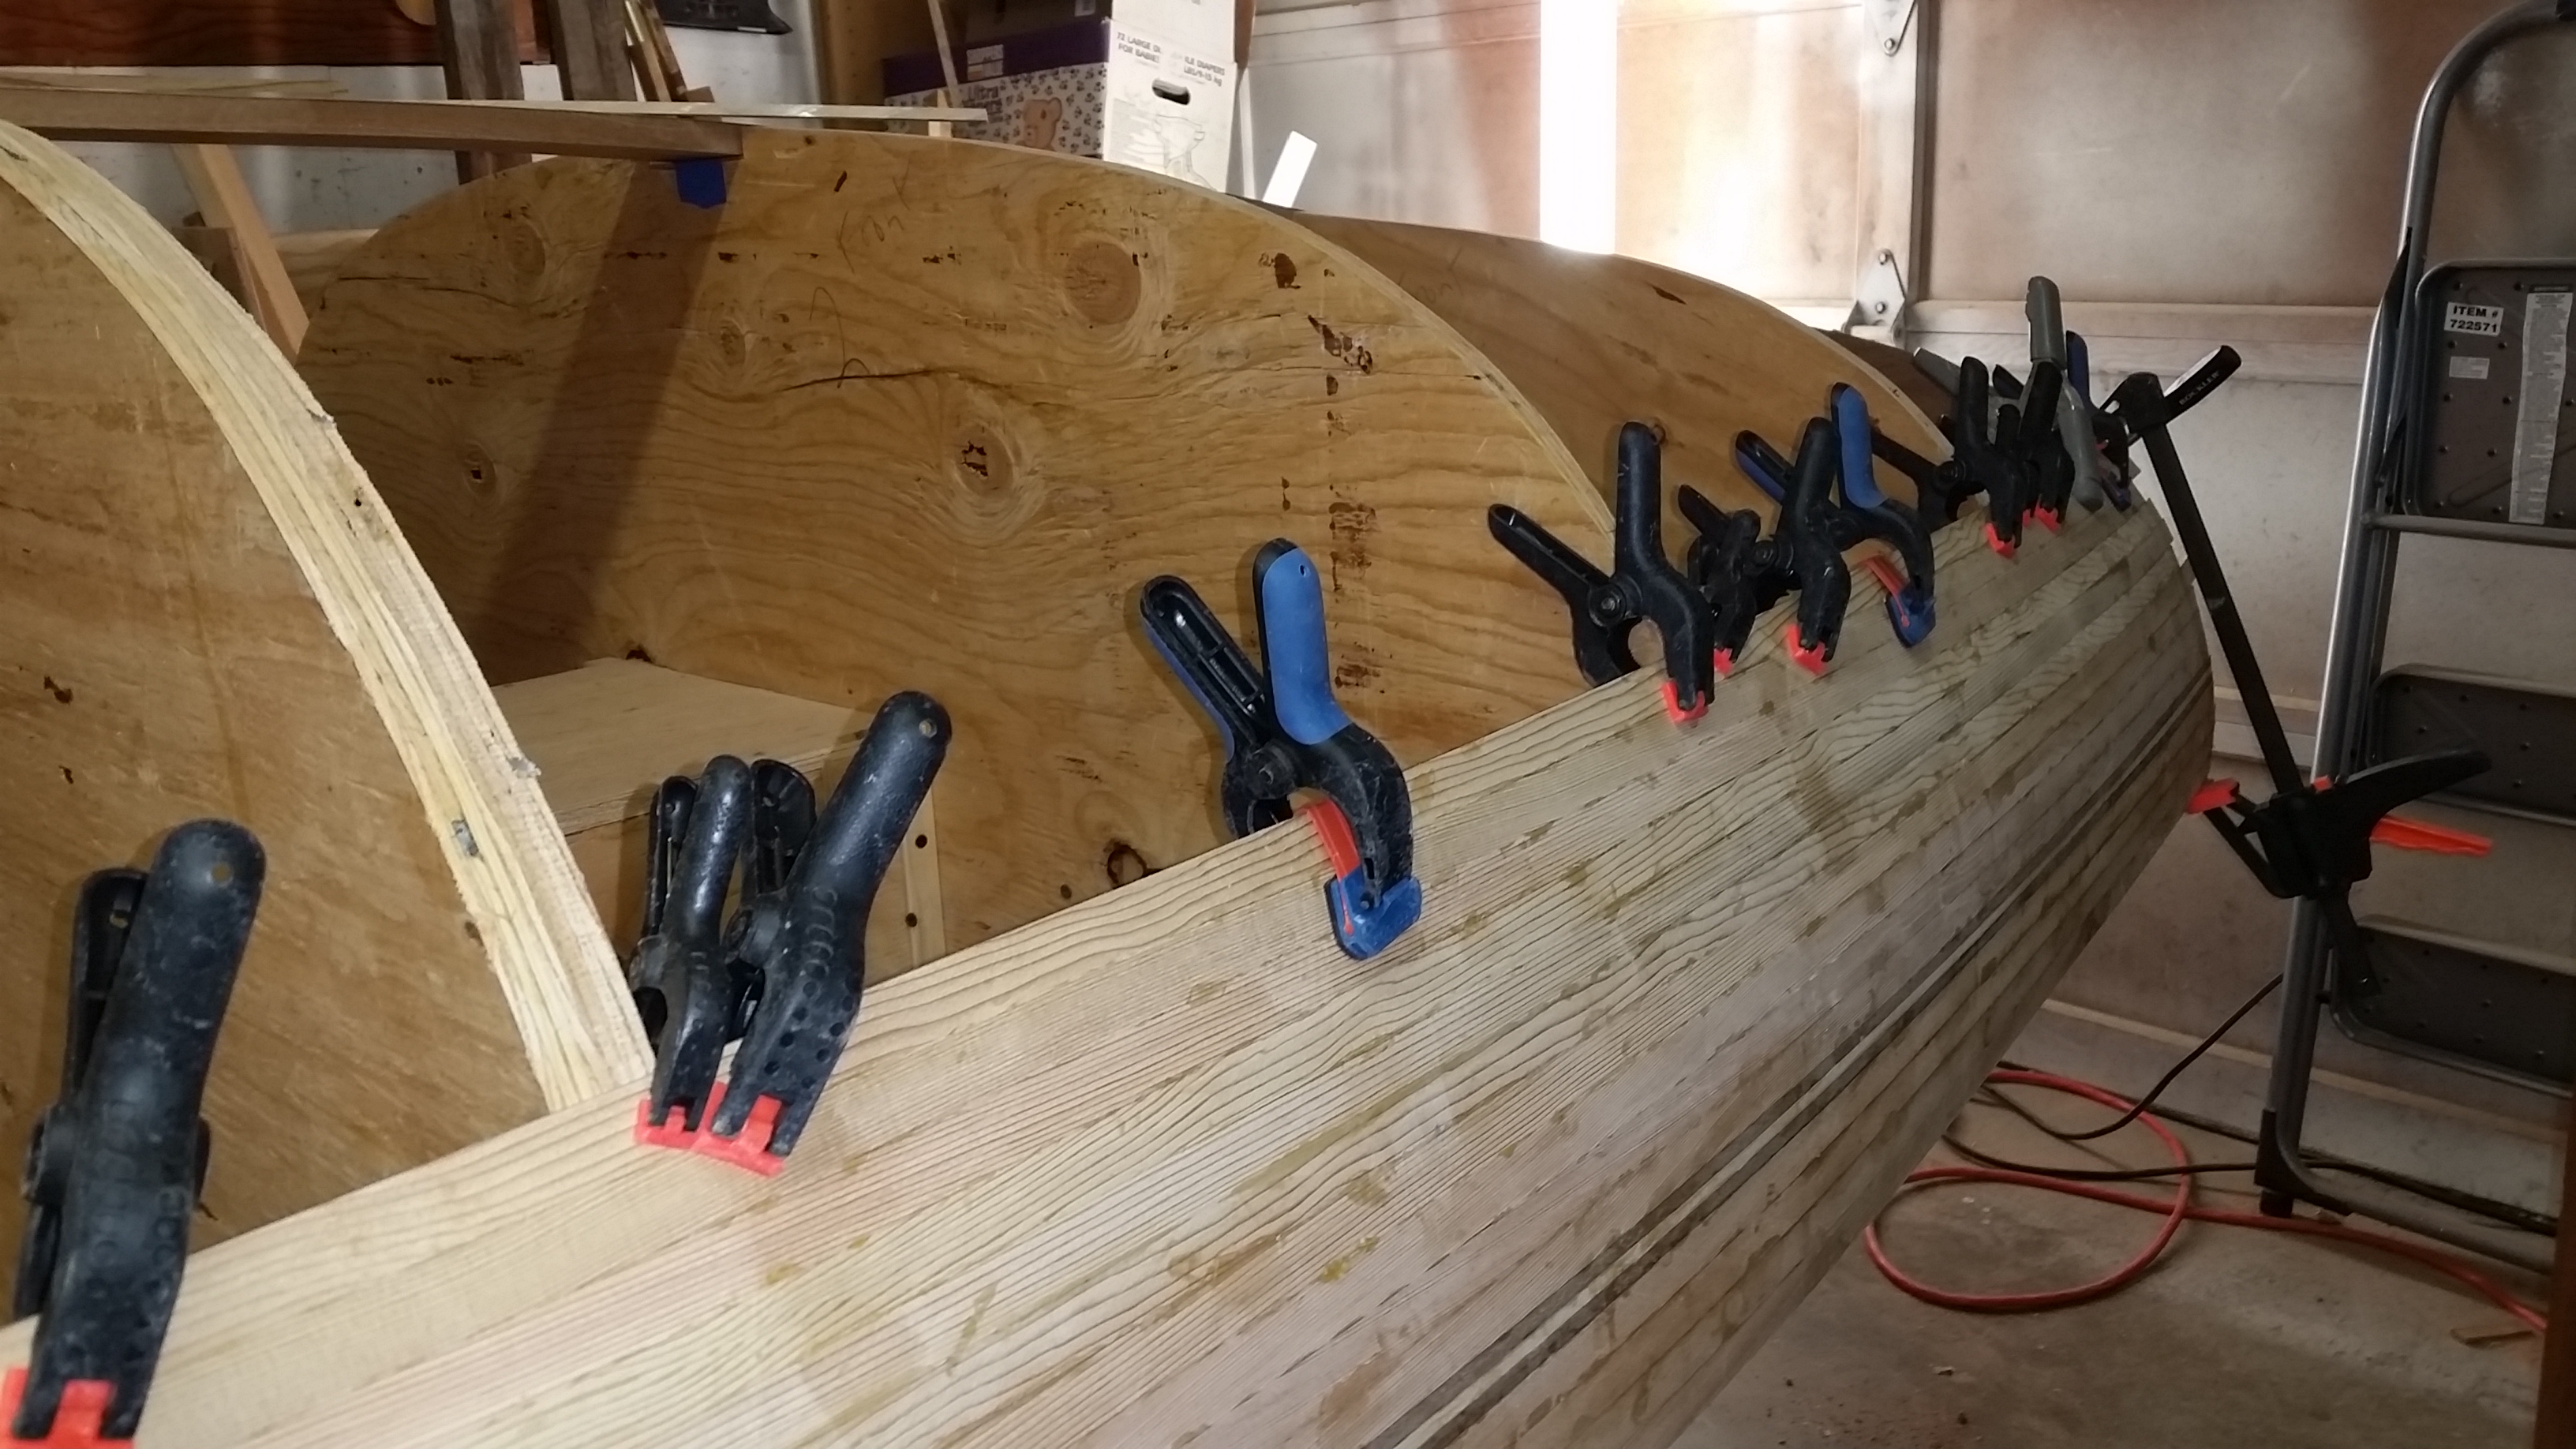
Maybe a bit more than 1/3 into the strip planking. 9 degree angle on the bottom edge seems to be the right angle now to fit nicely. However, the strips need a bit of a bendy twist inward to lay properly. They want to bow outward between stations. Using longer clamps in between to try and prevent that. I haven’t quite got the hang of using the heat gun to bend the strips yet – getting by with clamps and hot glue so far. Every time I feel like I’m learning how to do this, the job changes on me – constantly learning and experimenting.
Jan 28, 2017
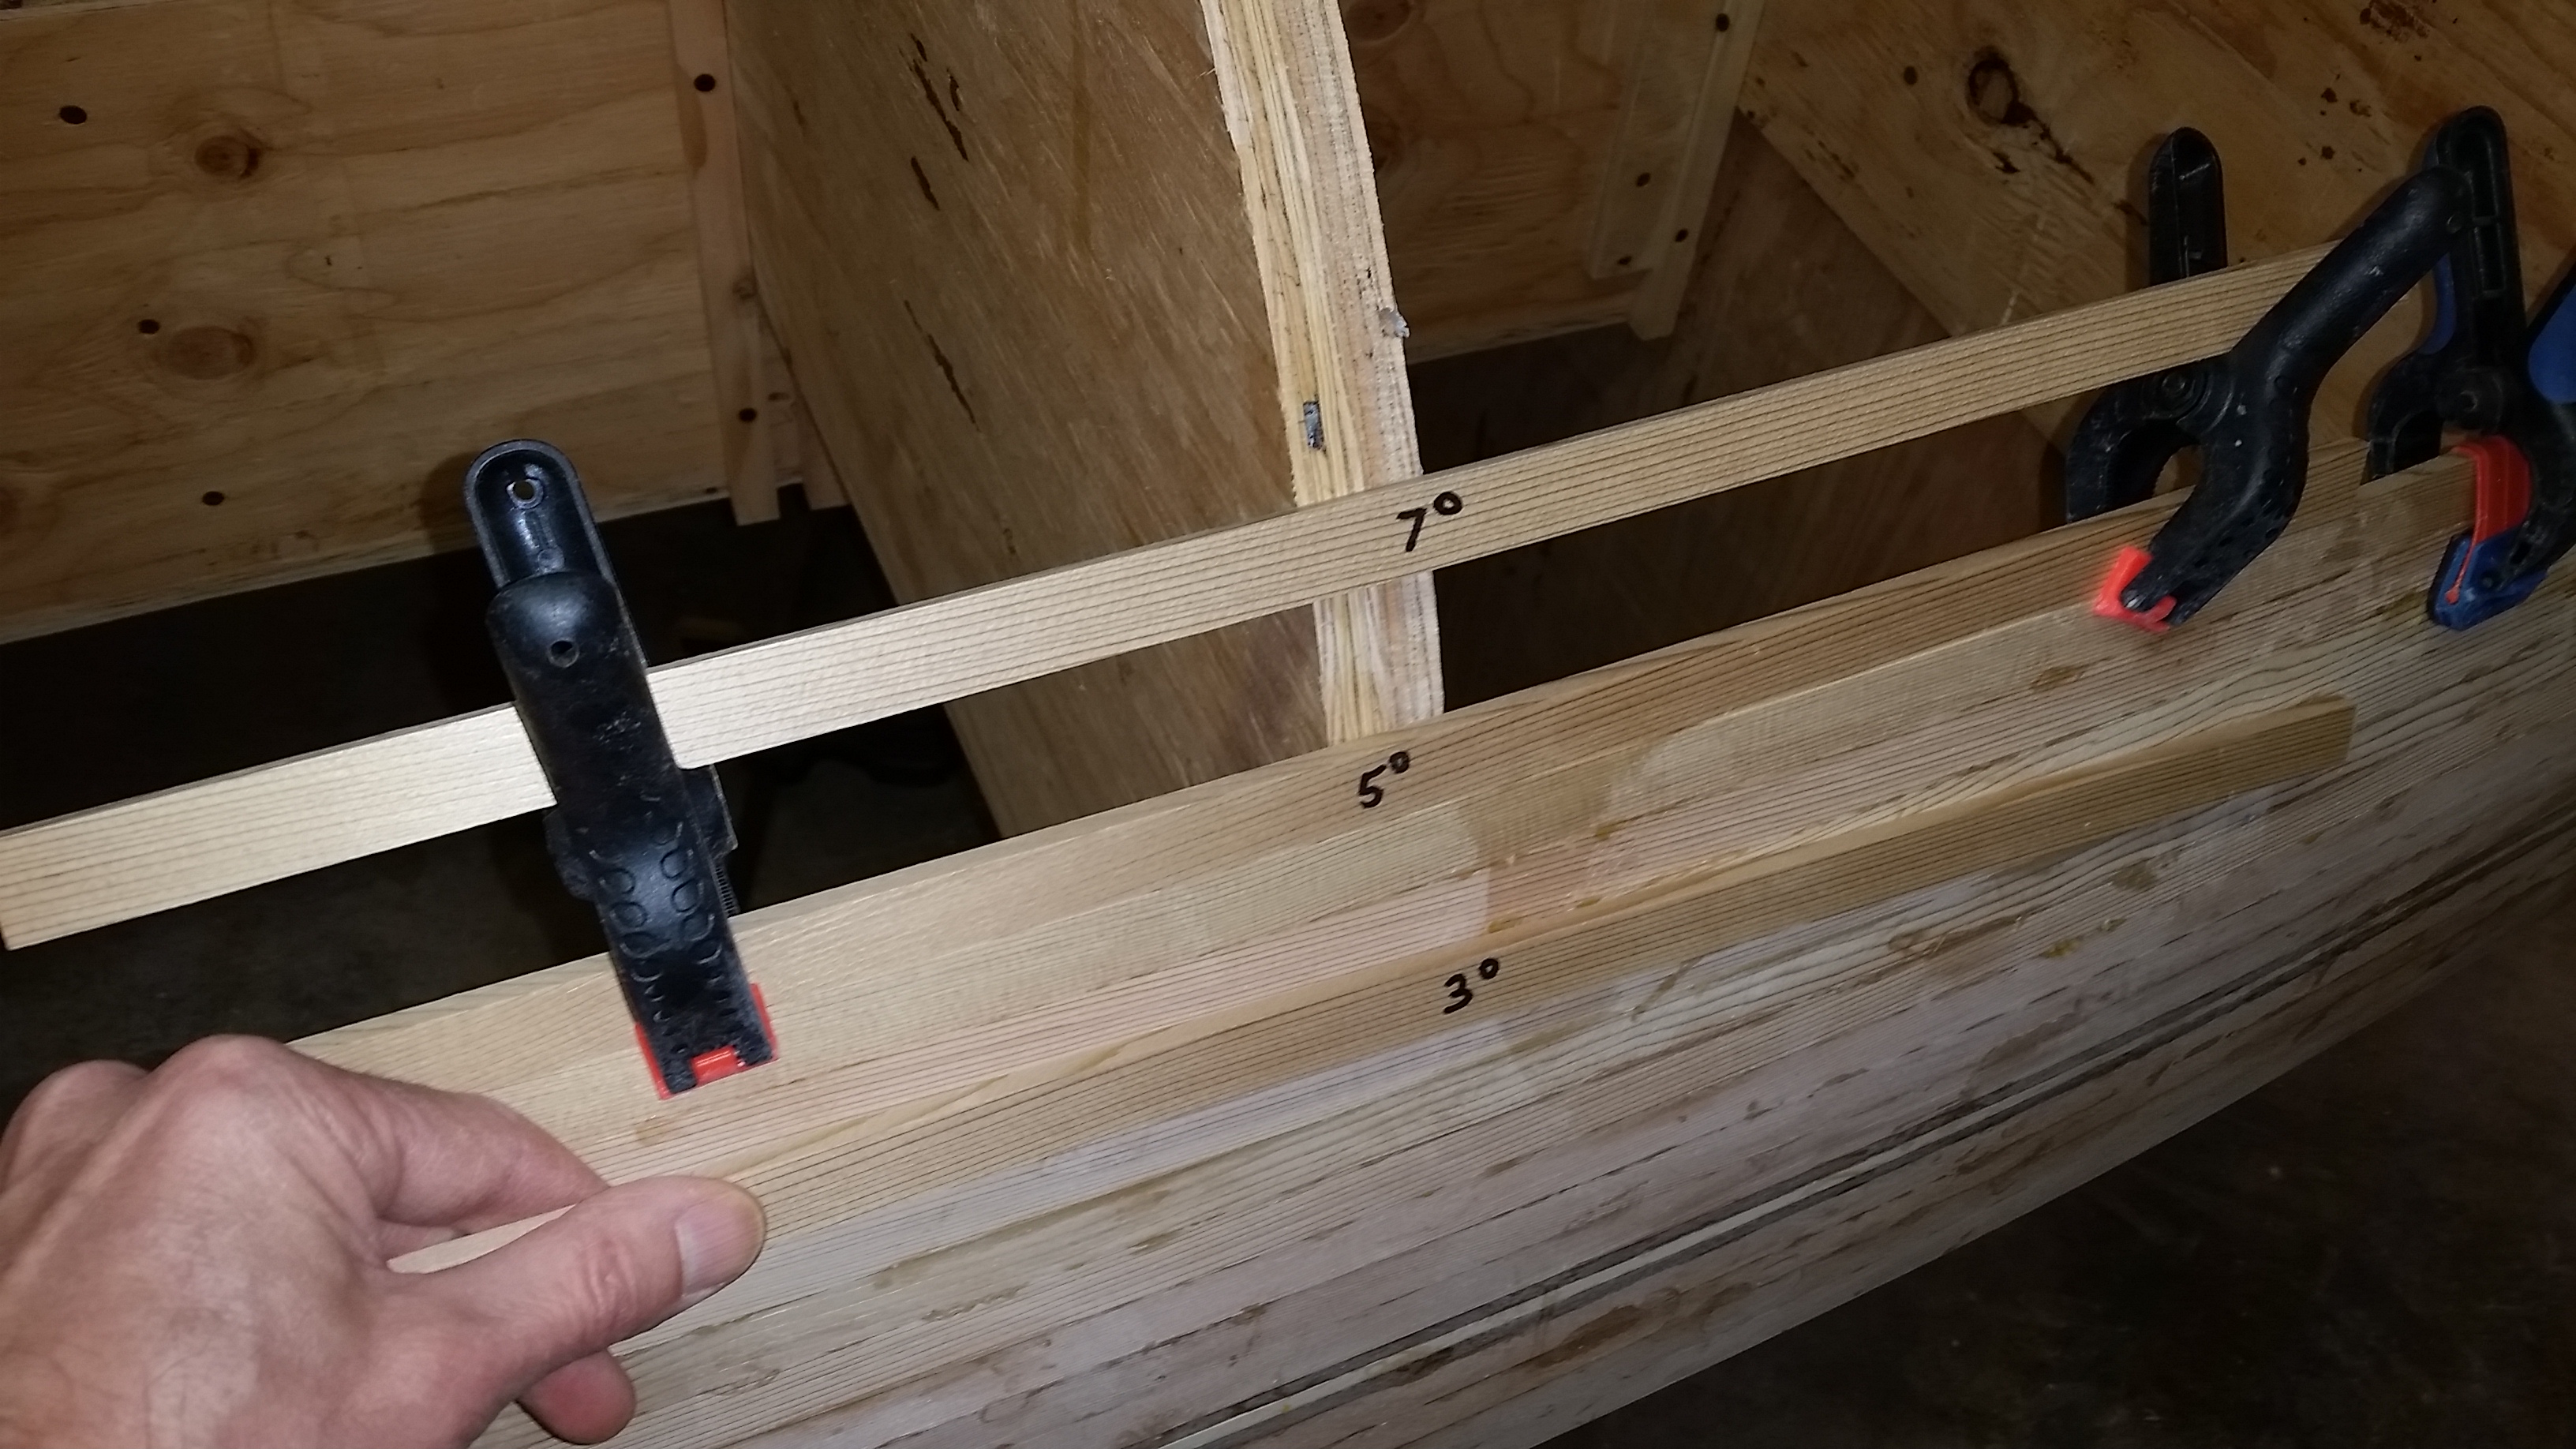
Made some “fitting” sticks, about 2′ long each with one edge cut at a fixed angle. So far made 3, 5, and 7 degree angle sticks. Using these prior to fitting each strip to assess what the proper angle will be for the majority of the strip, then I rip the entire strip on the table saw to the “best fit” angle. Using an electronic angle gauge on the table saw blade to set the angle. Got 13 more strips on since the last update. Angle on the last strips was 7 degrees (on bottom edge) as I’m getting to the curvier part of the stations.
Jan 26, 2017
A whopping 3 strips put on today. Just need more time in a day. I found that ripping a 3 degree angle on the bottom each strip, is just about right to get most of the strip lying against the stations snugly. I’ve been hand planing the angle where it wants to be a little more angle than that, right around the first station near the bow. Slow going.

Jan 25, 2017
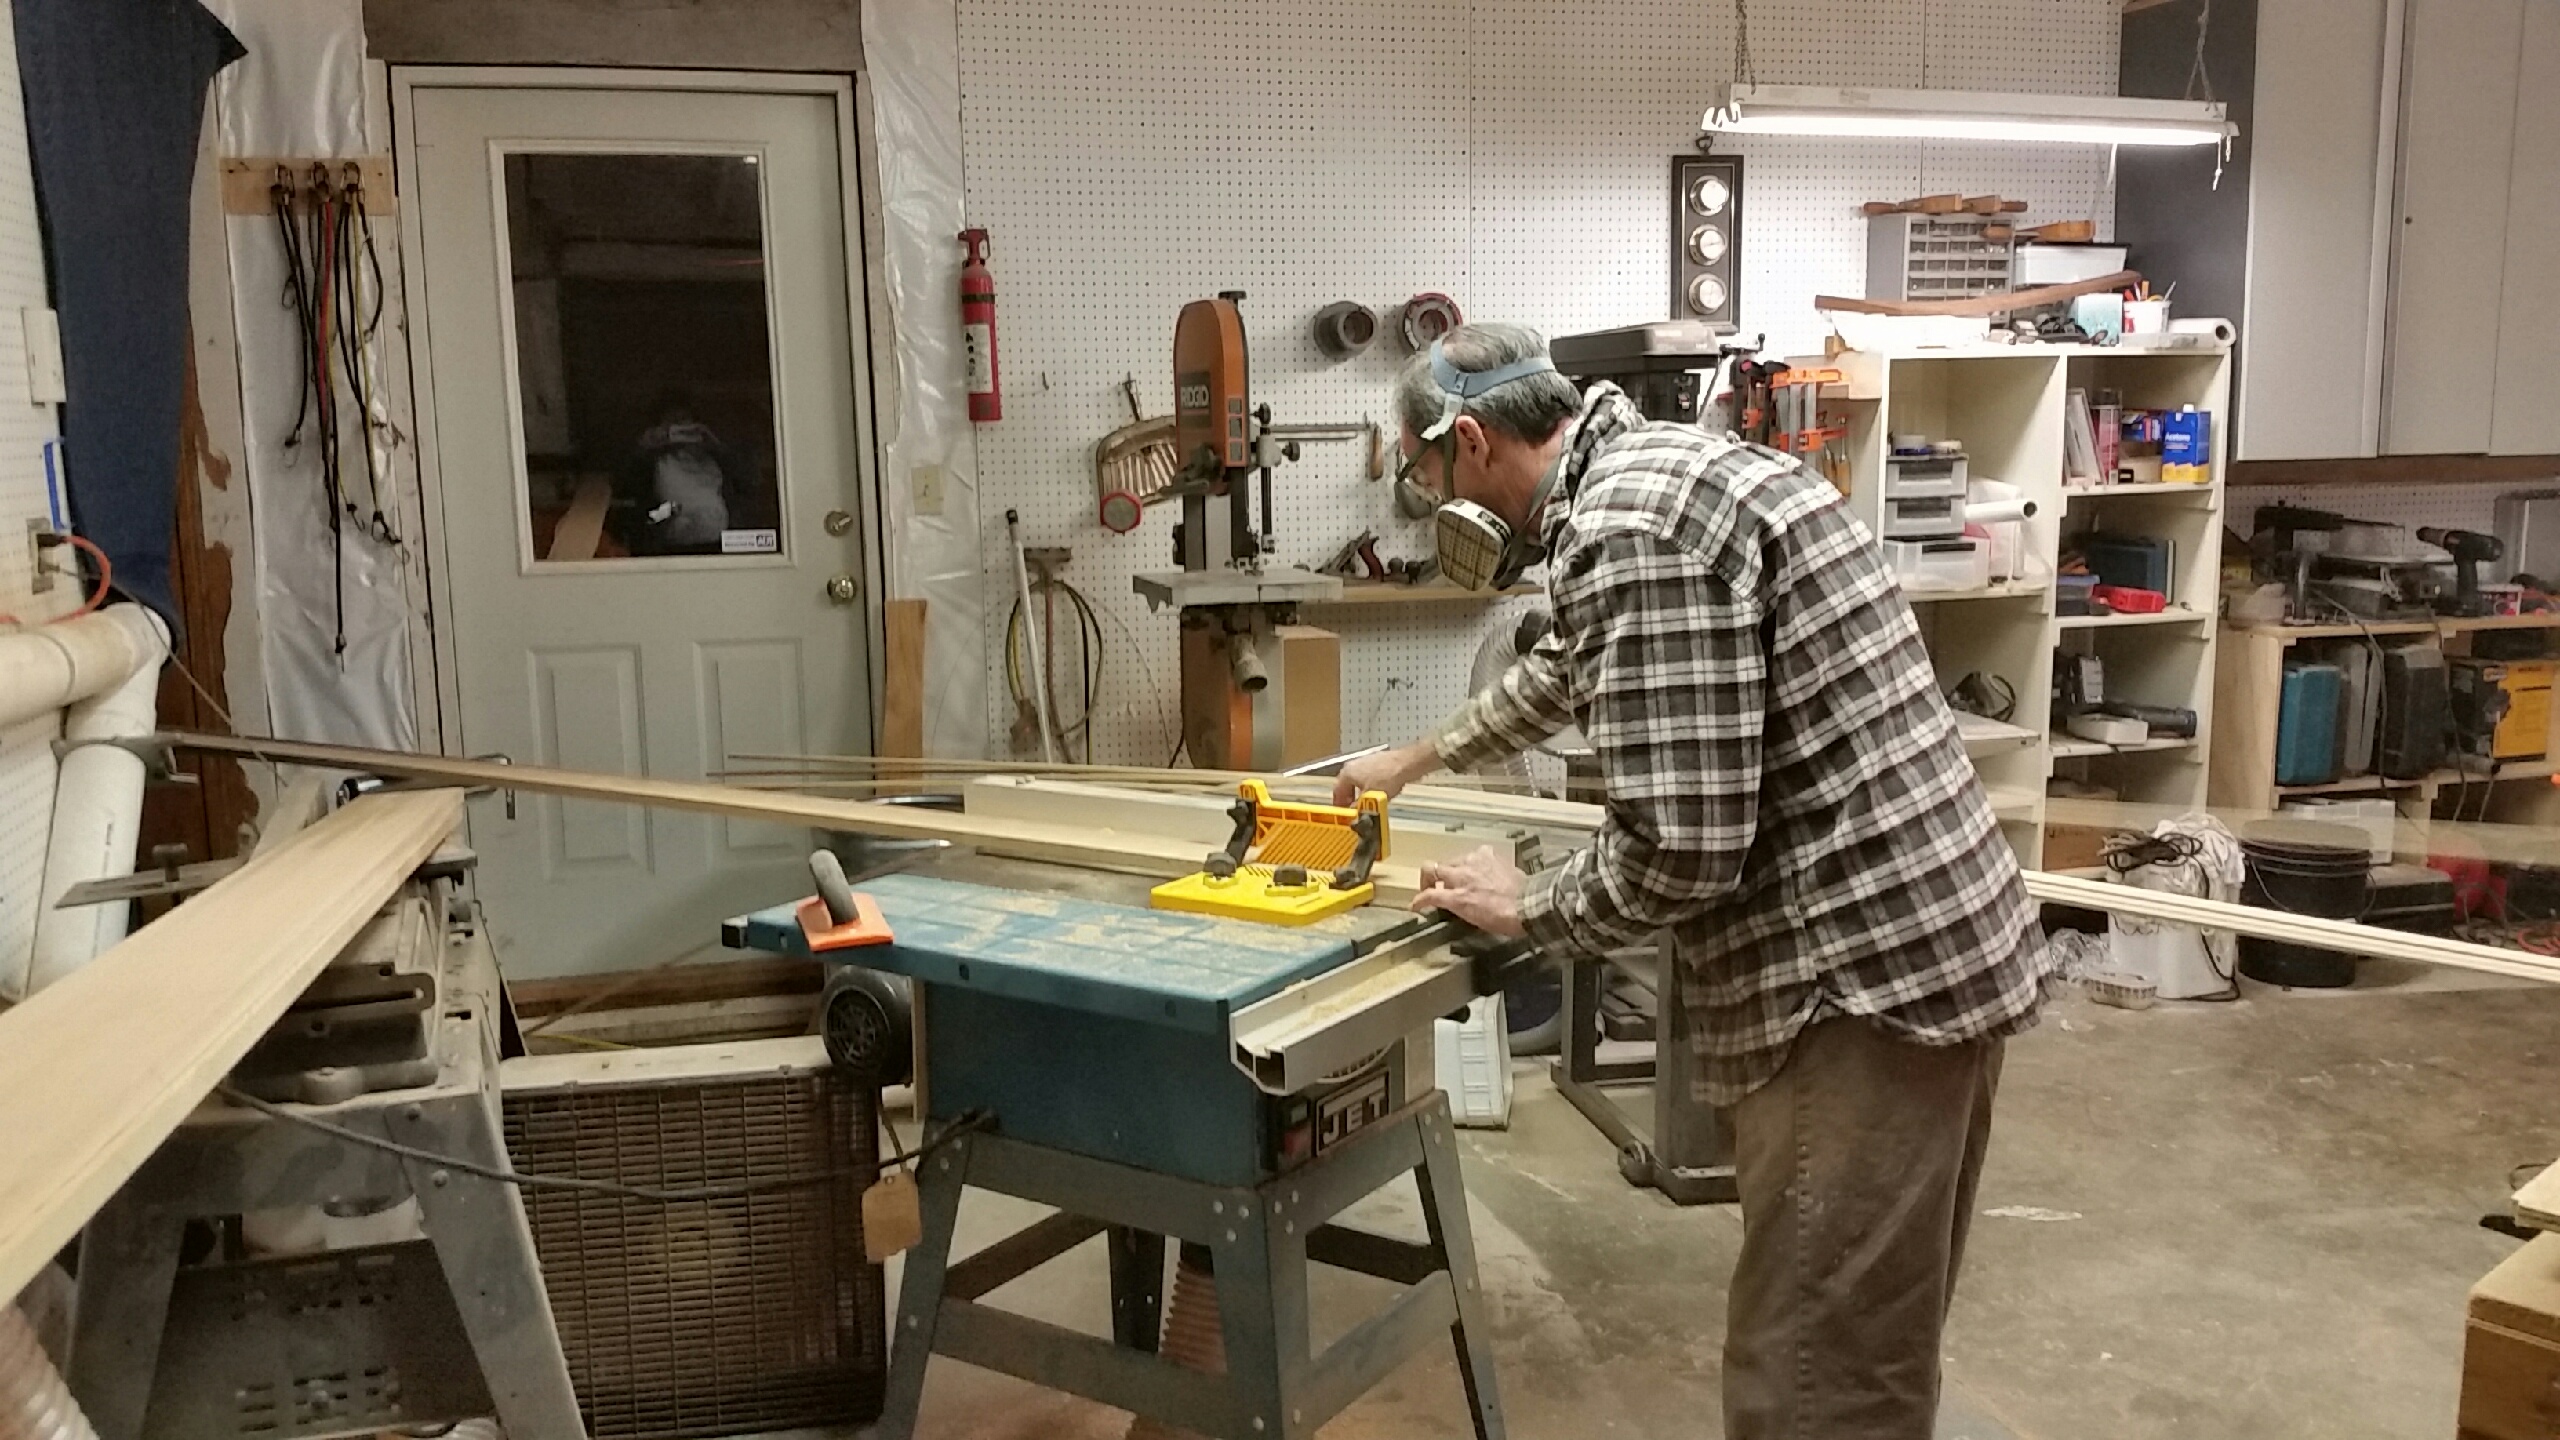
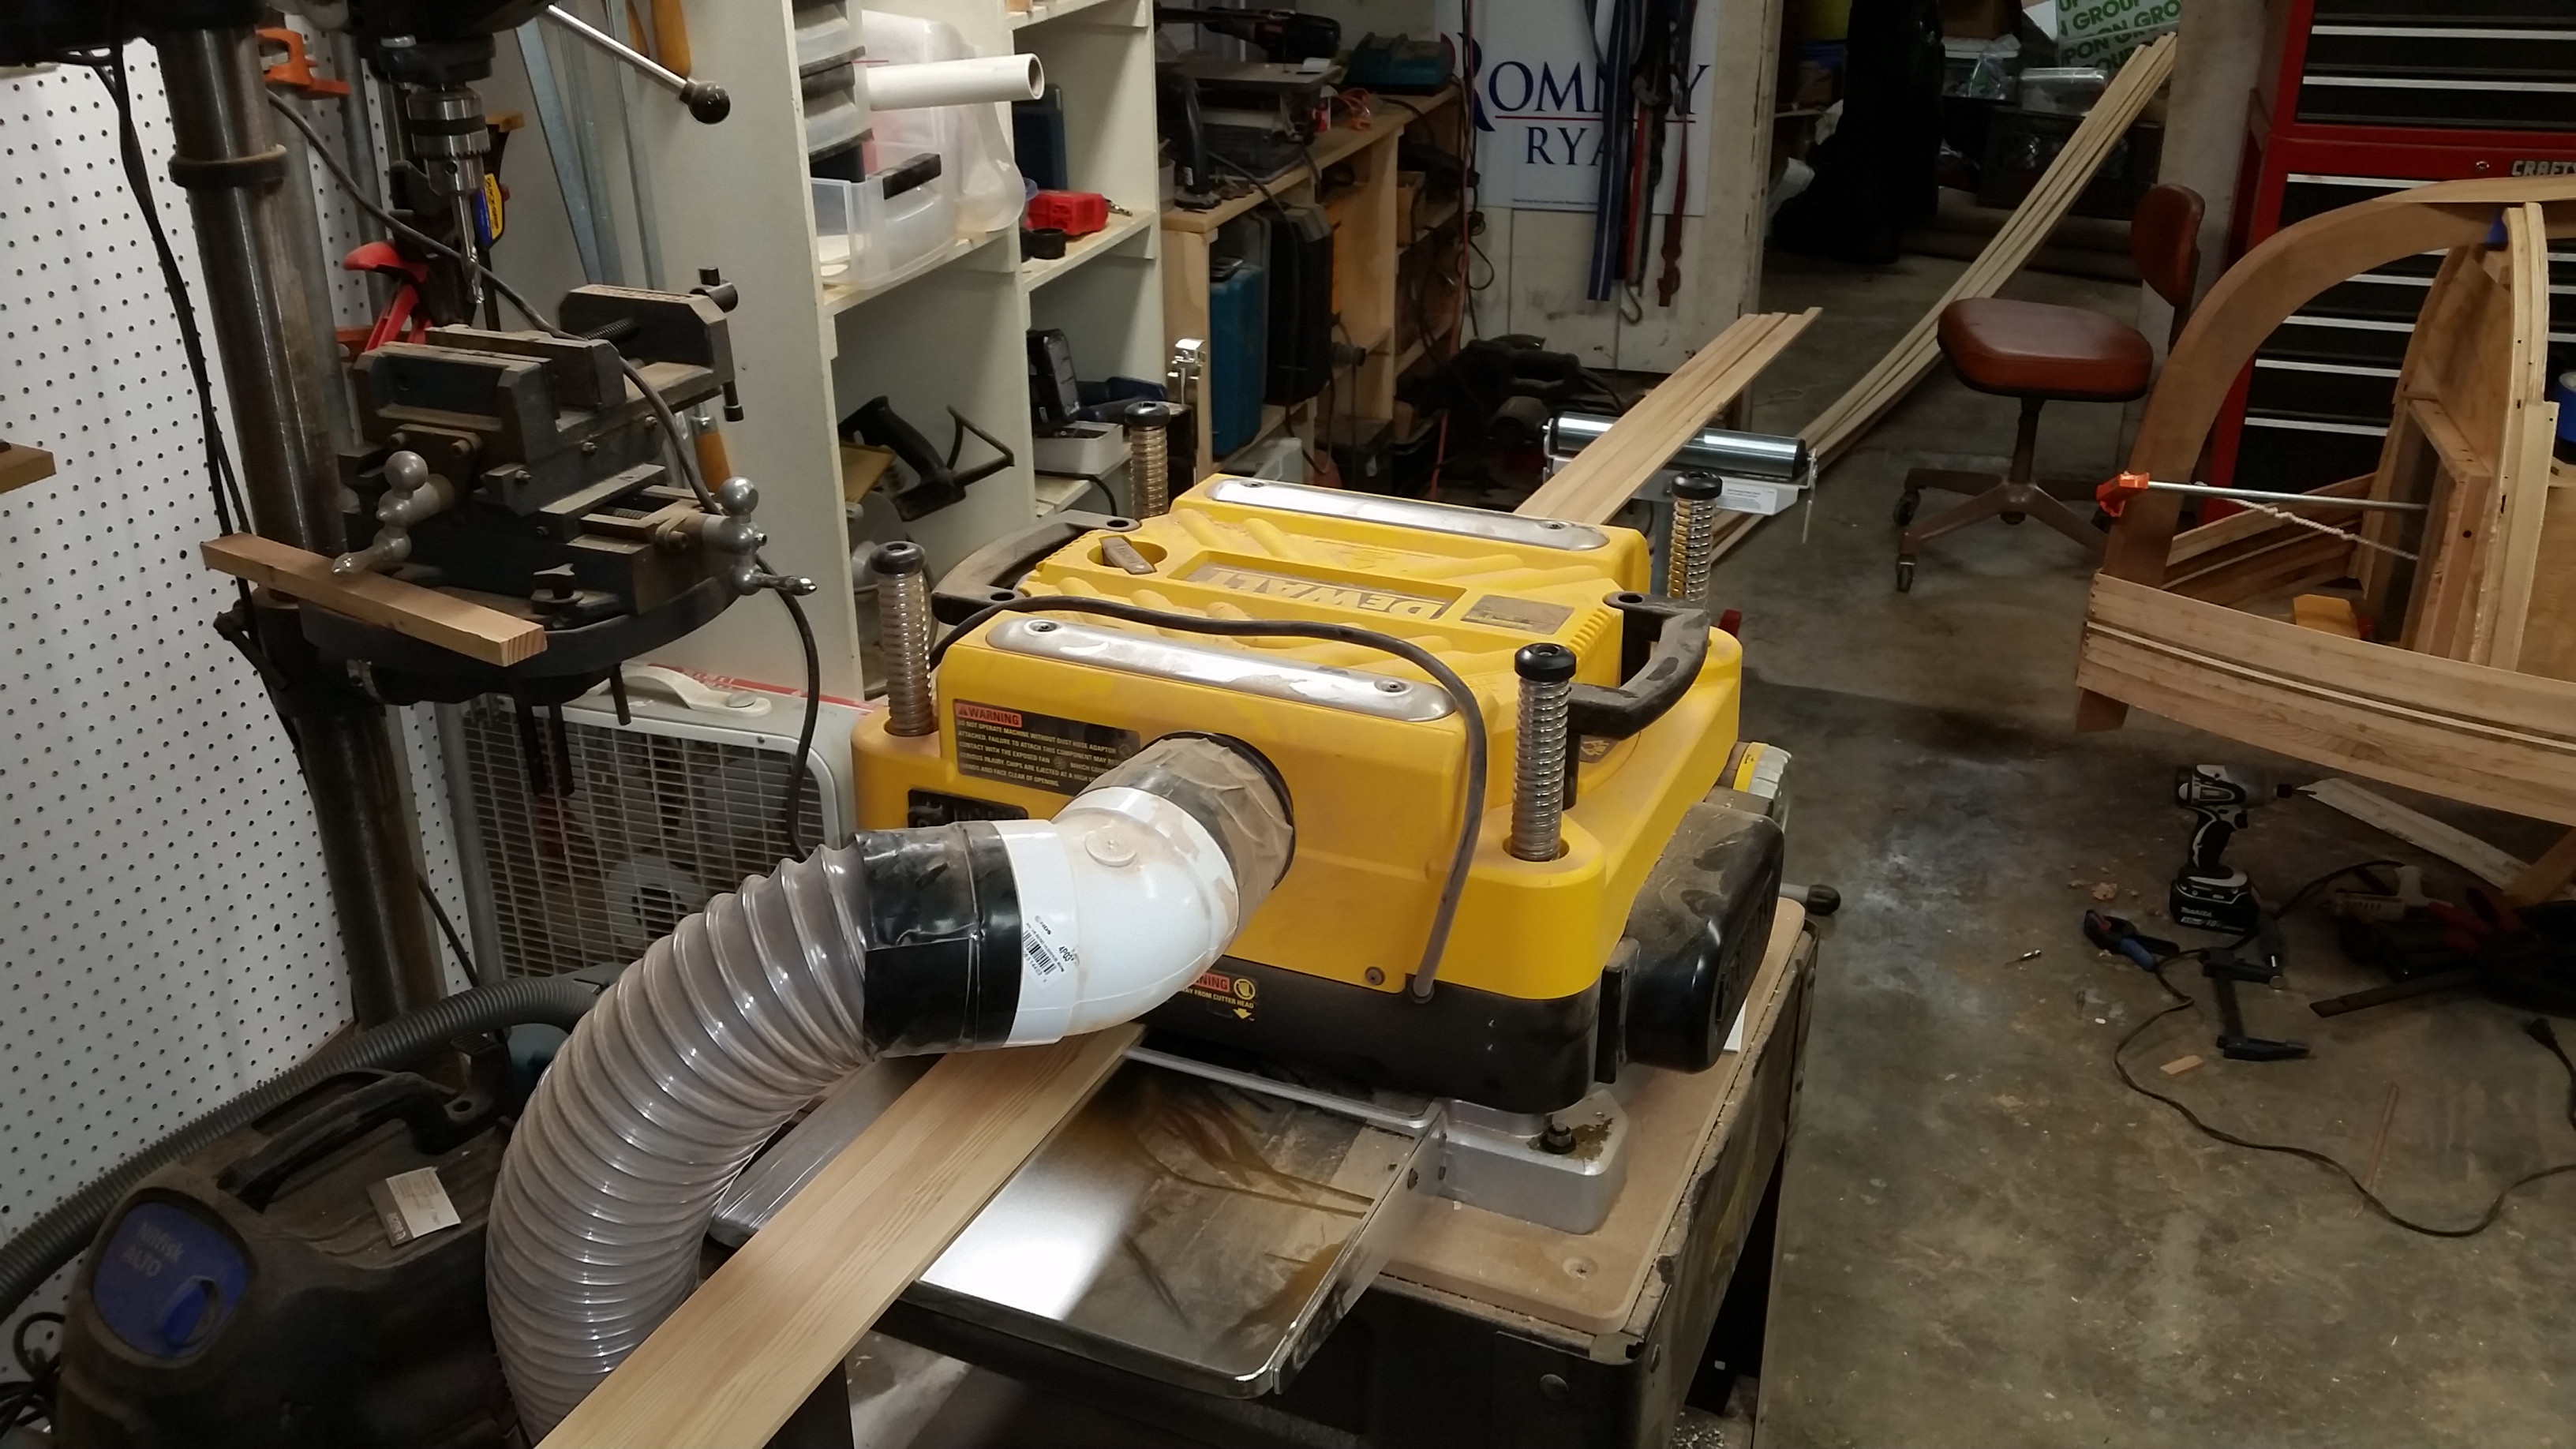
Ran out of my first batch of strips (was just 14 plus the pin stripping) and now have enough confidence in the size of strips that I could do a larger batch this time. Went for 3 boards worth. Planed the cedar to 18 mm, ripped to about 7.2 mm (on average) and planed to 6 mm, doing about half of the planing on each side. Strips came out near perfect but there sure is a lot of waste (about 70%!). Need to improve on that. The planing is expensive (waste wise), but the benefit is uniformity and it will save sanding later. Anyway, I’ve got 39 new strips, so about 20 hours of work at the going rate..
Jan 21, 2017
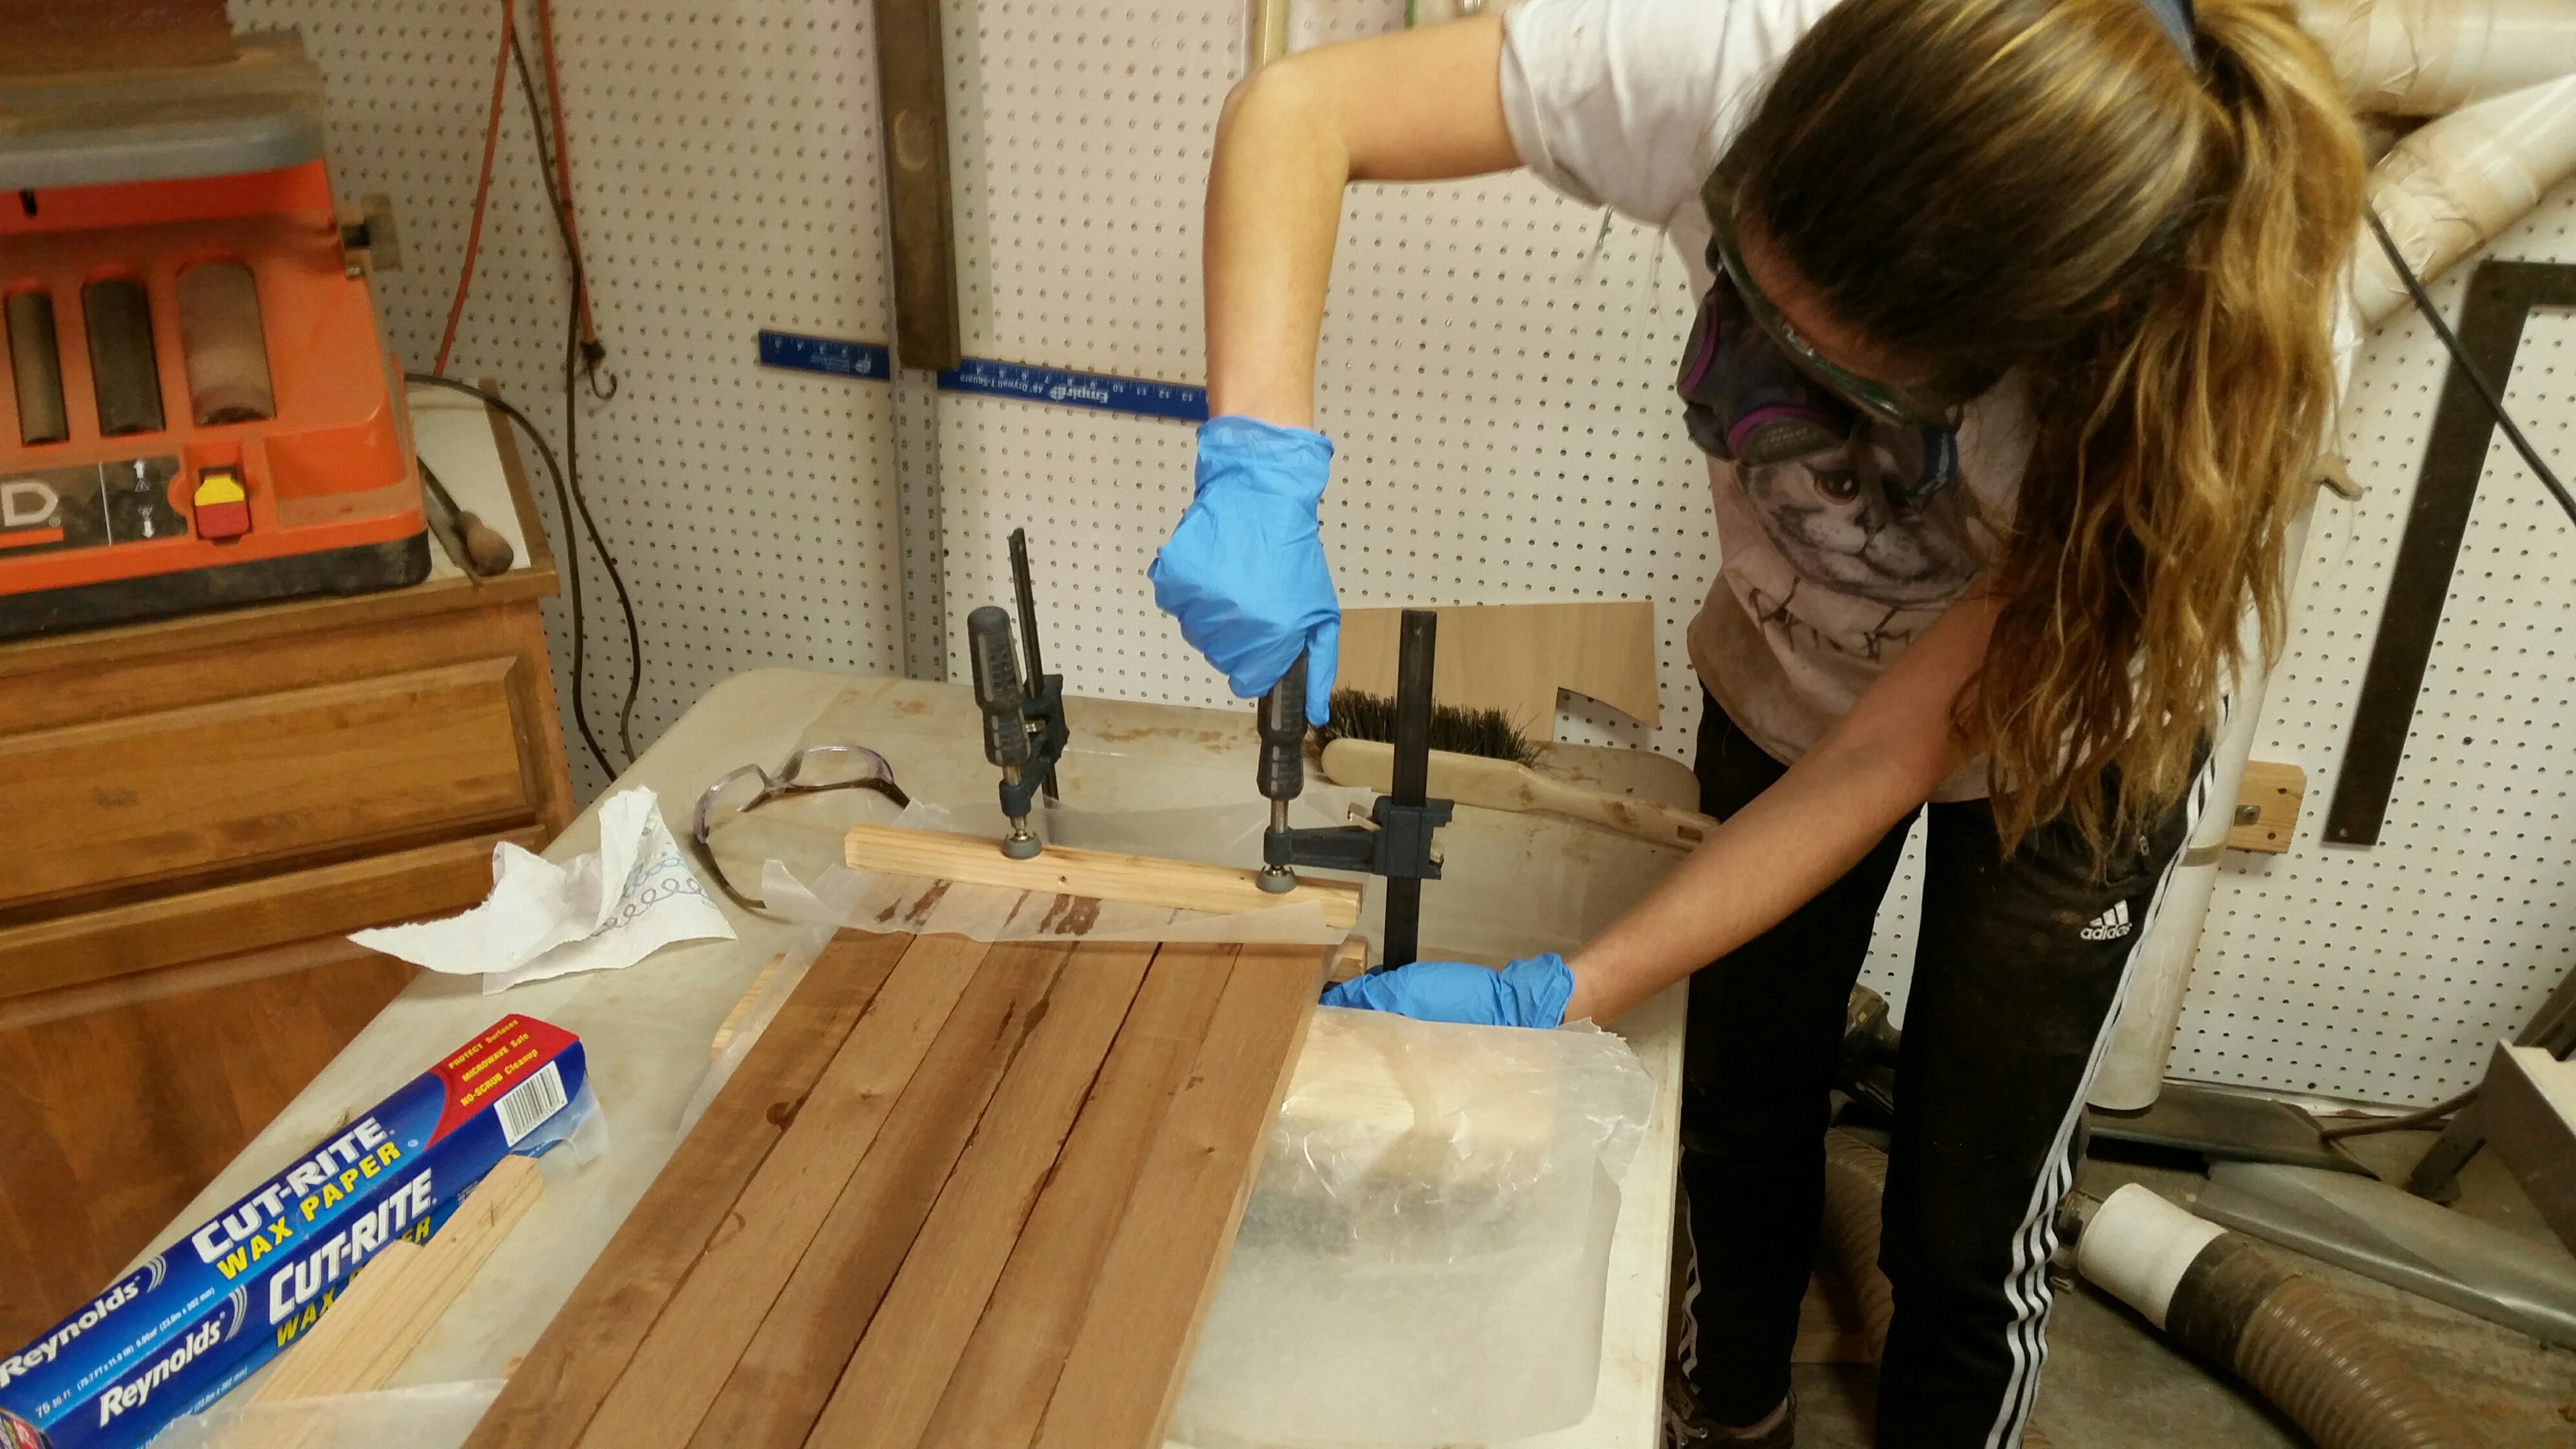
Stripping is taking me about 30 min per strip, including the fitting, resolving issues along the way, gluing, clamping, aligning, clamping, aligning, cleaning, repeat.. Maybe I’ll get faster – I am getting better at it, but still just a beginner. Decided right off to jazz it up a bit with some detail. Made some 7 mm wide strips of sapele and maple – tricky business cutting those, but got a Micro-jig splitter for the table saw, as well as a Magswitch thin stock ripping guide – those helped a lot. Just can’t get in too much of a hurry to get done.
Notice the temporary screws I’m using to hold the strips at the bow stem – Those will later get removed and the ends of the strips will be cut flush to the front of the stem. Then the false stem goes on top of that. The screw holes will all be gone. Not using any other screws or staples to hold the strips. At the stern, note the cleats I hot glued to the transom to hold the strips there. I’m using very little hot glue on the strips, generally, just enough to keep the strips snug against the forms (stations). I don’t put hot glue on every strip at every station.
Went to Harbor Freight and got a whole bunch of their inexpensive clamps, to augment some other higher quality clamps. As many as I have, it just never seems enough. The Rockler Bandy-clamps work pretty well to hold the strips downward, tight against the previous strip.
Jan 17, 2017
Picked up some western red cedar yesterday. Got 5/4 x 6″ x 12 footers. First step was to figure out my process for milling strips, hopefully without opening the garage door – the bitter cold has been replaced by rain – neither is too nice for trying to work partially outside. Running the timber diagonally through garage, and taking advantage of the doorway into neighboring garage did the trick.
Planed the cedar to 18 mm, then ripped strips to 7 mm wide. Planed a half mm off each surface to get to finished dimension of 6×18 mm. Before getting carried away with mass production, I just made up 4 strips and decided to get them on the boat to see if I would learn anything that would make me want to change any strip dimensions.
As expected, the first 2 strips, one on starboard and one on port at the sheer took me quite a good couple hours while I figured out clamping methodology, and got them all aligned fair and hot glued in place, except at the transom and bow stem where I glued them permanently in place. Decided to go for it and glue 1 strip additional, before calling it a day. Worked out fine but is certainly tedious. I’m sure I’ll get better at it with practice. Need more clamps. 3 strips down, 117 to go! 🙂

Jan 14, 2017
Ah, warmth! Wired up and Installed a 220V heater today to replace all the small space heaters I’ve been using. Good thing as it’s been down to 10-15F the last few nights. Warmed right up.

The keel glued up nice. Hand planed, shaped and sanded the connection of bow stem to keel, and cleaned up the connection to transom. Now completely ready to start stripping! 🙂
Jan 12, 2017
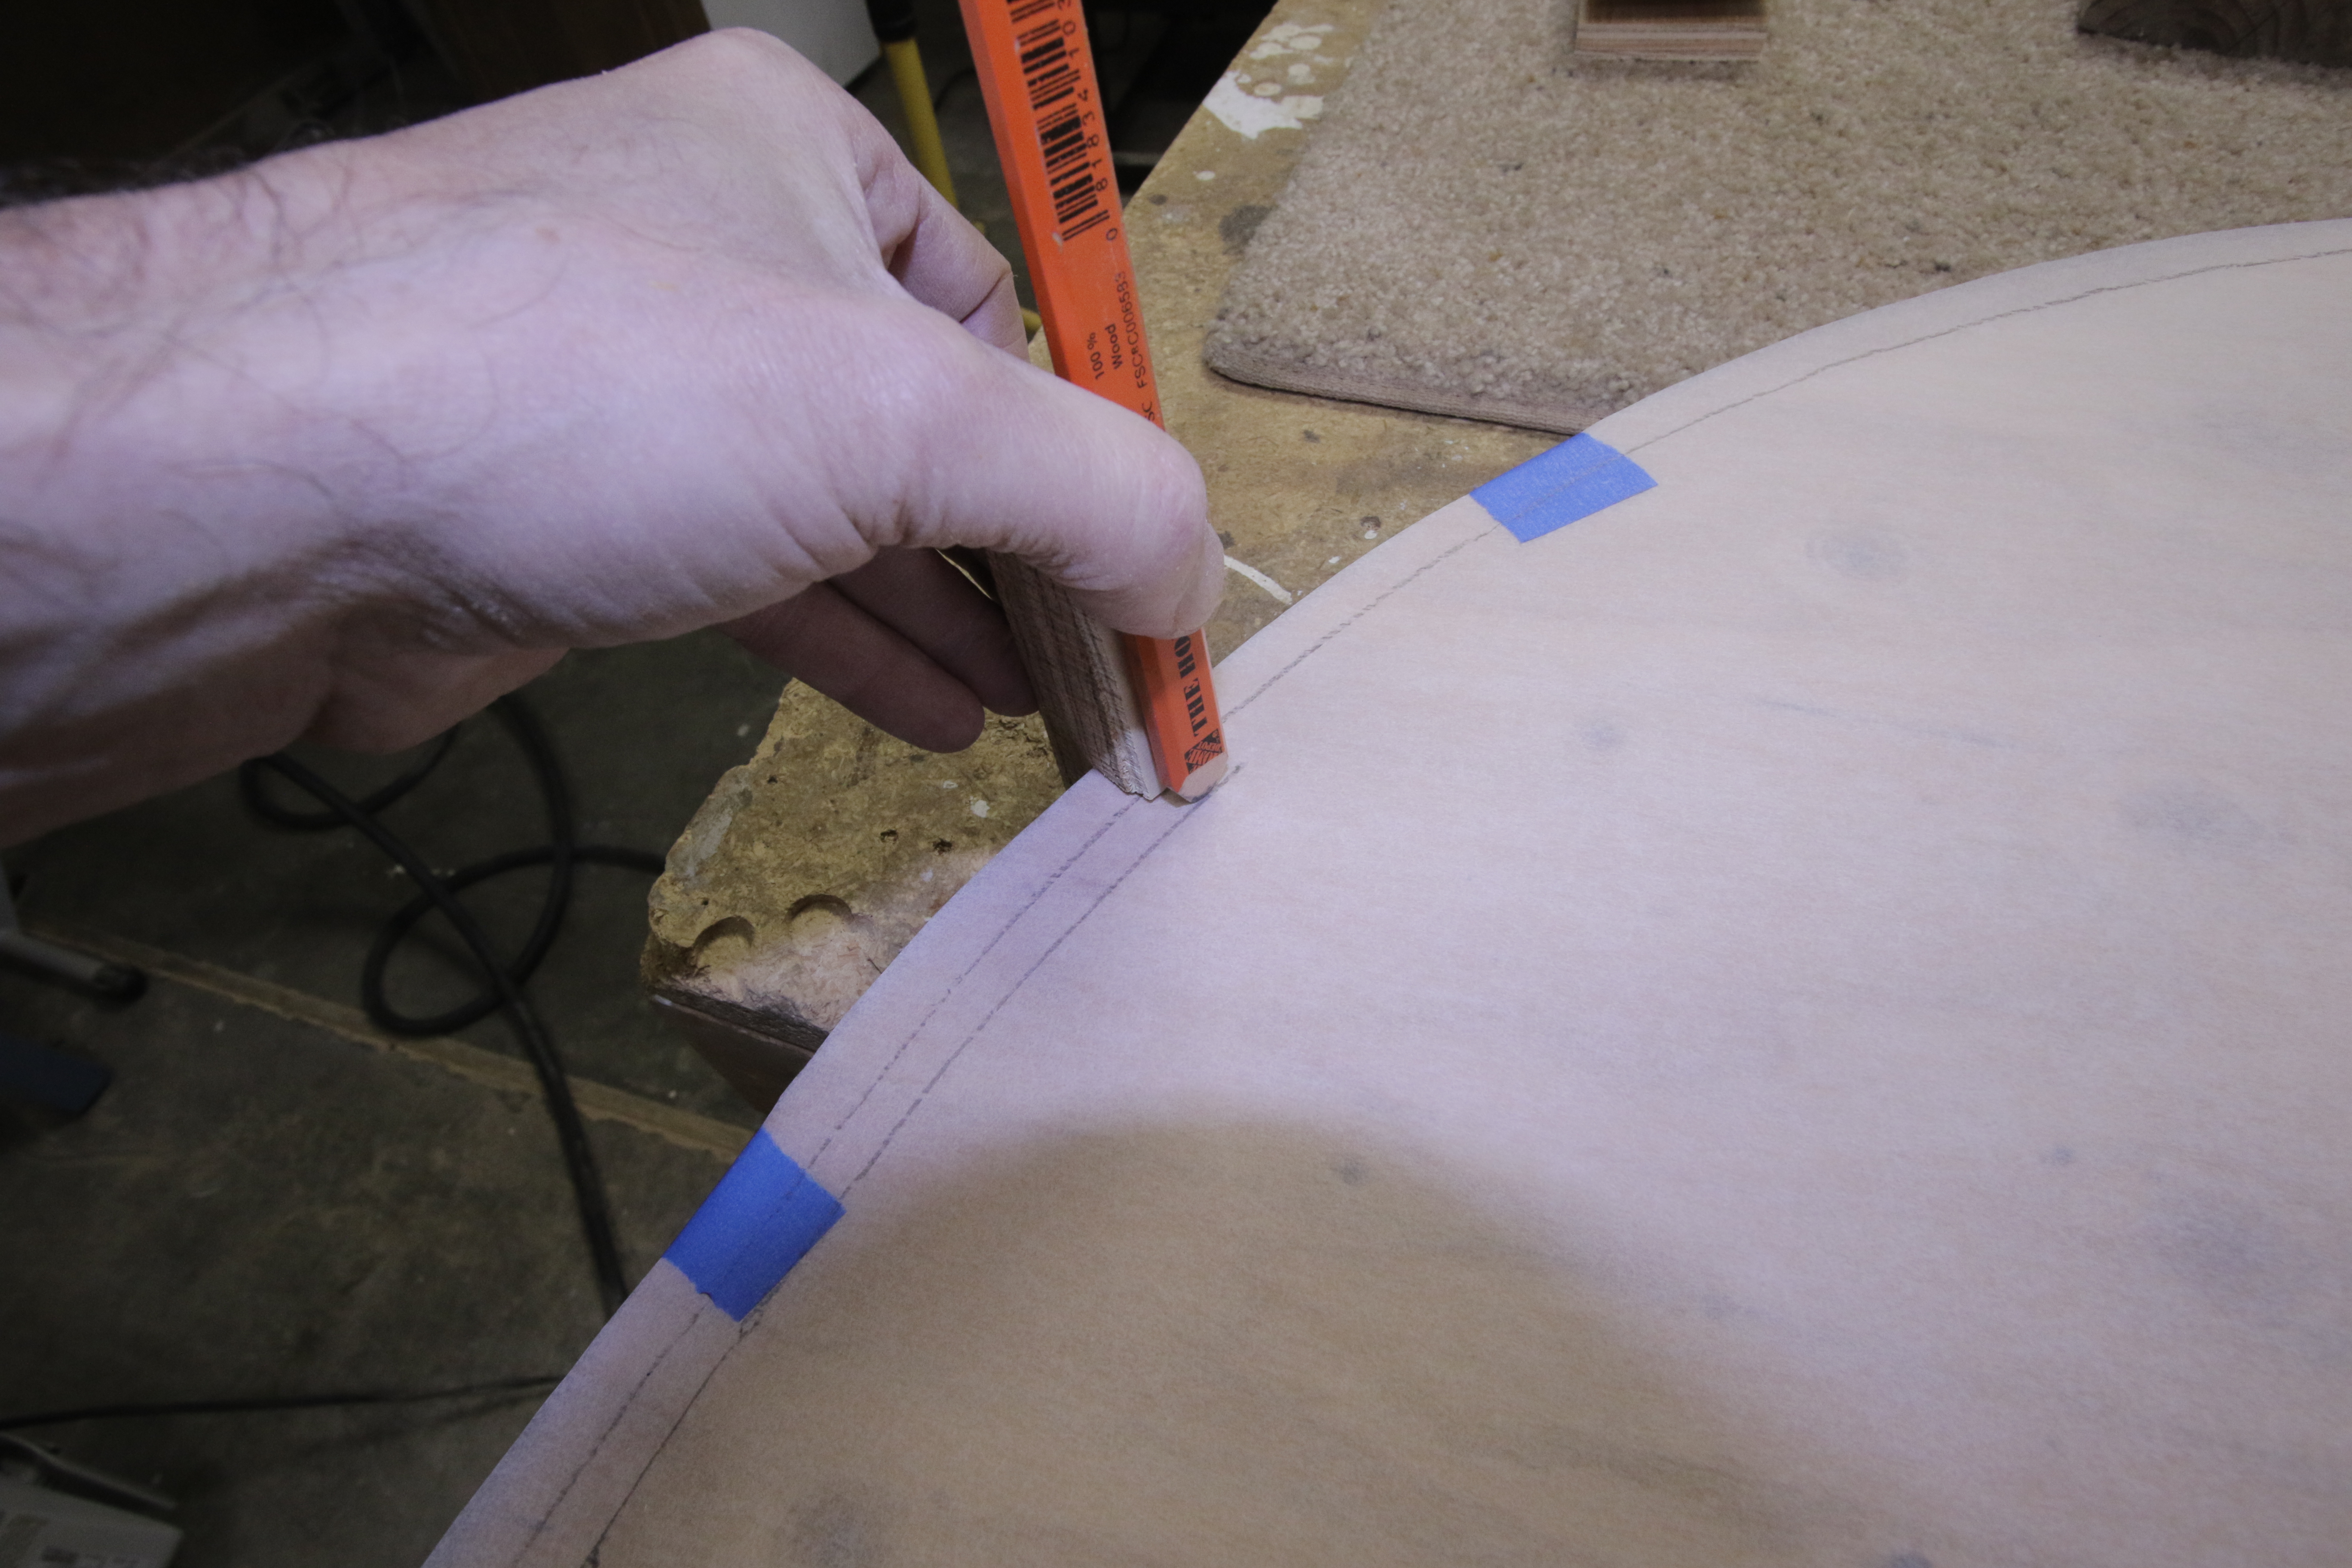
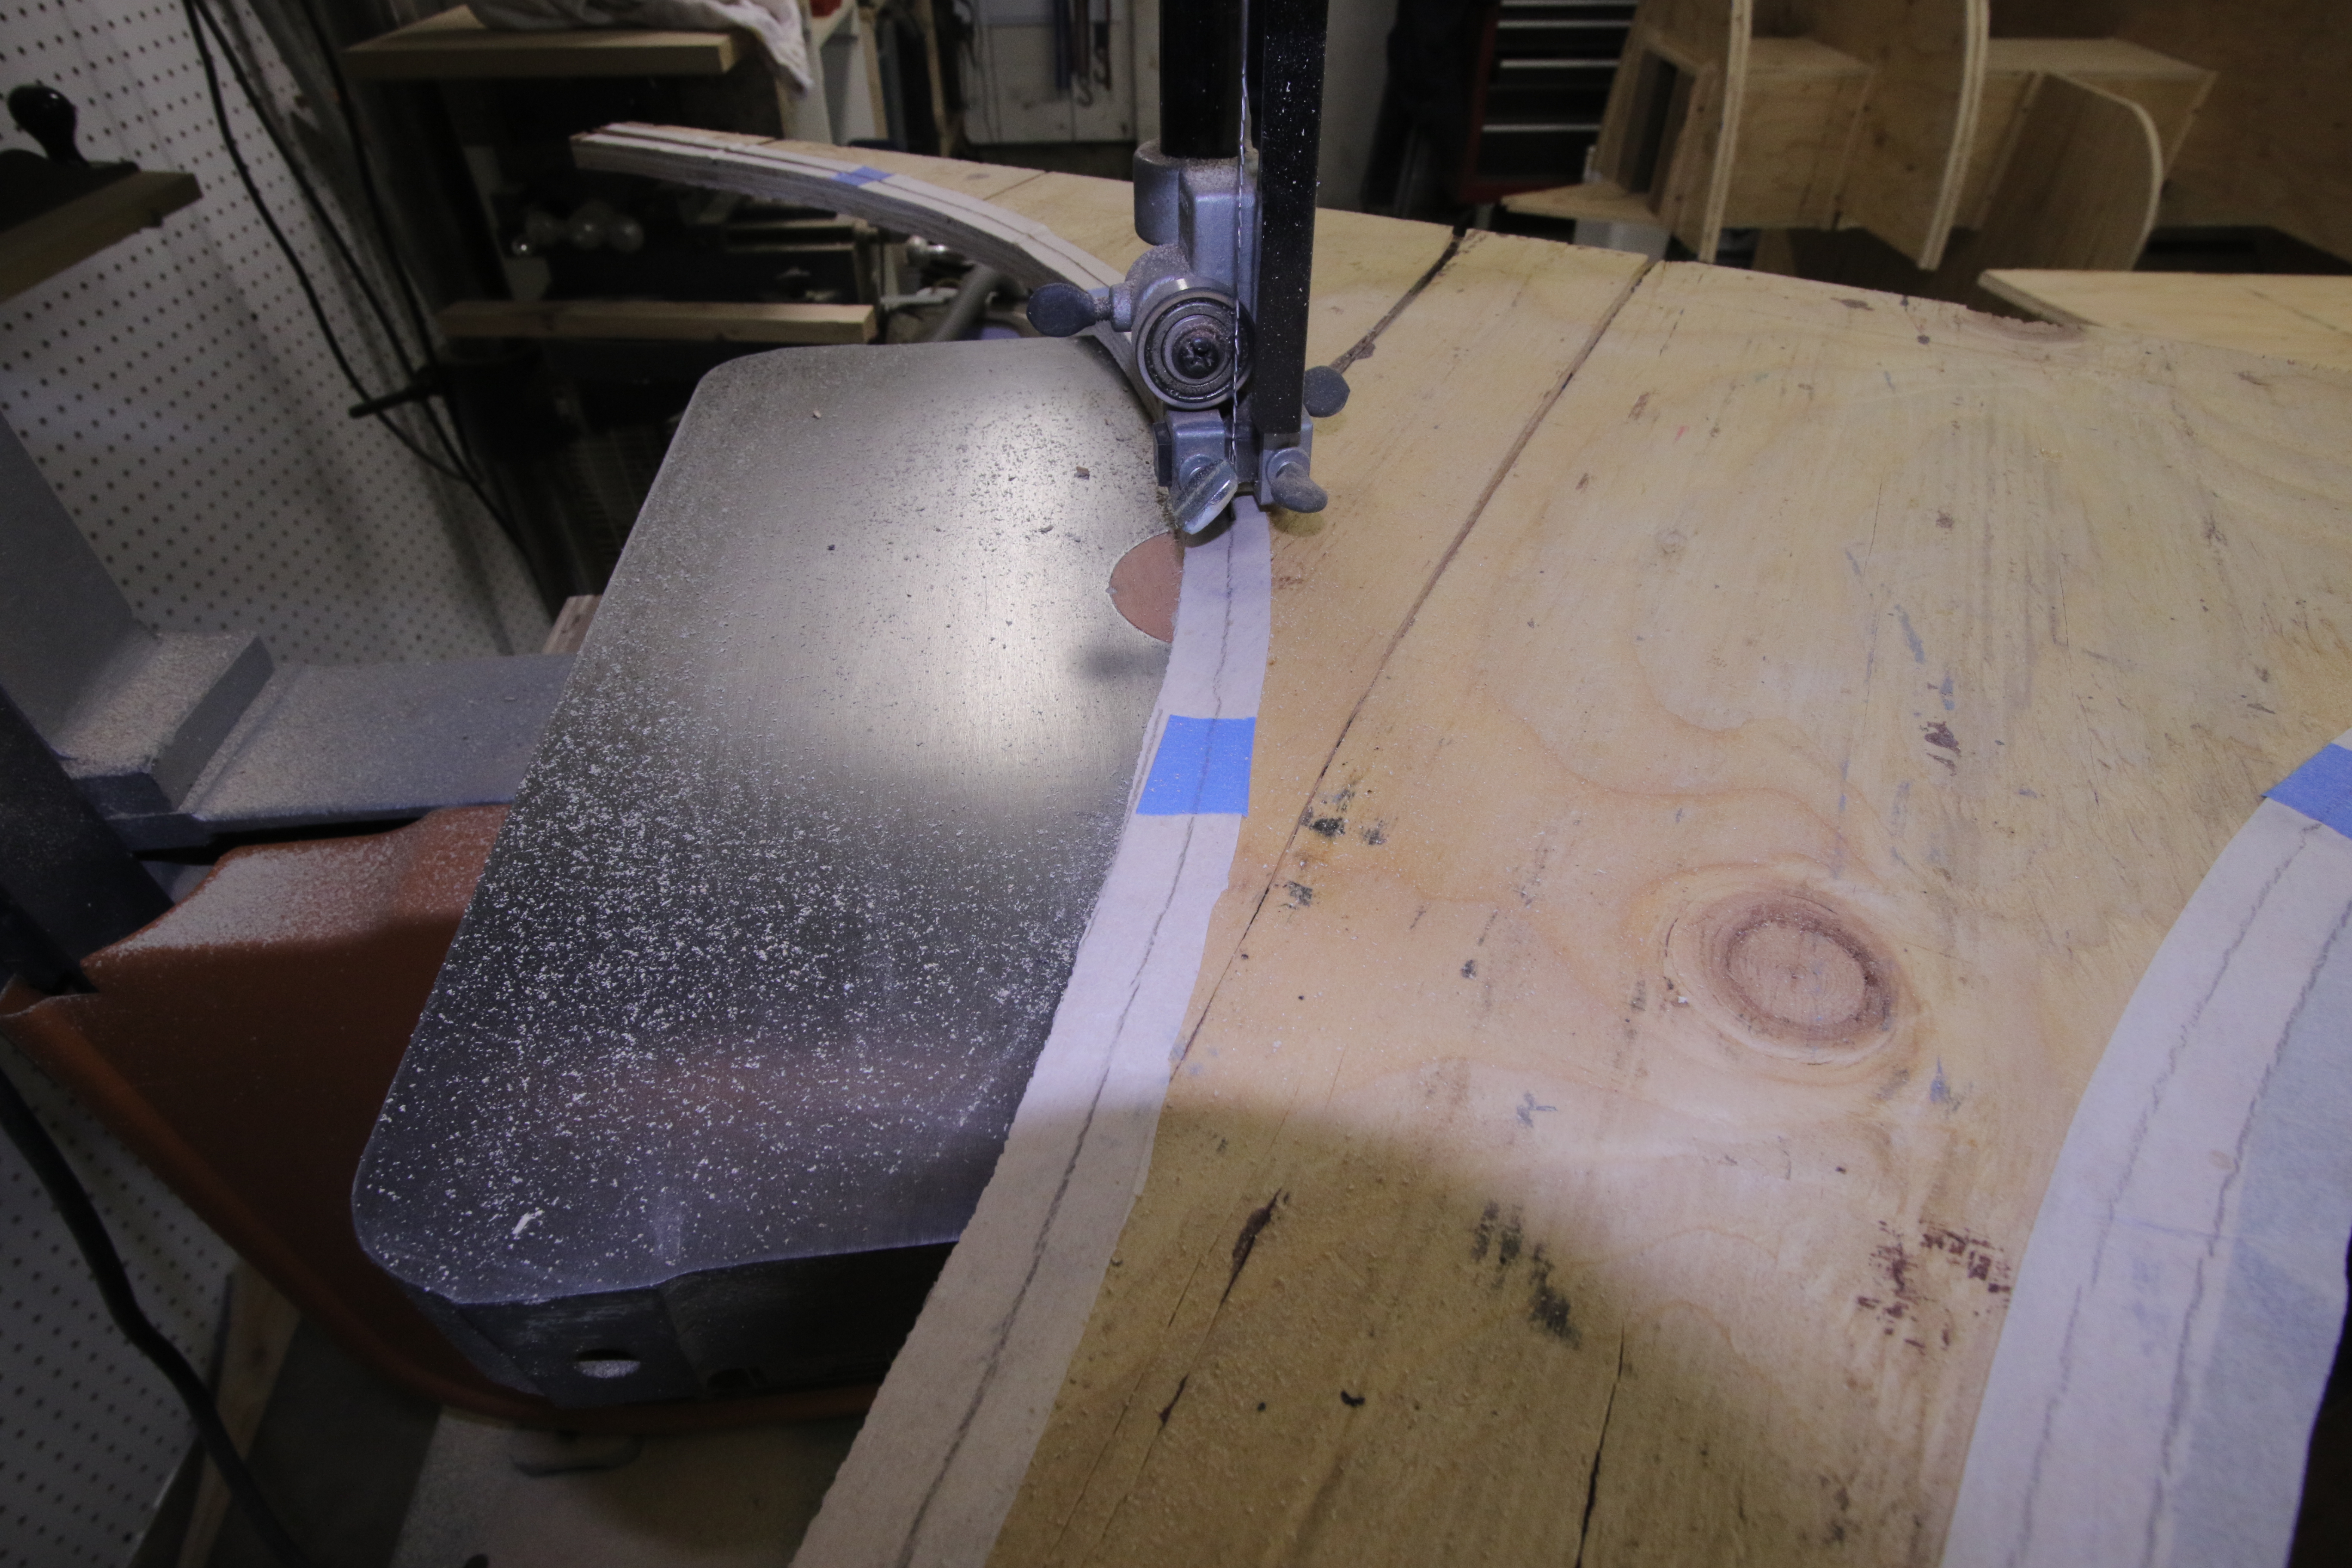
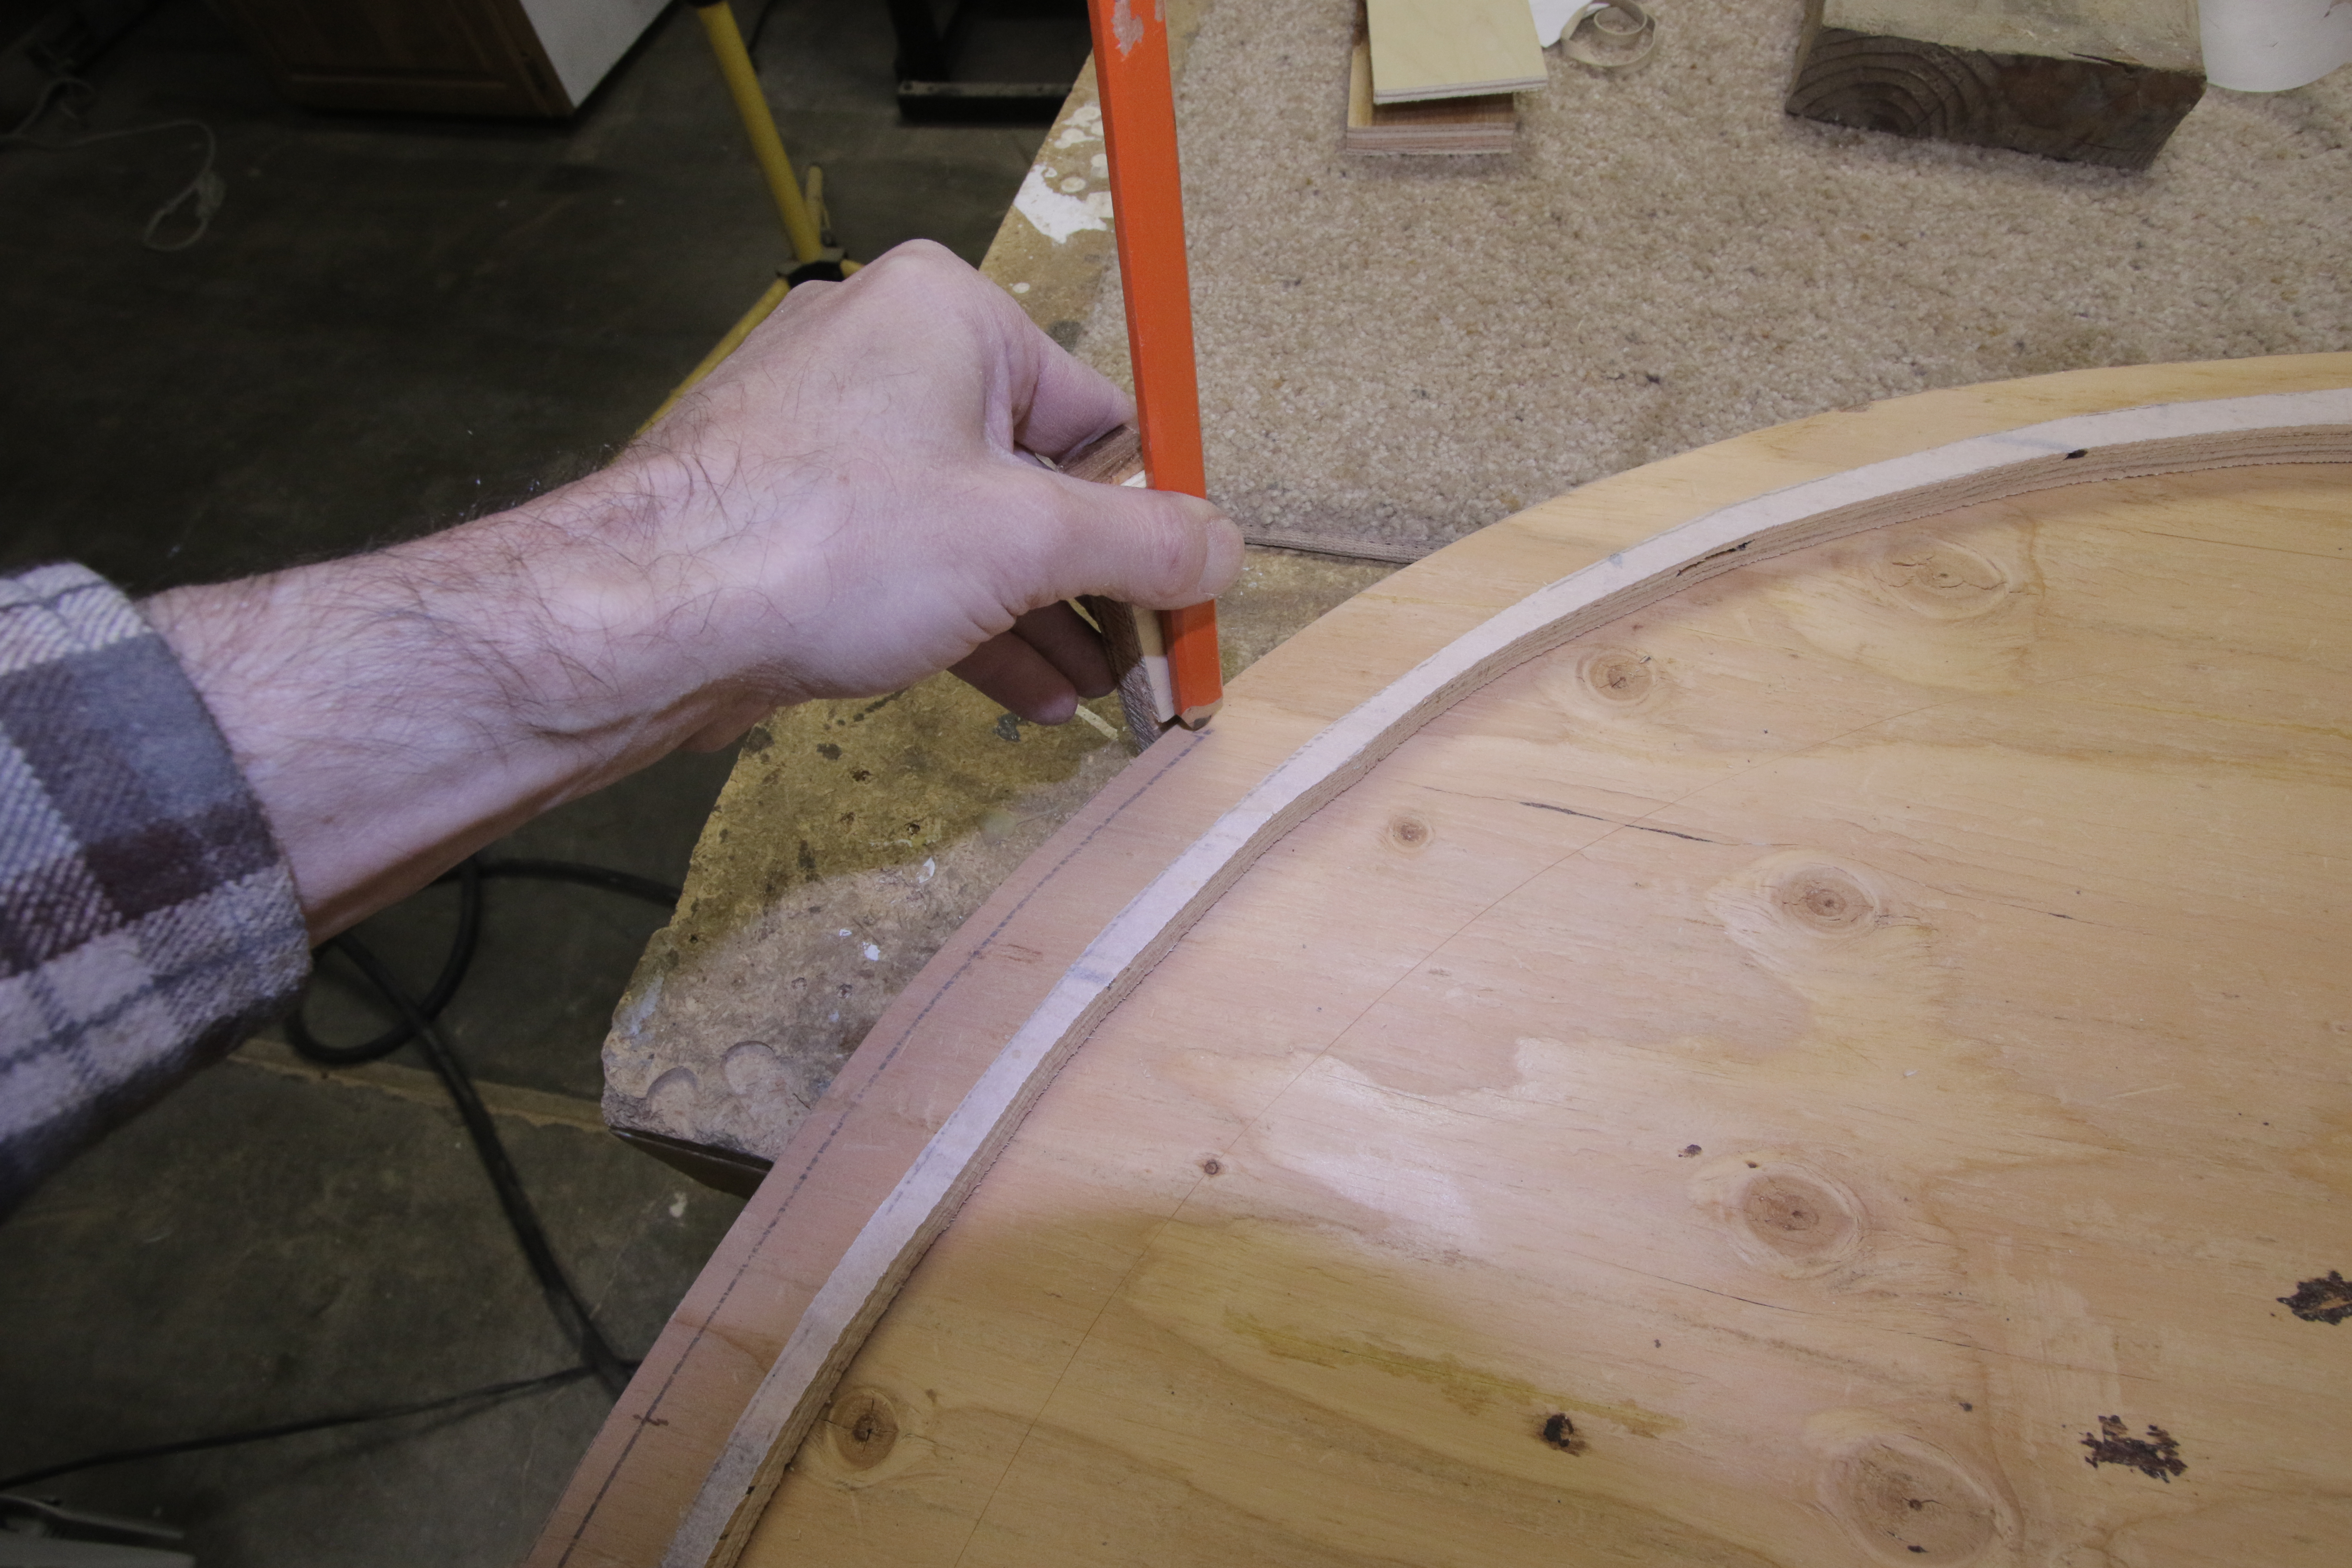
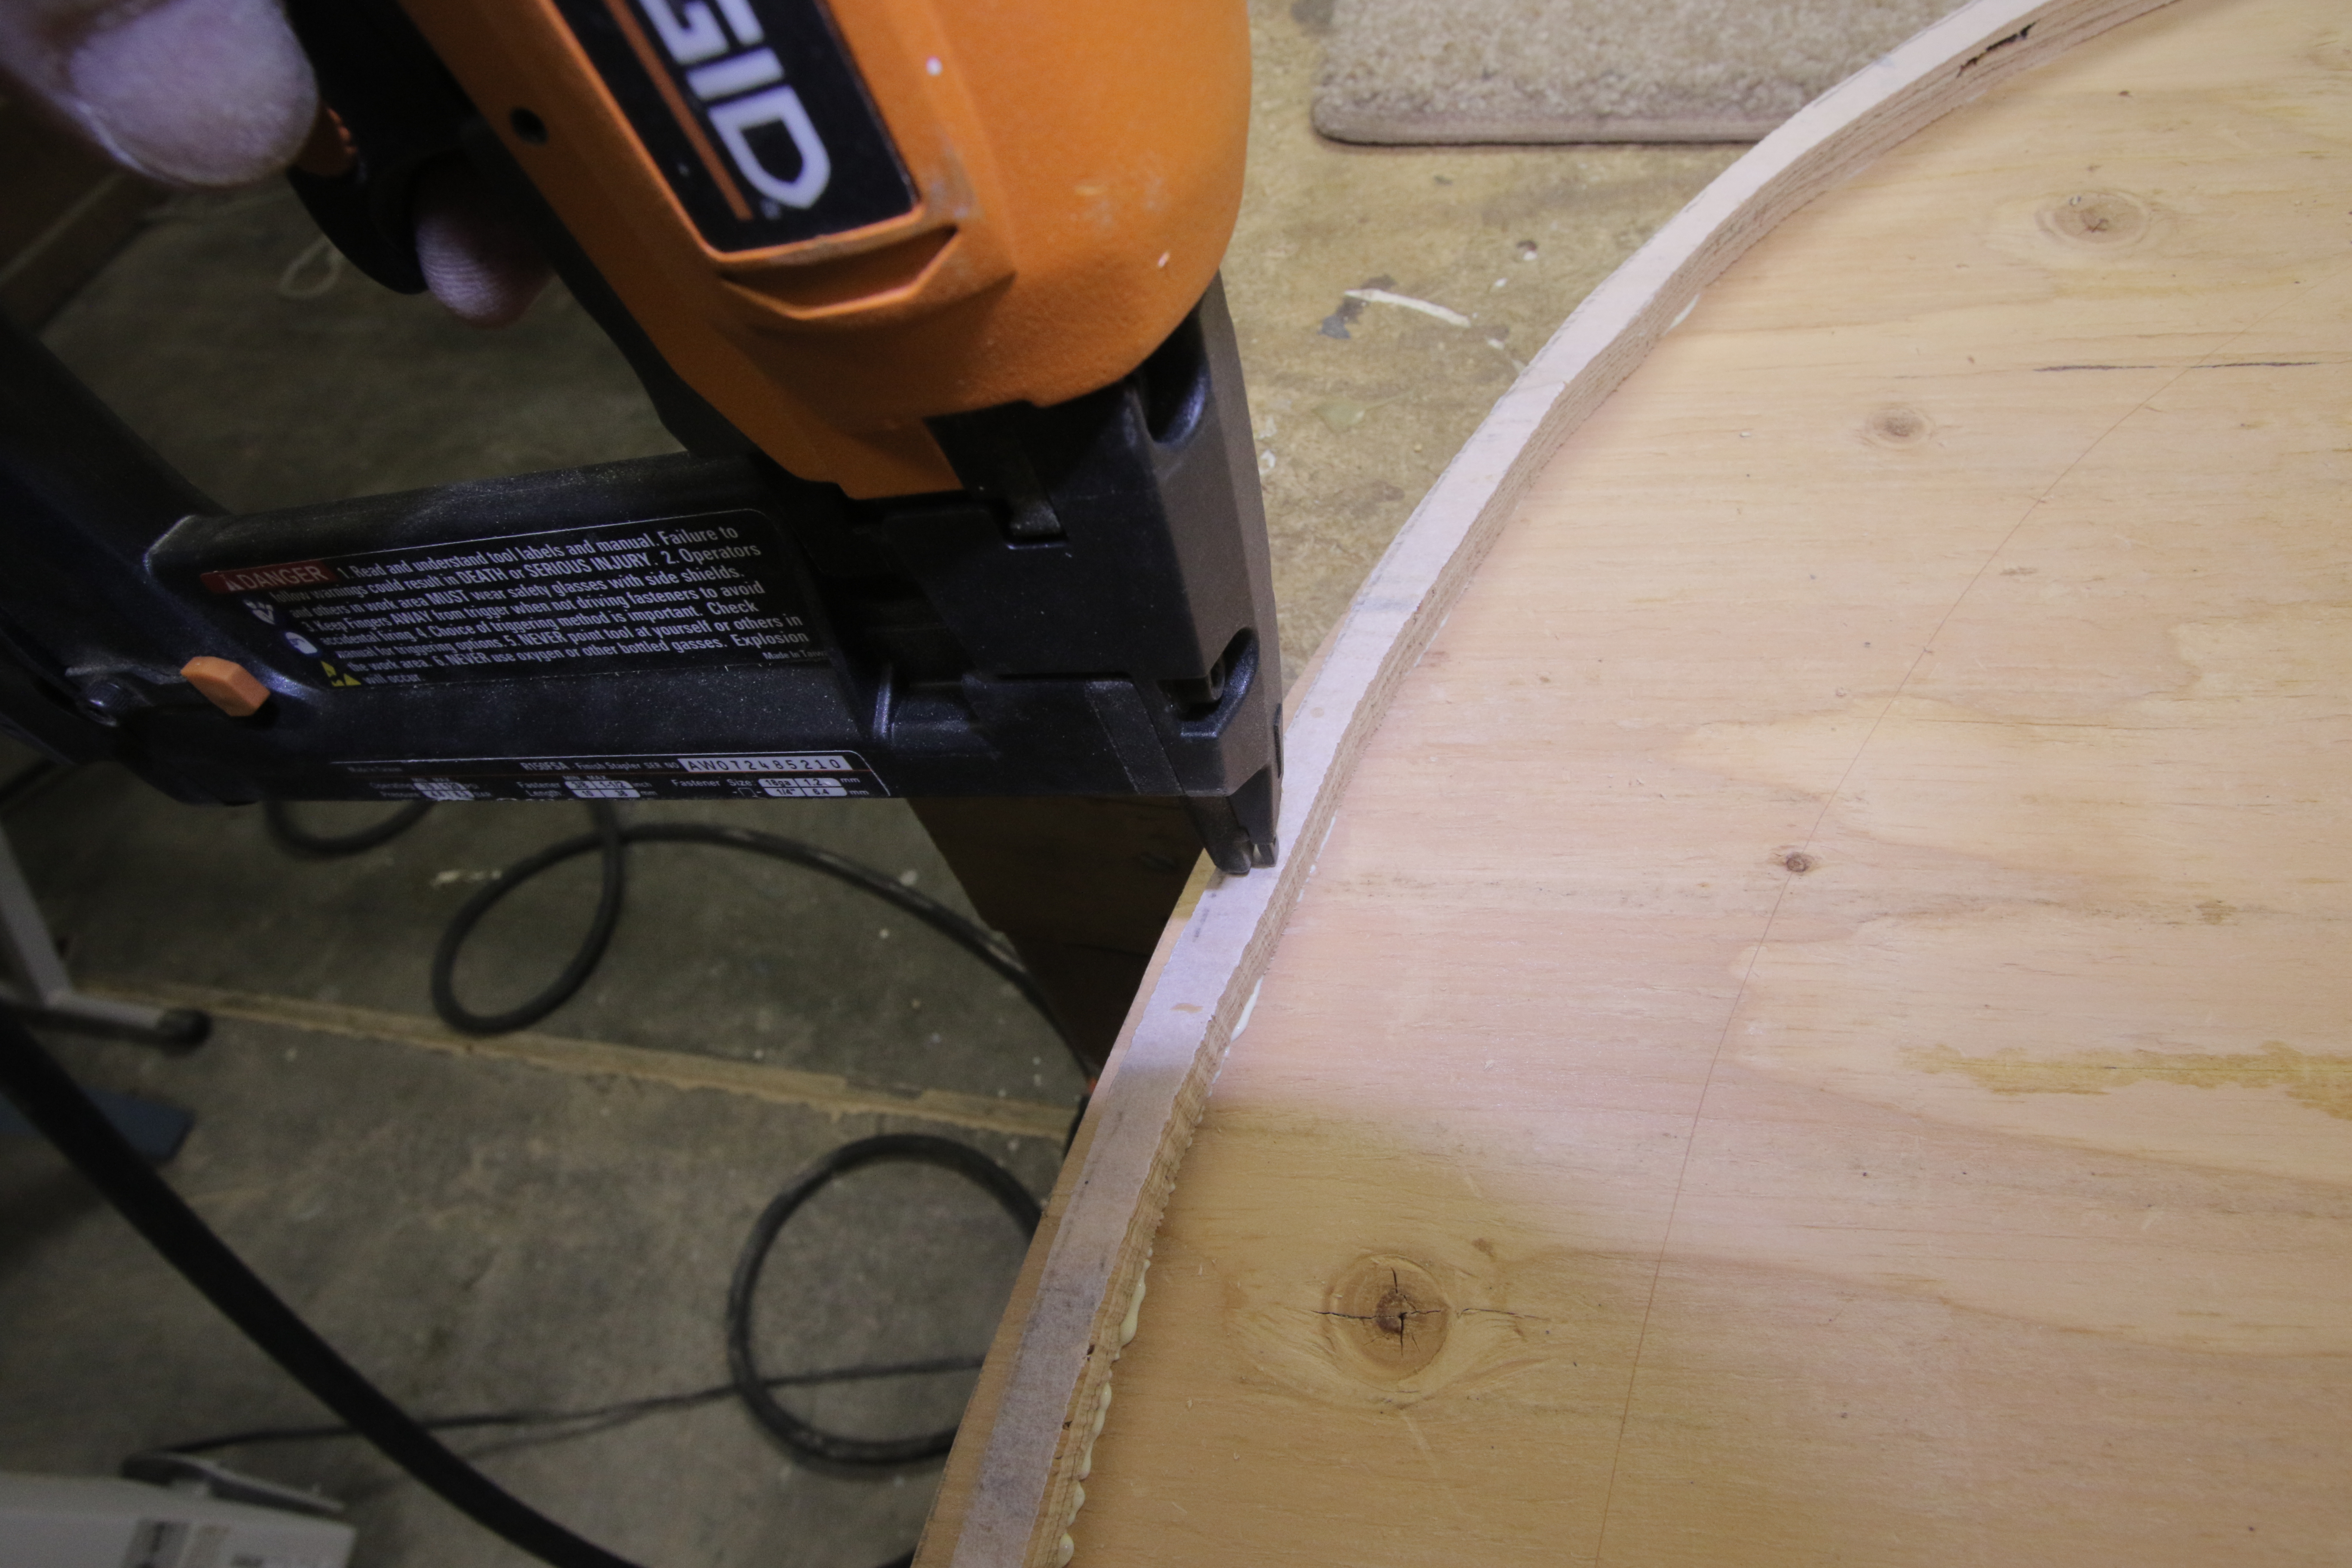
Made a template to cut the daggerboard hole in keel. Cut the hole to rough size with a jigsaw and routed to finish with a straight trim bit with roller bearing.
Now the keel was ready to epoxy in place. I used 2 screws with the epoxy to attach it to the transom cleat, but just used epoxy to attach to bow stem. I left the keel long at the bow, and just roughly shaped – will shape it to fit the stem after the epoxy is cured. The sapele is so stiff, with much spring, that I’m concerned when I remove the clamps that the bow stem is going to spring up. So I made a “bungee” tie of twisted nylon rope to keep it snug against the building frame until I get enough stripping done to hold it all in place on it’s own.
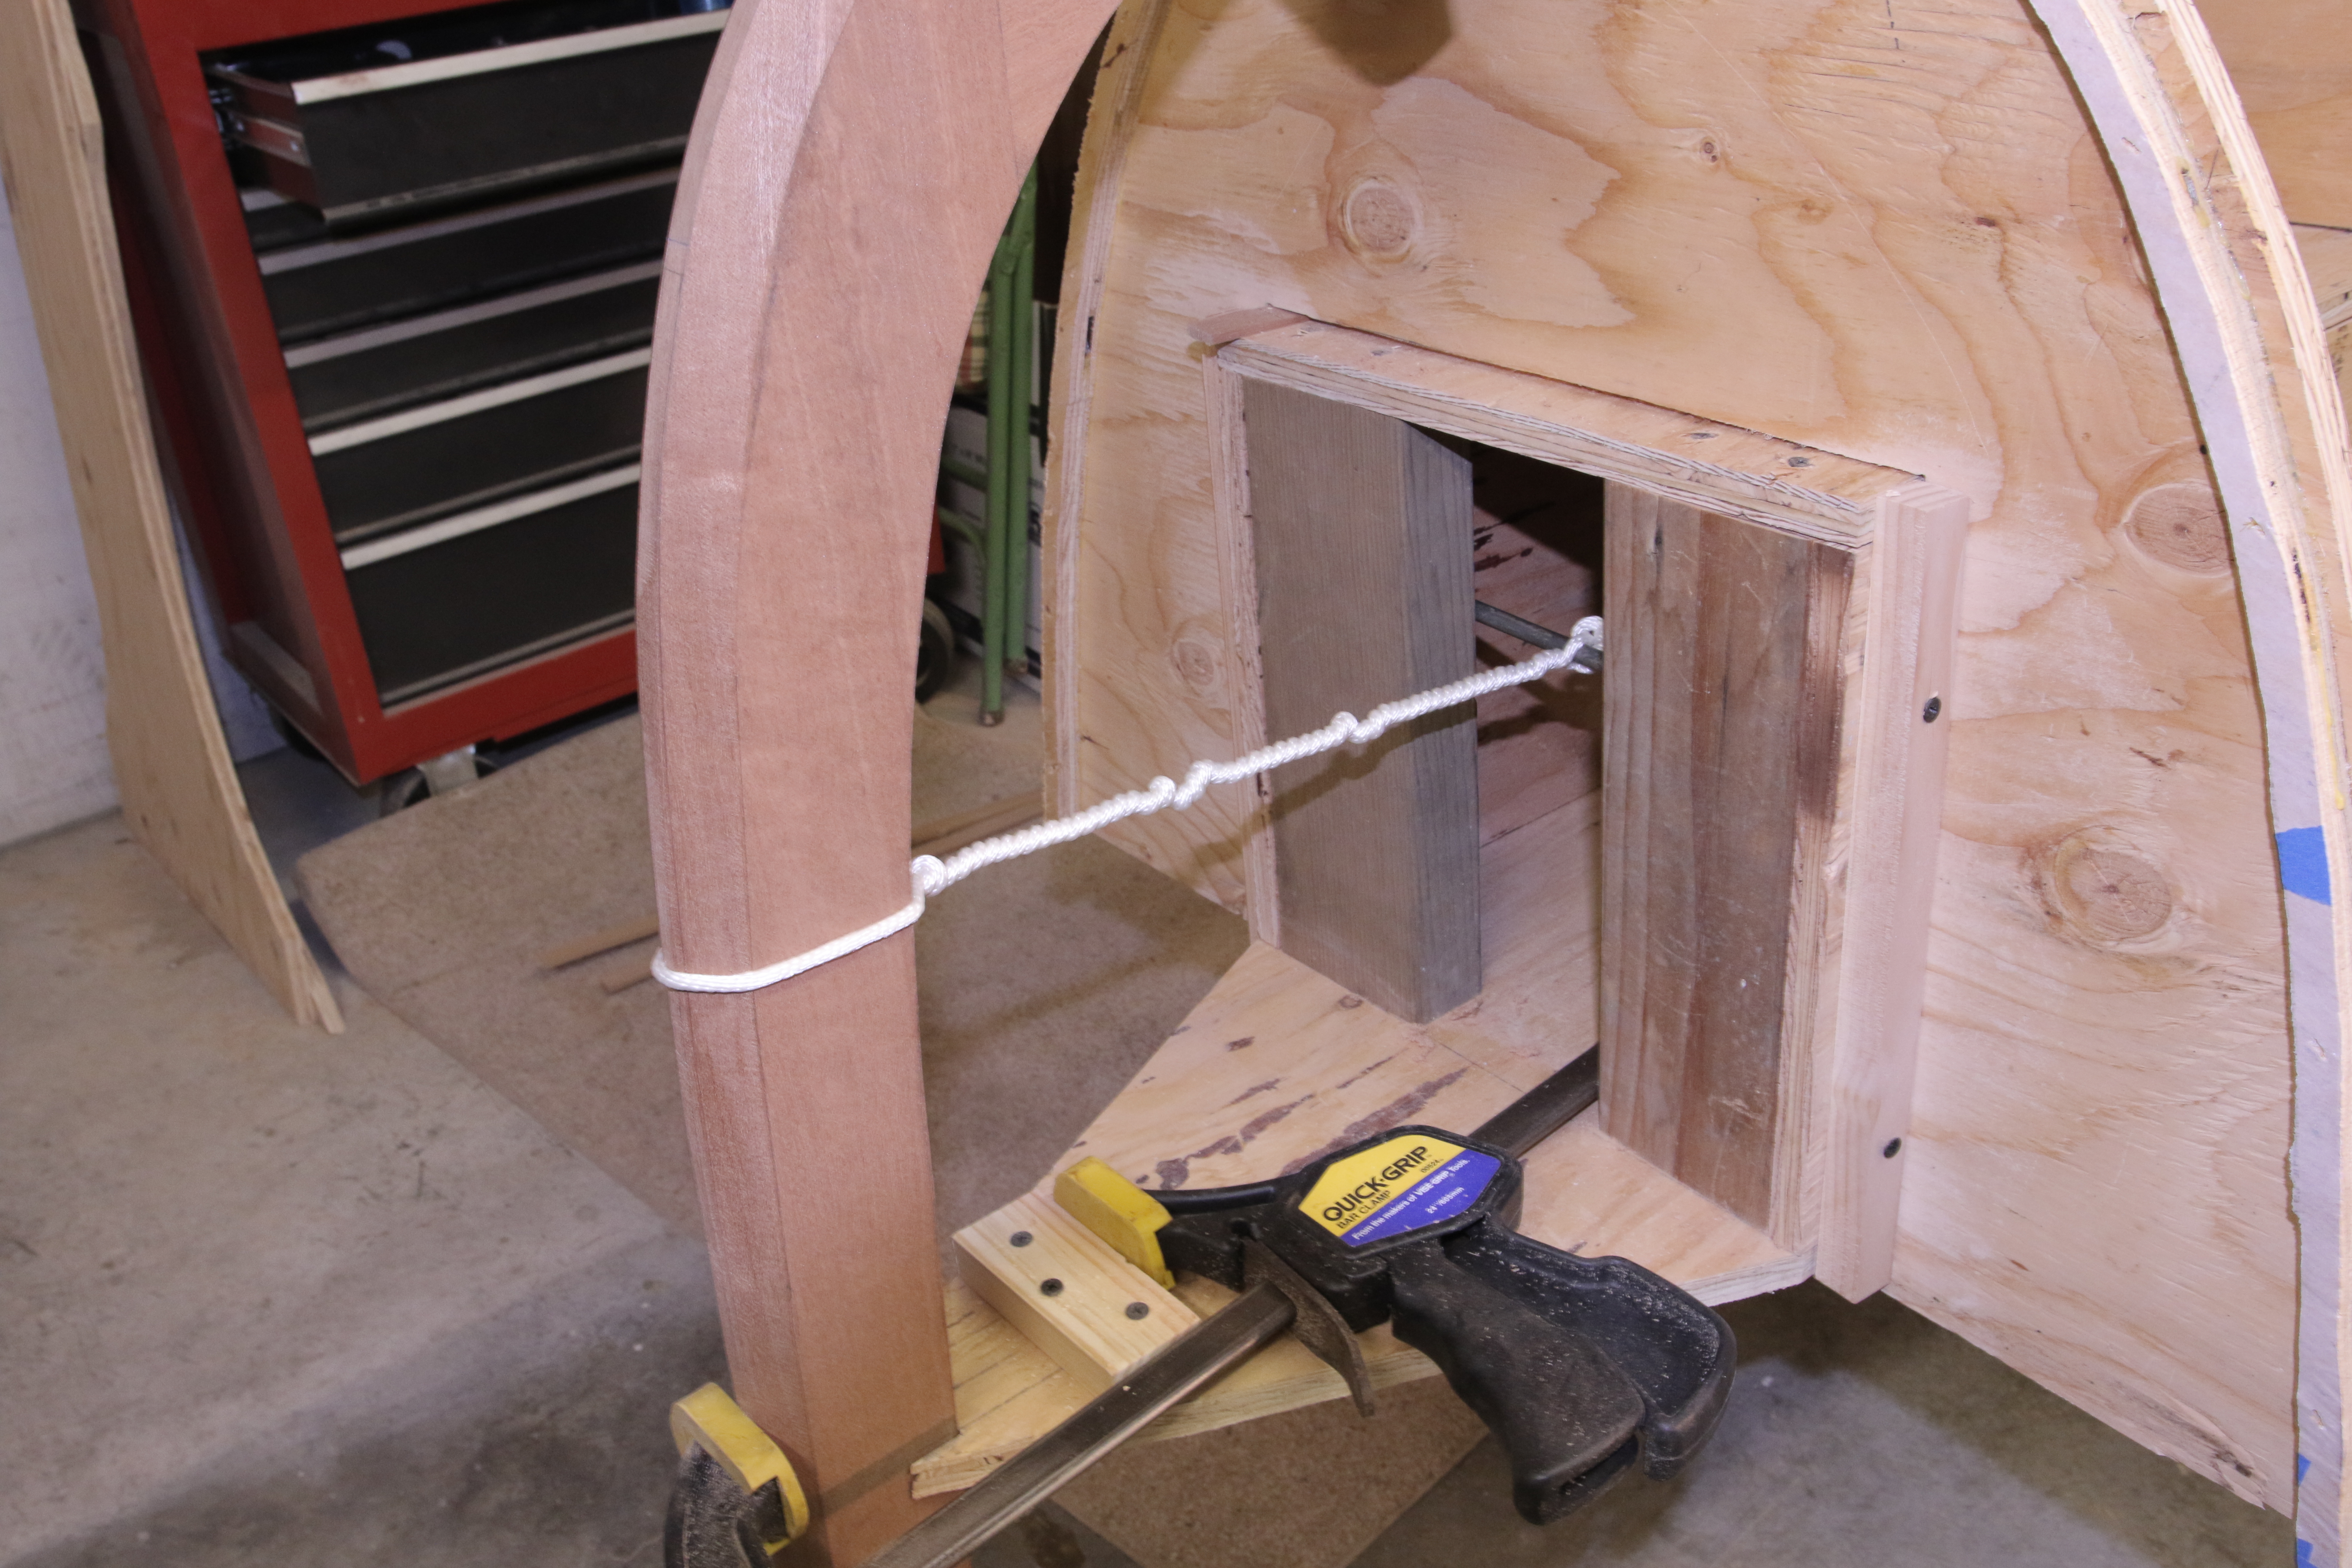
Jan 11, 2017
A somewhat simple task of gluing the keel cleat on the transom started a chain reaction that turned into several hours of work that was needed anyway, but I didn’t think it would be today. As I was positioning the cleat, the keel wasn’t quite square to the transom. Something wasn’t right, and I needed to figure it out. The center line on the keel is definitely straight – I drew it with my long aluminum straight edge – but not all the stations were aligned to it, and it was throwing the keel off.
First step was to shim the building frame supports so that the frame was level. Then one-by-one, I went through all the stations and made minor adjustments, using shims to level each one, on bottom edge, and to make sure they were all aligned to center, and then secured them all in place with screws. Much better, really good actually. Needed to do that anyway, before I started stripping. The keel fits much better and it bends down perfectly to match the transom now.
With that done, I drilled holes in the keel transom cleat, including counter-sinks, on the drill press, epoxied and screwed it home.
Jan 10, 2017
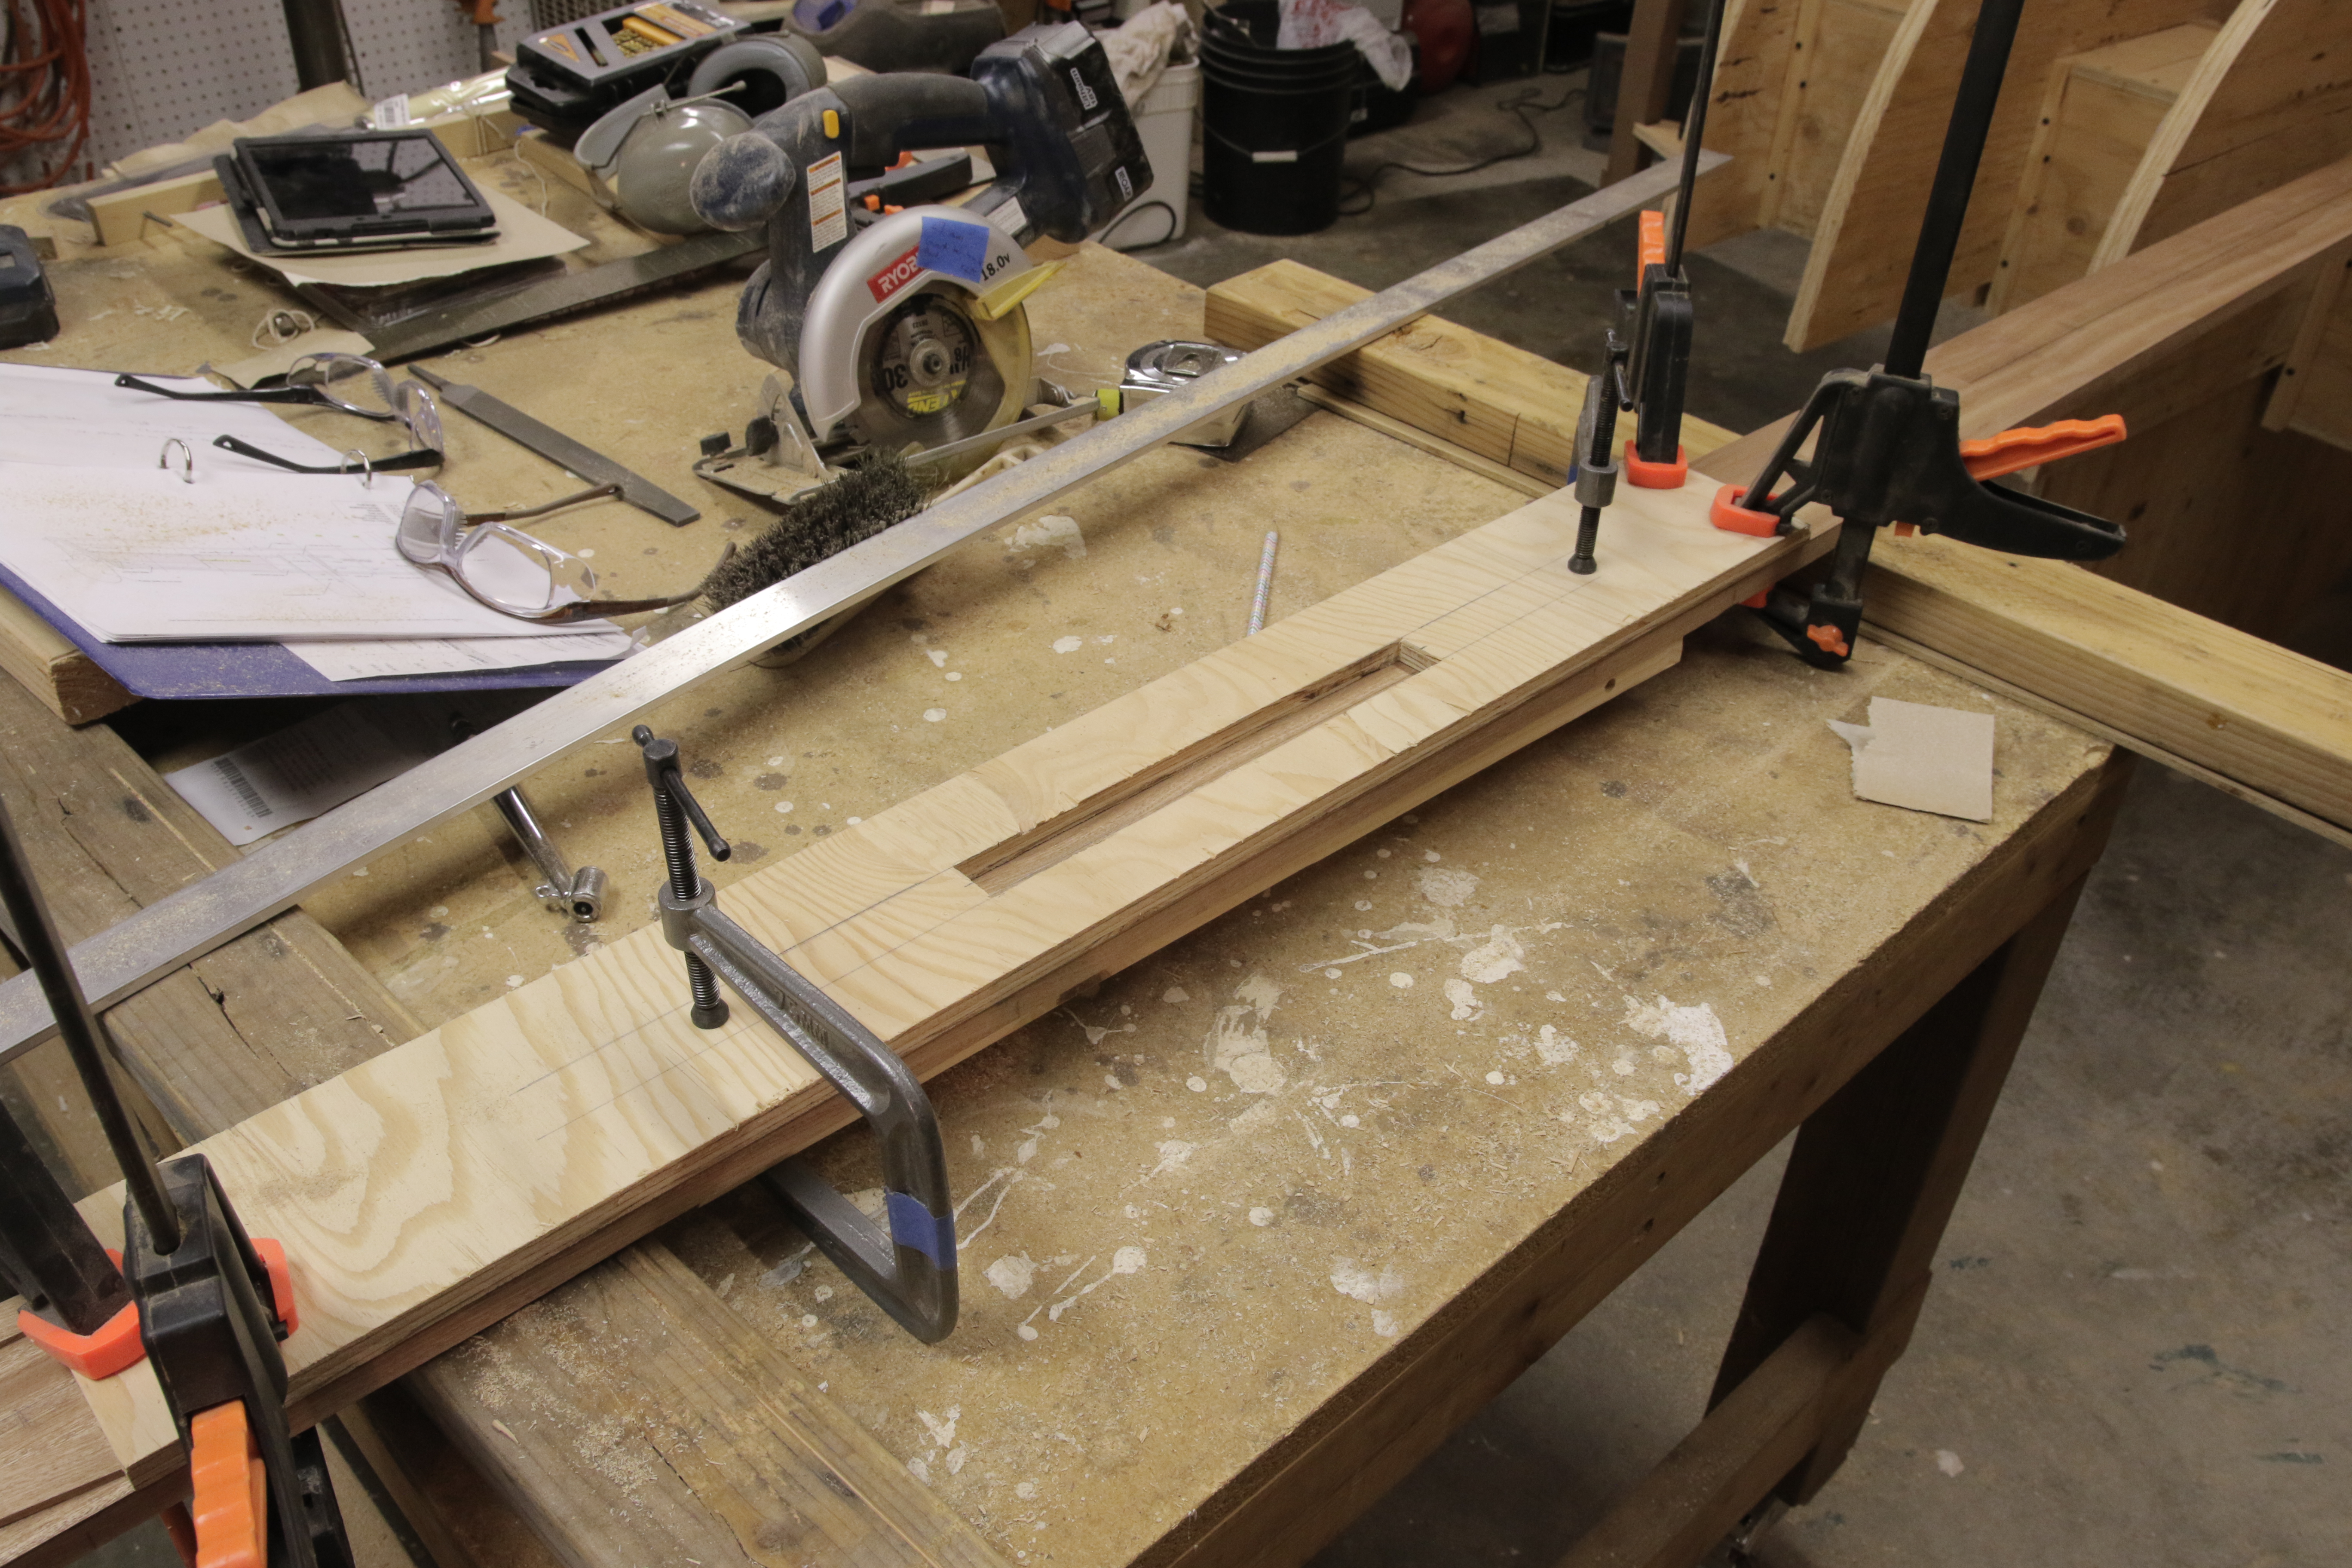
Worked on planing the bevel for the keel. Not done yet but have most of it roughed to size except for the bow end that I’m still working. Notice how the angle of bevel changes along the length of the keel. This is one tricky piece of wood. Cut a little piece off the stern end of it, with a carefully calculated/measured 24 degree angle to build a cleat to attach it to transom.


Jan 7, 2017
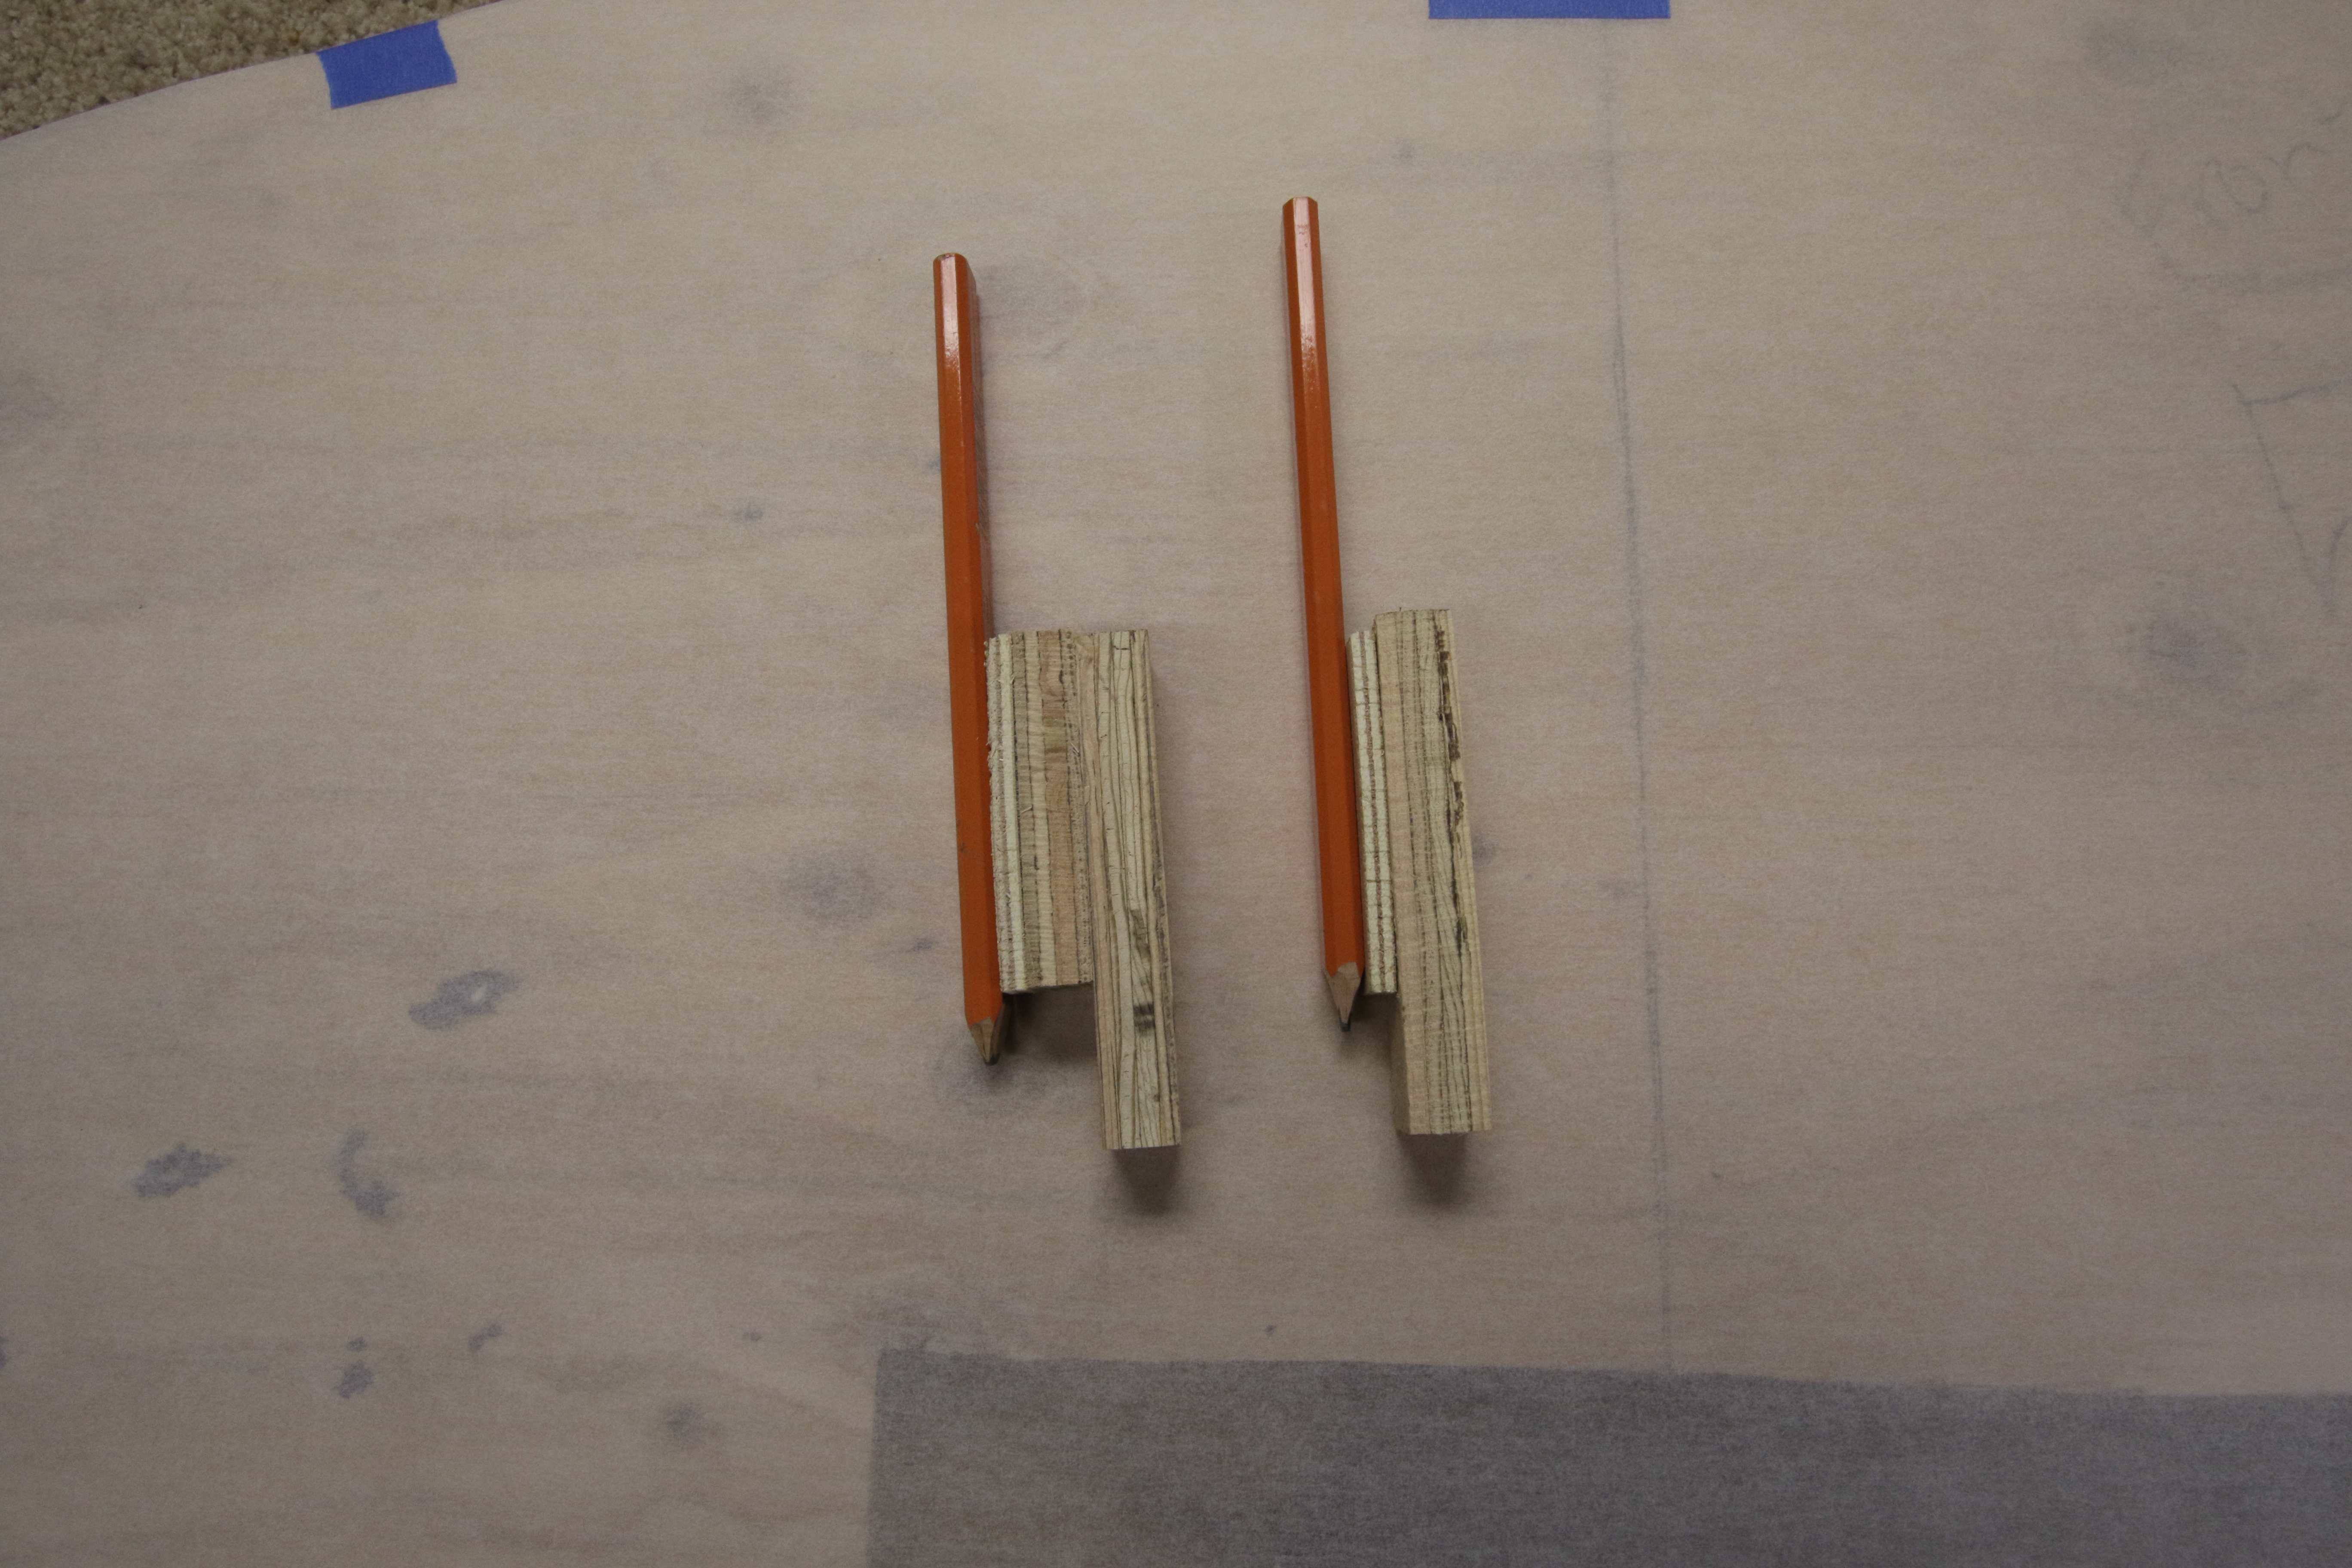
Added cleats to each station perimeter that will be used to clamp the cedar strips to. This is so that I don’t have to attach the strips with staples. I plan to hot-glue the strips to the stations and hold them in place with these cleats. These are about 1/2″ (13 mm) wide and 1/4″ (6 mm) in from the edge. I made some little jigs to use with my pencil to draw the shapes onto tracing paper, then glued the paper to 1/2″ plywood with spray adhesive and cut them out on the band saw. Attached with glue and staples.
I also started working on the keel today. Picked up a 8′ length of 1/4″ thick aluminum bar 2″ wide to use as a straight edge with router equipped with a flush trim bit. Easier than using our 6′ jointer to get an edge on long (12′) boards. Got the keel squared up and planed to 18 mm. Then tapered to width toward bow and stern (it is wider in the center); it fits perfectly (width-wise) into the cutouts on the stations. Still needs beveling. The sapele is beautiful!!
Jan 3, 2017
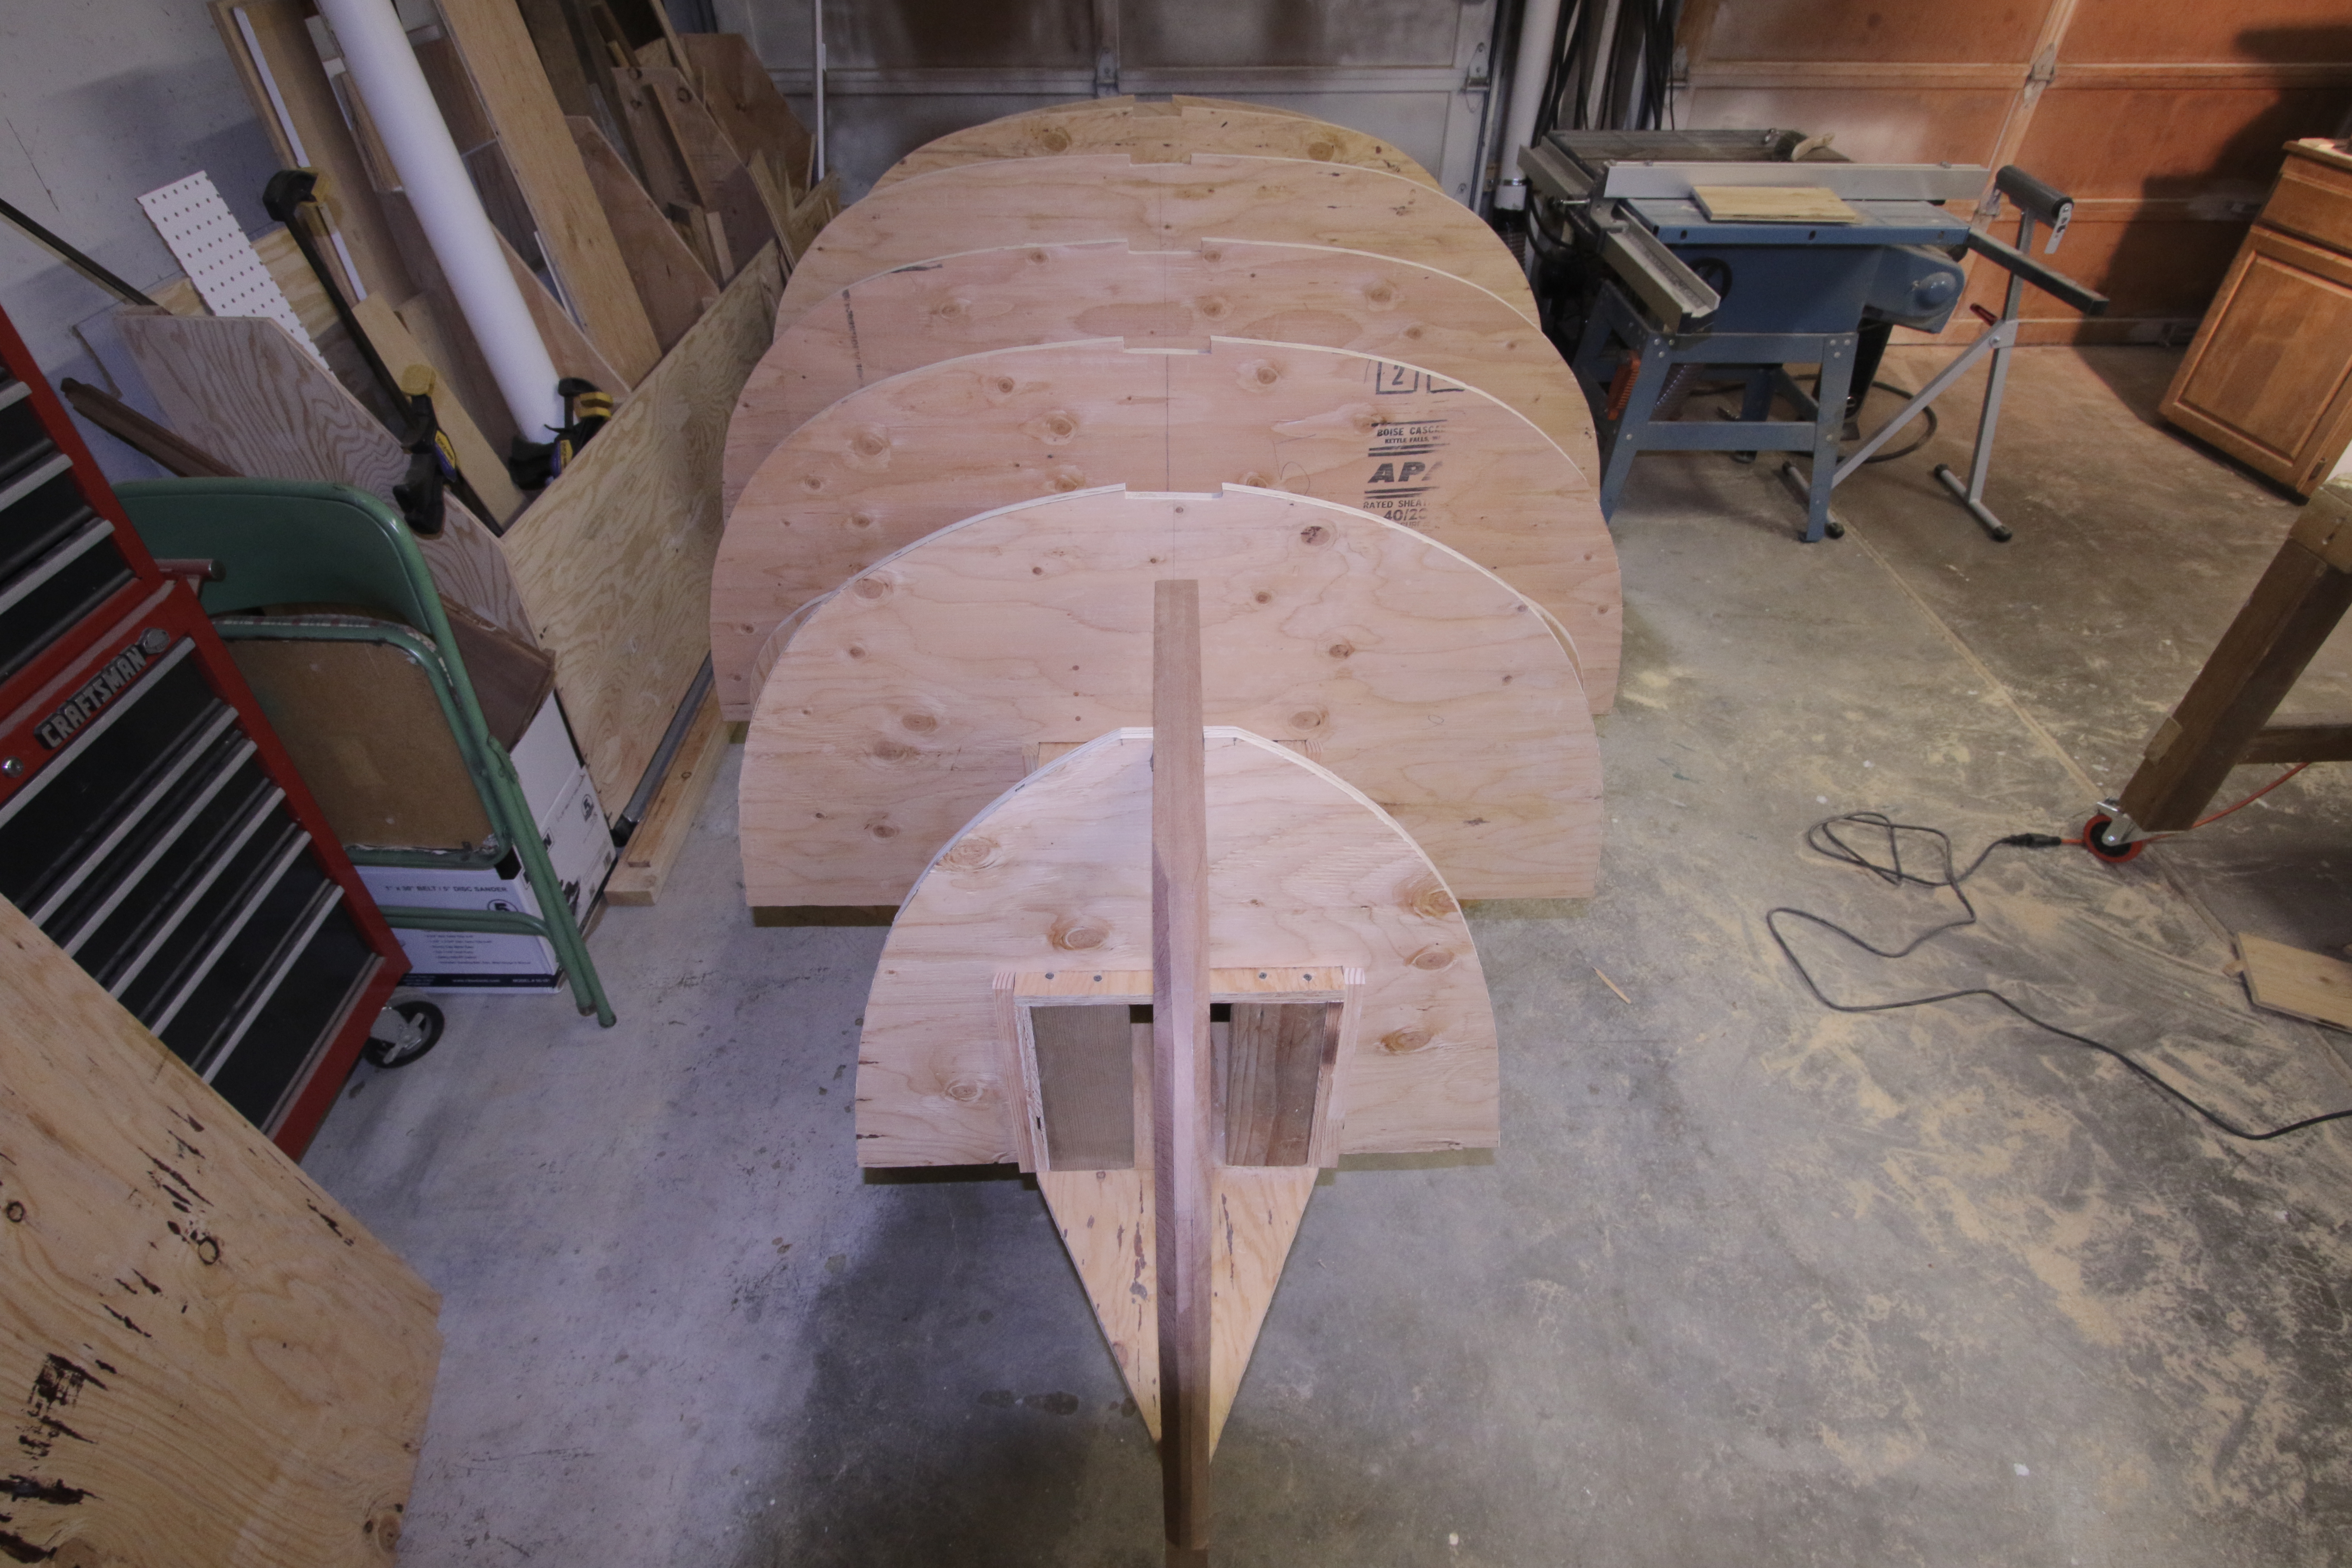
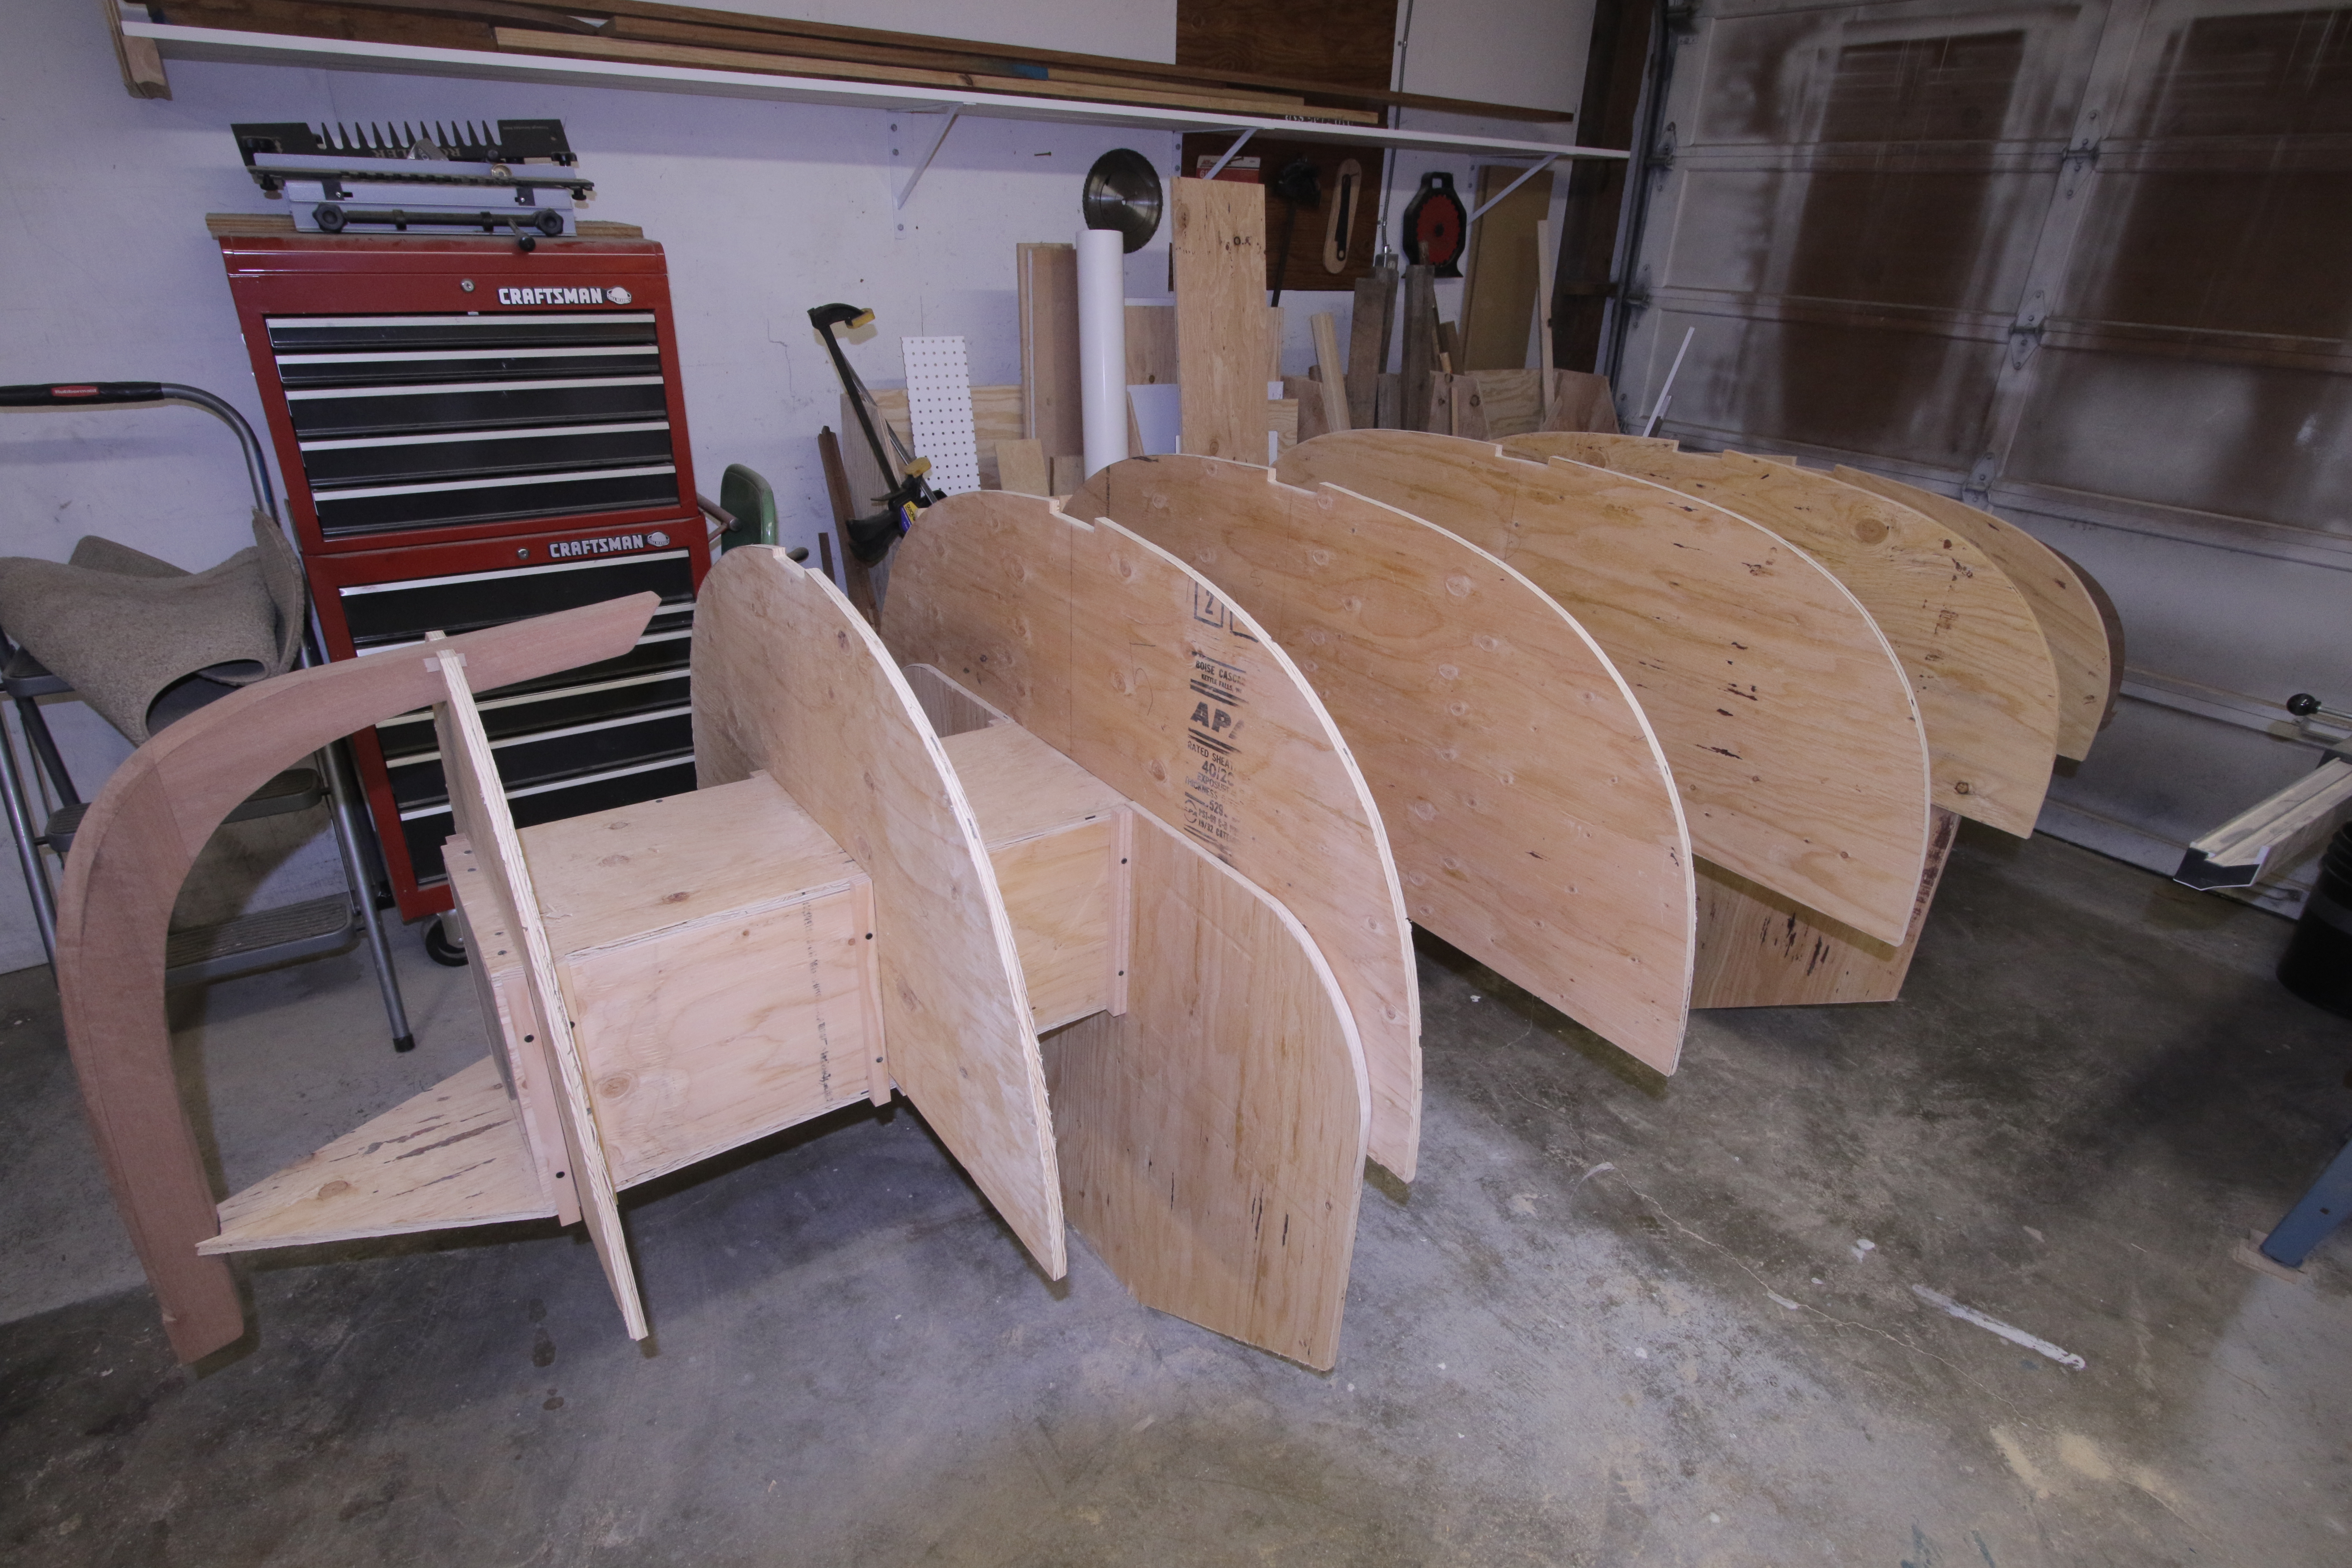
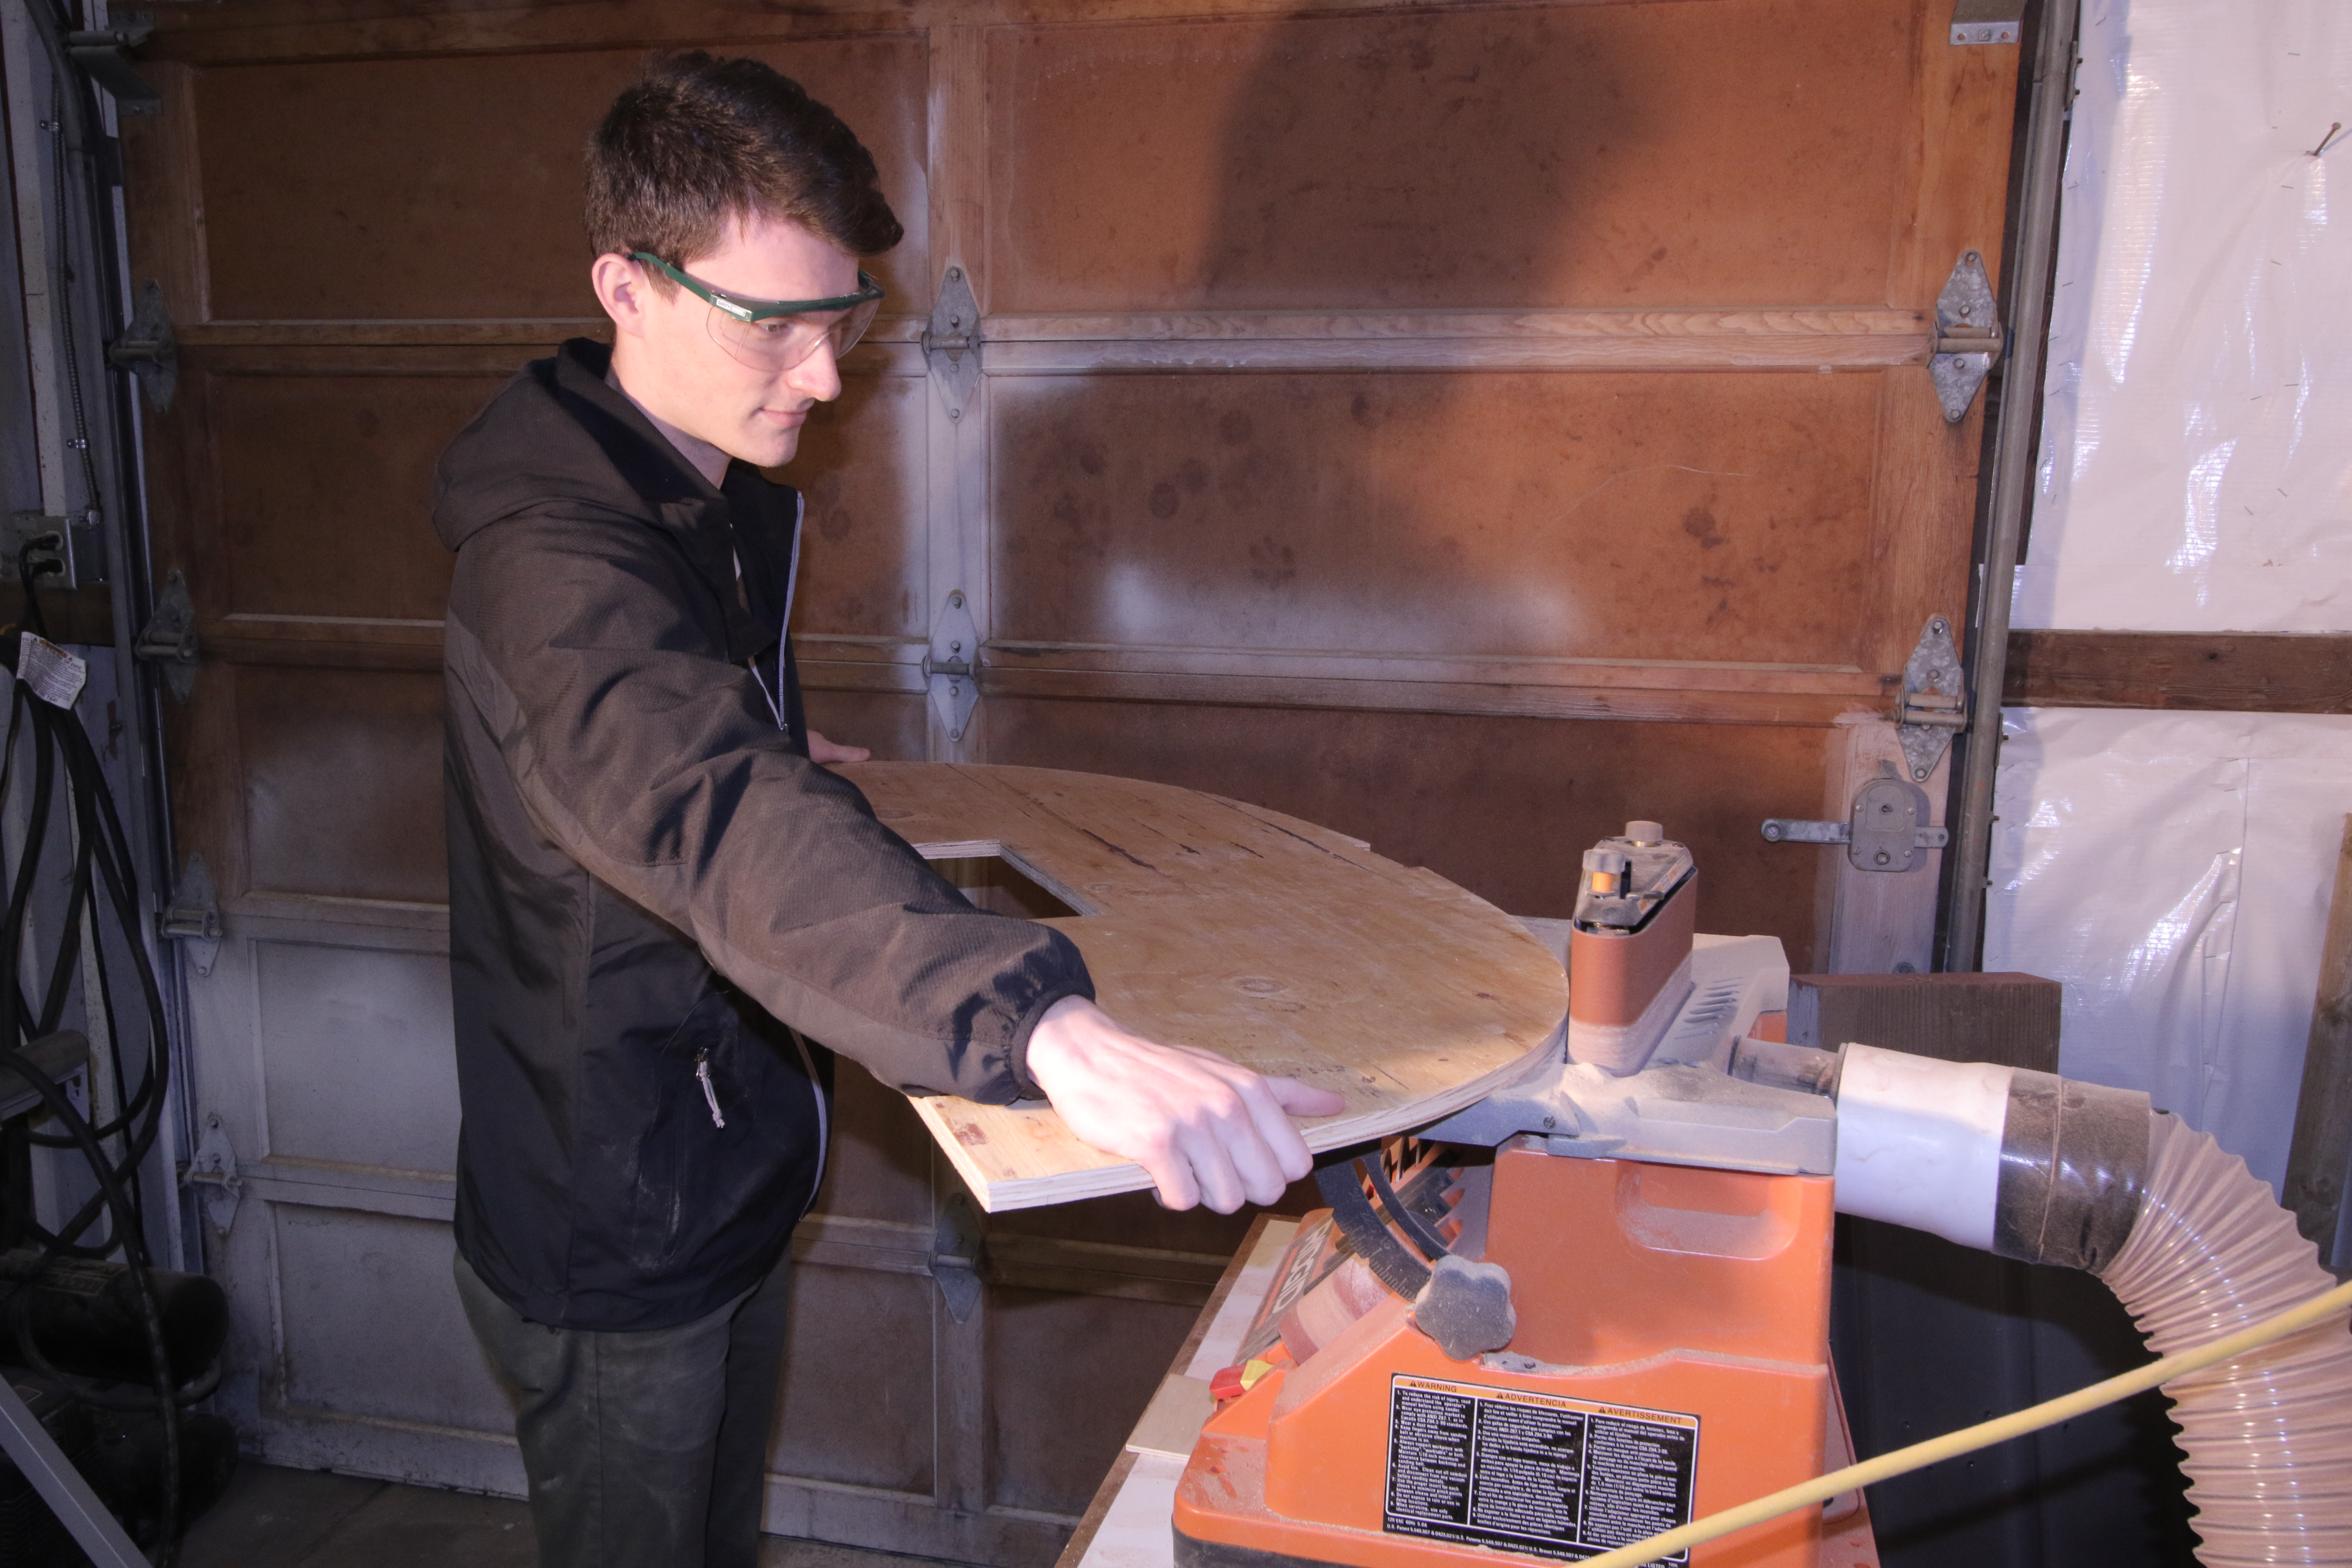
Tracy finished cutting out and sanding to finish the last station. Now taking shape! Picked up some more sapele to build the keel next.
Jan 2, 2017
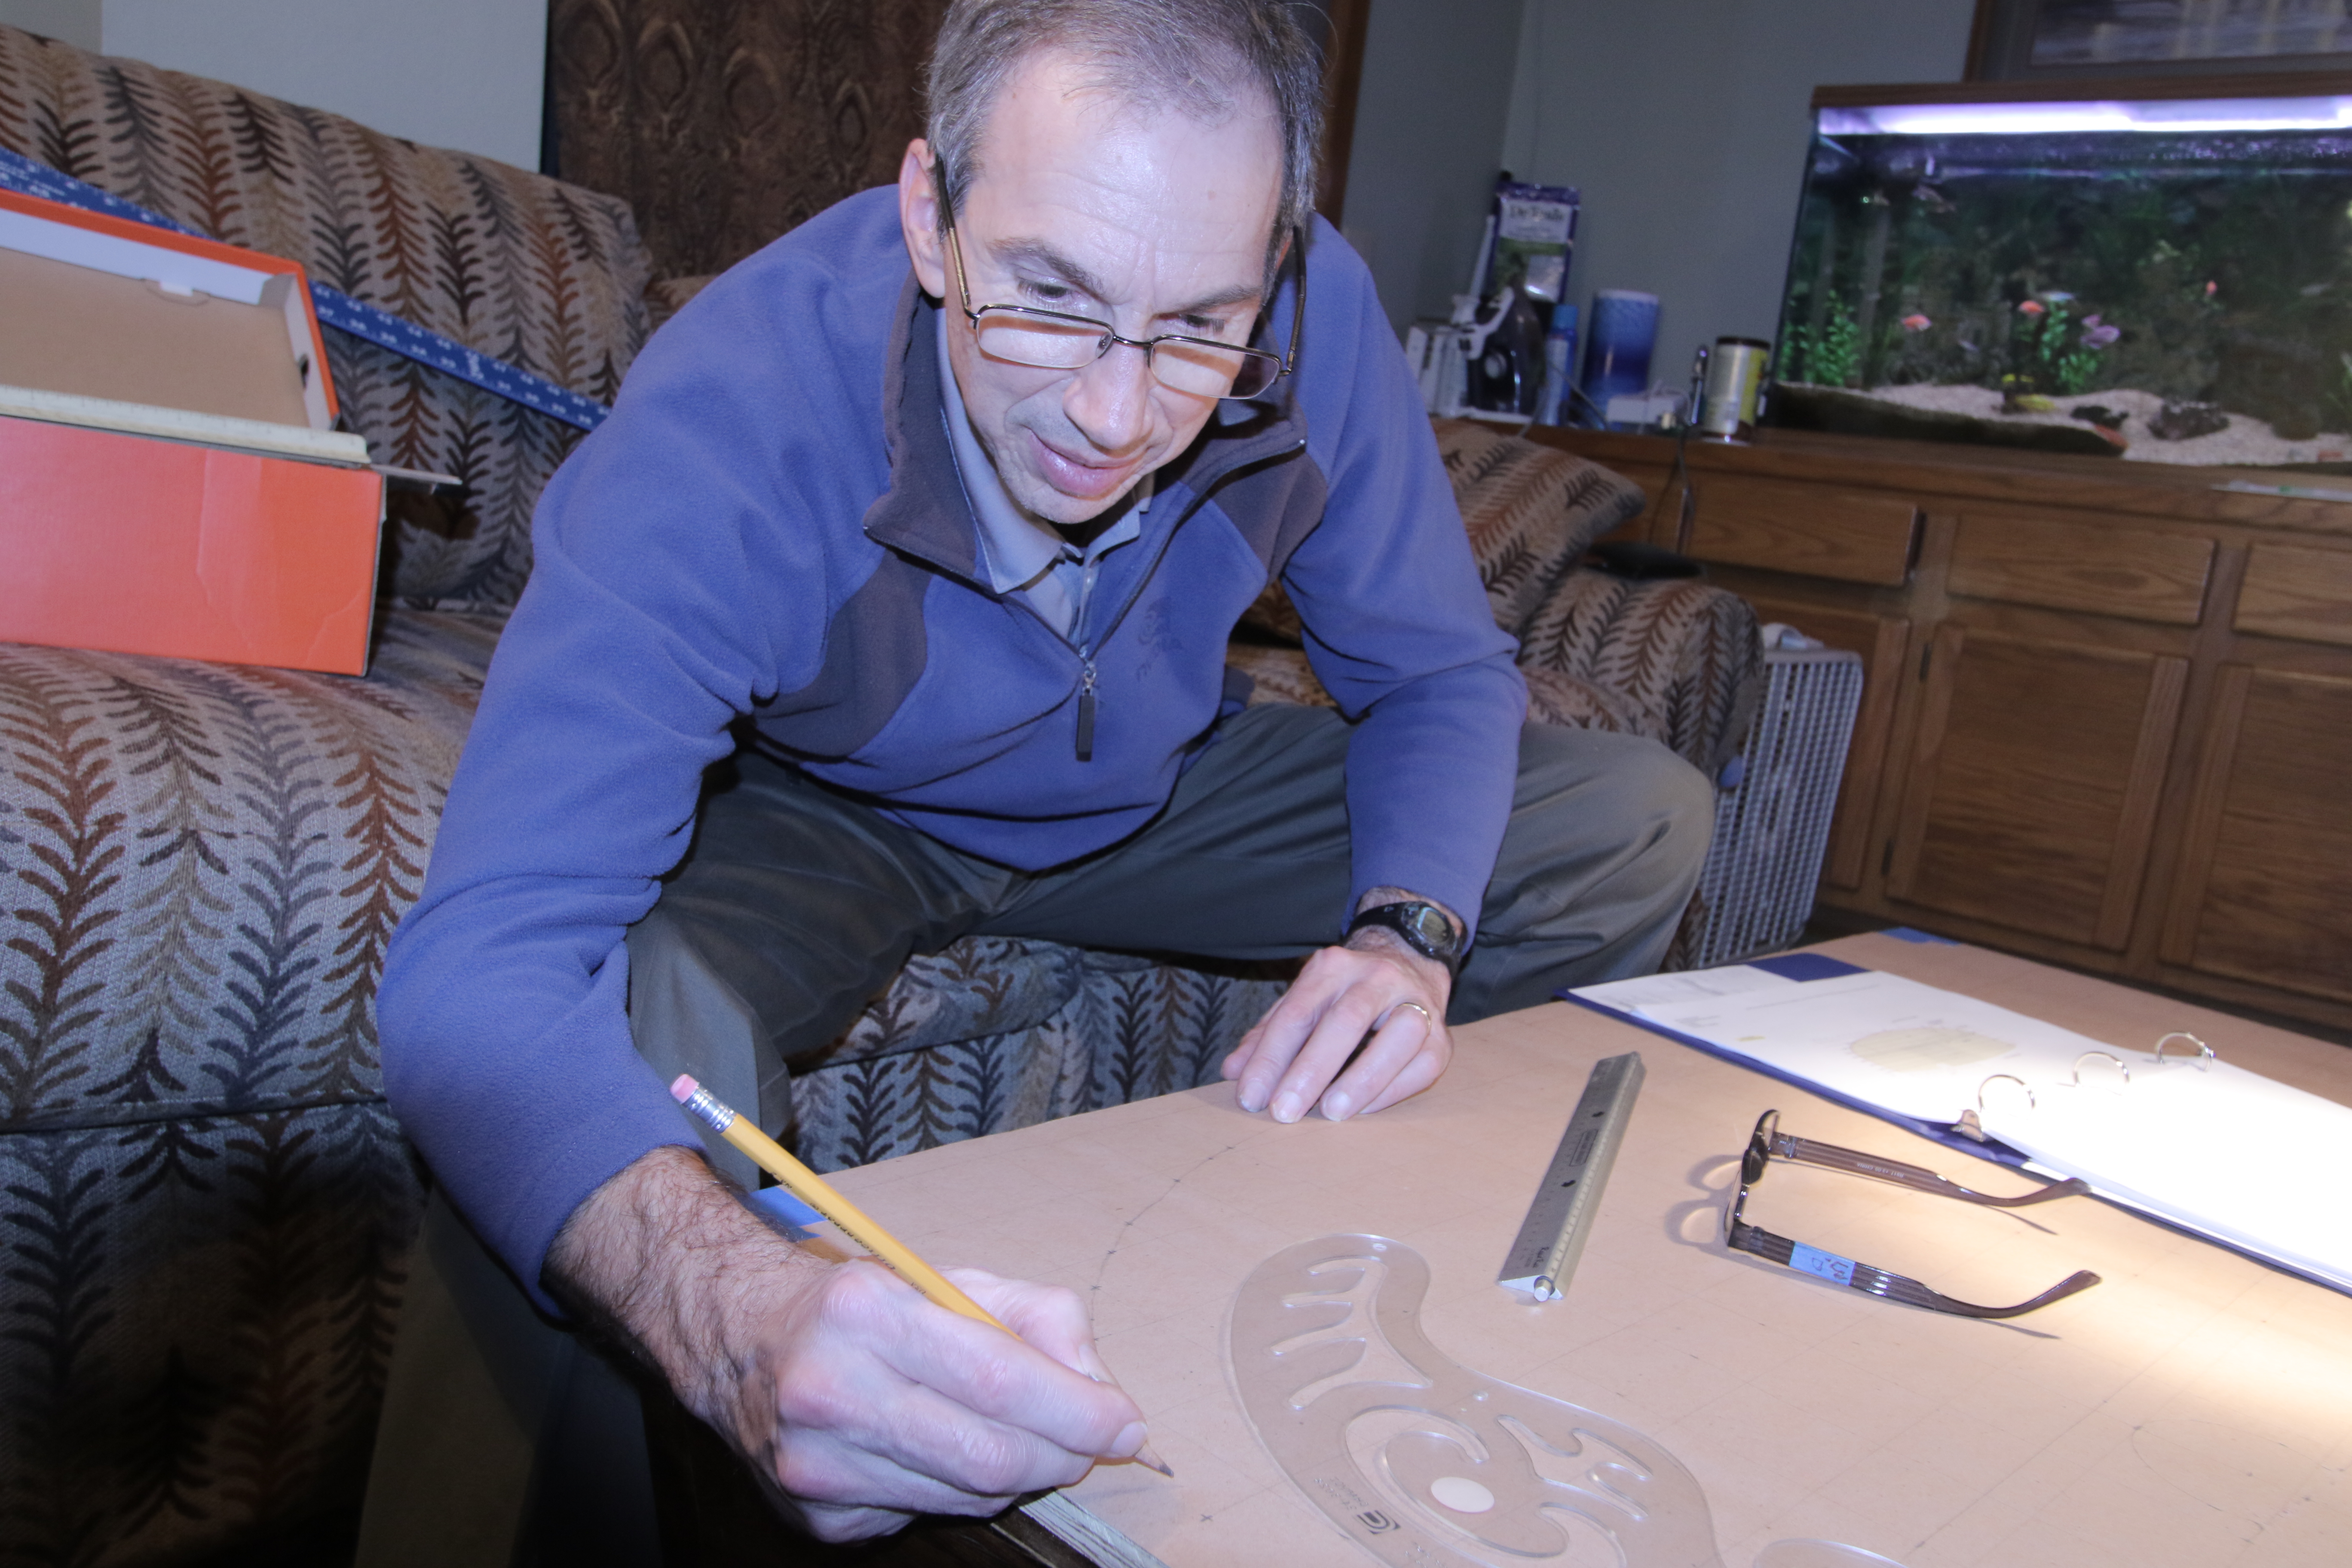
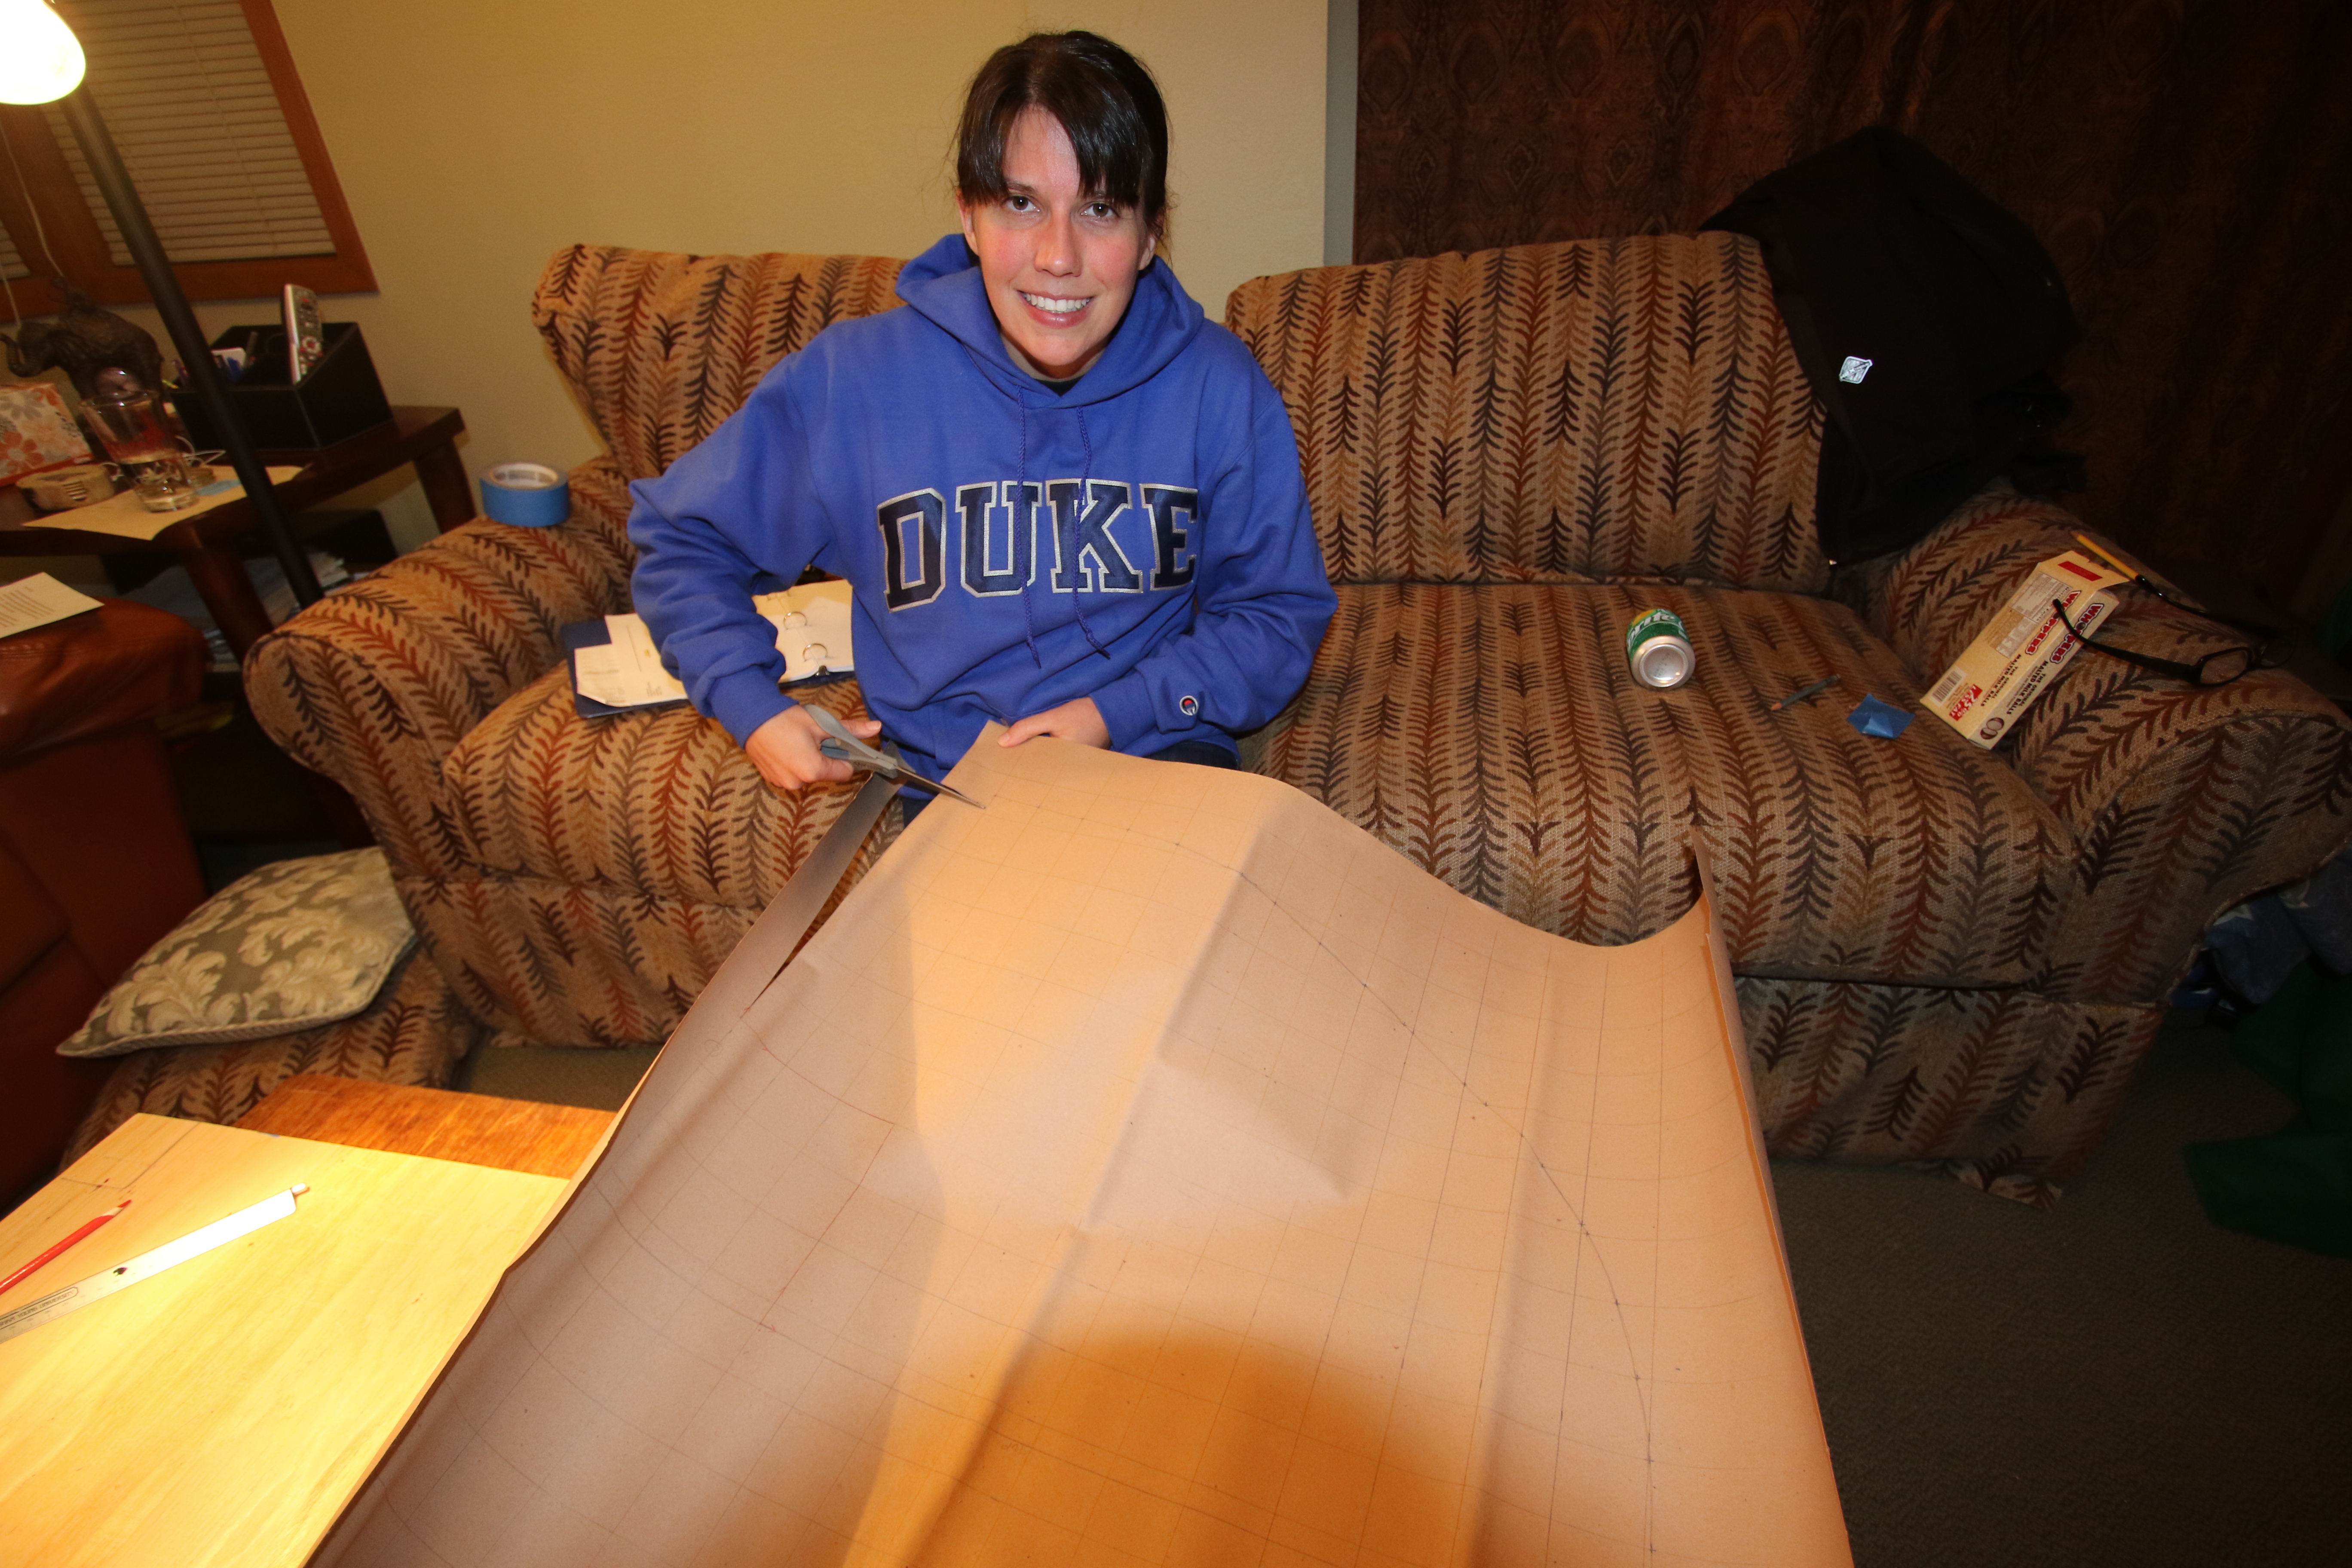
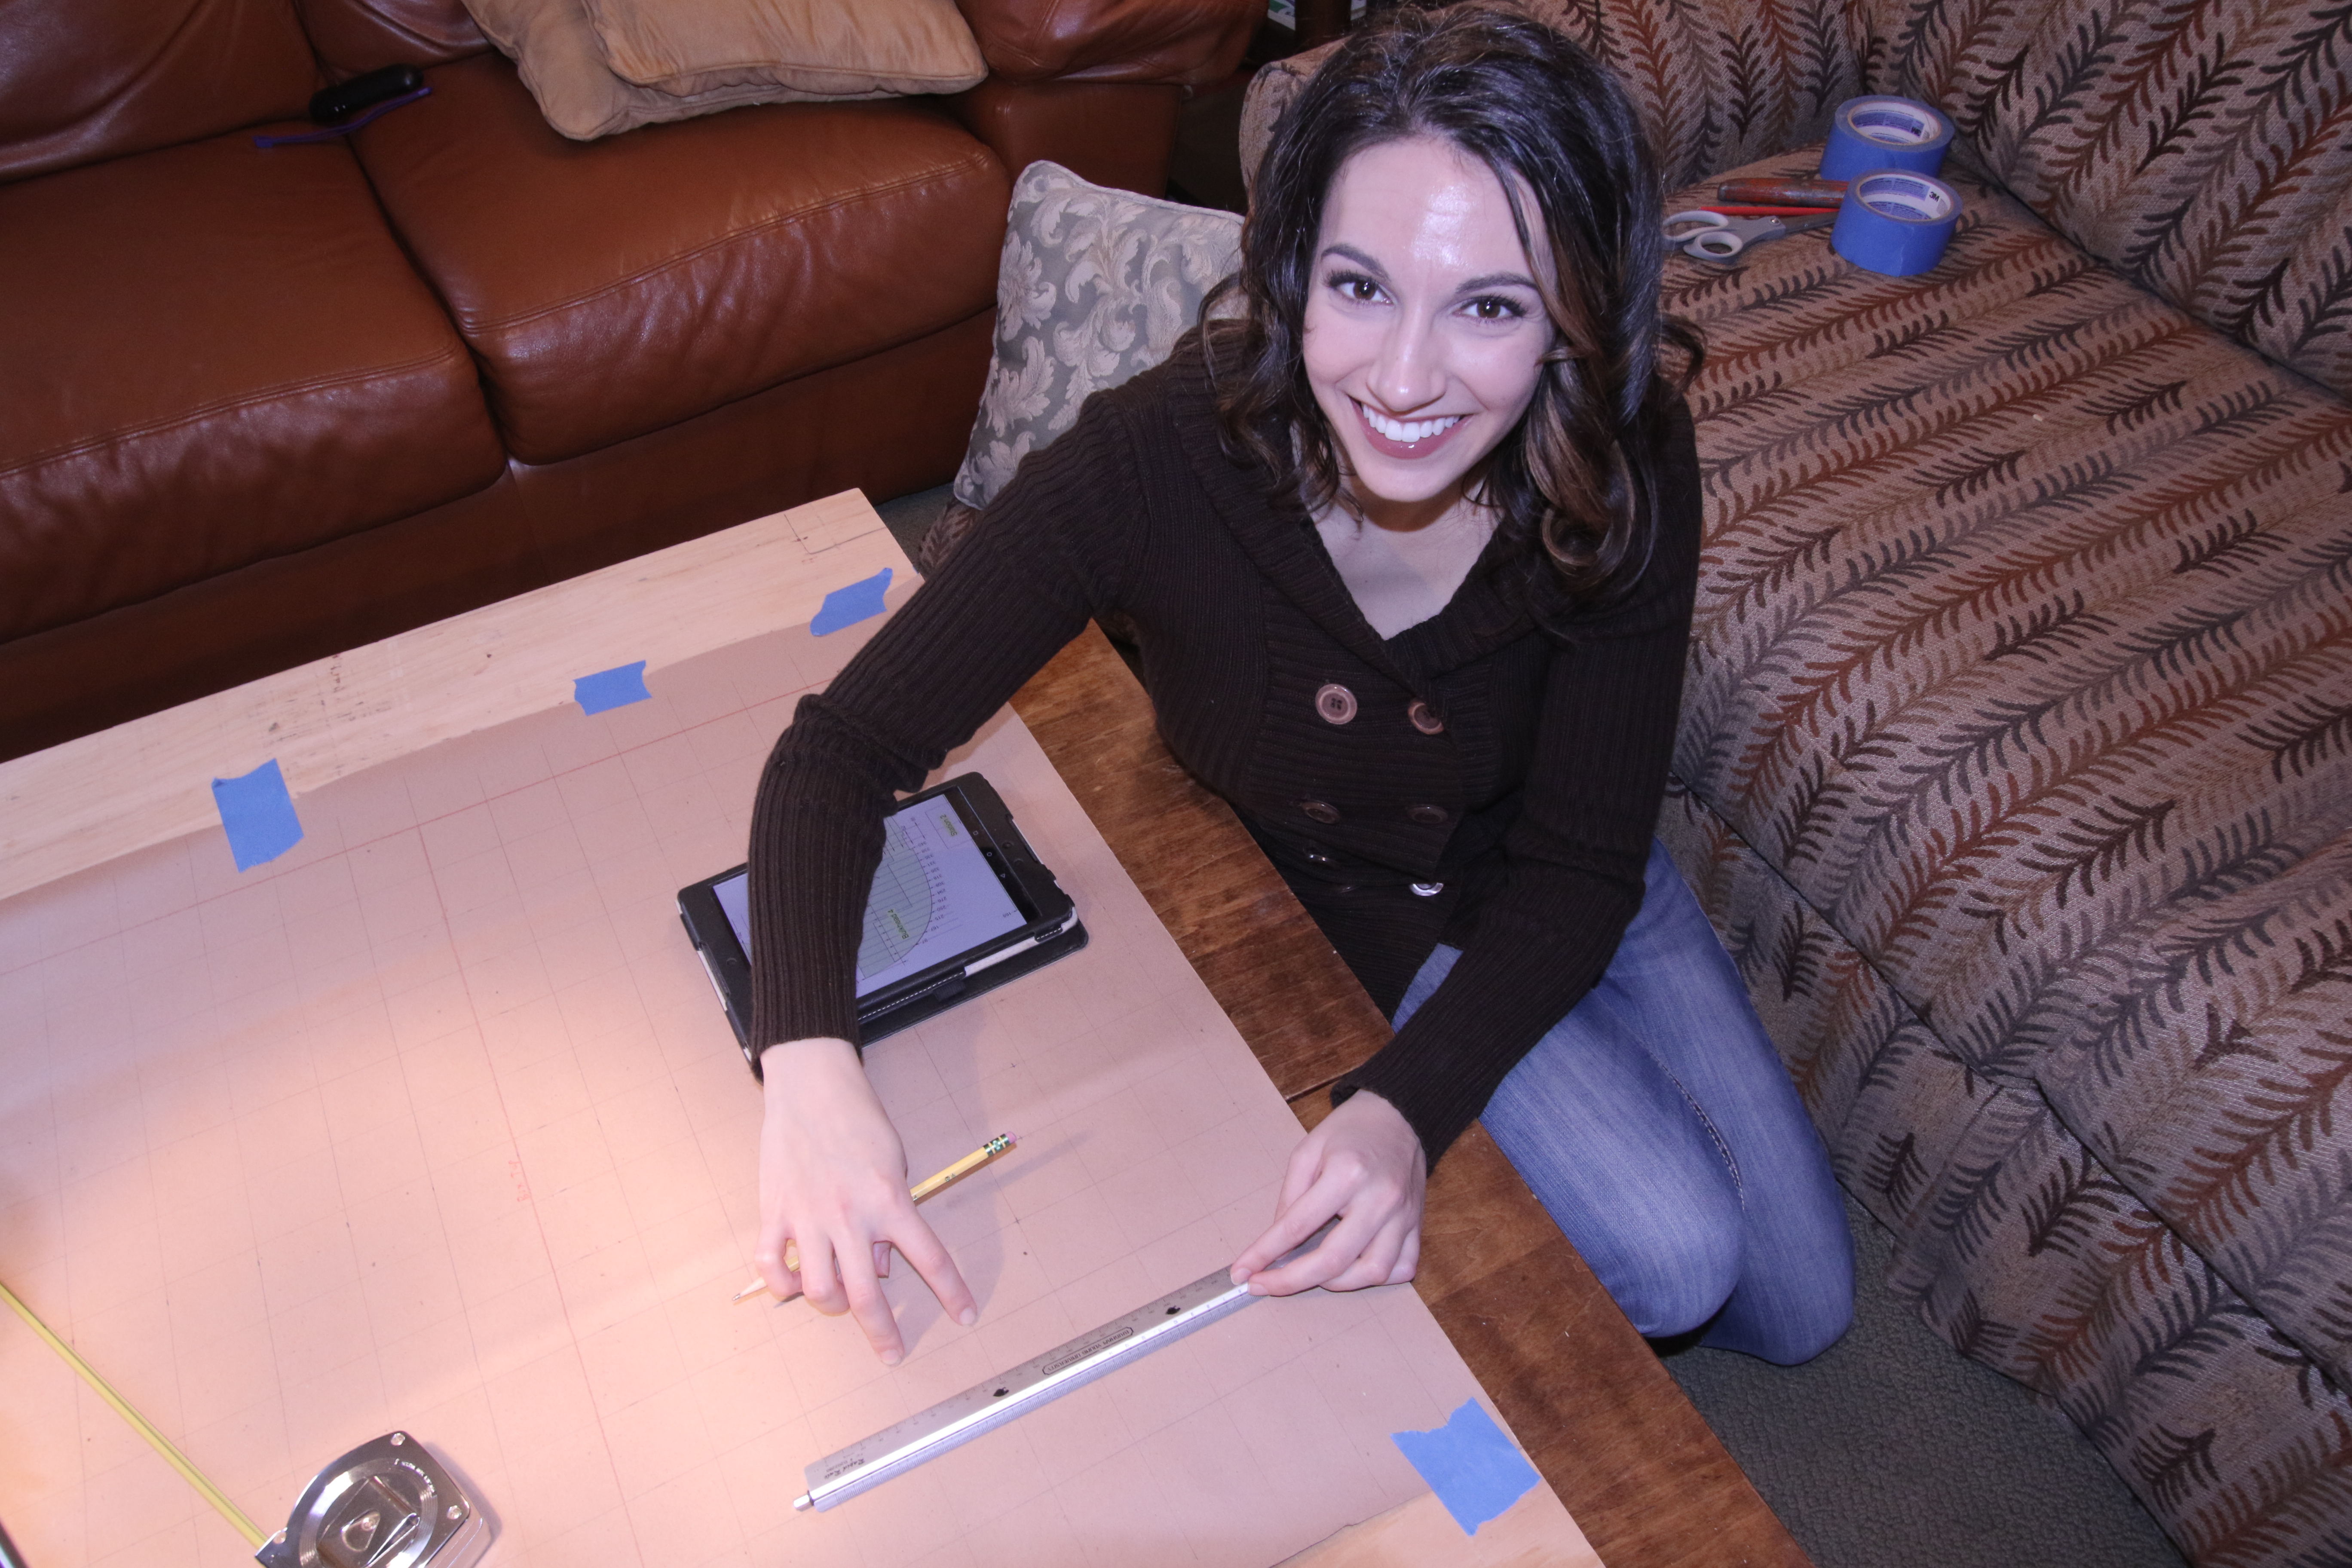
After another break for a Christmas vacation it’s back to work on the boat. Craig helped with some of the artwork and Kelly cut out station templates.

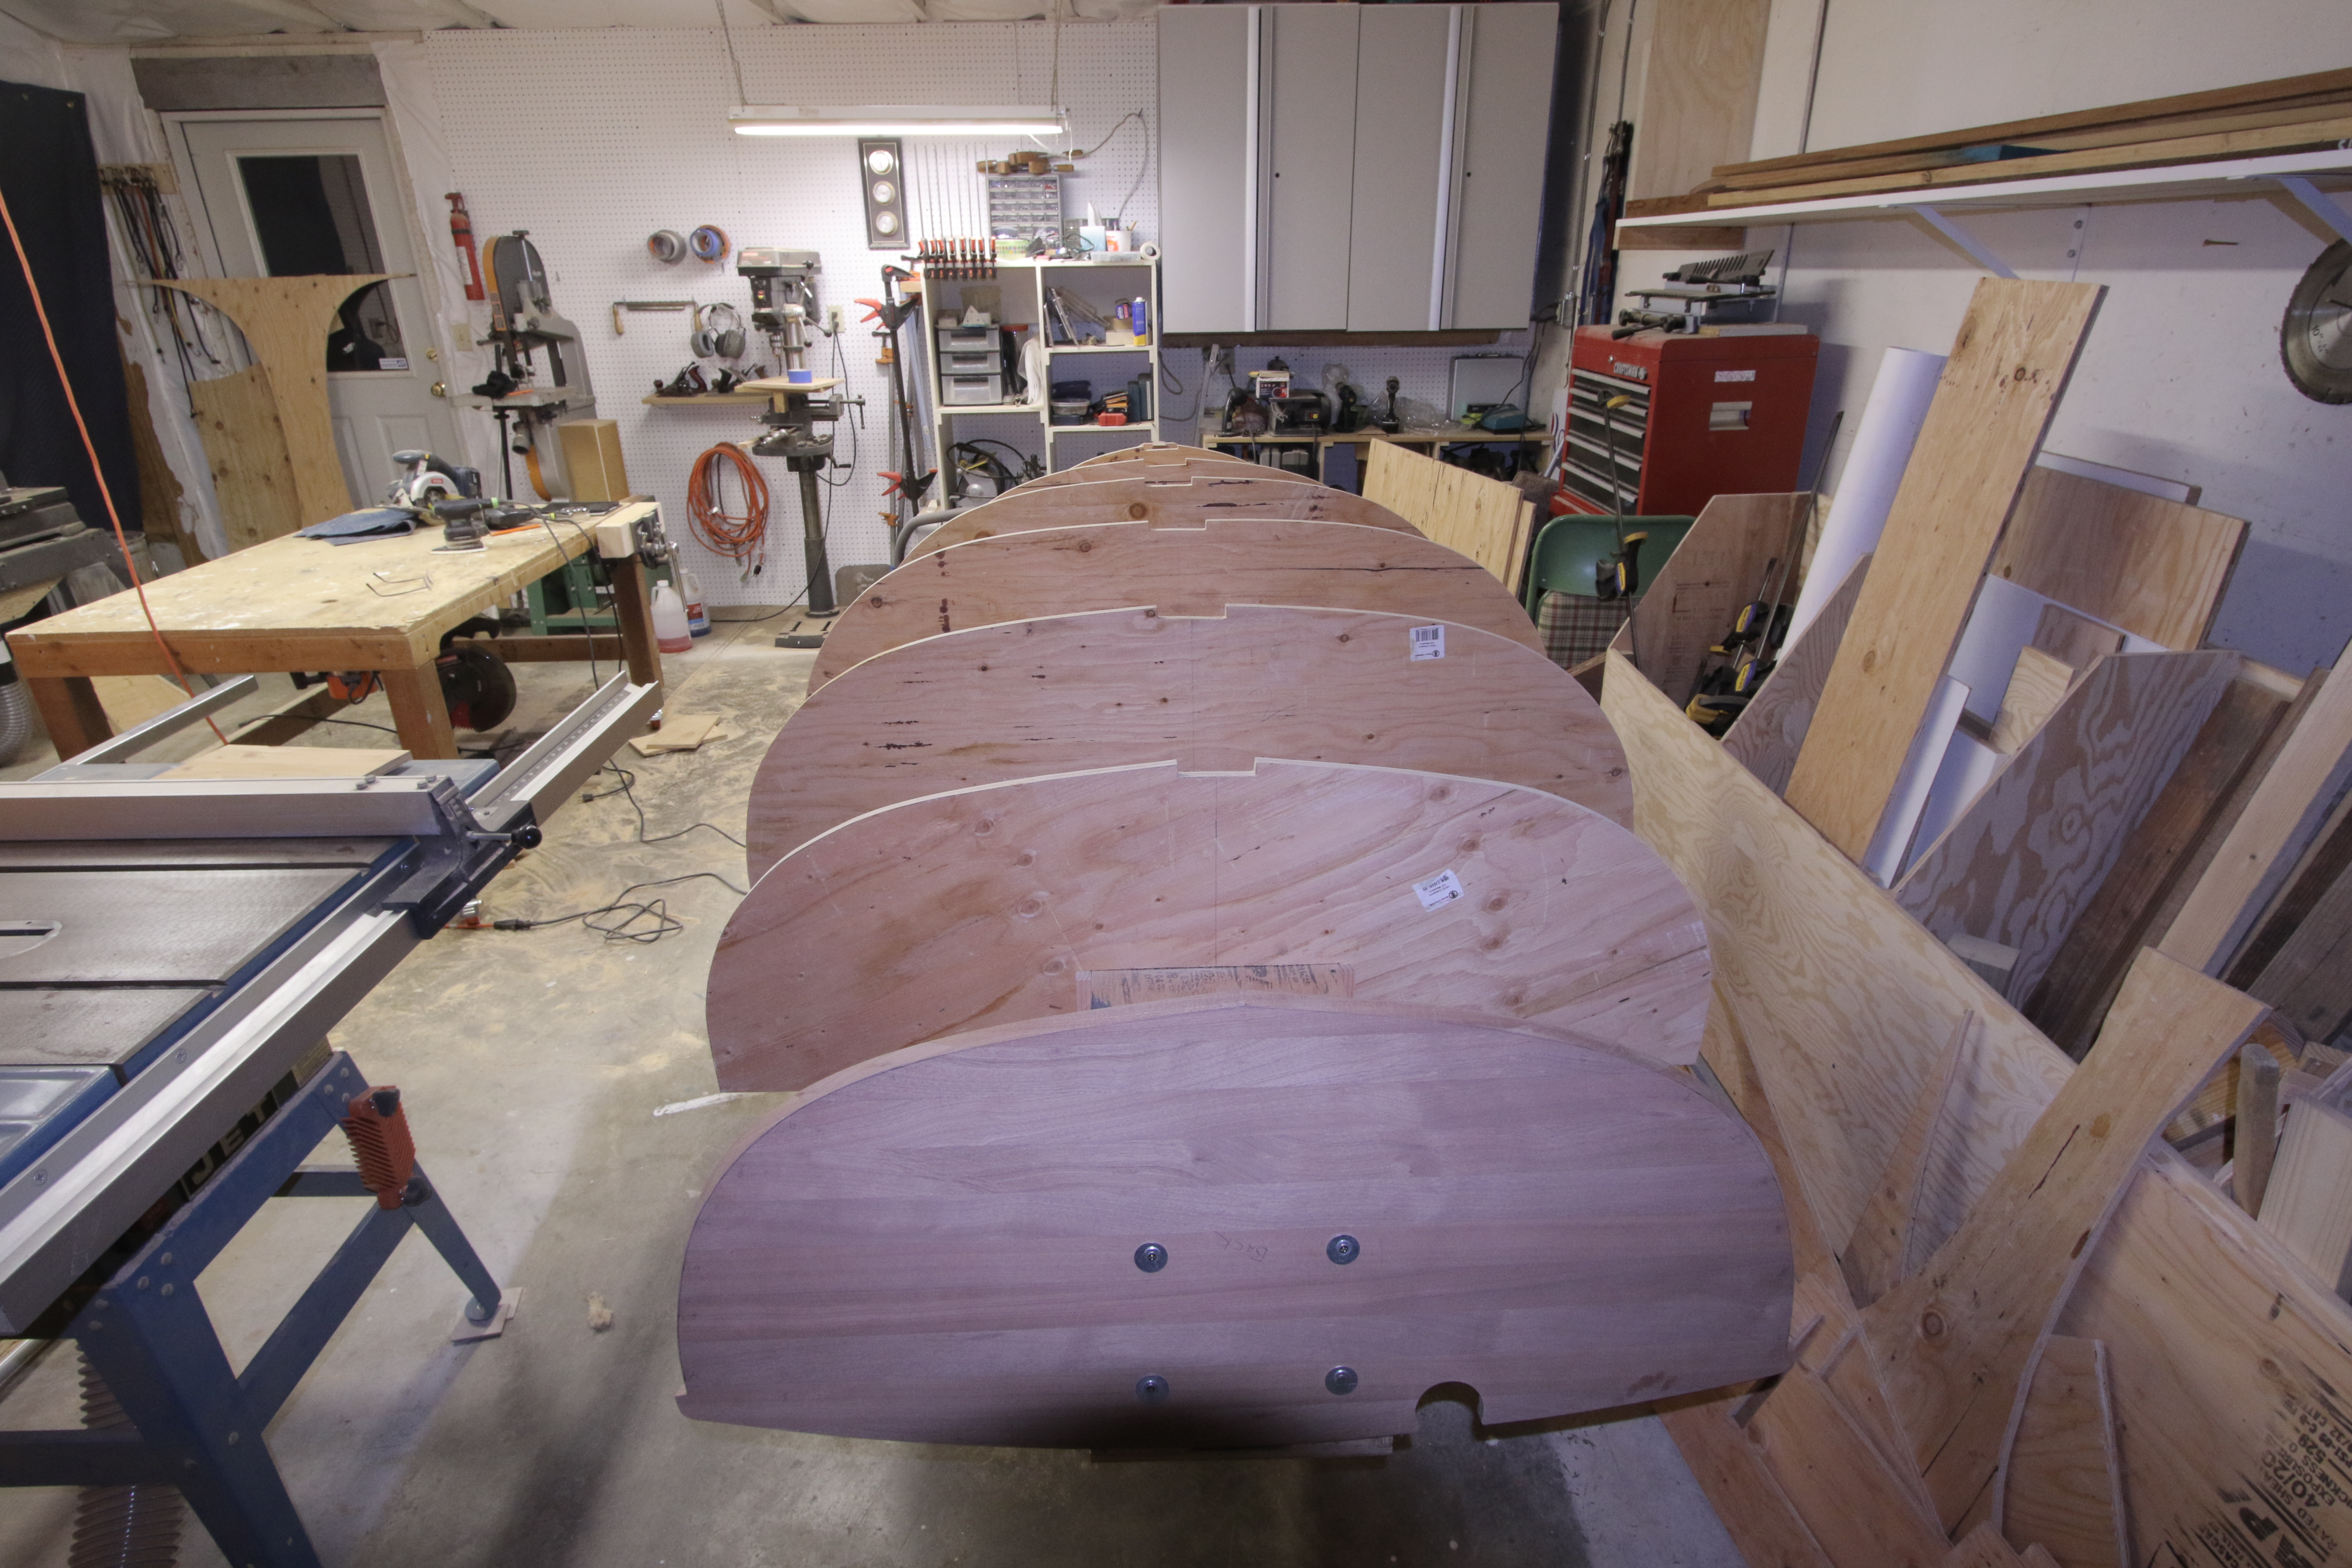
Dec 24, 2016
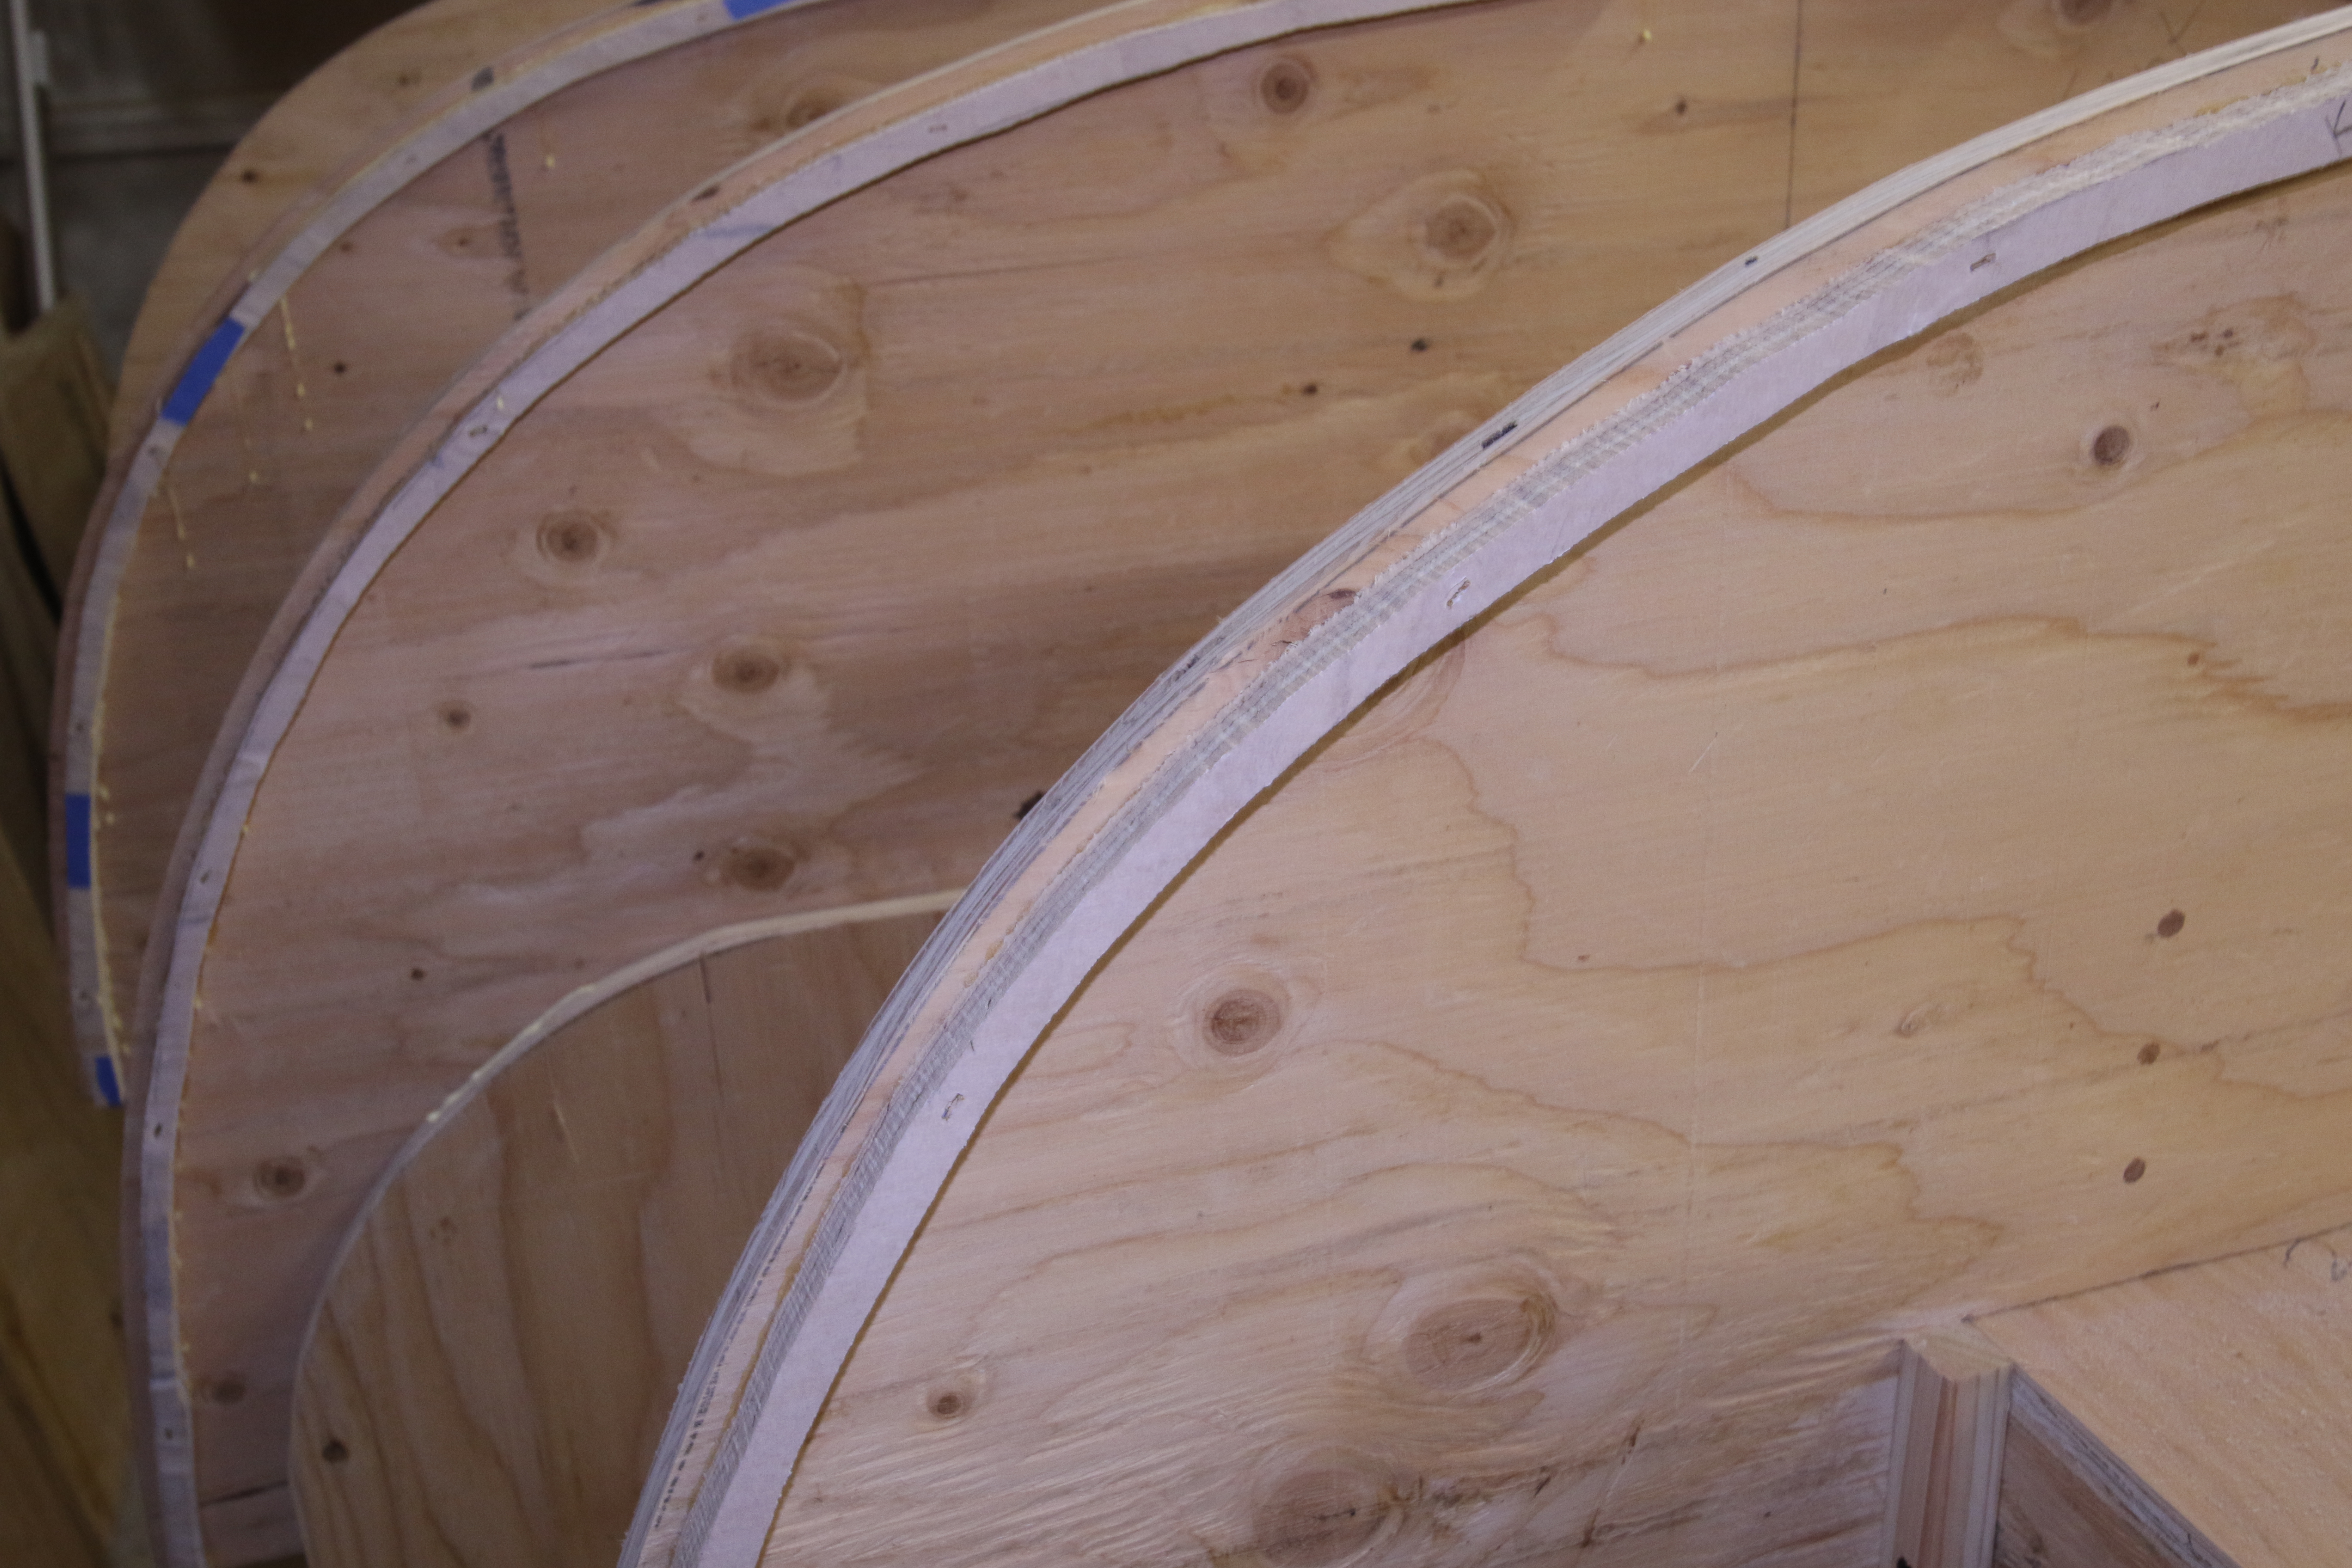
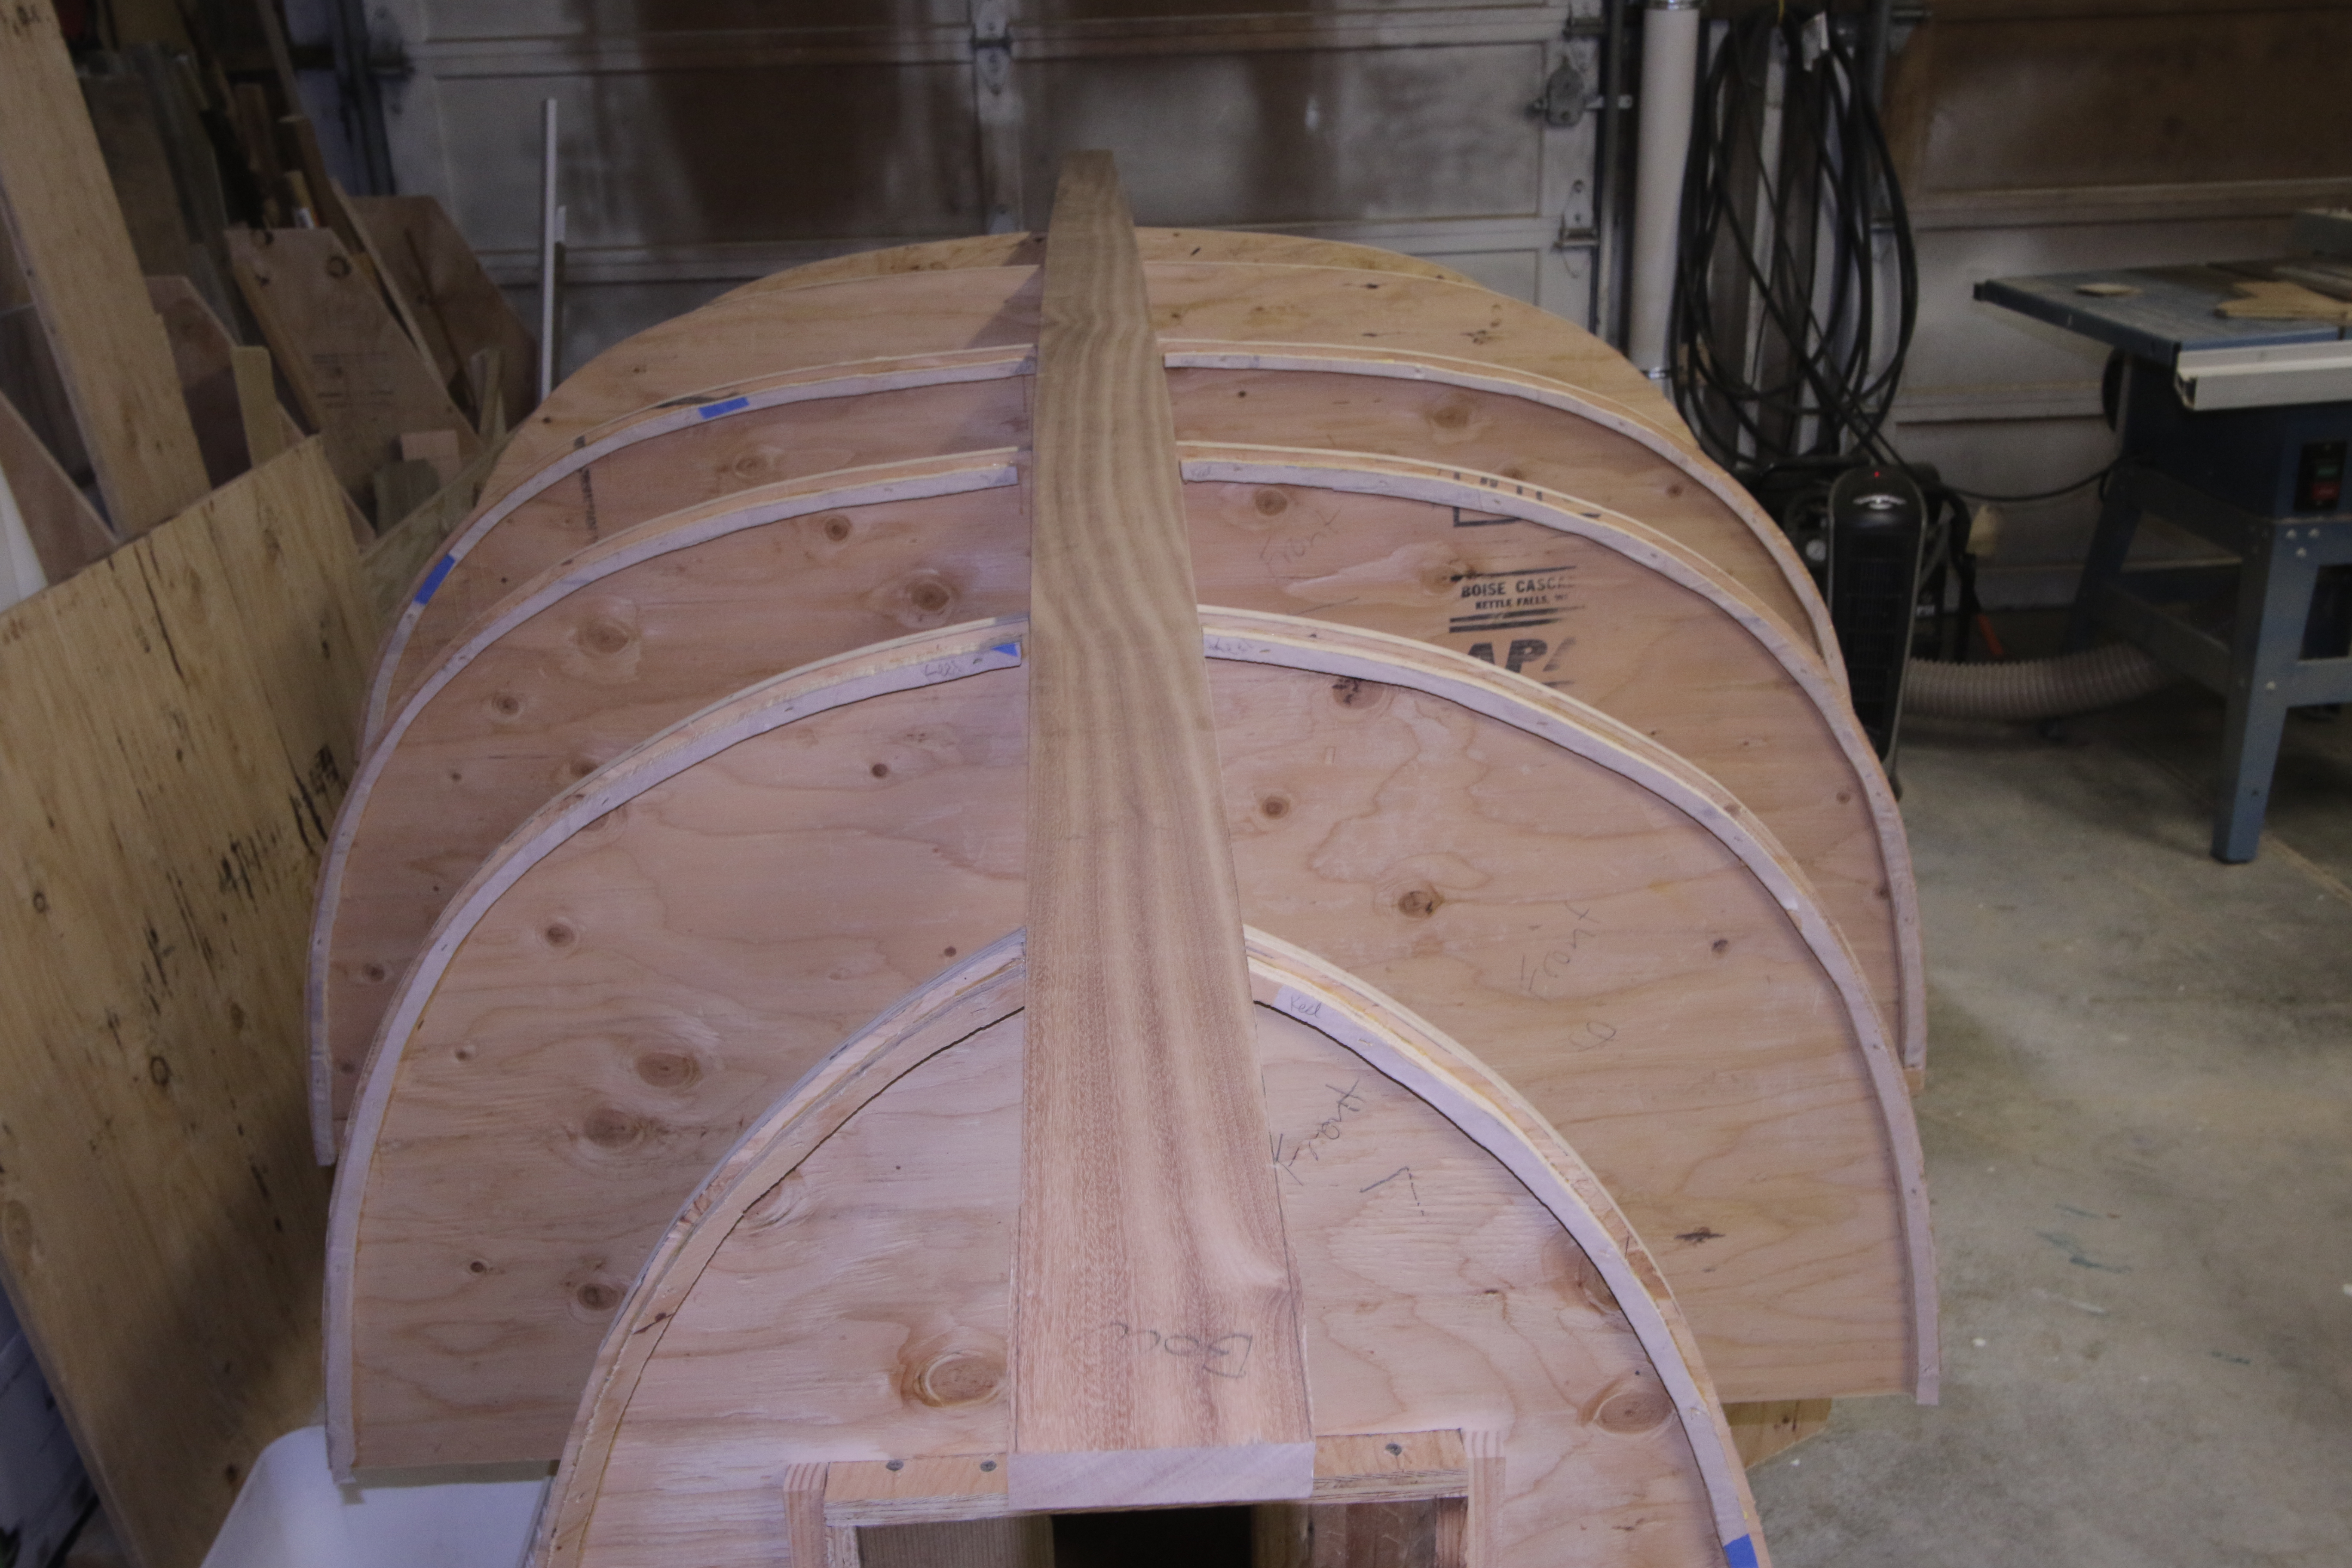
We have all our 5 kids home for Christmas – Yay. Everyone is getting a bit of work in on the boat so it can officially be an entire family project. Shana and Tyler each lofted, cut out and sanded to finish stations. Tracy did some more lofting. Starting to take shape!


Dec 23, 2016
Used a draw [spoke], hand planes, chisel and rasp to bevel the stem. Fine tuning with a scraper, and now press-fit installed. Fits really well in the first bow station that Tracy finished up.


Dec 22, 2016
Cut the Stem and False Stem apart and beveled the false stem with a band saw and finished up with hand block plane. Tracy’s been helping loft the stations. Has 2 done – we’ll cut those out tomorrow.
Dec 12 – 20
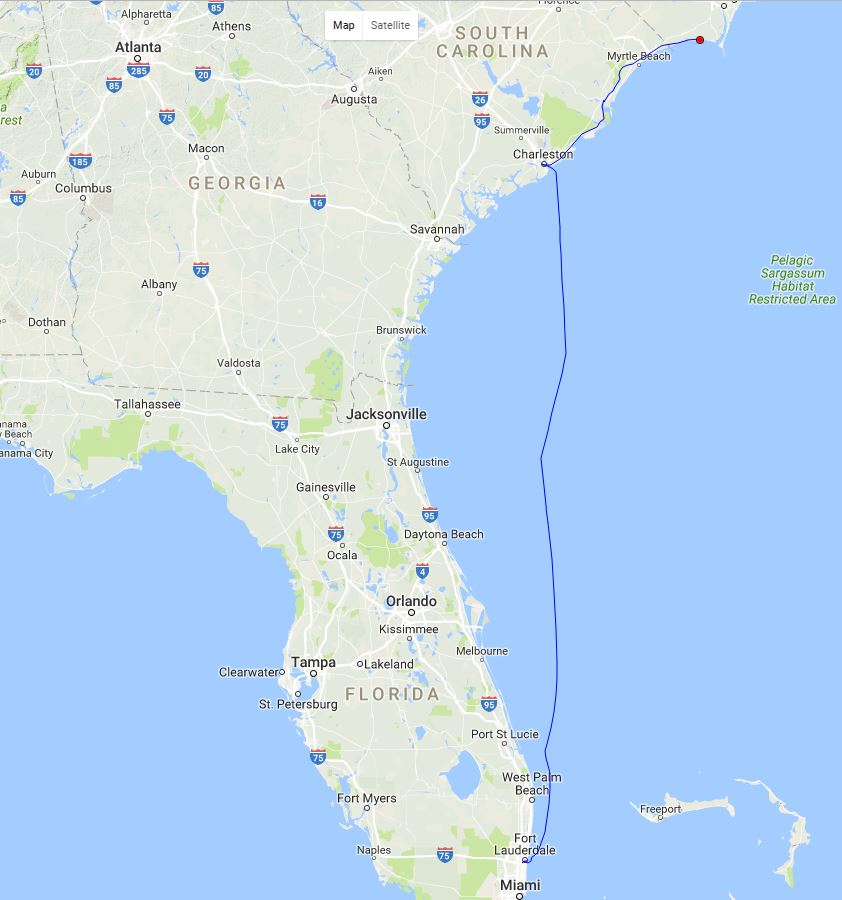
Taking a break from boat building so I can go help a friend deliver his new (to him) 38′ Catamaran from Ft Lauderdale to South Port, N.C. (I made it as far as Charleston with him before bad weather set in on the Atlantic. He finished the trip on the ICW.)
Dec 9-10, 2016
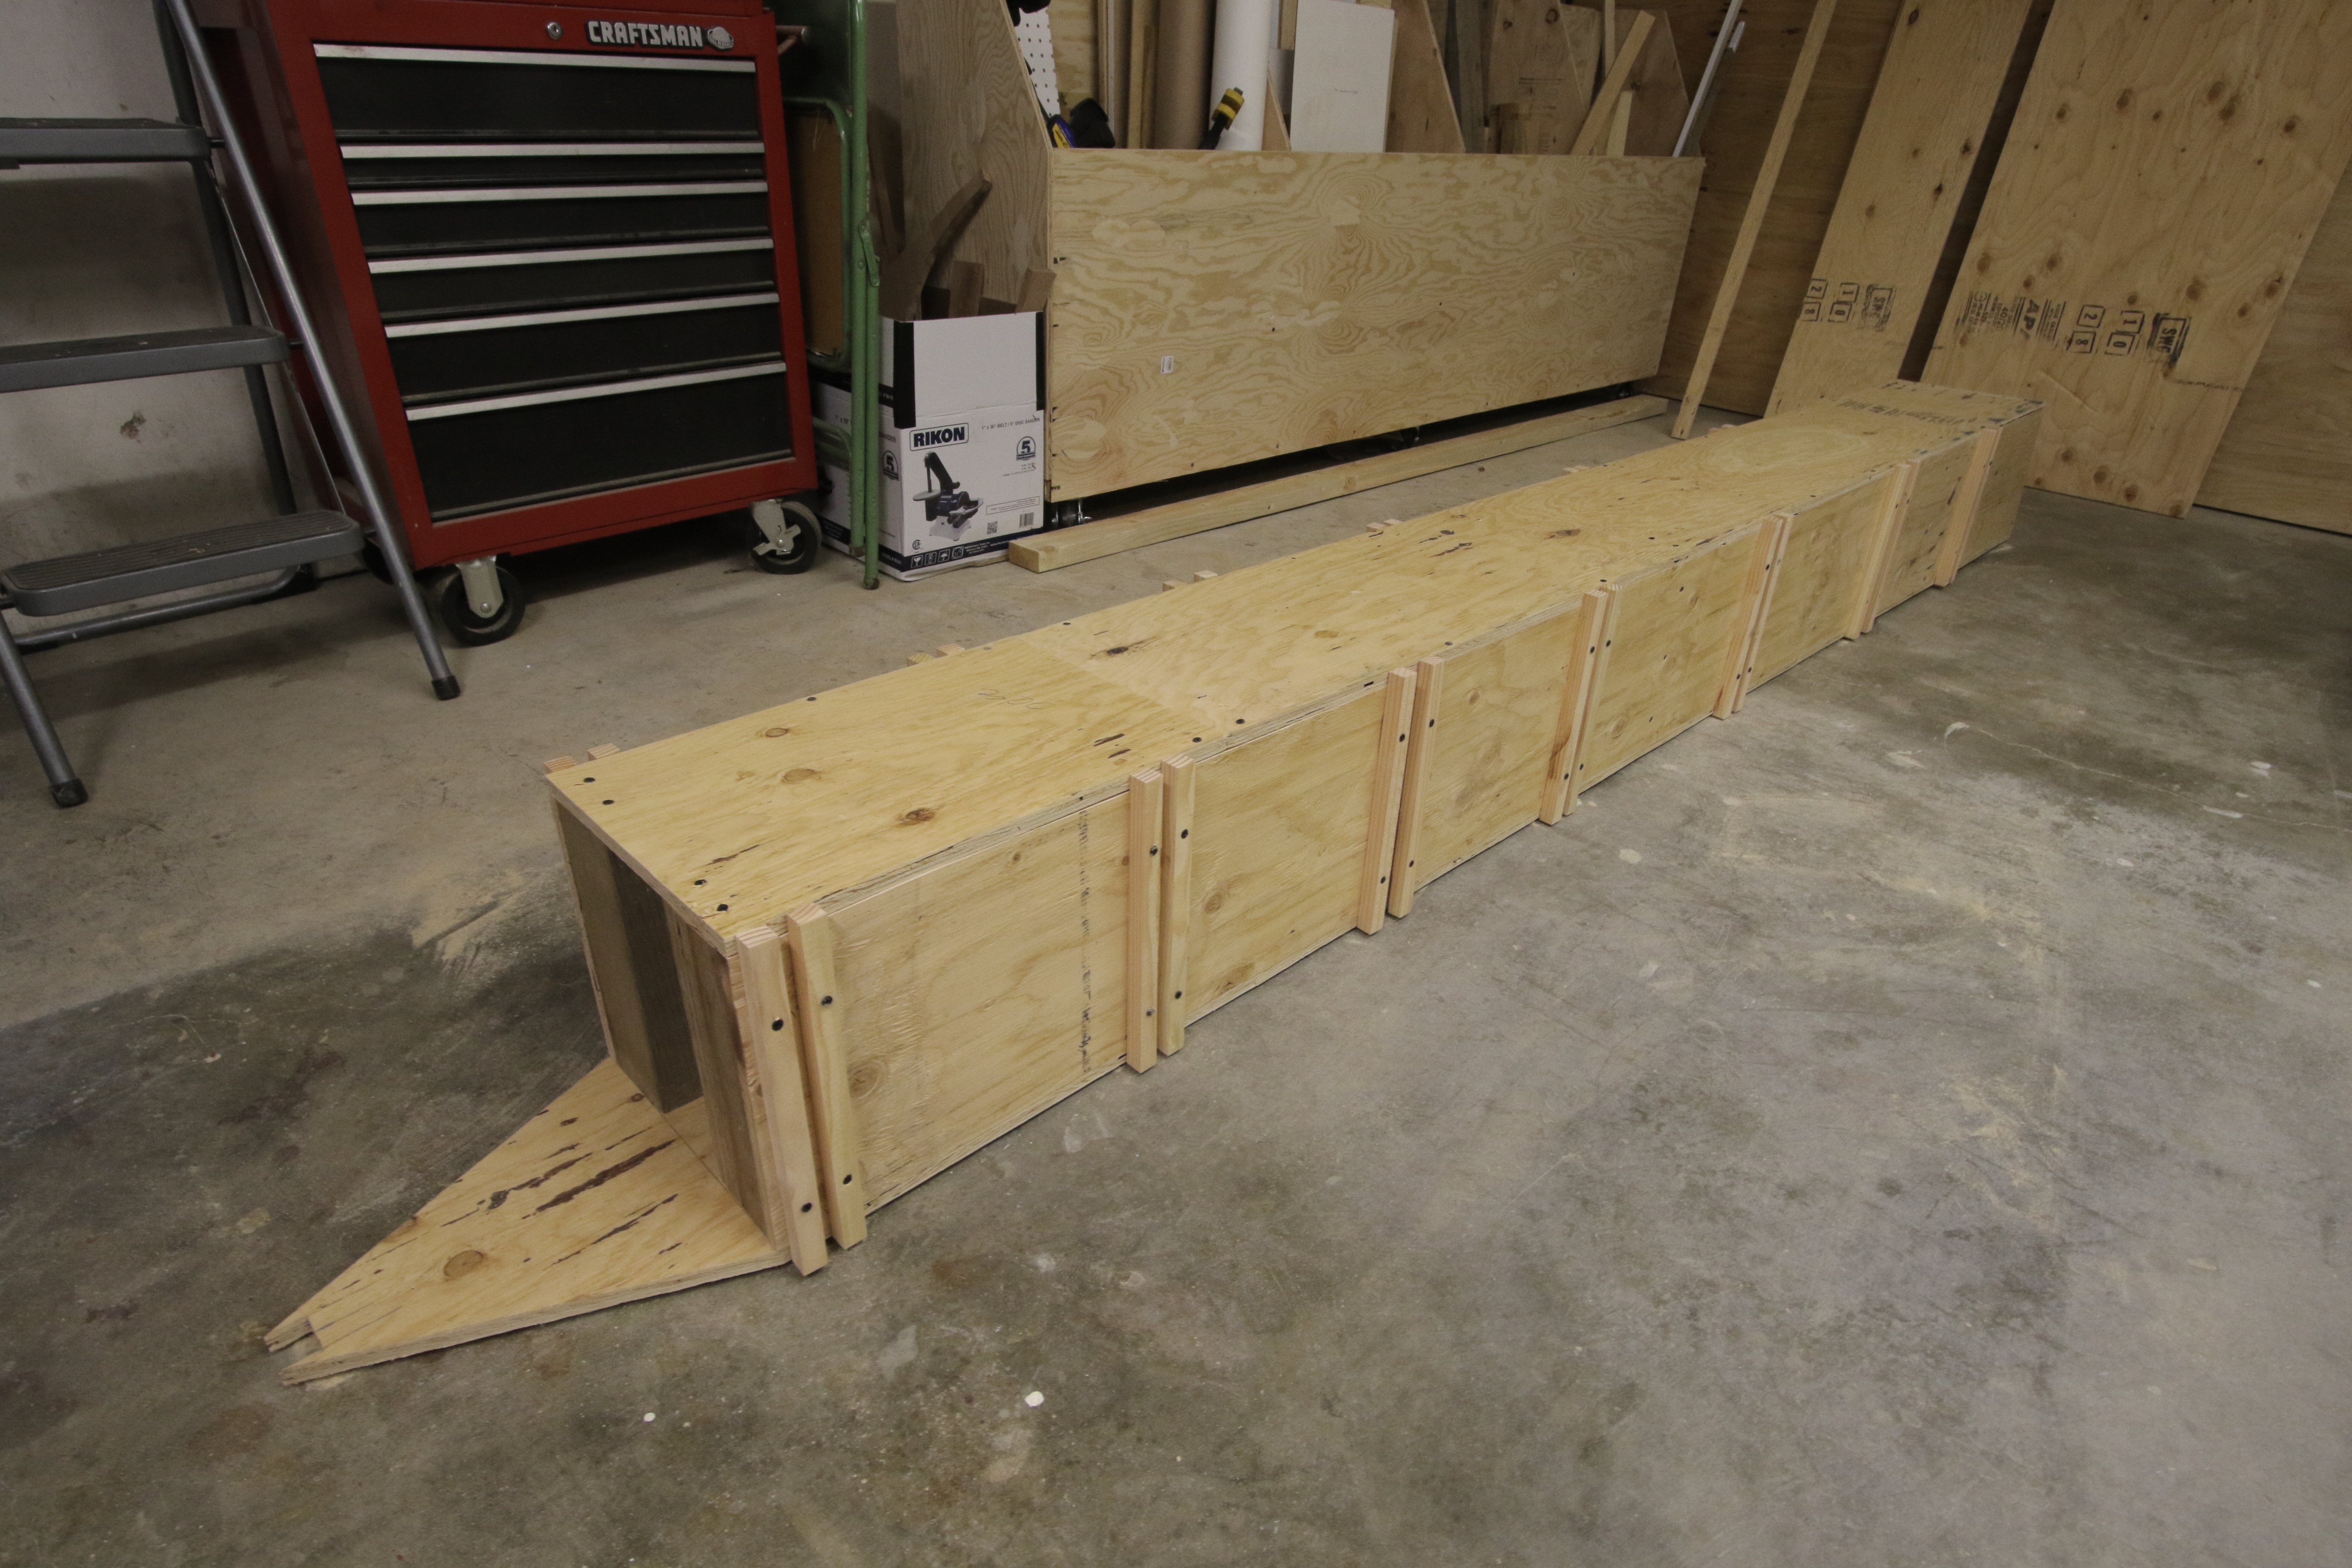
Cleaned up the stem/false stem after lamination. Sanded the surfaces and then cut it out and sanded the edges and sanded. Made the 2 stands for the building frame. It’s a clever design that can be tipped either direction as it’s strip planked. Note the extra plywood pieces temporarily sharing the same slots with the stands; these will be replaced later with stations that share the same slots. Beveled the transom using a belt sander and hand block plane. It’s a tricky bevel – 10 mm worth at the bottom and gradually changing on the transom sides from a 10 mm at bottom to a 4 mm bevel at the top. Came out sweet! Attached the transom to the building frame. Happy with the first week’s worth of progress.

Dec 8, 2016
Building frame construction was completed today. Came out nice and square. Happy with progress, considering I’m working my real job full time in addition.

Dec 7, 2016
Bought plywood for the building frame and stations and started to build the frame.
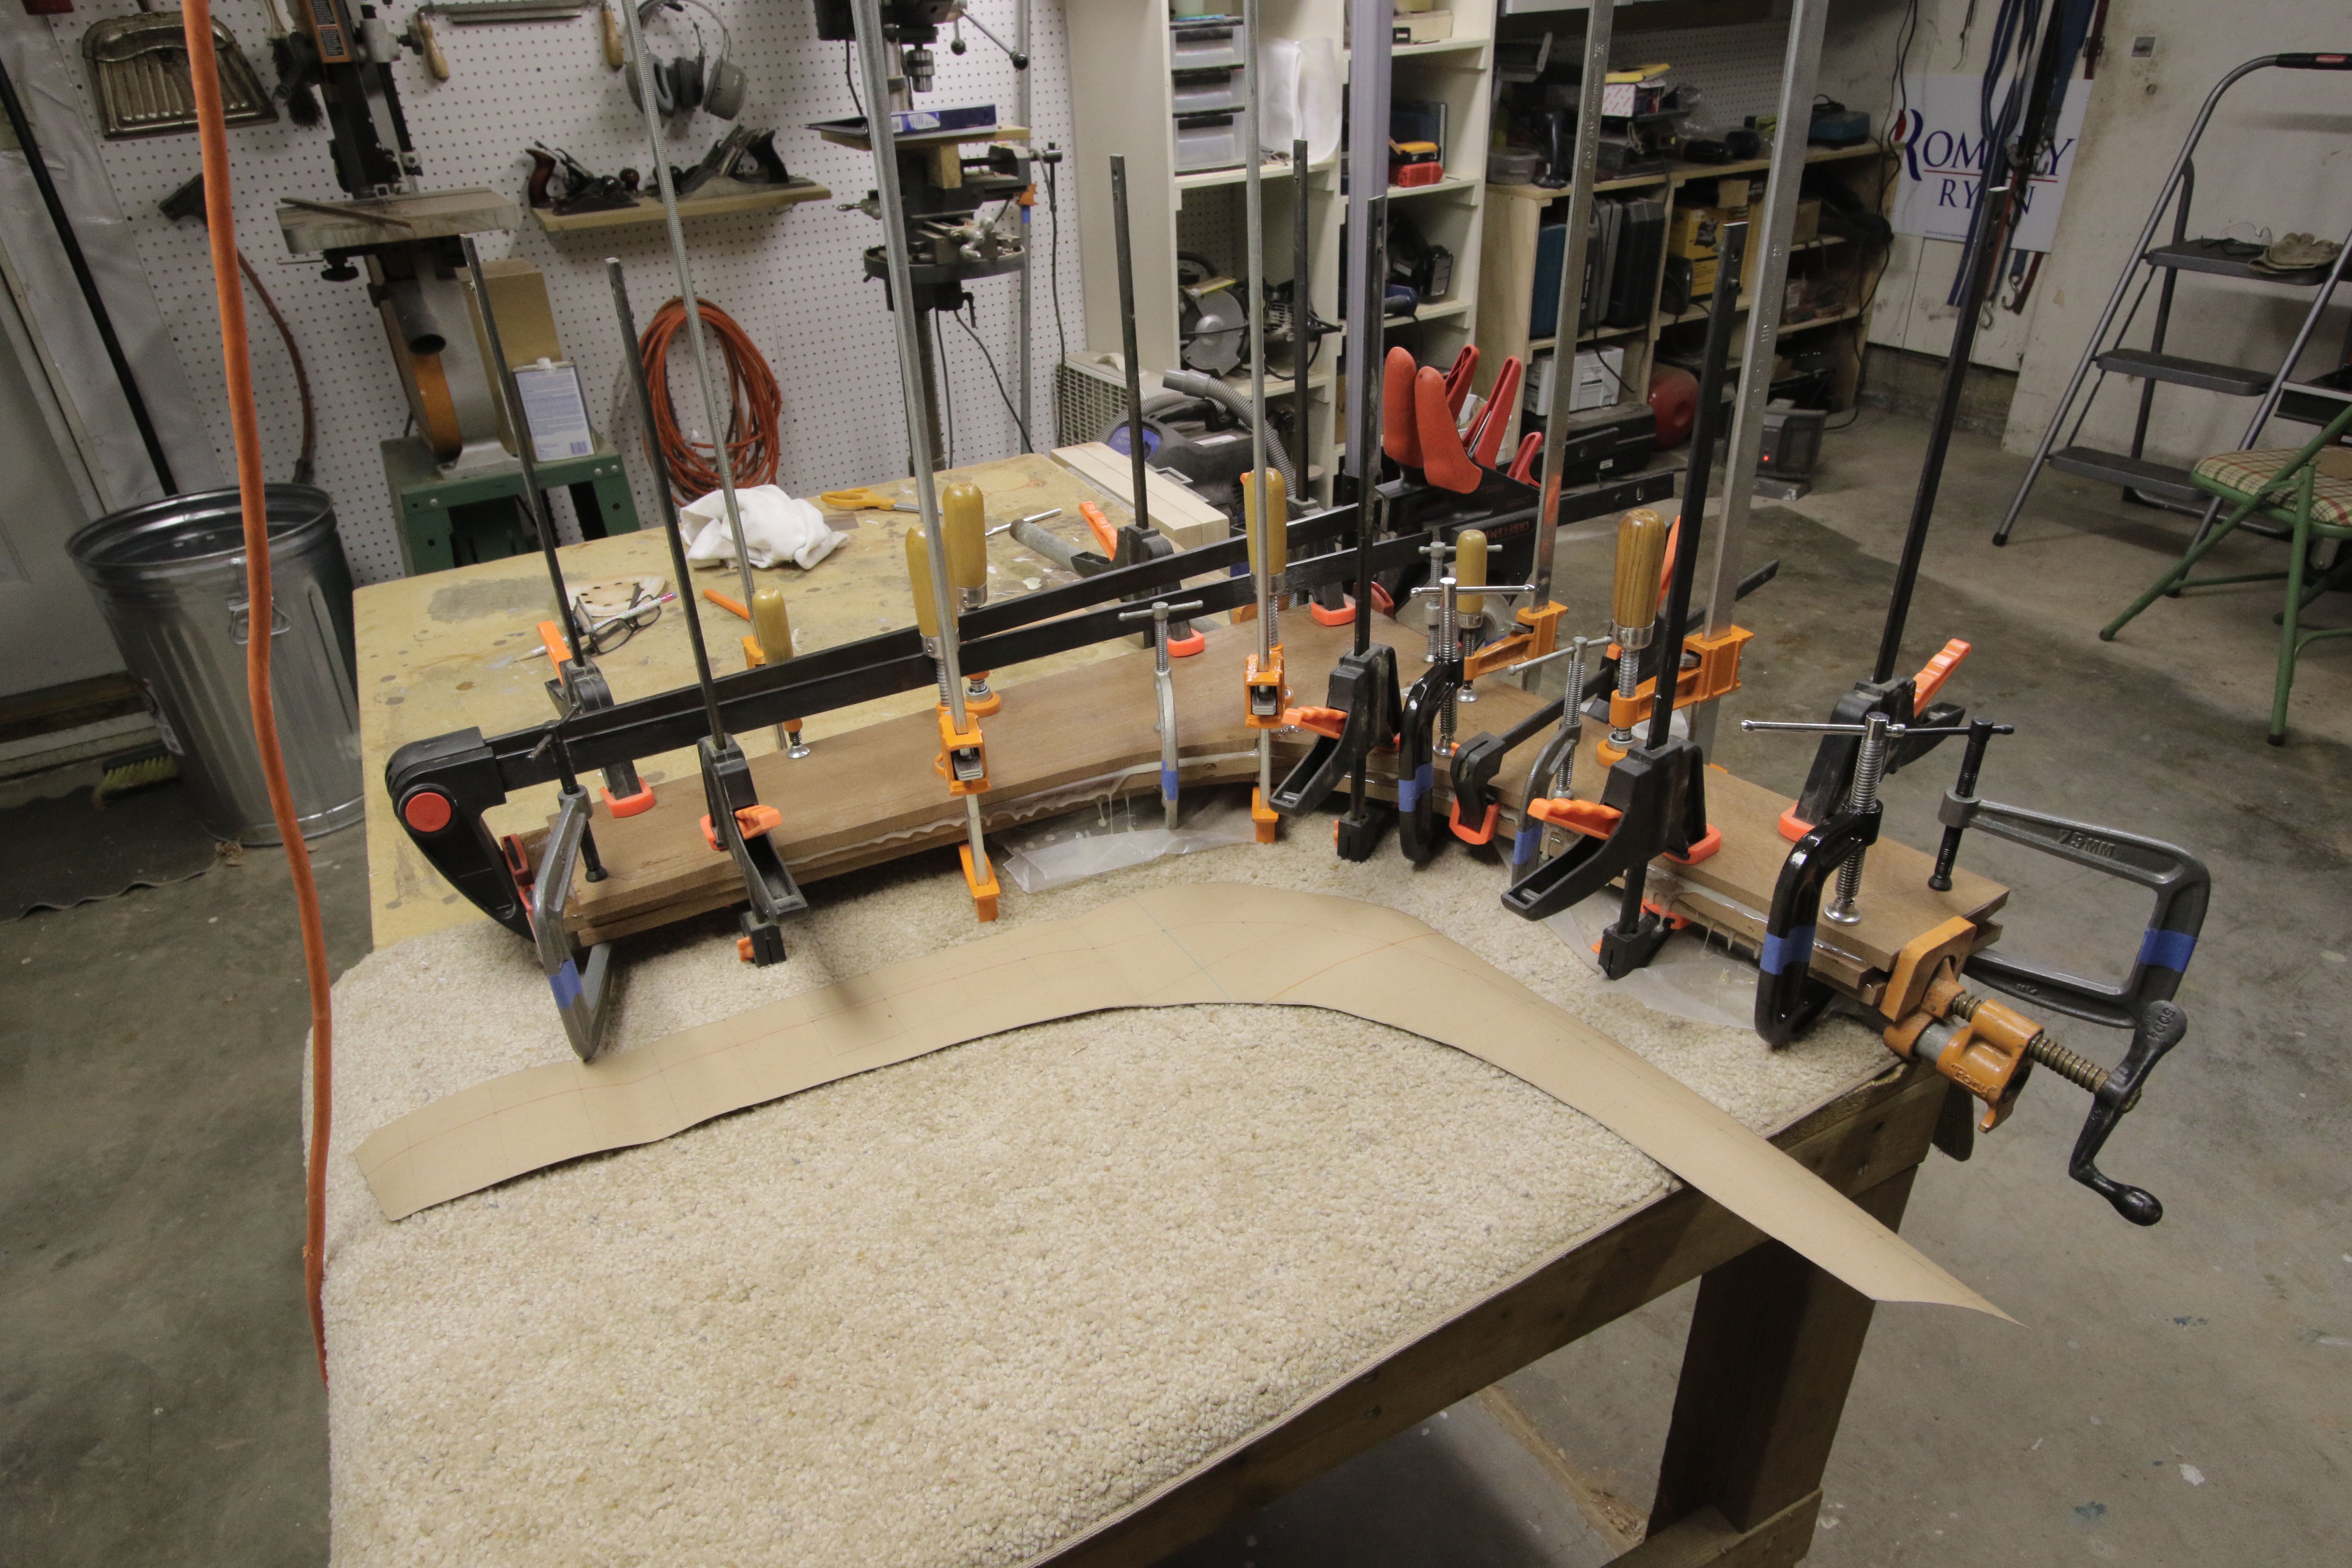
Glued up the laminated stem with epoxy.
Dec 6, 2016
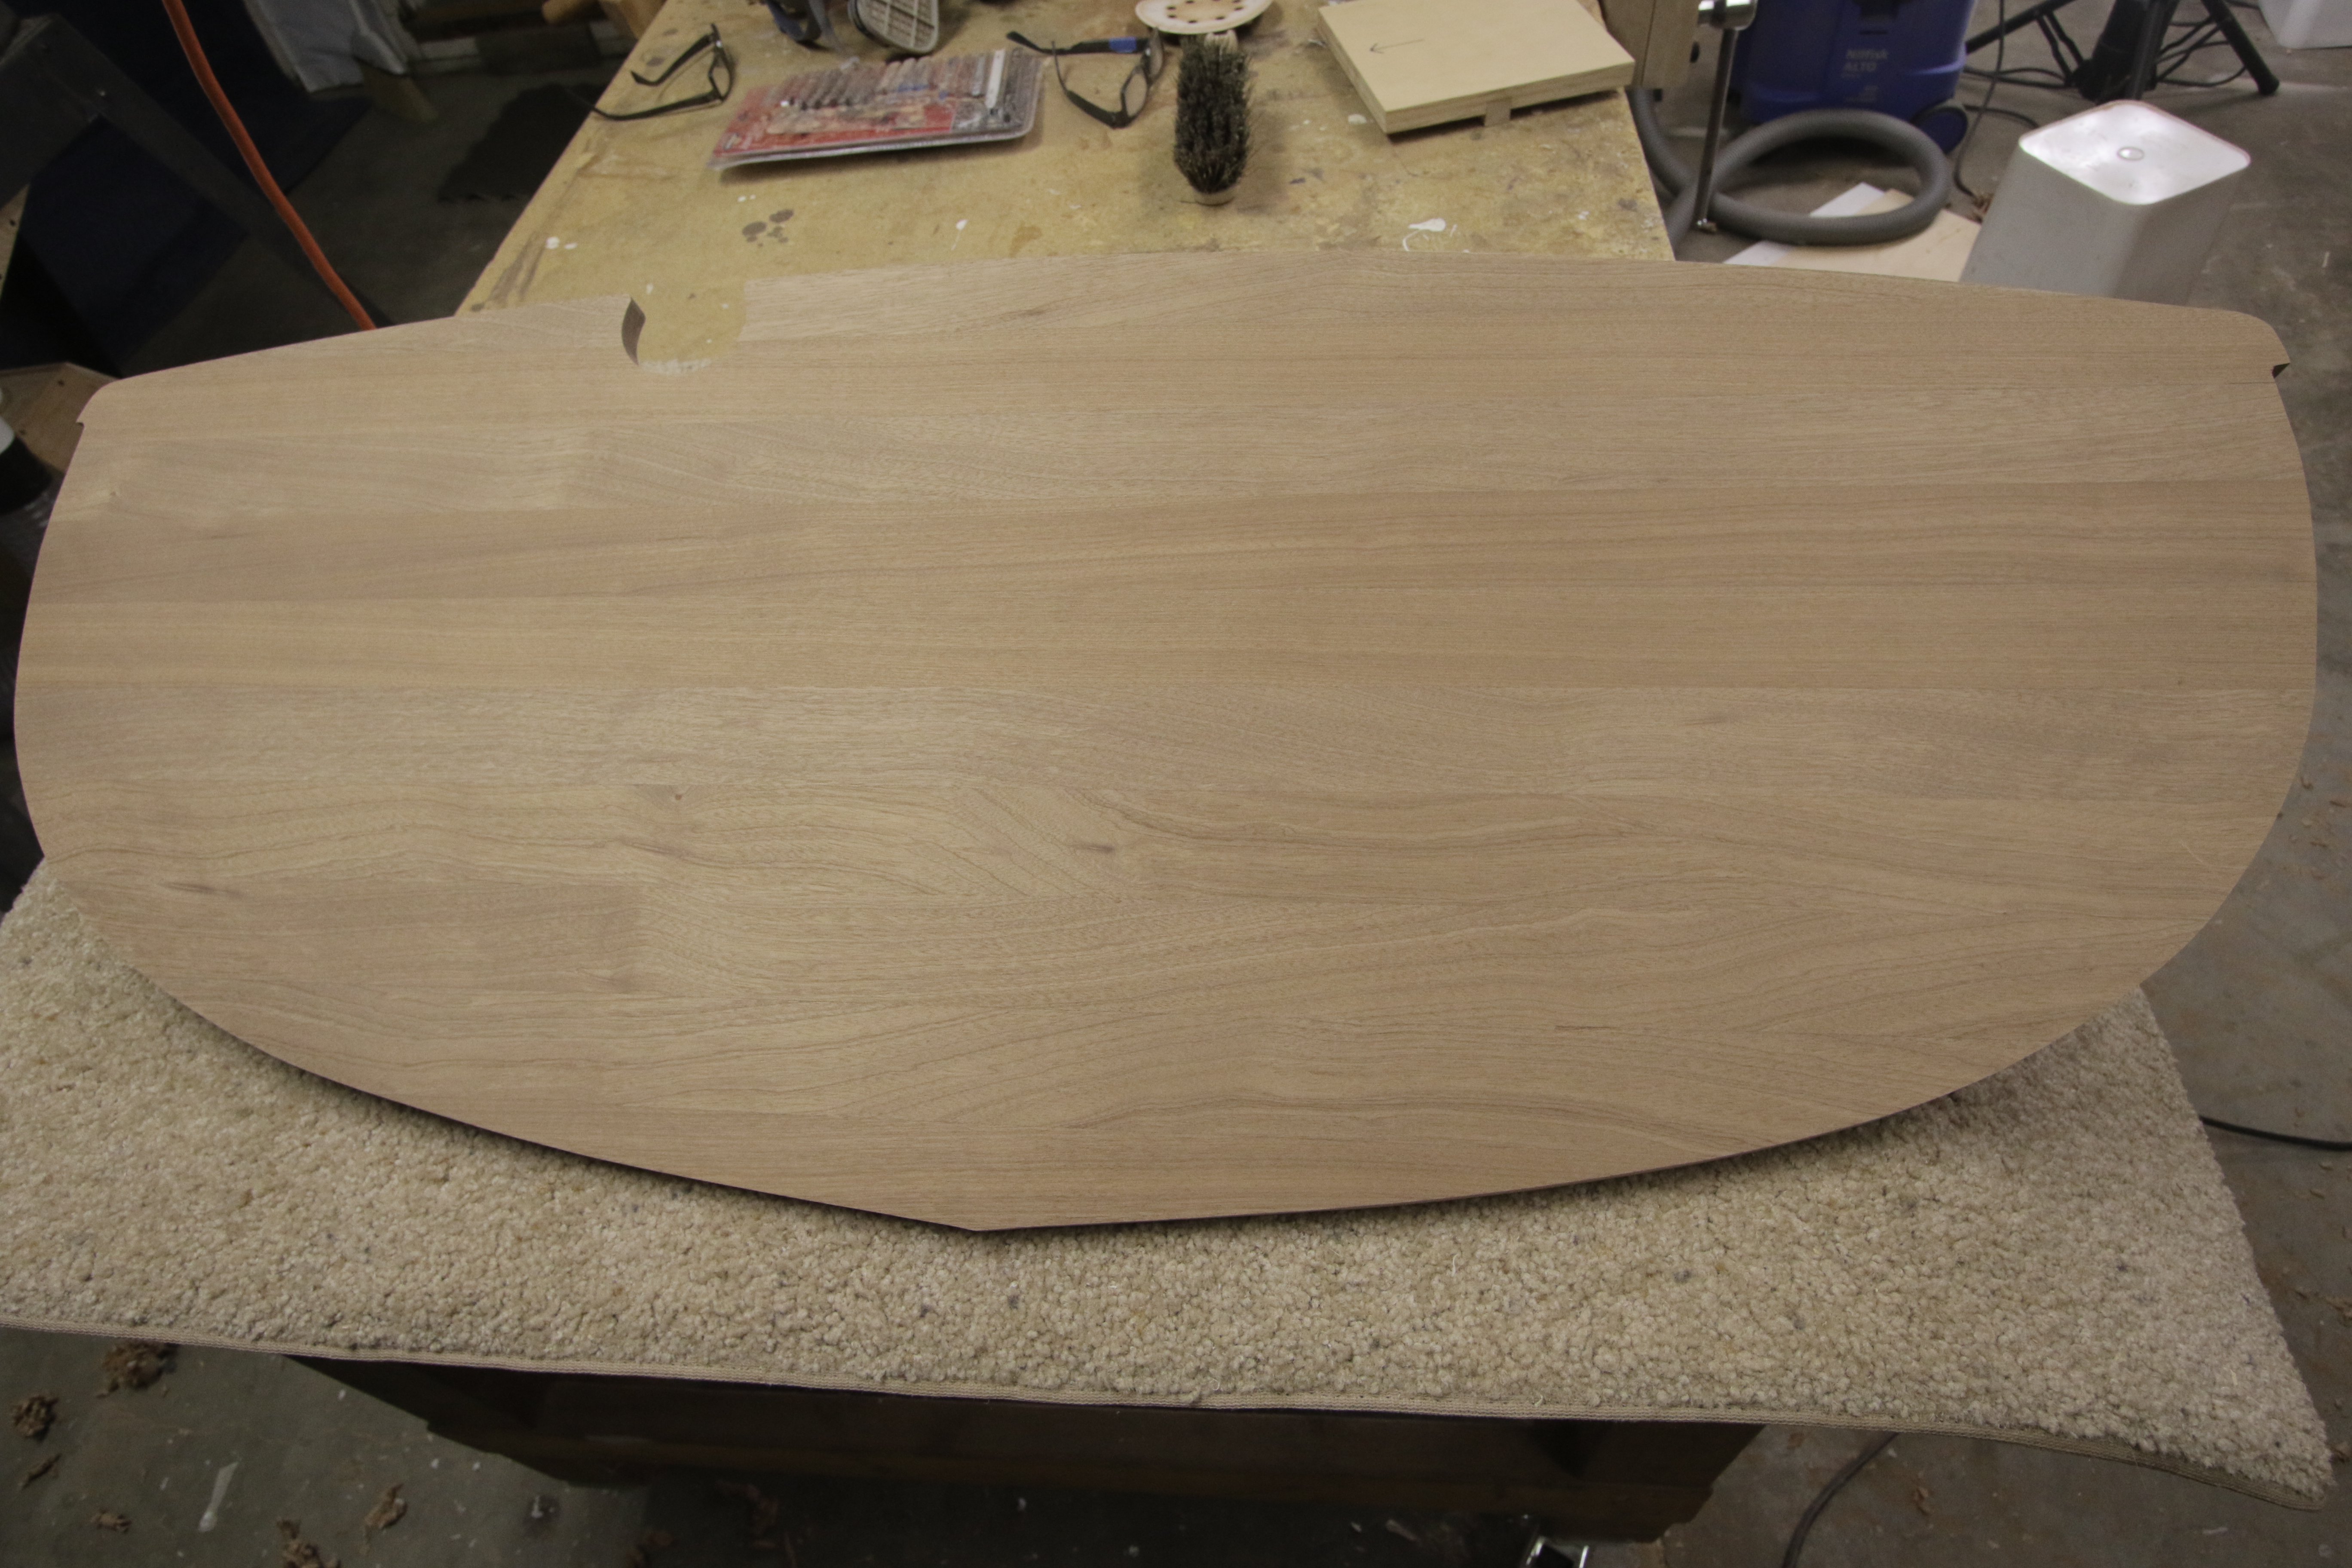
Scraped epoxy off the transom, sanded, traced from the lofted template and cut it out.
Very pleased with the Sapele wood selection! Still need to bevel the edges.
Dec 5, 2016
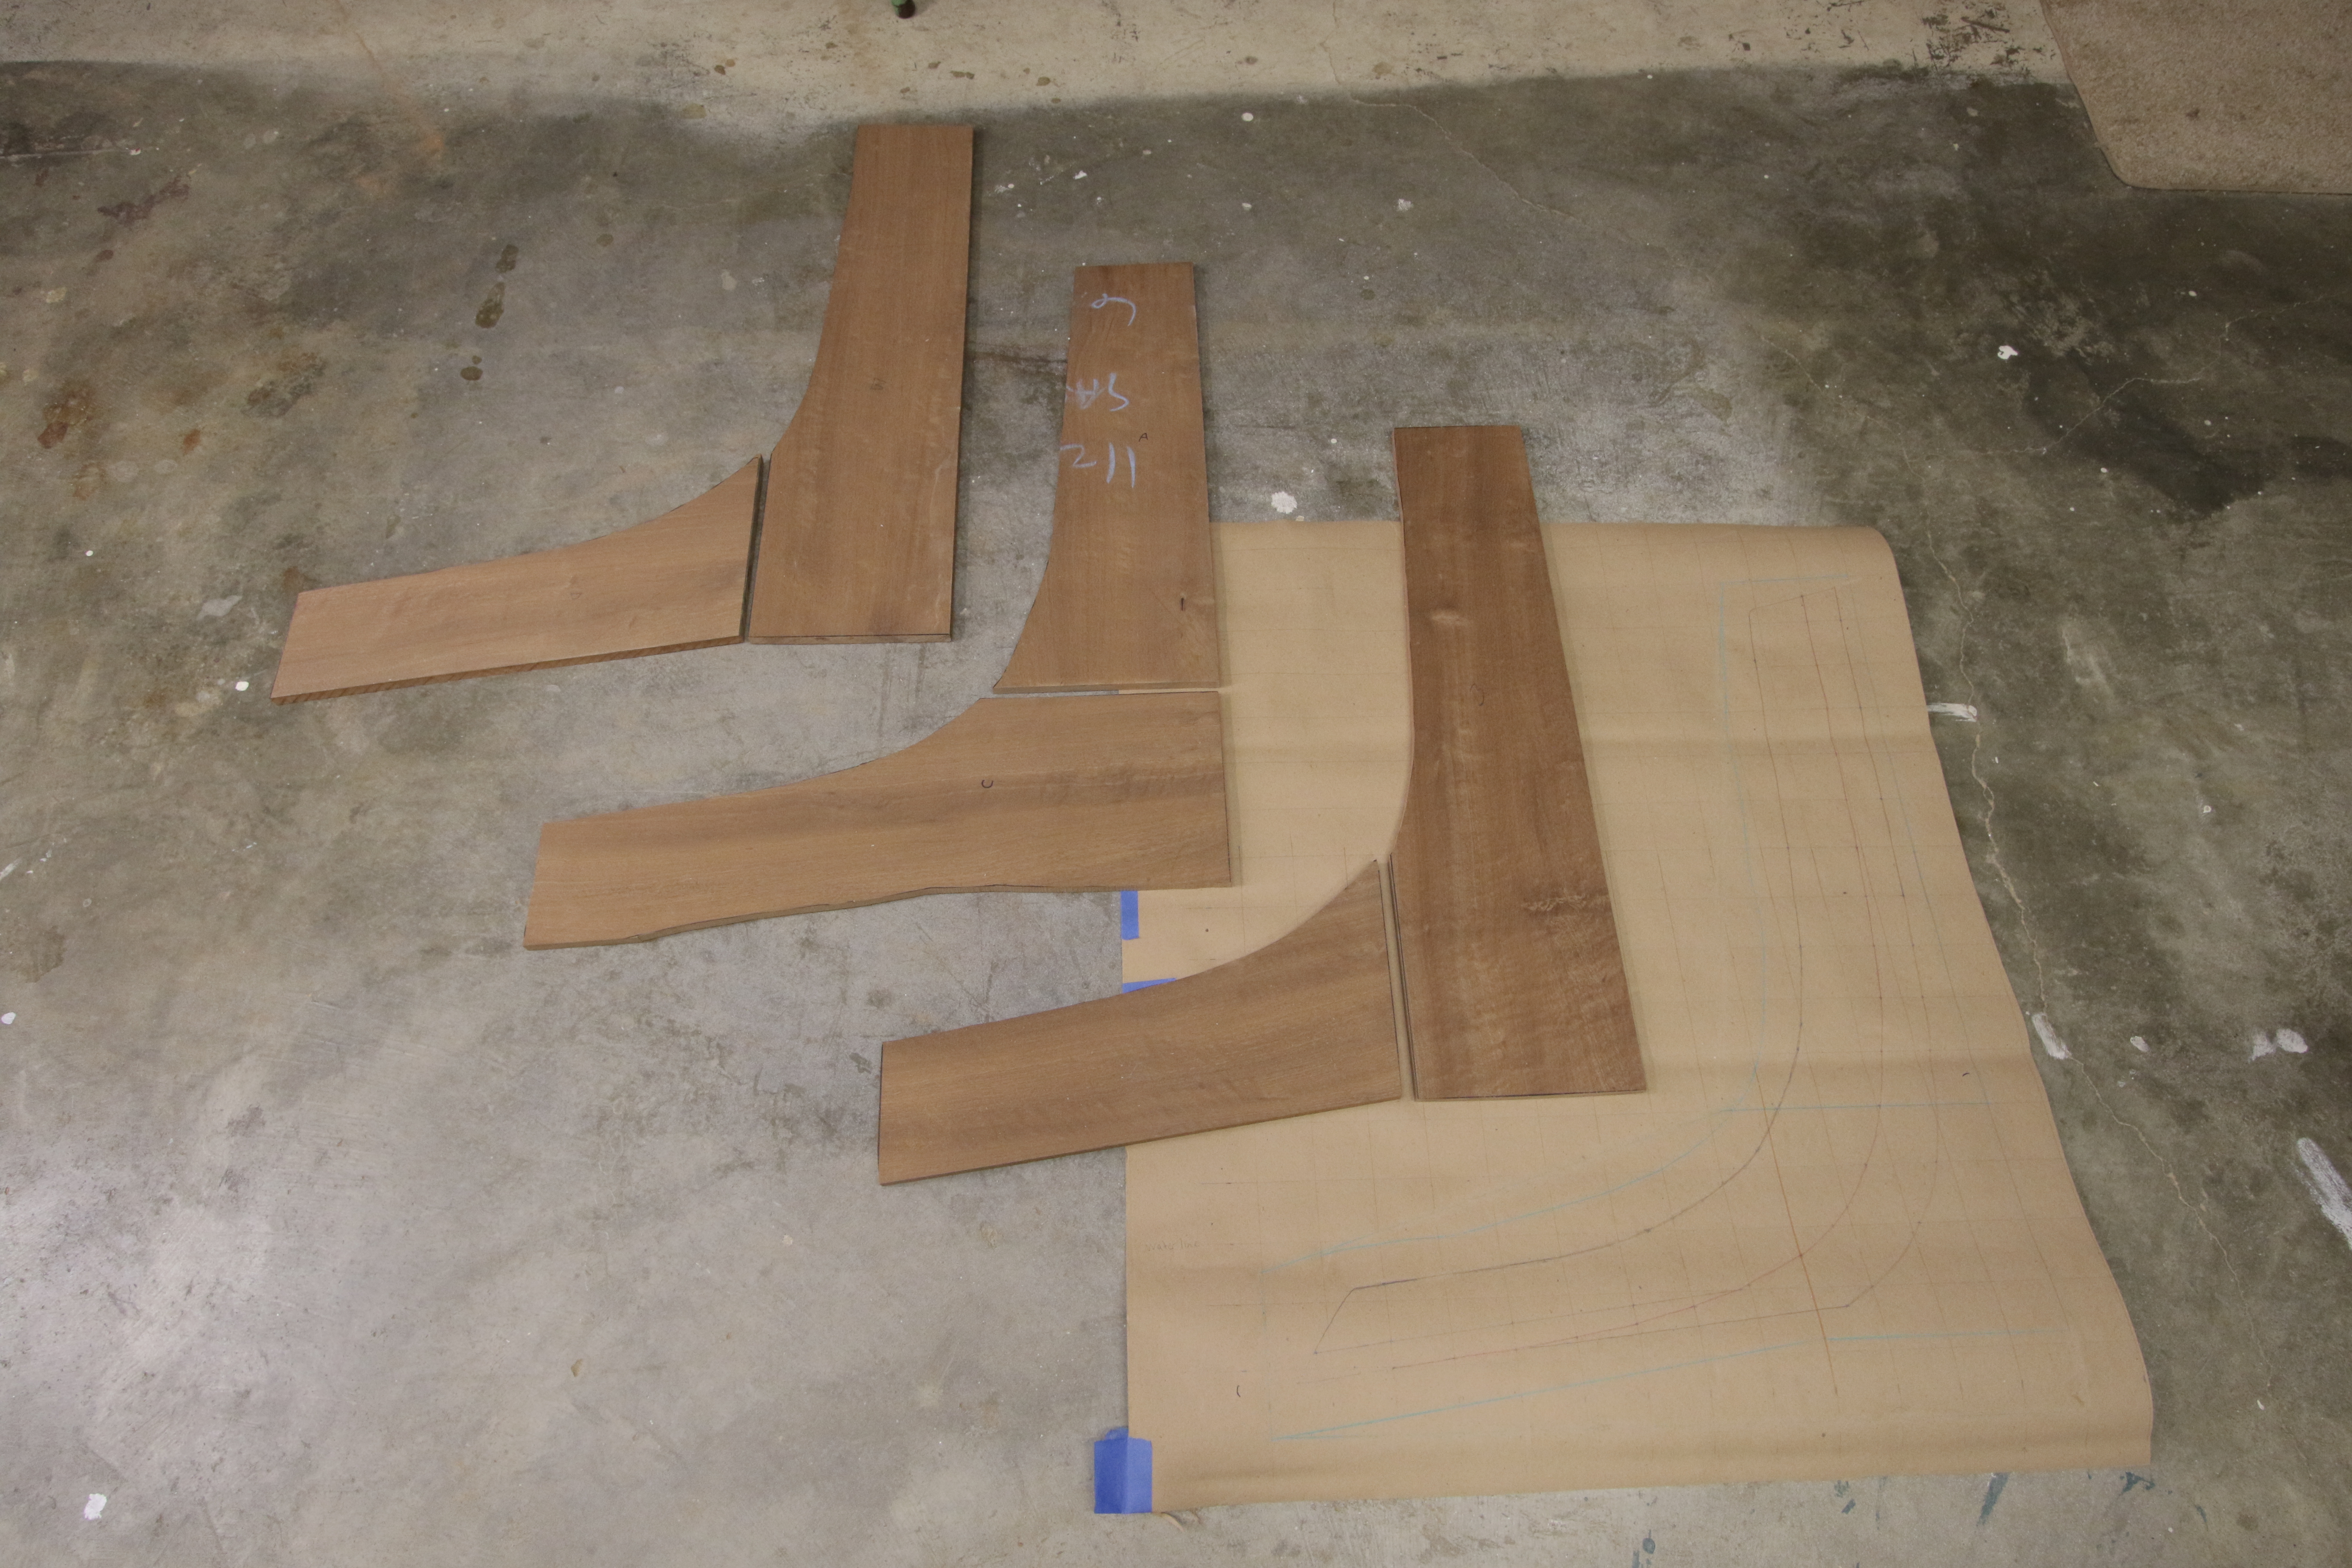
Lofted the stem and false stem, and cut out the associated material which will be laminated with epoxy and then cut to finished size after.
Dec 3, 2016
Decided to use Sapele (an African Mahogany like wood) for the Stem, Transom and Keel, so picked up some nice wood from Cross-cut, Portland OR yesterday.
Lofted the transom on to paper. Made the first cuts today – project officially started. Used dowels and System 3 T-88 epoxy to glue it up. Never can have too many clamps.