Mar 23, 2021
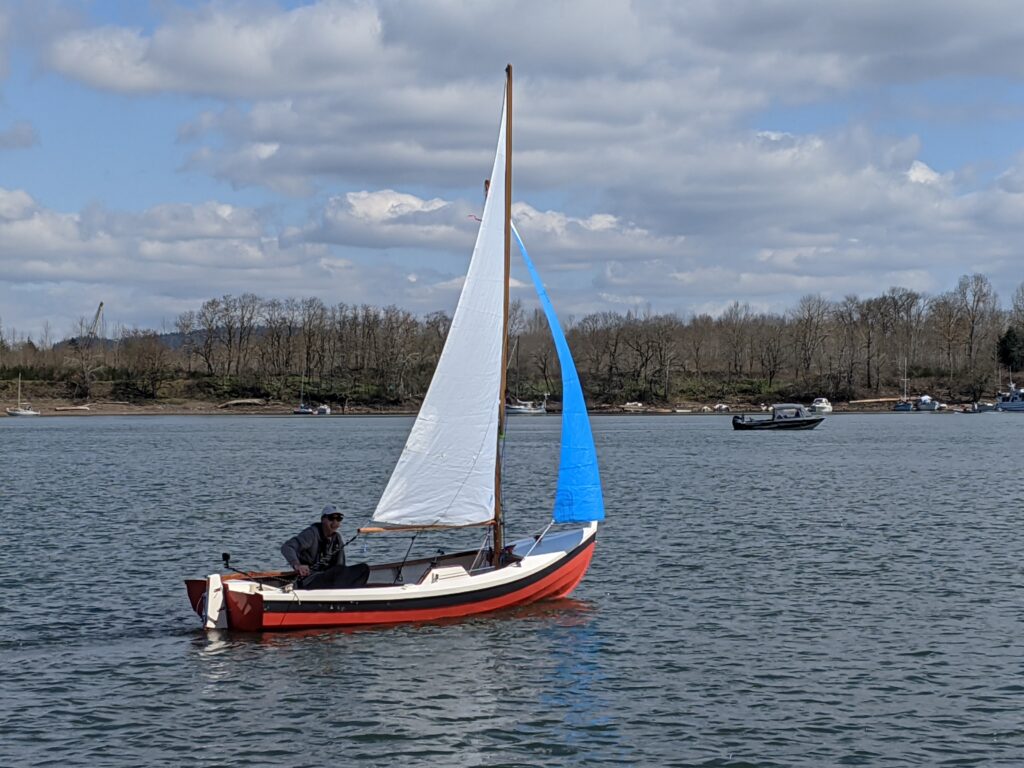
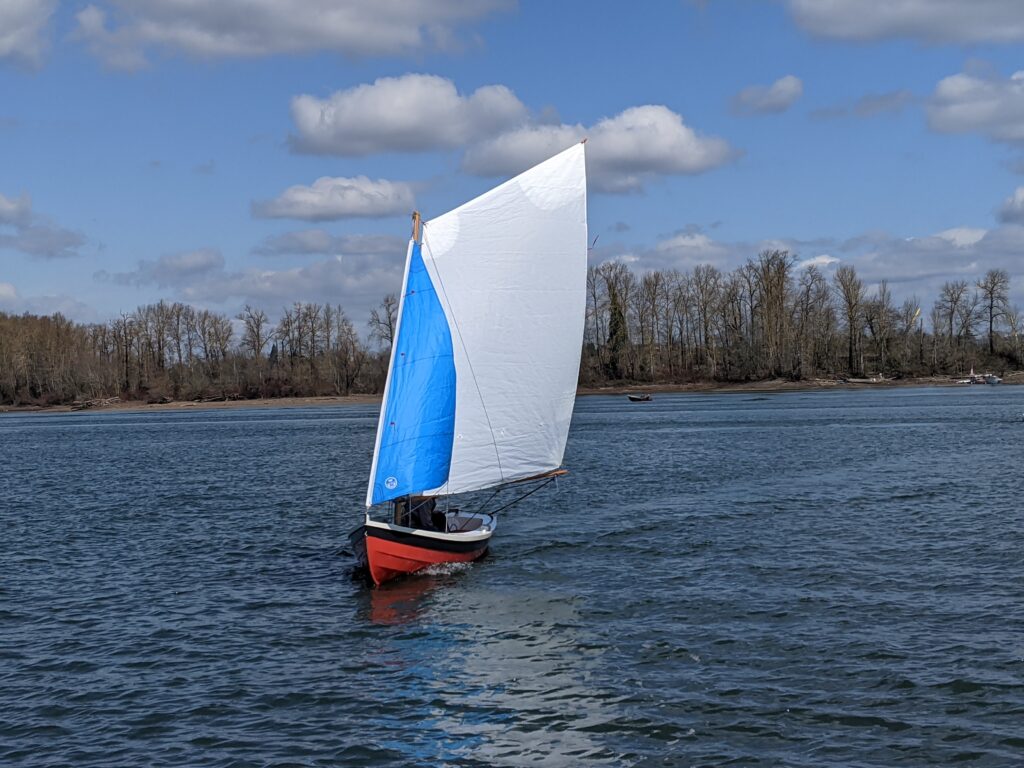
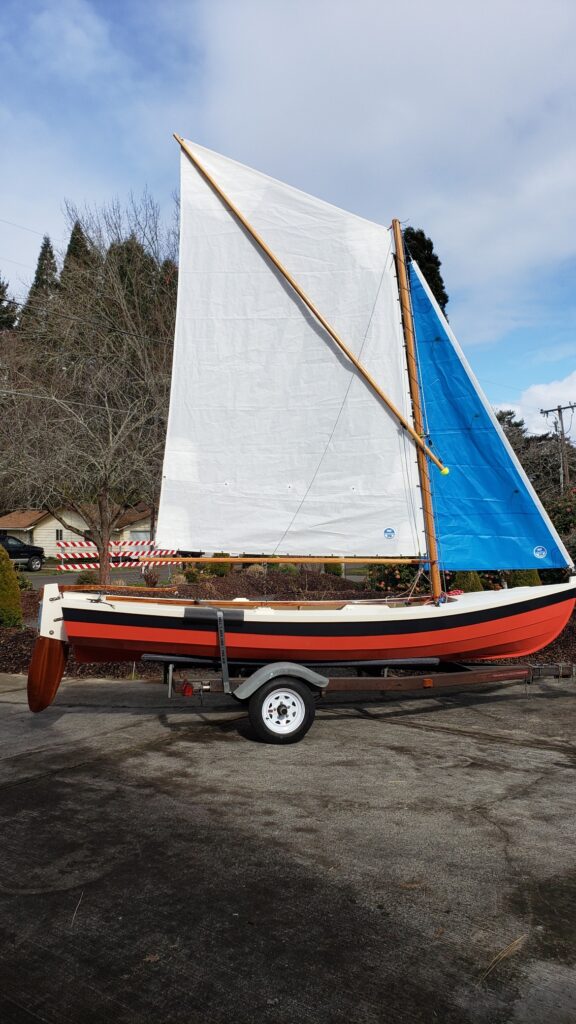
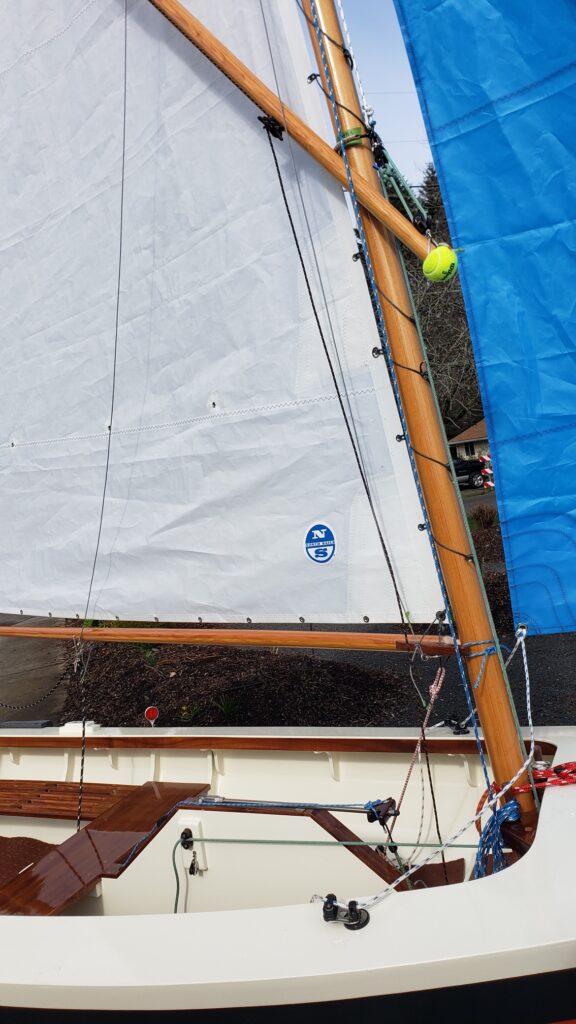
Finally, with rigging complete, it was time for a maiden voyage launching on the Willamette river (at Willamette Park). Wind was light, at most 5-6 kt gusts. Must say it’s quite satisfying to build a boat from scratch and take it out for the first time. 🙂 The snotter rigging and sprit were not too complicated to set up. It took 12 minutes from pulling into the parking lot with boat on trailer until mast was up and it was ready to put in the water.
Jan 29, 2021
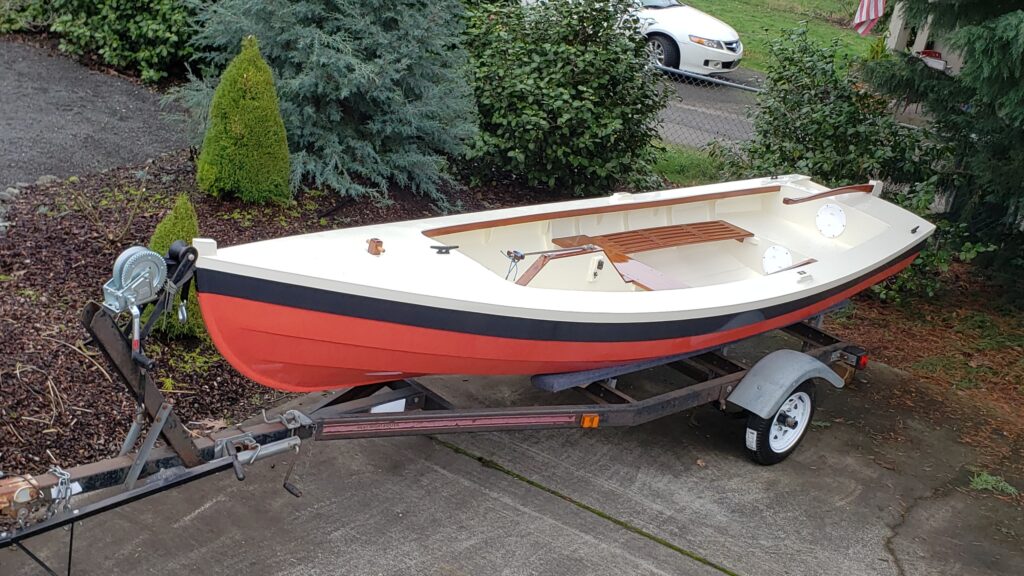
Got the bunks on trailer adjusted up for a great fit. We like how the paint turned out.

Jan 19, 2021
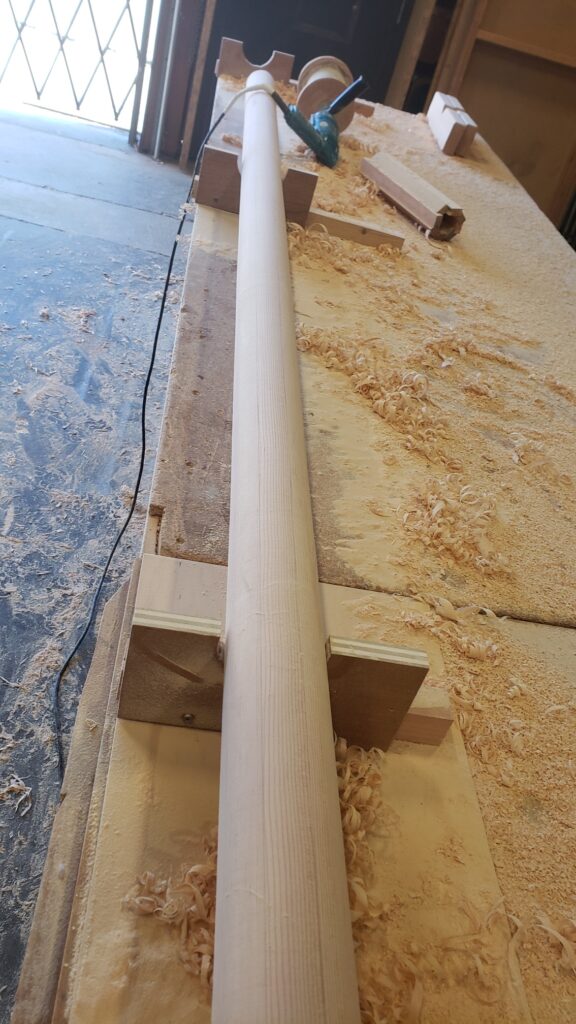
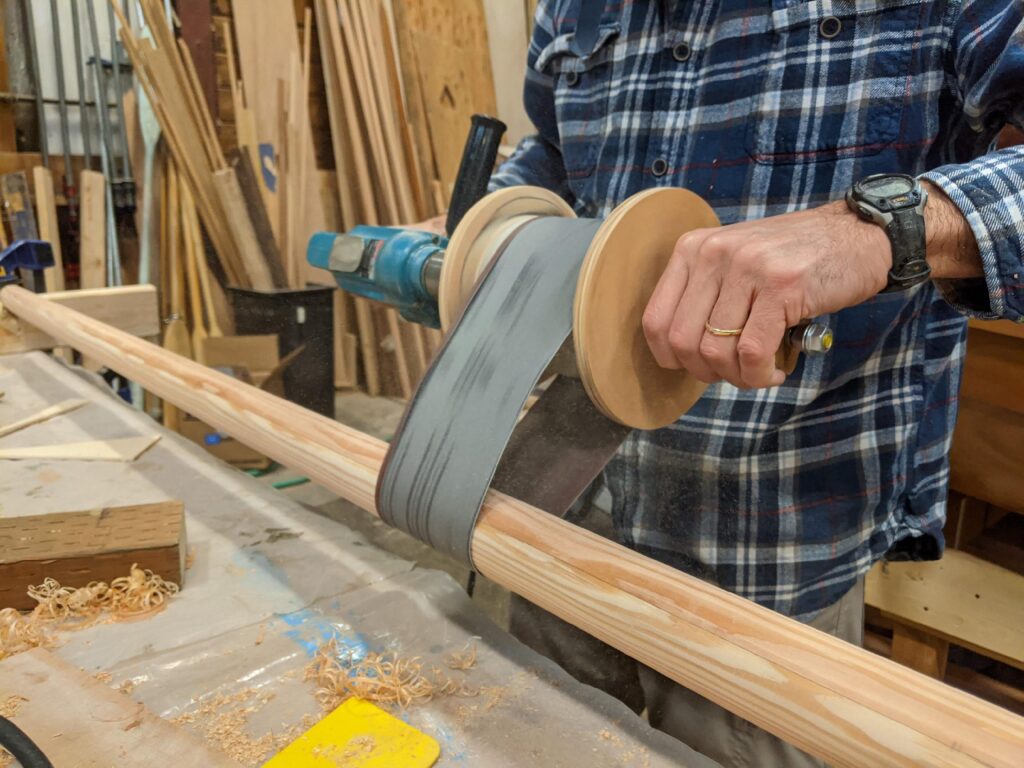
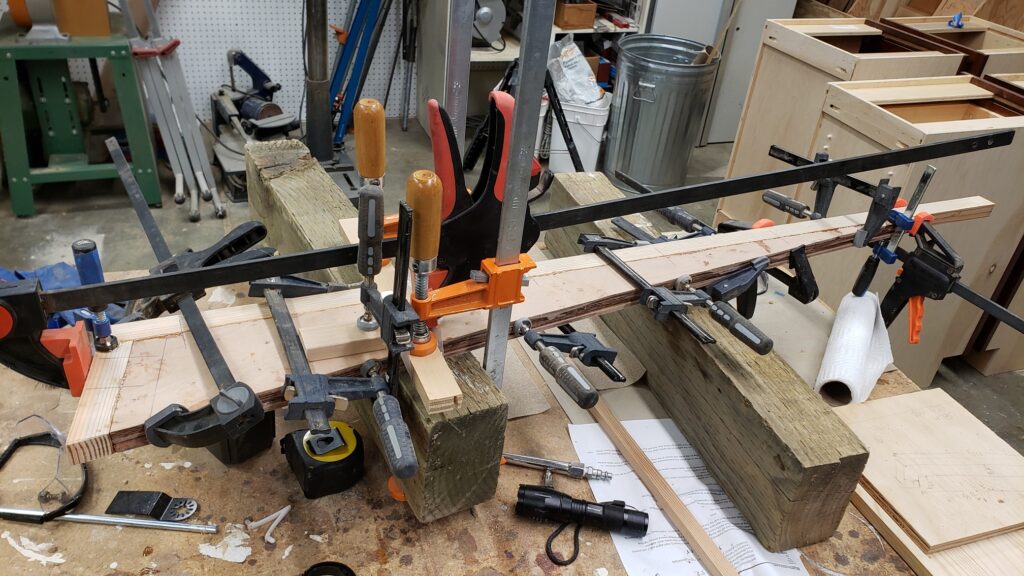
Shaped the hollow mast from 8 -> 16 -> 32 and then used the inverted 4×24″ belt sander (as before – the spool is shown in the top pic attached to drill motor) to sand it round with 40G, then working up to 120G. The solid mast weighed 16.9 lbs and this new hollow version (maybe a tiny bit larger in diameter) weighs 13.6 lbs, so about a 20% savings. Not much, but now I know how to build a hollow mast. 🙂

Jan 18, 2021
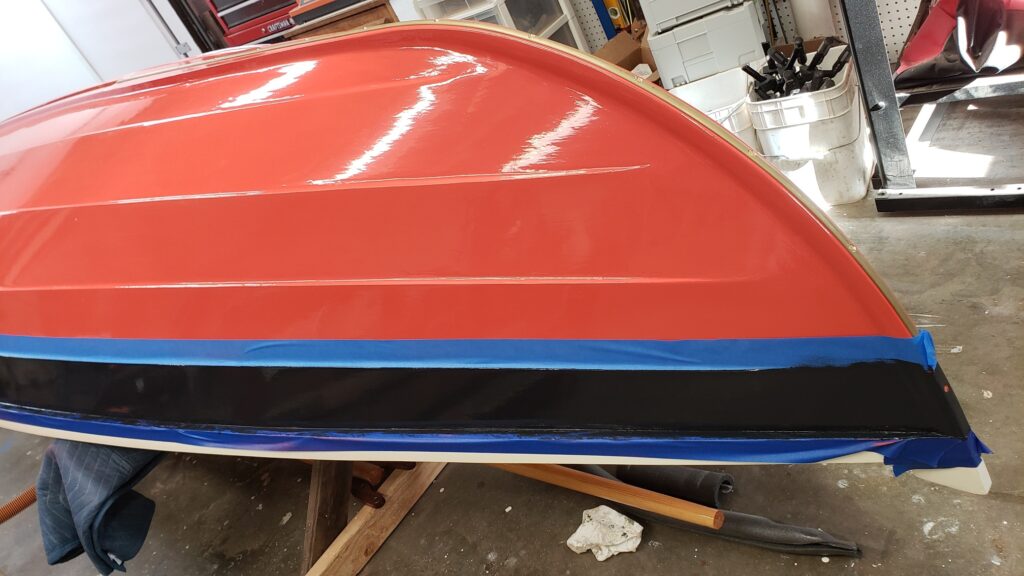
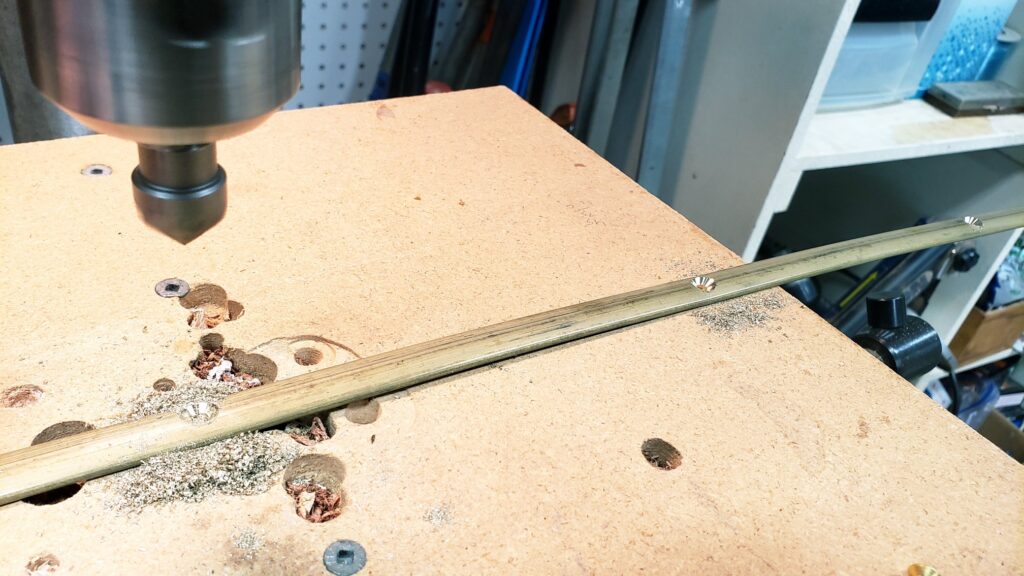
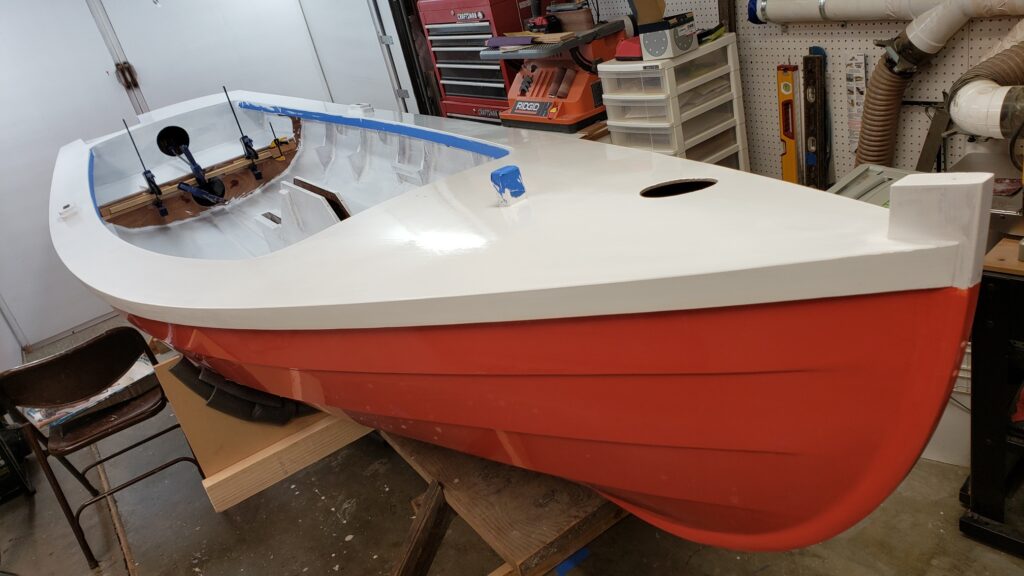
Installed some keel protection out of 1/2″ Oval Brass. Used the drill press to countersink the holes so they would be all to the same depth. Used 3/4″ #6 brass flat philip heads. Tracy wants the top plank charcoal color, so charcoal it is. (Looks black in the pic, but next to black it looks charcoal – blame white balance on the pic.) This time I didn’t tip the rolled on paint to avoid brush marks. Seems to be pretty smooth (not dry yet) and no sagging. We’ll reserve opinion for tomorrow. Will put on another coat.
Jan 14, 2021
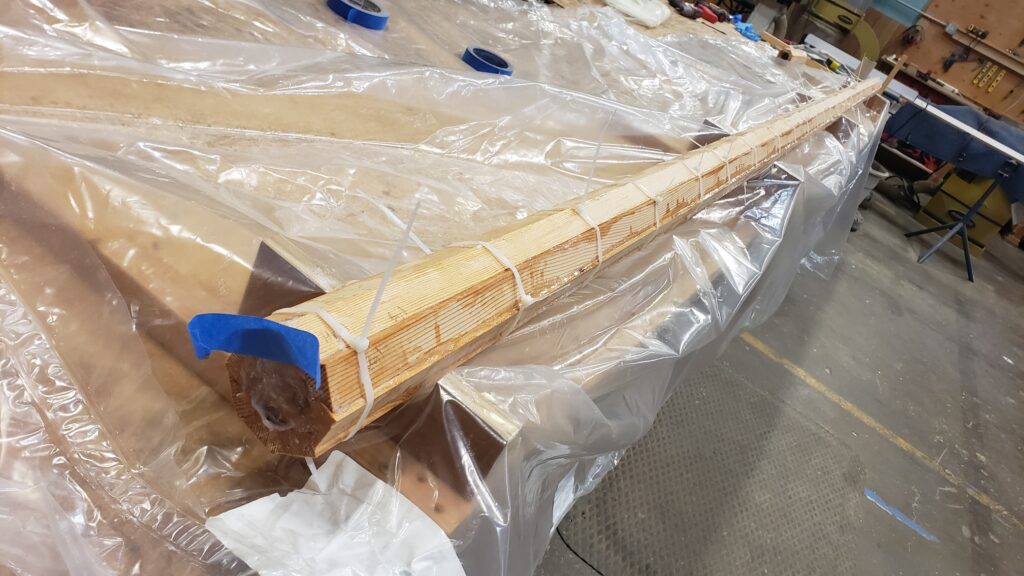
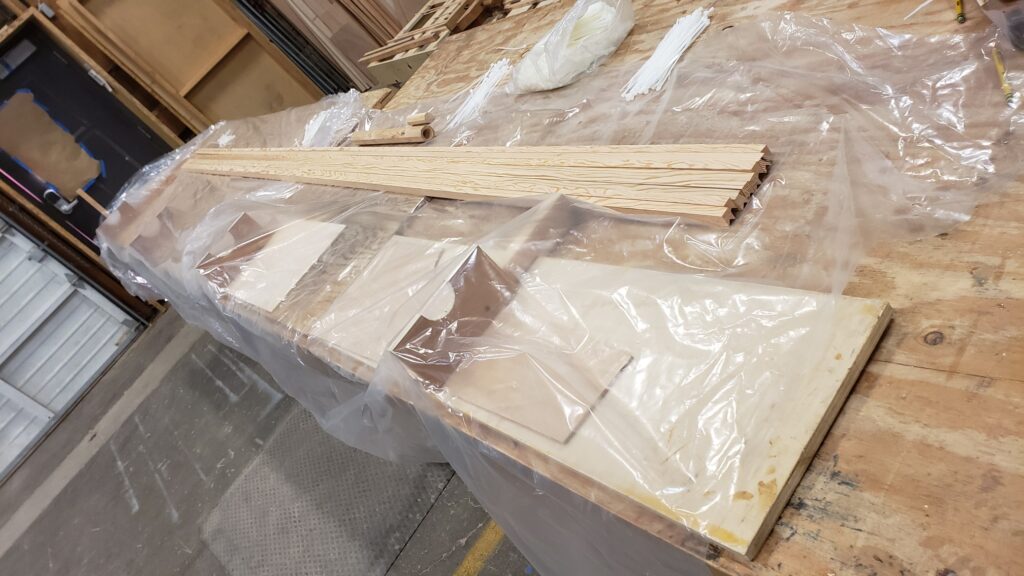
Working on a hollow mast, birdmouth style. My first one of these. Got it glued up today.
Jan 9, 2021
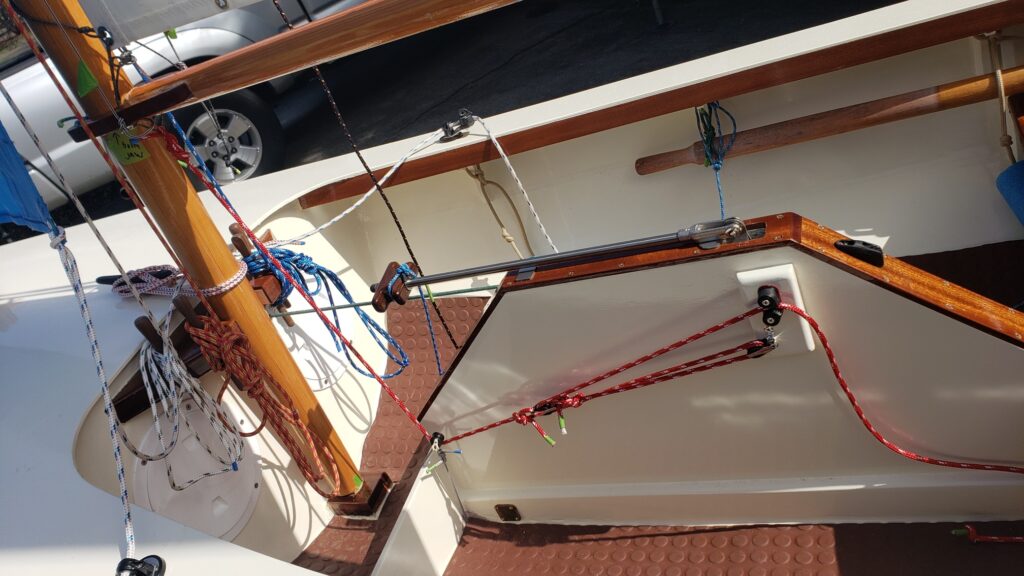
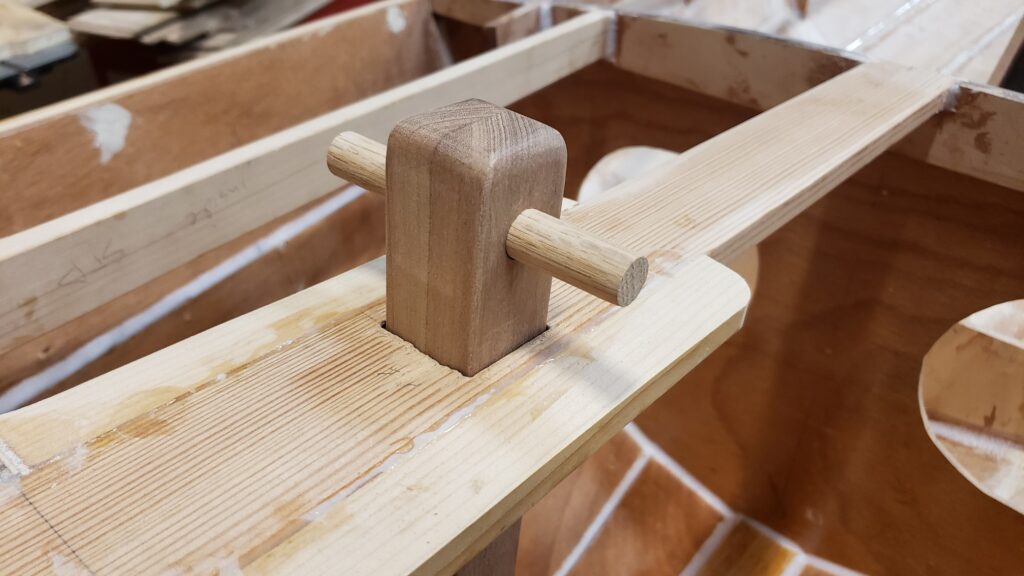
Calling it Done! 🙂 The rest fits in improvements category – I could take it sailing anytime now. Finished some rigging items, varnished the spars, and made belay pins from walnut for the mast partner. Happy with how she came out – we’ll see how she sails. I do think the Vivier Morbic 11 plans were more complete and easier to follow than these, but in the end we got a boat out of it, and just had to do some extra thinking/inventing and that’s not a bad thing either.
Jan 6, 2021
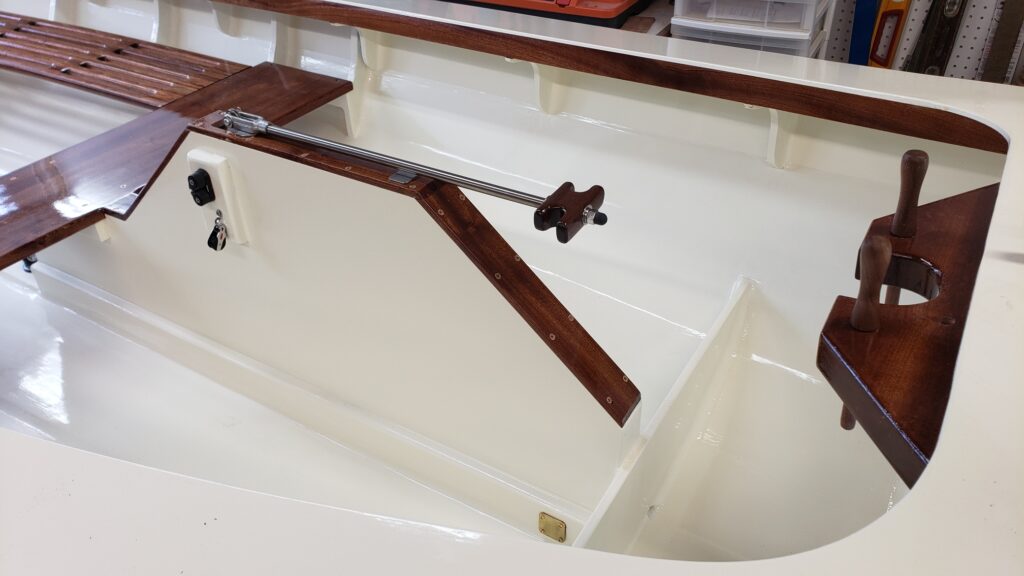
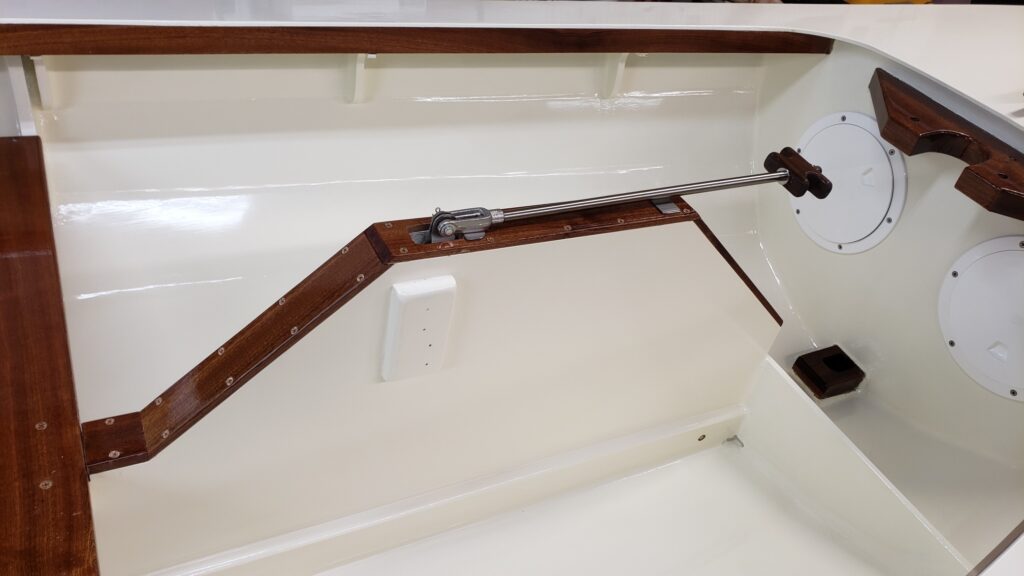
Finished assembly of centerboard lift rod and handle, including installation of CB case caps. I’ve seen several on other boats that frankly look whimpy. I don’t want this breaking. This is all stainless steel 316. The 3/8″ threaded rod has a SS sleeve. The trick was keeping everything < 1″ wide so it would freely move through the case with 1 1/4″ inside dimension.
Jan 5, 2021
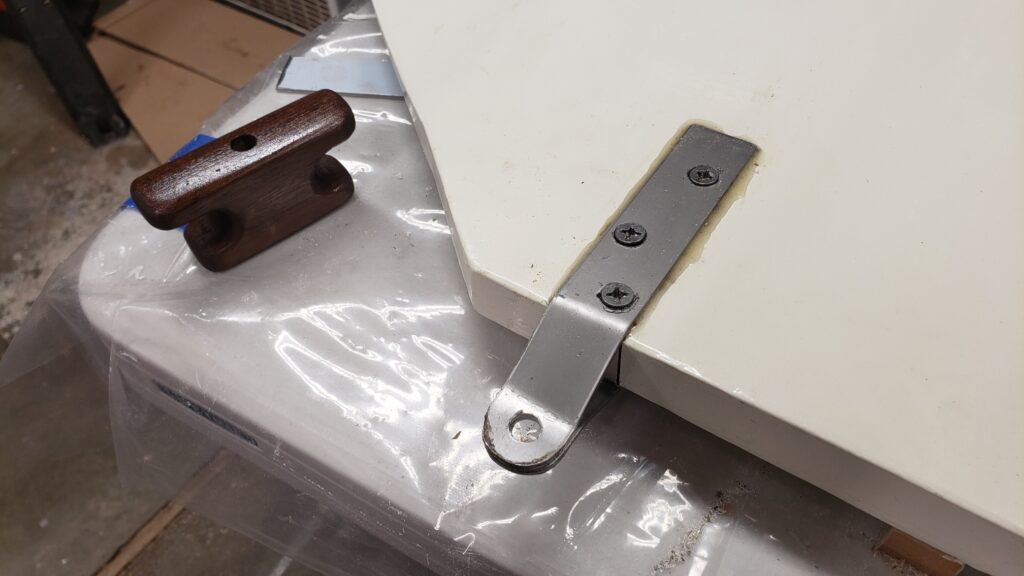
Not much to show for today, but it took a bunch of thinking. Fabricated a bracket to lift/lower the center board out of stainless steel. Tricky business to figure out dimensions and how to mount so that the board can fully raise without hitting the inside top of CB case, but raise it far enough so it’s not hanging below the hull. The designer sure didn’t leave much clearance around the board for mounting hardware. I used flat head screws and epoxy. Got a handle made, out of walnut, for the stainless steel rod that will attach to it. I’m much happier working with wood, than metal.
Jan 4, 2021
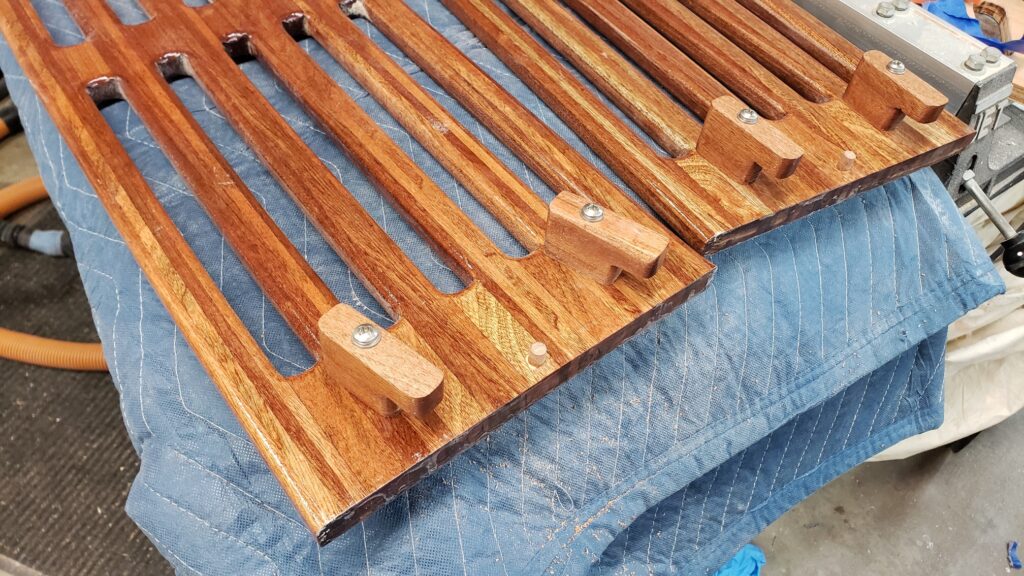
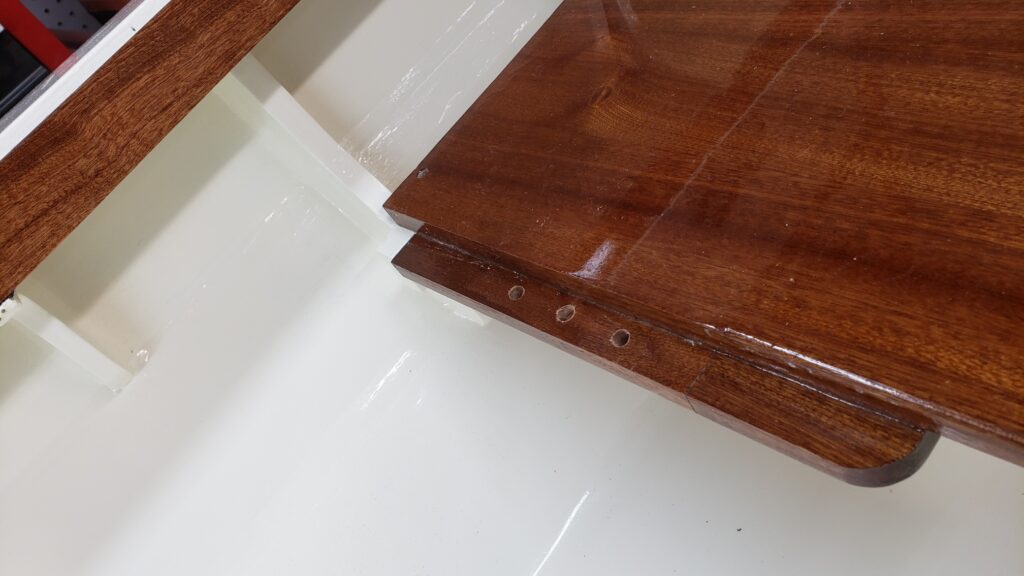
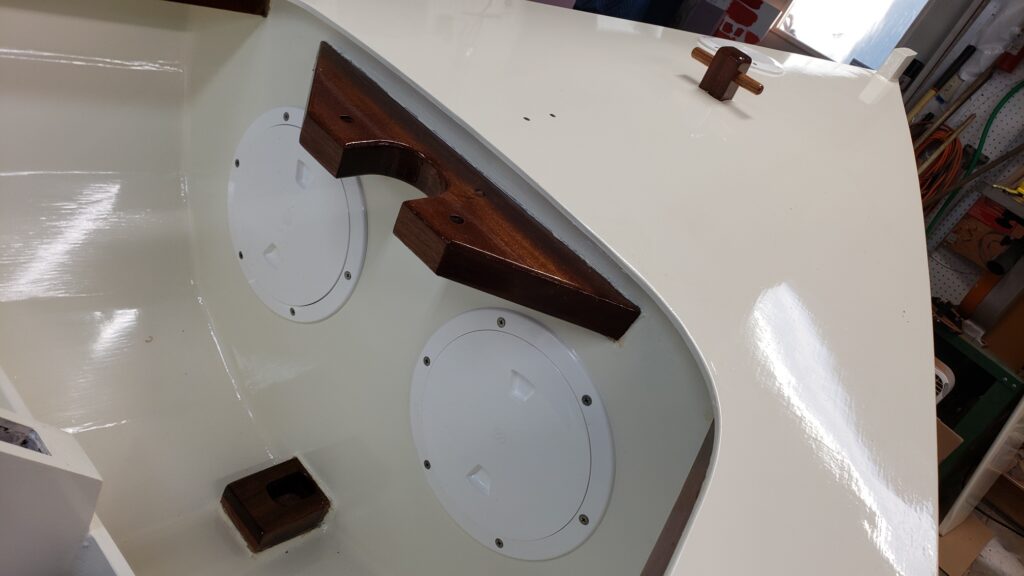
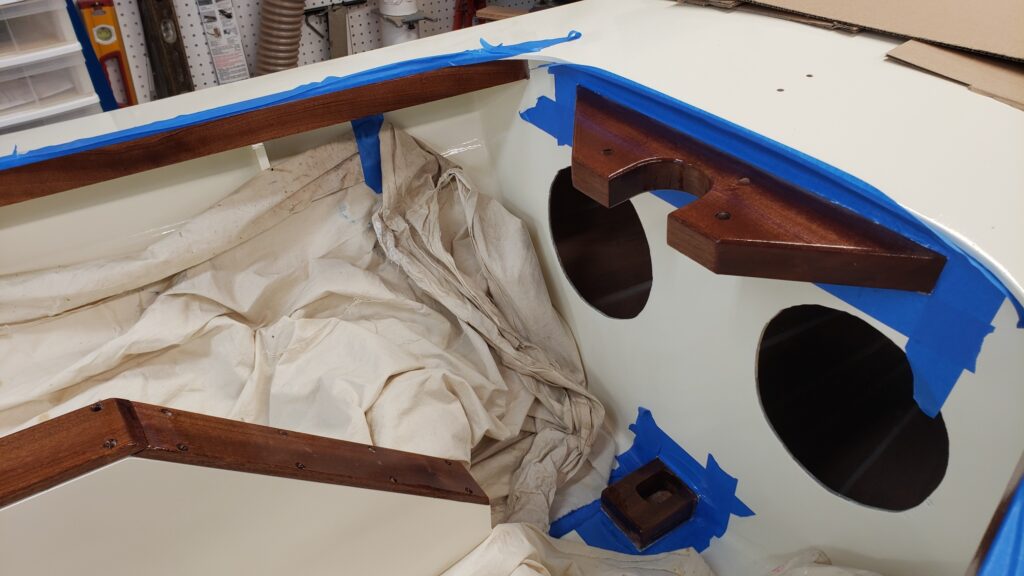
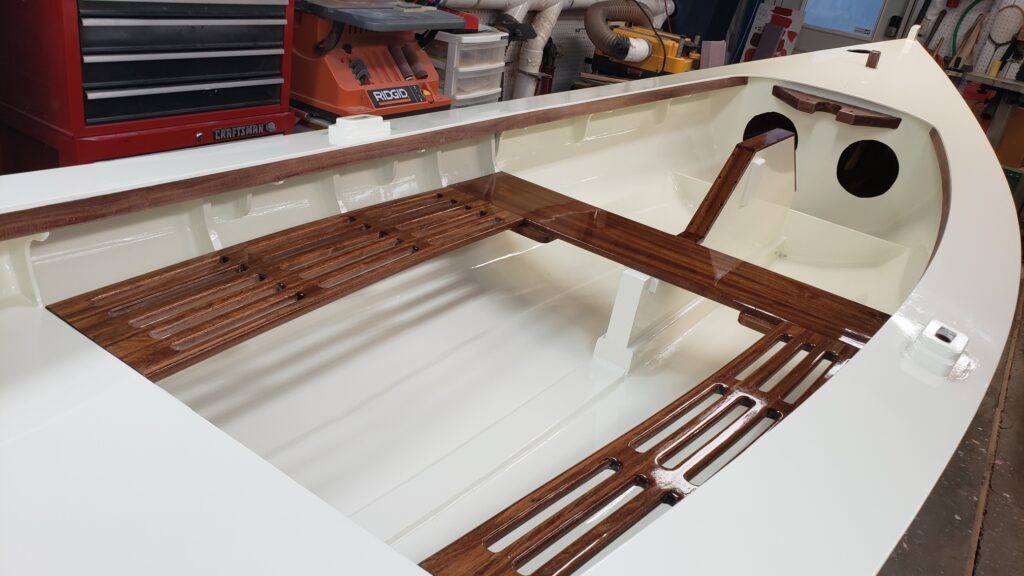
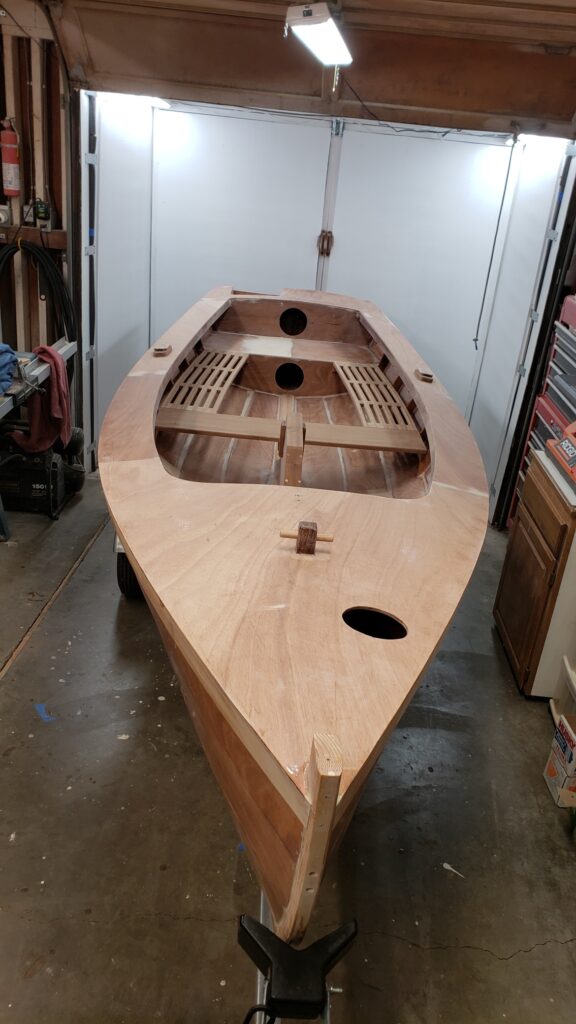
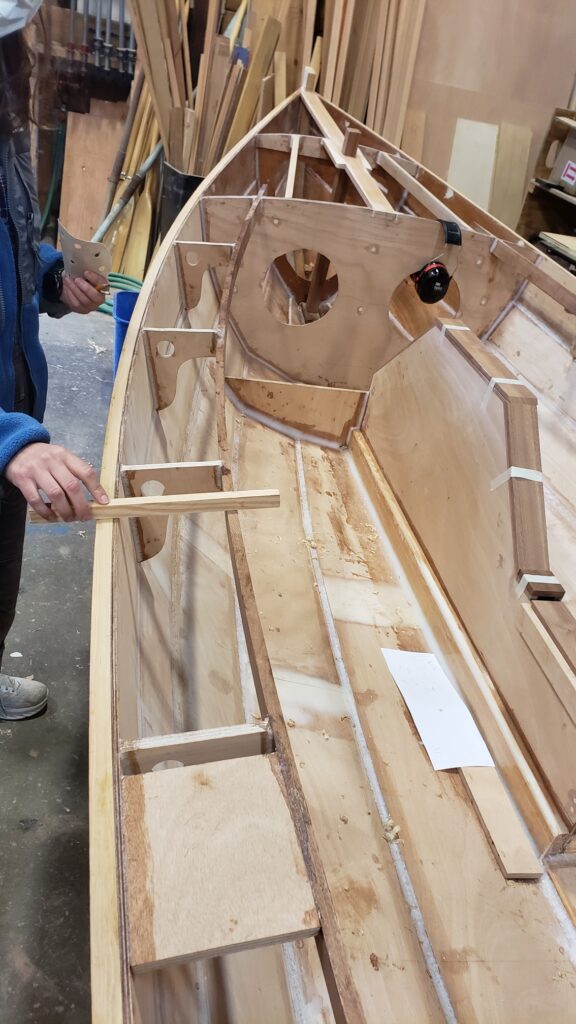
Installed the thwart and built some turn buttons into side seat bottoms to lock them into one of three adjustable positions defined by pins. When sailing sitting on deck, side seats can be tucked in against the hull side frames. For a more leisurely sail the seats can be adjusted toward center and side rails provide a comfy backrest. Got the 5 deck plates installed.
Jan 2, 2021
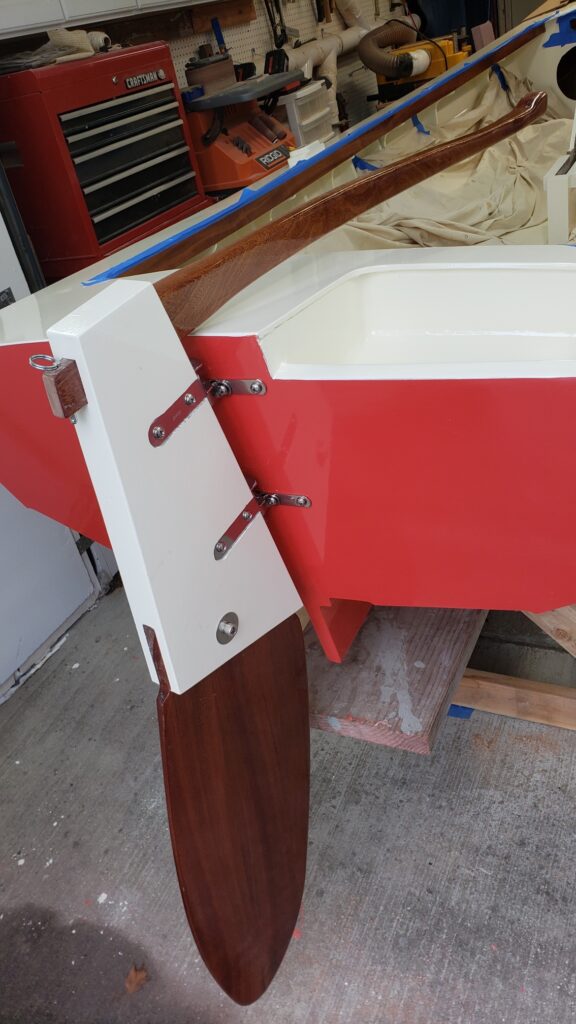
Installed pintles/gudgeons on rudder case and transom and mounted rudder and tiller. Tiller and rudder are both of sapele. Height of tiller is such that it clears the side decks by about an inch. It’s about 1/2 inch above the aft deck at the transom. Still need to install control lines for rudder – will do then when I rig. Added more coats on varnish on interior gunnels, mast partner/step and samson post.
Jan 1, 2021
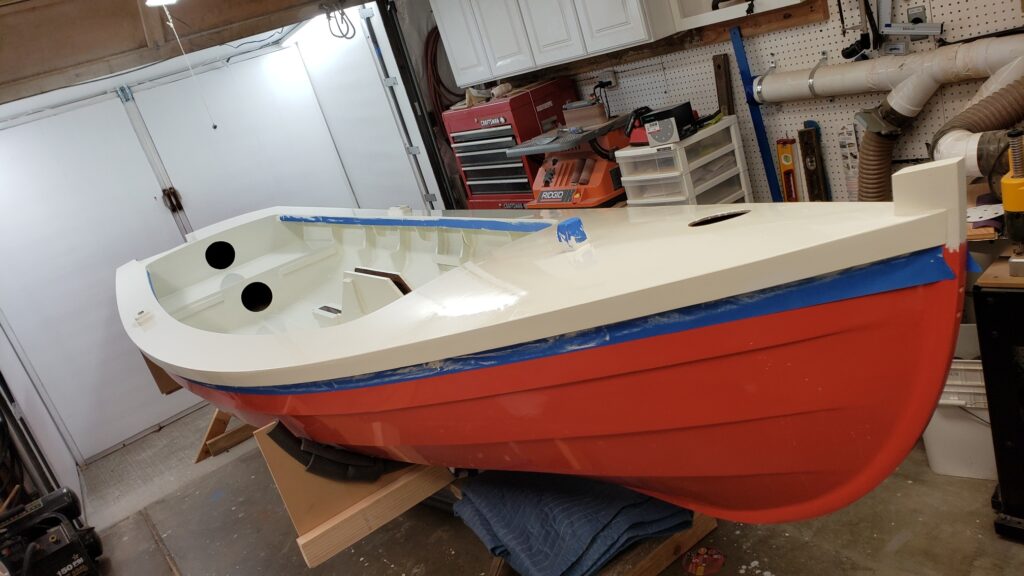
Happy New Year! Wow, thought I’d be done with this boat by now. Painting took forever. Well, I took some time off over the Christmas break too. Painting is done now though, and just finishing up the interior varnishing. I like how the varnished wood looks with the color scheme.
Dec 22, 2020
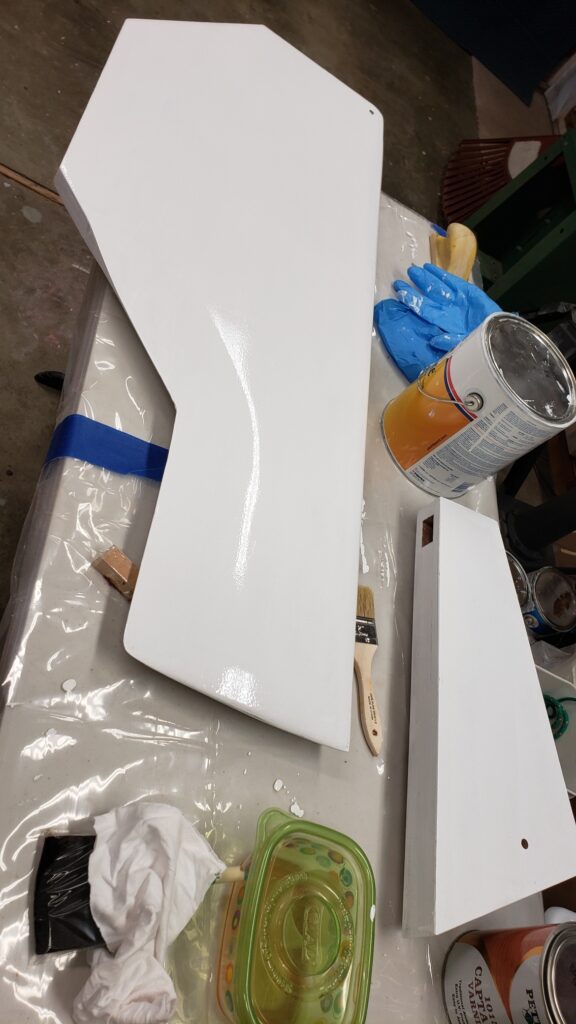
Four failed tries on interior colors we didn’t like, but finally arrived at this one that we love! I am getting seriously tired of sanding and repainting, but can’t stop now. Had tried 4 different shades of gray and ended up with one so dark (that wouldn’t go with varnished sapele) that I had to cover it with 2 coats of primer before going with this Hatteras (1990) off-white. Gray just wasn’t IT – needed something warmer, softer. Gives it a very classy look, we think :-).
Dec 17, 2020
Used Brightside “Seattle Gray” as a light gray option, but after application to the inside yesterday we decided we didn’t like the slightly green hue. But, at least, the thickened epoxy fillets on all the frames and deck knees, that we didn’t smooth with fairing compound, also looked horrible (to me). :-/
So, I decided to bite the bullet and treat that coat as another primer layer and re-sand (8 hours worth!) Used wood filler on the fillets and got them really smooth. We added a touch of blue and a couple teaspoons of black to the Seattle Gray to get more of a bluish and slightly darker gray. Not anywhere nearly as dark as battleship gray. A bit too tired now to start another coat of paint, with the diligence I want to give it, so that’s for tomorrow. I’ve got to quit torturing myself someday..

Dec 15, 2020
Another coat of primer. Real paint tomorrow.

Dec 14, 2020
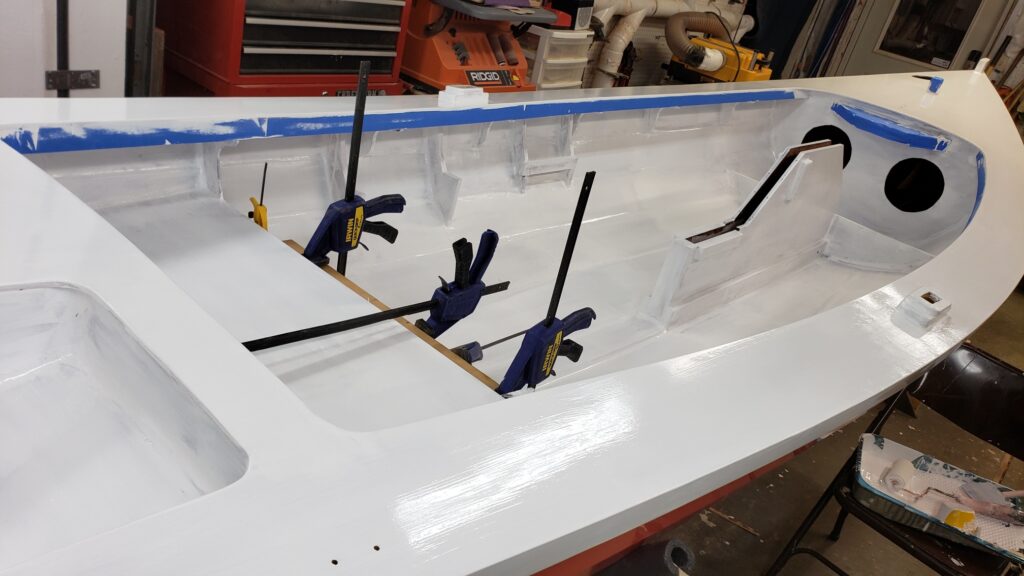
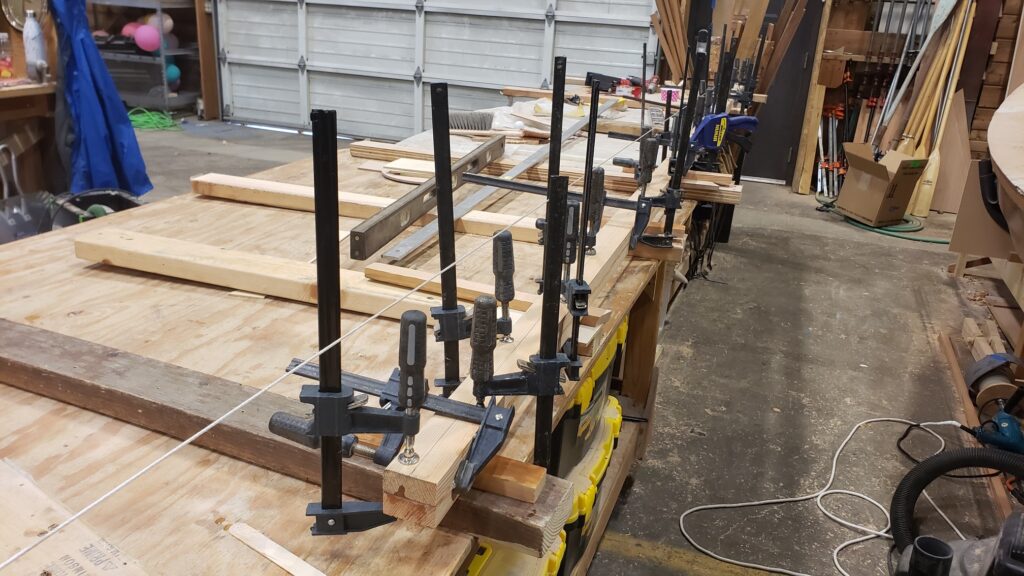
Got back to the Phoenix, after a few days on another project.. Boat flipped and got 1st coat of primer on inside. Admit it was painful, bending over to paint up under the deck and around the frames, knees and seat risers. Took 3 hours for 1 coat (vs. 1.5 hours for outside hull). But I know it can be done now, so will keep at it of course. The clamps are for extensions to the side seat aft cleats, as I’m going to make the seats adjustable in/out for when sitting on the rail vs. down inside.
Dec 10, 2020
Got 3 coats of Interlux Brightside, with a combination of about 1.5 parts Fire Red and 1 part Yellow. Super important to keep the wet edge to get a good finish. Roll on and foam brush to tip. Not enough paint and you get holidays or the foam brush squeaks or skips. Too much and you get sagging or drips. Just past the point of squeaks is about right. I didn’t use any thinner (maybe that would have helped? I don’t know. Just saying what I did, for others that come along). Wow, that’s bright! 🙂

Dec 6, 2020
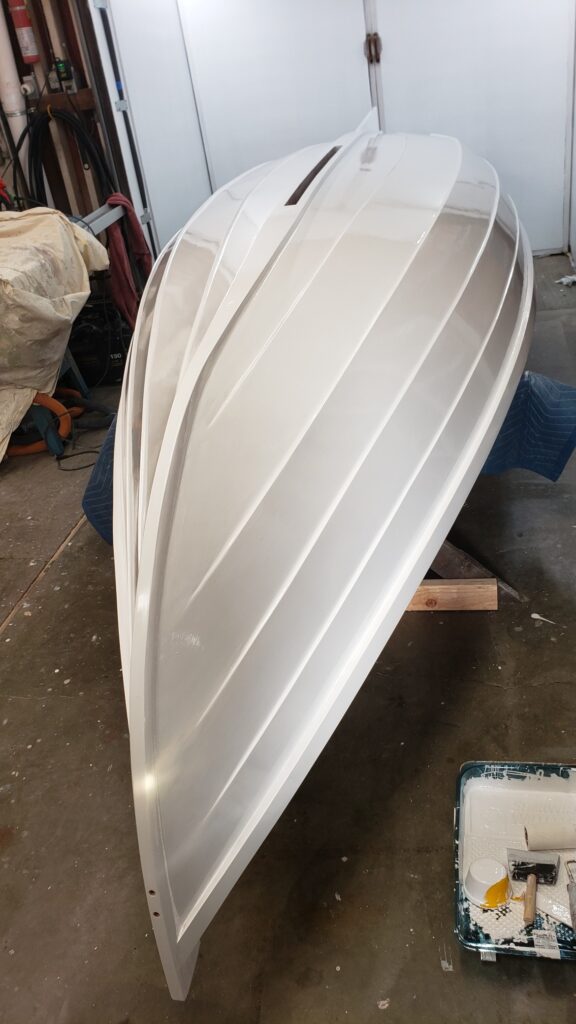
Second coat, the final, of primer on outside hull. Looks shiny as it’s still wet in the pic.
Dec 5, 2020
Put the first coat of Interlux Pre-kote primer on the hull, using a 1/8″ foam roller and tipping back to previous section with a foam brush. This paint starts to dry quicker than I expected and I ended up doing only 2′ wide sections to keep the wet edge. The heater is on to maintain about 60 degrees. Primed the centerboard and rudder case in addition, and applied some more varnish on the sapele parts.
Dec 4, 2020
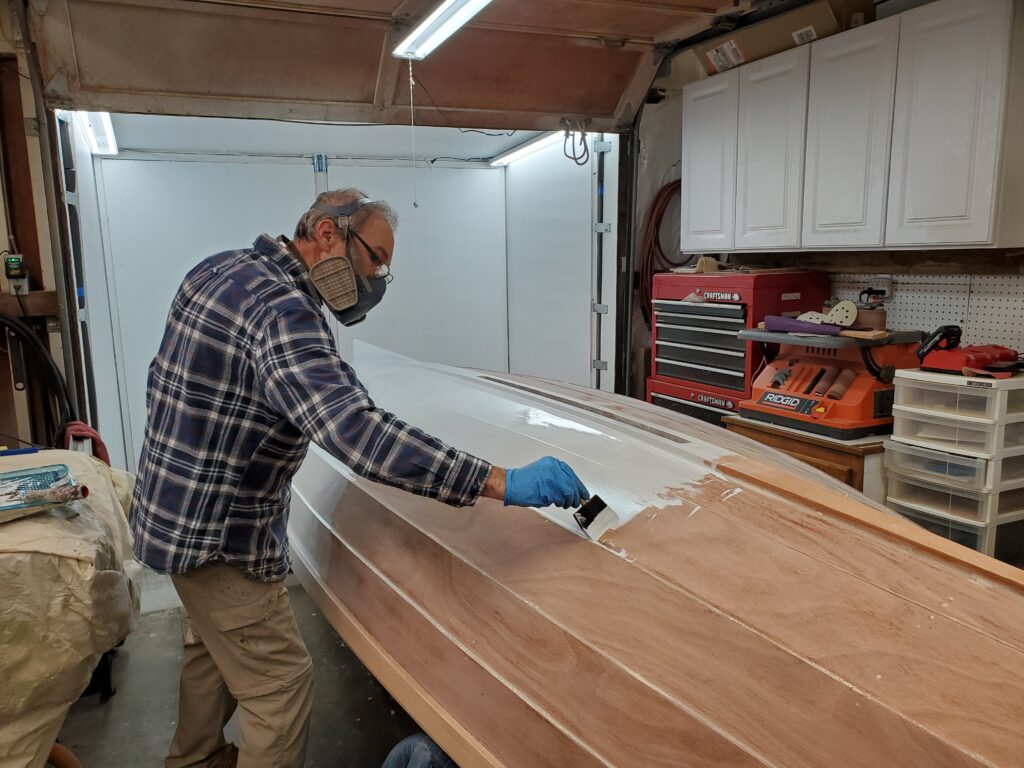
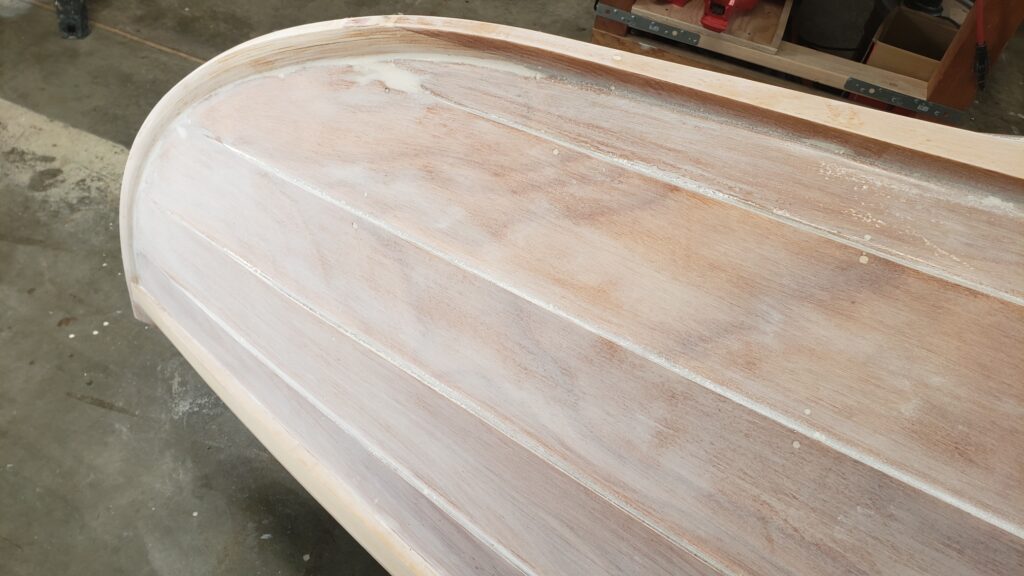
Took about 3 hours to get the outside sanded. I would have applied the first coat of primer, but noticed a spot that needed some cleanup trim-bit routing on the center board slot and I recoated after with fast epoxy. Did get working on varnish for the bright pieces – sapele is such a beautiful wood!
Dec 3, 2020
Have been sanding, sanding, sanding the inside getting ready to paint/varnish. Brought her home to paint in a more dust free environment, but had to build a 4′ extension onto the garage. Flipped her over to paint the outside first, but need to sand again. Shouldn’t be too hard as we gave it a good sanding before the last coat of epoxy before flipping, so there should be very few drips to clean up.
Nov 25, 2020
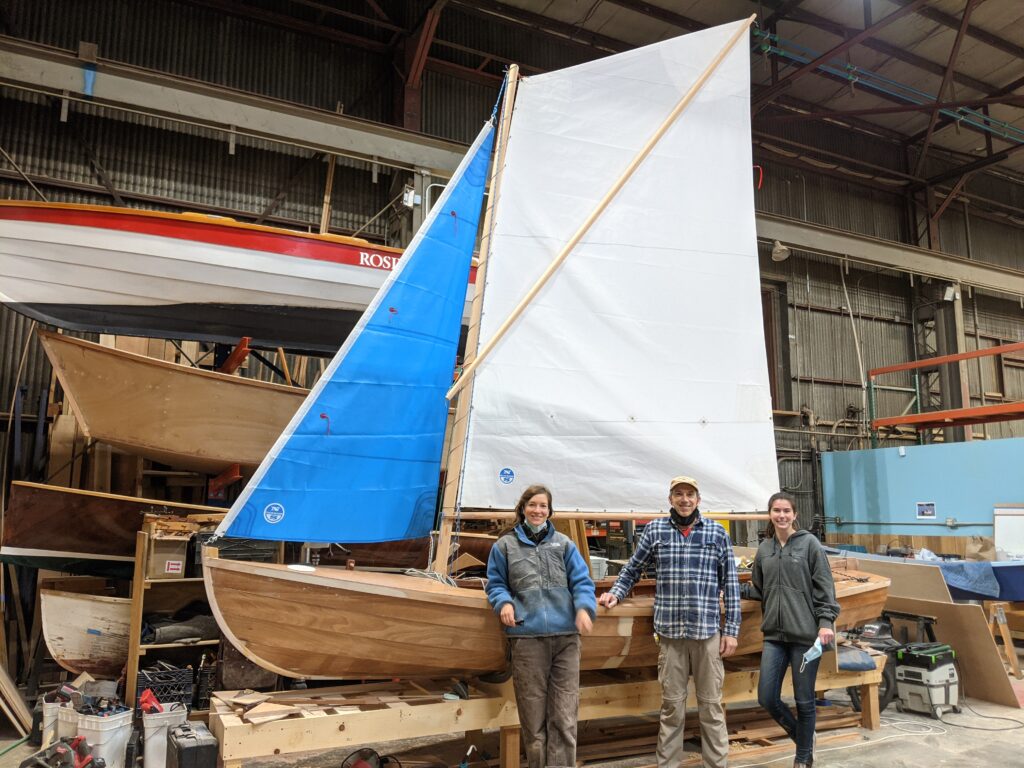
Finished up the spars and did some preliminary rigging and raised sails for the first time since Tracy, our daughter, (future owner) is in town and we wanted to get her feedback. Nice looking and quality of North sails! While there are cringles in foot, we’ll fly with a loose foot (with boom) for better sail shape control with outhaul. We have a number of details to work out still (center board controls, rudder install, main sail attach to mast preferably without lacing, snotter rigging..) but it’s getting close. Need some focus on ease of set-up and reefing. Confirmed that we need a lighter mast for Tracy.
Nov 21, 2020
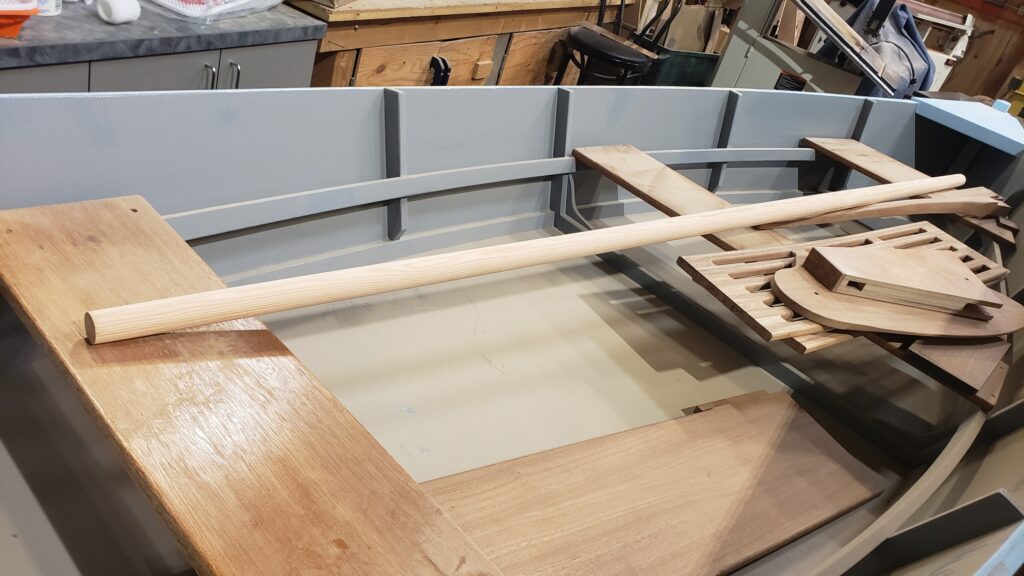
Finished making a round, tapered, reasonably straight mast out crooked boards, this morning. Heavier than I was hoping. Concerned about the weight of a brailed bundle of mast, sprit, boom and sail during setup (particularly mast raising). I may need to build a lighter mast, later.
Nov 20, 2020
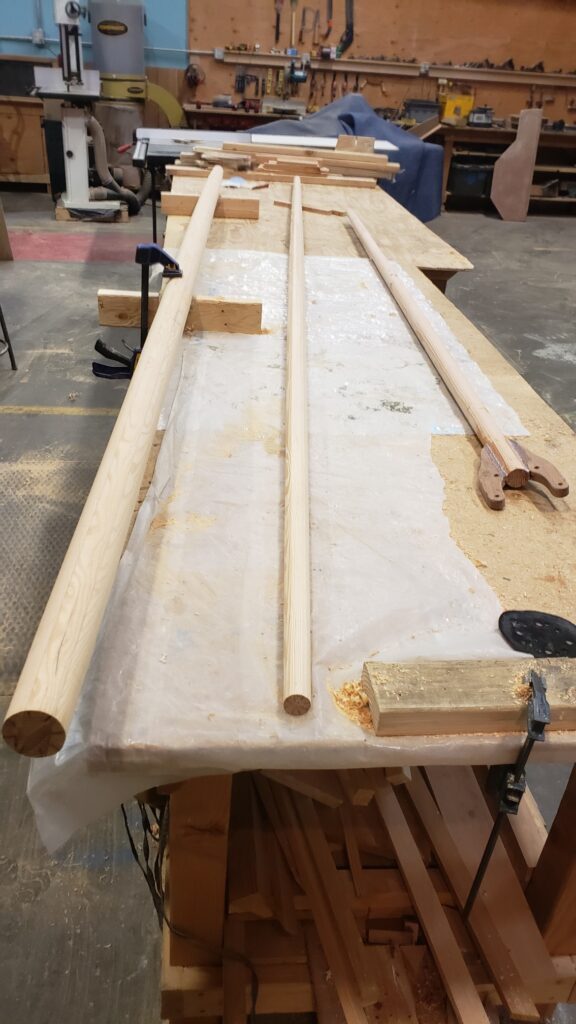
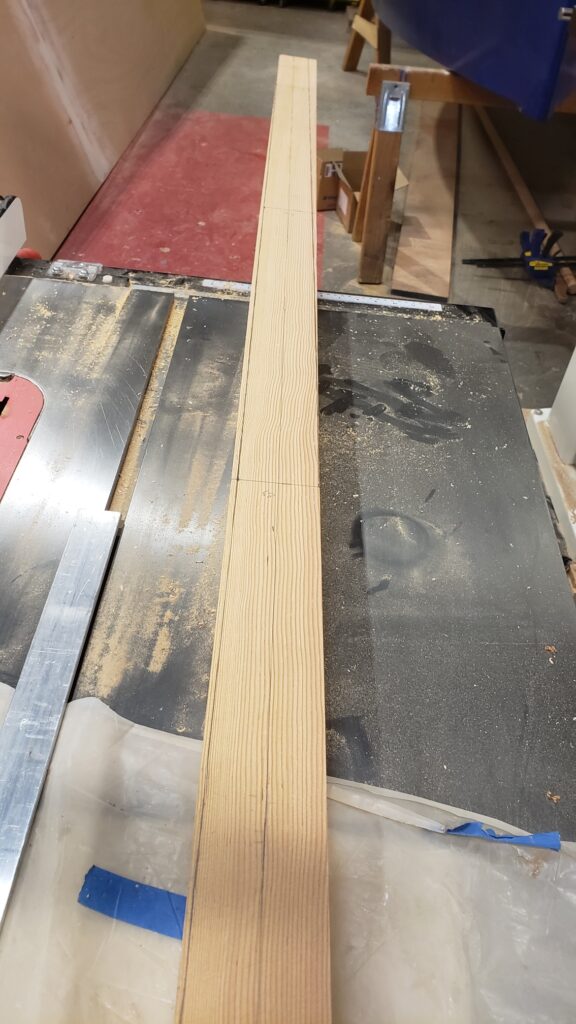
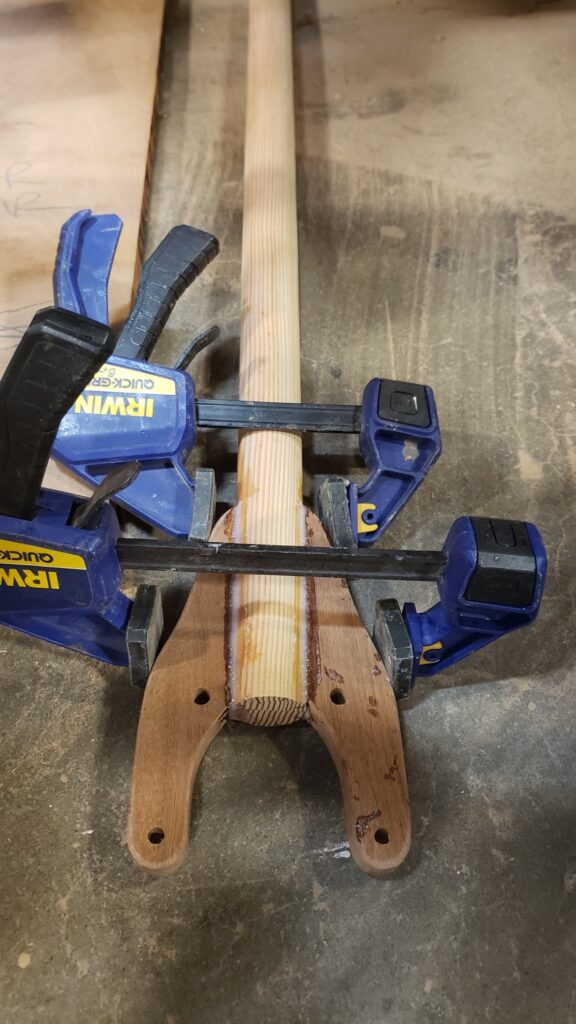
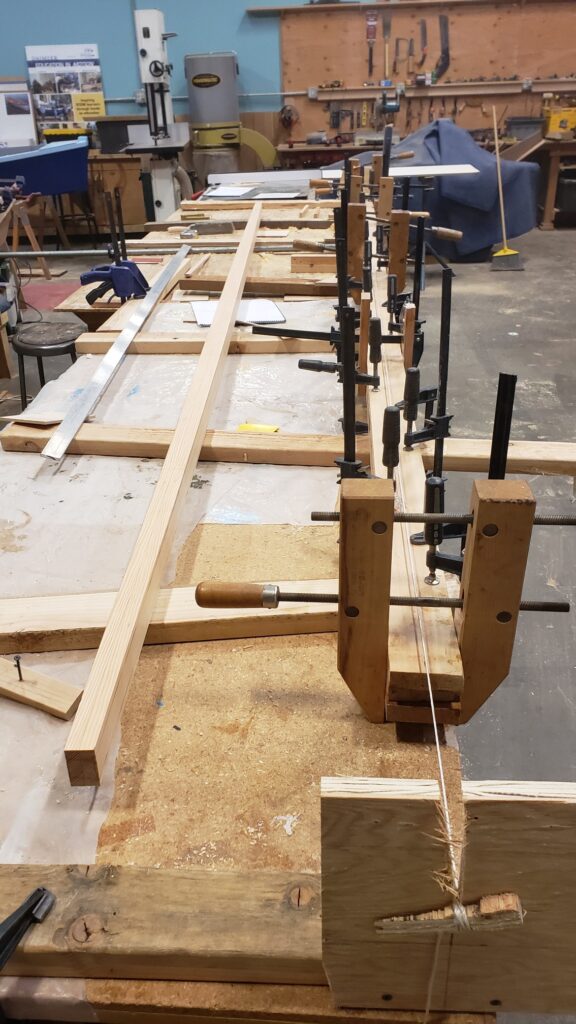
The mast pieces had been bowed by a few inches, and the glue-up, helped but didn’t cure it all. Still had about 3/4″ of bow over the top 4′. Was able to correct most of it – only off by 1/4″ along the entire length, so will just have the mast racked back more by just that bit. Check out the lines in the pic. Heck, having some bow in the mast on our Beneteau is a feature, not a bug! Half of the mast tapering is done. Abby got the sprit planed to ~32 sides and it’s close to sanding time. Built the boom jaws and epoxied to the boom. And did a bunch of finish shaping and sanding on deck edges and corners.
Nov 19, 2020
Routed the deck, and had a little muff when the bearing on the trim bit cam flying off and I gouged the gunnel for about 6″. 🙁 Repaired with an epoxy mix of 50/50 fairing/adhesive for strength. Abby tapered the sprit and we got the mast glued up. That nice piece of straight-grained fir did not like sitting around for 9 months, and had quite a bend. The 3 ripped pieces are crooked as a question mark. We flipped one end-for-end and stacked together with contrary bends, that added up to several inches. The mast is glued up clamped to a level surface, and in line with a taught string along the center line. Hopefully can salvage it.
Nov 18, 2020
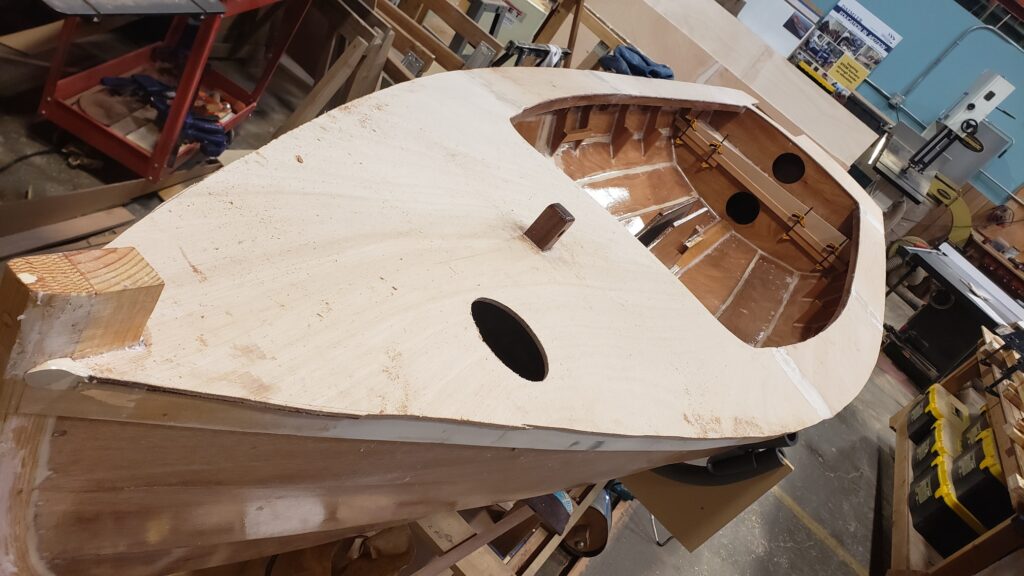
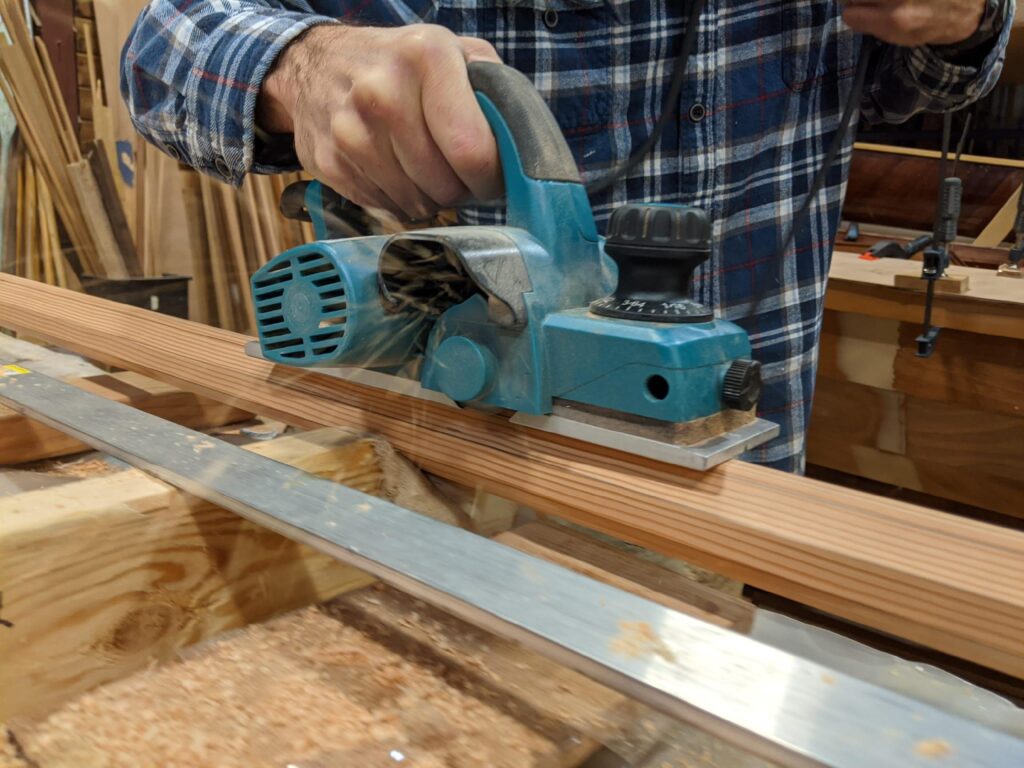
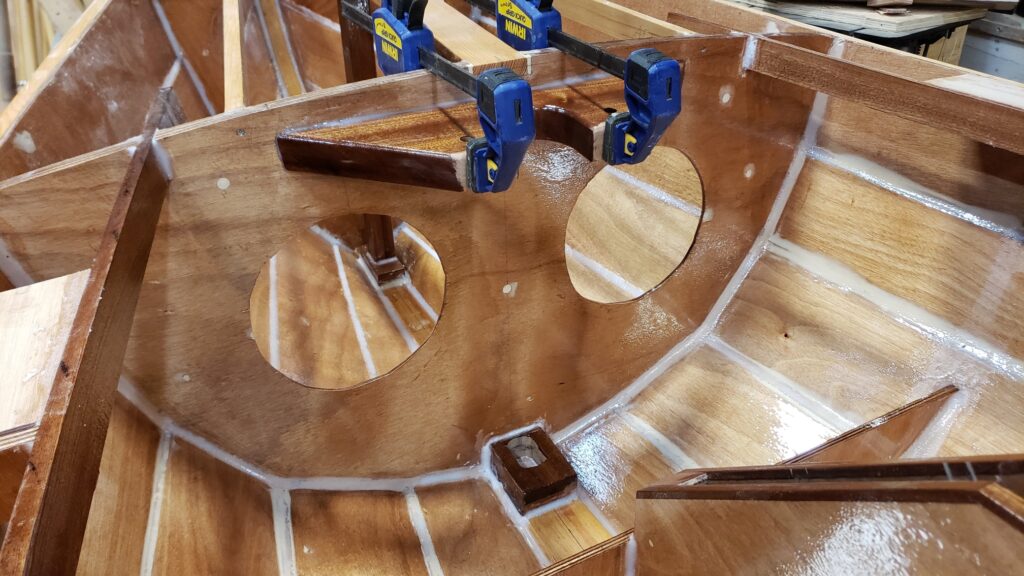
Deck turned out great! Still need to flush but it. Did cut the hole for foredeck access and faired the joints.
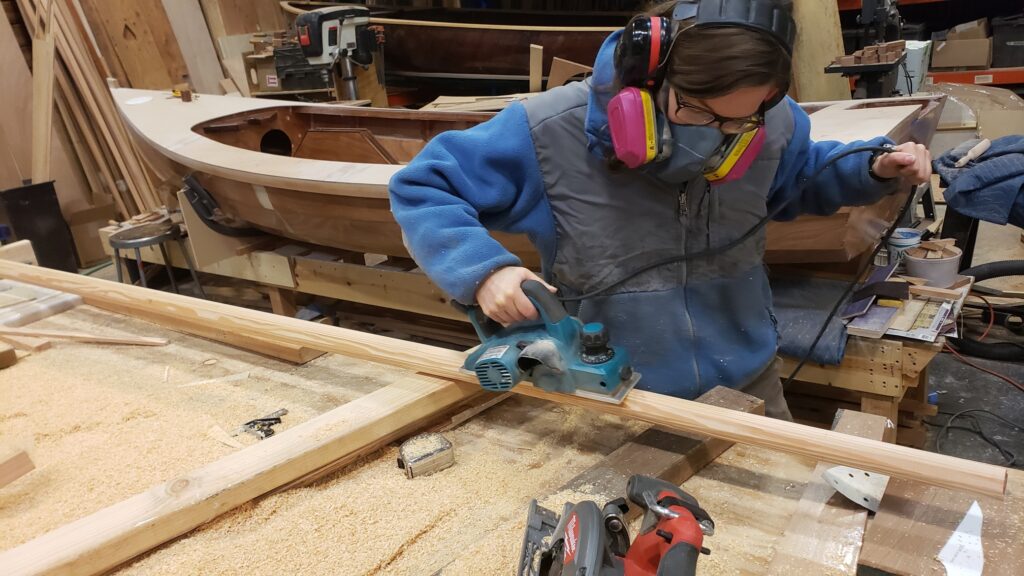
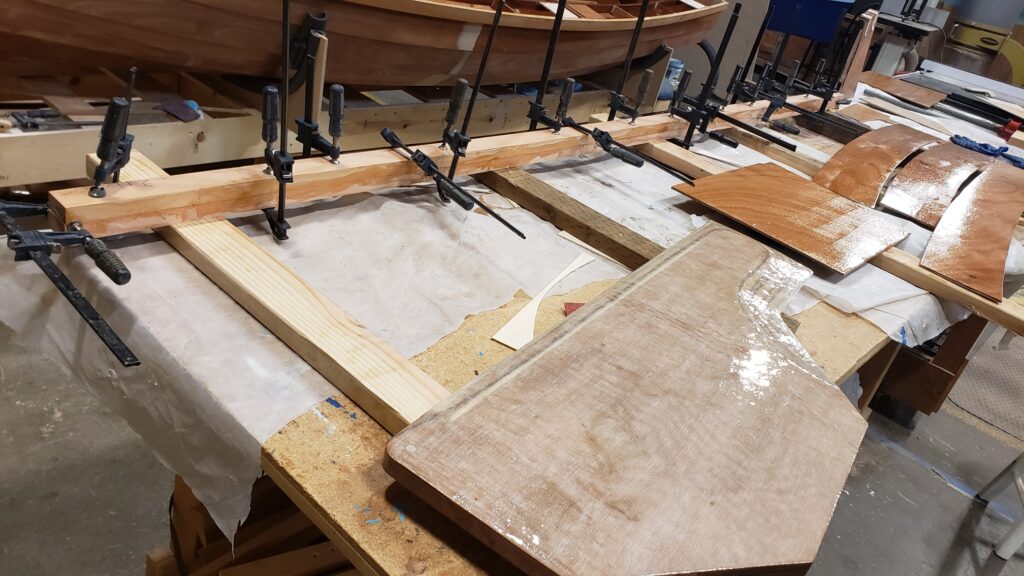
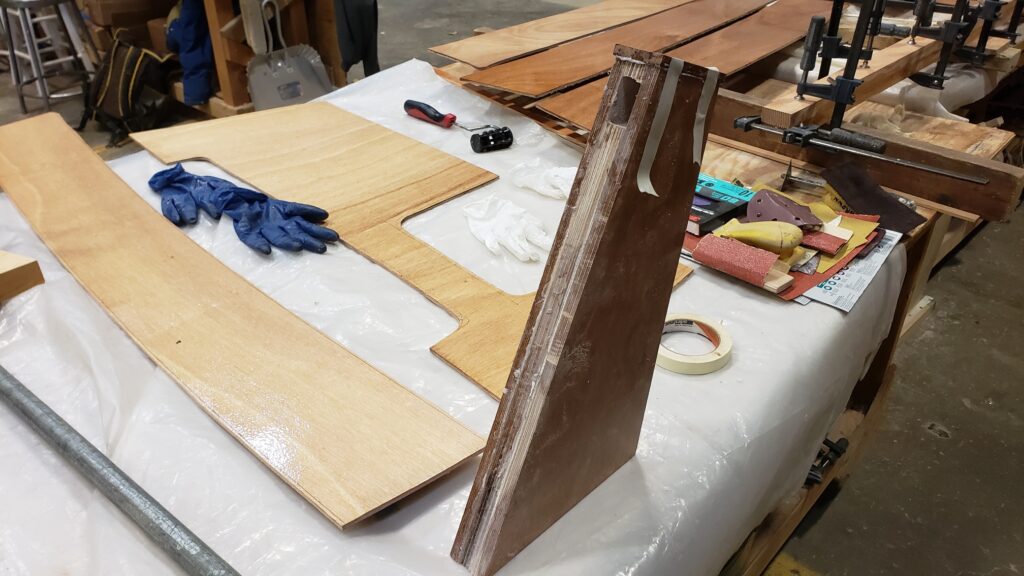
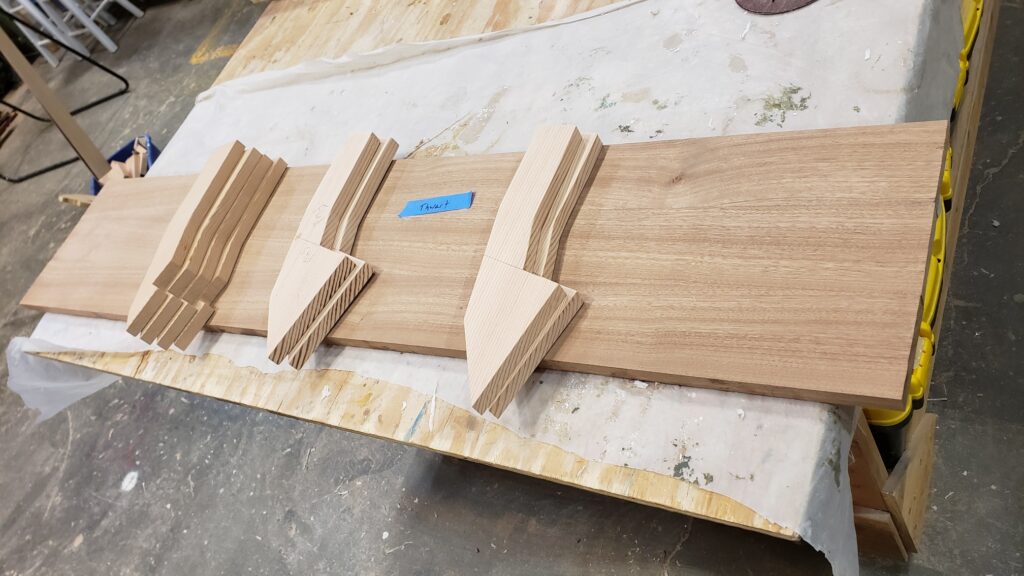
Tapered, rounded and sanded the boom (picture sequence below). I do this using metric system to make the math easier. After tapering, multiply the square spar width (in mm) by .29 to get the distance in from the edge to mark a point. (note: the whiteboard drawing shows where .29 comes from. This number is the same whether math is done in metric or imperial). I mark points every couple of feet and then connect all the dots (using a 9′ aluminum straight edge) to give the lines to plane to for creation of the 8-sided spar. I gave up using a spar gauges for this, as I found them to be more error prone on these small diameter spars. Anyway, after 8 sides, I do the rest free hand, rotating the spar one notch after each pass with the electric hand planer. After I get 16 sides, I using a block plane to knock off the corners to 32, then my home-made inverted belt sander to finish the rounding, then I hand sanded with 120g to remove any scratches. The entire job from square stock to tapered, rounded, sanded spar was 2 hours. Glued up the sprit and will repeat again tomorrow.

Nov 17, 2020
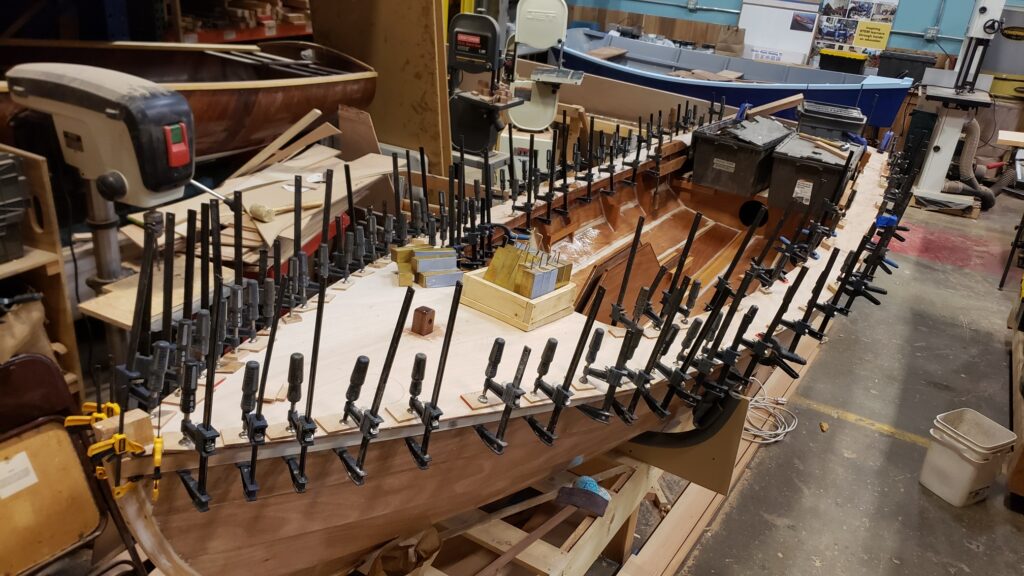
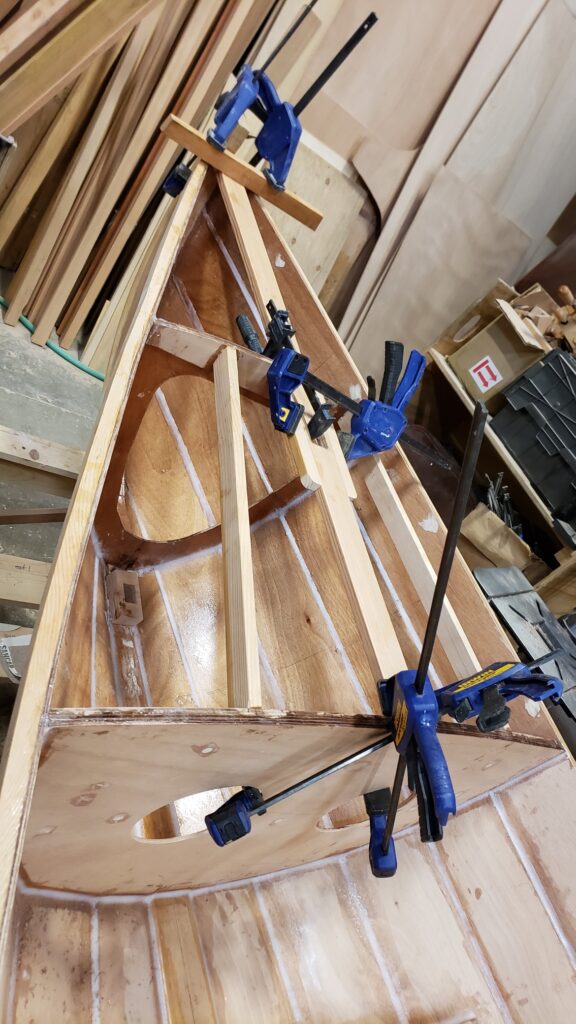
Clamp farm! Attached the entire deck and aft seating – 98 clamps, and some weights! Sanded up the rudder case and drilled hole for the rudder. Also planed the boom square and marked up for tapering.
Nov 16, 2020
Got a final coat of epoxy on interior after a good sanding, and the underside of all the deck pieces, so ready for deck install. Will leave the forward and aft buoyancy compartments unpainted as they each have a number of epoxy coats. The mast partner and step were installed. Ripped the stock for the boom and laminated it. The top of rudder case looked thin between the tiller and top, so added 3/8″ of sapele on top for some extra meat.
Nov 12, 2020
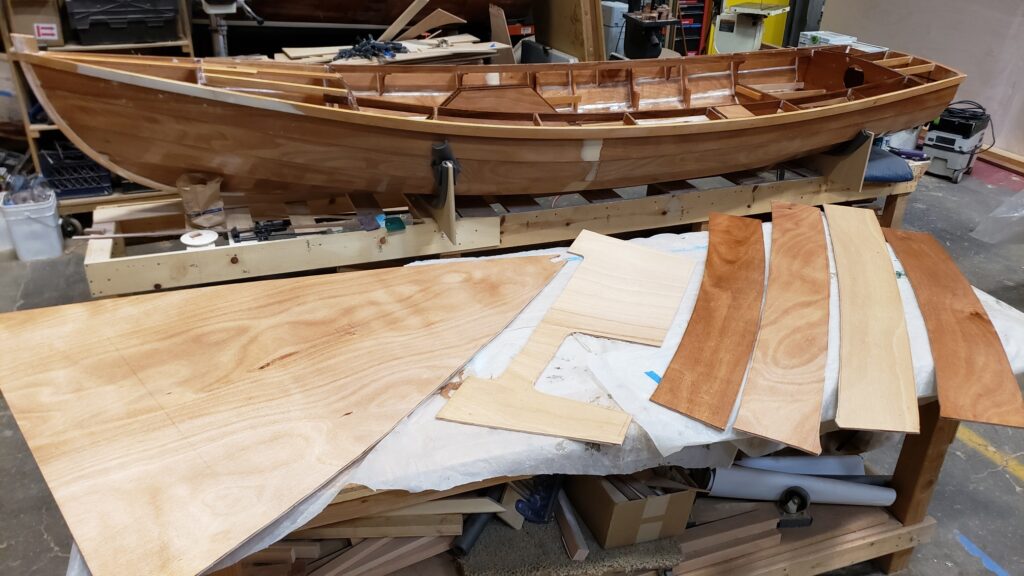
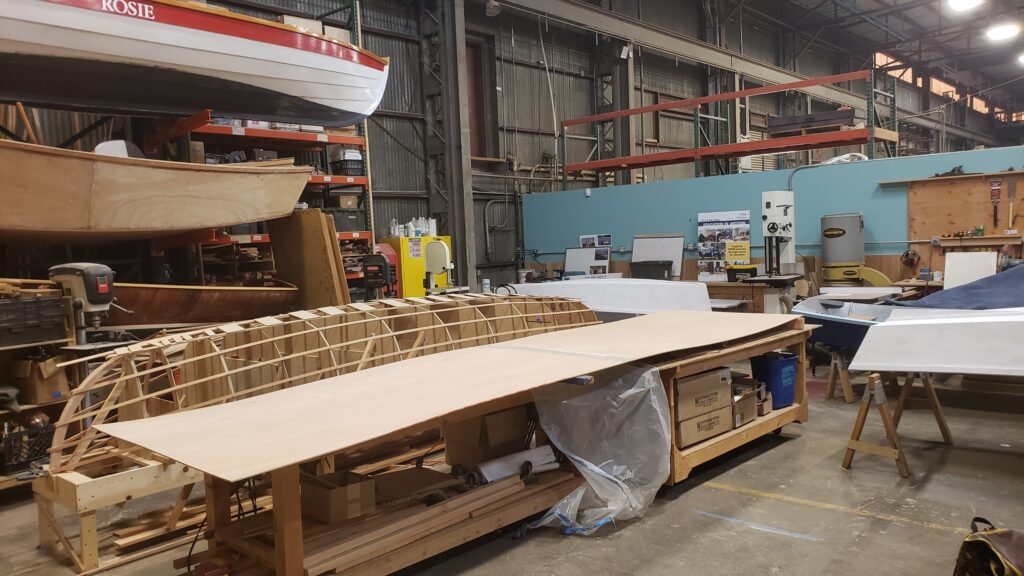
Cut out all the deck pieces. The plans show multiple pieces for aft deck, but I left as one piece that I think will lay nicer. Coated entire interior with epoxy and undersides of deck pieces. Will get at least 3 coats on everything, more on the bow and aft floatation compartments before we attach the deck permanently.

Nov 10, 2020
Much sanding and epoxy/fiberglass work, so not much new to show here, except for the installation of a U-bolt on the stem. Decided to add a small deck plate on the bow deck to access the forward compartment – will allow access to install the U-bolt permanently after paint.

Nov 9, 2020
Abby finished the Tiller shape and sanded, while I finished the samson post and rudder case. We glassed the rudder case as well as the center board. Did a bunch more sanding/fairing of fillets – admit we don’t enjoy that – as we prep to epoxy coat the main cockpit area.
Nov 6, 2020
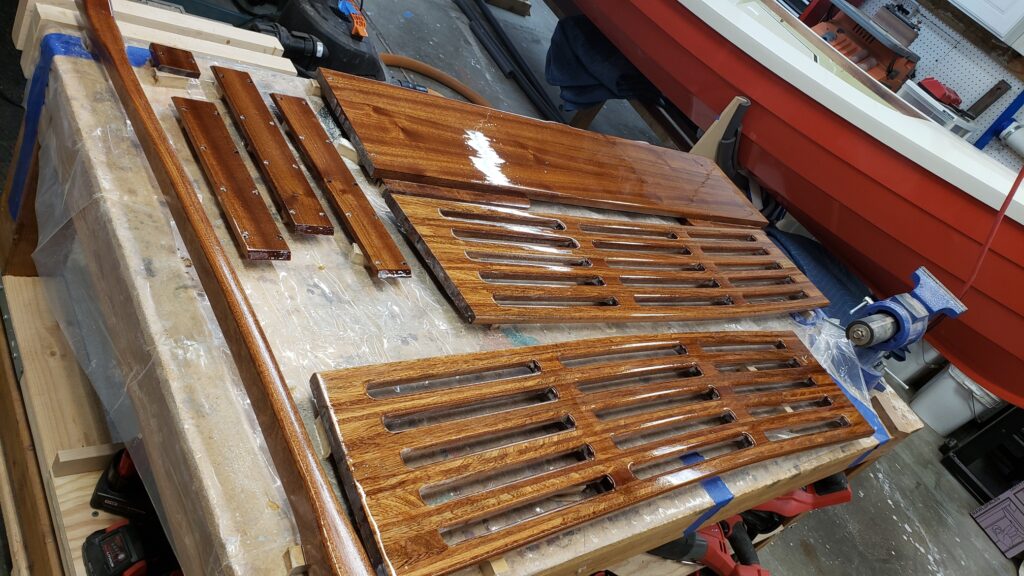
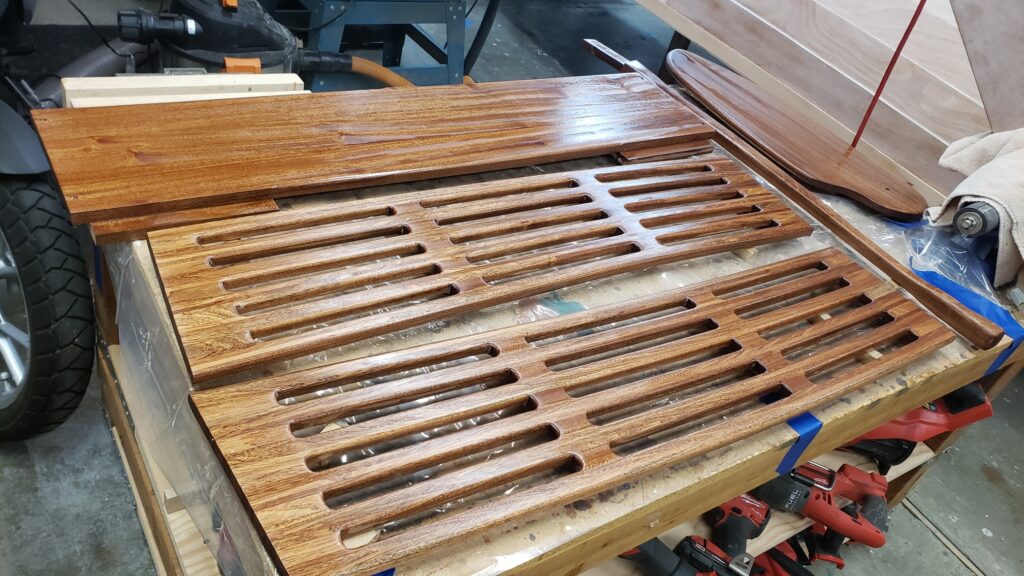
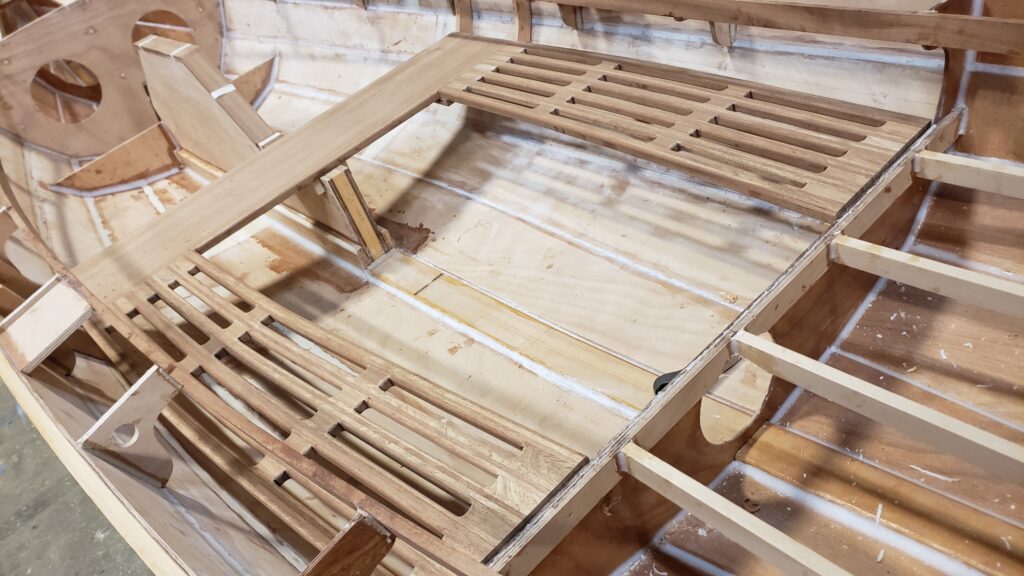
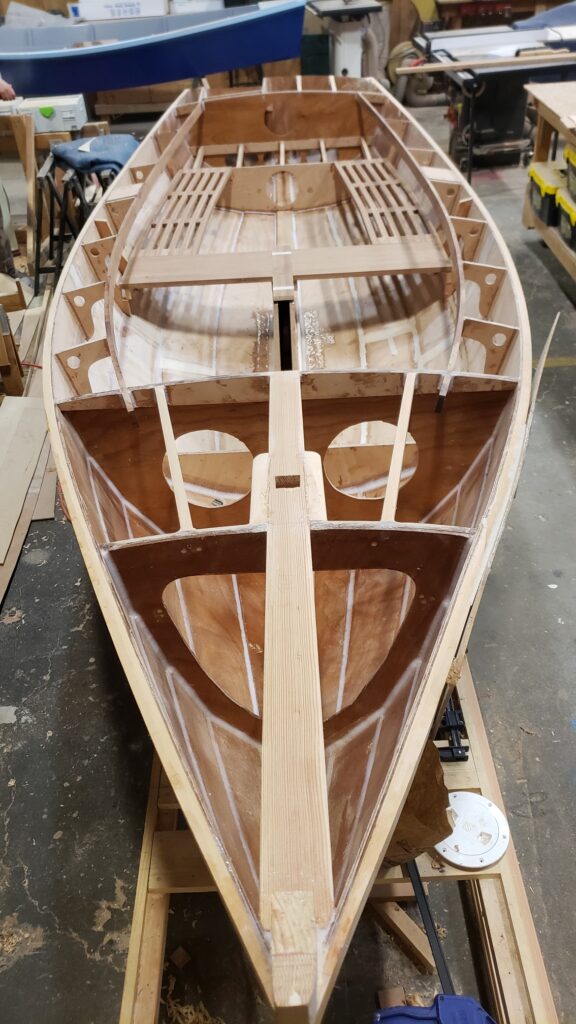
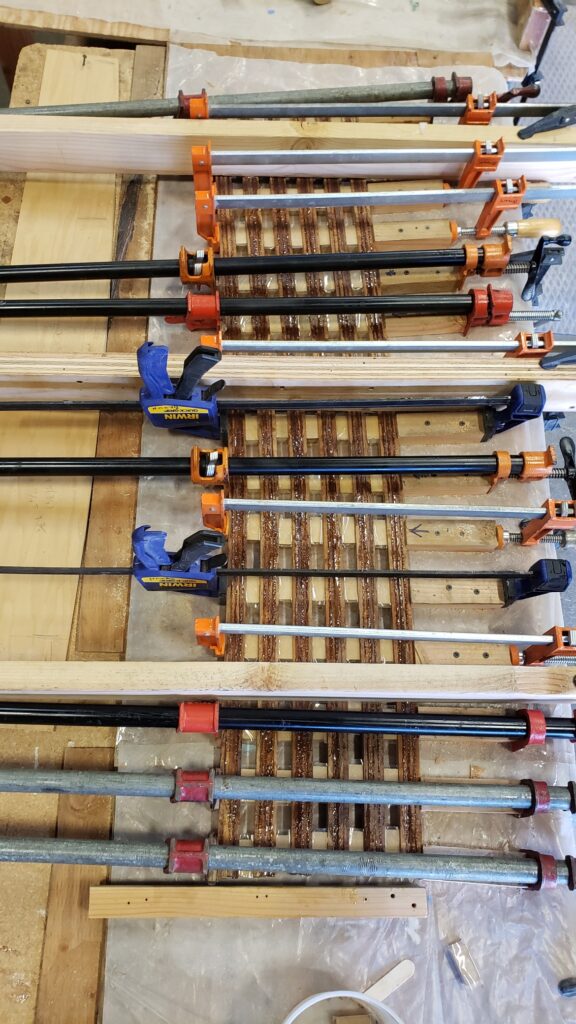
Benches installed – each with 44 individual pieces of Sapele – going to look nice with varnish! Resting on a cleat attached to bottom of thwart and another on the aft bulkhead. The thwart sits on seat risers that rest on frames. Abby got the tiller cut out and routed. The rudder case cheeks are cut out and the case filler is laminated. The 2nd pic shows the “happy face” of our boat!
Nov 4, 2020
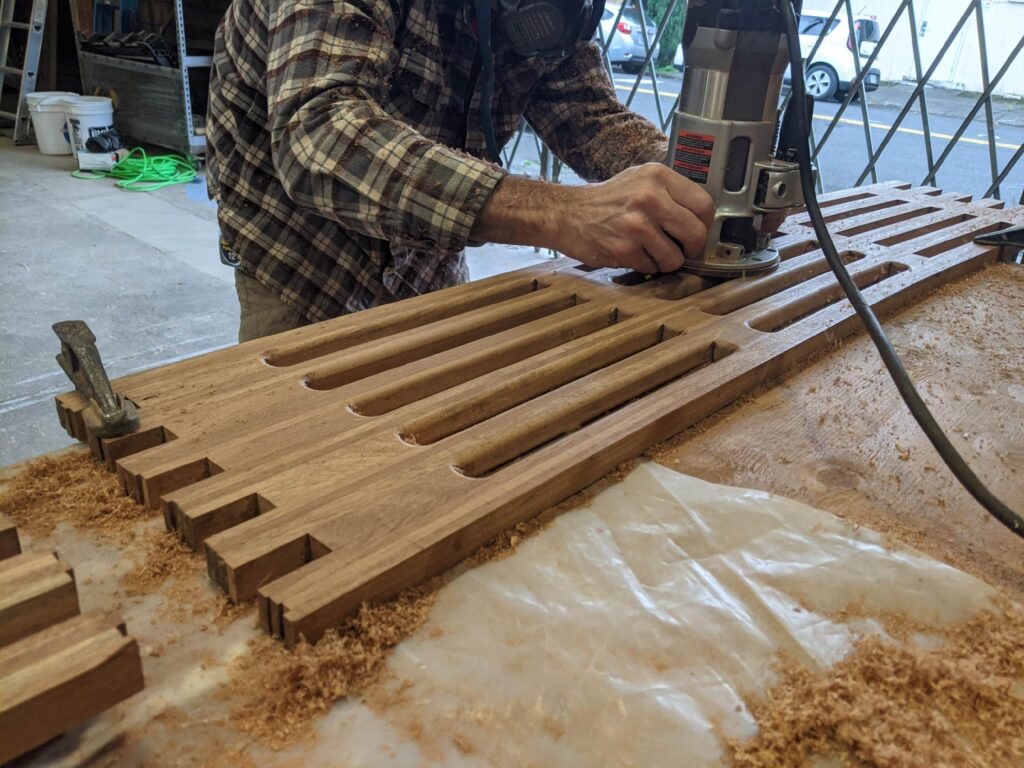
Planed and routed the benches and started fitting the thwart and frames. Then I can cut the benches to length.
Nov 3, 2020
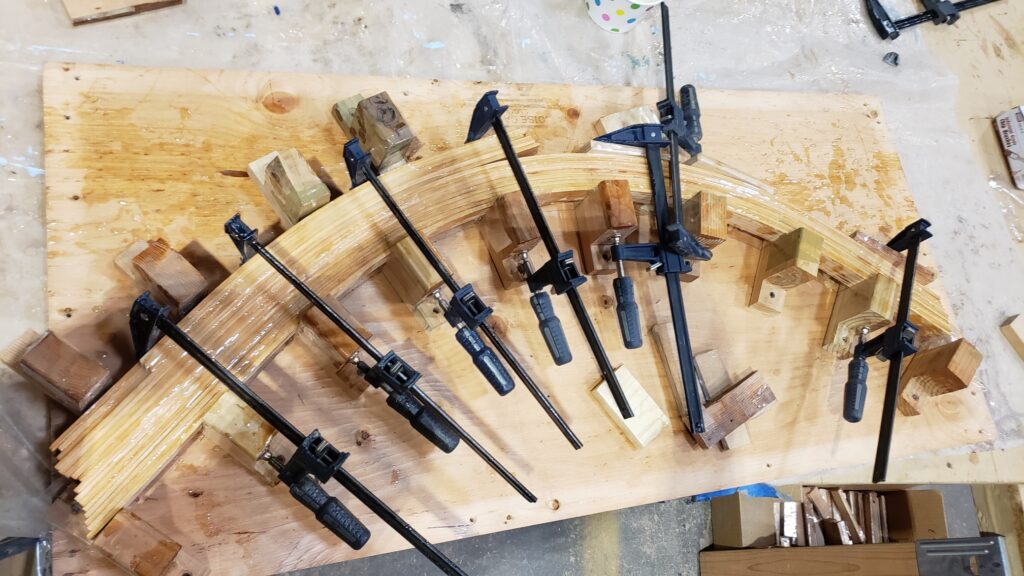
Not much to show on pics, but a bunch of little things done today. Planed the rubrails in prep for deck and added backing for oarlocks. Enlarged forward bulkhead deckplate holes. Faired rudder a bit more. Glued up spacers into the 2nd bench. Here’s a pic of one curved bench after gluing but before planing and routing.
Nov 2, 2020
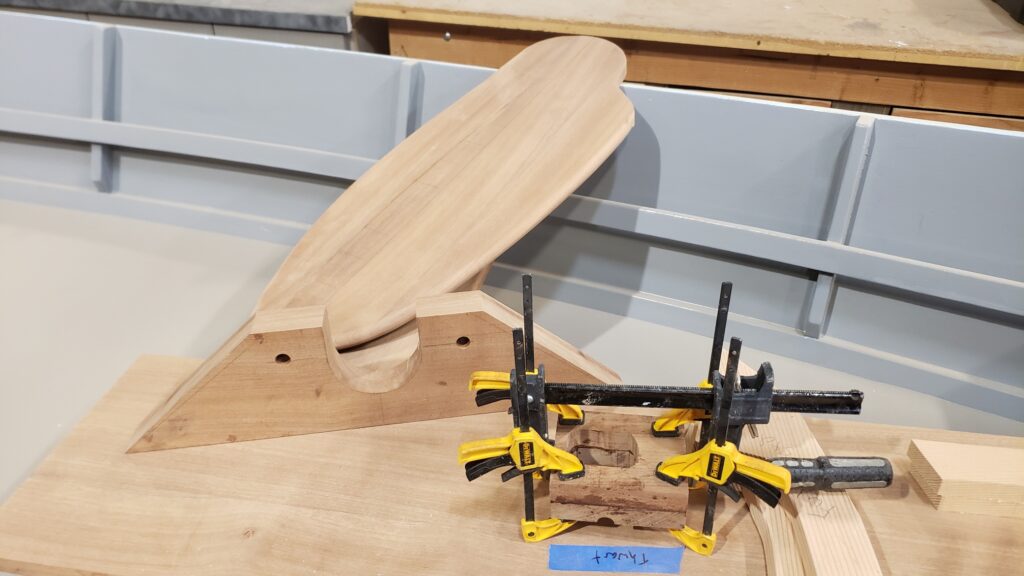
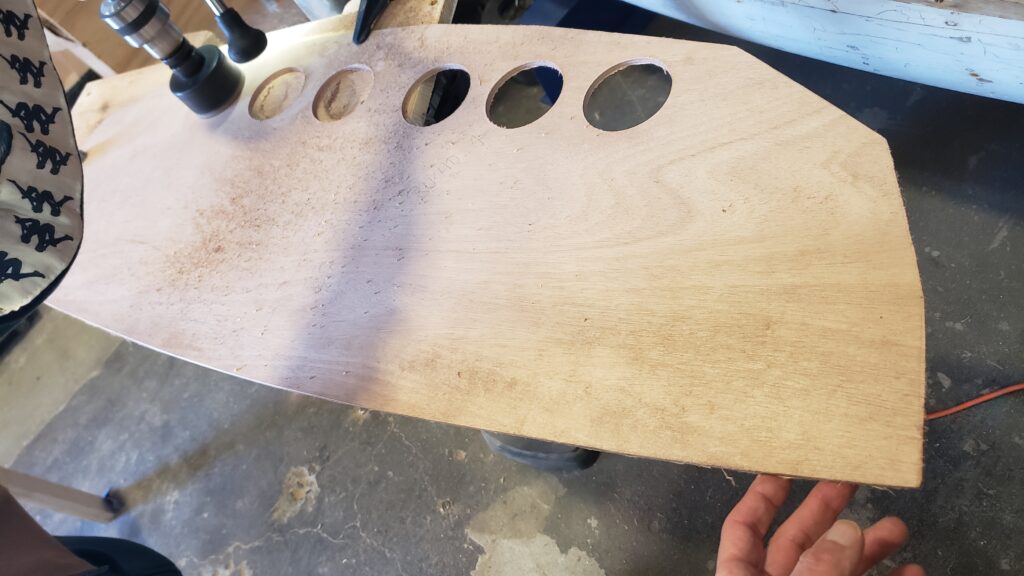
Cut out the rudder, shaped and faired the leading and trailing edge using Vivier’s 70/30% recommendation for my Morbic, since Lillystone didn’t give a spec on that (said to look it up in a book). Hard to see the taper on the trailing edge, but it’s there for 30% of board width. I think using solid timber is way better and easier than making it from plywood and fiberglassing it. We’ll put about 6 coats of epoxy and another 6 of varnish on it as a finish. Abby made the mast partner and glued up the mast step. Sapele 3/4″ spacers were glued into the 1st side bench.
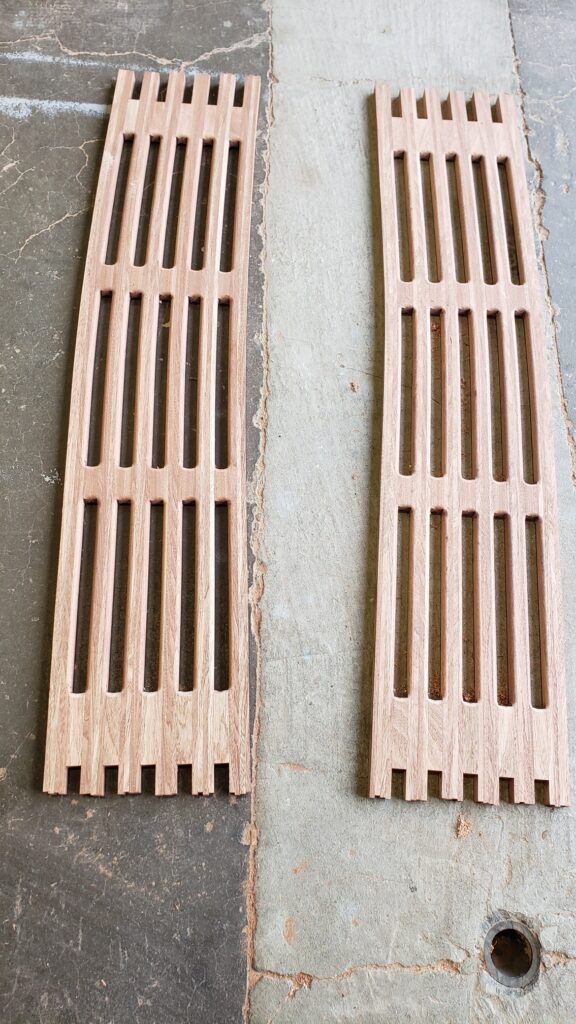
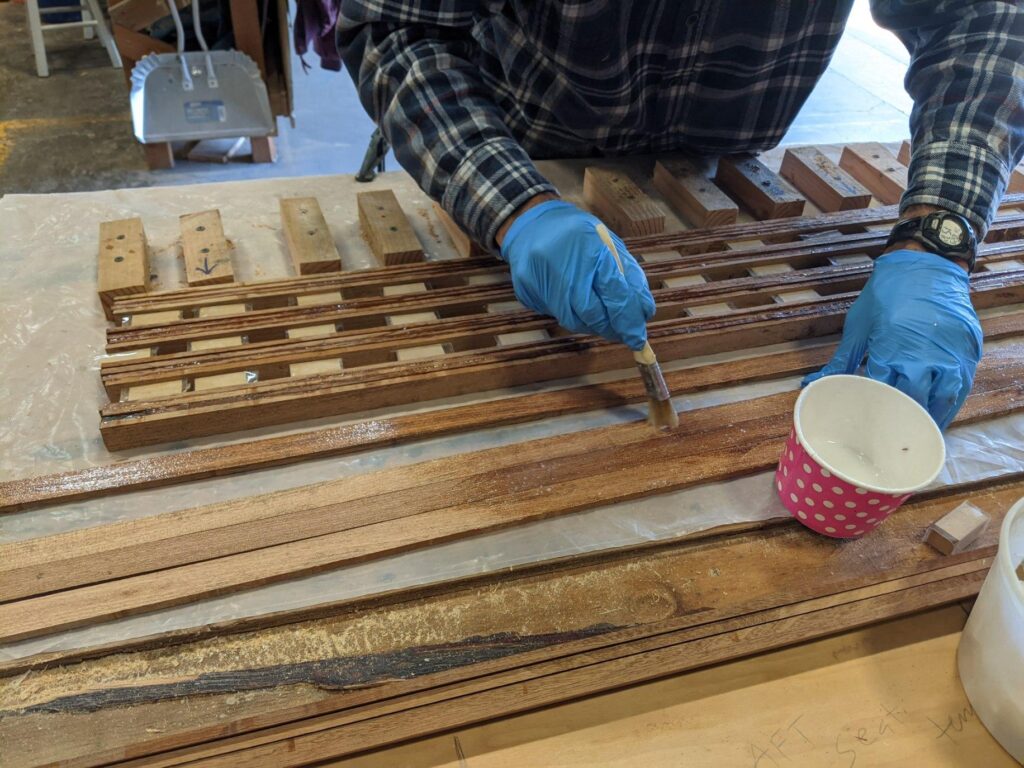
Oct 30, 2020
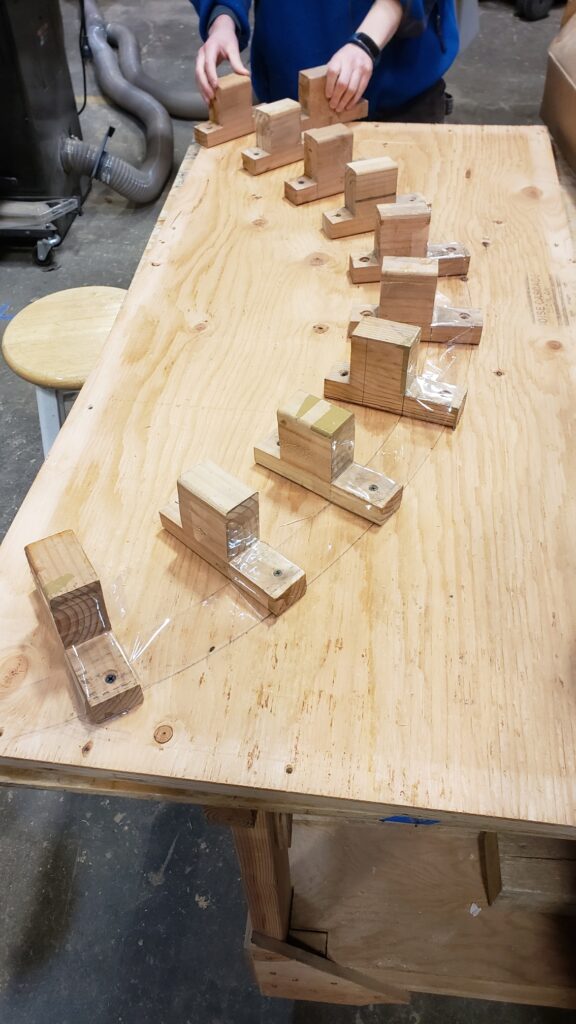
Centerboard case caps are ready for install. Glued some 1/4″ sapele on the top edges of the case to give the cap screws some more meat, besides screwing into plywood. Cut out 48 strips of 1/4″ and 7/8″ sapele and glued up both sets of curved slats that will be used to make side seating that follows the contour of the boat sides. The rudder, mast partner and samson post were glued up, and the mast step pieces were made.
Oct 28, 2020
Flipped the boat to flushcut the headledges at each end of centerboard slot, and we flush-trimmed the slot with a router, running the bearing on the inside ply of the case. Made the inside gunnels from sapele, cut/planed to 1/2 x 1 1/2″ and installed on the knees butting up against aft bulkhead, but we cut slots in the forward bulkhead and ran them through. Should add good strength.. Torturing ourselves with at least some sanding each day (fillets and CB).
Oct 27, 2020
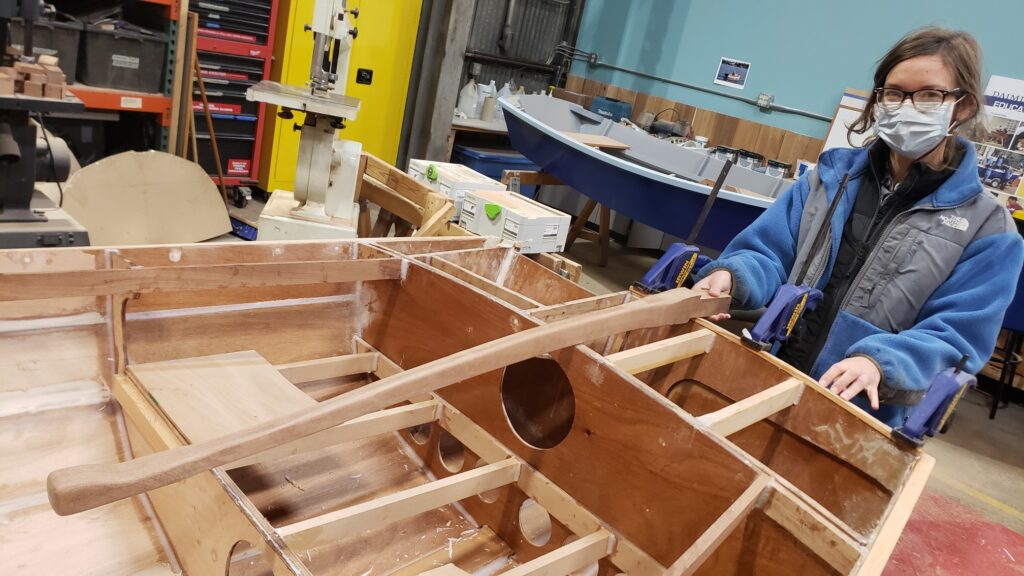
Completed construction and mounting of side deck knees. Cleaned up and sanded the main thwart. Built and fitted the frames to support the side benches – these will add strength to the side planking, tying the top 3 planks together. And, made a jig to create the curved slats that will make the benches.

Oct 26, 2020
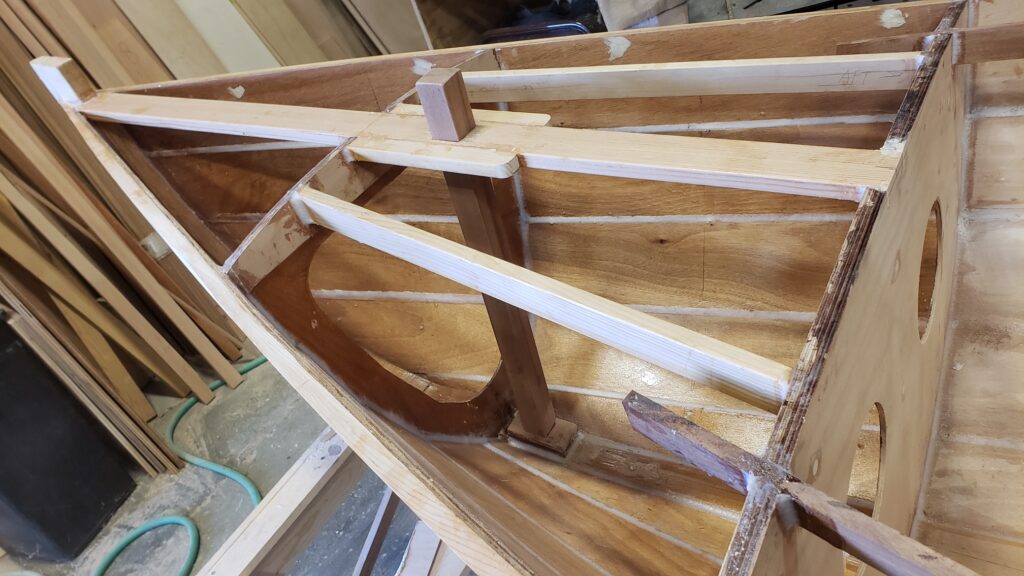
Completed foredeck framing including kingplank with a reinforced hole for a samson post, and side frames. Also installed a base support for the samson post. The thwart was glued up, in 3 pieces of sapele, biscuit joined. Making the thwart about 9″ wide, instead of the 12″ in plan. Made support frames for the thwart that will add strength to the upper 2 planks, and that seat riser will attach to. The knees to support side decks (coaming) were also cut out.
Oct 24, 2020
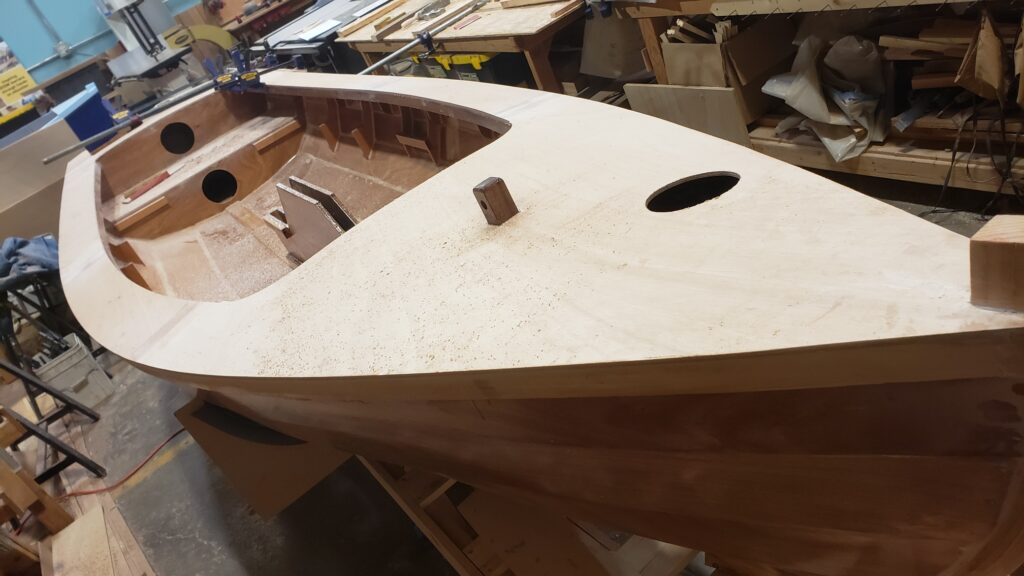
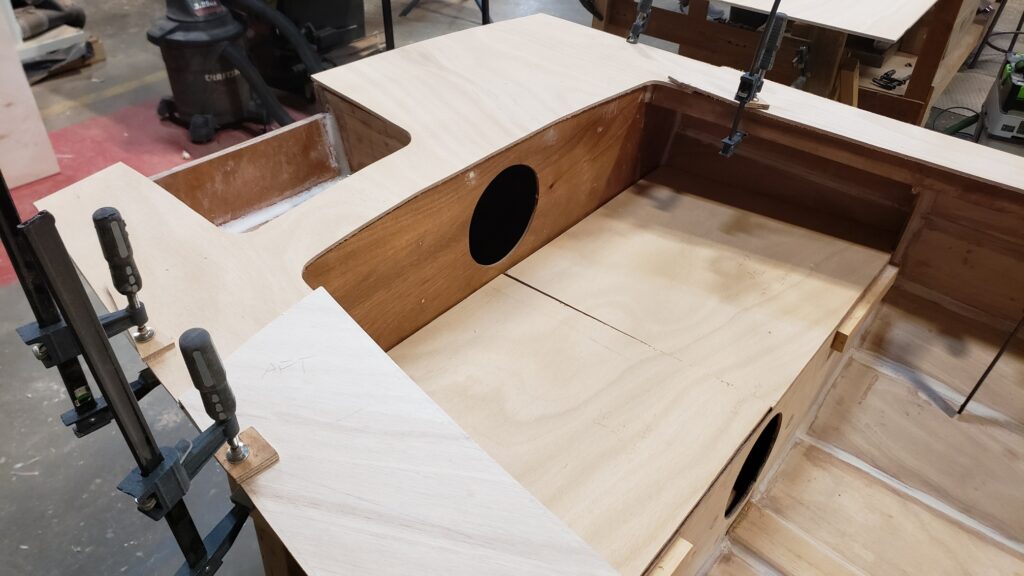
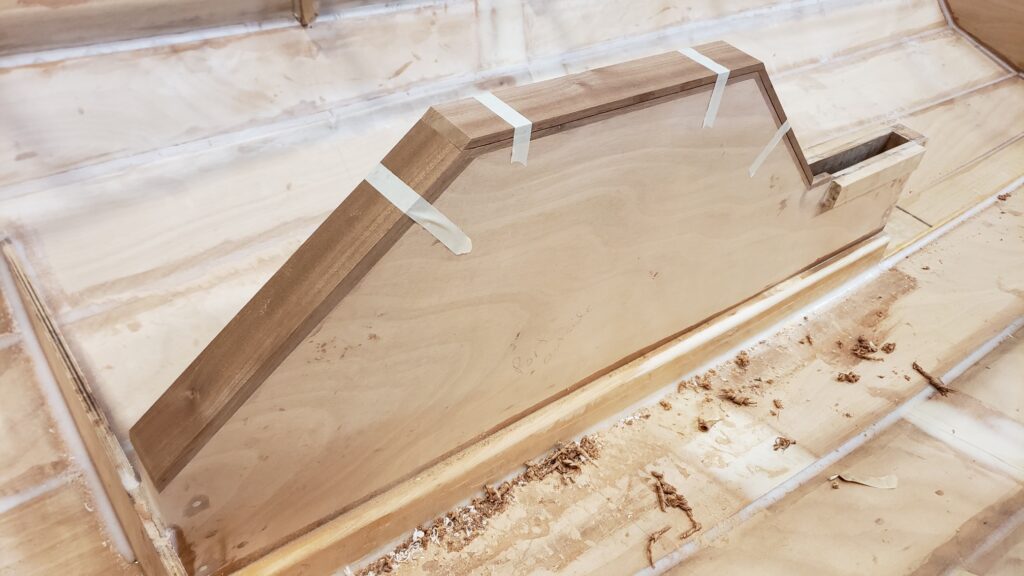
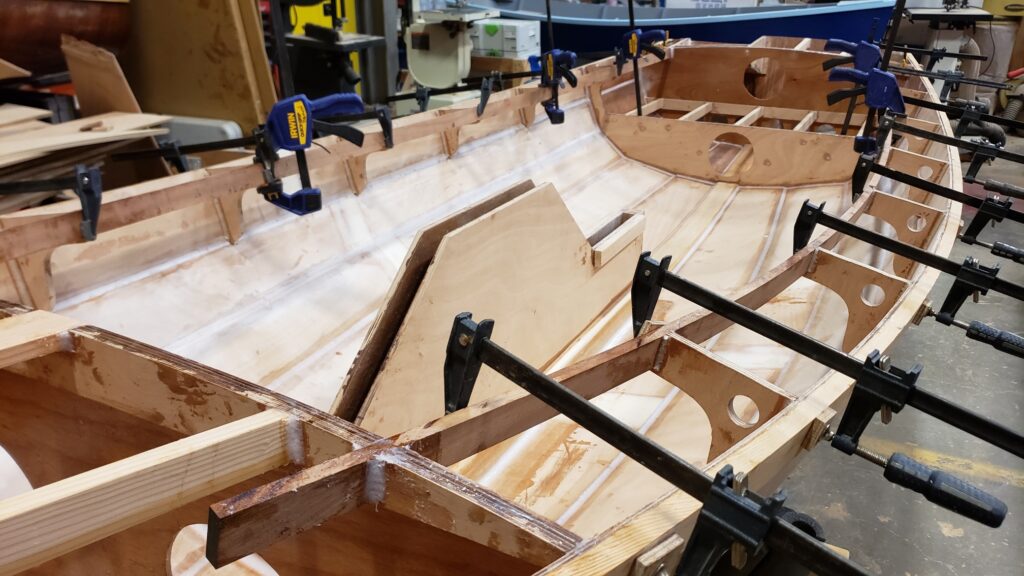
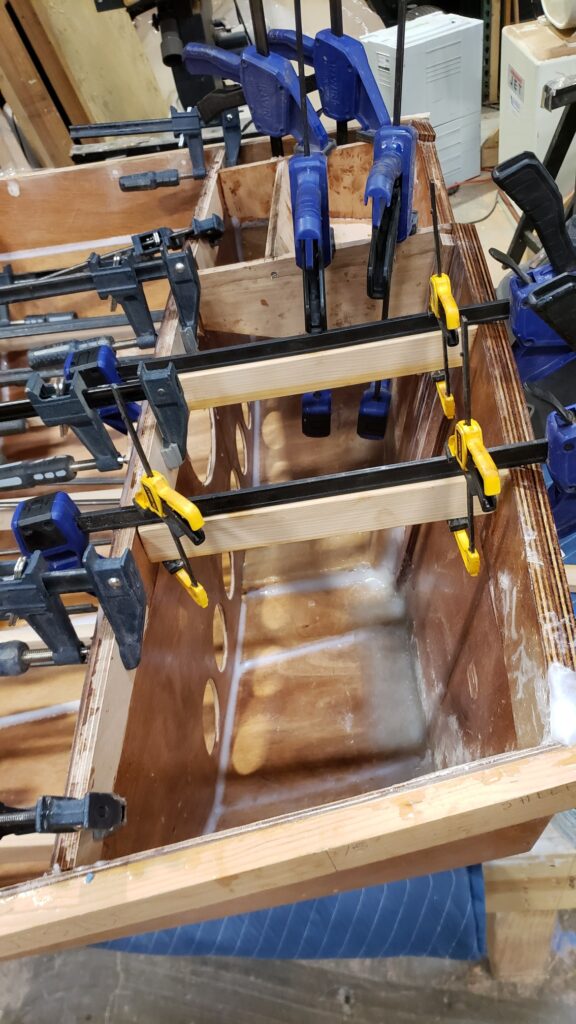
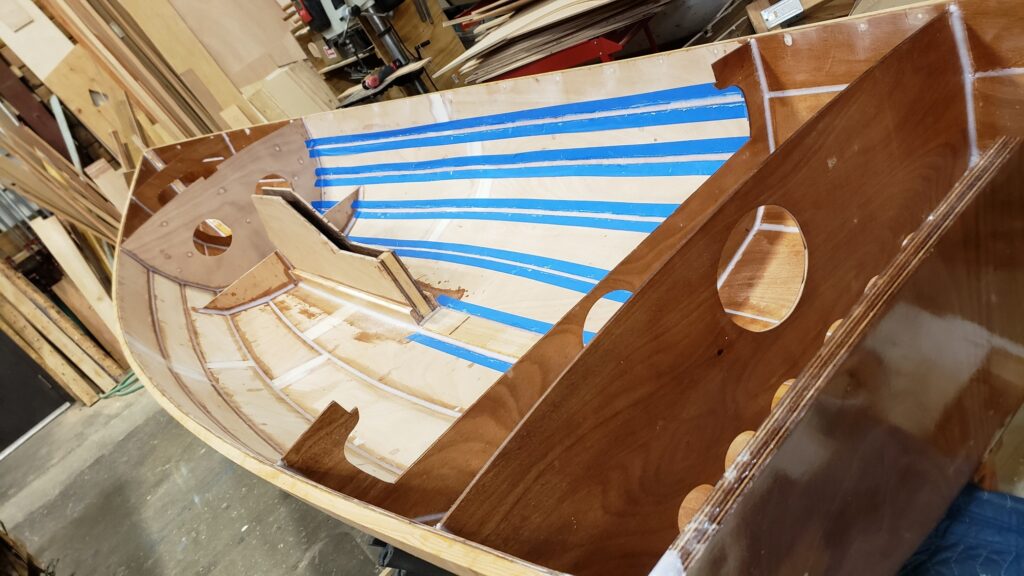
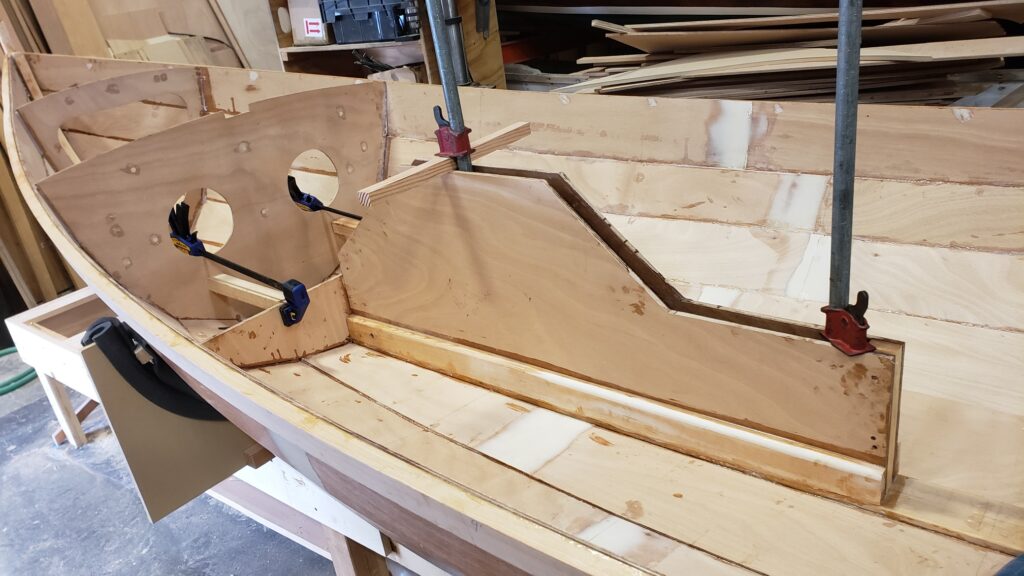
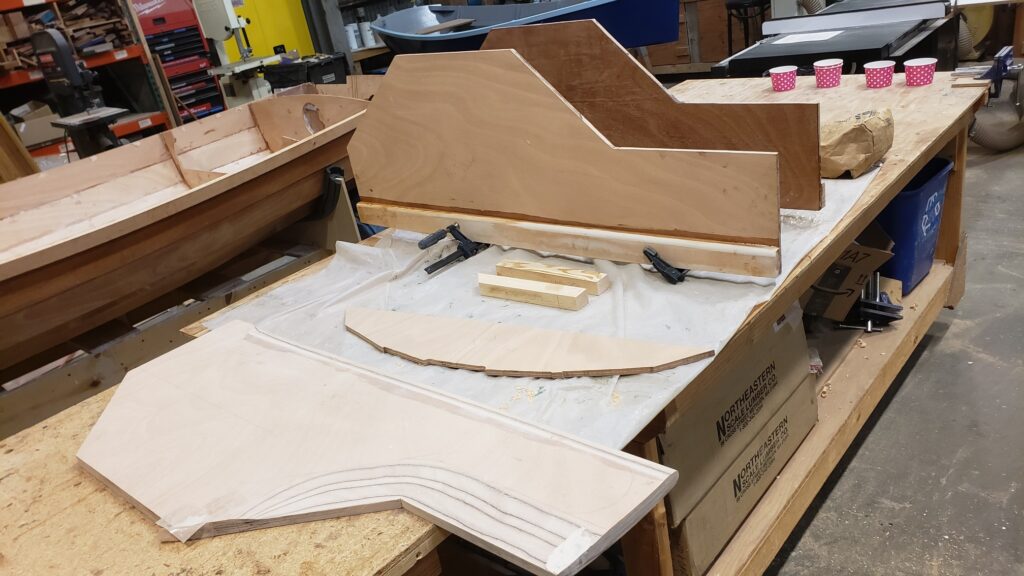
I didn’t like the resulting size of the outboard well, in my attempt to leave a little deck behind it, so decided to push the back wall forward a couple inches, and make it more vertical to give more room for the knobs used to mount an outboard. Got to love the Milwaukee Multi-tool for jobs like this – zipped the back right off, without damage to the sides or bottom. Rather than remove the bottom completely, I extended it with another piece (faired the joint, but still need to sand), and made a new back. I like this size better. While there had been room enough for our existing outboard, it was tight.

Oct 22, 2020
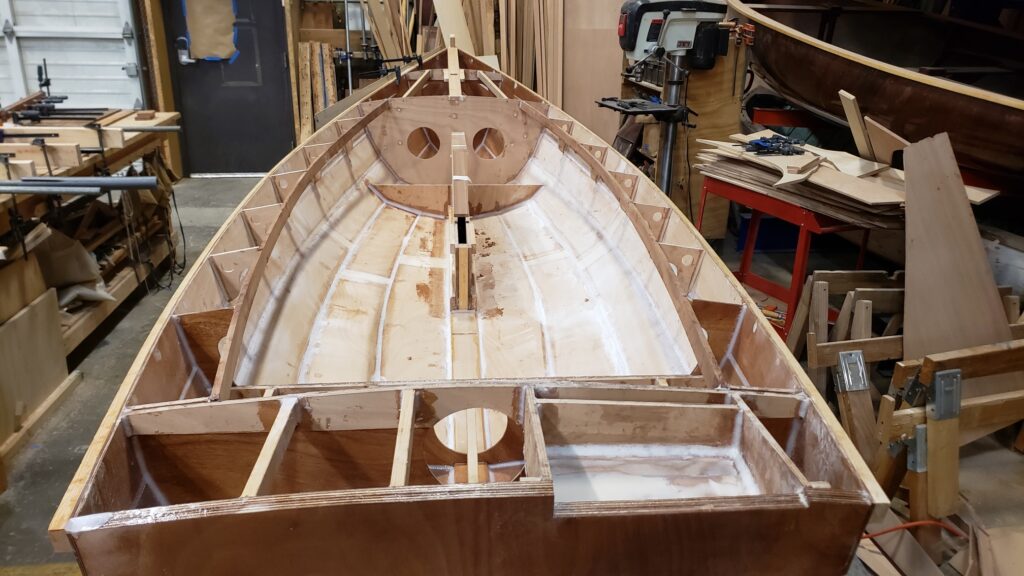
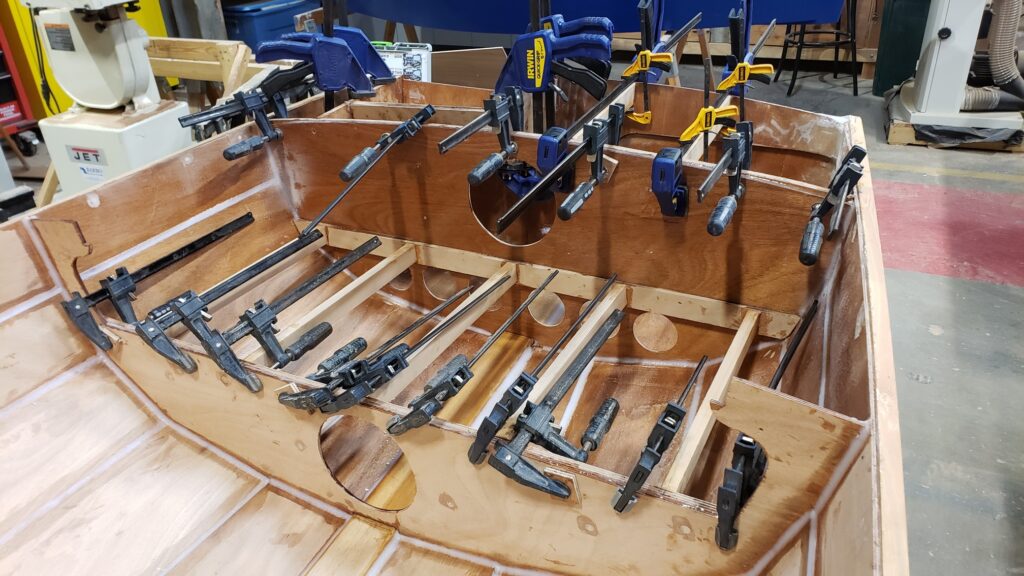
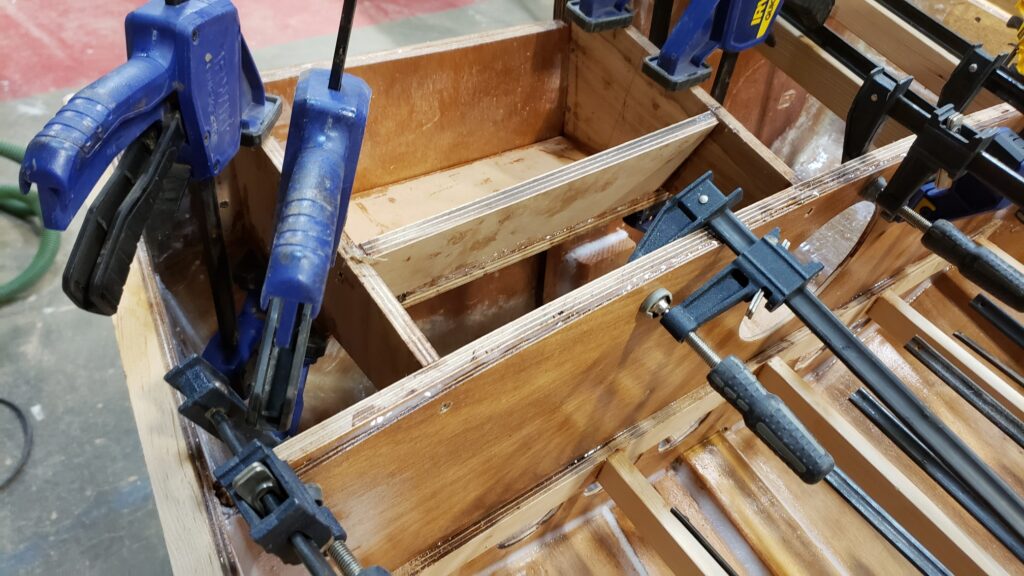
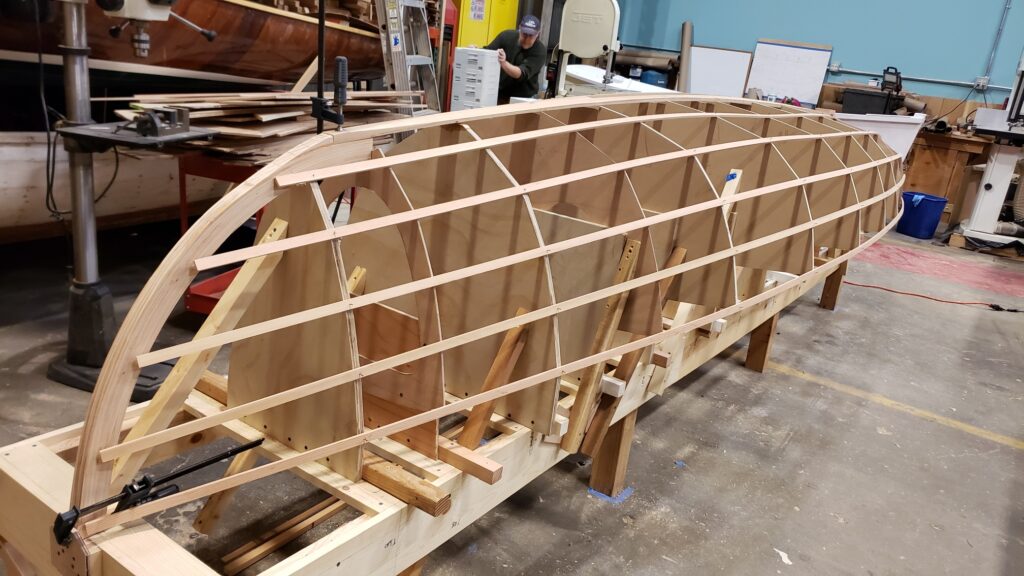
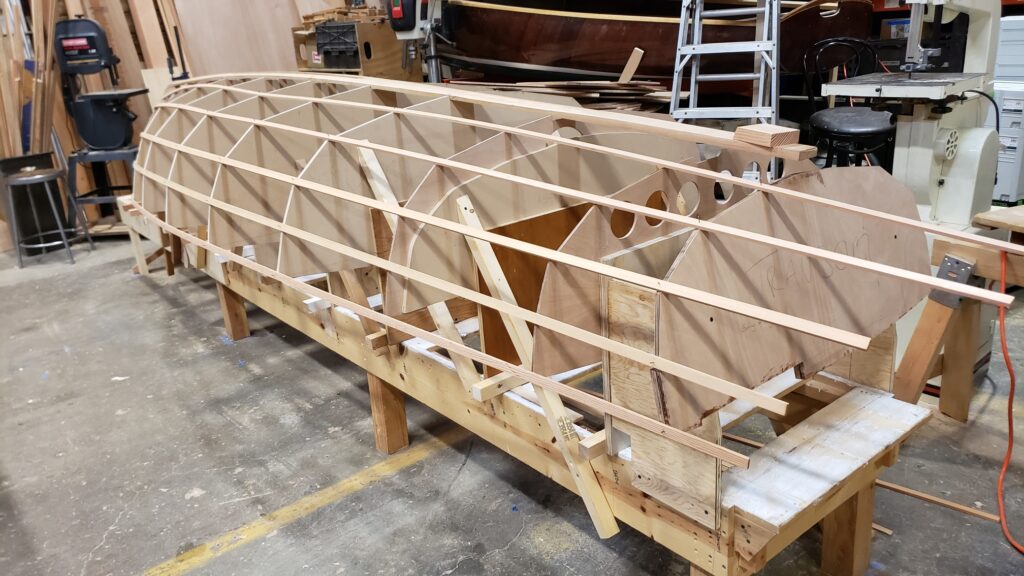
Built out the framing for both aft compartments, the forward of which is for seating and the aft framing supports decking. The outboard well is built out with 1/2″ marine ply. Included a couple different views to help future builders of Phoenix III.
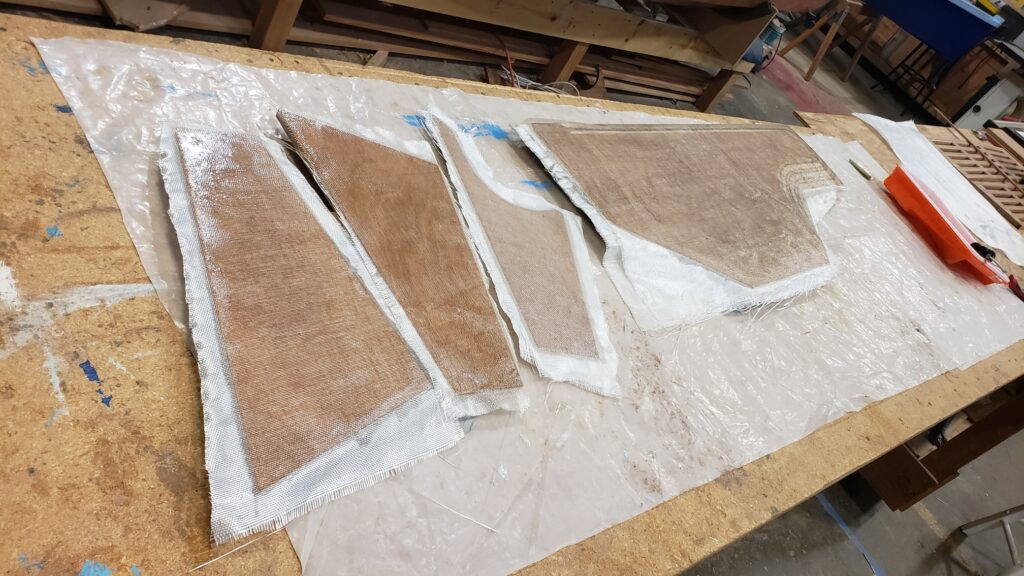
Thickened epoxy was put on the leading and trailing edges of centerboard – will be inside the glass. I’m not sure I like this approach, which is recommended by the designer, but will give it a try. The epoxy should protect the leading/trailing edges, of the plywood laminate, so hopefully it works out but I can see we’ll have a bunch more fairing work to do to get it right. If I had to do it over again, I’d use solid timbers and avoid the glass, but would coat with epoxy/varnish (that’s how we’ll do the rudder).
Oct 21, 2020
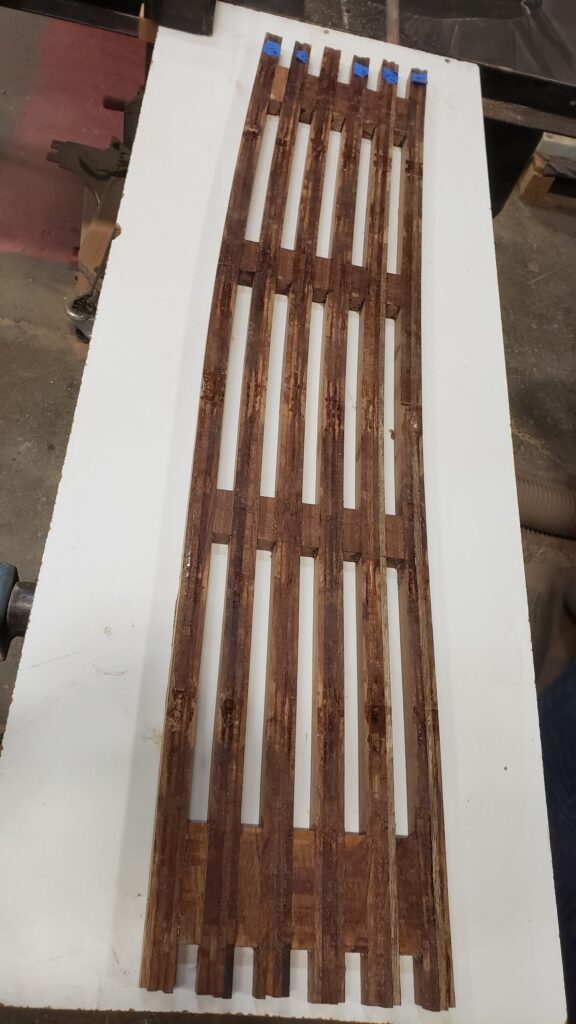
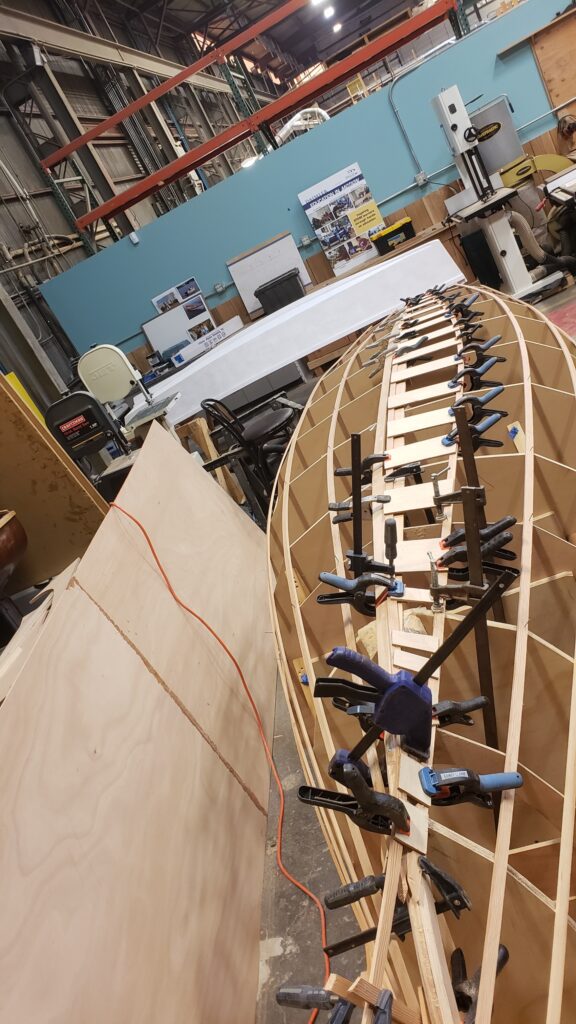
Abby finished fairing the centerboard and glassed the first side.
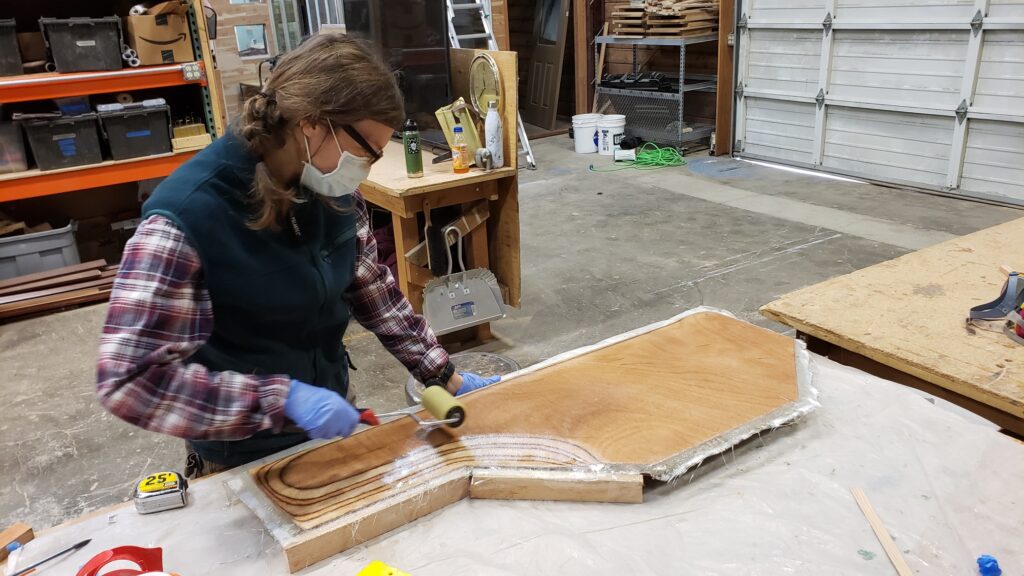
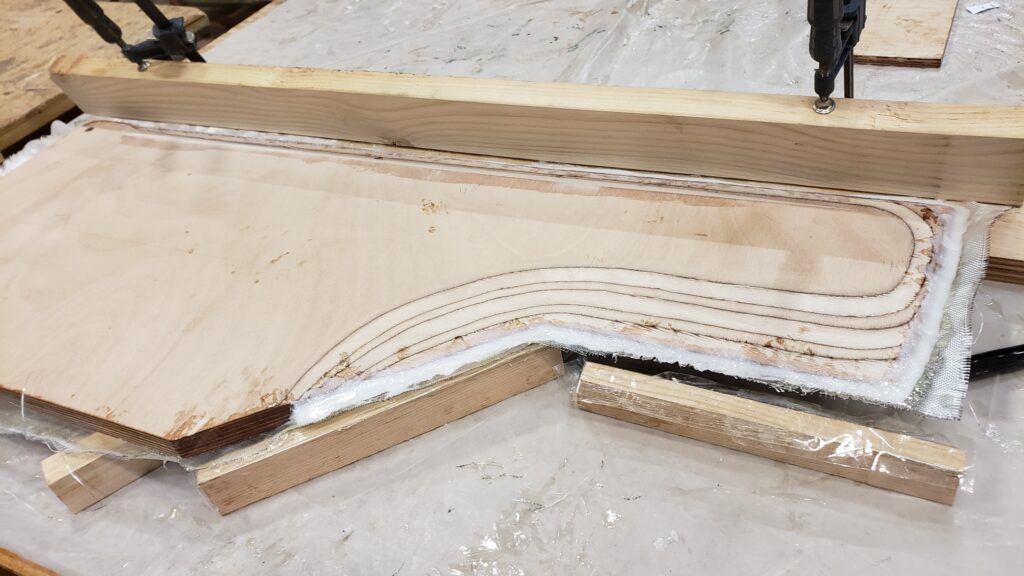
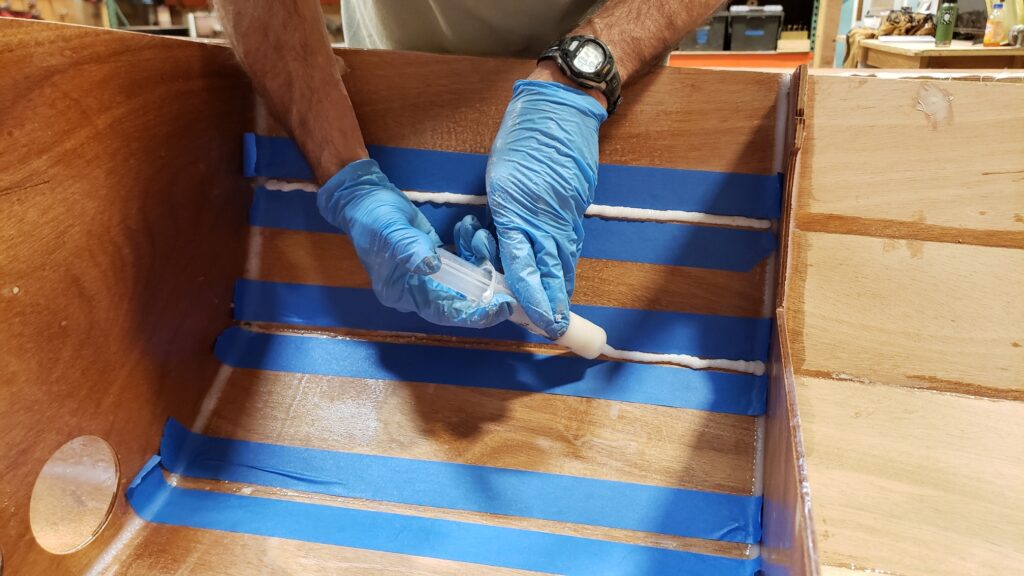
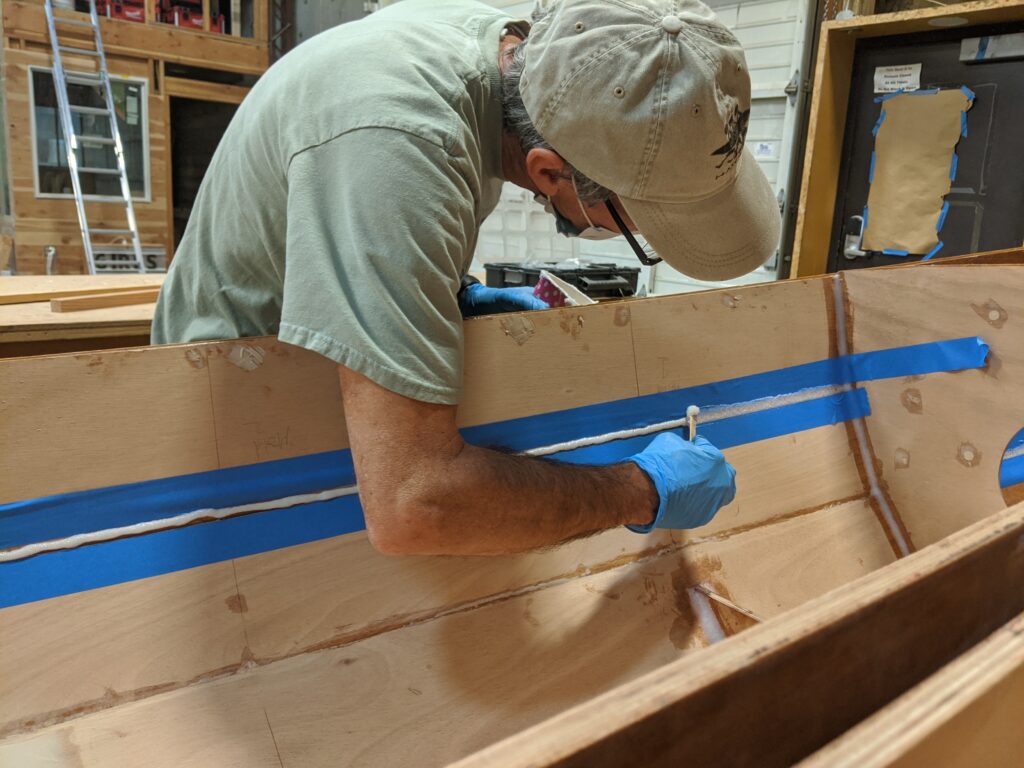
Fillets, fillets and more fillets. Tedious work, but we’re done. The bulkheads were relatively easy, but took a bunch of material. We settled on an approach for the longitudinal joints of using tape to mask off areas to fillet, then applied thickened epoxy with a syringe, smoothed with a shaped stick, and then after it started to set up we smoothed the fillets with alcohol using our finger wrapped in a rag (over glove). Then peeled off the tape and did a bit of touch up with the alcohol. The lines look pretty good. The lower part of centerboard case was fiberglassed after placing a generous fillet of thickened epoxy.
Oct 19, 2020
Centerboard case and “anchor locker” bulkhead epoxied in place. Everything came out nice and square and plumb, how we like it. The forward clamps are just holding some spacers in place to keep the bulkhead square. The bulkhead also has a couple screws along with the epoxy to attach to the forward headledge of the centerboard.
Oct 16, 2020
Made headledges (fore and aft spacers for centerboard case sides) and carefully fit into CB slot fore and aft, ensuring that they are plumb. Cut out bedlogs for the CB case and fit to the curvature of the keelson, attached to the sides. The bottom edges of CB case sides were also shaped to fit the keelson. Cut out the bulkhead that attaches to forward end of CB case. Abby is shaping the CB – has the leading edge and half of trainling edge complete.
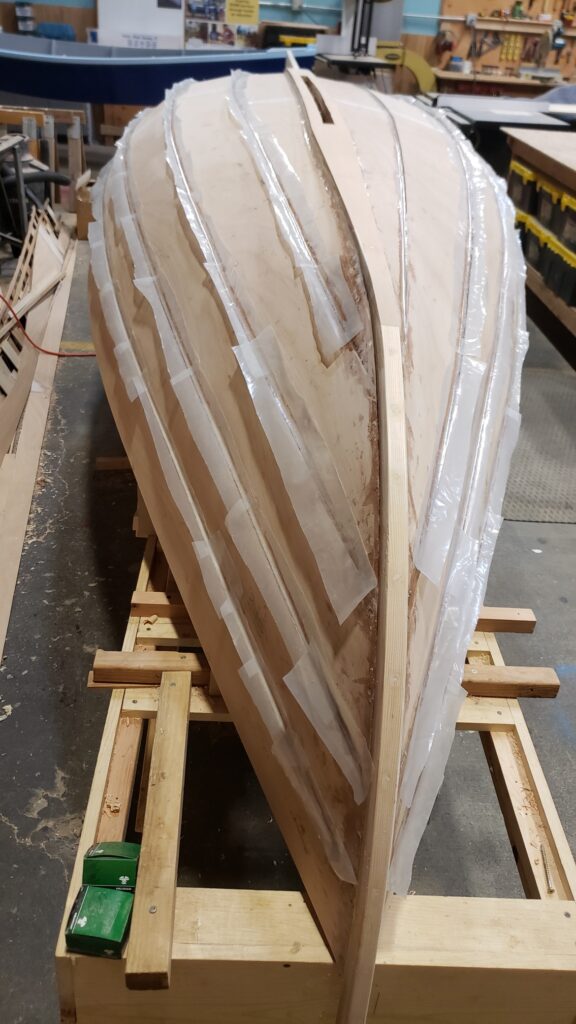
Also fiberglassed the transom to the hull with 2 layers of 20+ oz biaxial cloth, coverging the thickened epoxy filets that were sanded prior to glass. The pic shows some visqueen still attached, that we’ll peel off tomorrow. Most is peeled off to show what it looks like (cheap peel-ply). That’s a good trick to smooth the cloth, particularly at edges so the fringe strands don’t stick up.
Oct 14, 2020
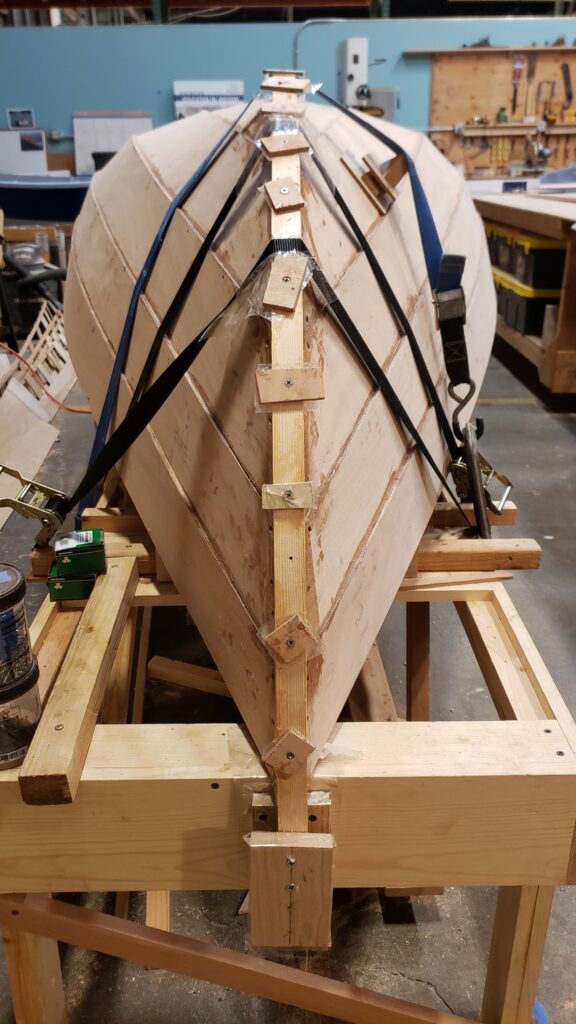
After some minor fitting at the bow, the gunnels were glue/screw attached to the hull. The gunnel tails were left long at the stern and 2×2 risers were clamped to the sides and tied together with rope, tensioning just enough to give the gunnels the right amount of twist as they approached the transom, without putting stress on the hull. Worked nicely. Also laminated some 1/2″ marine ply together to make the centerboard, and made the centerboard case pieces and glassed the insides.

Oct 13, 2020
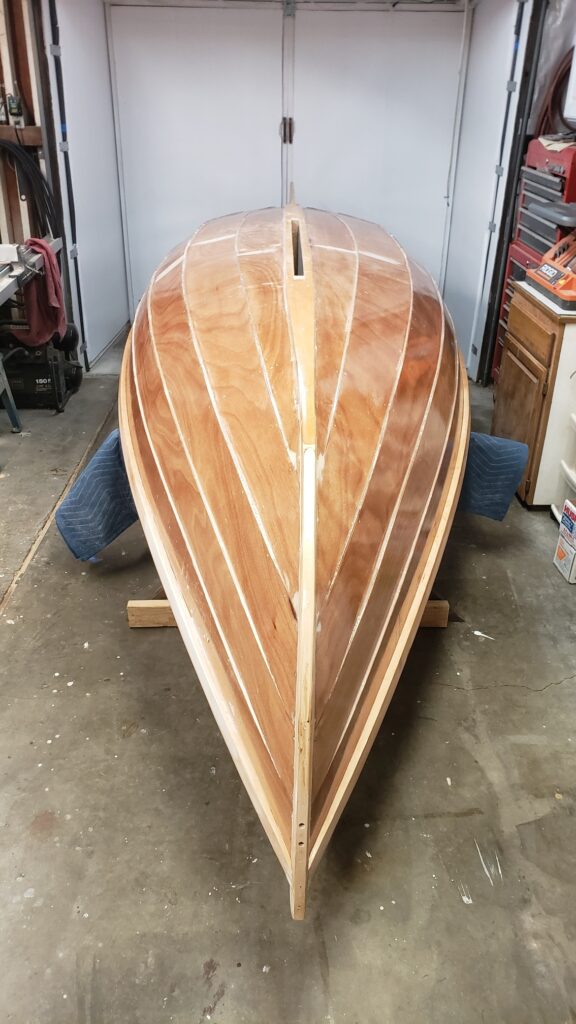
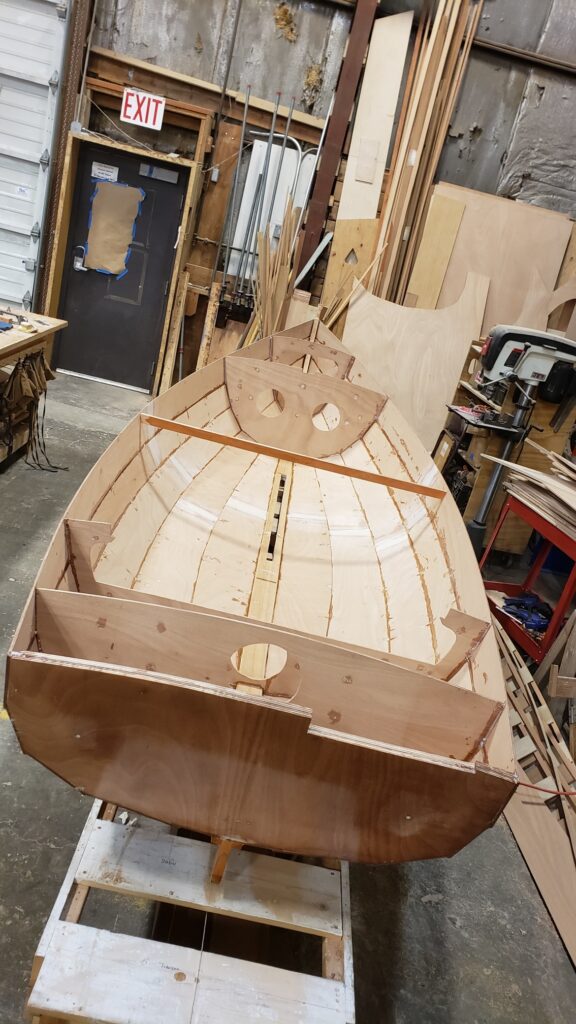
Big day, flipped to work on inside!

Oct 12, 2020
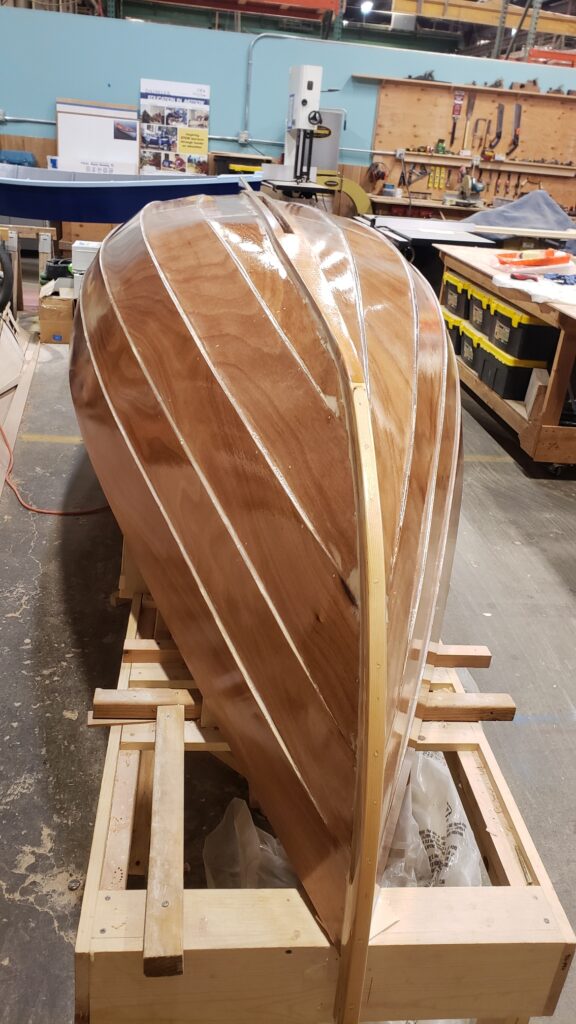
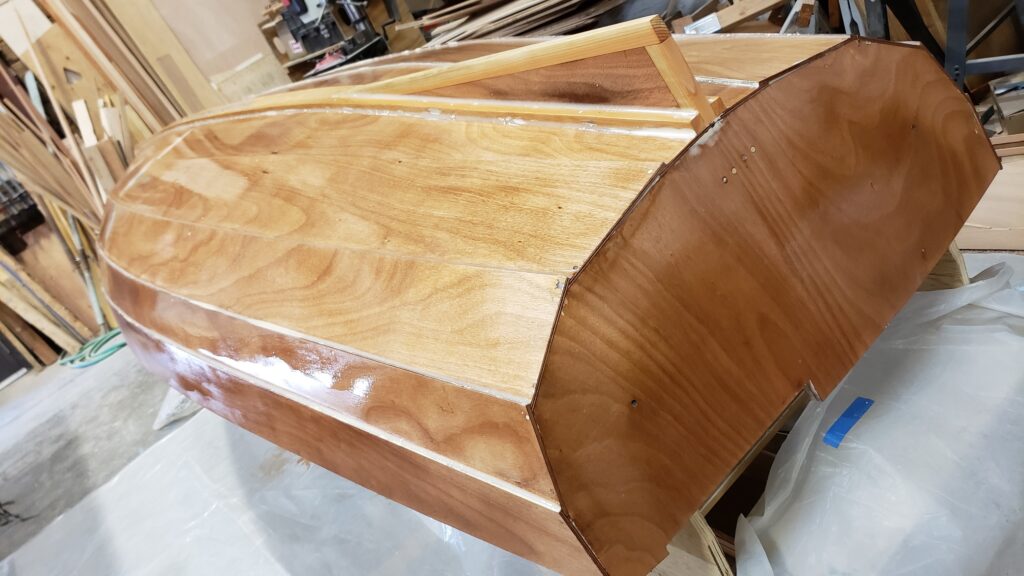
Three coats of epoxy. Ready to flip.
Oct 9, 2020
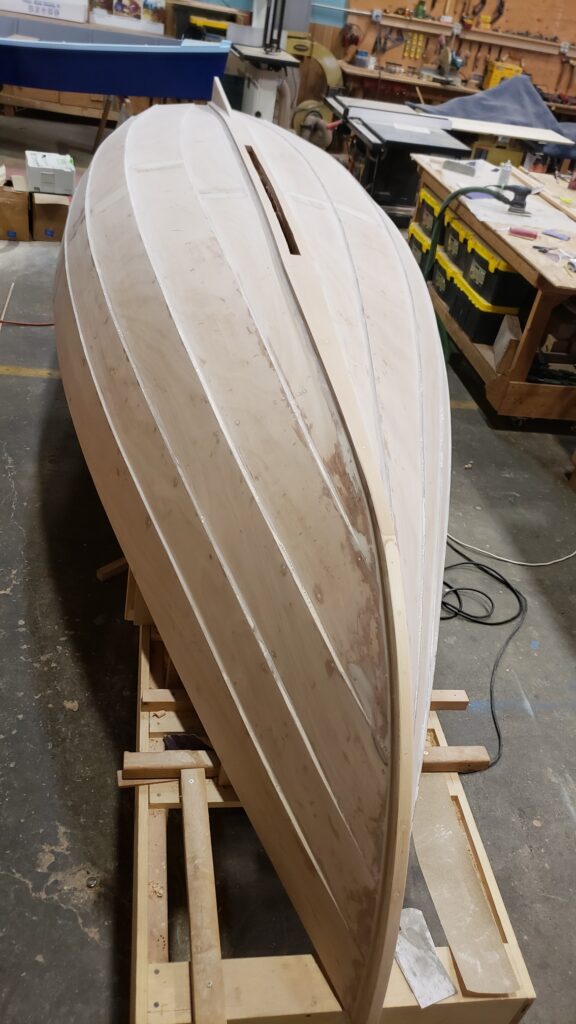
Finished sanding the hull with 150/220 and applied the first coat of epoxy. The boat will be painted, but hoping epoxy will help waterproof it, and protect it from moisture damage in the meanwhile. Paint will cover the faired spots.
Oct 8, 2020
Had a bit of travel and haven’t updated for a couple weeks. Made some progress. Abby made the gunnels but we decided to install them after we flip the boat, contrary to what some other Phoenix builders have done. Will be easier to eyeball everything. The stem was tapered on sides to 3/4″ and planed flat to accept the keel on top. The keel was epoxied in place, along with the skeg. We used a syringe to apply epoxy thickened with silica for fillets on all the plank seams and along keel and skeg. After running a tongue depressor over the wet fillets, we applied strips of visqueen (acts like peel ply) on the fillets to reduce sanding after. Even with that we needed to apply some fairing material to fill in some holes and low spots. Still, what a pain to sand! Got through most of that over the last couple days.
Sep 26, 2020
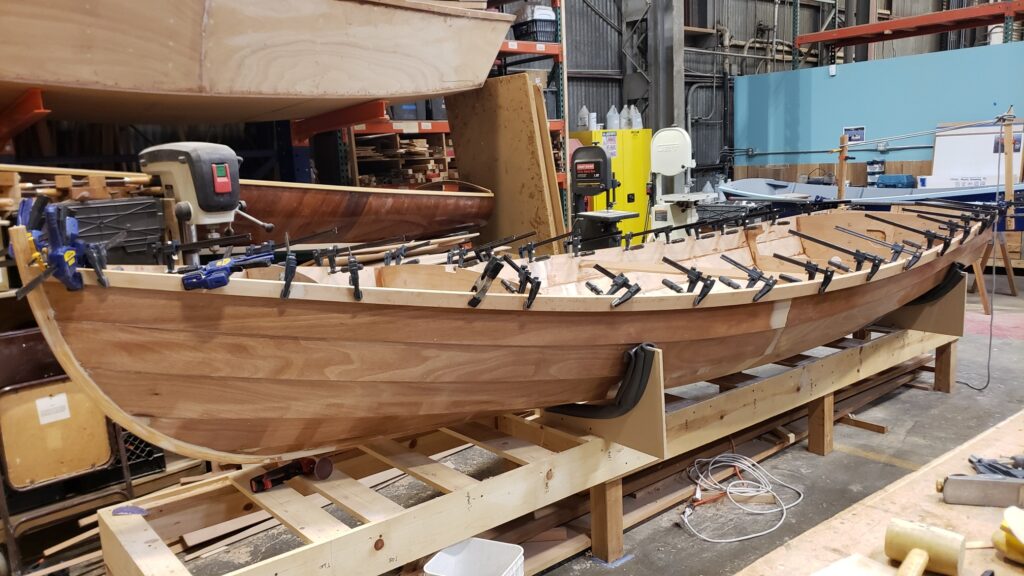
Planed the stem area in prep for outer stem. Epoxied the first 5 (of 10) strips in place using a method of clamping and screws that I saw from a guy named Jon that built a Phoenix (thanks!), and the rest the next morning. Ratchet straps helped immensely – I would move them to the position of each screw to get the layers tight while screwing. Cut the planks off at stern, flush with transom. And, cut out and laminated 4 layers of 1/4″ marine ply for the skeg. Will trim it out with solid timber and mount in a slot cut out from keel, to give it more lateral strength.

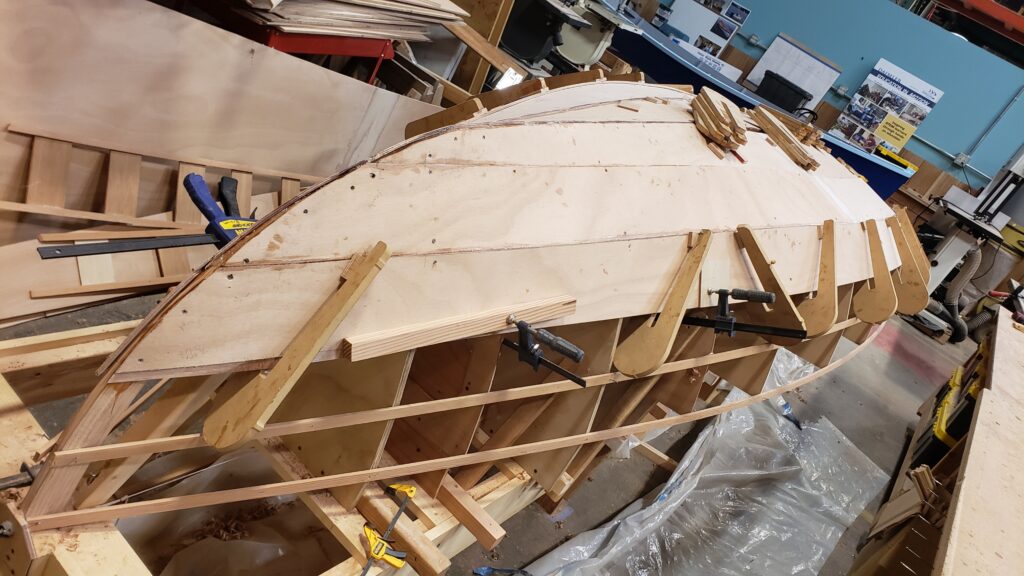
Sep 24, 2020
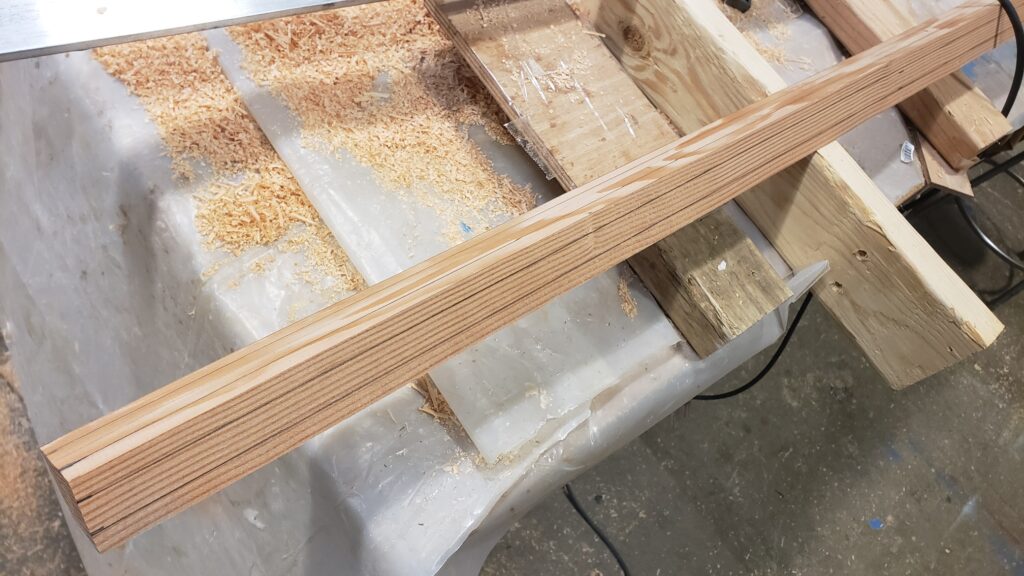
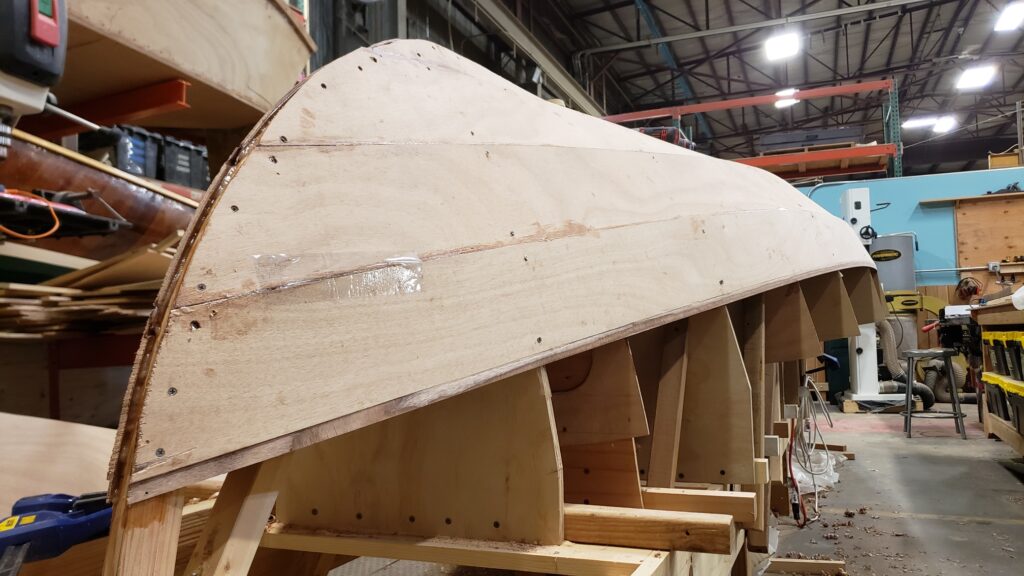
Planking is done – yay! Got the last planks (sheer strakes) epoxied in place. Laid out the keel location and planed the bottom flat to receive it. Cut out the keel except for the taper at bow, awaiting the planing of the stem area tomorrow. We’ll plan to laminate the stem first, and then plane it off flat and the forward part of keel will lay over it. Ripped up a bunch of 1/8″ wide by 48″ long doug fir strips, out of a standard 2×4, after planing to 1 1/8″ (picking out all the good straight grain, no-knot, pieces) to laminate the outer stem.
Sep 23, 2020
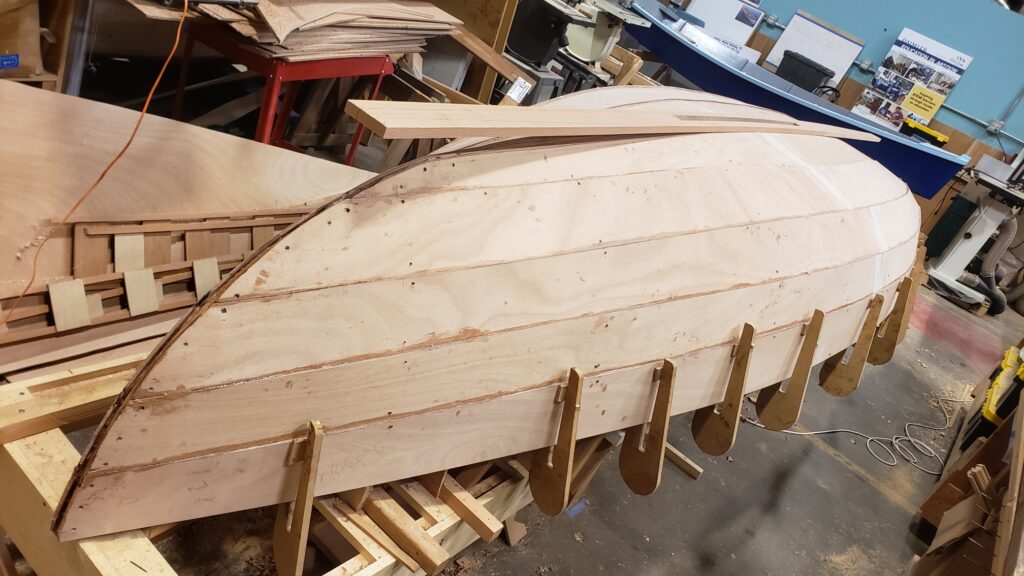
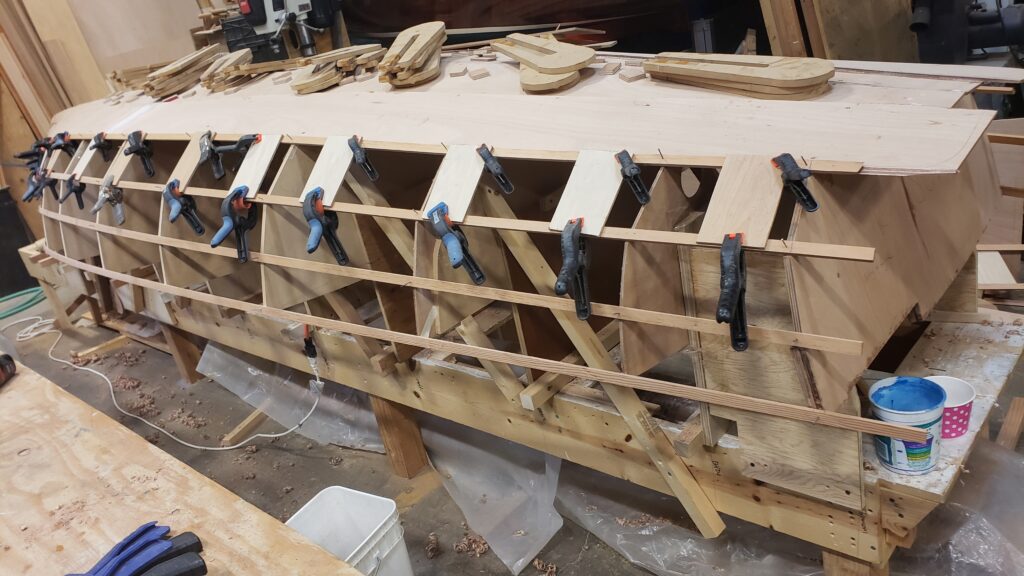
Next set of planks were epoxied in place, and just have the last (sheer) ones to go. Today we got the bevels done, spiling and pattern made, and sheer planks cut out, ready for epoxy in the morning. This picture shows the bevels to receive the sheer planks at the correct angle, and the rabbet for gains at the bow.
Sep 21, 2020
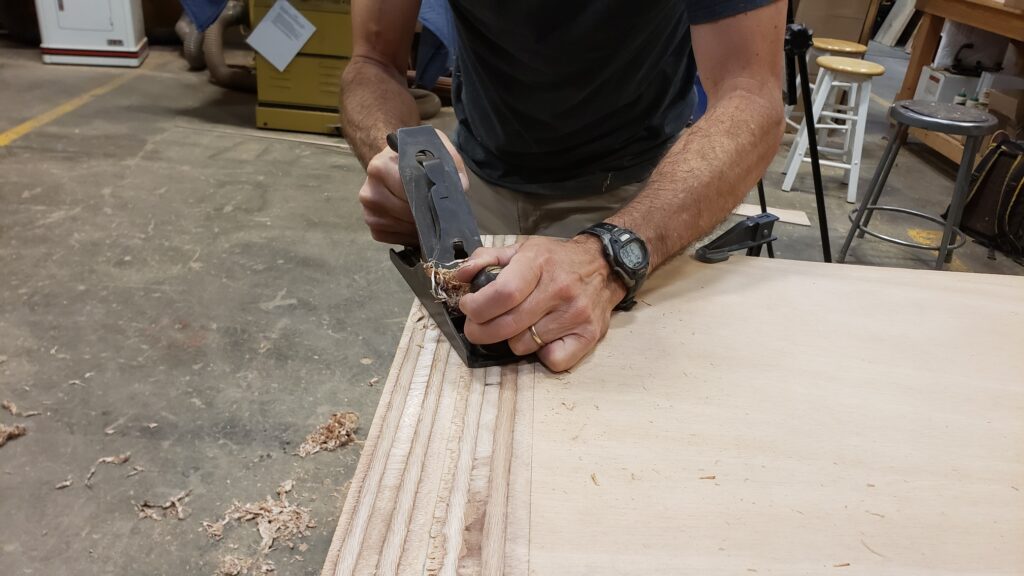
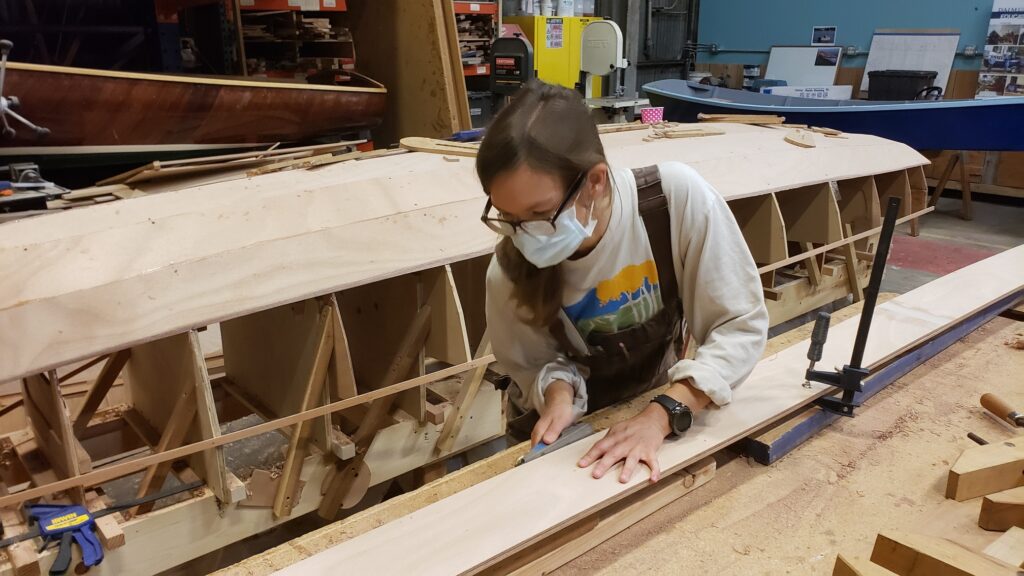
Gary is planing the scarf joint for the last set of planks. Learned that he needs to aim the plane downhill as to not shred the feathered edge. We built the pattern for and cut out the 4th set of planks. Abby has clamped the pair together and is planing to make identical.
Sep 19, 2020
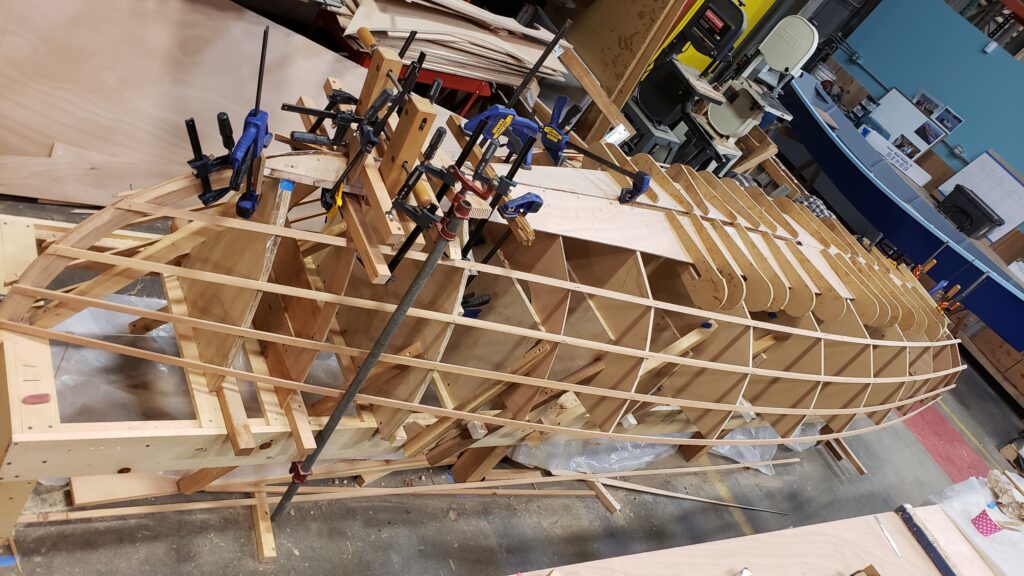
Spiling for next set of planks completed, including getting the fitting a first plank and then making a second identical plank cut out and both epoxied in place.
Sep 17, 2020
Second sets of planks installed. Gains are planed with a shoulder plane. Doing these 12″ long (since material is only 1/4″) with lap overhang disappearing at 3″ behind stem.

Sep 15, 2020
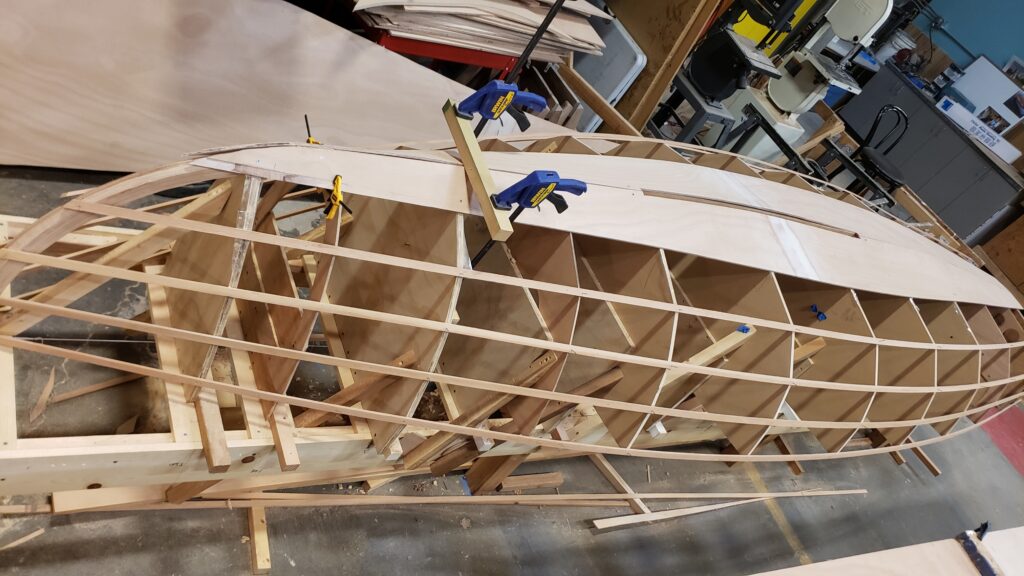
Garboard planks epoxied. Never can have enough clamps on hand!
Sep 14, 2020
Cut out the 2 garboard planks, clamped them together and hand planed edges so they matched. Unfortunately the first one I cut out had a huge void in the plywood, so made 3 altogether. Spent a fair amount of time fine-tuning with a dry fit, and hand-planed the rabbets for the gains at bow. All ready for epoxy. Glued up a scarf joint for the next set of two 4×8′ sheets of 1/4″ ply for planking. I’m guessing this won’t be the last one, since half of the first one is waste due to the void.
Sep 10, 2020
Have added battens on each side to check for fairness, tapered the stem to prepare for spiling and made the first pattern for the garboard planking using hot glue to attach bracing to the carefully positioned battens. Put fairing epoxy on the scarf connected two 4×8′ 1/4″ marine ply sheets.
Sep 4, 2020
Covid pandemic hit and everything shut down on this boat build for 6 MONTHS :-(.
All the schools went to online studies and the high schoolers working on this boat weren’t able to return. They did participate in some online model boat building, but this Phoenix sat waiting to hear what would happen to school in the Fall. Unfortunately, school is still online, so we decided to go ahead and finish this boat.
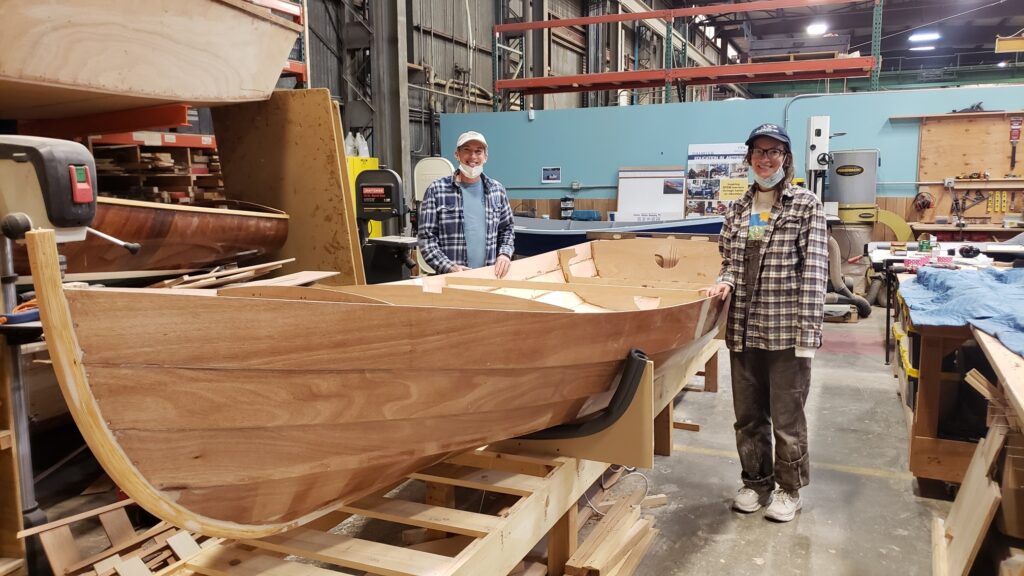
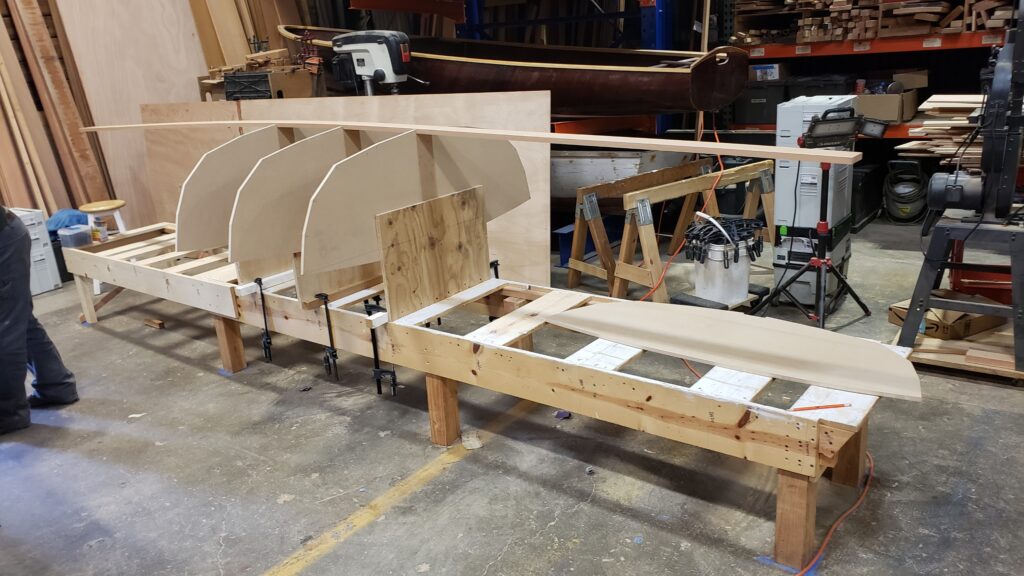
Abby, one of the boat building instructors and I spun back up on the plans yesterday and made a number of adjustments to the molds (stations) and bulkheads to center, make plumb and adjust for height. Today we fitted the keelson at stem and transom where we would attach with a cleat. The keelson was tapered to match angles on stations and routed the top edge. Then it was epoxied, clamped and screwed into place. ![]()
Mar 13, 2020
Mar 5, 2020
Feb 28, 2020
Feb 25, 2020
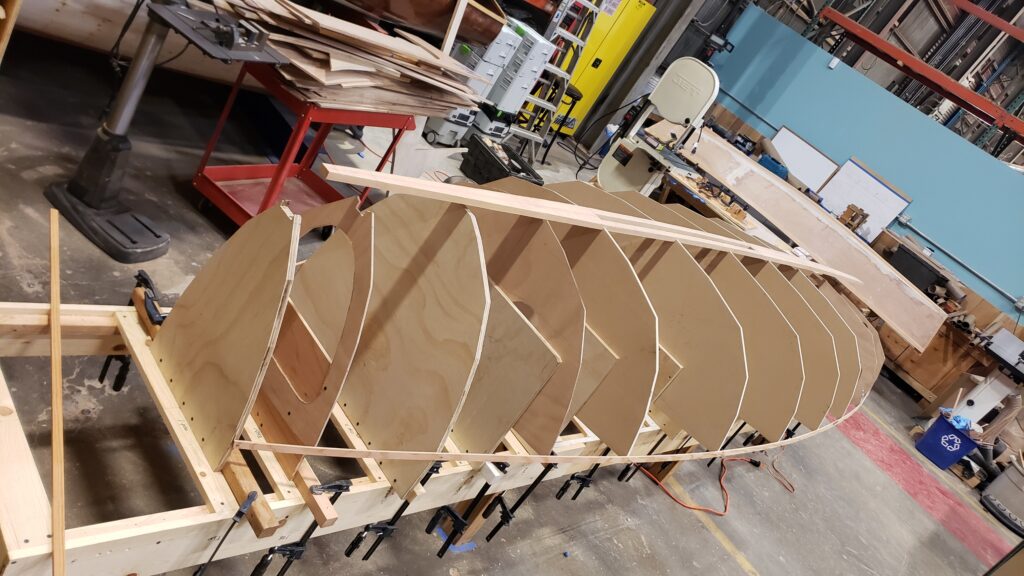
Work continues on the remaining molds and bulkheads.
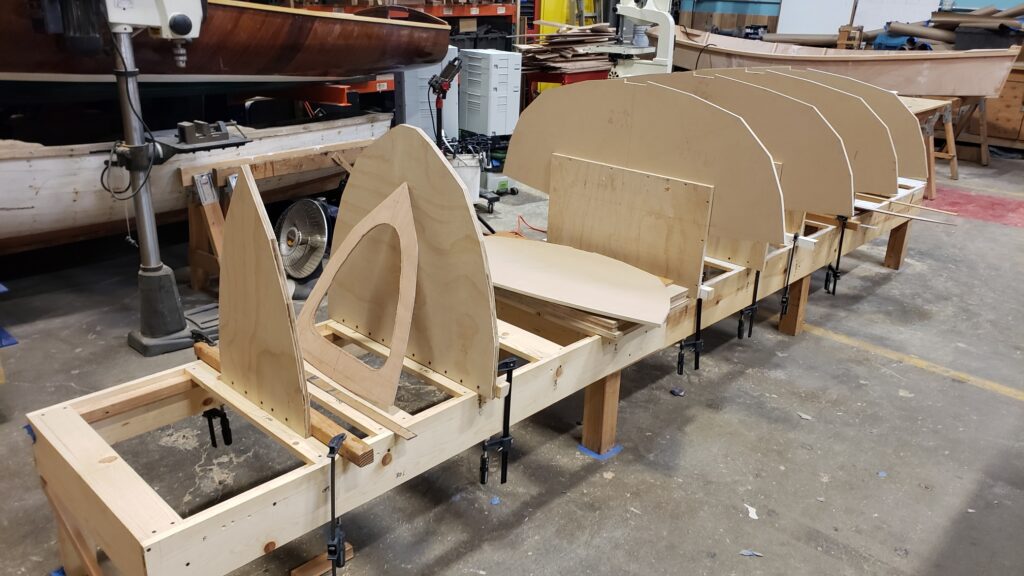
Feb 20, 2020
The Strongback was leveraged from another prior boat build, but it was extended 5 feet to be of sufficient length for the Phoenix III. The molds have been cut out of 1/2″ MDF and mounted on 3/4 plywood base extensions.
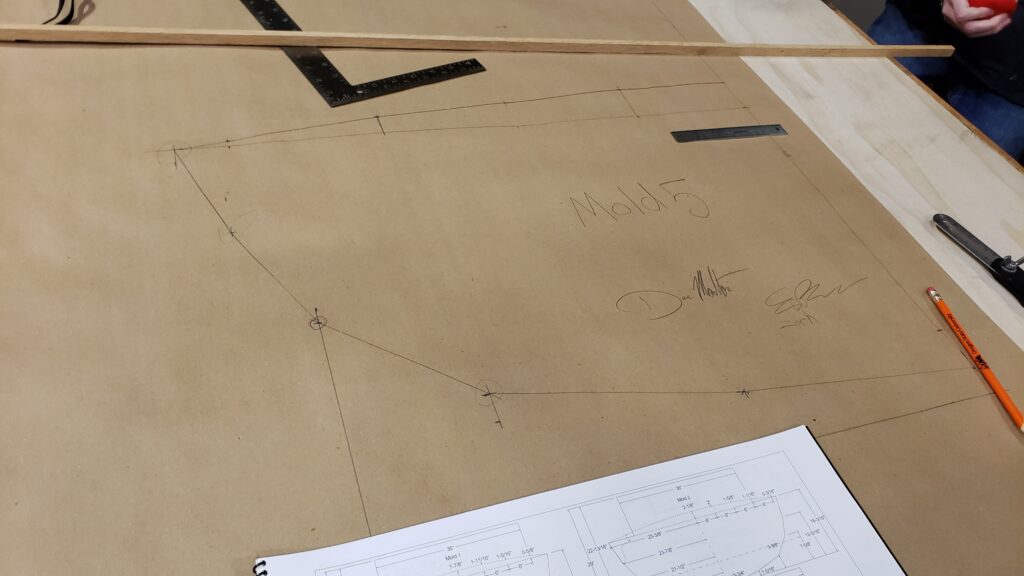
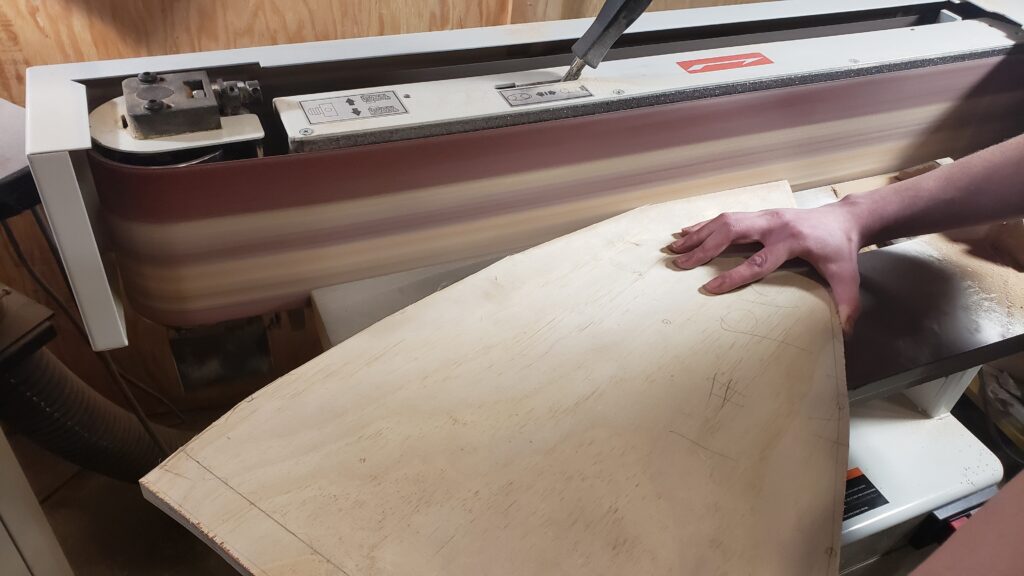
Feb 10, 2020
Patterns for each mold were lofted onto paper first, and then vertices of chines transferred onto MDF using an awl. Flipped the paper to get symmetrical port and starboard sides of each mold.